Navigation
- Upgrade
- New Install Preparation
- Delivery Controller 7.11 Install
- Studio – Slow Launch
- Database Maintenance:
- Change Database connection strings, read-committed snapshot, Director grooming, etc.
- Studio Administrators
- Customer Experience Improvement Program
- vCenter Connection – Hosting Resources
- Citrix Licensing Server
- Remote Desktop Licensing Server
- Health Check
Upgrade
If you are performing a new install of XenApp/XenDesktop Controller, then skip to the next section.
You can upgrade directly from any Delivery Controller version 5.6 or newer.
Before upgrading, if you have a standalone Citrix Licensing Server, upgrade it to 11.14.0.1 build 17005.
During the upgrade of Delivery Controller, be aware that a database upgrade is required. Either get a DBA to grant you temporary sysadmin permission, or use Citrix Studio to generate SQL scripts that a DBA must then run in SQL Studio.
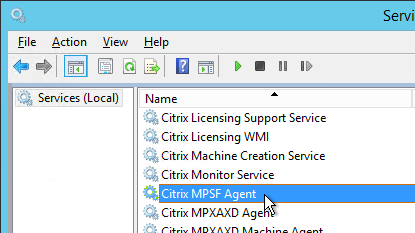
- If StoreFront is installed on the Controller, and if the Citrix SCOM Agent for StoreFront is installed, stop the Citrix MPSF Agent service.
- Close PowerShell/Consoles. Make sure all Citrix Consoles and PowerShell consoles are closed. StoreFront won’t upgrade if any are running. If StoreFront fails, then the StoreFront configuration is wiped out.
- Snapshot. If StoreFront is on the Controller, take a snapshot before attempting the upgrade.
- Another option is to export the StoreFront configuration so you can restore it later if something goes wrong.
- Run AutoSelect.exe from the XenApp/XenDesktop 7.11 ISO.

- Click Studio and Server Components.
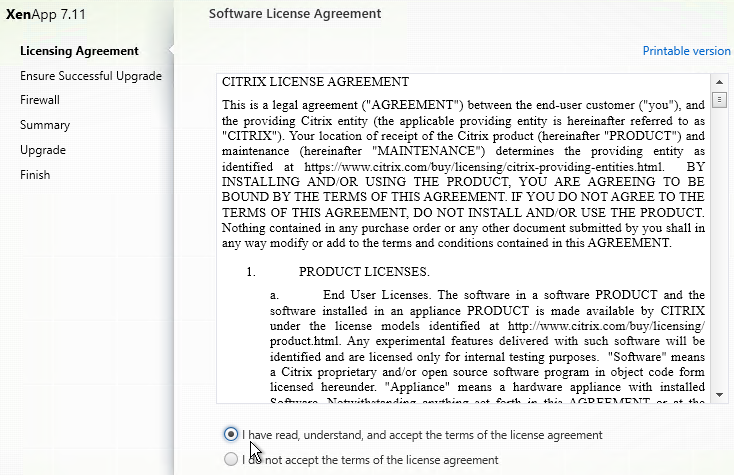
- In the Licensing Agreement page, select I have read, understand, and accept the terms, and click Next.
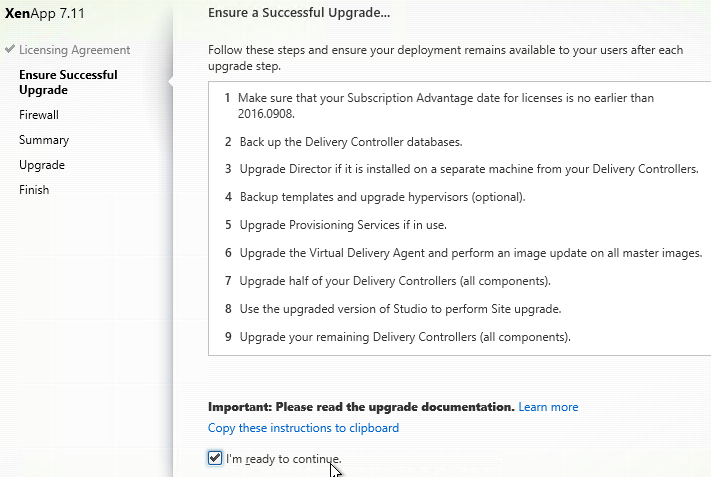
- In the Ensure Successful Upgrade page, read the steps, check the box next to I’m ready to continue, and click Next.
- In the Firewall page, click Next.
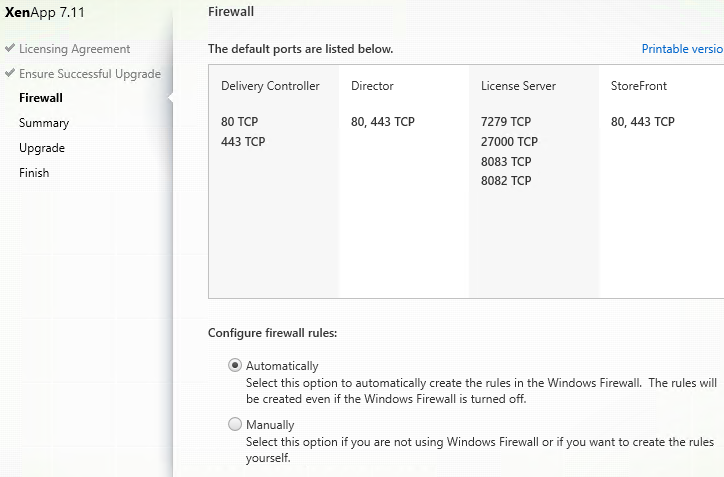
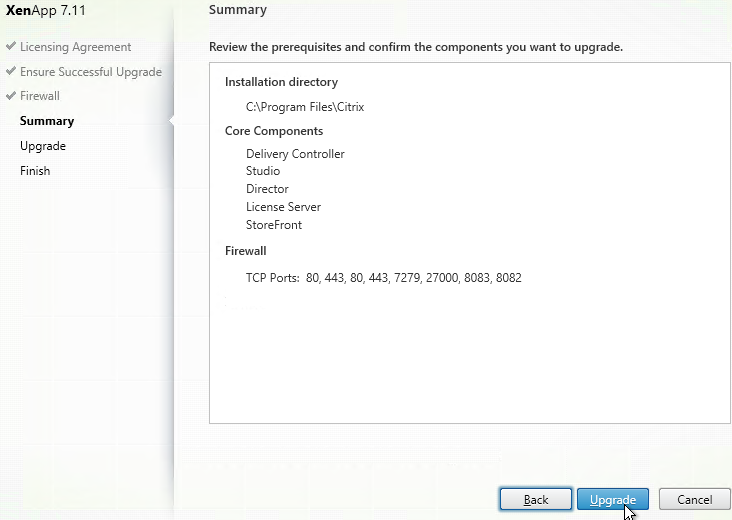
- In the Summary page, click Upgrade.
- Click Close if prompted to restart.
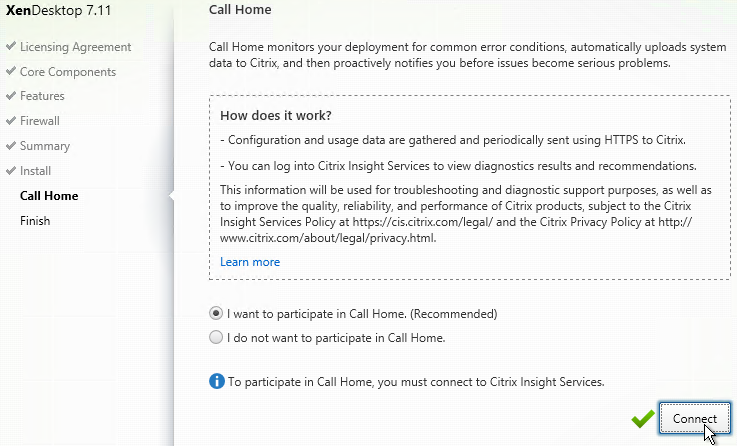
- In the Call Home page, make a selection. If participating, click Connect, login, and then click Next.

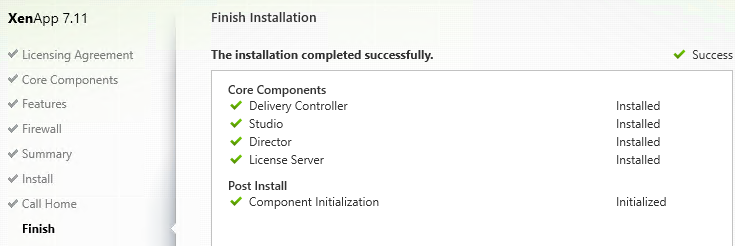
- In the Finish page, click Finish.
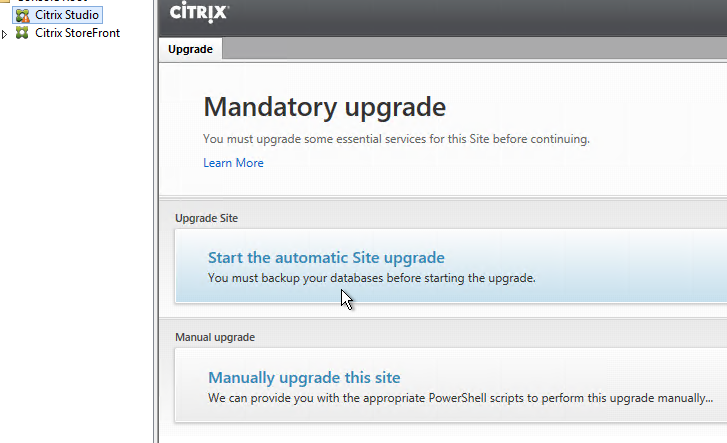
- After Citrix Studio launches, if you have sysadmin permissions on SQL, then click Start the automatic Site upgrade. If you don’t have full permission, then get a DBA to help you, click Manually upgrade this site, and follow the instructions.
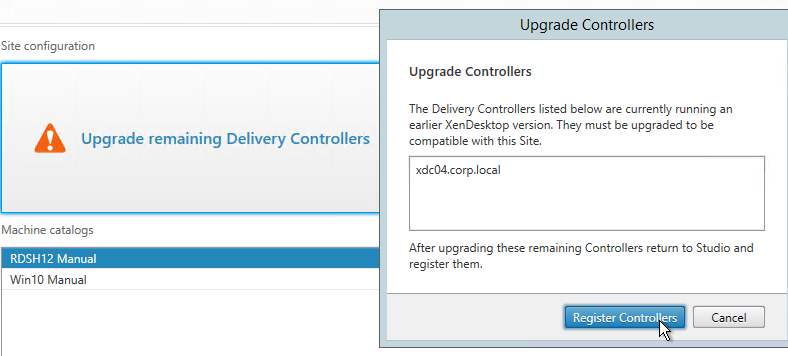
- When you upgrade the remaining Controllers, you might have to Register Controllers.
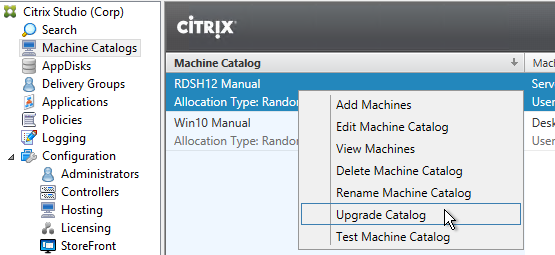
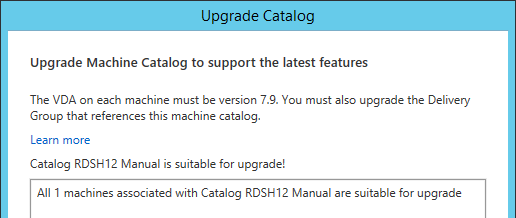
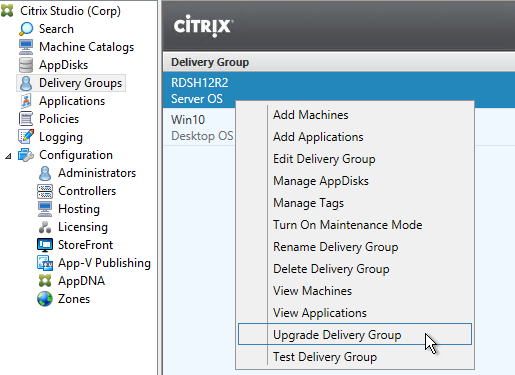
- After all Controllers and VDAs are upgraded, right-click the Catalogs, and click Upgrade Catalog. Note: 7.9 is the newest minimum functional level. You won’t see an option for 7.11. If your Catalogs are already set to VDA version 7.9, then no upgrade is needed.
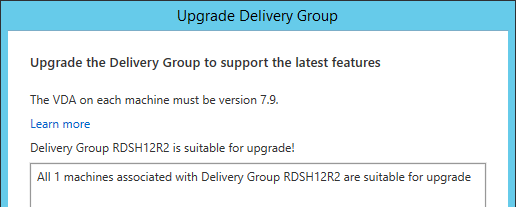
- Then do the same for the Delivery Groups. Note: 7.9 is the newest minimum functional level. You won’t see an option for 7.11. If your Delivery Groups are already set to VDA version 7.9, then no upgrade is needed.
Other XenApp/XenDesktop components can also be in-place upgraded:
- StoreFront
- Director
- VDAs
- AppDNA
- Provisioning Services
- SCOM Management Packs
- Session Recording
- Federated Authentication Service
New Install Preparation
Citrix Licensing – If you are going to use an existing Citrix Licensing Server, upgrade it to 11.14.0.1 build 17005.
SQL Databases
- Citrix CTX209080 Database Sizing Tool for XenDesktop 7 💡
- Citrix article CTX114501 – Supported Databases for Citrix Products
- There are typically three databases: one for the Site (aka farm), one for Logging (audit log) and one for Monitoring (Director).
- The monitoring database name must not have any spaces in it. See CTX200325 Database Naming Limitation when Citrix Director Accesses Monitoring Data Using OData APIs
- If you want Citrix Studio to create the SQL databases automatically, then the person running Studio must be a sysadmin on the SQL instances. No lesser role will work. sysadmin permissions can be granted temporarily and revoked after installation.
- As an alternative, you can use Citrix Studio to create SQL scripts and then run those scripts on the SQL server. In that case, the person running the scripts only needs the dbcreator and securityadmin roles.
- It is possible to create the databases in advance. However, you must use the non-default Latin1_General_100_CI_AS_KS collation. Then use Citrix Studio to configure the database tables.
- If SQL 2016 or newer, implement Basic Availability Group.
- Only SQL Standard Edition is required. There’s no need for SQL Enterprise Edition.
- Two SQL Standard Edition servers plus a file share witness. No more SQL Express.
- The Basic Availability Group has an AAG listener. Point XenDesktop to the listener.
- To setup SQL Basic Availability Group, see Carl Webster Implementing Microsoft SQL Server 2016 Standard Basic Availability Groups for Use in Citrix XenApp and XenDesktop 7.9.
- If SQL 2014 or older, Citrix recommends SQL Mirroring because it has the fastest failover.
- SQL Mirroring requires two SQL Standard Edition servers and one SQL Express for the witness server.
- You can setup SQL Mirroring either before installing XenDesktop or after installing XenDesktop. If after, then see Citrix CTX140319 to manually change XenDesktop’s database connection strings How to Migrate XenDesktop Database to New SQL Server.
- To setup SQL Mirroring, see Rob Cartwright: Configure SQL Mirroring For Use With XenDesktop, XenApp, and PVS Databases.
- If you try to stretch the mirror across datacenters, the SQL witness must be placed in a third datacenter that has connectivity to the other two datacenters. However, stretching a single XenApp/XenDesktop site/farm and corresponding SQL mirror across datacenters is not recommended.
- AlwaysOn Availability Groups and SQL Clustering are also supported. However, these features require the much more expensive SQL Enterprise Edition.
Windows Features
- Installing Group Policy Management on the Delivery Controller lets you edit GPOs and have access to the Citrix Policies node in the GPO Editor. Or you can install Citrix Studio on a different machine that has GPMC installed.
- vSphere Web Client – if you will connect to vSphere Web Client from the Controller machine, Flash Player is only available for IE if you install the Desktop Experience feature. Or you can use Google Chrome.
vSphere
- Create a role in vSphere Client. Assign a service account to the role at the Datacenter or higher level.
Delivery Controller Install
- A typical size for the Controller VMs is 2-4 vCPU and 8 GB of RAM.
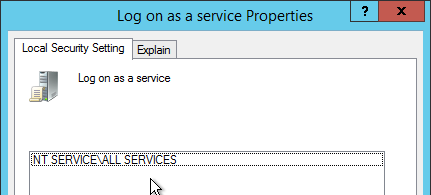
- Make sure the User Right Log on as a service includes NT SERVICE\ALL SERVICES or add NT SERVICE\CitrixTelemetryService to the User Right.
- On two Delivery Controllers, install the Delivery Controller software from the XenApp/XenDesktop 7.11 ISO. Go to the extracted ISO and run AutoSelect.exe.
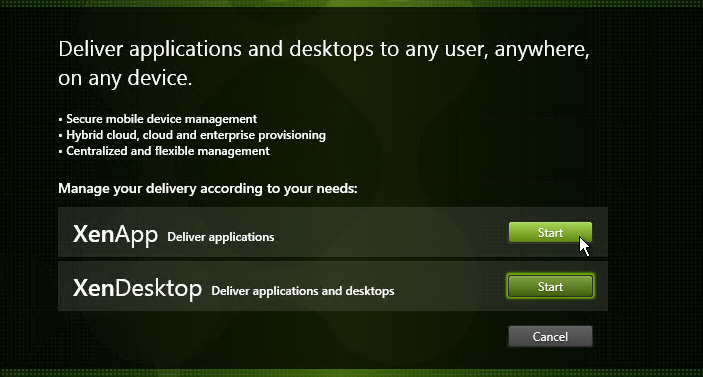
- Click Start next to either XenApp or XenDesktop. The only difference is the product name displayed in the installation wizard.
- On the left, click Delivery Controller.
- In the Licensing Agreement page, select I have read, understand, and accept, and click Next.
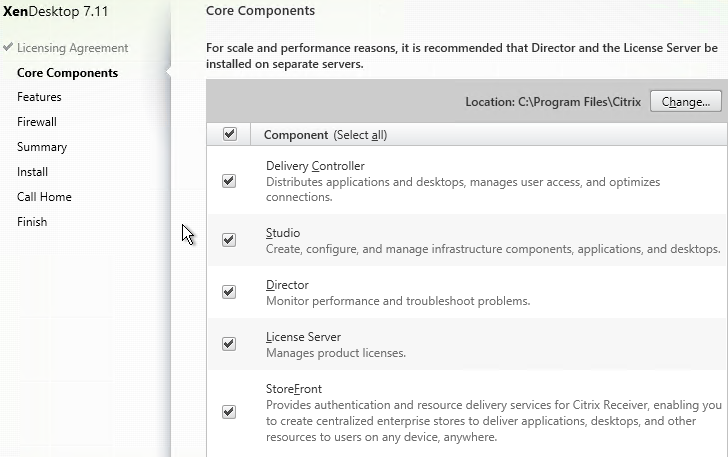
- In the Core Components page, you can install all components on one server, or on separate servers. Splitting them out is only necessary in large environments, or if you have multiple farms and want to share the components (e.g. Licensing, StoreFront, Director) across those farms.
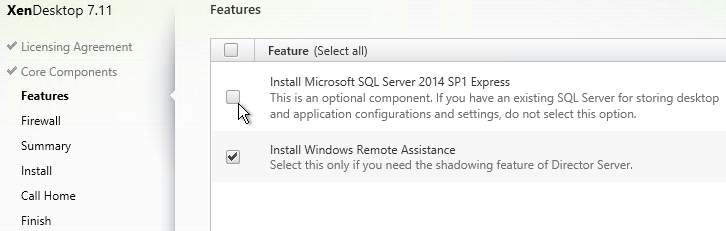
- In the Features page, uncheck the box next to Install Microsoft SQL Server 2014 SP1 Express, and click Next.
- In the Firewall page, click Next.
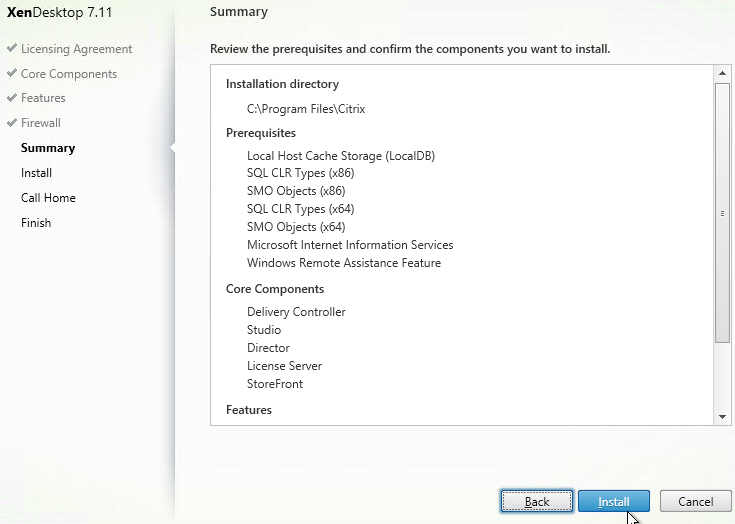
- In the Summary page, click Install.
- In the Call Home page, make a selection, click Connect, enter your MyCitrix credentials, and then click Next.
- In the Finish page, click Finish. Studio will automatically launch.
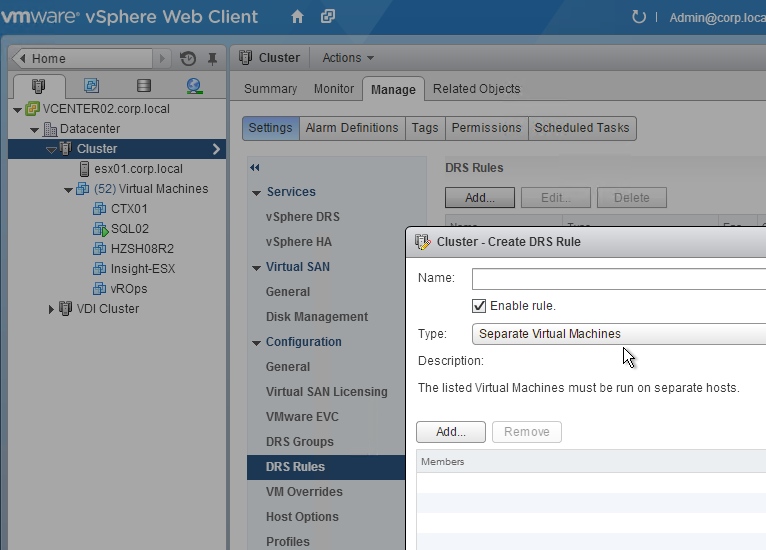
- Ensure the two Controller VMs do not run on the same hypervisor host. Create an anti-affinity rule.
Create Site
There are several methods of creating the databases for XenApp/XenDesktop:
- If you have sysadmin permissions to SQL, let Citrix Studio create the databases automatically.
- If you don’t have sysadmin permissions to SQL, then use Citrix Studio to generate SQL scripts, and send them to a DBA.
Use Studio to Create Database Scripts
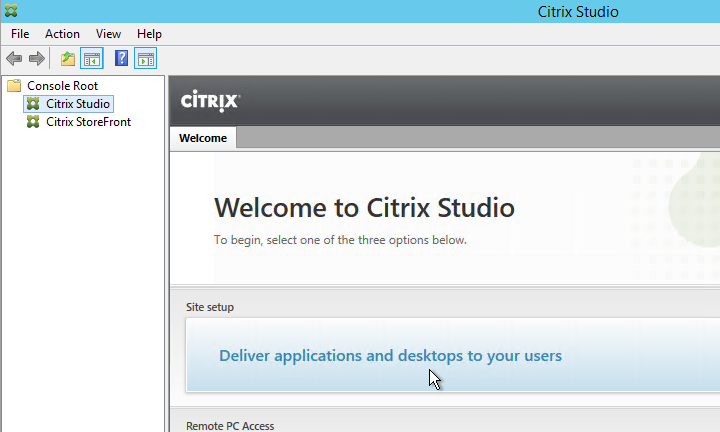
- Launch Citrix Studio. After it loads, click Deliver applications and desktops to your users.
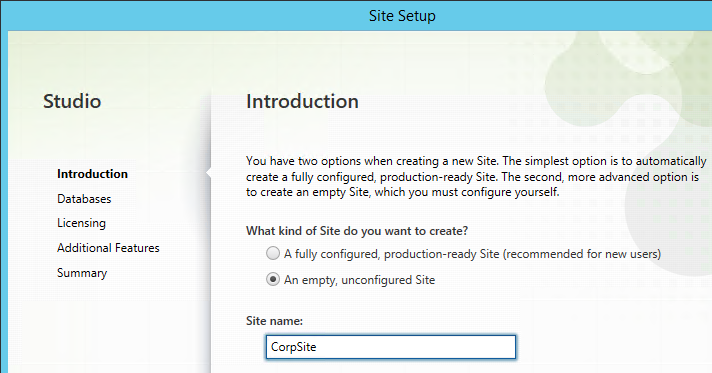
- In the Introduction page, select An empty, unconfigured site. This reduces the number of pages in this Setup wizard. The other pages will be configured later.
- Enter a Site Name (aka farm name) and click Next. Only administrators see the farm name.
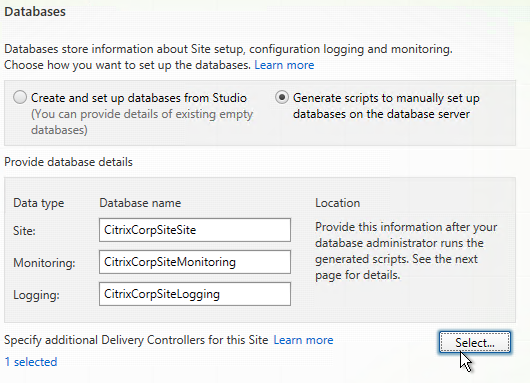
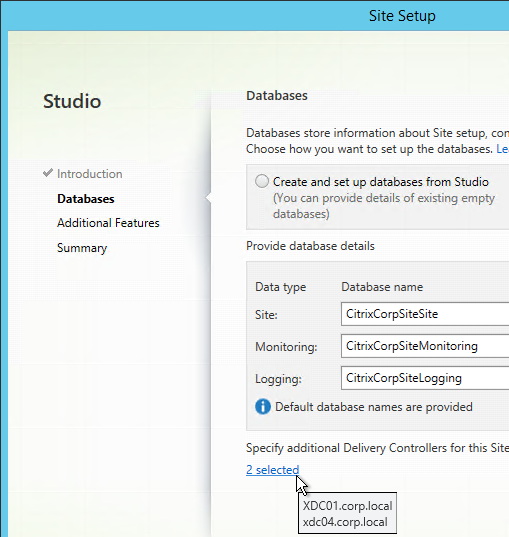
- In the Databases page, change the selection to Generate scripts to manually set up databases on the database server.
- Change the database names if desired.
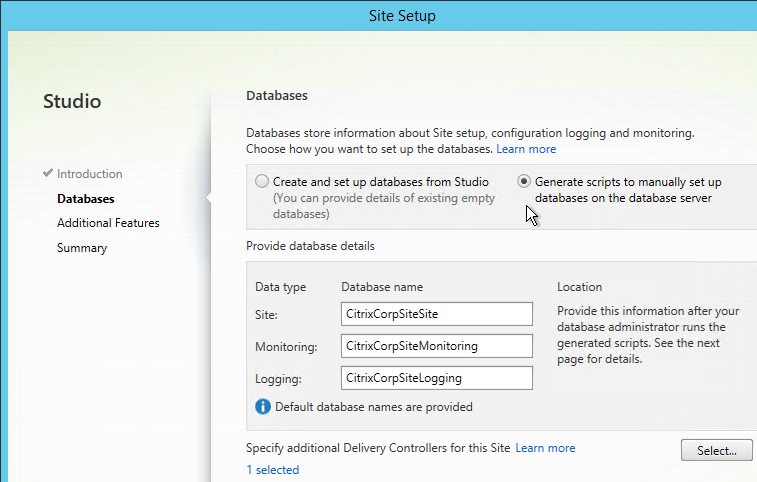
- If you are building two Controllers, click Select near the bottom of the same page.
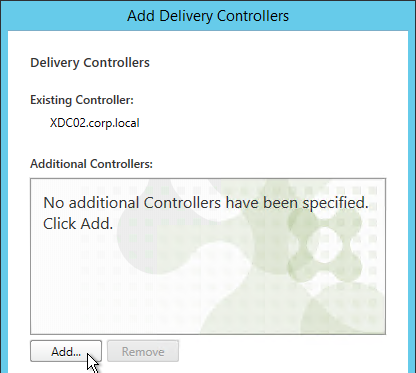
- Click Add.
- Enter the FQDN of the second Controller and click OK. Note: the Delivery Controller software must already be installed on that machine.
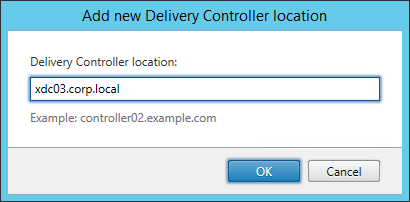
- Then click Save.
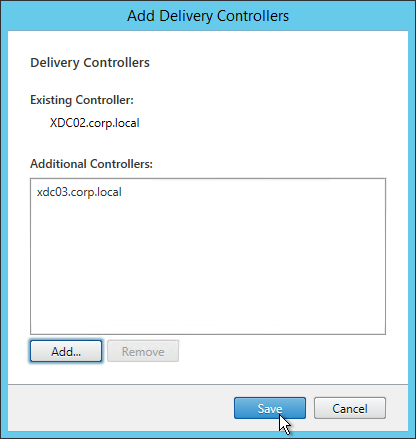
- If you hover your mouse over 2 selected, it will show both Controllers. Click Next.
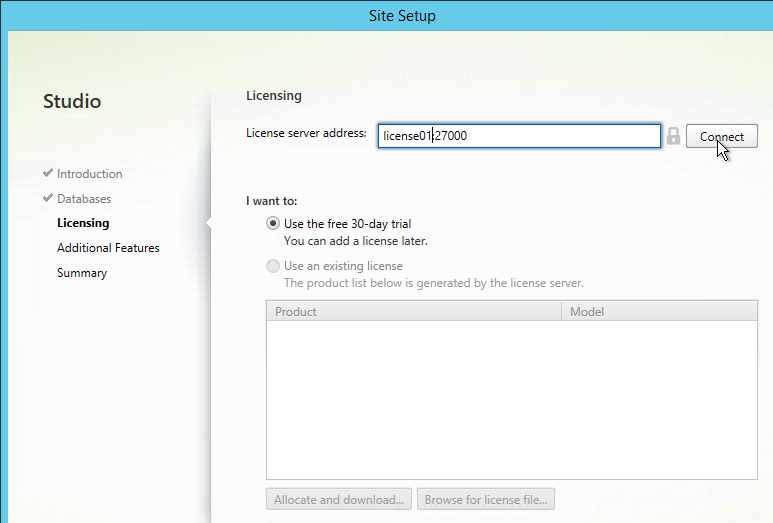
- If you see the Licensing page, you can leave it set to localhost, or you can point it to an external license server and click Connect.
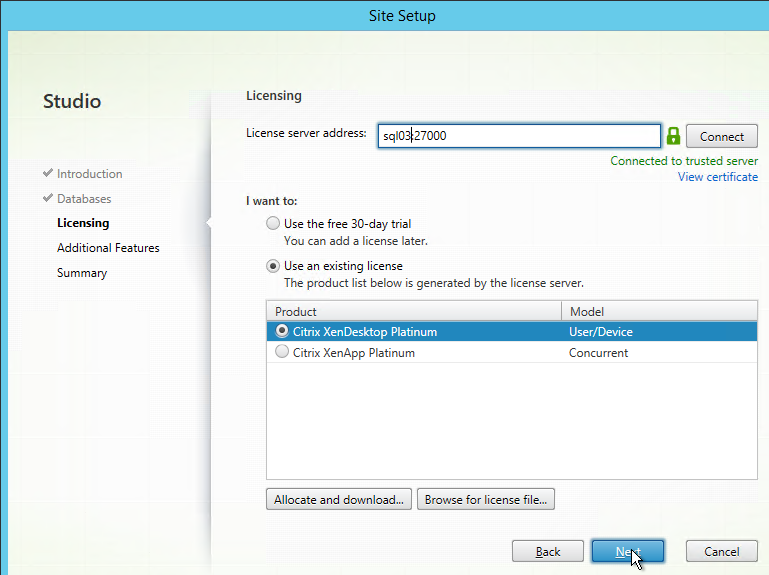
- Then select your license, and click Next.
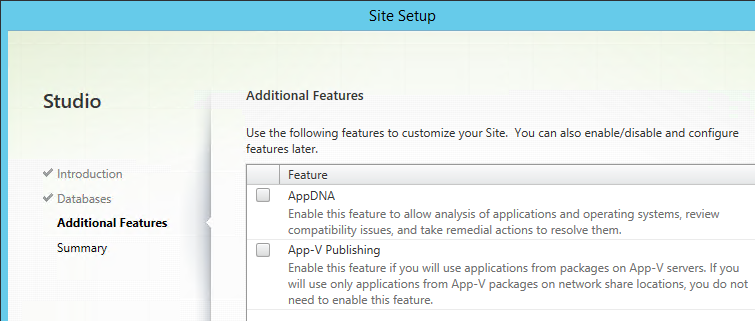
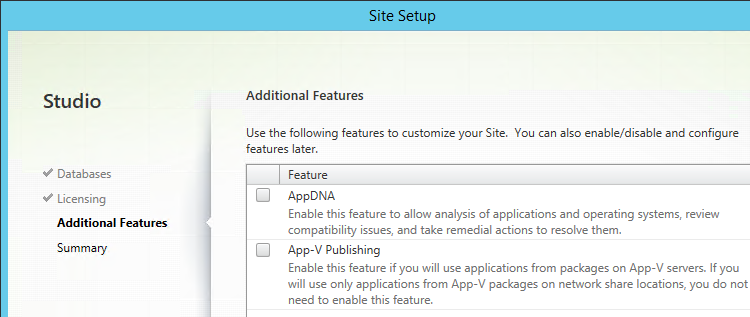
- In the Additional Features page, click Next.
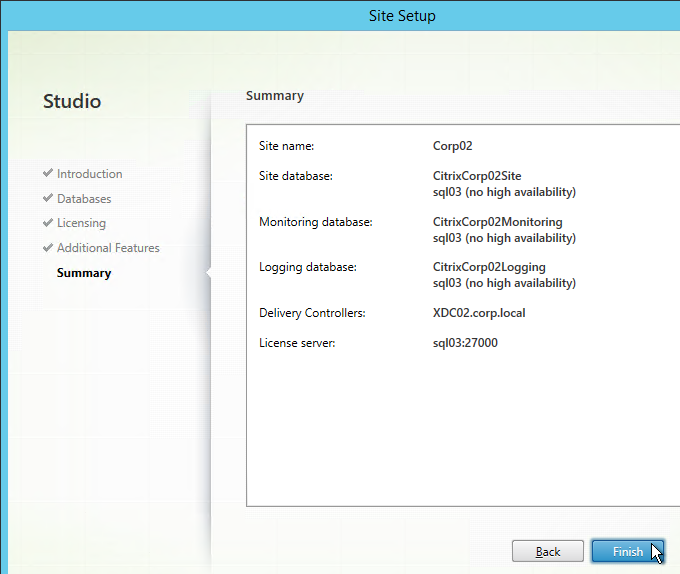
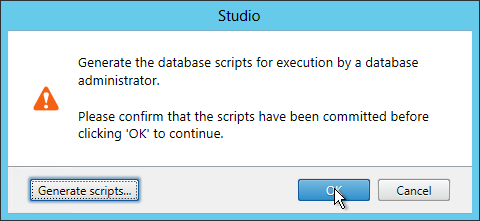
- In the Summary page, click Generate scripts.

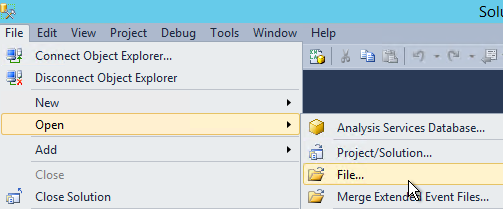
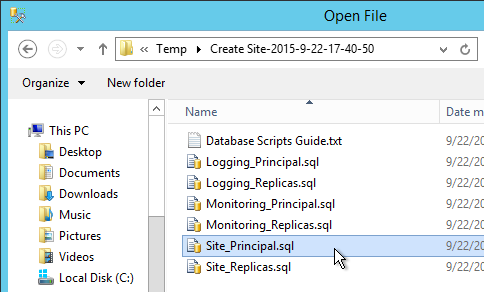
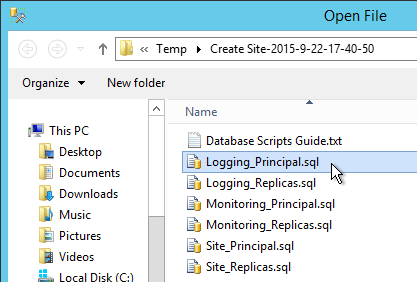
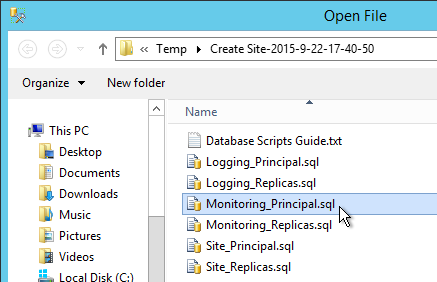
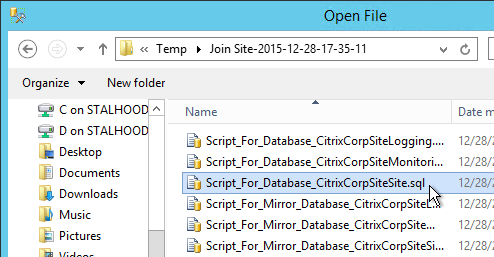
- A folder will open with six scripts. Edit each of the scripts.
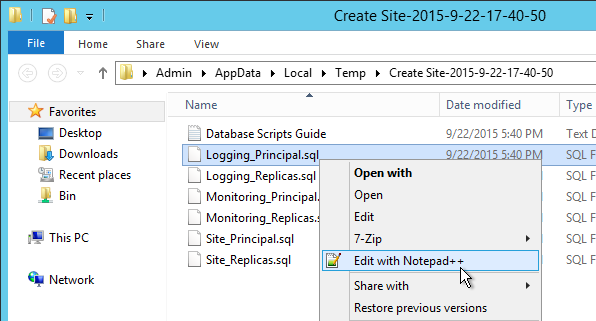
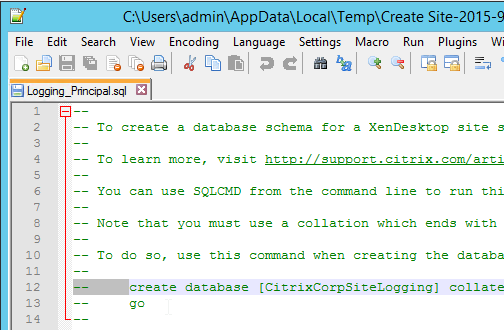
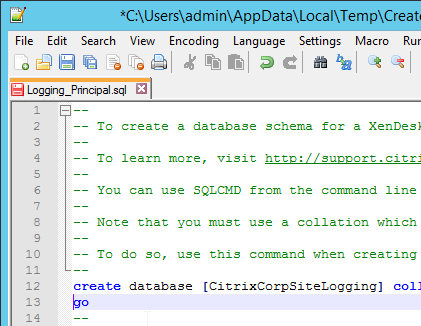
- Near the top of each script are two lines to create the database. Uncomment both lines (including the go line). Then save and close the file.
- Once all of the scripts are edited, you can send them to your DBA.
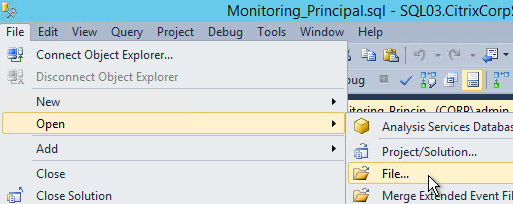
- On the Principal SQL Server, open the file Site_Principal.sql.
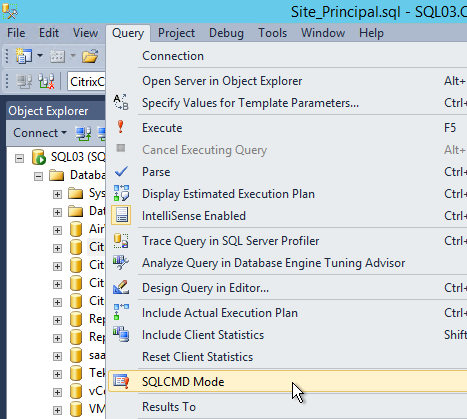
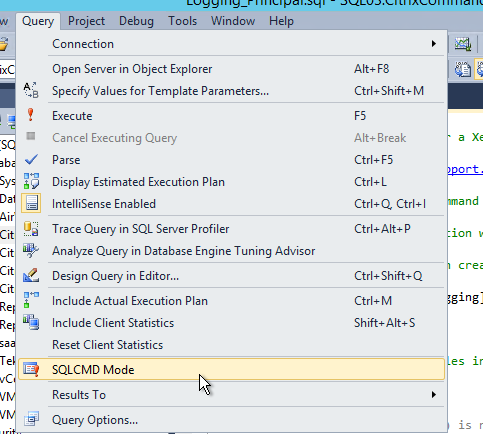
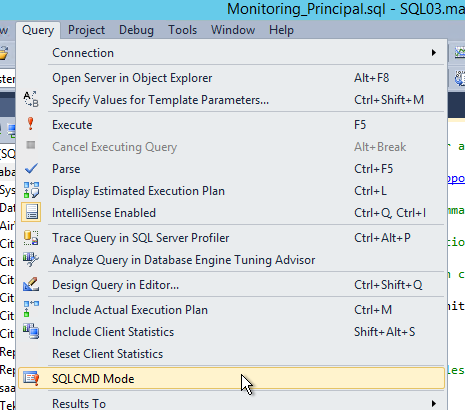
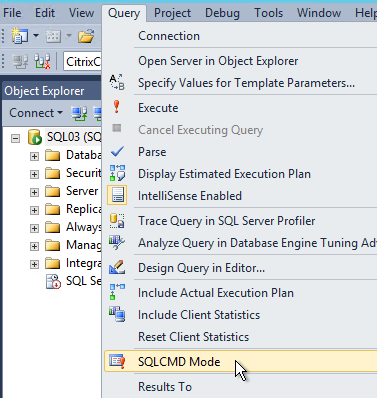
- Open the Query menu, and click SQLCMD Mode.
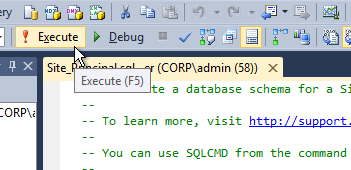
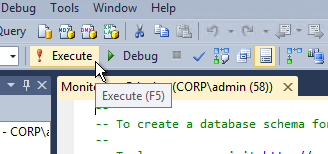
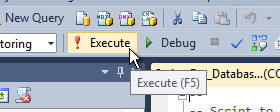
- Then execute the script.
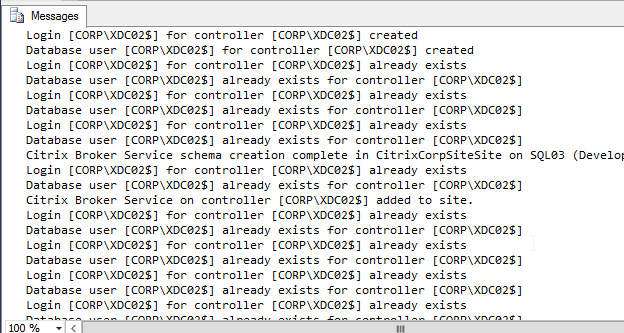
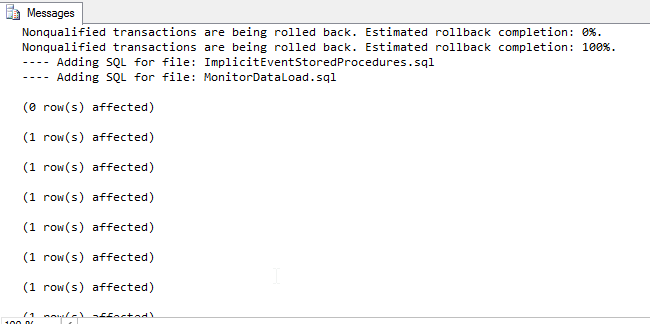
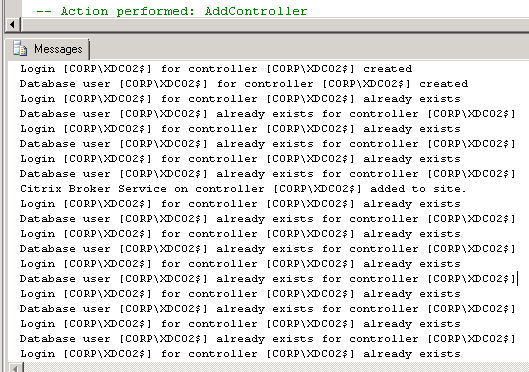
- If SQLCMD mode was enabled properly, then the output should look something like this:
- If you have a mirrored database, run the second script on the mirror SQL instance. Make sure SQLCMD mode is enabled.
- Repeat for the Logging_Principal.sql script.
- You’ll have to enable SQLCMD Mode for each script you open.

- Repeat for the Monitoring_Principal.sql script.
- Once again enable SQLCMD Mode.
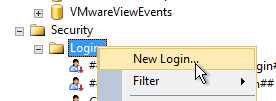
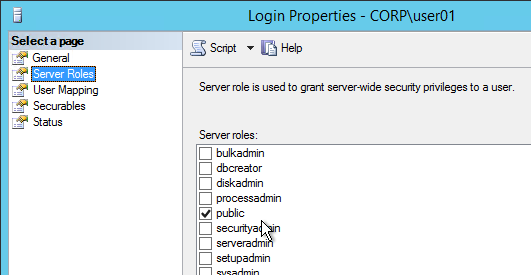
- The person running Citrix Studio must be added to the SQL Server as a SQL Login and granted the public server role.
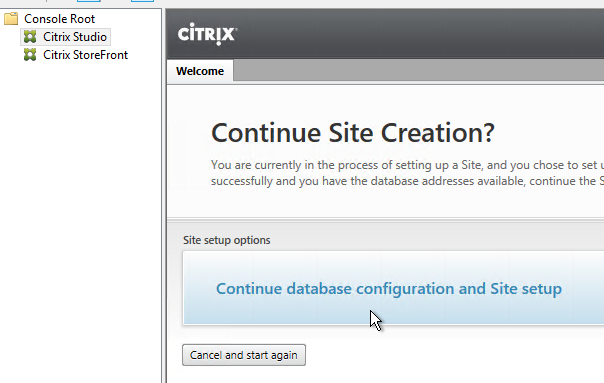
- Back in Citrix Studio, click the Continue database configuration and Site setup button.
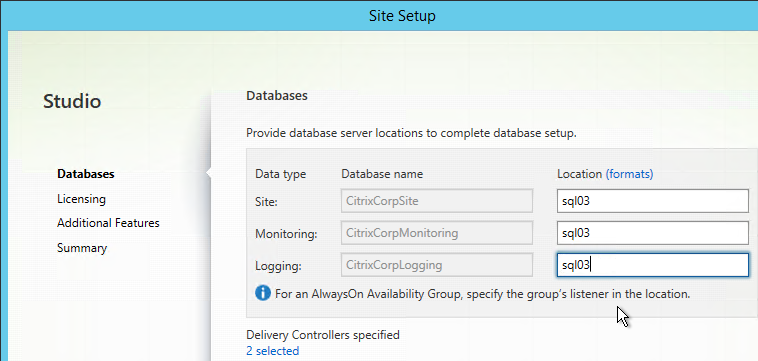
- In the Database page, enter the SQL server name and instance name and click Next.
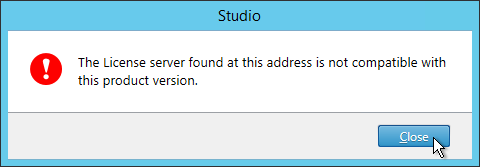
- On the Licensing page, enter the name of the Citrix License Server and click Connect. If you installed Licensing with your Delivery Controller, then simply enter localhost.
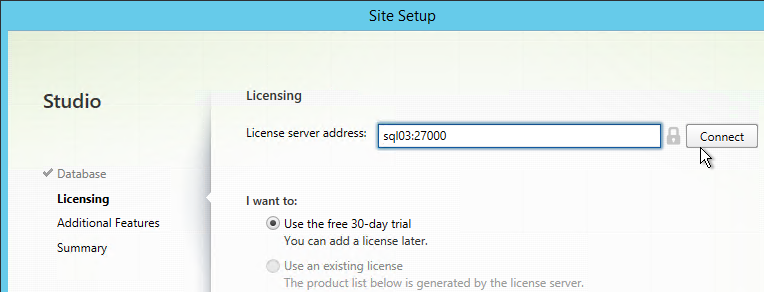
- XenApp/XenDesktop 7.11 requires the newest Licensing Server. If your server isn’t compatible, leave it set to localhost and fix it later.
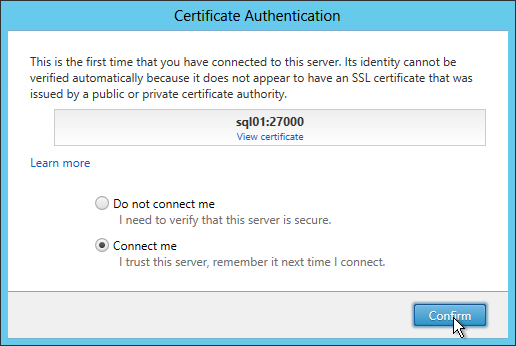
- If the Certificate Authentication appears, select Connect me, and click Confirm.
- Then select your license, and click Next.

- In the Additional Features page, click Next.
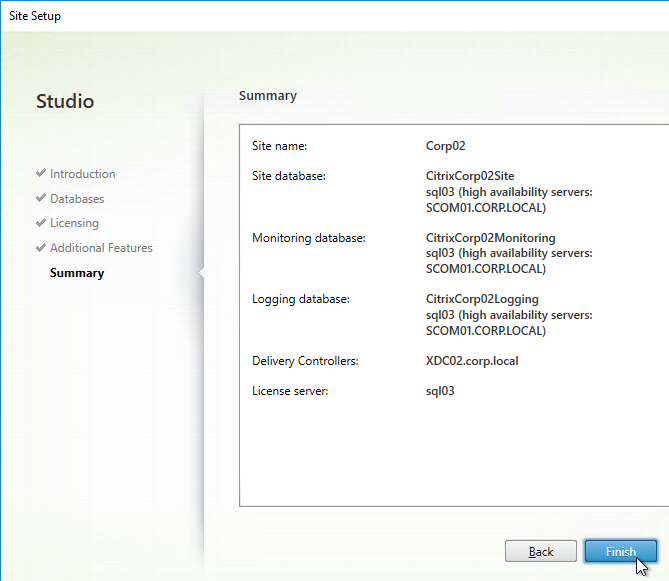
- In the Summary page, if your databases are mirrored, each database will show high availability servers and the name of the Mirror server. Click Finish.
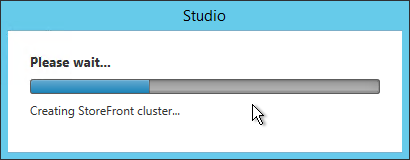
- It will take some time for the site to be created.
Verify Database Mirroring
If your database is mirrored, when you run asnp citrix.* and then run get-brokerdbconnection, you’ll see the Failover Partner in the database connection string.

Second Controller
When building the first Delivery Controller, the scripts might have already included the second Delivery Controller. Thus no special SQL permissions are needed. If the second Delivery Controller has not already been added to the SQL databases, then there are several methods of adding a second Controller to the databases for XenApp/XenDesktop:
- If you have sysadmin permissions to SQL, let Citrix Studio modify the databases automatically.
- If you don’t have sysadmin permissions to SQL then use Citrix Studio to generate SQL scripts and send them to a DBA.
To use Citrix Studio to create the SQL Scripts:
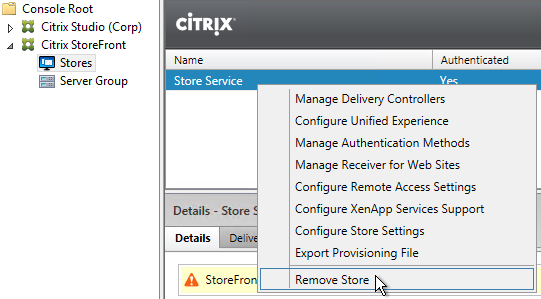
- On the first Delivery Controller, if StoreFront is installed, delete the default StoreFront store (/Citrix/Store) and recreate it with your desired Store name (e.g. /Citrix/CompanyStore).
- On the 2nd Delivery Controller, install XenDesktop as detailed earlier.
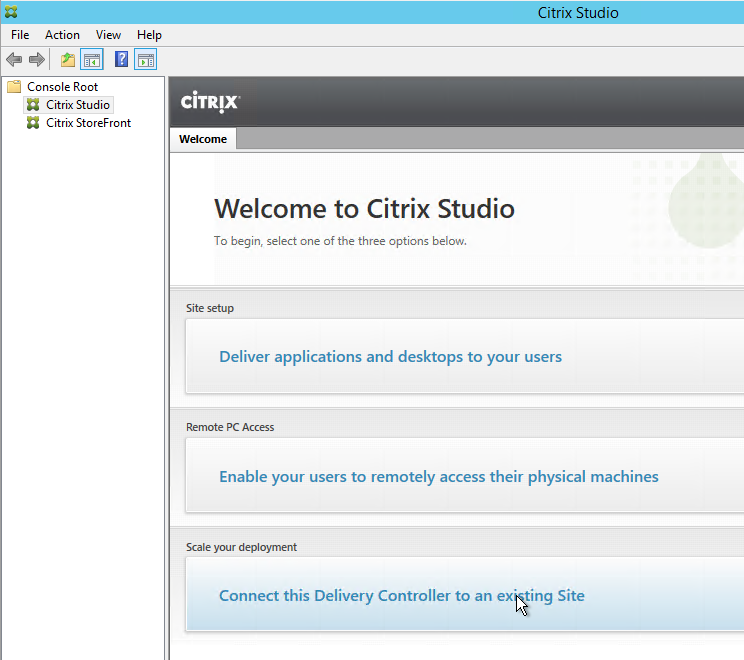
- After running Studio, click Connect this Delivery Controller to an existing Site.
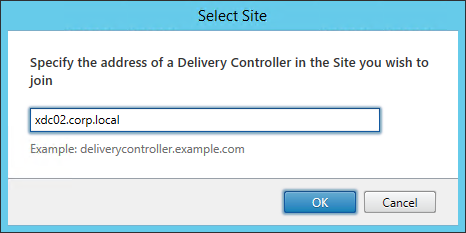
- Enter the name of the first Delivery Controller, and click OK.
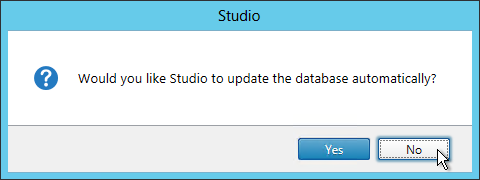
- If you don’t have elevated SQL permissions, click No when asked if you want to update the database automatically.
- Click Generate scripts.

- A folder will open with six scripts. If not mirroring, then the top three scripts need to be sent to a DBA. If mirroring, send all six.

- On the SQL Server, open one of the .sql files.
- Open the Query menu and click SQLCMD Mode.
- Then execute the XenDesktop script.
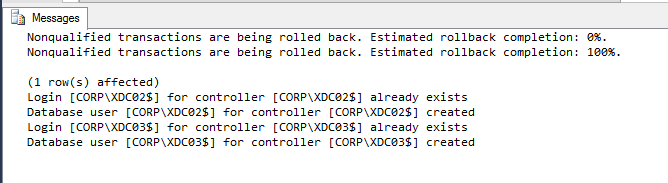
- If SQLCMD mode was enabled properly then the output should look something like this:
- Repeat for the remaining script files.
- Back in Citrix Studio, click OK.
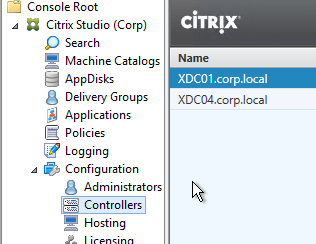
- In the Studio, under Configuration > Controllers, you should see both controllers.
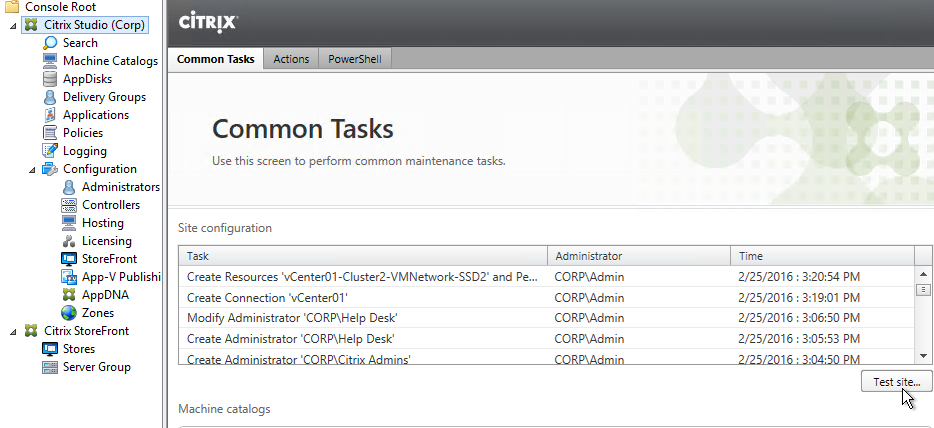
- You can also test the site again if desired.
Studio – Slow Launch
From B.J.M. Groenhout at Citrix Discussions: The following adjustments can be made if Desktop Studio (and other Citrix management Consoles) will start slowly:
- Within Internet Explorer, go to Tools – Internet Options – Tab Advanced – Section Security and uncheck the option Check for publisher’s certificate revocation
After adjustment Desktop Studio (MMC) will be started immediately. Without adjustment it may take some time before Desktop Studio (MMC) is started.
Registry setting (can be deployed using Group Policy Preferences):
- HKEY_CURRENT_USER\Software\Microsoft\Windows\CurrentVersion\WinTrust\Trust Providers\Software Publishing
- “State“=dword:00023e00
Database Maintenance
Enable Read-Committed Snapshot
The XenDesktop Database can become heavily utilized under load in a large environment. Therefore Citrix recommends enabling the Read_Committed_Snapshot option on the XenDesktop databases to remove contention on the database from read queries. This can improve the interactivity of Studio and Director. It should be noted that this option may increase the load on the tempdb files. See Citrix article CTX137161 How to Enable Read-Committed Snapshot in XenDesktop for configuration instructions.
Change Database Connection Strings
Sometimes the database connection strings need to be modified:
- When moving the SQL databases to a different SQL server
- For AlwaysOn Availability Groups, to add MultiSubnetFailover to the SQL connection strings
- For SQL mirroring, to add Failover Partner to the SQL connection strings
CTX140319 How to Migrate XenDesktop Database to New SQL Server has the correctly ordered list of PowerShell commands to change the database connection strings. Make sure PowerShell is running as administrator before running these commands.
Here are the DB Connections that must be changed. This list might be longer than the article. When using the article, make sure you include all of the DB Connections shown below.
Set-ConfigDBConnection -DBConnection $null
Set-AppLibDBConnection –DBConnection $null    #7.8 and newer
Set-OrchDBConnection –DBConnection $null      #7.11 and newer
Set-TrustDBConnection –DBConnection $null     #7.11 and newer
Set-AcctDBConnection -DBConnection $null
Set-AnalyticsDBConnection -DBConnection $null
Set-HypDBConnection -DBConnection $null
Set-ProvDBConnection -DBConnection $null
Set-BrokerDBConnection -DBConnection $null
Set-EnvTestDBConnection -DBConnection $null
Set-SfDBConnection -DBConnection $null
Set-MonitorDBConnection -DataStore Monitor -DBConnection $null   #Monitoring Database
Set-MonitorDBConnection -DBConnection $null                      #Site Database
Set-LogDBConnection -DataStore Logging -DBConnection $null       #Logging Database
Set-LogDBConnection -DBConnection $null                          #Site Database
Set-AdminDBConnection -DBConnection $null -force
Director Grooming
If XenDesktop is not Platinum Edition, then all historical Director data is groomed at 7 days.
For XenDesktop/XenApp Platinum Edition, by default, most of the historical Director data is groomed at 90 days. This can be adjusted up to 367 days by running a PowerShell cmdlet.
- On a Delivery Controller, run PowerShell and run asnp Citrix.*

- Run Get-MonitorConfiguration to see the current grooming settings. If this command gives you a “database error”, see Get-MonitorConfiguration is no more working at Citrix Discussions. 💡
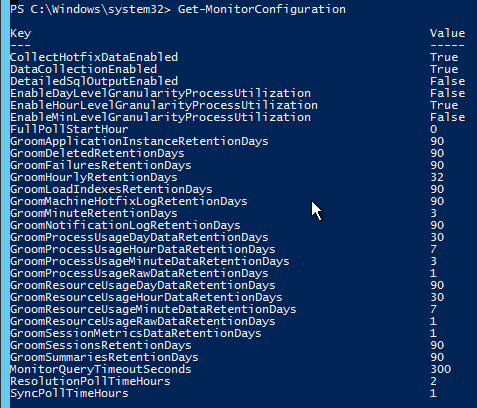
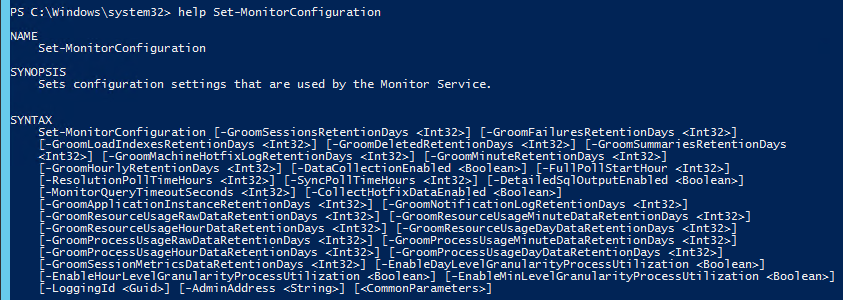
- Run Set-MonitorConfiguration to change the grooming settings.
View Logging Database
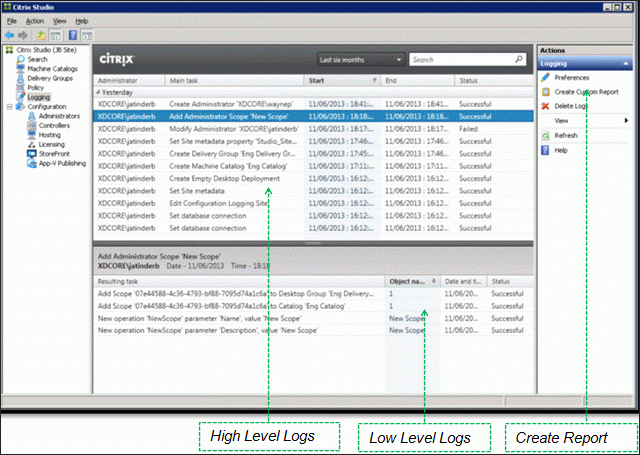
To view the contents of the Logging Database, in Studio, click the Logging node. On the right is Create Custom Report. See Citrix article CTX138132 Viewing Configuration Logging Data Not Shown for more info.
Studio Administrators
Full Administrators
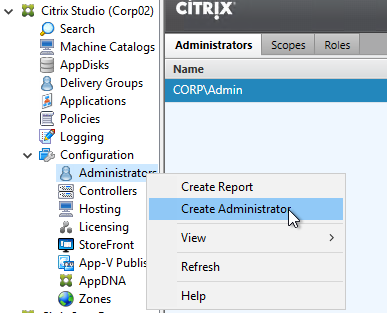
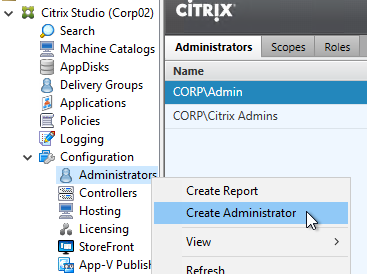
- In the Studio, under Configuration, click the Administrators node. The first time you access the node you’ll see a Delegated Administration page. Feel free to check the box, and then click Close.
- On the Administrators tab, right-click, and click Create Administrator.
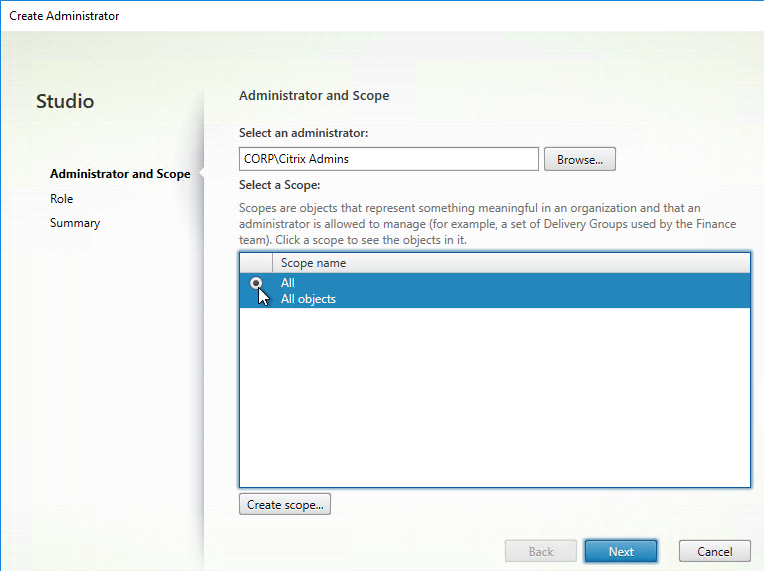
- In the Administrator and Scope page, Browse to a group (e.g. Citrix Admins) that will have permissions to Studio and Director. These groups typically have access to all objects so select the All scope. Alternatively, you can create a Scope to limit the objects. Click Next.
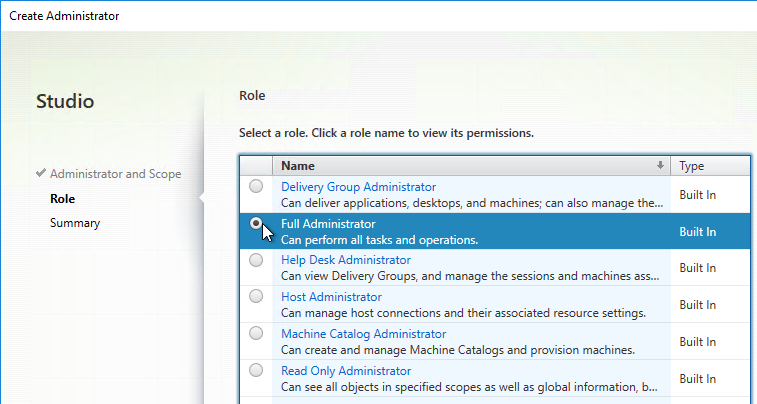
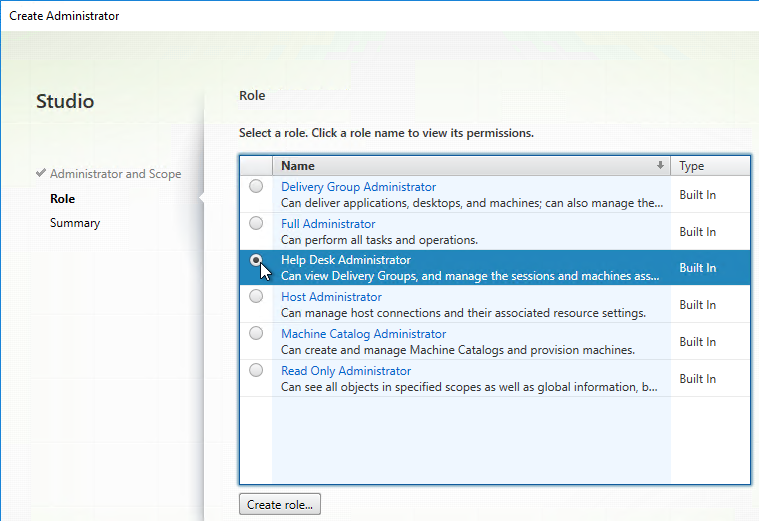
- On the Role page, select a role and then click Next. For example:
- Full Administrator for the Citrix Admins group
- Help Desk Administrator for the Help Desk group
- Machine Catalog Administrator for the desktop team
- In the Summary page, click Finish.
Help Desk
- In the Studio, under Configuration, click the Administrators node. On the Administrators tab, right-click, and click Create Administrator.
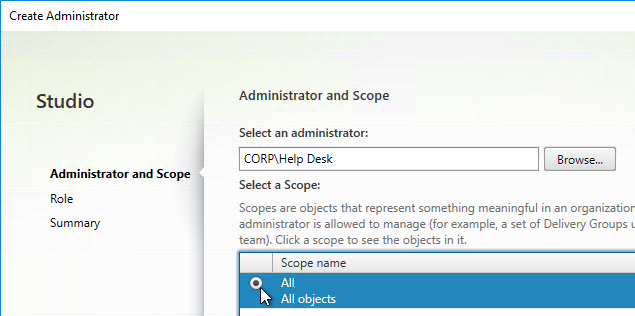
- In the Administrator and Scope page, Browse to a Help Desk group that will have permissions to Studio and Director. Select the All scope. And click Next.
- On the Role page, select the Help Desk Administrator role, and then click Next.
- In the Summary page, click Finish.
- When administrators in the Help Desk role log into Director, all they see is this.

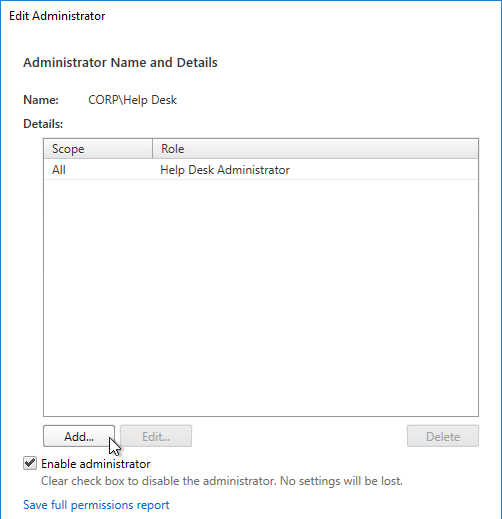
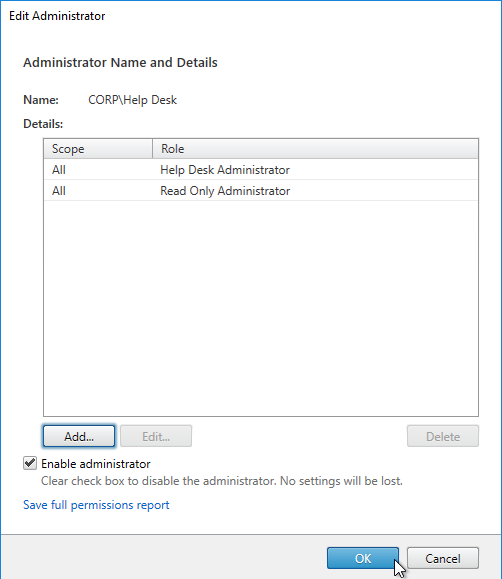
To jazz it up a little, add the Help Desk group to the read-only role. - Right-click the Help Desk Administrator, and click Edit Administrator.

- Click Add.
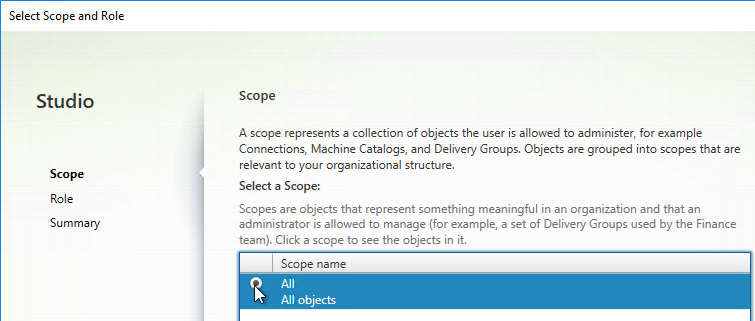
- In the Scope page, select a scope, and click Next.
- In the Role page, select Read Only Administrator, and click Next.
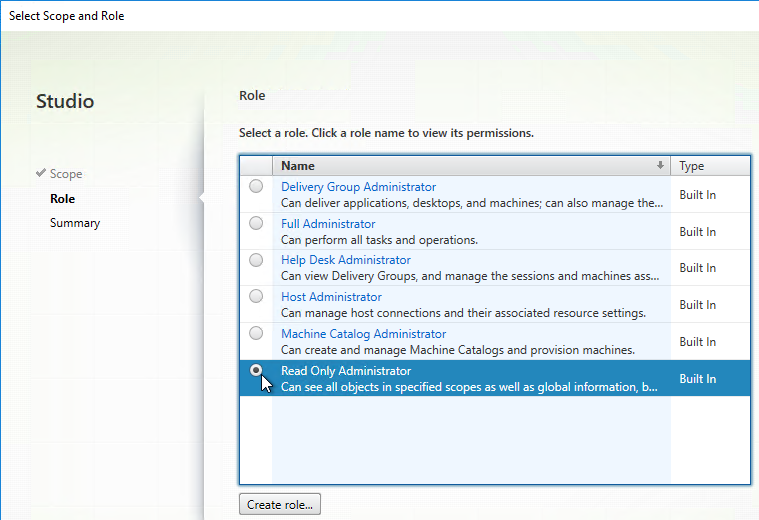
- In the Summary page, click Finish.
- Then click OK. Now Director will display the dashboard.
Provisioning Services w/Personal vDisk
From Considerations: Provisioning Services at Configure and manage Personal vDisk at Citrix Docs: The Provisioning Services Soap Service account must be added to the Administrator node of Studio and must have the Machine Administrator or higher role. This ensures that the PvD desktops are put into the Preparing state when the Provisioning Services (PVS) vDisk is promoted to production.
Customer Experience Improvement Program
XenApp/XenDesktop 7.11 enables CEIP by default. If desired, you can disable it in Citrix Studio:
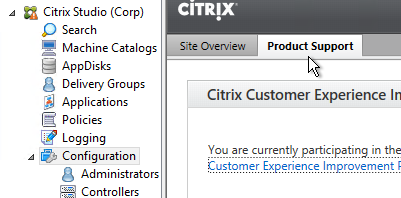
- On the left, go to the Configuration node.
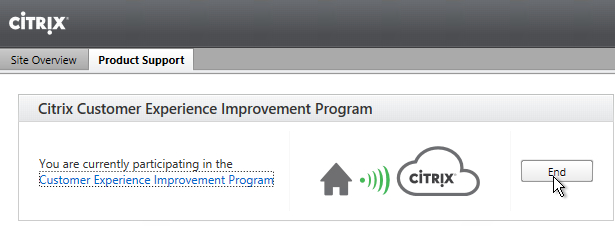
- On the right, switch to the Product Support tab.
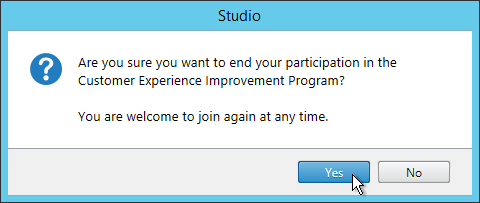
- Click End.
- Click Yes.
vCenter Connection
XenDesktop uses an Active Directory service account to log into vCenter. This account needs specific permissions in vCenter. To facilitate assigning these permissions, create a new vCenter role and assign it to the XenDesktop service account. The permissions should be applied at the datacenter or higher level.
Hosting Resources
A Hosting Resource = vCenter + Cluster (Resource Pool) + Storage + Network. When you create a machine catalog, you select a previously defined Hosting Resource, and the Cluster, Storage, and Network defined in the Hosting Resource object are automatically selected. If you need some desktops on a different Cluster+Storage+Network then you’ll need to define more Hosting Resources in Studio.
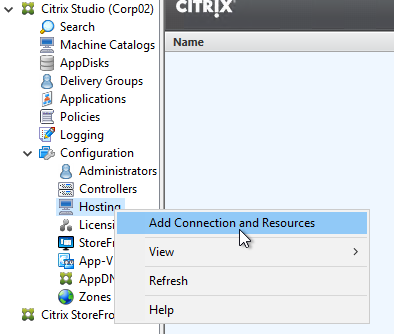
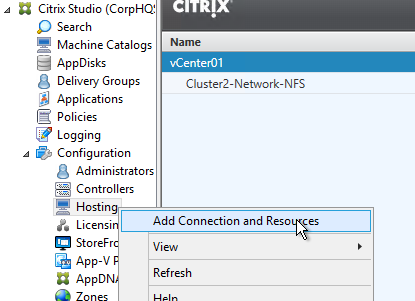
- In Studio, expand Configuration and click Hosting. Right-click it, and click Add Connection and Resources.
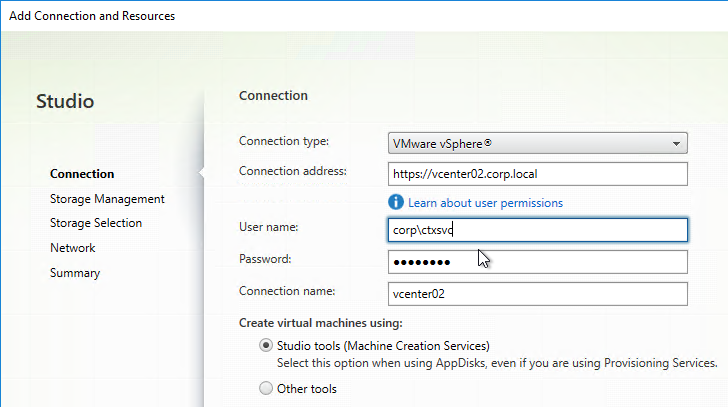
- In the Connection page, for Connection type, select VMware vSphere.
- Notice there’s a Learn about user permissions blue link to an article that describes the necessary permissions.
- Enter https://vcenter01.corp.local/sdk as the vCenter URL. The URL must contain the FQDN of the vCenter server. Ensure the entered URL has /sdk on the end.
- Enter credentials of a service account that can log into vCenter.
- In the Connection name field, give the connection a name. Typically, this matches the name of the vCenter server.
- If you are not using Machine Creation Services and instead only need the vCenter connection for machine power management, change the Create virtual machines using selection to Other Tools. If you intend to use MCS, leave it set to Studio Tools.
- Click Next.
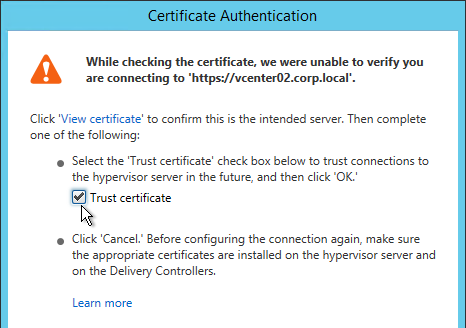
- If you see a message about the vCenter certificate, check the box next to Trust certificate, and click OK.
- In the Storage Management page, click Browse and select a vSphere cluster.
- Select Use storage shared by hypervisors.
- If you have sufficient disk space on each ESXi host, also select Optimize temporary data on available local storage. From Mark Syms at discussions.citrix.com: “If you use just MCS caching to local storage then the VM is not agile at all and cannot be moved even when powered off as it has a virtual disk permanently associated with a single host.”
- From Martin Rowan at discussions.citrix.com: for the temporary cache disk, “Don’t format it, the raw disk is what MCS caching uses.”
- Click Next.

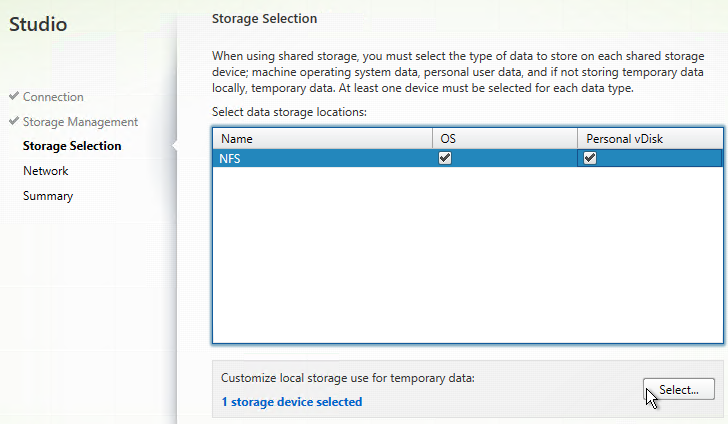
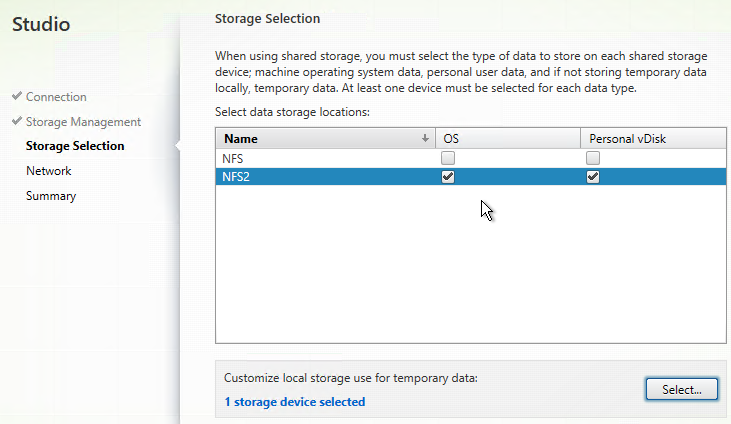
- In the Storage Selection page, OS and Personal vDisk must be selected on at least one datastore. For maximum flexibility, only select one datastore. To select additional datastores, run this wizard again to create a separate Hosting Resource.
- If you selected the temporary data on local storage option, on the bottom, click Select, and choose the datastores you want to use for disk caching. By default, all local datastores are selected. Click Next when done.
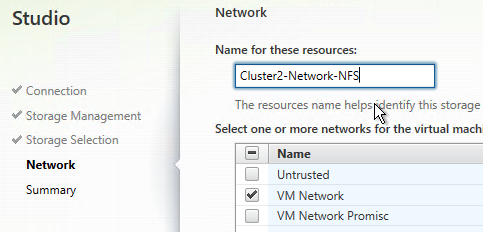
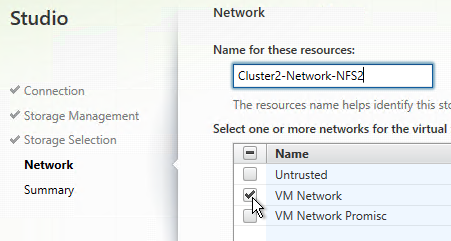
- In the Network page, enter a name for the hosting resource. Since each hosting resource is a combination of vCenter, Cluster, Network, and Datastores, include those names in this field (e.g. vCenter01-Cluster01-Network01-Datastore01).
- Select a network and click Next.
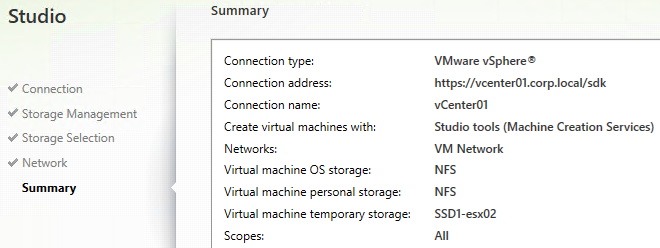
- In the Summary page, click Finish.
- If you have multiple datastores for your VDAs, run the wizard again.
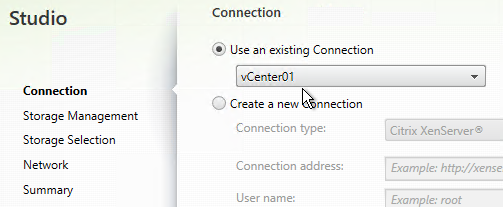
- You can use the existing vCenter connection.
- This time, select a different datastore.
- Give it a name that indicates the chosen datastore.
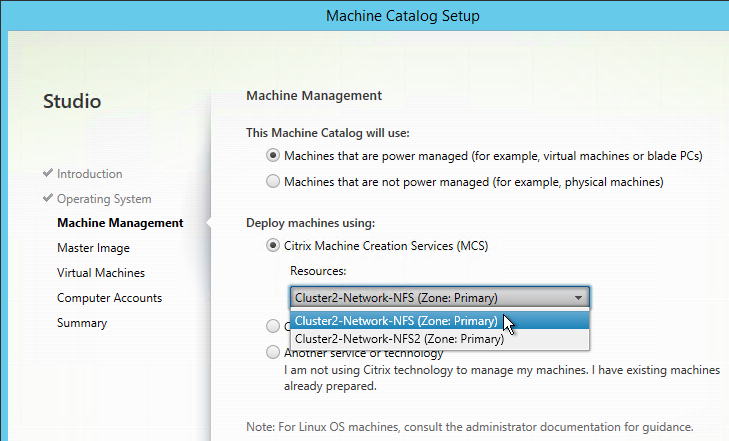
- When you create a Catalog, select the Hosting Resource for the datastore where you want the VDAs to be placed. Create additional Catalogs for each datastore. You can then combine the Catalogs into a single Delivery Group.
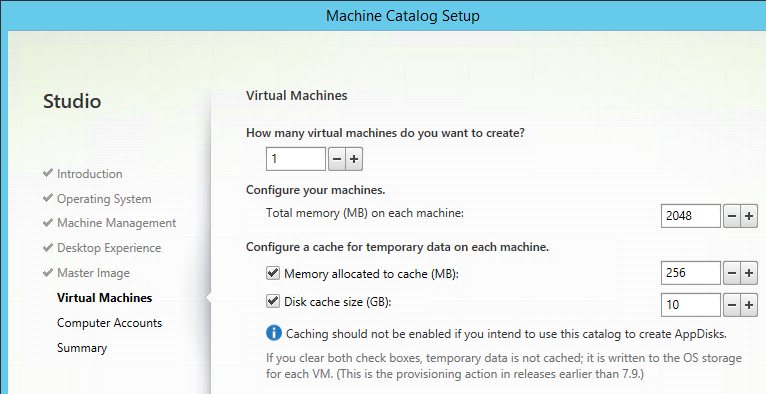
- Later in the Catalog wizard, you’re given an option to enable caching and select a cache size. This is similar to Provisioning Services option “Cache in RAM with overflow to disk”.
Citrix Licensing Server
Upgrade
XenApp/XenDesktop 7.11 comes with 11.14.0.1.
If you have a standalone Licensing Server, upgrade it to Citrix Licensing 11.14.0.1 if it isn’t already.
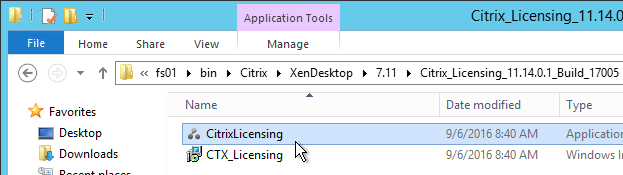
- Go to the downloaded Citrix Licensing 11.14.0.1 build 17005 and run CitrixLicensing.exe.
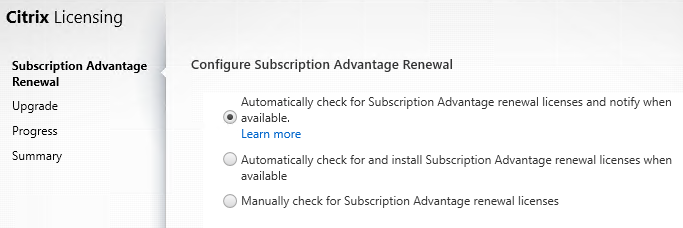
- In the Subscription Advantage Renewal page, make a selection, and click Next.
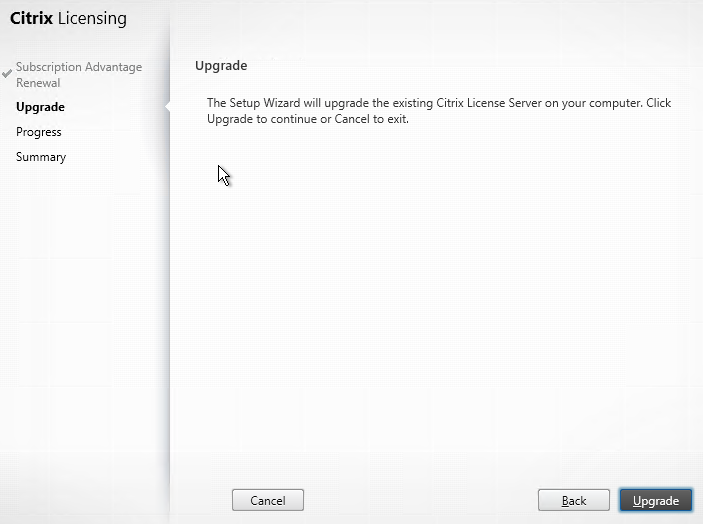
- In the Upgrade page, click Upgrade.
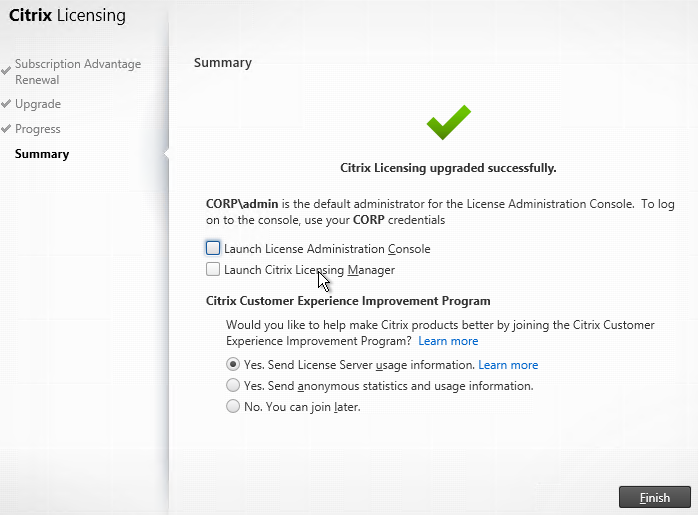
- Click Finish.
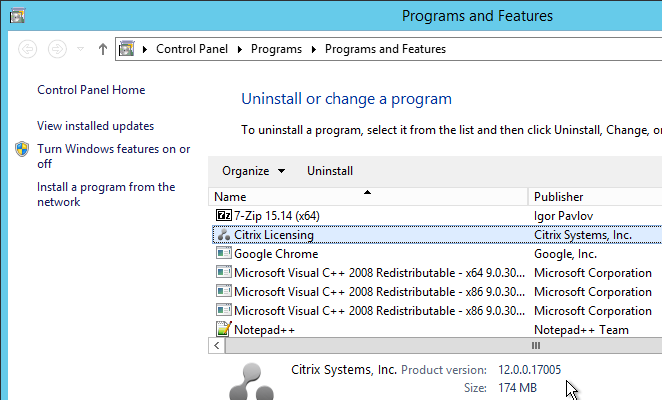
- If you go to Programs and Features, it should now show version 12.0.0.17005.
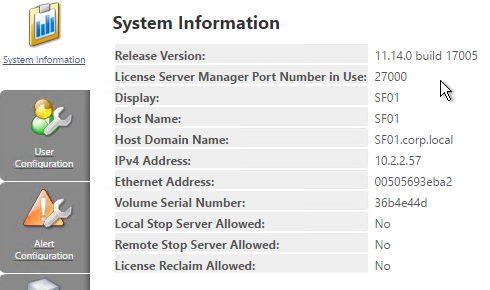
- If you login to the license server web console, on the Administration tab, it shows it as version 11.14.0 build 17005.
- You can also view the version in the registry at HKLM\Software\Wow6432Node\Citrix\LicenseServer\Install.

Citrix License Management Service
New in 11.14.0.1 is the Citrix License Management Service. This service helps you avoid prohibited practices:
- Duplication of licenses outside a Disaster Recovery (DR) environment
- Use of legacy licenses for new product versions
- Use of rescinded licenses
Licensing Server HA using GSLB
From Dane Young – Creating a Bulletproof Citrix Licensing Server Infrastructure using NetScaler Global Server Load Balancing (GSLB) and CtxLicChk.ps1 PowerShell Scripts. Here is a summary of the configuration steps. See the blog post for detailed configuration instructions.
- Build two License Servers in each datacenter with identical server names. Since server names are identical, they can’t be domain-joined.
- Install identical licenses on all License Servers.
- Set the DisableStrictNameChecking registry key on all Citrix Licensing servers.
- Synchronize the certificate files located at C:\Program Files (x86)\Citrix\Licensing\WebServicesForLicensing\Apache\conf. They must be identical on all Licensing Servers.
- Download CtxLicChk.exe from http://support.citrix.com/article/CTX123935 and place on all Licensing Servers.
- Schedule the PowerShell script CtxLicChk.ps1 on all Licensing Servers. Get this script from the blog post linked above.
- Configure NetScaler:
- Configure GSLB ADNS services.
- Add wildcard Load Balancing service for each Citrix Licensing Server.
- Configure service TCP monitoring for ports 27000, 7279, 8082, and 8083.
- Create Load Balancing Virtual Server for each Licensing Server.
- Set one Load Balancing Virtual Server as backup for the other.
- Repeat in second datacenter.
- Configure GSLB Services and GSLB Monitoring.
- Configure GSLB Virtual Servers. Set one GSLB Virtual Server as backup for the other.
- Delegate the Citrix Licensing DNS name to the ADNS services on the NetScaler appliances.
- Configure Citrix Studio to point to the GSLB-enabled DNS name for Citrix Licensing.
Citrix License Server Monitoring
Citrix Licensing 11.13.1 and newer has historical usage reporting:
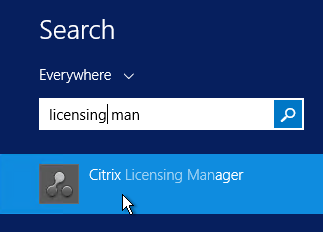
- Run Citrix Licensing Manager from the Start Menu. Or use a browser to connect to https://MyLicenseServer:8083
- Use the drop-down menus to select a license type, select dates, and export to a .csv file.
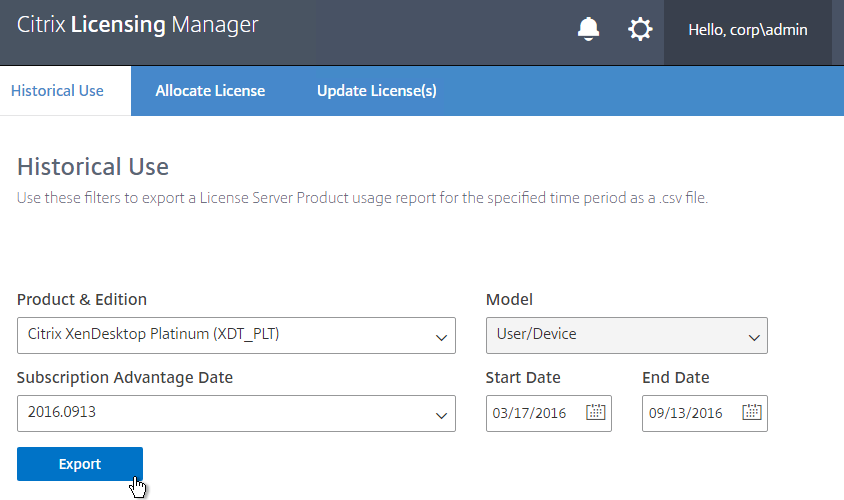
- The Update Licenses tab lets you check for renewals and download them.
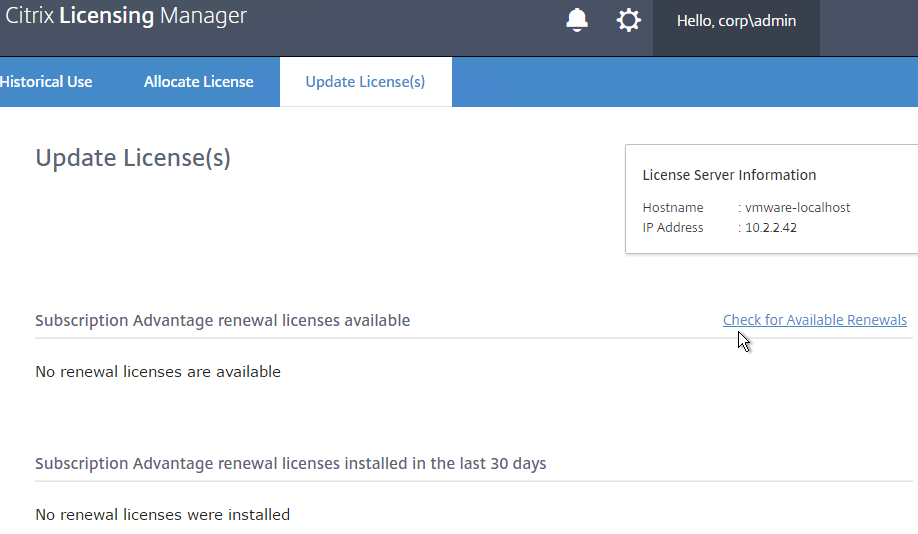
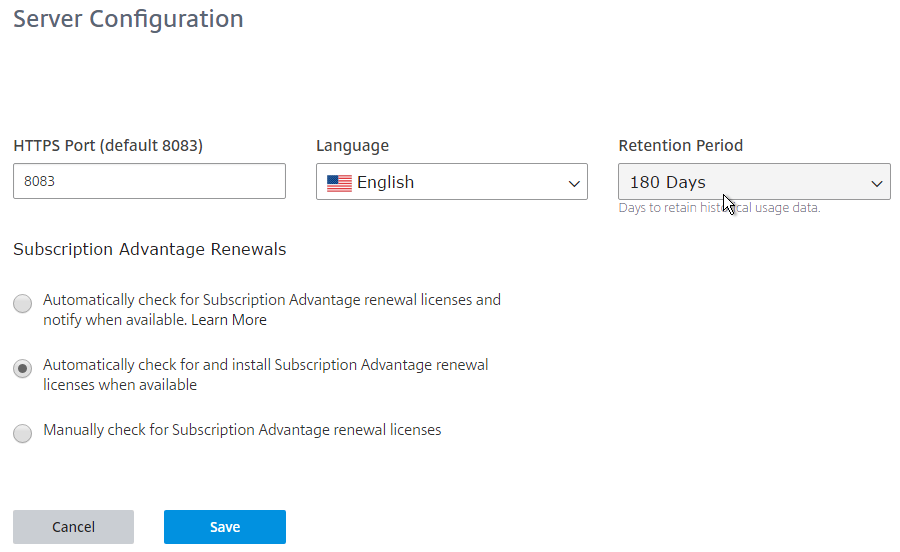
- On the top right is a gear icon where you can set the historical retention period and configure SA license auto-renewal.

http://www.jonathanmedd.net/2011/01/monitor-citrix-license-usage-with-powershell.html.
Lal Mohan – Citrix License Usage Monitoring Using Powershell
Jaroslaw Sobel – Monitoring Citrix Licenses usage – Graphs using WMI, Powershell and RRDtool. This script generates a graph similar to the following:


Remote Desktop Licensing Server
Install Remote Desktop Licensing Server
Do the following on your XenDesktop Controllers:
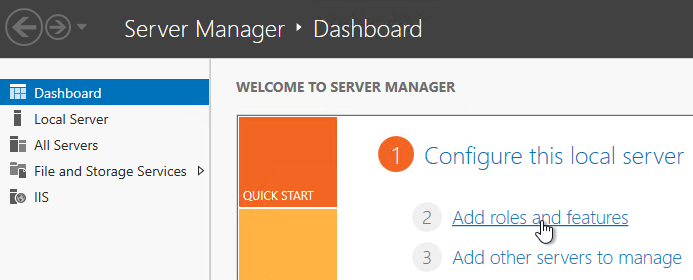
- In Server Manager, open the Manage menu, and click Add Roles and Features.
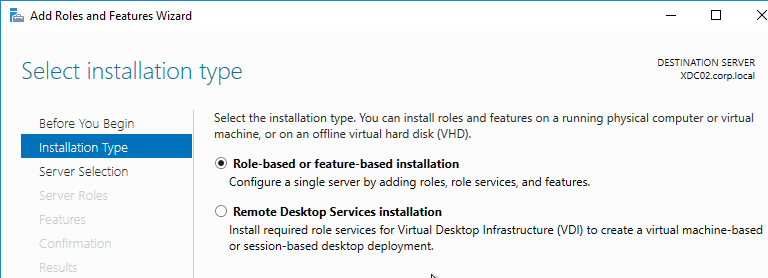
- In the Installation Type page, select Role-based or feature-based installation.
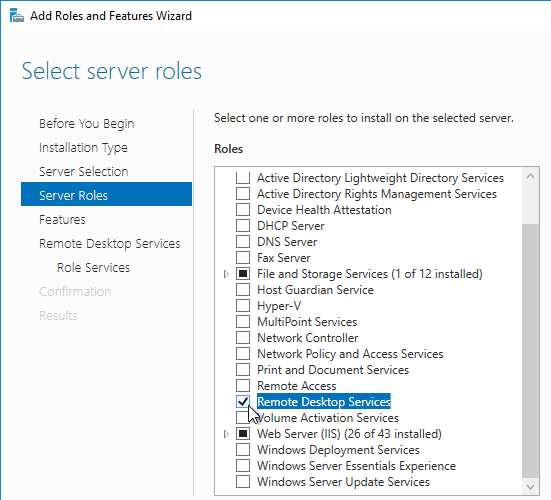
- Click Next until you get to the Server Roles page. Check the box next to Remote Desktop Services, and click Next.
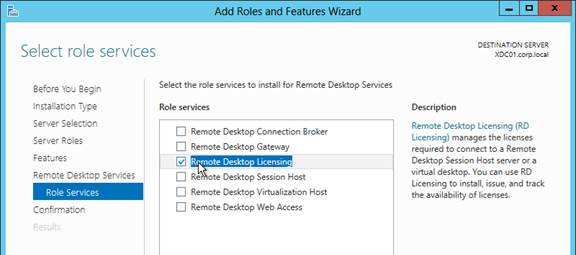
- Click Next until you get to the Role Services page. Check the box next to Remote Desktop Licensing, and click Next.
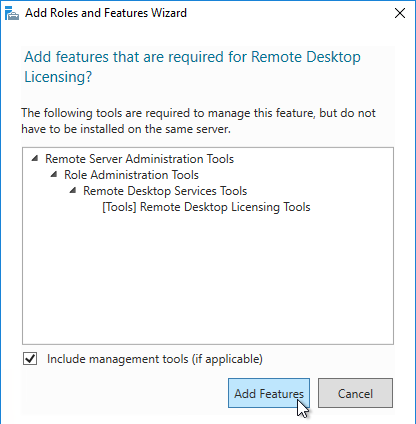
- Click Add Features if prompted.
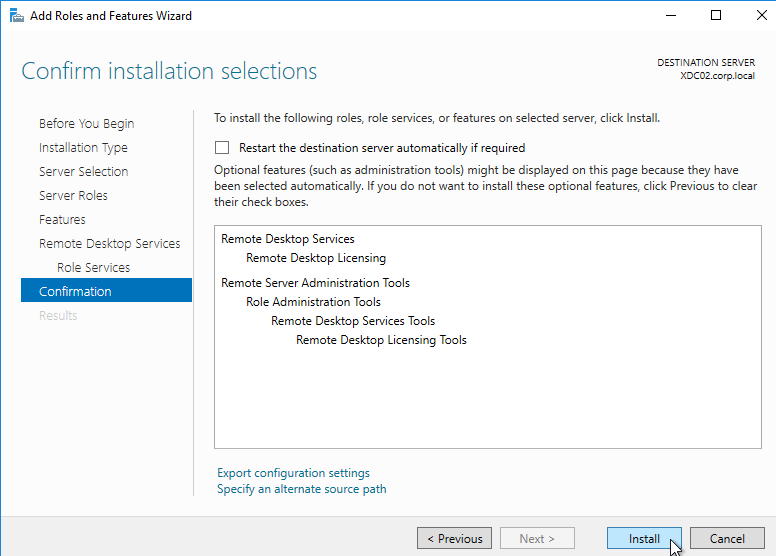
- Then finish the wizard to install the role service.
Activate Remote Desktop Licensing
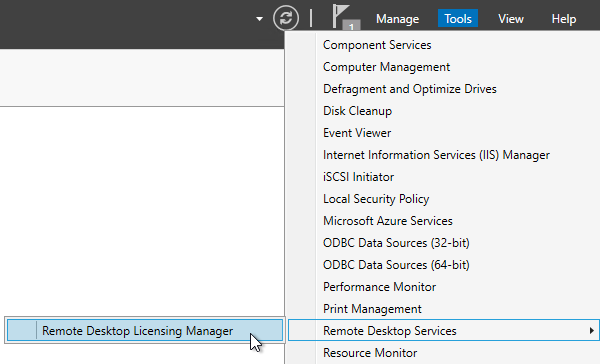
- After RD Licensing is installed, in Server Manager, open the Tool menu, expand Terminal Services (or Remote Desktop Services), and click Remote Desktop Licensing Manager.
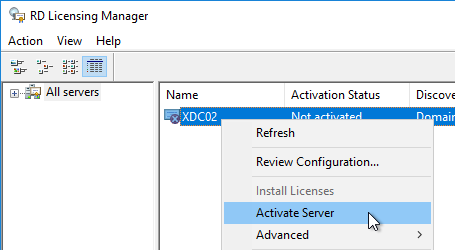
- The tool should find the local server. If it does not, right-click All servers, click Connect, and type in the name of the local server.
- Once the local server can be seen in the list, right-click the server and click Activate Server.
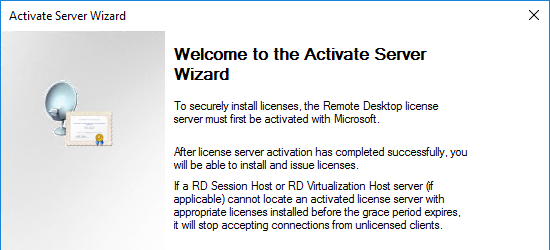
- In the Welcome to the Activate Server Wizard page, click Next.
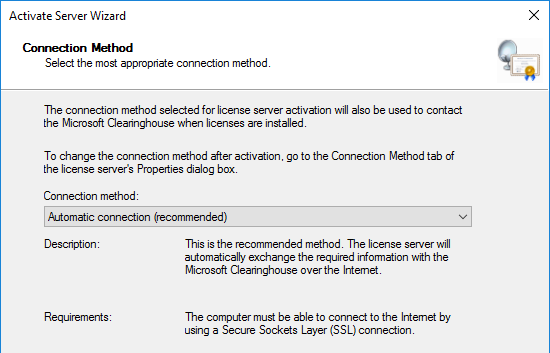
- In the Connection Method page, click Next.
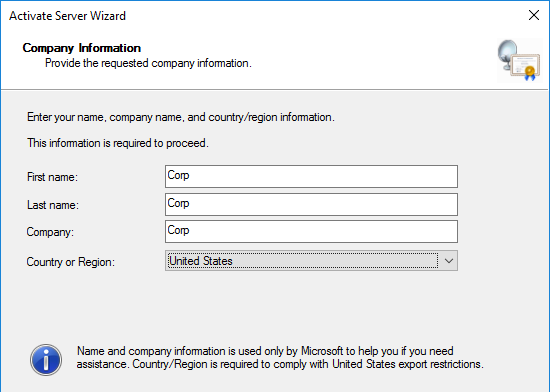
- In the Company Information page, enter the required information, and click Next.
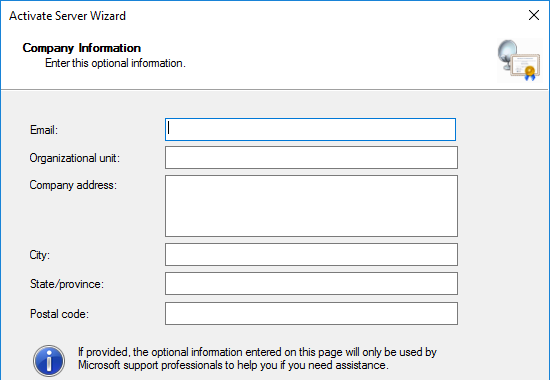
- All of the fields on the Company Information page are optional, so you do not have to enter anything. Click Next.
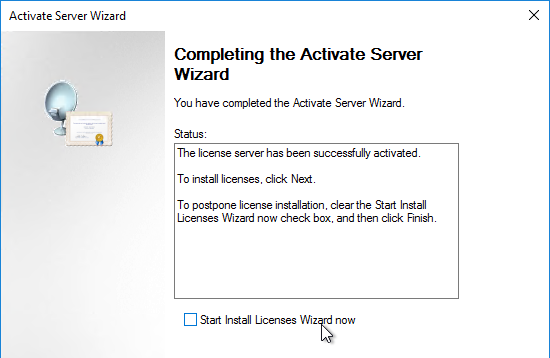
- In the Completing the Activate Server Wizard page, uncheck the box next to Start Install Licenses Wizard now, and click Finish. Since the session hosts will be configured to pull Per User licenses, there is no need to install licenses on the RD Licensing Server.
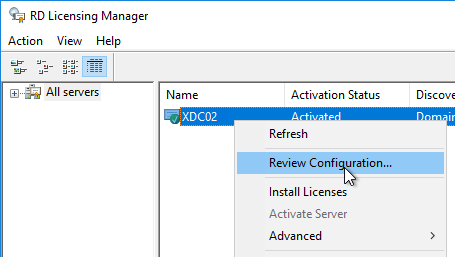
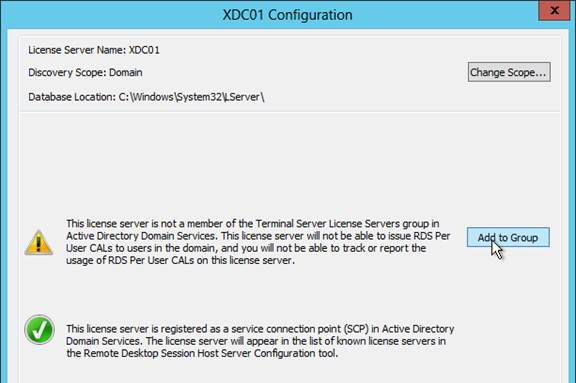
- In RD Licensing Manager, right-click the server, and click Review Configuration.
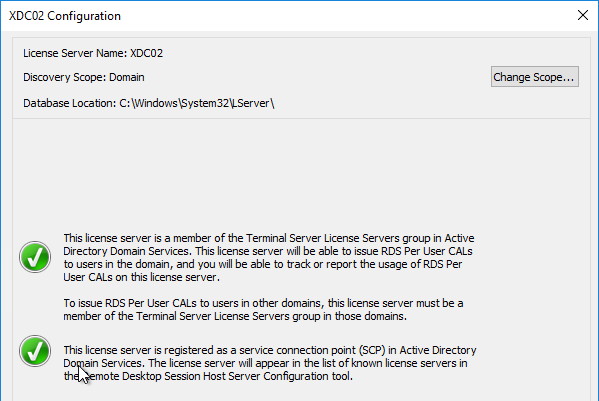
- Ensure you have green check marks. If the person installing Remote Desktop Licensing does not have permissions to add the server to the Terminal Server License Servers group in Active Directory, ask a domain admin to do it manually. If you have the proper permissions, click Add to Group.
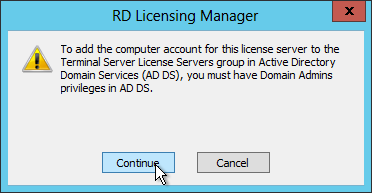
- Click Continue when prompted that you must have Domain Admins privileges.
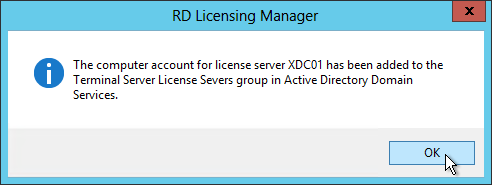
- Click OK when prompted that the computer account has been added.
- Click OK to close the window.
XenApp/XenDesktop Health Check
Sacha Tomet Finally 1.0 – but never finalized!: XenApp & XenDesktop 7.x Health Check script has now Version 1.0.

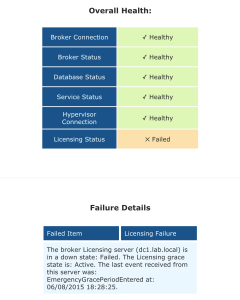
Andrew Morgan – New Free Tool: Citrix Director Notification Service: The Citrix Director Notification service sits on an edge server as a service (or local to the delivery controller) and periodically checks the health of:
- Citrix Licensing.
- Database Connections.
- Broker Service.
- Core Services.
- Hypervisor Connections.
And if any of these items fall out of bounds, an SMTP alert is sent to the mailbox of your choice for action. The tool will also send “All Clear” emails when these items are resolved, ensuring you are aware when the service has resumed a healthy state.
Matt Bodholdt XenDesktop 7.x Controller Service Status Script at CUGC – PowerShell script that checks the following:
- Lists Controllers with boot time
- Licensing status
- Service status on each Controller
- DB Connections
- Controller Available Memory
- Hypervisor Connections Status
Hey Carl,
I’m looking at building a XenApp 7.11 environment. Your pages have been a great help, can I use your steps to create a functioning lab? I’m struggling to get past “Cannot complete your request” on StoreFrontWeb.
Thanks in advance for any pointers.
Clive
What are you seeing in StoreFront > Event Viewer > Applications and Services > Citrix Delivery Services?
Hi Carl,
I scrapped my Delivery Controller and have rebuilt it using the steps you’ve provided. I’ll try and deliver some apps today and tell you what I see in the Event log.
Cheers for getting back to me 🙂 Really need this lab up and running!
Clive
Install Remote Desktop Licensing Server Section:
Carl – Have a question, do I need to installs the RDS License Server role on all XenApp servers as well or just Controllers?
You need at least one server to run RDS Licensing. It doesn’t matter where it runs. Then you configure your Remote Desktop Session Host VDAs to point to the RDS Licensing Server(s).
Carl, we have got two data centers. primary is the production and secondary one is for DR purpose. our architectural requirement is to have two DCs in primary and another two in DR site. we have two delivery controllers from primary site to joined to database (AG) already and also managed to join 3rd one from DR site already but for joining the 4th one is failing. I’ve tried to join the 4th one through Studio and as well as trough script generated from the studio. but in both instance I am getting below error.
Failed to add Citrix AD Identity Service on controller [S-1-5-21-1017909788-408882013-1392588124-48614]
** An error was encountered during execution of batch. Exiting.
Any idea? Thanks
That’s new to me. Is there any more info in the error message? Is this a brand new Delivery Controller VM that never existing before (not rebuilt)? Have you called Citrix Support?
I’m having the exact same issue… what was the fix? Thanks!
Hello Carl,
Inam curious after reading this when setting up the center connection in my setup i selected other for pvs. But the other option is mcs and it states even for provisioning services. Can u use this to with pvs? I noticed in pvs I can’t used the xendesktop wizard. Instead I use the normal way pvs uses. Is this because of the other option I selected?
That’s correct. The XenDesktop Setup Wizard uses the Hosting Resources defined in Citrix Studio.
Thanks Carl. I’m finding that customers prefer stability and predictability over bells and whistles. Customers will also be required to run older versions of different components to fall in the compliant category. For example, you will not as of today be able to run 3.7 storefront with 7.6 LTSR CU2. In order to fall in the compliant category, storefront 3.0.1 will be required. I hope this helps others that are digging for some info on LTSR and CR.
Thanks
Sunshine
Carl,
If you had a new install, would you go with 7.9 or 7.11? Please give some details on why you would choose one over the other.
7.11 has the latest fixes. The only known issue is Director, and there’s a private fix for that. If you do 7.11, then you need to upgrade to 7.12 when it is released because that’s the only way to get support or fixes.
Thanks Carl, we are considering upgrading from 7.6 but is this a stable release?
Citrix still lists 7.9 as the last stable release.
You have two choices: 7.6.2000 (LTSR) or 7.11 (Current Release). But need to upgraded peridocially. LTSR gets Cumulative Updates (e.g. CU3). 7.11 gets new features (e.g. 7.12).
Much obliged
Thanks for the great article Carl. I would like to know your opinion about going with 7.9 or 7.11. I really like 7.11, just because the Slurpee’s from there are awesome.
If you had a new install, would you go with 7.9 or 7.11? Please give some details on why you would choose one over the other.
Thanks,
Sunshine
The only way you get bug fixes is by upgrading. However, 7.11 Director seems to require frequent restarts of the Monitoring service.
Hi Carl,
Upgrade 7.6 to 7.11
Question: Should I first upgrade the clients (VDA) and then the Controller/Site/Studio or can I first upgrade the Controllers/Site/Studio and do the clients later?
Cheers,
Jan
Order does not matter.
Hello Carl,
thanks for the great Post, could you tell me what the Local Host Cache Storage(LocalDB) prerequisites mean?
Will Local Host Cache be back in this release or is it only a preparation for the next release?
If I entered Get-BrokerSite in Powershell on a DDC I could see a point called Enable Local Host Cache, which is set on false.
Thanks for reply
The feature isn’t ready yet.
Hello Carl,
thanks for the fast answer, I tried to enable this feature in my lab and it is possible if you set Connection Leasing to false. If you try to set it true, while Connection Leasing is set to true you would get an error message in your powershell console. Do you know if Connection Leasing is working if I set the Local Host Cache to true or have we then a Problem if the Site Database Connection is lost?
Local Host Cache is not officially available at this time. Citrix writes code, they test it, and if tests are not completely successful, then they disable the feature before shipping it. I expect them to fix the code in a future release.
Its licencing based, even though XenApp Advanced doesn’t support AWS, it shows up in the list as an option, however, for Azure the connection simply does not exist
Interestingly I have a fresh xenapp 7.11 build just completed and I have no azure connection types available… All other host connections are there, just no azure. Carl, are you able to confirm the same in your lab please?
I have Azure and Azure Classic in my list of Hosting Connection types.
Odd, wonder if it’s flaked out when I’ve installed with the /xenapp switch, I’ll have to lab it up and have a look – thanks for checking