Navigation
- Change Log
- Overview
- Prerequisites
- PCoIP Profile
- Session Policy/Profile
- Gateway Virtual Server
- Horizon Configuration
- Update Content Switching Expression for Unified Gateway
- Use Citrix Gateway PCoIP Proxy
- CLI Commands
Change Log
- 2018 Dec 22 – renamed NetScaler Gateway to Citrix Gateway
- 2018 Oct 7 – updated screenshots for Citrix Gateway 12.1
- Horizon Configuration – 12.1 build 49 supports USB redirection with PCoIP
Overview
NetScaler Gateway 12.0 and Citrix Gateway 12.1 and newer support the PC-over-IP (PCoIP) protocol, which is the remote display protocol for several non-Citrix VDI solutions, including VMware Horizon. PCoIP is analogous to Citrix HDX/ICA protocol, and Microsoft RDP protocol. PCoIP uses UDP port 4172.
- VMware Blast is currently not supported
When PCoIP is proxied through Citrix Gateway, Citrix Gateway can replace the traditional PCoIP remote access solutions, like Horizon Security Server, or VMware Unified Access Gateway.
Prerequisites
- NetScaler Version – NetScaler 12.0 or newer.
- Build 51 and newer for NAT
- NetScaler Edition – PCoIP Proxy is available in all NetScaler Editions
- Universal Licenses – PCoIP Proxy uses the Clientless Access feature of Citrix Gateway, which means every Citrix Gateway connection must be licensed for Citrix Gateway Universal. On the Citrix Gateway Virtual Server, ensure ICA Only is unchecked.
- Horizon infrastructure – A functioning internal Horizon infrastructure. Ensure you can connect to Horizon Agents internally without Citrix Gateway.
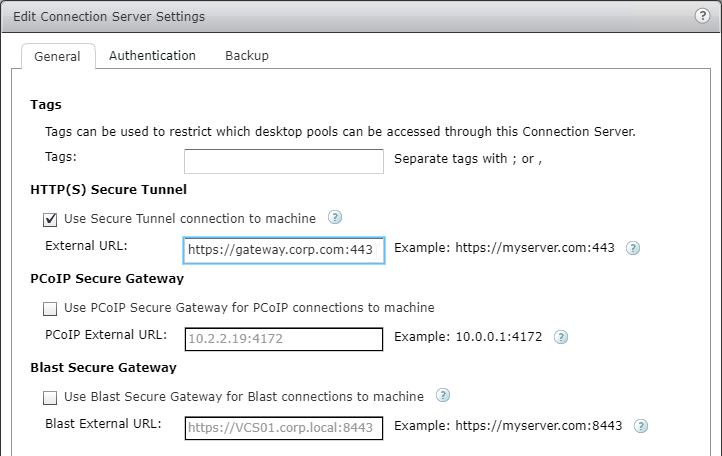
- Ensure that the Horizon HTTP(S) Secure Tunnel and PCoIP Secure Gateway are not enabled on the Horizon Connection Servers that NetScaler will proxy connections to.
- Configure Desktop Pools and RDS Farms to use PCoIP as the default protocol.
- Firewall Ports:
- TCP 4172, UDP 4172, and TCP 443 open from Horizon Clients to the Citrix Gateway VIP.
- TCP 4172, and UDP 4172 open from the NetScaler SNIP to all internal Horizon Agents.
- Certificate – A valid certificate for the Citrix Gateway Virtual Server.
- Authentication – An LDAP authentication policy/server.
- Unified Gateway (optional) – If Unified Gateway, create the Unified Gateway before adding PCoIP functionality.
- RfWebUI Portal Theme – For web browser access to Horizon, the Citrix Gateway Virtual Server must be configured with the RfWebUI theme.
- Horizon Client – The Horizon Client must be installed on the client device, even if accessing Horizon published icons using the NetScaler RfWebUI portal.
PCoIP Profile
To create the PCoIP Profile:
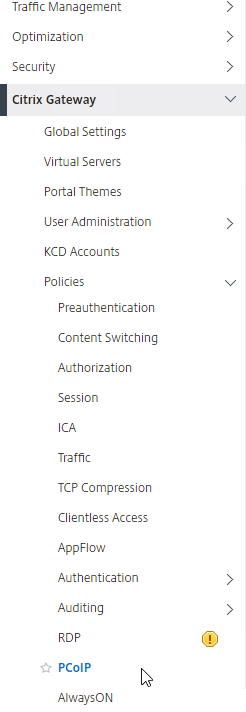
- In the NetScaler management GUI, navigate to Citrix Gateway > Policies> PCoIP.
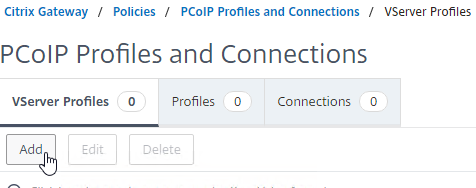
- On the right, in the PCoIP Profiles and Connections pane, you will create a VServer profile and a PCoIP profile.
- To create a VServer profile, on the VServer Profiles tab, click Add.
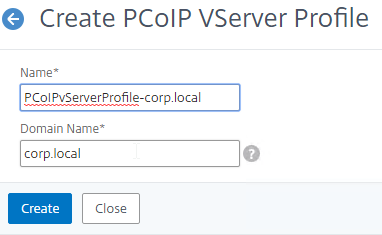
- Enter a name for the VServer profile. The only purpose of the VServer Profile is to specify the Active Directory domain name so name it accordingly.
- Enter an Active Directory Domain Name that will be used for Single Sign-on to Horizon Connection Server, and then click Create.
- Note: only a single Active Directory domain is supported per NetScaler Gateway Virtual Server. Also, the domain name specified here is displayed in the Horizon Client.
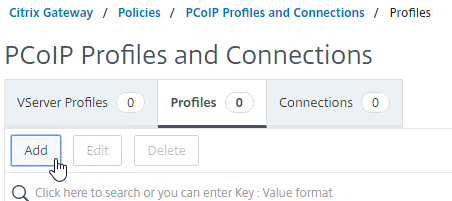
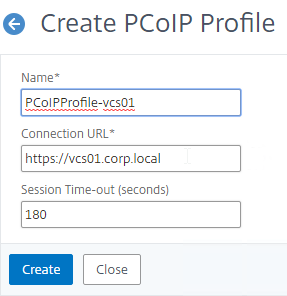
- To create a PCoIP profile, on the Profiles tab, click Add.
- Enter a name for the PCoIP Profile. The PCoIP Profile specifies the internal DNS name for Horizon so name it accordingly.
- Enter the internal connection URL for the internal VMware Horizon View Connection Servers, and then click Create. NetScaler SNIP needs to be able to connect to this URL.
Session Policy/Profile
To create or edit a Session Policy/Profile that has PCoIP Proxy enabled:
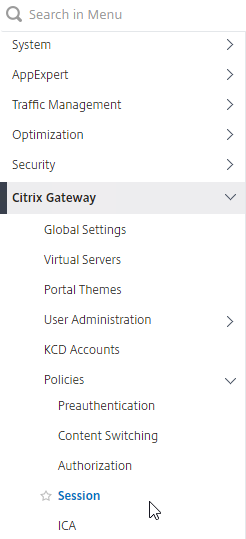
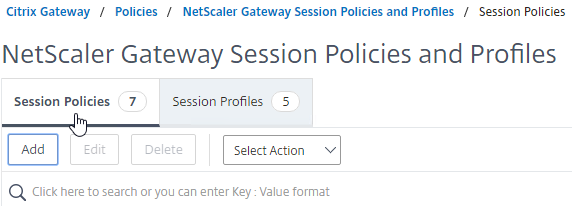
- Navigate to Citrix Gateway > Policies> Session.
- On the right, select the Session Profiles tab.
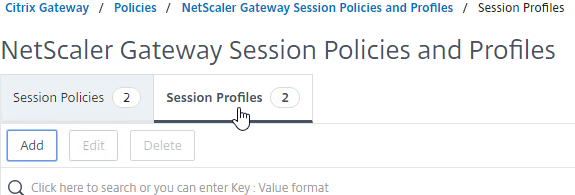
- On the NetScaler Gateway Session Policies and Profiles page, create or edit a NetScaler Gateway Session Profile.
- To create a NetScaler Gateway session profile, click Add, and provide a name.
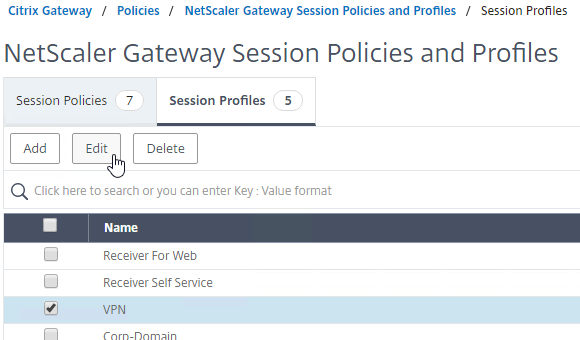
- To edit a NetScaler Gateway session profile, select the profile, and click Edit.
- On the Client Experience tab, ensure that the Clientless Access value is set to On.
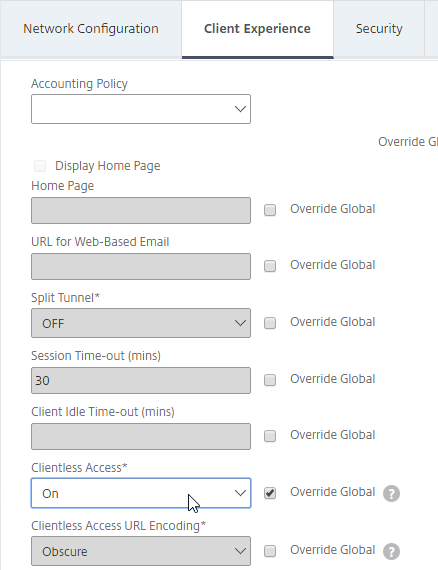
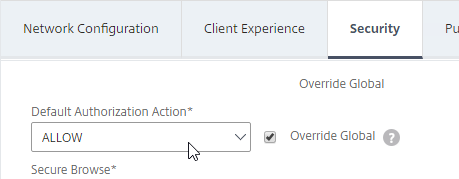
- On the Security tab, ensure that the Default Authorization Action value is set to ALLOW.
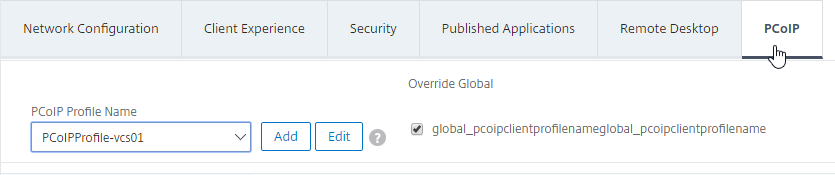
- On the PCoIP tab, select the required PCoIP profile. Note: you can also create or edit PCoIP Profiles from this tab.
- Click Create or OK to finish creating or editing the Session Profile.

- If you created a new Session Profile, then you must also create a corresponding Session Policy.
- Navigate to Configuration > Citrix Gateway > Policies > Session.
- On the right, select the Session Policies tab.
- Click Add.
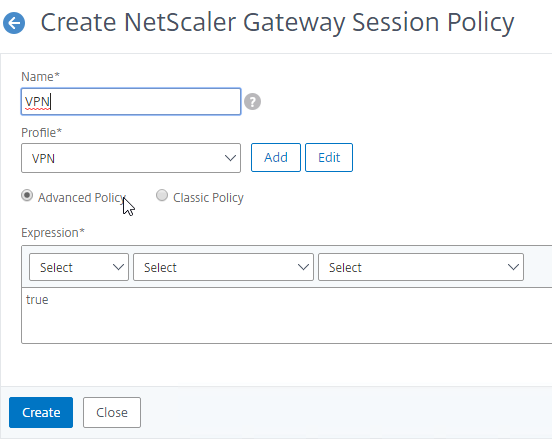
- Provide a name for the Session Policy, and select the required session profile name from the Profile drop-down.
- In the Expression area, type true (Default Syntax, or Advanced Policy), and then click Create.
Gateway Virtual Server
Bind the created PCoIP VServer profile and Session Policy to a Citrix Gateway Virtual Server:
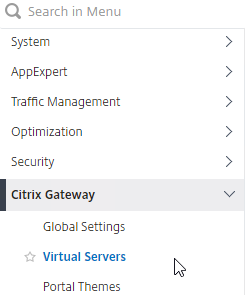
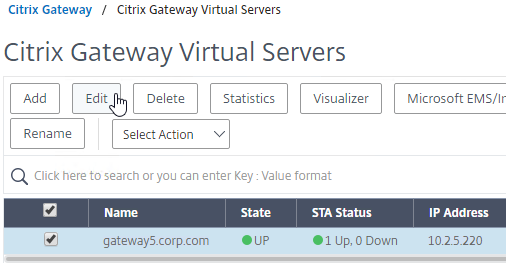
- Go to Citrix Gateway > Virtual Servers.
- On the right, either Add a new Citrix Gateway Virtual Server, or Edit an existing Citrix Gateway Virtual Server.
- If you are editing an existing Citrix Gateway Virtual Server, in the Basic Settings section, click the pencil icon.

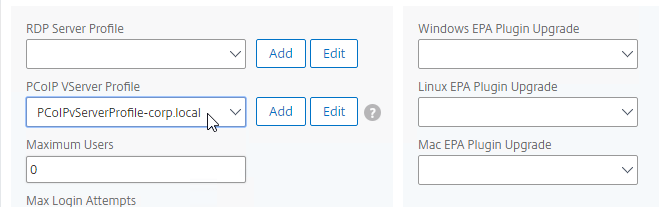
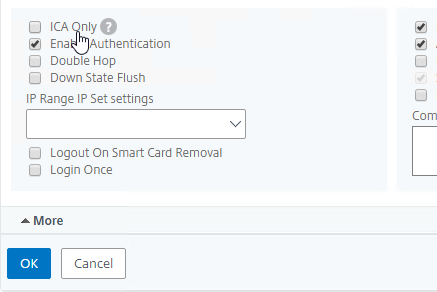
- For both adding and editing, in the Basic Settings section, click More.

- Use the PCoIP VServer Profile drop-down to select the required PCoIP VServer Profile.
- Scroll down and ensure that ICA Only is unchecked. Then click OK to close the Basic Settings section.
- If you are creating a new Citrix Gateway Virtual Server, bind a certificate, and bind an LDAP authentication policy.
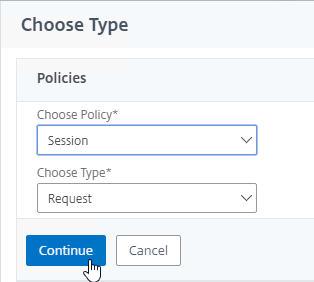
- Then scroll down to the Policies section and click the plus icon.

- The Choose Type page defaults to Session and Request. Click Continue.
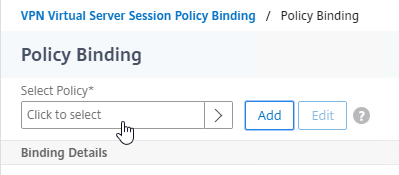
- In the Policy Binding section, click on Click to select.
- Click the radio button next to the required Session Policy that has the PCoIP Profile configured, and then click the blue Select button at the top of the window.
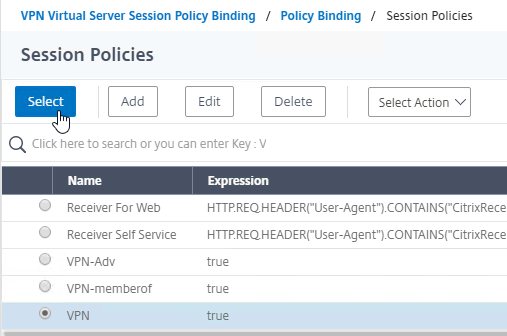
- Back in the Policy Binding page, click Bind.

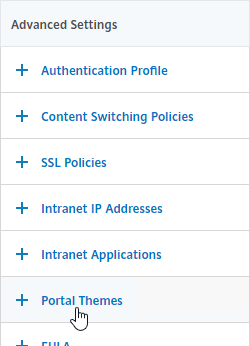
- If you want to use a web browser to connect to VMware Horizon, then on the right, under Advanced Settings, add the Portal Themes section. If you are only using Horizon Client to connect to Citrix Gateway, then you don’t need to perform this step.
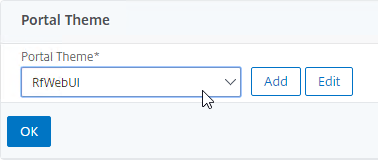
- Use the Portal Theme drop-down to select RfWebUI, and click OK.
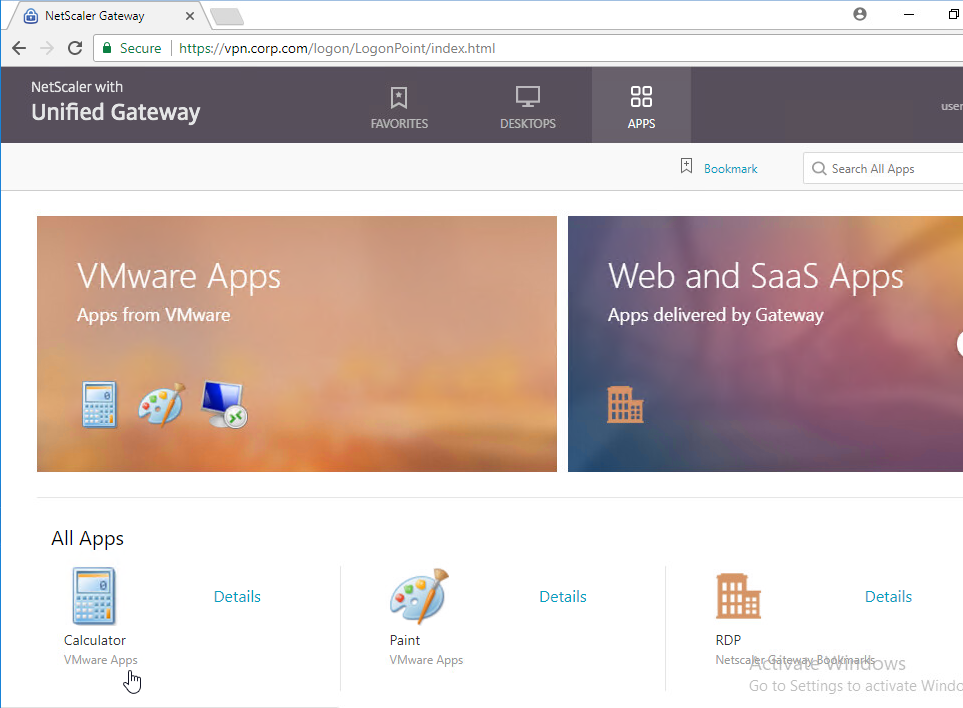
- Horizon published icons are added to the RfWebUI portal.
- Use the Portal Theme drop-down to select RfWebUI, and click OK.
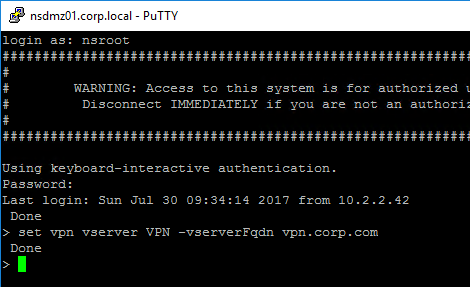
- To enable support for NAT, SSH to the NetScaler to access the CLI.
- Run the command set vpn vserver MyVserverName -vserverFqdn MyFQDN. This causes NetScaler to send the FQDN back to the Horizon Client, which enables it to connect to the public IP instead of the DMZ private IP address. Unfortunately, this setting is not available in the NetScaler GUI.
- Run the command set vpn vserver MyVserverName -vserverFqdn MyFQDN. This causes NetScaler to send the FQDN back to the Horizon Client, which enables it to connect to the public IP instead of the DMZ private IP address. Unfortunately, this setting is not available in the NetScaler GUI.
Horizon Configuration
- In Horizon Administrator, go to View Configuration > Servers. Edit the Horizon Connection Server that Citrix Gateway connects to.

- On the General tab, uncheck PCoIP Secure Gateway.
- In Citrix Gateway 12.1 build 49 and newer, to enable USB Redirection, enable the HTTP(S) Secure Tunnel and enter the external FQDN for Citrix Gateway.
- Click OK when done.
- At Resources > Farms, edit your RDS Farms.
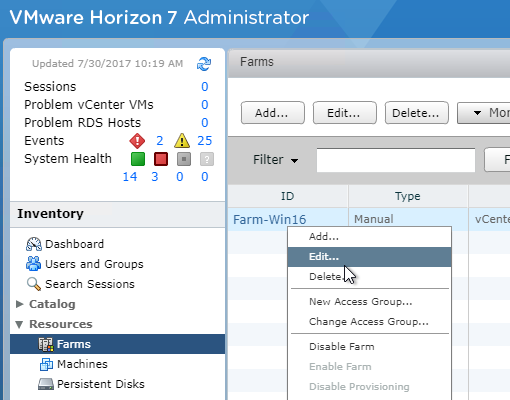
- Set the Default display protocol to PCoIP.
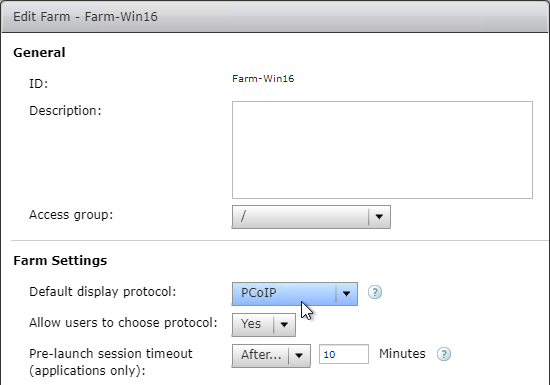
- Set the Default display protocol to PCoIP.
Update Content Switching Expression for Unified Gateway
If your Citrix Gateway Virtual Server is behind a Unified Gateway (Content Switching Virtual Server), then you must update the Content Switching Expression to include the PCoIP URL paths.
- In the NetScaler GUI, navigate to Configuration> Traffic Management > Content Switching > Policies.
- On the right, select the Unified Gateway Content Switching Policy, and then click Edit.
- Append the following expression under the Expression area, and then click OK.
|| http.req.url.path.eq("/broker/xml") || http.req.url.path.eq("/broker/resources") || http.req.url.path.eq("/pcoip-client")
Use Citrix Gateway PCoIP Proxy
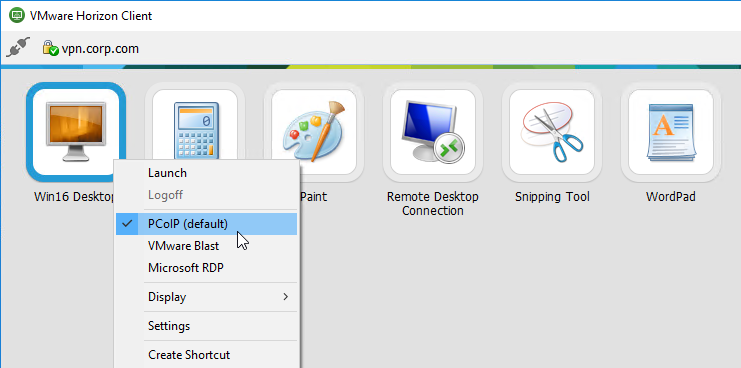
- To connect, you must have Horizon View Client installed on the client device. Once installed, you can either use the Horizon View Client’s User Interface to connect to Citrix Gateway, or you can use the Citrix Gateway RfWebUI portal page to view the icons published from Horizon.
- To view the active PCoIP connections, in NetScaler, go to Citrix Gateway > Policies > PCoIP.
- On the right, switch to the Connections tab. The active sessions are displayed with the following data: user name, Horizon View Client IP, and Horizon View Agent Destination IP.
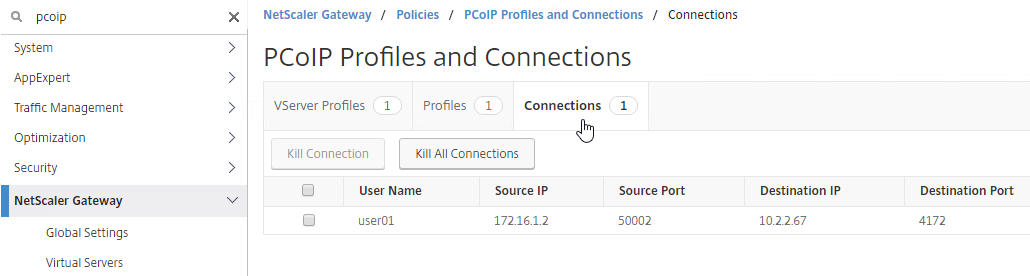
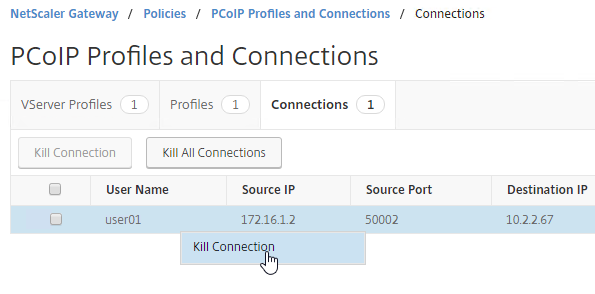
- To terminate a connection, right-click the connection, and click Kill Connection. Or click Kill All Connnections to terminate all PCoIP connections.
CLI Commands
Here are CLI Commands for the configuration shown above.
add ssl certKey WildcardCorpCom -cert WildcardCorpCom.pfx -key WildcardCorpCom.pfx -inform PFX -passcrypt "abc"

add authentication ldapAction AD01 -serverIP 10.2.2.11 -serverPort 636 -ldapBase "dc=corp,dc=local" -ldapBindDn ctxsvc@corp.local -ldapBindDnPassword abc -encrypted -encryptmethod ENCMTHD_3 -ldapLoginName sAMAccountName -groupAttrName memberOf -subAttributeName cn -secType SSL
add authentication ldapPolicy AD01 ns_true AD01

add vpn pcoipVserverProfile corp -loginDomain corp
add vpn pcoipProfile vcs01 -conServerUrl "https://vcs01.corp.local"

add vpn sessionAction VPN -defaultAuthorizationAction ALLOW -clientlessVpnMode ON -pcoipProfileName vcs01
add vpn sessionPolicy VPN true VPN

add vpn vserver VPN SSL 10.3.3.13 443 -downStateFlush DISABLED -Listenpolicy NONE -vserverFqdn vpn.corp.com -pcoipVserverProfileName corp

bind vpn vserver VPN -portaltheme RfWebUI
bind vpn vserver VPN -policy AD01 -priority 100
bind vpn vserver VPN -policy VPN -priority 100 -gotoPriorityExpression NEXT -type REQUEST -urlName RDP
bind ssl vserver VPN -certkeyName WildcardCorpCom
Hi Carl, by continuing the question below, we found there might exist a SSL encryption mismatch (digest method) between NetScaler PCoIP Proxy and Horizon CS. By tracing the packets back and forth, the latest CS (2206/2209) requires SHA-512 whereas NetScaler only supports SHA-1 and SHA-256, is there any solution able to leverage this bottleneck? Thanks!
Hi Carl, have no idea why my Horizon Apps fail to be launched (Horizon Client kept as spinning and grey-out eventually) whenever visiting the Citrix Gateway accompanied with PCOIP configuration as you do, whereas the Apps are able to be launched if visiting the Load Balance vServer succeeded with the Horizon Connection server/service. May you please kindly advise? Thanks!
I know this a pretty old article. I was wondering if anyone was able to get password reset to work on the Horizon Client. It works on the web but just sits connecting from the client.
Hi Carl,
Thanks for your information. My client configured Citrix Gateway with VMWare Horizon using PCoIP successfully. But they must authenticate twice: the first, SSL VPN login and second, login to VMware Workspace. Authenticated users are from same AD. So can we configure single-sign on? If possible, please help where to configure that.
i configure using this article all good but after authentication when i open by vdi using PCoIP whole screen goes black with out citrix gateway its working fine so there could be issue with citrix configuration.
Hi Carl, i wanted to understand the traffic flow of app launch i.,e after the app enumeration. Can you please share the info?
Great post, have you seen any issues with Linux thin client o/s? Windows devices work fine but Linux fails !
Hi Carl,
Did it support Client Drive redirection via Citrix NetScaler PCoIP proxy?
Hi Carl, great article – have you heard of any plans from Citrix to support Blast protocol proxy in the near future?
I’d be surprised if it wasn’t on the roadmap, but no idea when. Maybe your local Citrix sales team can provide some guidance.
I found netscaler can not loadbalancing over 2 connection servers with one vserver,isn’t that?
Hi, Carl!
So, I’m giving this another whirl using a sandbox SDX virtual instance running 12.0 51.24. I’ve followed the steps, both on the NS and on a test Horizon 7 server with some desktop and RDS pools on it. I’ve gotten it all built, I get to the NSG login, log in OK, and …am staring at a mostly blank page. 🙁
Top-left is the “Unified Gateway” logo (which is weird, b/c I’m not using any CSW), and under it is “Please select from the following:” with a bit empty void underneath it. I’m not sure what I’m missing!
Here’s my config:
#Creating the PCoIP VServer profile and client profile
add vpn pcoipVserverProfile gw_pcoip_prof_vsrvProfile -loginDomain domain.tld
add vpn pcoipProfile vpn_client_prof_pcoip_test -conServerUrl “https://horizon7v1tst.domain.tld” -sessionIdleTimeout 121
#Creating the session profile and policy
add vpn sessionAction gw_session_prof_pcoipTesting -defaultAuthorizationAction ALLOW -clientlessVpnMode ON -pcoipProfileName vpn_client_prof_pcoip_test
add vpn sessionPolicy gw_session_pol_pcoipTesting ns_true gw_session_prof_pcoipTesting
#Creating the NSG virtual server (just GW, no CSW/UG involved)
add vpn vserver gw_vsrv_pcoipProxyTesting SSL X.X.X.X 443 -downStateFlush DISABLED -Listenpolicy NONE -pcoipVserverProfileName gw_pcoip_prof_vsrvProfile
set ssl vserver gw_vsrv_pcoipProxyTesting -eRSA DISABLED -ssl3 DISABLED -tls1 DISABLED -tls11 DISABLED -HSTS ENABLED
#Binding stuff to the NSG (excluding the default caching policies for brevity)
bind vpn vserver gw_vsrv_pcoipProxyTesting -policy authe_pol_mgmtGuiAuth -priority 100
bind vpn vserver gw_vsrv_pcoipProxyTesting -policy gw_session_pol_pcoipTesting -priority 100
bind ssl vserver gw_vsrv_pcoipProxyTesting -certkeyName “DigiCert Wildcard (2017)”
What am I missing? I’m stumped. :/
Insights are, as always, appreciated!
Don’t enable HSTS in SSL Parameters. Use Rewrite policy instead.
*bad German accent* Veeeeery interesting!
That HSTS setting definitely jacks with it – I just confirmed in my own testing. Weird. Good call on that one! As soon as I disabled it and retried, I was getting automatically into the portal and seeing stuff.
So here are a few follow-up questions about it, now that I’ve managed to successfully get into this thing:
1. I’ve noticed that on a normal NSG (no UG), if I have both PCoIP config and Citrix config in the same session profile, I have to enable Client Choices in order to click “Clientless Access” and see both sets of resources. If I don’t, and I disable Client Choices, it logs me directly into only the Storefront side of things without showing any of the Horizon View resources. Is that expected, or did I derp something up?
2. I’ve noticed when using a UG for this, I don’t have the Client Choices issue; however, none of the VMWare icons show. There are boxes for them, but they’re empty why squares with descriptions. They launch just fine – I just cant’ figure out why it is the actual icon previews don’t display.
Thanks again for being a rockstar! 😀
Clientless Access Portal is required for displaying of the Horizon PCoIP icons. StoreFront portal does not connect to Horizon and thus can’t show Horizon icons.
That I understand, but I guess the question is whether or not you can define default post-logon behavior to go directly to the Clientless Access portal. Disabling the Client Choices sends you to the Receiver/Storefront portal, meaning you never see any of the other VMWare/Web/SaaS resources. My initial response to this was to change from a standard NSG to a UG, but that’s when I noticed the VMWare icon pictures don’t show up – just white squares.
Make sure ICA Proxy is set to OFF and Clientless is set to ON.
I’m really glad this is now a feature, and that you’ve covered it here. I’ve not been able to test my config yet because (I hope) of some missing configuration on the Connection Broker side of things. I’ll get to look at that in depth this week, though. I’m excited to see this work given all the problems we’ve had out of the IDM product. Presenting Horizon View resources through something not IDM has been a desire of ours almost since we implemented Horizon View. lol
Great work! I was able to test in my lab without any issues!