Navigation
RADIUS Load Balancing Overview
Two-factor authentication to NetScaler Gateway requires the RADIUS protocol to be enabled on the two-factor authentication product.
On your RADIUS servers you’ll need to add the NetScaler appliances as RADIUS Clients. When NetScaler uses a local (same appliance) load balanced Virtual Server for RADIUS authentication, the traffic is sourced from the NetScaler SNIP (Subnet IP). When NetScaler uses a direct connection to a RADIUS Server without going through a load balancing Virtual Server, or uses a remote (different appliance) Load Balancing Virtual Server, the traffic is sourced from the NetScaler NSIP (NetScaler IP). Use the correct IP(s) when adding the NetScaler appliances as RADIUS Clients. And adjust firewall rules accordingly.
For High Availability pairs, if you locally load balance RADIUS, then you only need to add the SNIP as a RADIUS Client since the SNIP floats between the two appliances. However, if you are not locally load balancing RADIUS, then you’ll need to add the NSIP of both appliances as RADIUS Clients. Use the same RADIUS Secret for both appliances.
When load balancing RADIUS, you’ll want a monitor that verifies that the RADIUS server is functional. The RADIUS monitor will login to the RADIUS server and look for a response. You will need static credentials that the RADIUS monitor can use to login to the RADIUS server.
If you don’t want your monitor to login to RADIUS, then the only other monitoring option is Ping. Adjust the firewall accordingly.
If you have RADIUS Servers in multiple datacenters, you can create multiple load balancing Virtual Servers and cascade them so that the local RADIUS Servers are used first and if they’re not available then the Virtual Server fails over to RADIUS Servers in remote datacenters.
RADIUS Monitor
The RADIUS Monitor attempts to successfully log into the RADIUS server. For RSA, create an account on RSA with the following parameters as mentioned by Jonathan Pitre:
- Setup a user with a fixed passcode in your RSA console.
- Ensure you login with that user at least once to the RSA console because you’ll be asked to change it the first time.
- There is no need to assign a token to your monitor user as long as you are using a fixed passcode. You don’t want to waste a token on a user just for monitoring.
Henny Louwers – Configure RSA RADIUS monitoring on NetScaler:
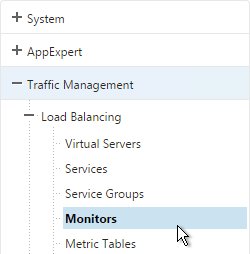
- In the NetScaler Configuration Utility, on the left under Traffic Management > Load Balancing, click Monitors.
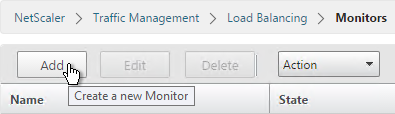
- On the right, click Add.
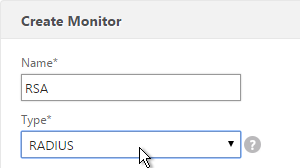
- Name the monitor RSA or similar. Change the Type drop-down to RADIUS.
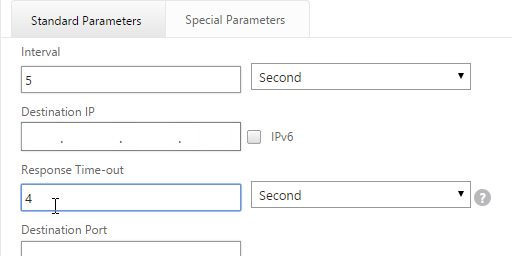
- On the Standard Parameters tab, you might have to increase the Response Time-out to 4.
- On the Special Parameters tab, enter valid RADIUS credentials. Make sure these credentials do not change or expire. For RSA, in the Password field, enter the fixed passcode.
- Also enter the RADIUS key configured on the RADIUS server for the NetScaler as RADIUS client.
- For Response Codes, add both 2 and 3. 2 means success while 3 indicates some kind of failure. Either result means that the RADIUS server is responding and thus is probably functional. But 2 is the ideal response.
- Click Create when done.
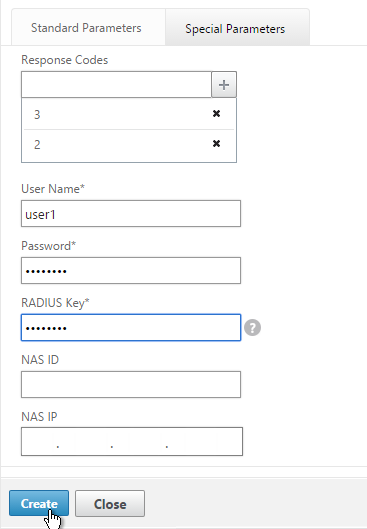
add lb monitor RSA RADIUS -respCode 2-3 -userName ctxsvc -password Passw0rd -radKey Passw0rd -resptimeout 4
Servers
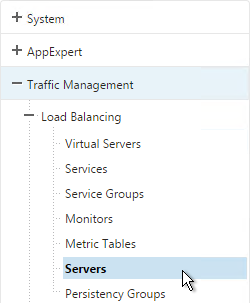
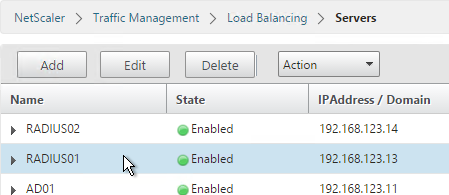
- On the left, expand Traffic Management, expand Load Balancing, and click Servers.
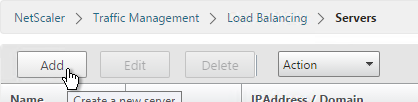
- On the right, click Add.
- Enter a descriptive server name, usually it matches the actual server name.
- Enter the IP address of the server.
- Enter comments to describe the server. Click Create.
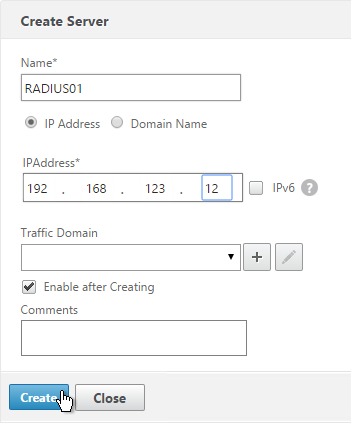
add server RSA01 10.2.2.42
add server RSA02 10.2.2.43
- Continue adding RADIUS servers.
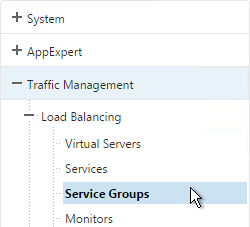
Service Groups
- On the left, expand Traffic Management, expand Load Balancing, and click Service Groups.
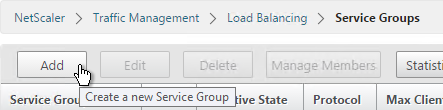
- On the right click Add.
- You will create one Service Group per datacenter. Enter a name reflecting the name of the datacenter.
- Change the Protocol to RADIUS.
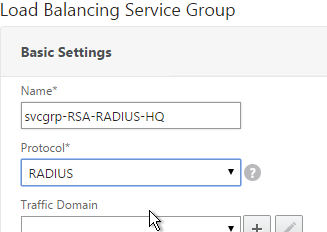
- Click OK.

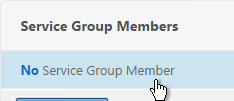
- On the left, in the Service Group Members section, click where it says No Service Group Member.
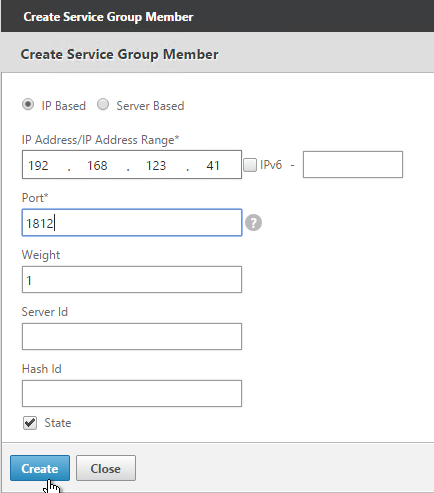
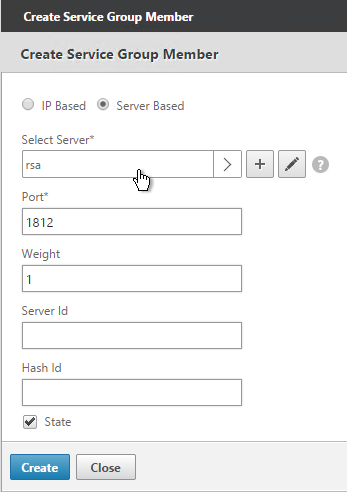
- If you did not create server objects then enter the IP address of a RADIUS Server in this datacenter. If you previously created a server object then change the selection to Server Based and select the server object.
- In the Port field, enter 1812 (RADIUS).
- Click Create.
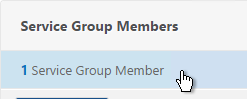
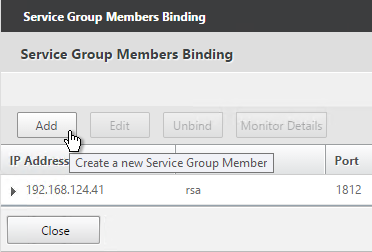
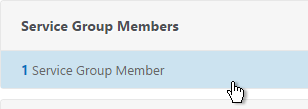
- To add more members, in the Service Group Members section, click where it says 1 Service Group Member.
- Click Add to add another member. Click Close when done.
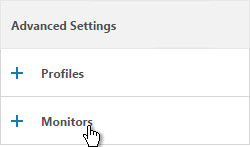
- On the right, in the Advanced Settings column, click Monitors.
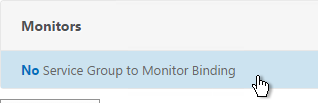
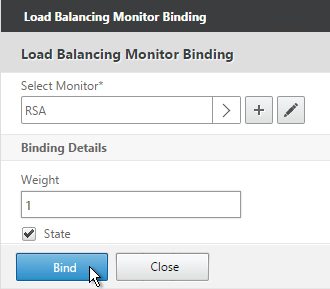
- On the left, in the Monitors section, click where it says No Service Group to Monitor Binding.
- Click the arrow next to Click to select.
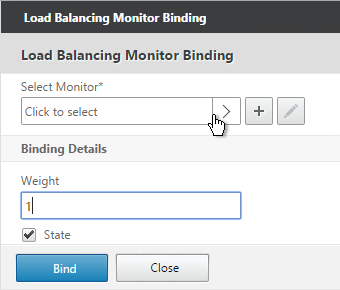
- Select your new RADIUS monitor, and click OK.

- Click Bind.
- To verify the member is up, click in the Service Group Members section.
- Highlight a member and click Monitor Details.
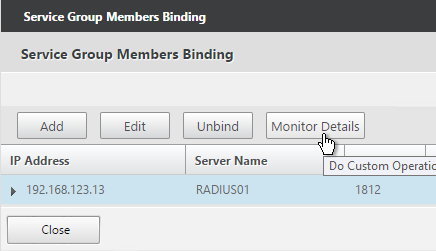
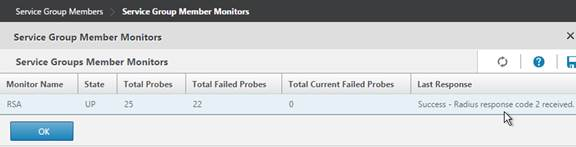
- It should say Radius response code 2 (or 3) received. Click OK.
- Click Done to finish creating the Service Group.

add serviceGroup svcgrp-RSA RADIUS
bind serviceGroup svcgrp-RSA RSA01 1812
bind serviceGroup svcgrp-RSA -monitorName RSA
- The Service Group is displayed as UP.

- Add additional service groups for Radius servers in each data center.

Virtual Server
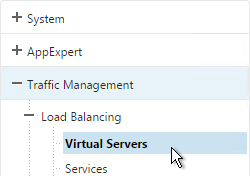
- On the left, expand Traffic Management, expand Load Balancing, and click Virtual Servers.
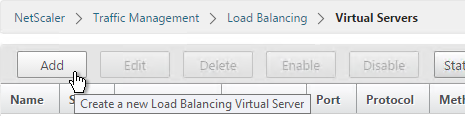
- On the right, click Add.
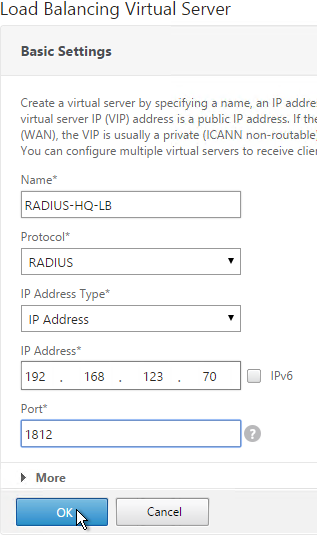
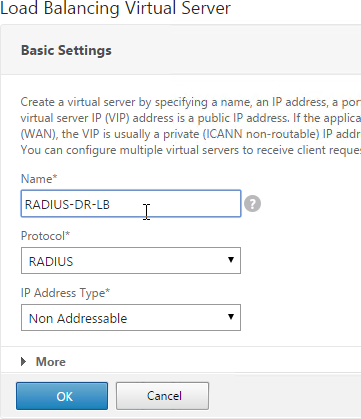
- Name it RADIUS-HQ-LB or similar. You will create one Virtual Server per datacenter so include the datacenter name.
- Change the Protocol drop-down to RADIUS.
- Enter a Virtual IP. This VIP cannot conflict with any other IP/Port already being used. You can use an existing VIP that is not already listening on UDP 1812.
- Enter 1812 as the Port. Click OK.
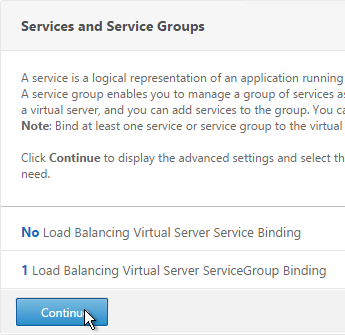
- In the Services and Service Groups section, click where it says No Load Balancing Virtual Server ServiceGroup Binding.
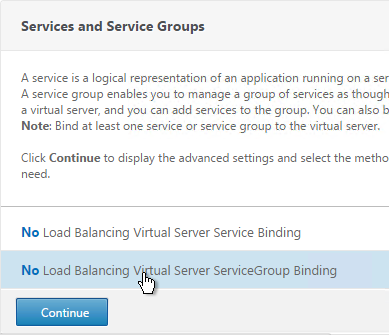
- Click the arrow next to Click to select.
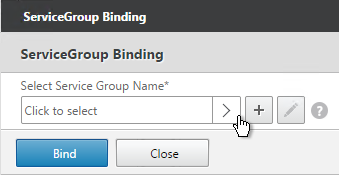
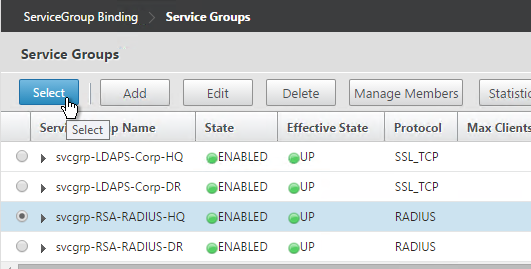
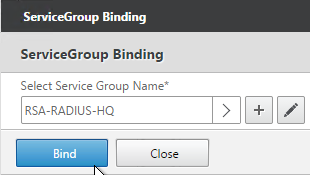
- Select a previously created Service Group and click OK.
- Click Bind.
- Click Continue.
- Configuring RADIUS Load Balancing with Persistence at Citrix Docs recommends Rule Based Load Balancing. On the right, in the Advanced Settings column, add the Method section.
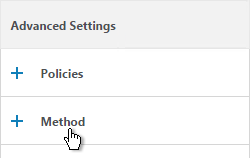
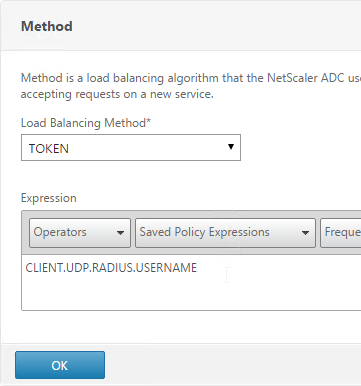
- Change the Load Balancing Method to TOKEN.
- In the Expression field, enter CLIENT.UDP.RADIUS.USERNAME and click OK.
- Click Done to finish creating the Virtual Server.
- If you are configuring this RADIUS Load Balancer for more than just NetScaler Gateway, you can add another Load Balancer on port 1813 for RADIUS Accounting. Then you need a Persistency Group to tie the two load balancers together. See Configuring RADIUS Load Balancing with Persistence at Citrix Docs.
add lb vserver lbvip-RSA RADIUS 10.2.2.210 1812 -persistenceType RULE -lbMethod TOKEN -rule CLIENT.UDP.RADIUS.USERNAME
bind lb vserver lbvip-RSA svcgrp-RSA
- The new Virtual Server should show as Up. If not, click the Refresh icon.

- Create additional Virtual Servers for each datacenter. These additional Virtual Servers do not need a VIP so change the IP Address Type to Non Addressable. Only the first Virtual Server will be directly accessible.
add lb vserver lbvip-RSA-Backup RADIUS 0.0.0.0 0 -persistenceType NONE -cltTimeout 120
Notice that the additional datacenter Virtual Servers show up with an IP Address of 0.0.0.0 and port of 0.
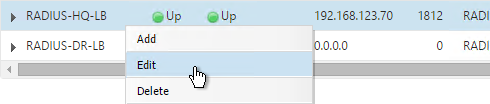
- After you are done creating a Virtual Server for each datacenter, right-click the primary datacenter’s Virtual Server and click Edit.
- On the right, in the Advanced Settings column, click Protection.
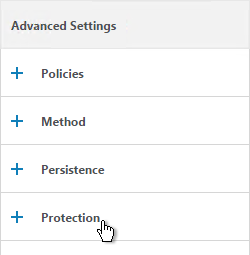
- On the left, in the Protection section, change the Backup Virtual Server to one of the other datacenter Virtual Servers. If all of the services in this datacenter are DOWN, the backup Virtual Server will be used instead. You can cascade multiple Virtual Servers using this method. Click OK and Done.

set lb vserver lbvip-RSA -backupVServer lbvip-RSA-Backup
- You may now use this Virtual IP in your RADIUS authentication policies for NetScaler Gateway or NetScaler management login.
This is still an outstanding issue; RADIUS Server logs keep seeing the malformed radius packets from NS Monitors.
Hi Carl, thank you for this great Tutorial. I think at Point 14 “CLIENT.UDP.RADIUS.USERNAME” should be used instead of “UDP.RADIUS.USERNAME” (also seen in the Screenshot).
Thanks for catching that. Should be updated now.
I get the same and never found out how to receive a success message, but since the error is being returned it’s still a decent indicator that the Radius servers and services are up and processing, more so than say a ping which only let’s you know the server is up.
The only problem is that it puts logon failure messages in the RADIUS server’s log.
I have followed this procedure but we have noticed in the Radius Logs on the Radius server we are constantly seeing errors every 5 seconds based on the monitor hitting the radius servers to verify they are up and running.
The logs are filling up with errors like below:
a malformed Radius message was received from client CLIENTNAMEHERE – NetScaler. The data is the RADIUS message.
When expanding the message we see:
Radius : undefinedValue, Id = 100, Length =28704
MessageType: UndefinedValue, 85 (0x55)
Identifier: 100 (0x64)
AllLength: 28704 (0x7020)
Did you find a solution for this? I’m facing the same problem
Hi Chris,
Did you find a solution for this? I’m facing the same problem.
I’m also seeing the malformed message from NetScaler to NPAS, does anyone have a solution for this?
What do you see in /var/log/ns.log and /tmp/aaad.debug?
This what I see in ns.log
Jul 20 18:46:05 192.xx.xx.xx.x 07/21/2017:00:46:05 GMT servername 0-PPE-0 : default UI CMD_EXECUTED 92 0 : User vic – Remote_ip 206.144.98.66 – Command “login victor “********”” – Status “Success”
Jul 20 18:46:10 192.xx.xx.xx.x 07/21/2017:00:46:10 GMT servername 0-PPE-0 : default CLI CMD_EXECUTED 93 0 : User vic – Remote_ip 206.144.98.66 – Command “shell” – Status “Success”
Jul 20 18:47:47 192.xx.xx.xx.x 07/21/2017:00:47:47 GMT servername 0-PPE-0 : default AAA Message 94 0 : “(0-17) send_authenticate_pdu: Sending Preamble”
Jul 20 18:47:47 192.xx.xx.xx.x 07/21/2017:00:47:47 GMT servername 0-PPE-0 : default AAA Message 95 0 : “(0-17): Reply Received”
Jul 20 18:47:47 192.xx.xx.xx.x 07/21/2017:00:47:47 GMT servername 0-PPE-0 : default AAA Message 96 0 : “In update_aaa_cntr: Succeeded policy for user victor = 10.10.11.4_LDAP”
Jul 20 18:47:47 192.xx.xx.xx.x 07/21/2017:00:47:47 GMT servername 0-PPE-0 : default AAA Message 97 0 : “(0-18) sslvpn_aaad_login_handler: Sending Preamble”
Jul 20 18:48:17 192.xx.xx.xx.x 07/21/2017:00:48:17 GMT servername 0-PPE-0 : default AAA Message 98 0 : “(0-18): Reply Received”
Jul 20 18:48:17 192.xx.xx.xx.x 07/21/2017:00:48:17 GMT servername 0-PPE-0 : default AAA Message 99 0 : “In update_aaa_cntr: Failed policy for user victor = Google Authenticator”
Jul 20 18:48:17 192.xx.xx.xx.x 07/21/2017:00:48:17 GMT servername 0-PPE-0 : default AAA LOGIN_FAILED 100 0 : User victor – Client_ip 206.xxx.xx.xxx – Failure_reason “External authentication server denied access” – Browser Mozilla/5.0 (Windows NT 10.0; Win64; x64) AppleWebKit/537.36 (KHTML, like Gecko) Chrome/59.0.3071.115 Safari/537.36