Navigation
- Change Log
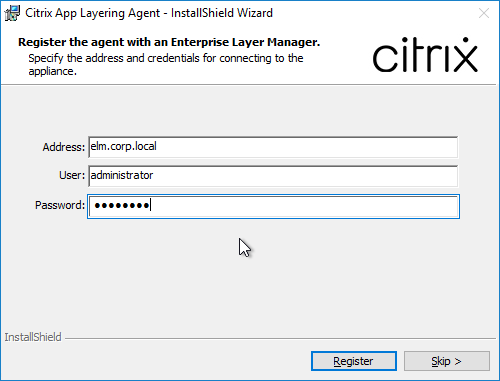
- Enterprise Layer Manager (separate page)
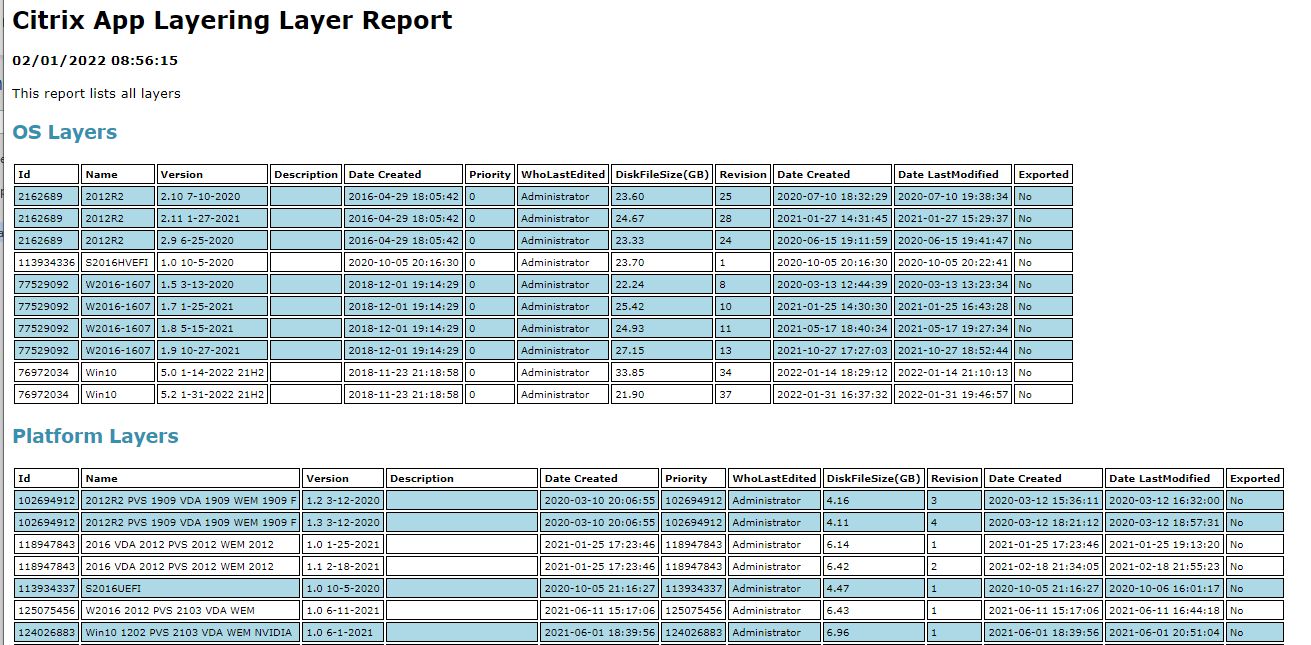
- OS Layer and Platform Layer (separate page)
- App Layer
- Image/Template
- Publish Image
- Elastic Layers
- Update Layers
- Export Layers
Change Log
- 2023 Sept 27 – Image/Template – App Layering 2308 and newer have an option to Defragment Layered Image Disk.
- 2021 Dec 25 – added screenshots for the new HTML5 interface
- 2021 July 19 – added link to User Layer Management Utility
- 2019 Aug 30 – Create App Layer – new User Layer Repair feature in ELM 1908
- 2019 Feb 22 – Elastic Layers – added info from CTX246468 How to disable delayed loading of Elastic Layers on an image
- 2018 Dec 10 – Update Layers – 1812 supports cloning of App Layers
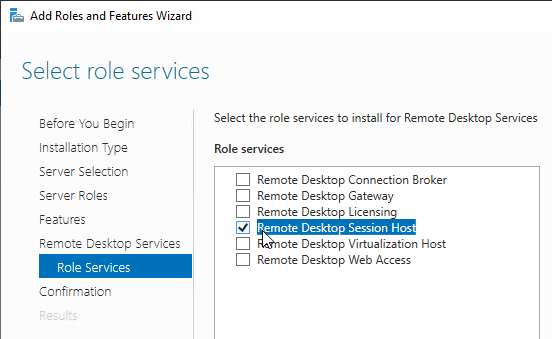
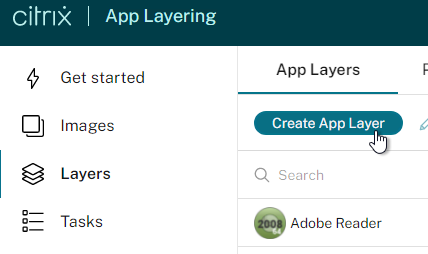
Create App Layer
Note: Citrix App Layering does not isolate applications. If you need isolation (e.g. multiple versions of Java), consider implementing Microsoft App-V. Citrix App Layering merges the layers without isolation.
- See Citrix CTX225952 4.x Layering Best Practices
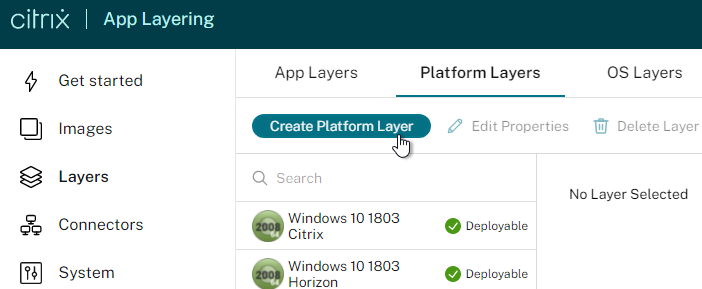
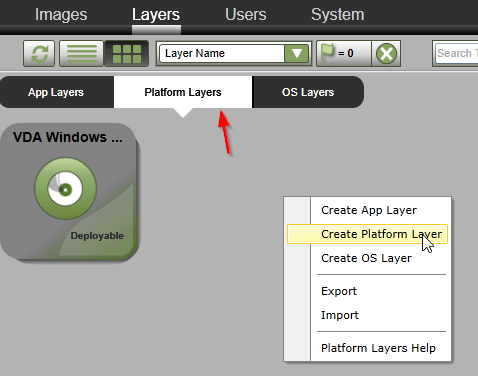
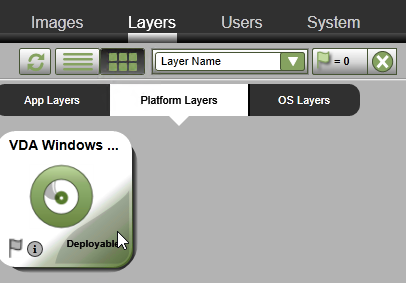
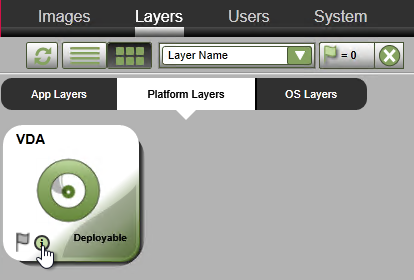
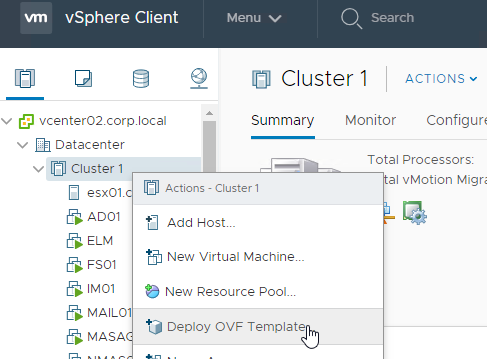
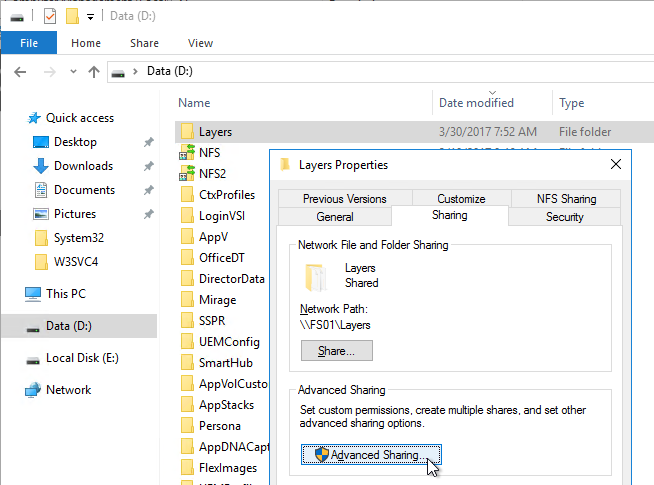
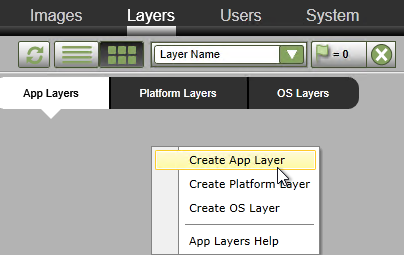
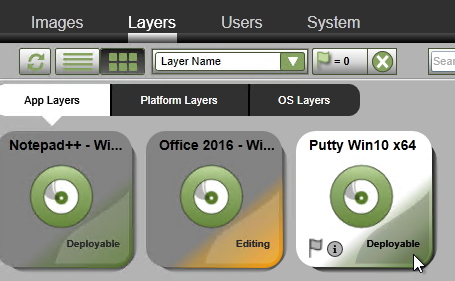
- In the ELM Management Console, go to the Layers tab or node.
- In the App Layers tab, click the Create App Layer button. Or in the Silverlight interface, right-click in the grey, and click Create App Layer.
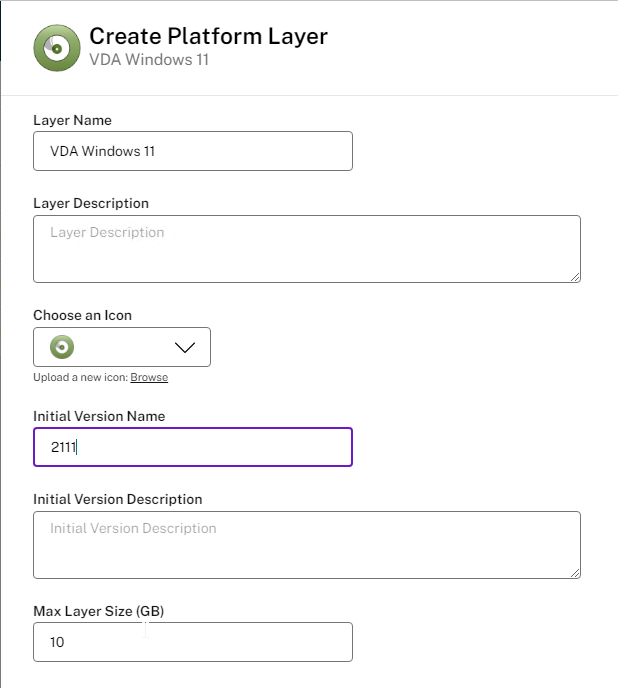
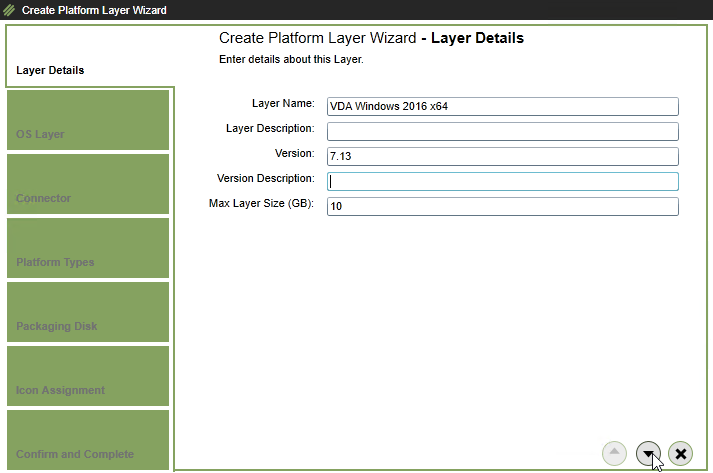
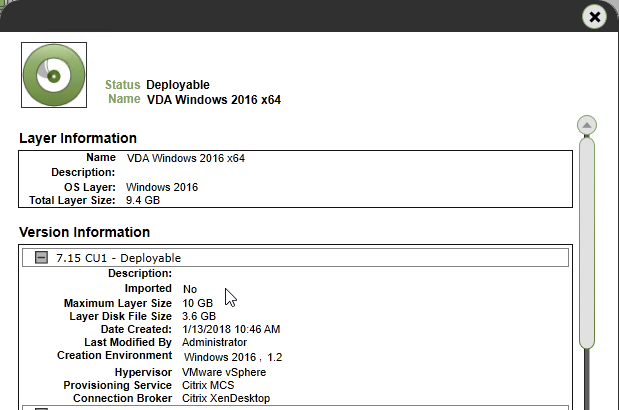
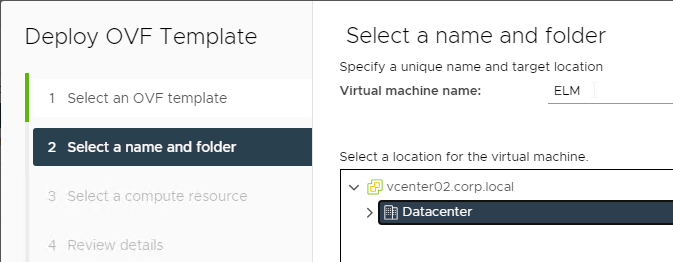
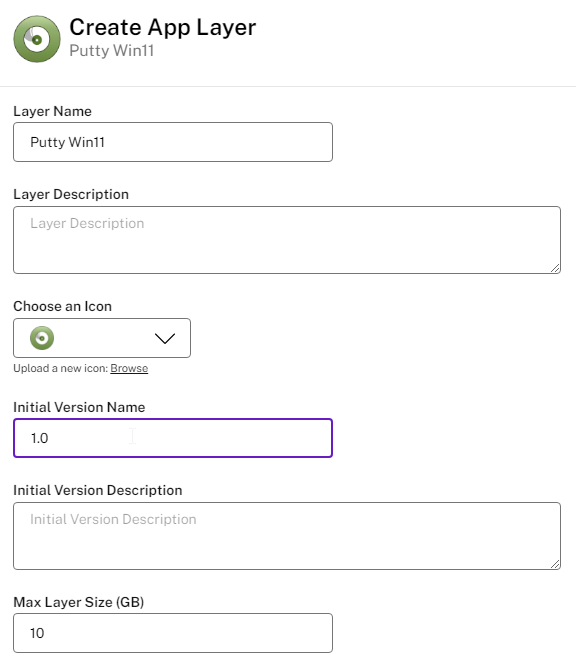
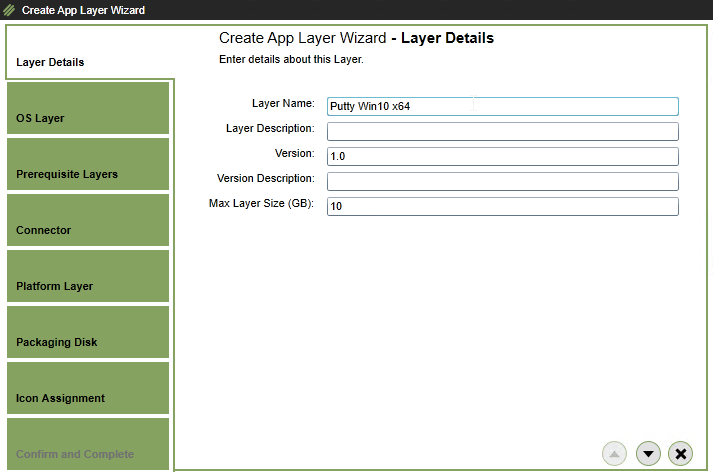
- In the Layer Details page, give the layer a name and version. Since the App Layer is tied to the OS Layer, it’s a good idea to include the OS Layer name in the App Layer name.
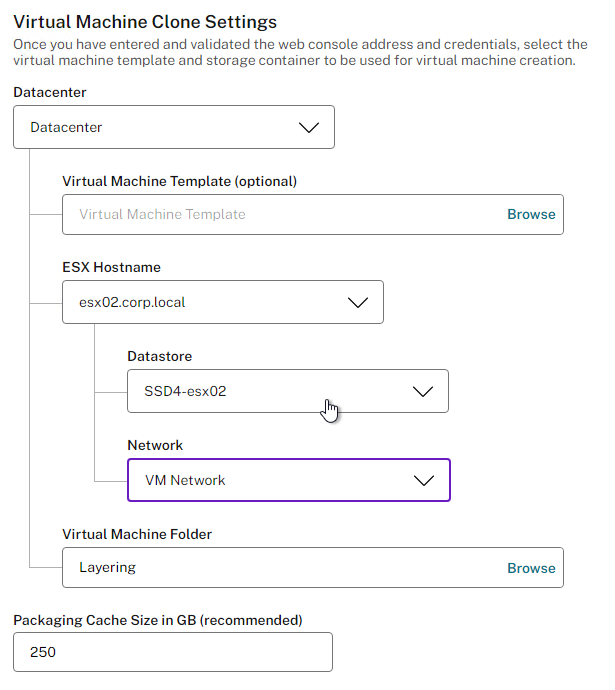
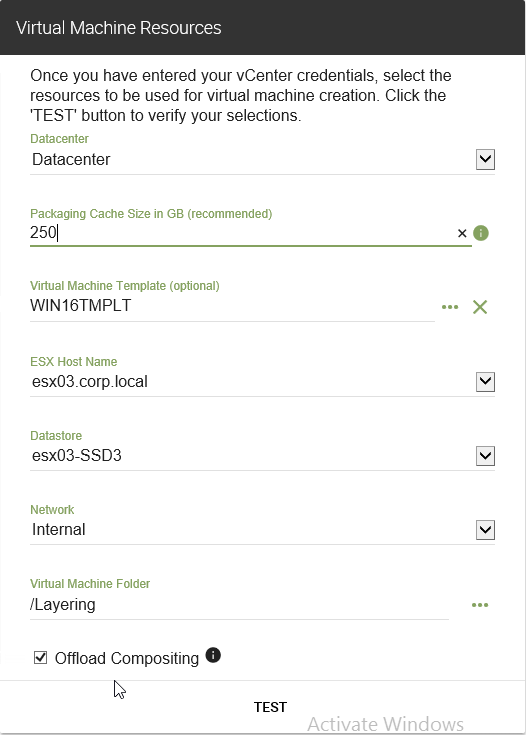
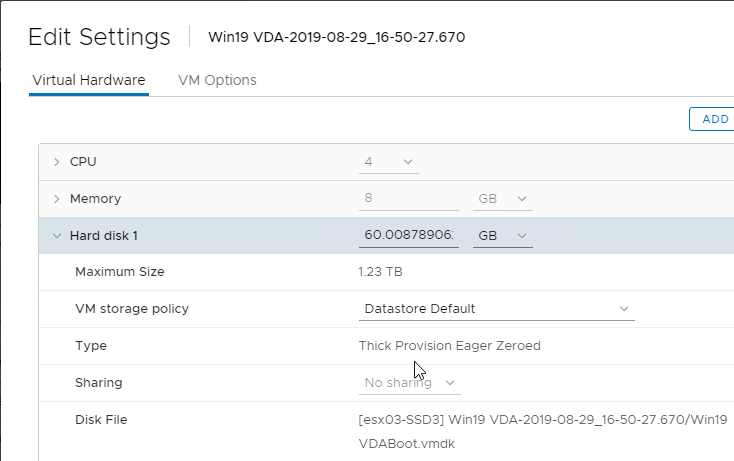
- Give the layer a Max Size. If Offload Compositing is not enabled then the layer disk created for the vSphere Packaging Machine is Thick Provisioned. Scroll down or click the down arrow.
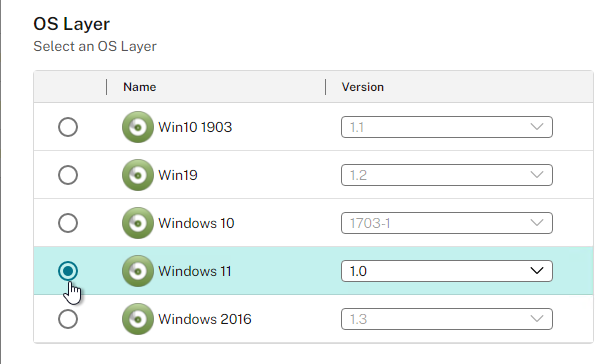
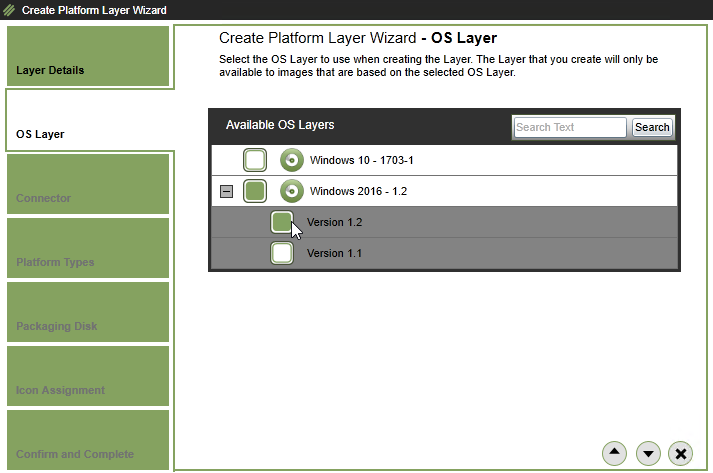
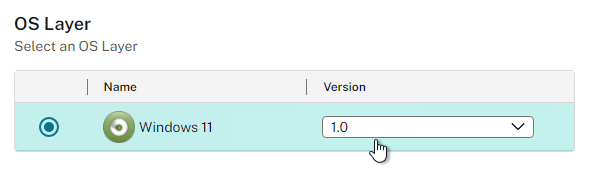
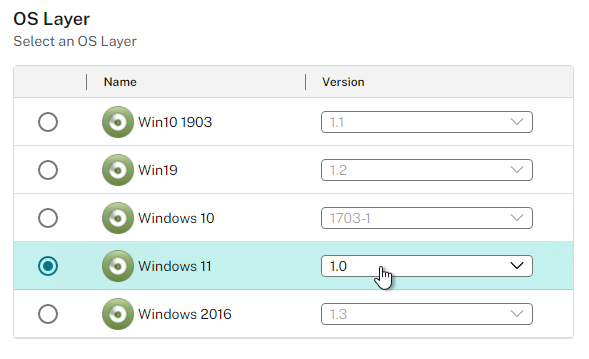
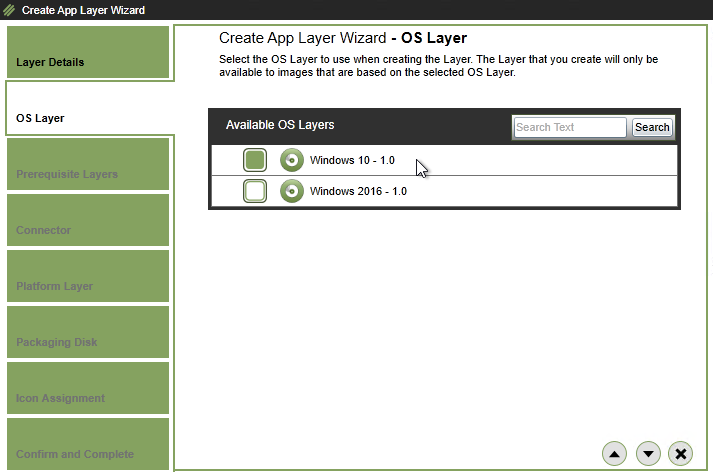
- In the OS Layer section, select an OS Layer and version. An App Layer created for one OS Layer cannot be used with another OS Layer. Scroll down or click the down arrow.
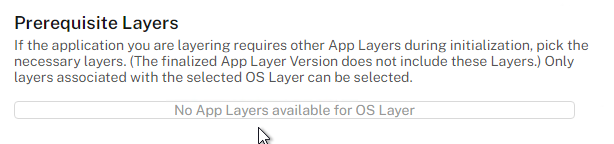
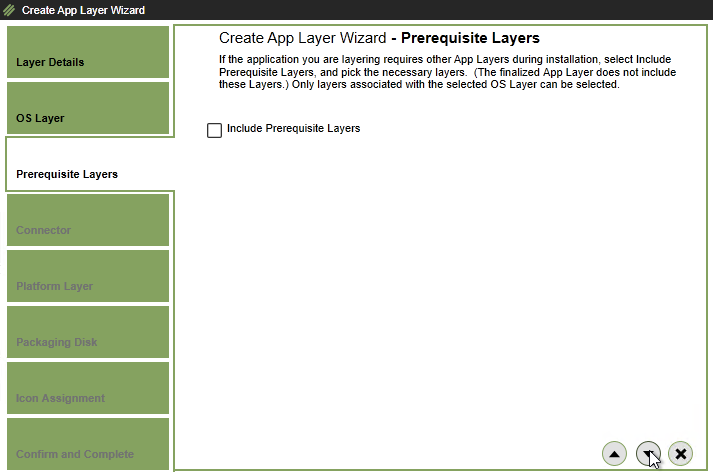
- In the Prerequisite Layers section, you can select additional dependent App Layers to include in your packaging machine. If there are no dependent layers, just scroll down or click the down arrow.
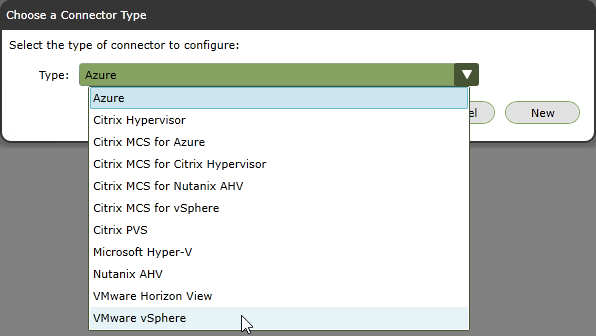
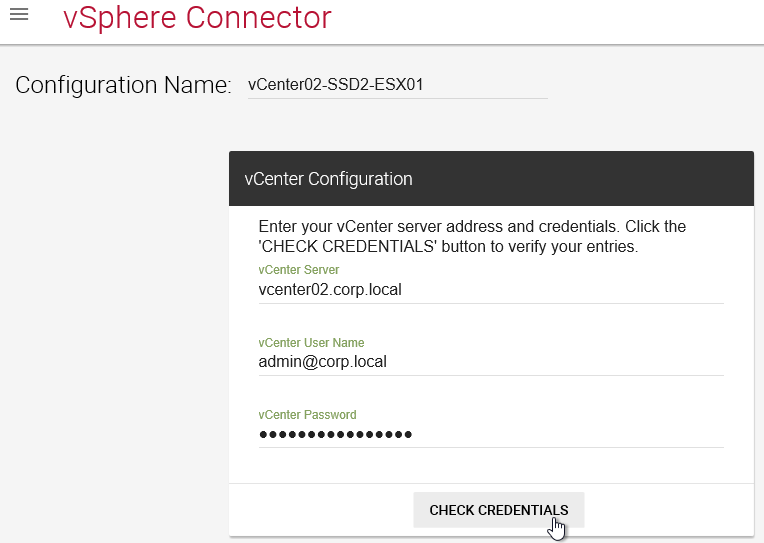
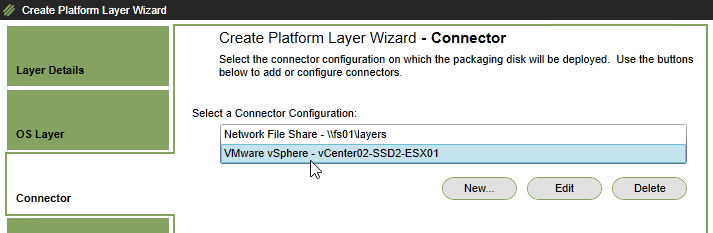
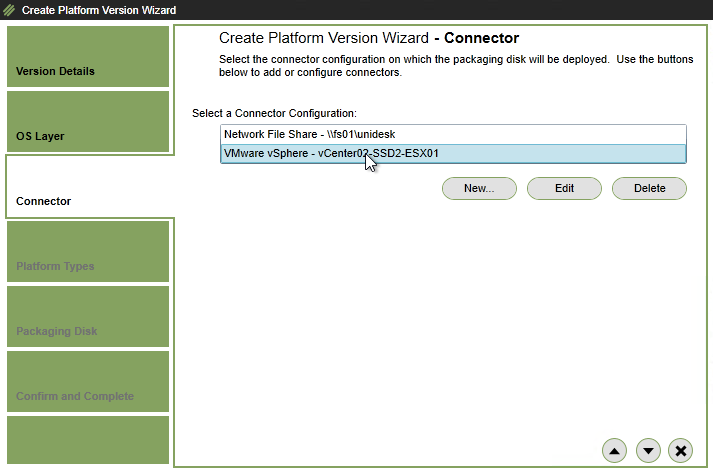
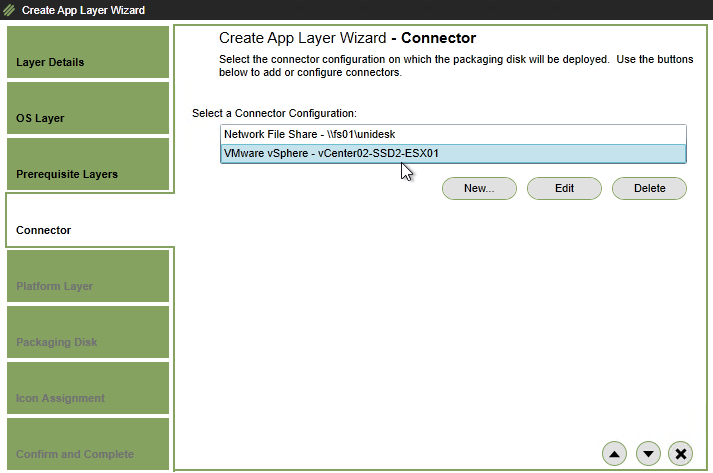
- In Silverlight, in the Connector page, select a vSphere connector, and click the down arrow.
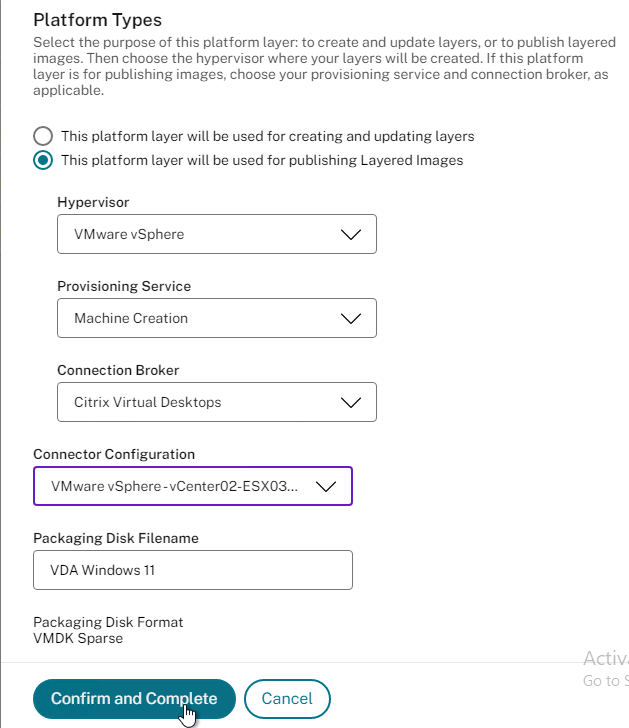
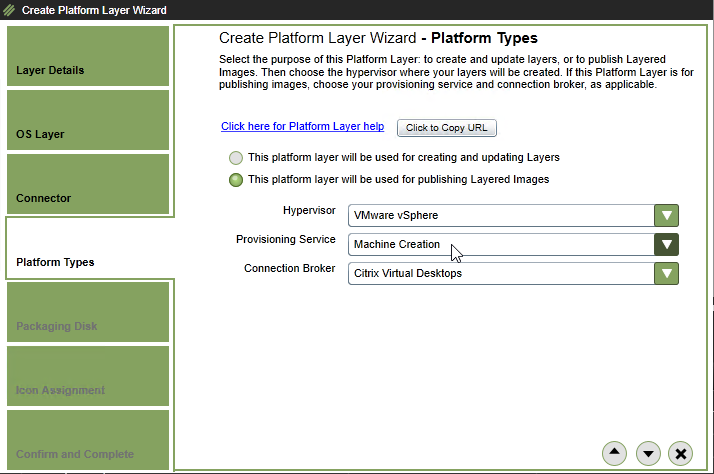
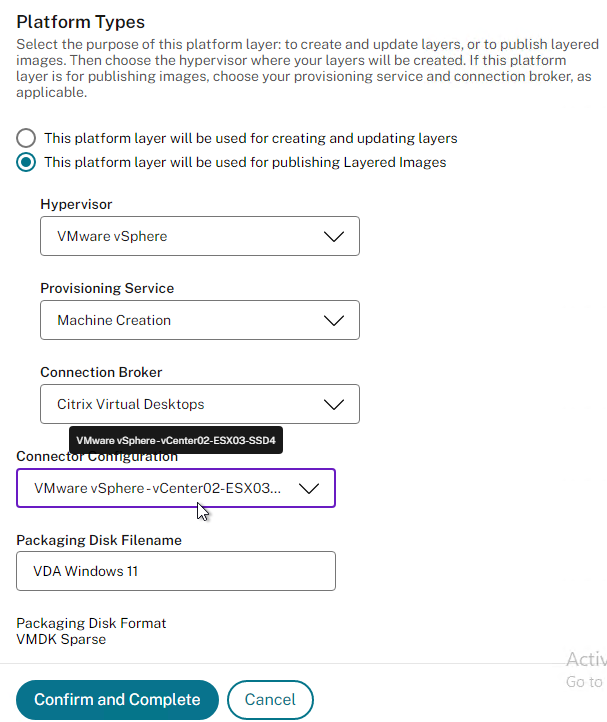
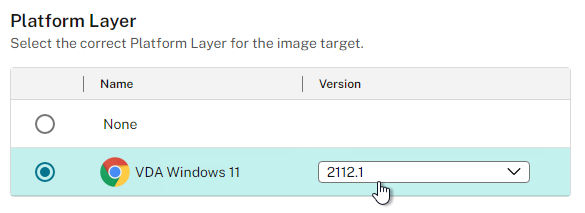
- In the Platform Layer section, if you are creating the App Layer on a different hypervisor than originally used for the OS Layer, you can select the Platform Layer for the new hypervisor. If the hypervisor has not changed, just scroll down or click the down arrow. The hypervisor can also be changed when publishing the Image Template later.


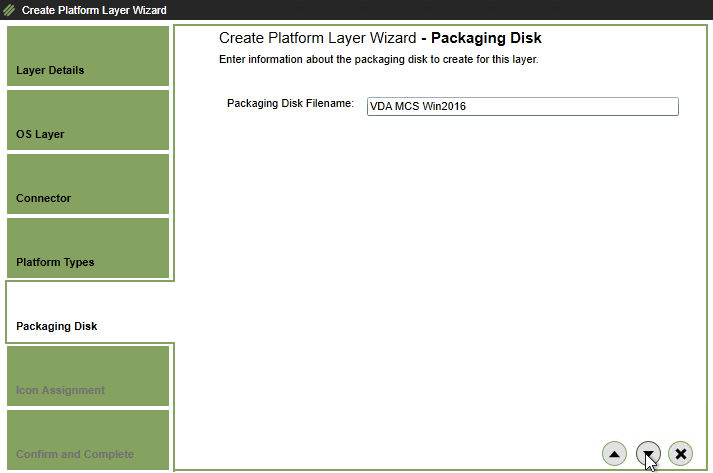
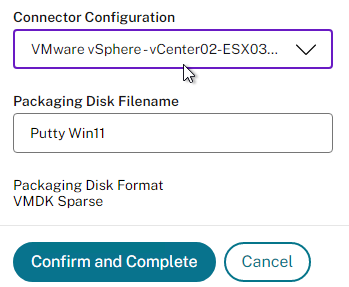
- In the HTML5 interface, select a Connector, enter a filename for the .vmdk file, and click Confirm and Complete.
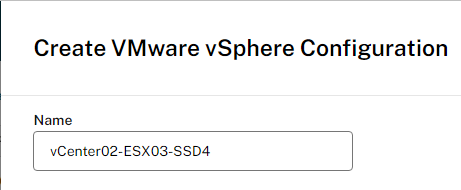
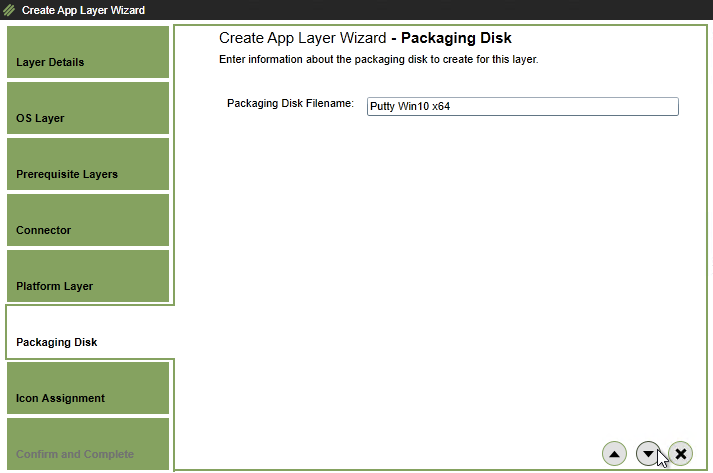
- In the Silverlight interface, in the Packaging Disk page, give the .vmdk file a name, and click the down arrow.
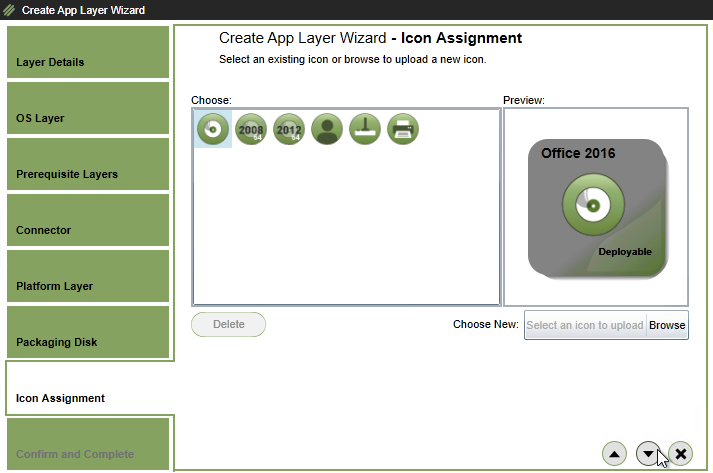
- In the Icon Assignment page, select an icon, or upload a new one, and click the down arrow.
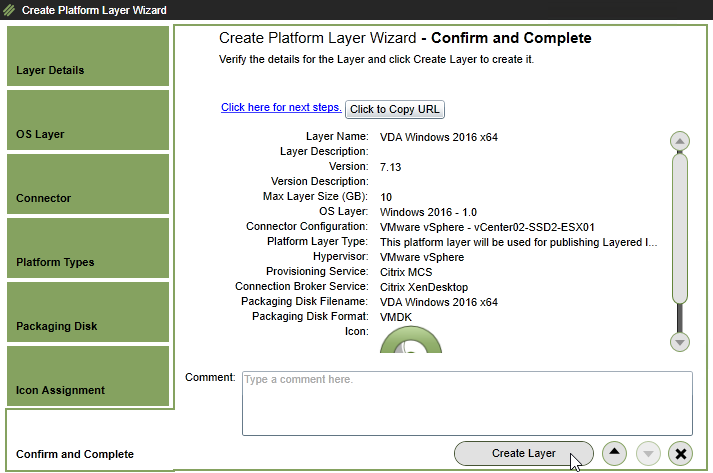
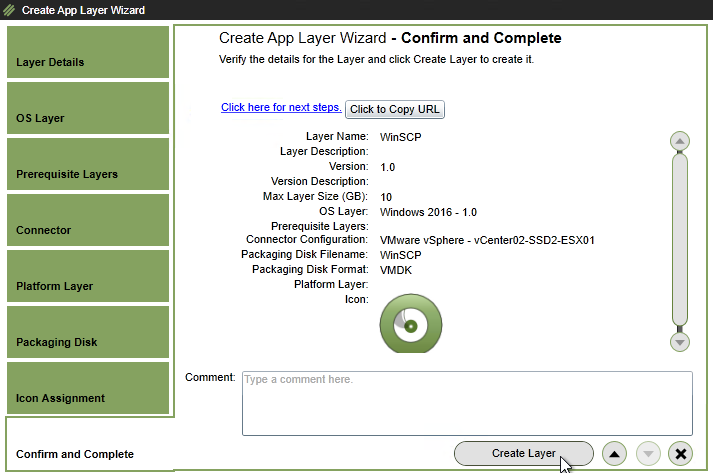
- In the Confirm and Complete page, click Create Layer.
- In the Silverlight interface, in the Packaging Disk page, give the .vmdk file a name, and click the down arrow.
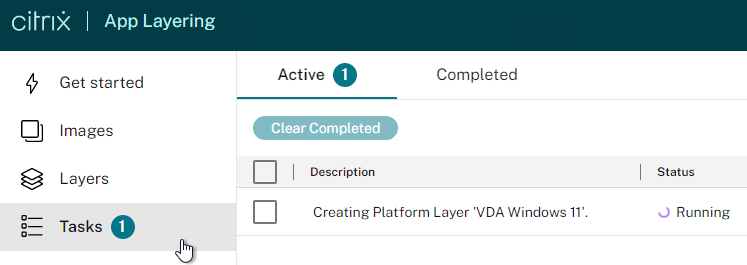
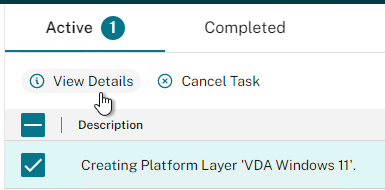
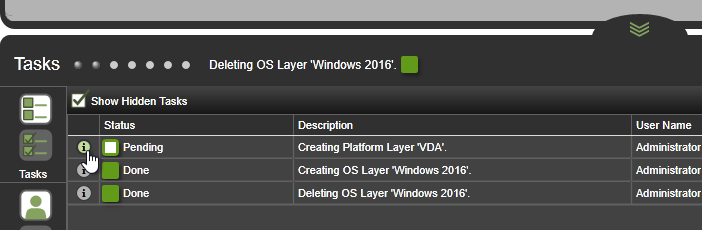
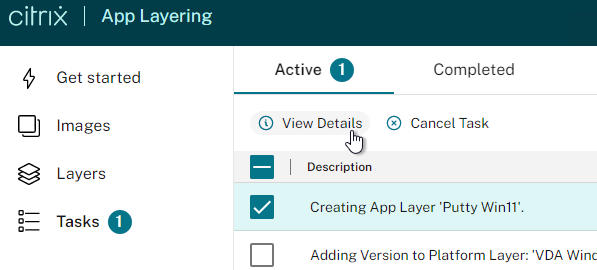
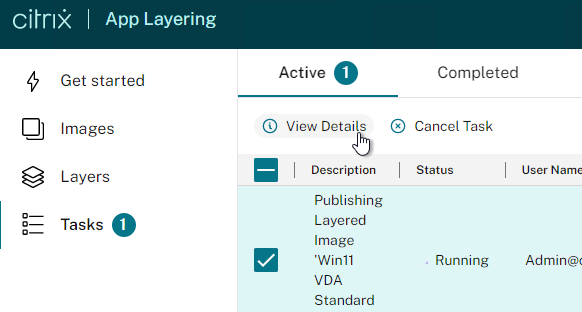
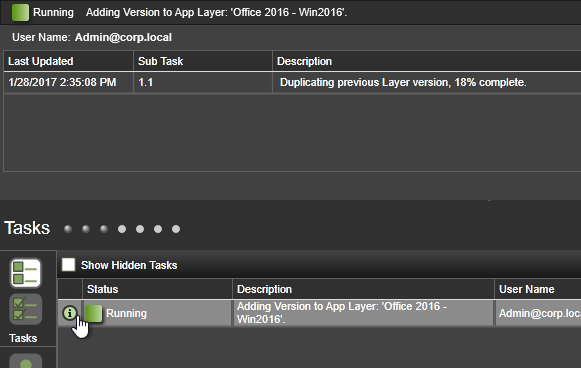
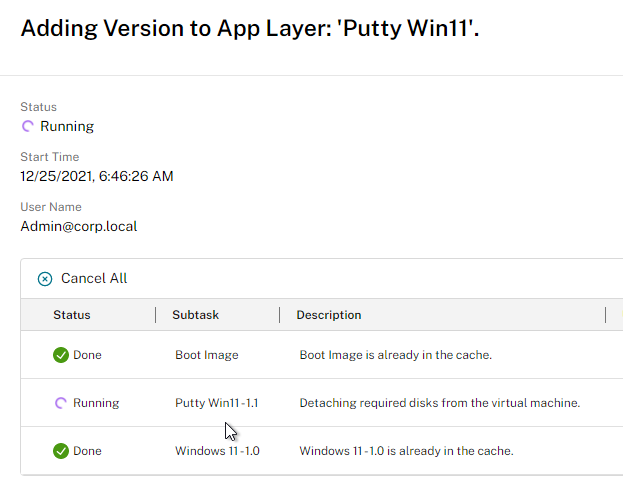
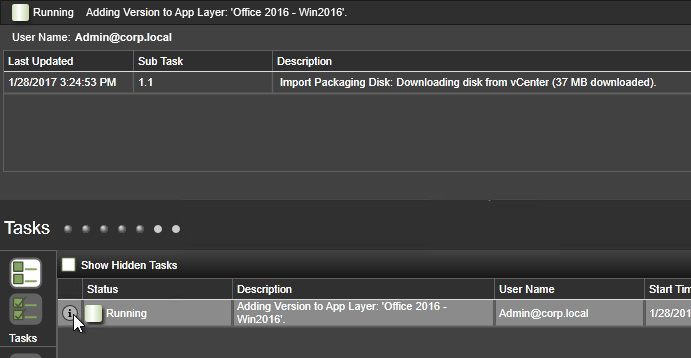
- Go to the Tasks page. Or in Silverlight, at the bottom of the page, open the Tasks panel.
- Click View Details for the running task. Or in Silverlight, click the information icon next to the running task.
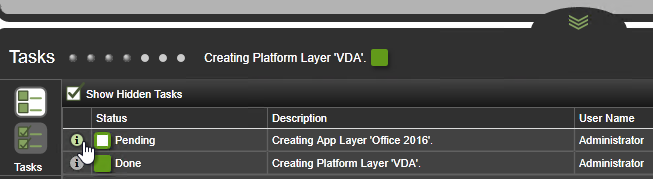
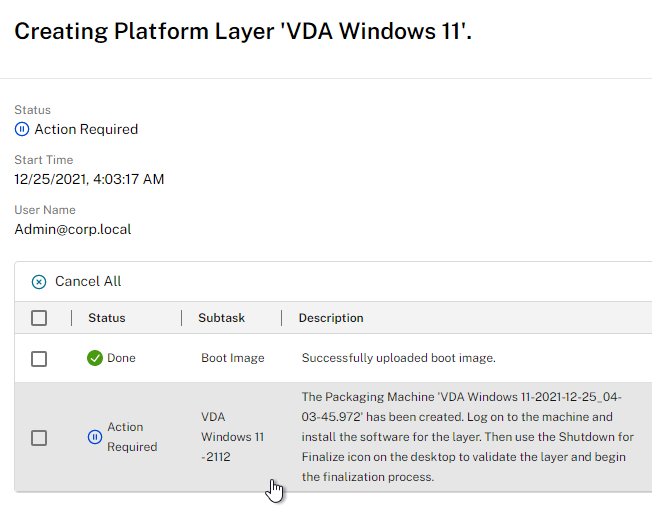
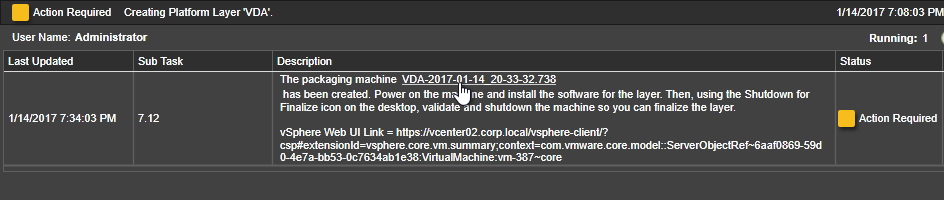
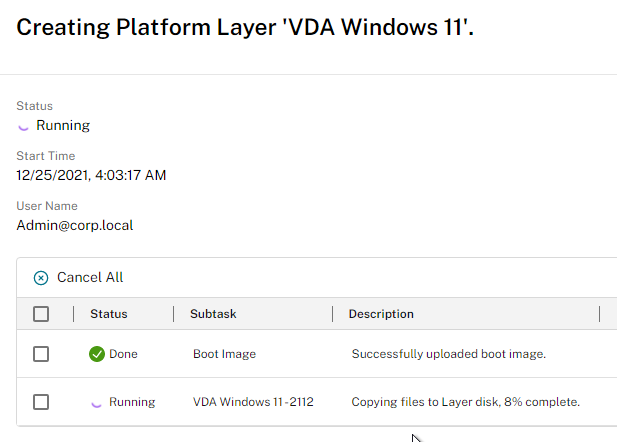
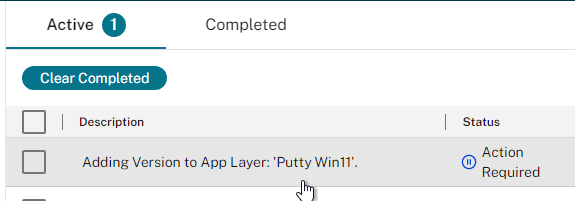
- Eventually the task will finish deploying the Packaging Machine and say Action Required.
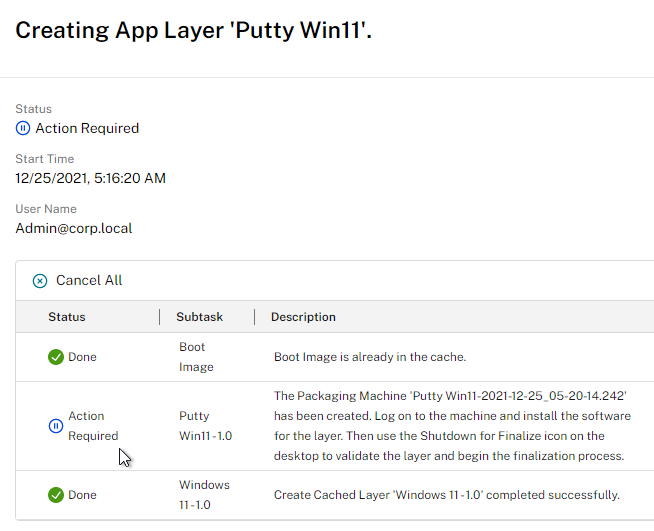
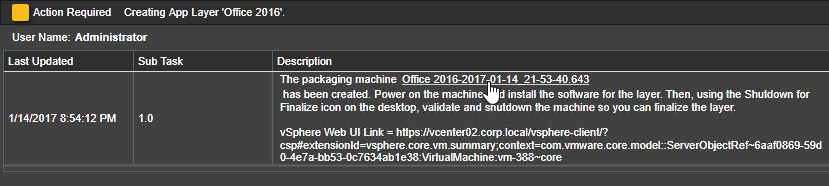
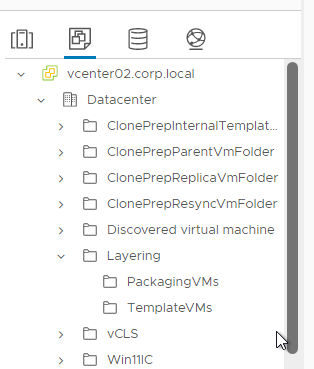
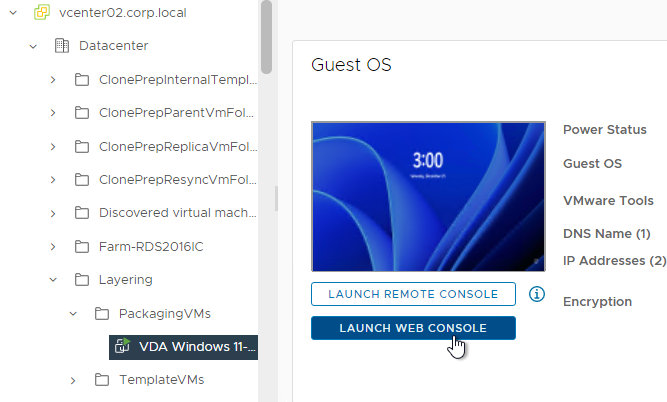
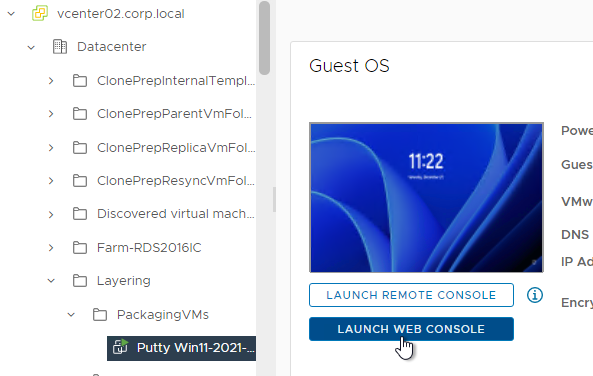
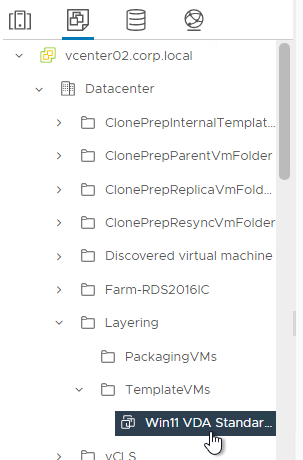
- In vSphere Web Client, find the new Packaging Machine (in the PackagingVMs folder in the Layering VM folder), open its console, and install your app normally.
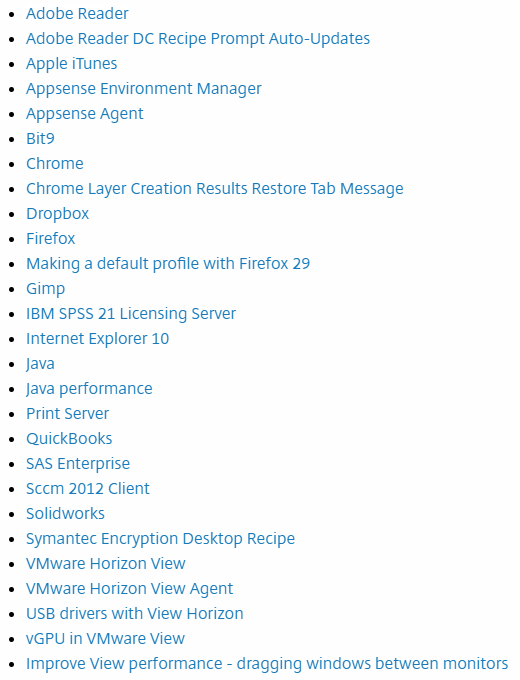
- See App layer recipes at Citrix Docs for some application install instructions.
- Citrix CTX226984 App Layering/Unidesk: The list of Windows Updates is usually wrong in app/platform layers and published images/desktops.
- Antivirus can be installed on an App layer. See Deploy anti-virus software at Citrix Docs for instructions for the following:
- Symantec
- McAfee
- Trend Micro
- Sophos
- AVG
- Kaspersky
- User settings are not captured in an Application Layer.
- Domain Join – CTX224668 How to install applications that require joining the domain with Citrix App Layering – In summary, you can join a layer to the domain while packaging, but you must remove it from that domain before finalization.
- For Office, put all Office apps in one layer.
- Print to OneNote does not work in Elastic Layers.
- For Office 365 Click-to-run activation:
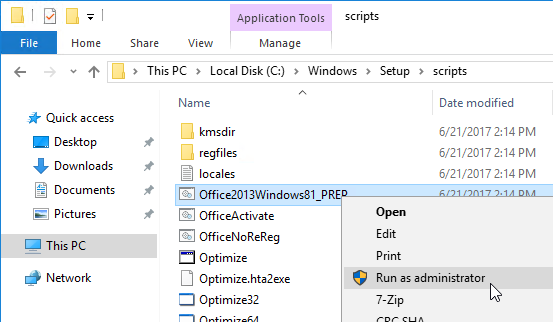
- After Office Click-to-run is installed, for all OSs other than Windows 7, run C:\Windows\Setup\scripts\Office2013Windows81_PREP.cmd as Administrator.
- In App Layering 4.6, Optimize.hta and Office Activate.cmd can handle Office 365 Click-to-run activation. For 4.5 and older, see Rob Zylowski at Office Activation Scripts for Office 365 at Citrix Discussions, to download these scripts . Also see O365 Office 2016 click to run online activation at Citrix Discussions.
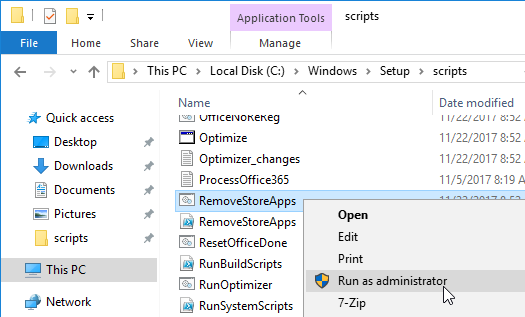
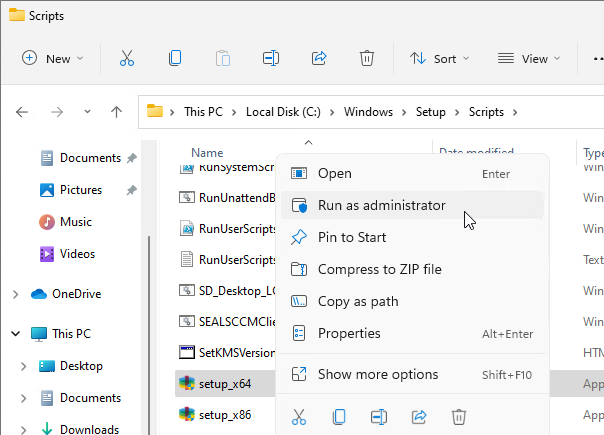
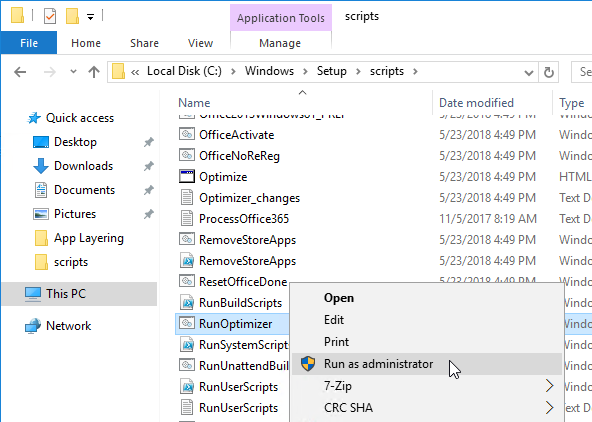
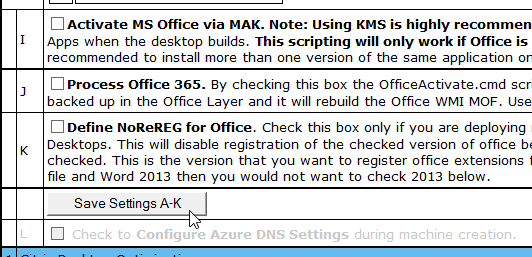
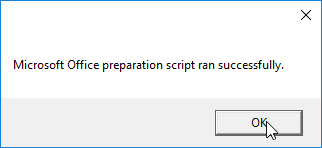
- Go to C:\Windows\Setup\Scripts, right-click RunOptimizer.cmd, and click Run as administrator.
- Scroll down to J, check the box next to Process Office 365, and click Save Settings A-K.

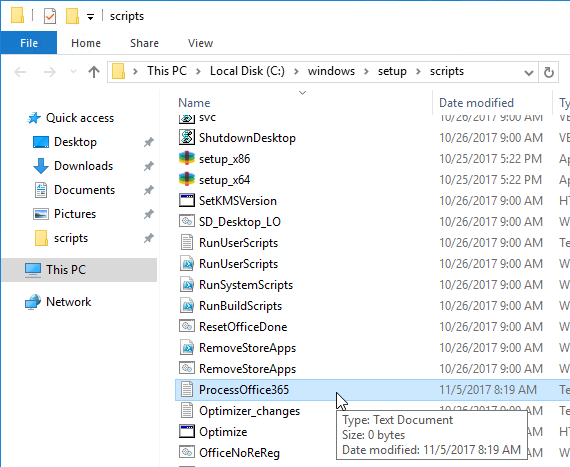
- This creates a file called ProcessOffice365.txt.
- See Citrix CTX224566 Unidesk Recipe for Office 2016: Using Shared Computer Activation From Office 365 for more licensing guidance.
- After Office Click-to-run is installed, for all OSs other than Windows 7, run C:\Windows\Setup\scripts\Office2013Windows81_PREP.cmd as Administrator.
- For Office Volume License activation: (Source = Citrix CTX224900 Windows / Office 2016 KMS not activating in App Layering images (MCS Image Prep OS Rearm Failed)
- Go to C:\Windows\Setup\Scripts, right-click RunOptimizer.cmd, and click Run as administrator.
- Configure item H.

- Scroll down a little bit and click the button labelled Save Settings A-K. Then click the Optimizer.
- For all OSs other than Windows 7, run C:\Windows\Setup\scripts\Office2013Windows81_PREP.cmd as Administrator.
- Then rearm Office by running C:\Program Files\Microsoft Office\Office16\OSPPREAM.exe as administrator.
- Go to C:\Windows\Setup\Scripts, right-click RunOptimizer.cmd, and click Run as administrator.
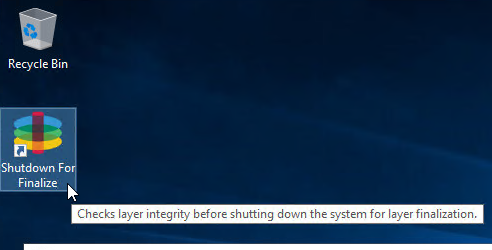
- When you are done installing your app, finalize the layer:
- George Spiers Citrix App Layering Preparation Script: runs a number of tasks to clean out temporary folders, clear out Event Log entries, remove ghost devices from Device Manager, etc. ?
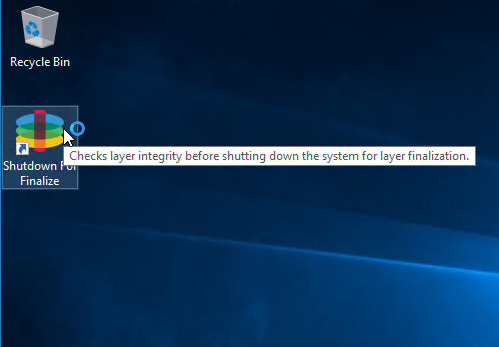
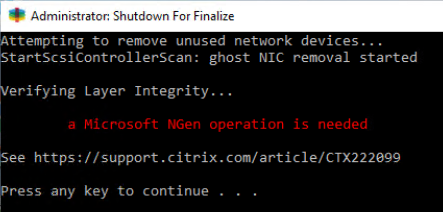
- Double-click the Shutdown for Finalize icon on the desktop. If it finds issues, it will tell you what to do (e.g. reboot needed). Otherwise, it will shut down the VM.
- If Offload Compositing is enabled in your Connector, then upload will happen automatically.
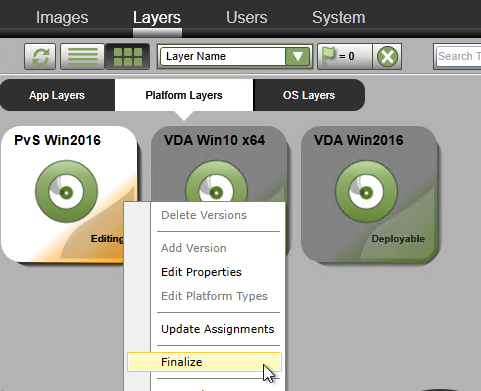
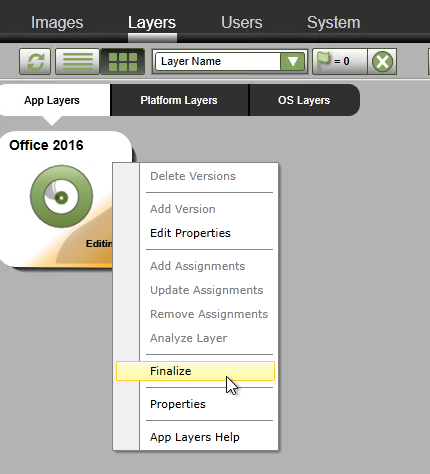
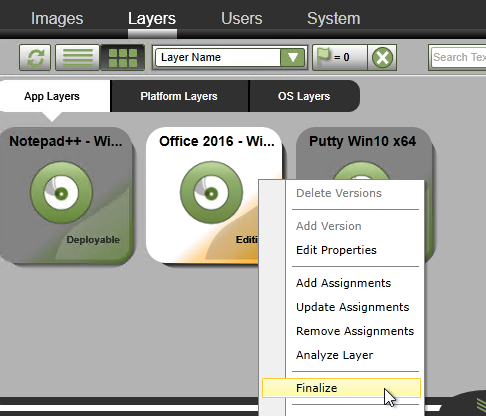
- Otherwise, after the machine is shutdown, in ELM Management Console, go to Layers > App Layers.
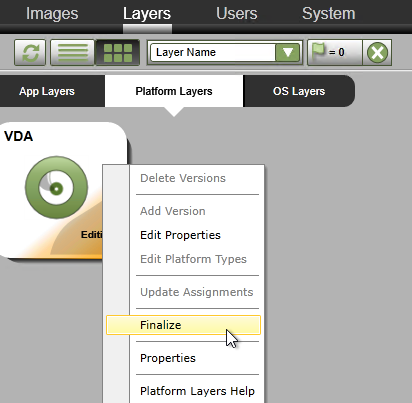
- Right-click the Layer that is currently being Edited, and click Finalize.
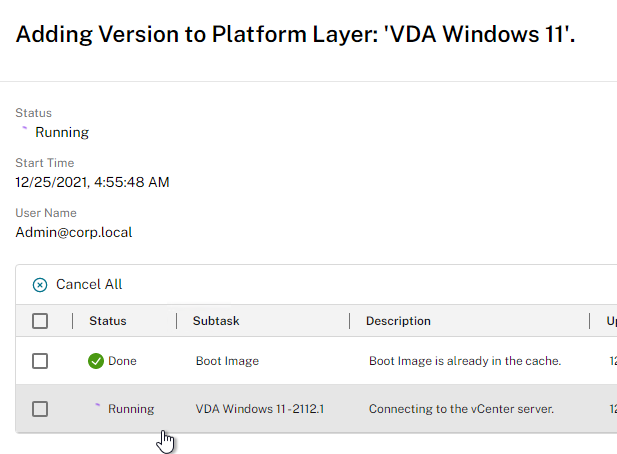
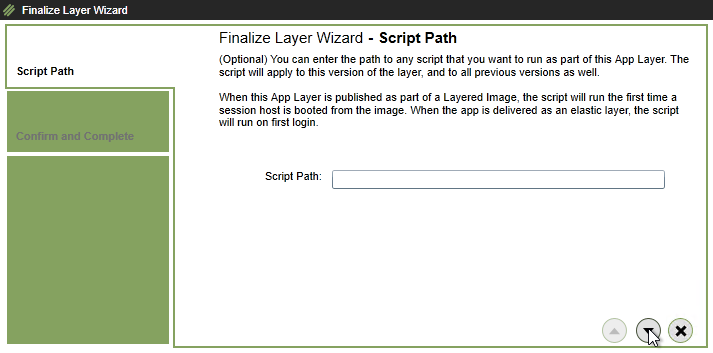
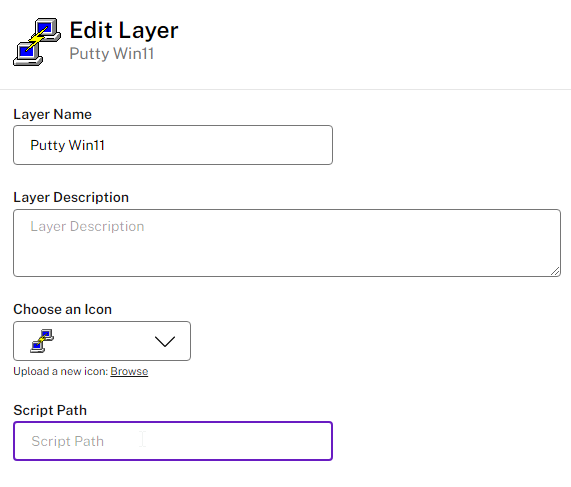
- In the Script Path page, if you embedded any scripts in the layer, specify the path. Otherwise, just click the down arrow.
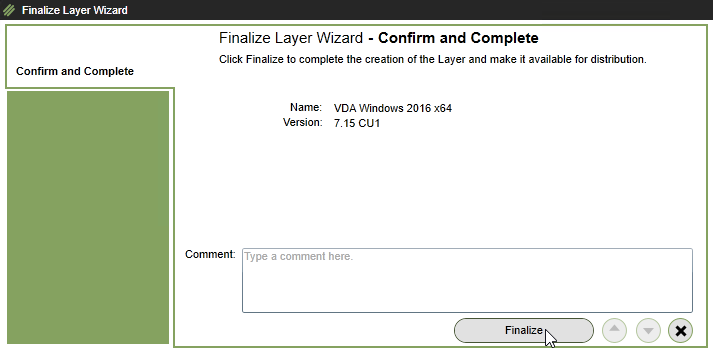
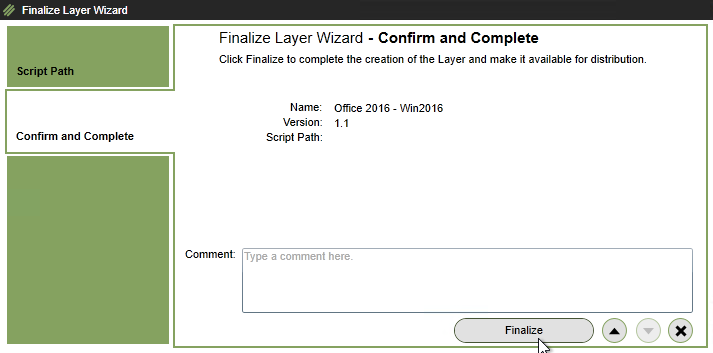
- In the Confirm and Complete page, click Finalize.
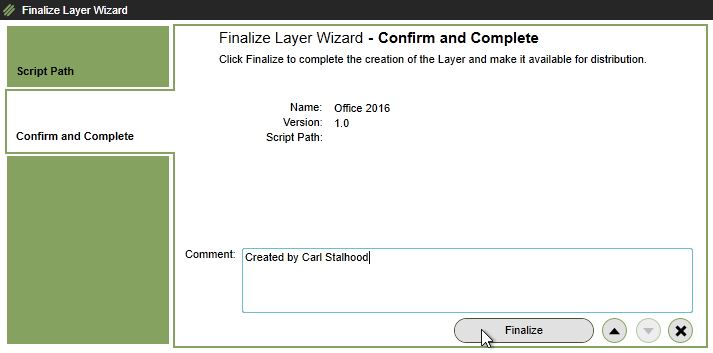
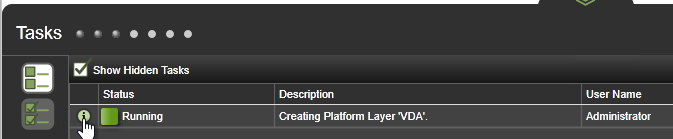
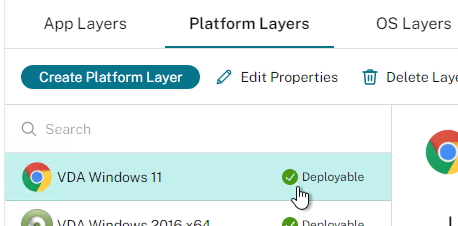
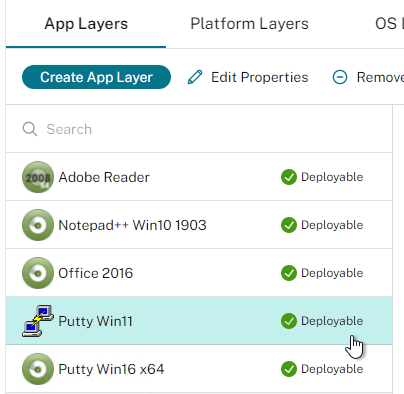
- It will eventually finish and say Deployable.
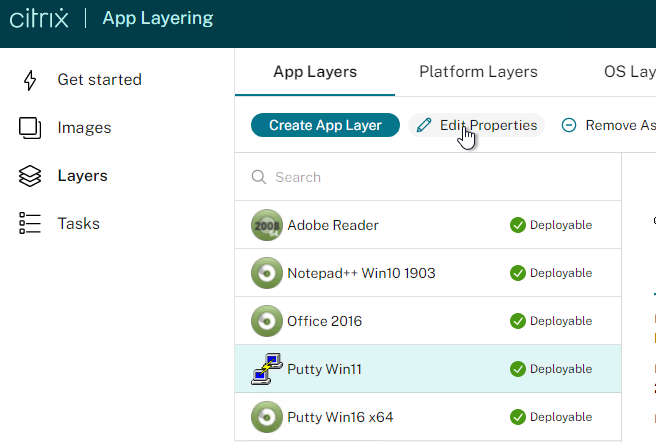
- You can Edit Properties on your App Layer to change the icon or specify a Script Path.
Windows Updates – From Gunther Anderson: “Generally, the list of updates is unreliable anywhere except the layer where the updates were installed. If your OS layer says the updates were installed, then they were. The actual list (the list is not the same as the actual updates) tends to get stepped on by your other app layers, since they remember the updates list from when they were originally created. With all of your app layers trying to set their own personal misunderstanding based on when they were initially created, what winds up in the published image is not a good reflection of any reality. However, the information from the OS layer is correct. Likewise, the list of Office updates shown in the Office layer is correct even when the list of Windows updates shown in the Office layer is not.”
User Layer Repair – App Layering 1908 and newer create User Layer Repair files for any new or edited App Layer. Uses these files to repair User Layers so that the App Layer you just created or edited overrides the User Layer.
Citrix has a User Layer Management Utility that does more than just repair. It can also Reset (rename) user layers, Compress them, or Expand them. This tool also works with FSLogix disks.
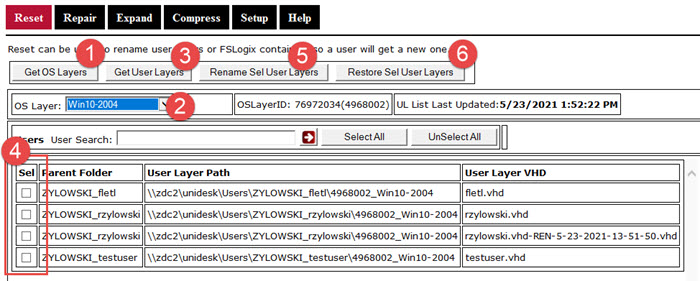
To repair user layers without using a utility:
- Find the repair files in your file share under \Unidesk\Layers\App\Repair and \Unidesk\Layers\App\PackageAppRules.

- Copy the UserLayerRepair.json file for the App Layer to the user’s User Layer .vhd location.

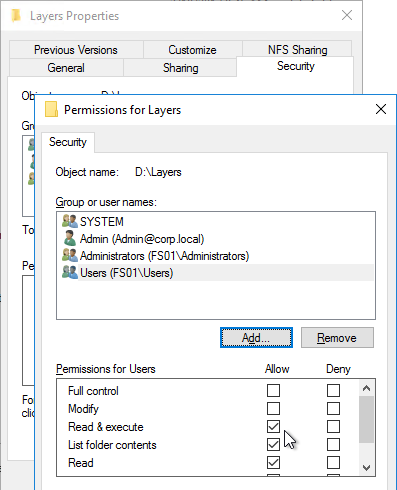
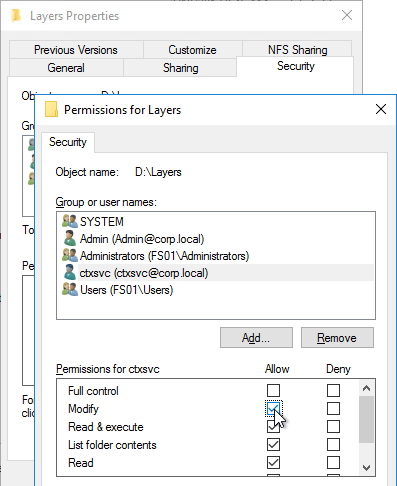
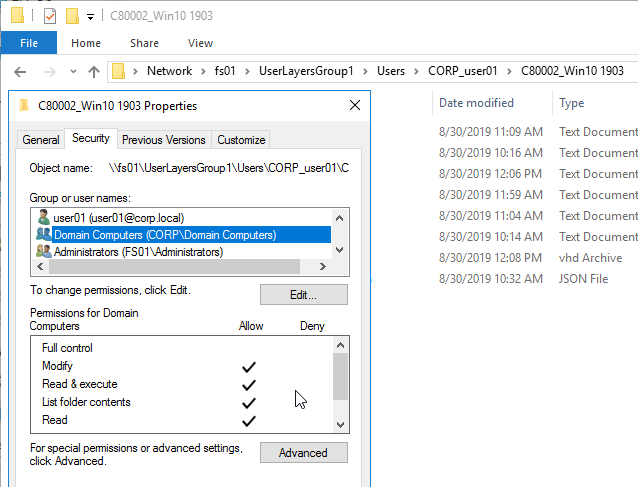
- Make sure Domain Computers has Modify access to the user’s VHD location. The repair function runs as the computer, not the user.
- After logging into a published machine, C:\Programdata\Unidesk\Logs\ulayersvc.log shows the Repair status.

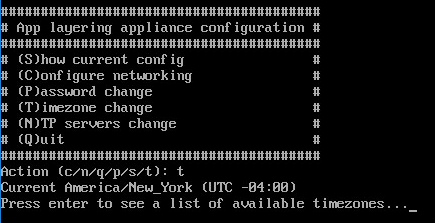
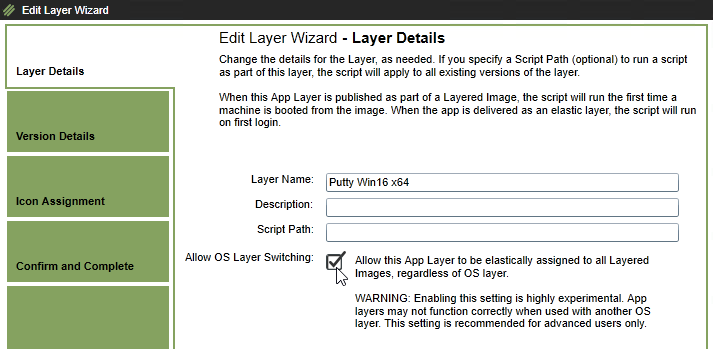
OS Layer Switching – if you enabled the OS Layer Switching Lab Feature, then do the following:
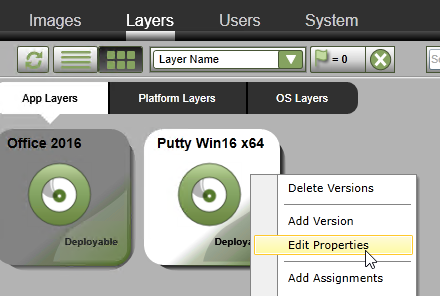
- Edit Properties on the App Layer.
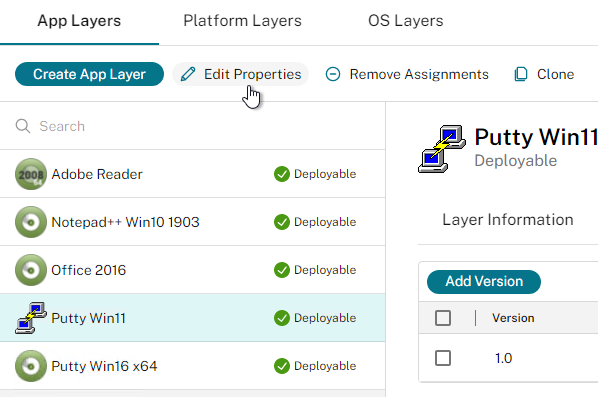
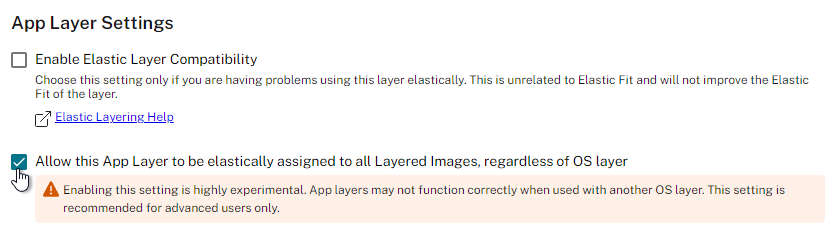
- In the App Layer Settings section (Layer Details page) is a checkbox to Allow this App Layer to be elastically assigned to all Layered images, regardless of OS layer (Allow OS Layering Switching). You’ll need to repeat this for each additional App Layer. Source = Elastic layers to other OS layers not working as expected at Citrix Discussions.
Image/Template
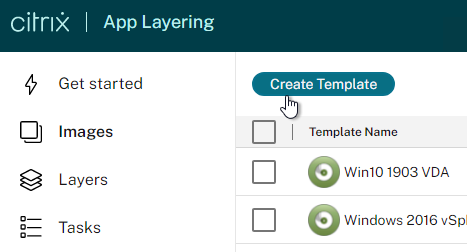
- In the ELM Management Console, go to the Images node/tab, and click Create Template.
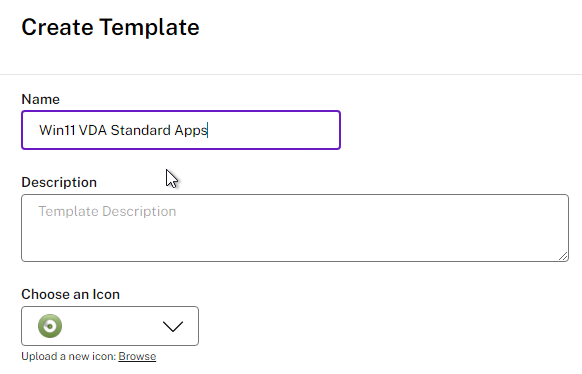
- In the Name and Description page, give the Template a Name that indicates the OS Layer, Platform Layer, and App Layers. Then scroll down or click the down arrow.
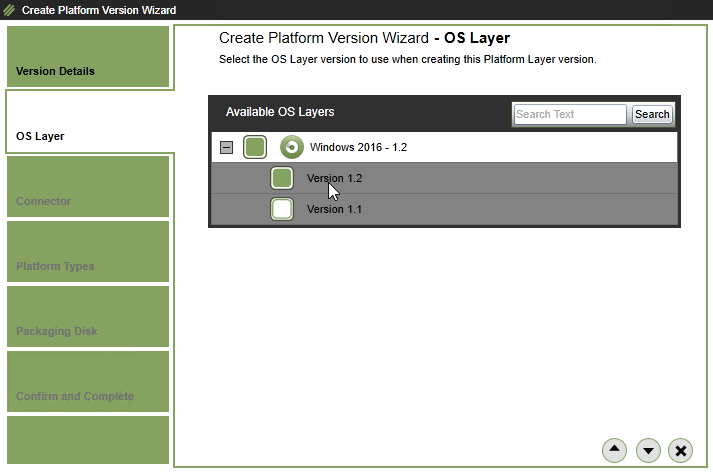
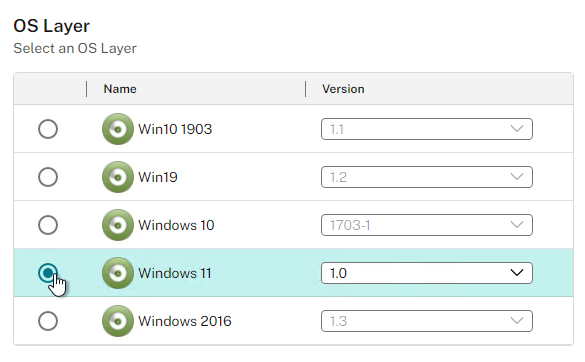
- In the OS Layer section, select an OS Layer, and scroll down or click the down arrow.
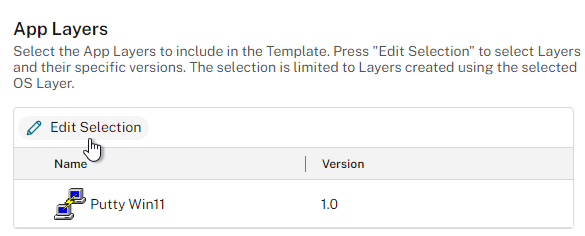
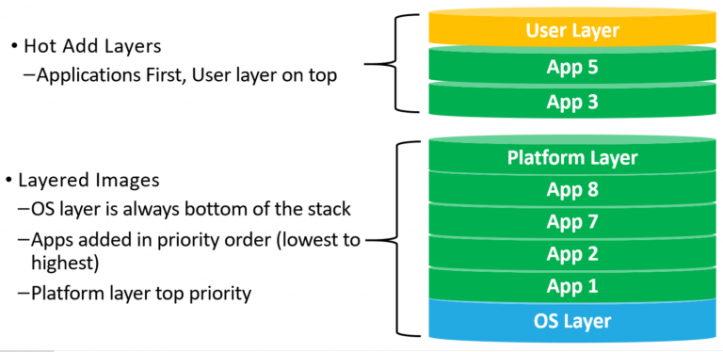
- In the App Layers section (Application Assignment page), click Edit Selection and select zero or more applications. Any App Layer you select here will be merged into the machine pre-boot. Elastic Layers are assigned later. Click the down arrow.
- Note: if you find that App Layers are conflicting with each other, you can adjust the App Layer priority by using the Citrix App Layering 4: LayerPriority Utility tool.

- Note: if you find that App Layers are conflicting with each other, you can adjust the App Layer priority by using the Citrix App Layering 4: LayerPriority Utility tool.
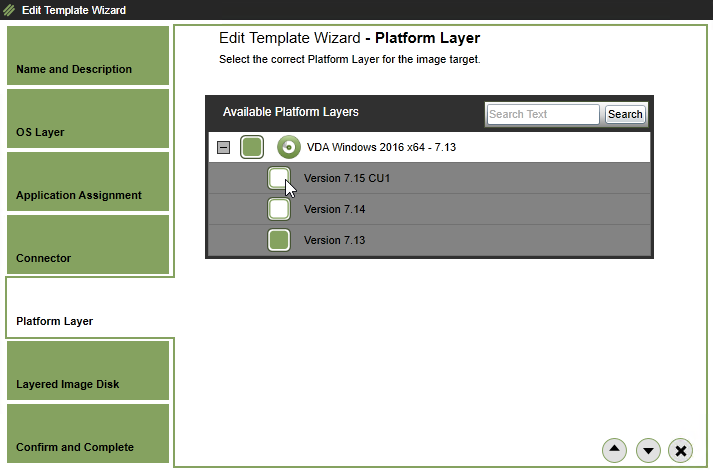
- In HTML5, in the Platform Layer section, select a Platform Layer and version. If you are pushing to PVS, then make sure the Platform Layer includes the PVS Target Device Software. Scroll down.

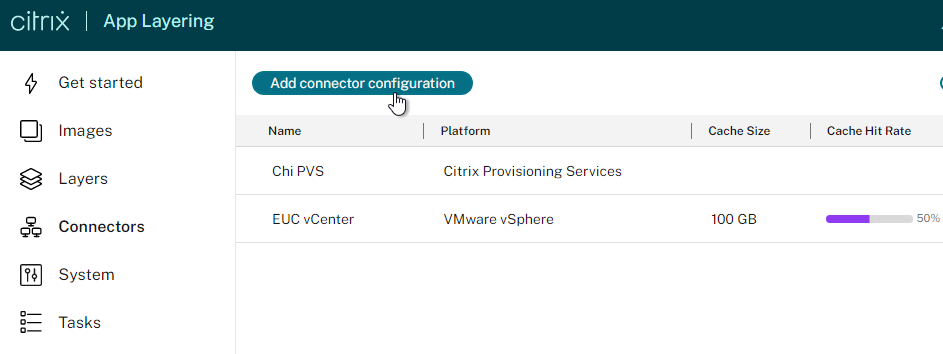
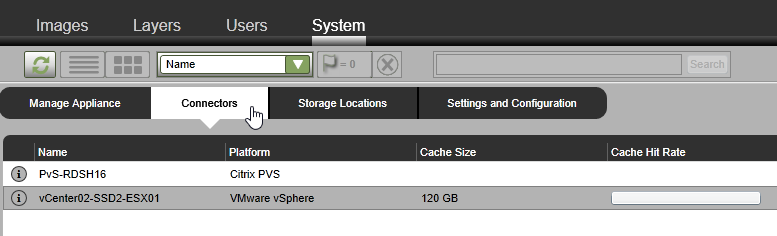
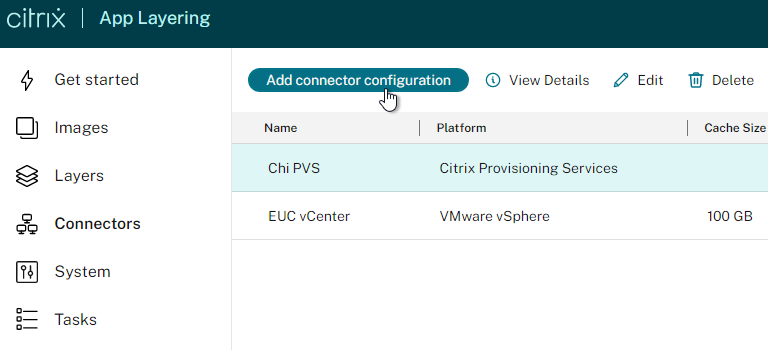
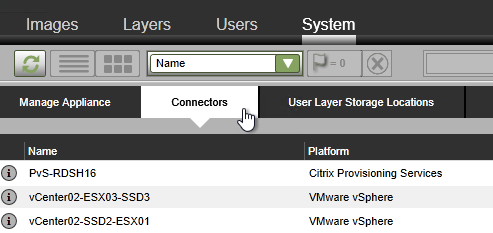
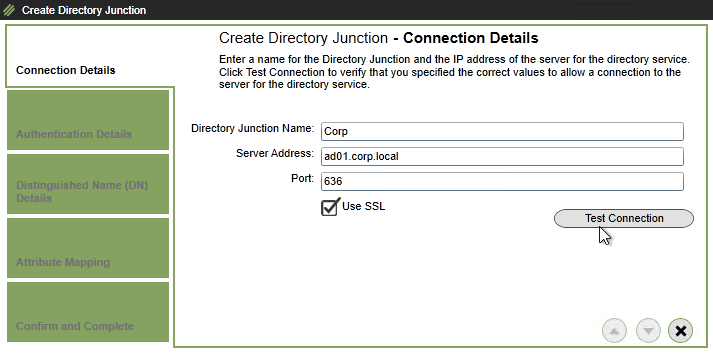
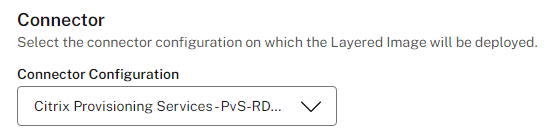
- In HTML5, in the Connector section, select an existing Connector. In the HTML5 interface, in App Layering 2202 or newer, use the Connectors page in the HTML5 interface to add a Provisioning Services connector. Or use the Internet Explorer Silverlight interface at System > Connectors. See below for some configuration info for this type of Connector.
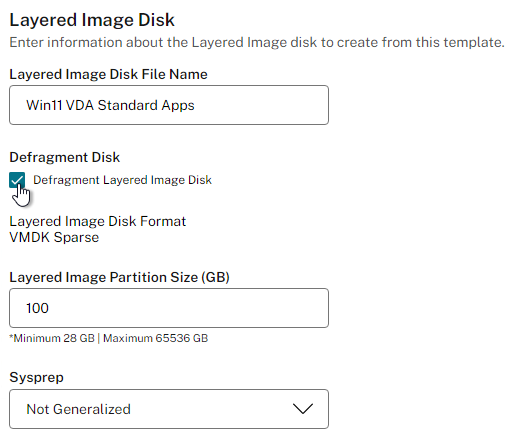
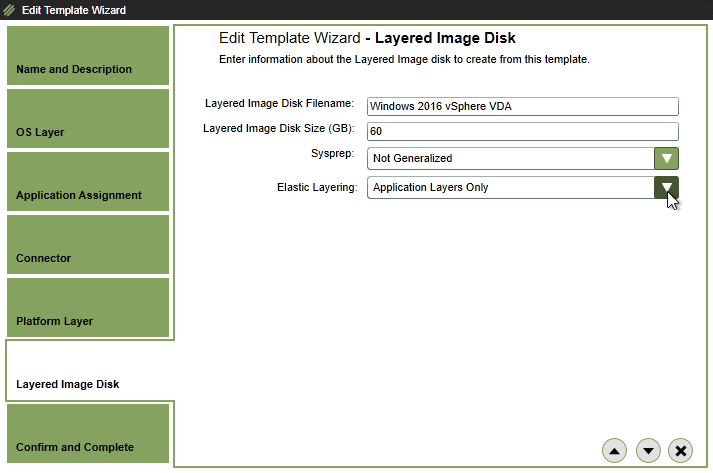
- In the Layered Image Disk page, give the .vmdk file a name, specify a size, and decide if you want Sysprep to run or not. You typically don’t need to Sysprep the image if you’re using MCS, PVS, Composer, or Instant Clone.
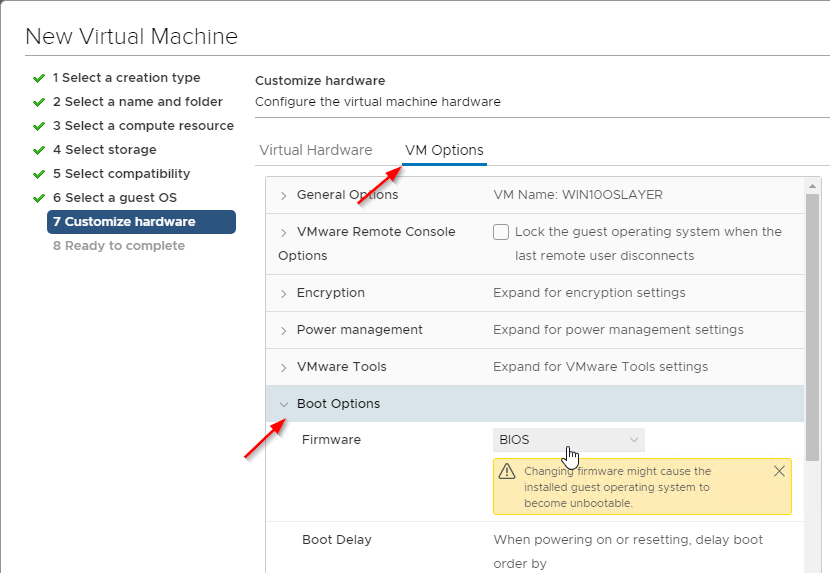
- App Layering 2308 and newer have an option to Defragment Layered Image Disk.
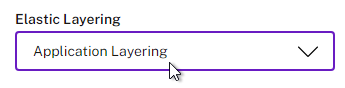
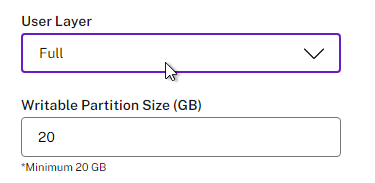
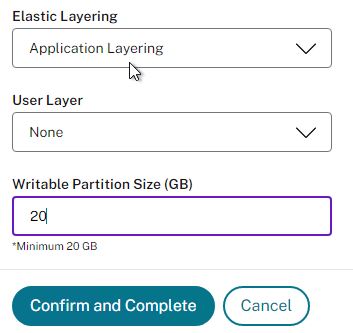
- If you wish to enable Elastic Layering, select it here to enable it in the Image Template. Assignment of Elastic Layers to users is described later. Notes:
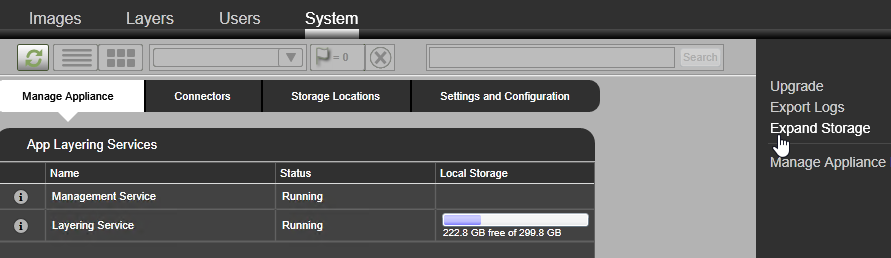
- Disk Free Space – when you enable Elastic Layering, the published image only gets 20 GB of free space due to the addition of a writable partition. To change the size, see CTX225030 How to set the default size of the Elastic Layering writable volume. You edit
/usr/local/CAMService/CAMService.exe.configand add the line<add key="ScratchVolumeSizeInMB" value="20480"/> - Login time delay – From Rob Zylowski at XenApp Image Template Application Assignment vs Elastic Delay at Citrix Discussions: “There is a 5-8 second penalty just for turning on elastic layering. But its not a straight x seconds per app because the mounts run in parallel. However more apps do take longer. What can have more of an effect is if the app has a service. We have to mount the disk, read it and then start the service before we allow the logon to ensure that the service is available if your logon actually needs it. There is a log at c:\programdata\unidesk\logs that will tell you the time associated with mounting and starting elastic layers so you will know how much of the logon impact is due to elastic layering.”
- Elastic Layers Path Override – The path to Elastic Layers can be overridden by setting HKEY_LOCAL_MACHINE\SOFTWARE\Unidesk\ULayer:RepositoryPath on the published machine. See CTX222107 You can change the Elastic Layer repository in the registry without reimaging (4.x).
- Citrix Profile Streaming Compatibility – App Layering 4.12 and newer support Citrix Profile Management Profile Streaming with Elastic Layers. Also see Elastic Layers and Profile issues at Citrix Discussions.
- Delayed loading – By default, Elastically Assigned Layers are loaded at the end of the login process so that the user can get to a desktop quickly and not have to wait for their Elastic Layers to surface first. However, especially with Session Hosts, you may find that the Elastic Layers are not available quickly enough. It is possible to make Elastically Assigned Layers attach at the beginning of the login process. by setting HKLM\SOFTWARE\Unidesk\ULayer\MaxCompositingPhase = 0. More info at CTX246468 How to disable delayed loading of Elastic Layers on an image.
- Disk Free Space – when you enable Elastic Layering, the published image only gets 20 GB of free space due to the addition of a writable partition. To change the size, see CTX225030 How to set the default size of the Elastic Layering writable volume. You edit
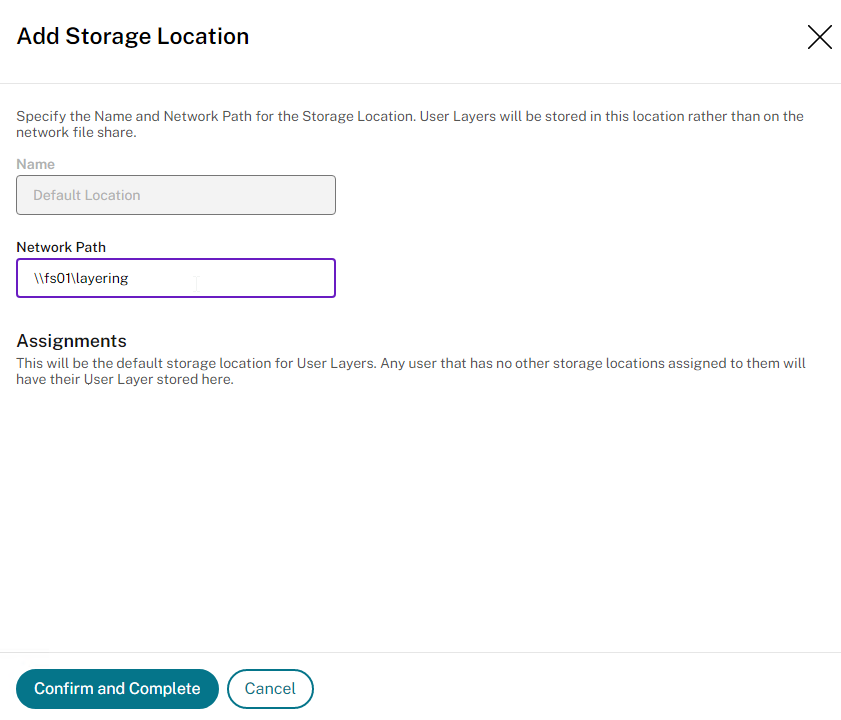
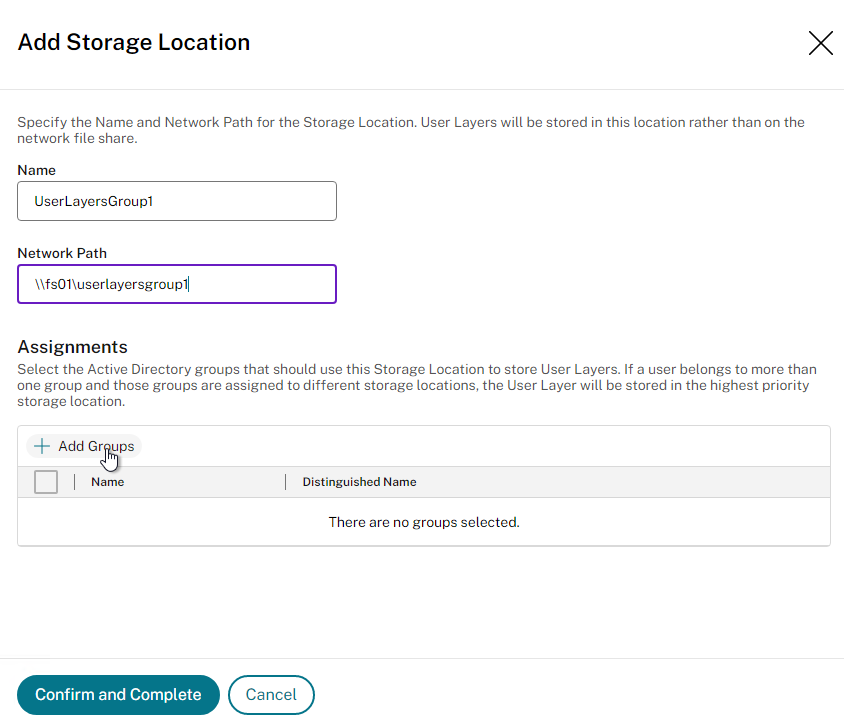
- User Layers is another option. Notes:
- User Layers have the same application compatibility limitations as Elastic Layers.
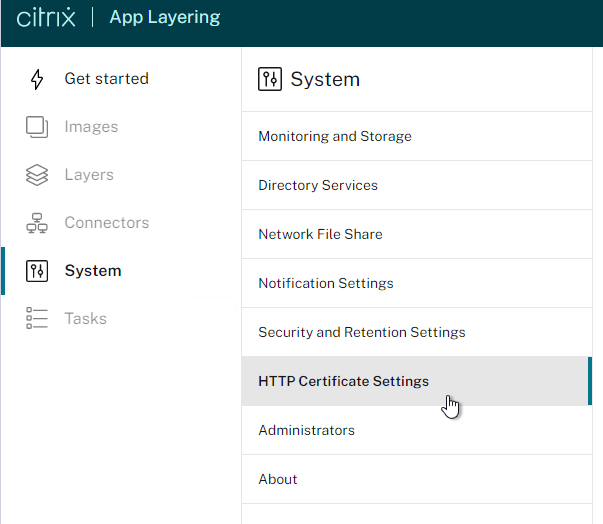
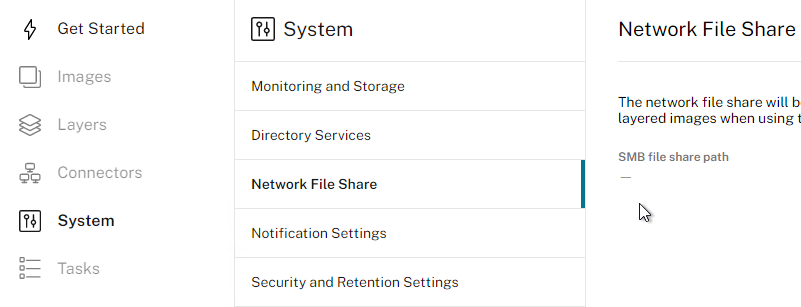
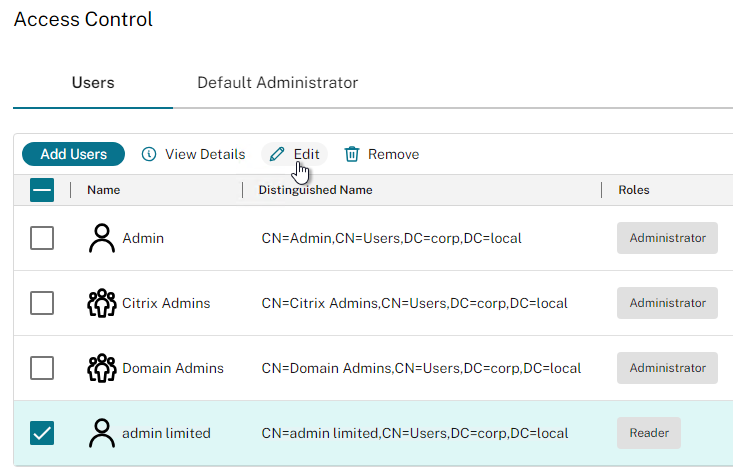
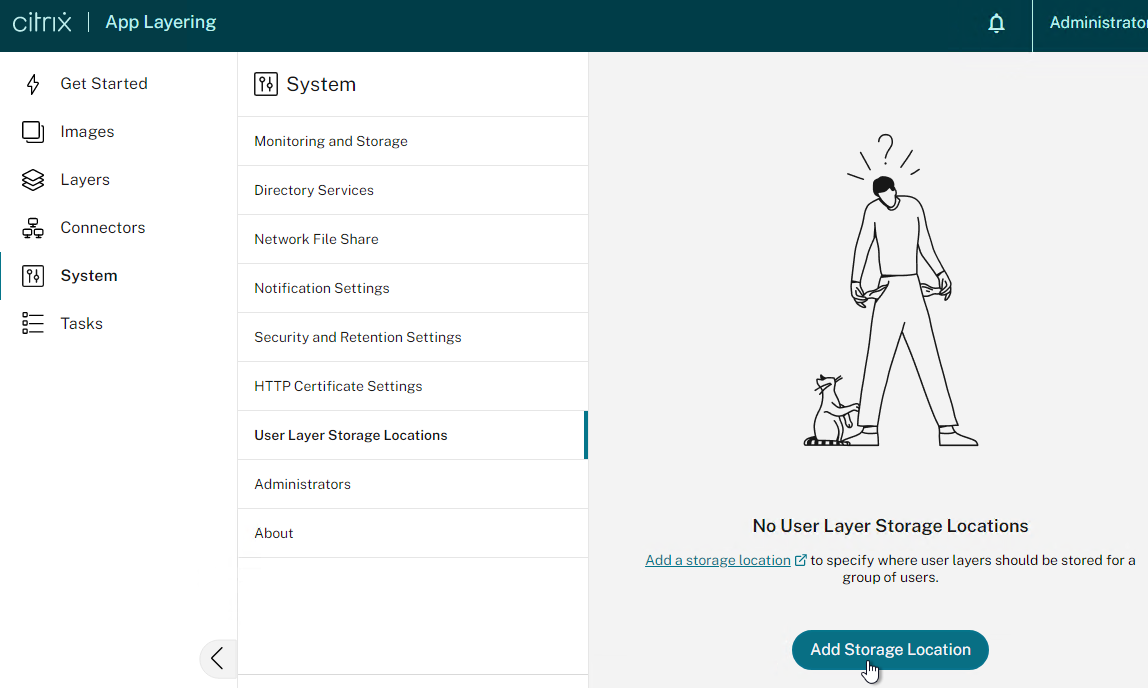
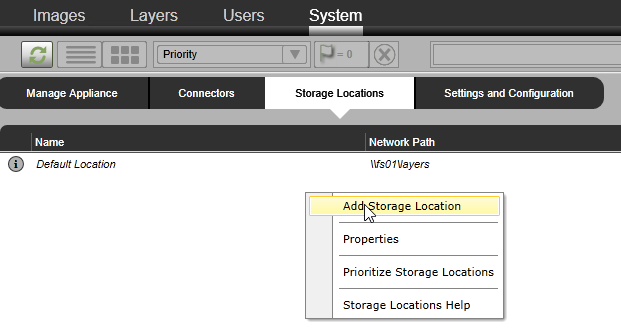
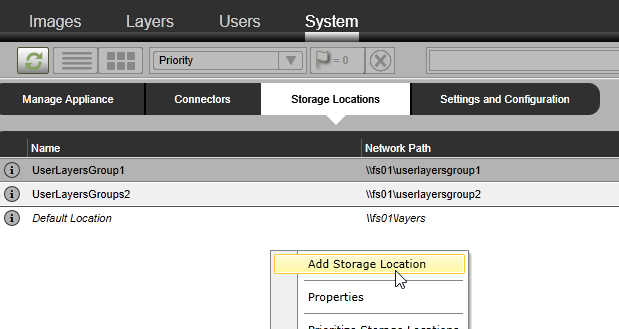
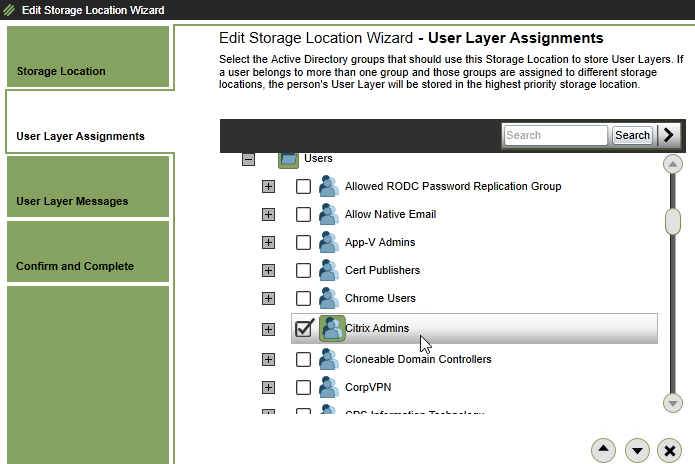
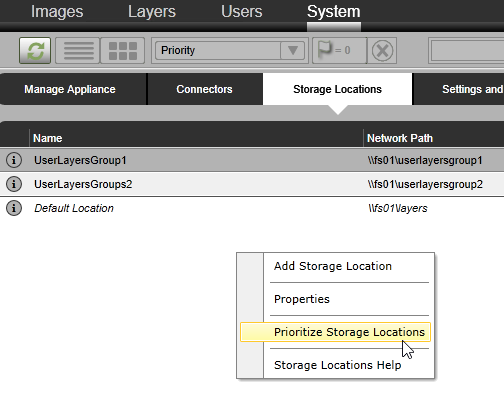
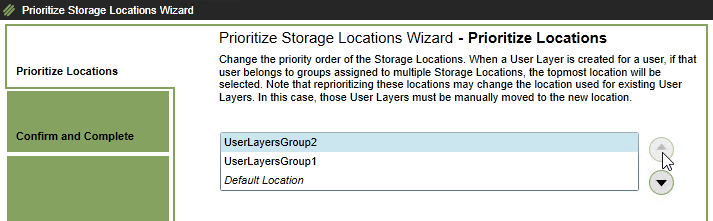
- Storage Locations for User Layers are configured at System > Storage Locations.
- In App Layering 2005 and newer, you can set a custom path by creating a
REG_SZvalue calledCustomUserLayerPathin theHKLM\Software\Unidesk\Ulayerkey. See How to specify a custom user layer path at Citrix Docs.
- In App Layering 2005 and newer, you can set a custom path by creating a
- The default size for User Layers is 10 GB. You can change this size by setting HKLM\Software\Unidesk\Ulayer\DefaultUserLayerSizeInGb on the managed machines. Source = Understanding Elastic Layering > Scaling (tab) > User Layer Size.
- If quotas are defined on the file share, then User Layer is sized to consume the entire quota. Source = CTX222095 How Big is the 4.x User Layer Disk, and How Can You Change That?
- Multiple access to the User Layer VHD is not allowed.
- After logging into a published, layered machine and mounting a user layer, you must revert the machine. Non-persistent Catalogs automatically revert the machine after logoff. Or take a snapshot before logging in and revert to snapshot after logging out.
- David Wilkinson describes User Layers in detail at Citrix Application Layering – User layers.
- Office 365 User Layers is a fully supported feature. For details (including limitations), see:
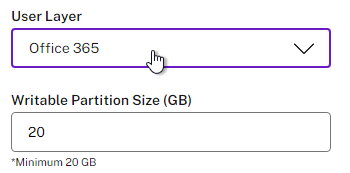
- David Wilkinson Citrix Application Layering – Office 365 User layer
- George Spiers Office 365 User Layers – Citrix App Layering
- Christiaan Brinkhoff How to configure Citrix Cloud – App Layering 4.8 to deliver virtualized apps and Office 365 caching – User Layers for XenApp and XenDesktop Service Cloud Workspaces in Microsoft Azure

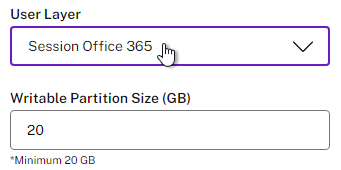
- Session Office 365 User Layers can roam Outlook OST files on RDSH VDAs.
- You can find some information at Enable User layers at Citrix Docs.
- Scroll down or click the down arrow and then click the Confirm and Complete button or Create Template button.

- The Image is then displayed as Publishable.

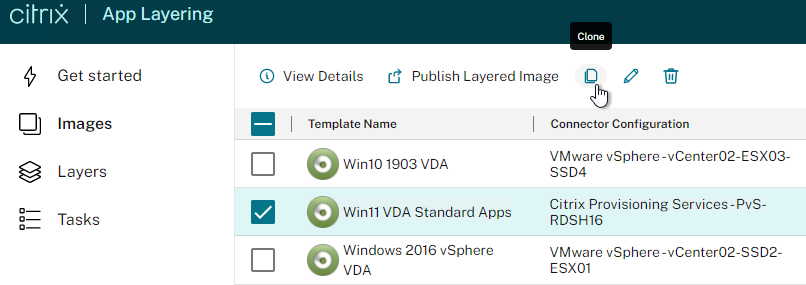
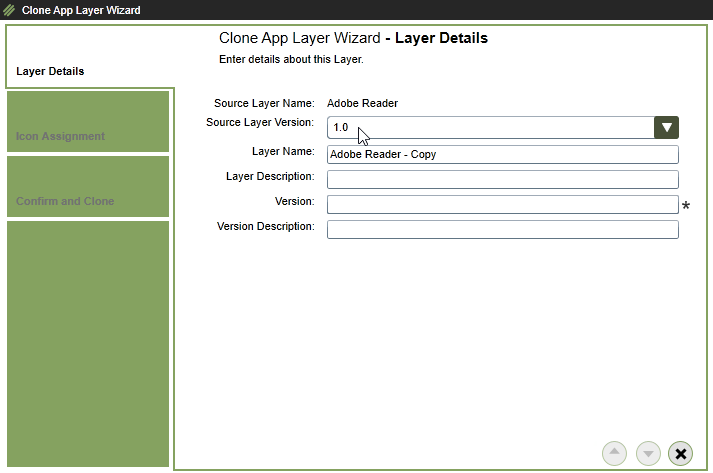
Clone Template
There’s a Clone Template feature to more easily create multiple templates with similar configurations.
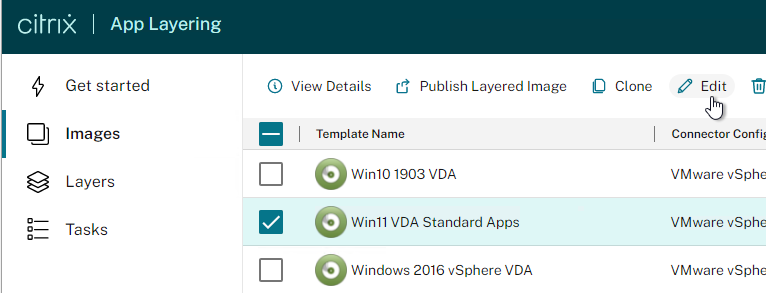
- On the Images tab, select an existing Image Template and click the Clone button.
- Right-click the newly created template and click Edit.
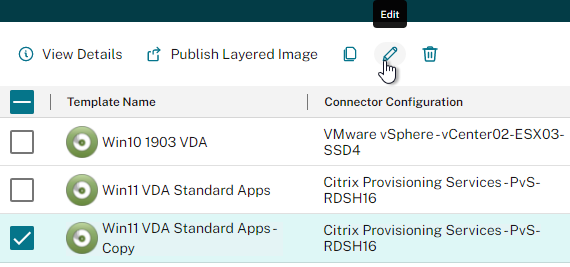
- Notice the name has – Copy on the end. Feel free to change the name and edit the new template as desired.

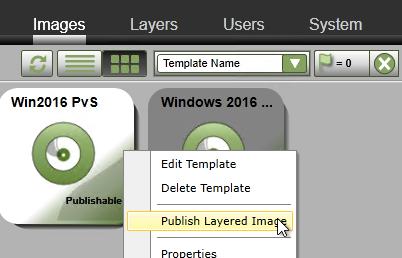
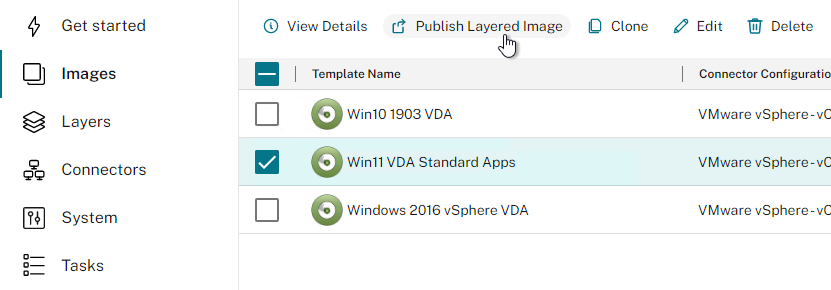
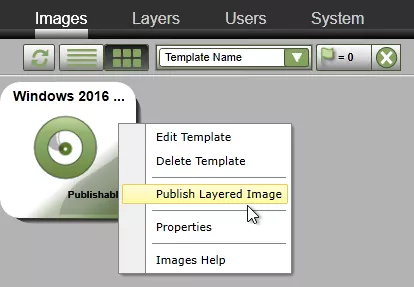
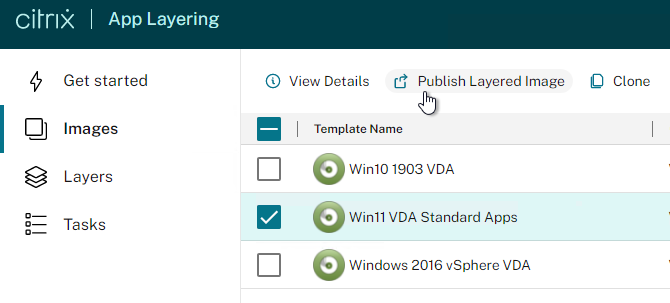
Publish Image
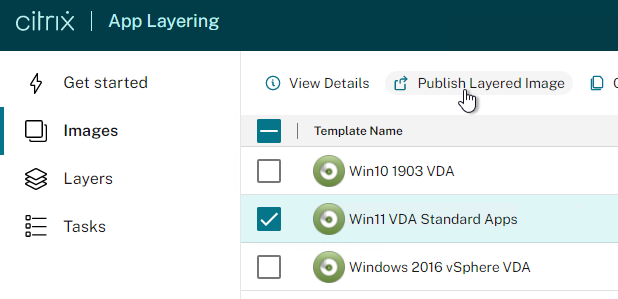
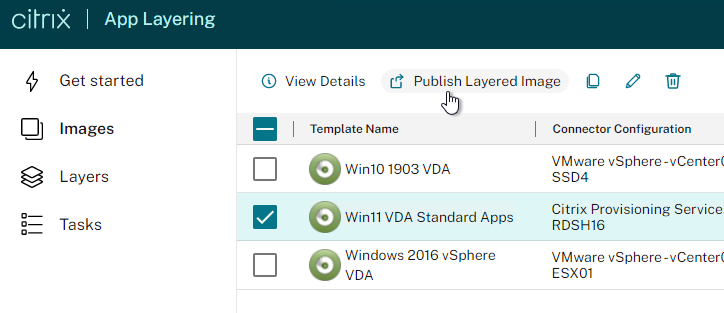
- Select a publishable image template and click Publish Layered Image.
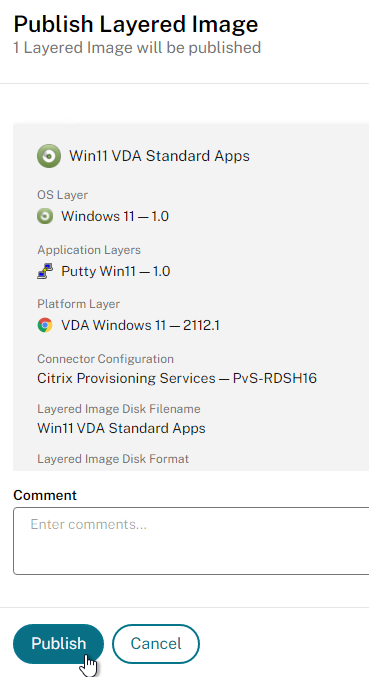
- In the Confirm and Complete page, click Publish Layered Image.
- Open the Tasks pane and click View Details (the information icon) to view details of the running task.
- If publishing to MCS (vSphere):
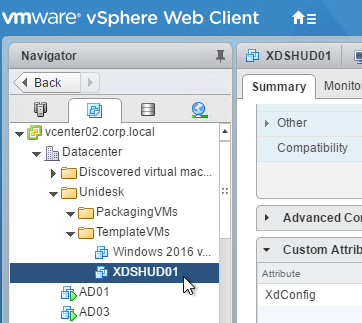
- In the vSphere Web Client, you’ll find the Template VM under the TemplateVMs folder under the Virtual Machine folder you selected for the Connector.
- Citrix MCS creates VMs in the same Folder as the Master Image. You might want to move the Template VM to a different virtual machine folder.
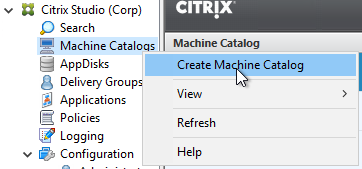
- For MCS, in Citrix Studio, create a Machine Catalog using the Template VM as the Master Image.
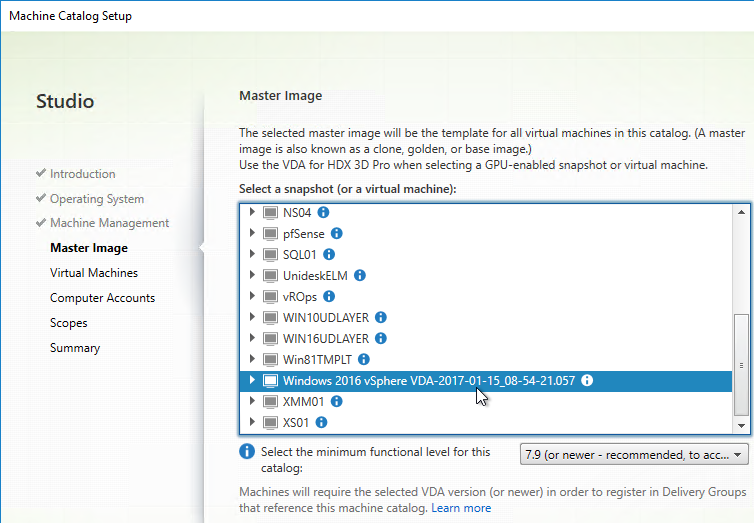
- Notice that MCS creates VMs in the same Virtual Machine folder as the Master Image.
- If publishing to Provisioning Services (PVS):
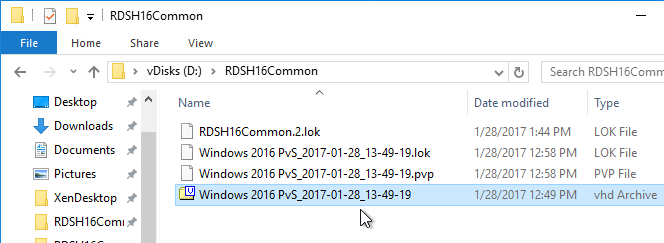
- The image is uploaded to the vDisk Store as a .VHD file (not .VHDX).
- And it’s automatically added to the vDisk Store in the PVS Console. You can now assign it to your Target Devices.

- You can Redirect ulayersvc.log to another folder or drive by modifying C:\Program Files\Unidesk\Layering Services\ULayer.exe.config. You can only modify this file after the image is published. (Source =CTX237138 Redirect ulayersvc.log to another folder or drive)
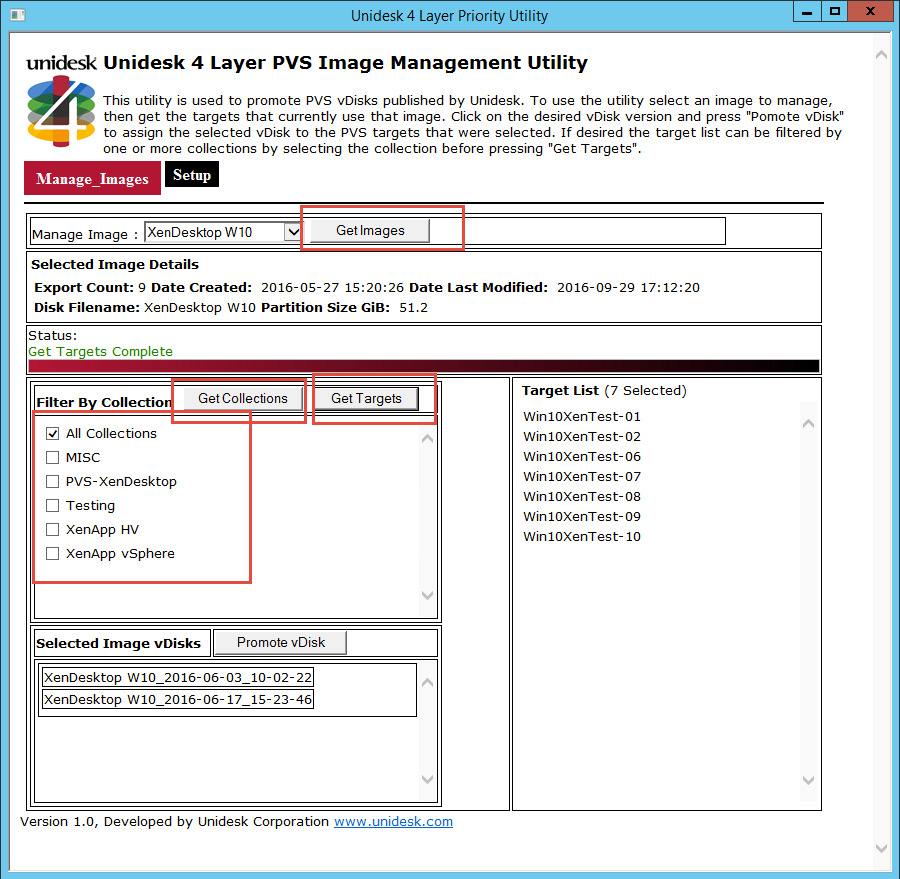
- CTX226065 Citrix App Layering 4.x: PVS Image Management – choose an image, then list all the targets using that image optionally filtering on one ore more collections, then “promote” the image to all selected targets.
- If the PVS Image prompts for a reboot, then see CTX230767 App Layering: Published image to PVS prompts user to restart computer. Create a new Platform Layer version. Take an existing Write Cache disk and attach to the Packaging VM so it can detect the new hardware. Remove the second disk and Finalize the Layer.

- The image is uploaded to the vDisk Store as a .VHD file (not .VHDX).
Elastic Layers
Logon delay – From Rob Zylowski at XenApp Image Template Application Assignment vs Elastic Delay at Citrix Discussions: “There is a 5-8 second penalty just for turning on elastic layering. But its not a straight x seconds per app because the mounts run in parallel. However more apps do take longer. What can have more of an effect is if the app has a service. We have to mount the disk, read it and then start the service before we allow the logon to ensure that the service is available if your logon actually needs it. There is a log at c:\programdata\unidesk\logs that will tell you the time associated with mounting and starting elastic layers so you will know how much of the logon impact is due to elastic layering.”
Provisioning Cache Disks – Citrix CTX227454 App Layering: PVS Cache Disks May Need to Be Larger with Elastic Layering: you may need to add capacity to your Cache Disks and/or Cache Memory reservation on your Target Machines to support App Layering with Elastic Layers. App Layering caches entire modified files, not individual modified blocks.
Profile Streaming Compatibility – App Layering 4.12 adds support for Citrix Profile Management Profile Streaming with Elastic Layers. Also see Elastic Layers and Profile issues at Citrix Discussions.
Delayed loading – By default, Elastically Assigned Layers are loaded at the end of the login process so that the user can get to a desktop quickly and not have to wait for their Elastic Layers to surface first. However, especially with Session Hosts, you may find that the Elastic Layers are not available quickly enough. It is possible to make Elastically Assigned Layers attach at the beginning of the login process. by setting HKLM\SOFTWARE\Unidesk\ULayer\MaxCompositingPhase = 0. More info at CTX246468 How to disable delayed loading of Elastic Layers on an image. 💡
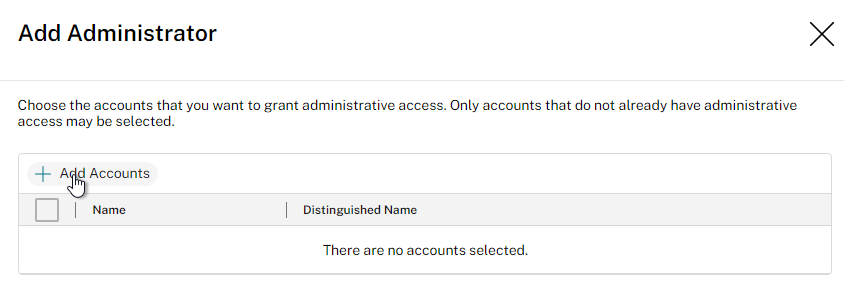
To assign elastic layers to users:
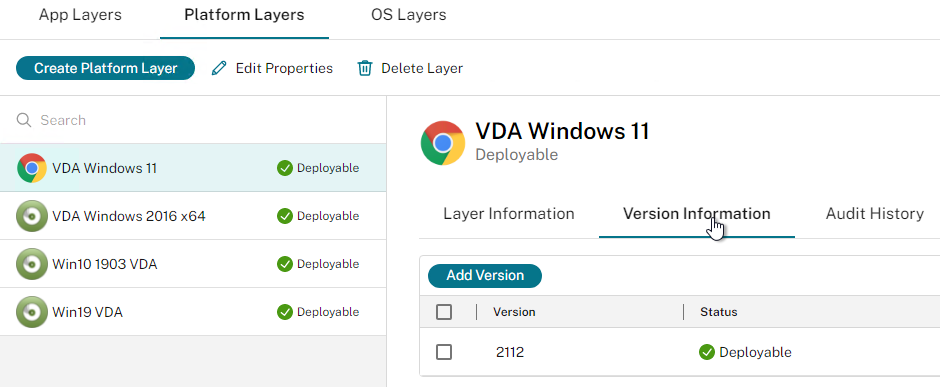
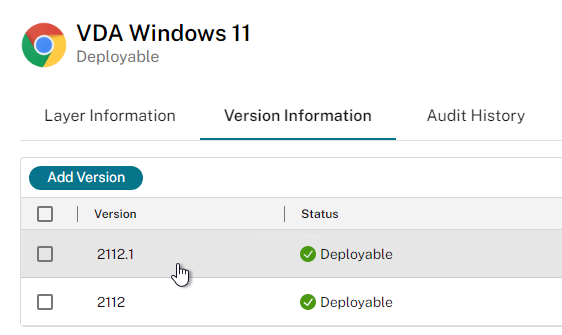
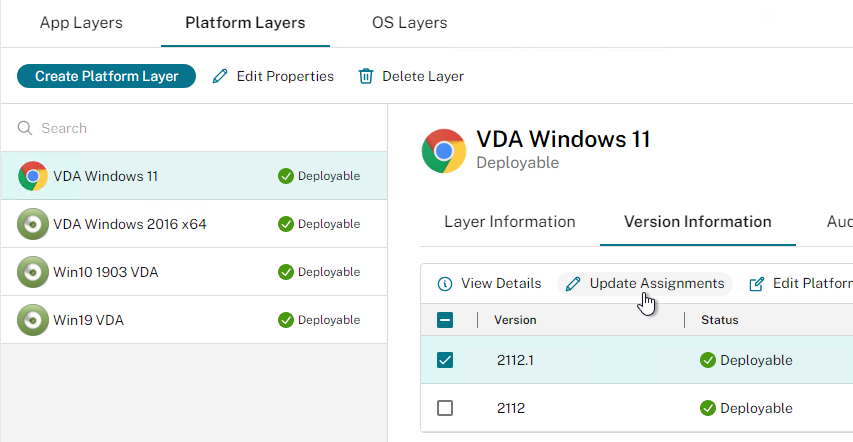
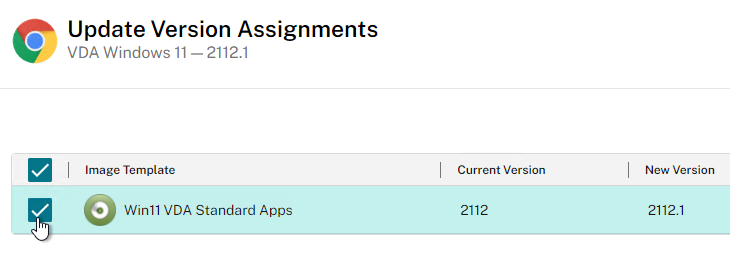
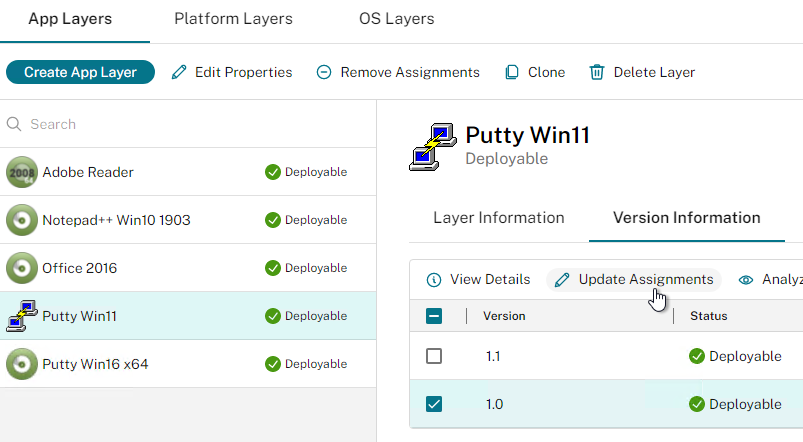
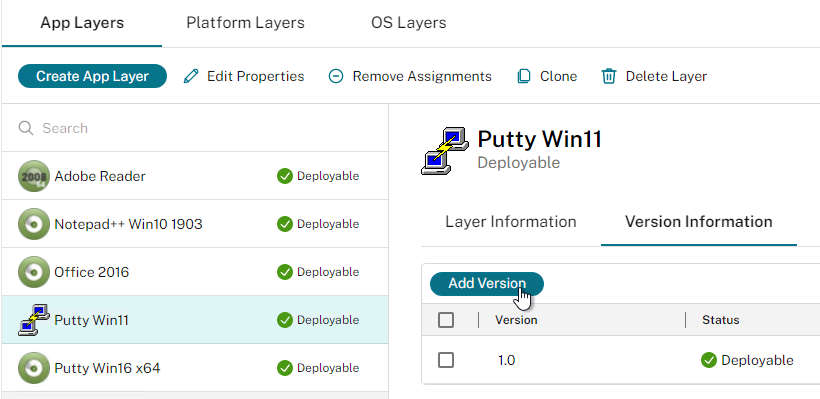
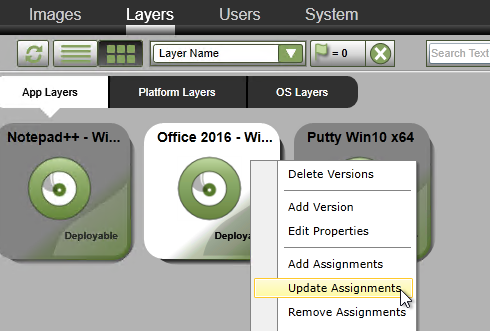
- In HTML5, select an App Layer and switch to the Version Information tab. Select a version and click Update Assignments.
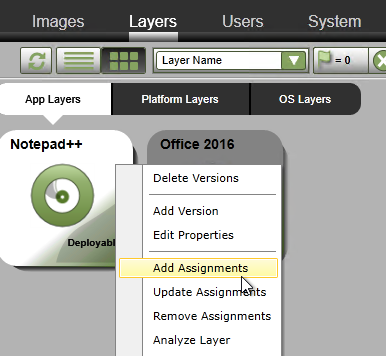
- In Silverlight, go to Layers > App Layers. Right-click a Deployable App Layer, and click Add Assignments.
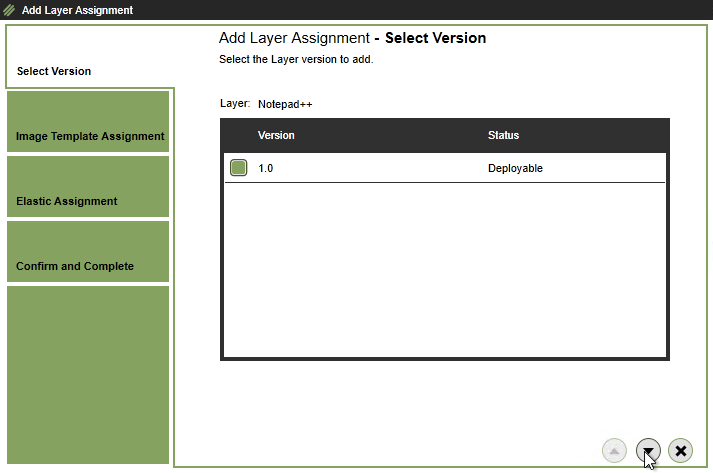
- In the Select Version page, select an App Layer version, and click the down arrow.
- In the Image Template Assignment page, don’t select anything. This page lets you assign this App Layer to a Image Template for pre-boot merging. For Elastic merging/mounting, just click the down arrow.

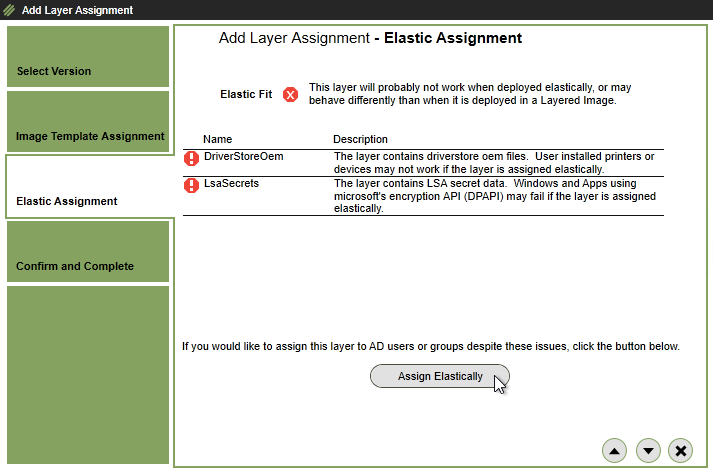
- In the Elastic Assignment page, note any issues that Elastic Fit discovered that would prevent the app from merging elastically correctly. If you’re OK with the issues, click the Assign Elastically button.
- In Silverlight, go to Layers > App Layers. Right-click a Deployable App Layer, and click Add Assignments.
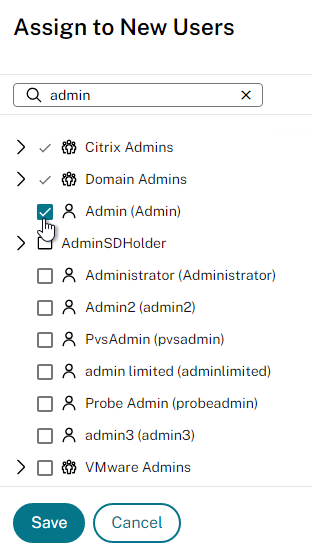
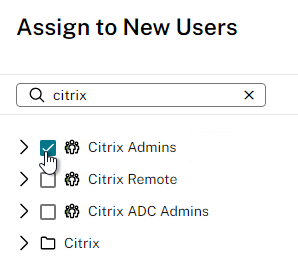
- In HTML5, switch to the Elastic Assignments tab and click Assign to new users.

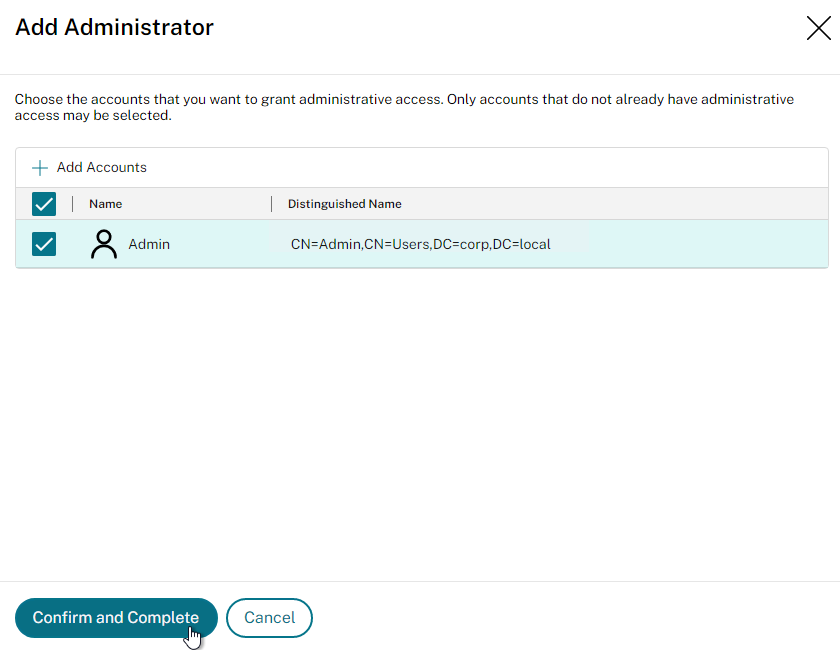
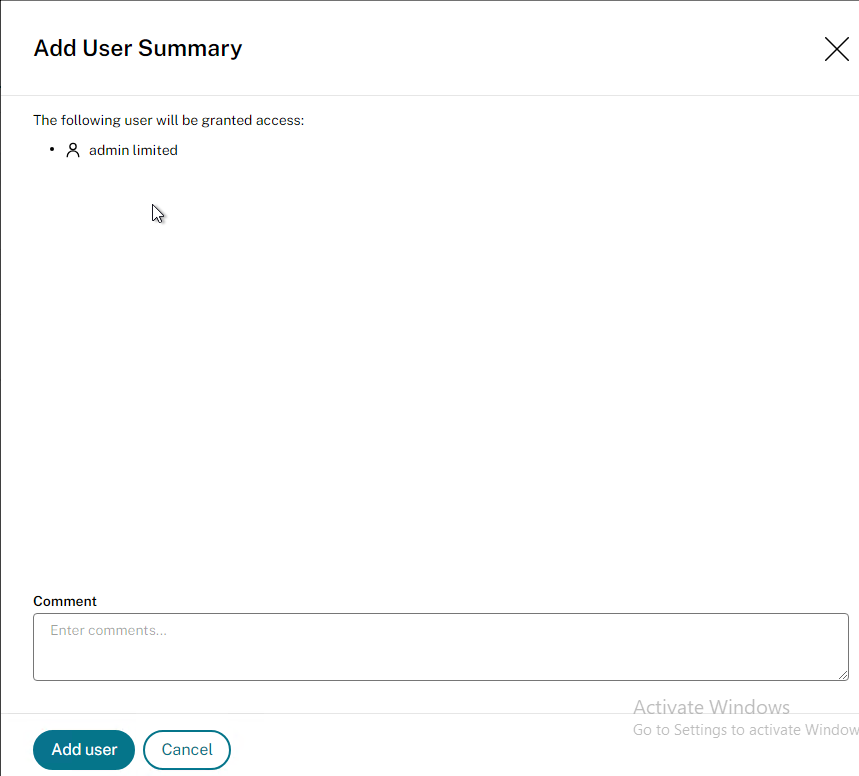
- Search for a user group you want to assign this Layer to, and check the box next to the group. Click Save when done. Or click the down arrow when done.
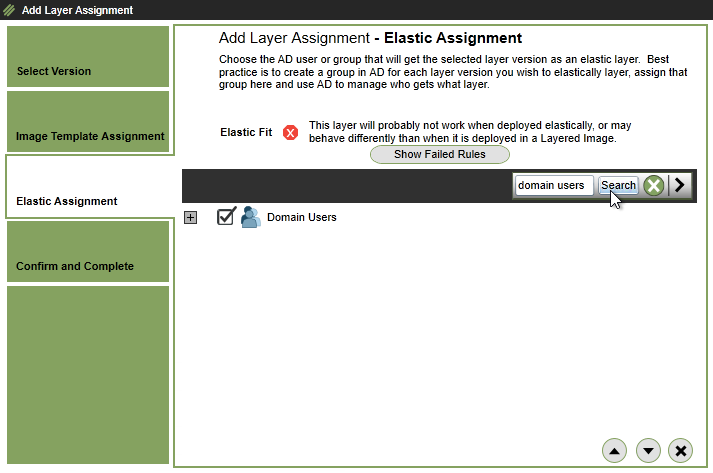
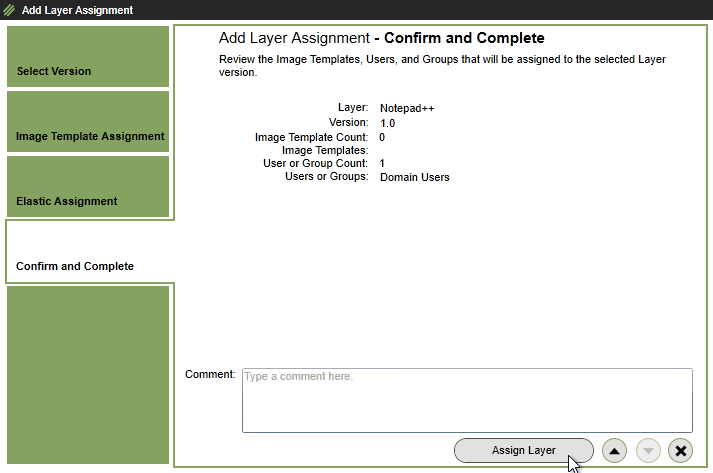
- Click Confirm and Complete. Or in Silverlight’s Confirm and Complete page, click Assign Layer.

- Open the Tasks pane to see the progress while it copies the App Layer to the remote SMB share.
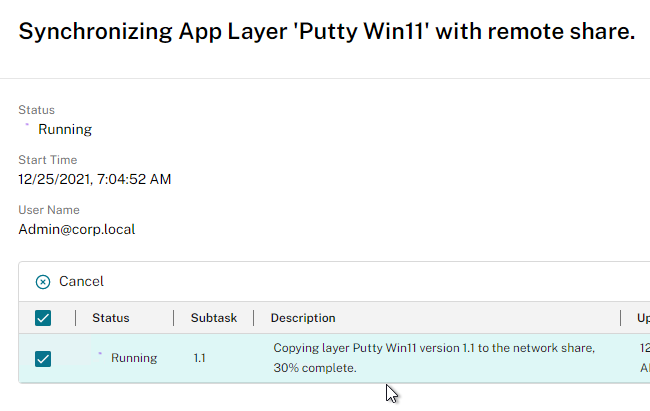
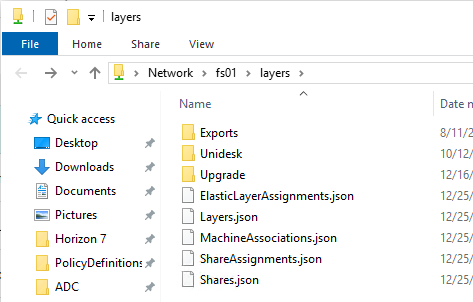
- When it’s done, go to the SMB share to see the files it uploaded, including the .json files that contain Layer assignments.
- To enable Elastic Layers in machines created from a ELM Image Template, edit the Template (Images), and make sure Elastic Layers is enabled in the Layered Image Disk page.
- Note: when you enable Elastic Layering, the published image only gets 20 GB of free space due to the addition of a writable partition. HTML5 lets you edit the size of this writable partition.
- To change the size in older App Layering, see CTX225030 How to set the default size of the Elastic Layering writable volume. You edit
/usr/local/CAMService/CAMService.exe.configand add the line<add key="ScratchVolumeSizeInMB" value="20480"/>
- To change the size in older App Layering, see CTX225030 How to set the default size of the Elastic Layering writable volume. You edit
- If you find that App Layers are conflicting with each other, you can adjust the App Layer priority by using the Unidesk 4 Layer Priority Utility — Experimental tool.
- From Citrix Discussions Application from an Elastic Layer as “Published App”? You can publish an elastic app. Simply publish an app, but manually specify the path to where executable would be. The app is mounted before the user logs in, so it will be there when Citrix tries to launch the app.
- The path to Elastic Layers can be overridden by setting HKEY_LOCAL_MACHINE\SOFTWARE\Unidesk\ULayer:RepositoryPath on the published machine. See CTX222107 You can change the Elastic Layer repository in the registry without reimaging (4.x).
- To debug Elastic Layers, see CTX222133 Elastic Layering Logs. Only Info logging is enabled by default.
- In C:\Program Files\Unidesk\Layering Services\ulayer.exe.config, set LogFileAppender level to Debug
- Must be set before machine boots.
- C:\ProgramData\Unidesk\Logs\ulayersvc.log
- In C:\Program Files\Unidesk\Layering Services\ulayer.exe.config, set LogFileAppender level to Debug
Update Layers
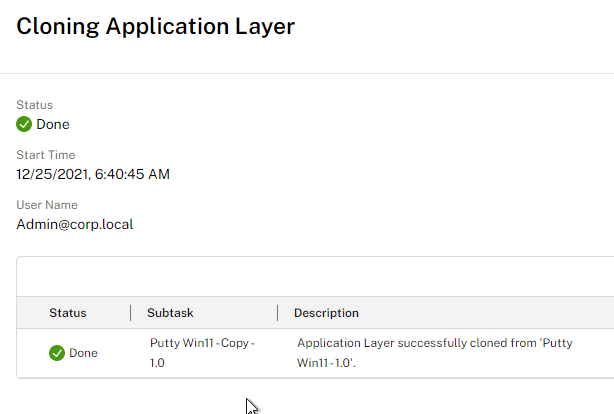
- You can optionally select an existing App Layer and click Clone. You would do this if want to create a new branch of app updates without affecting the main branch.
- You can select a particular version of the source layer.
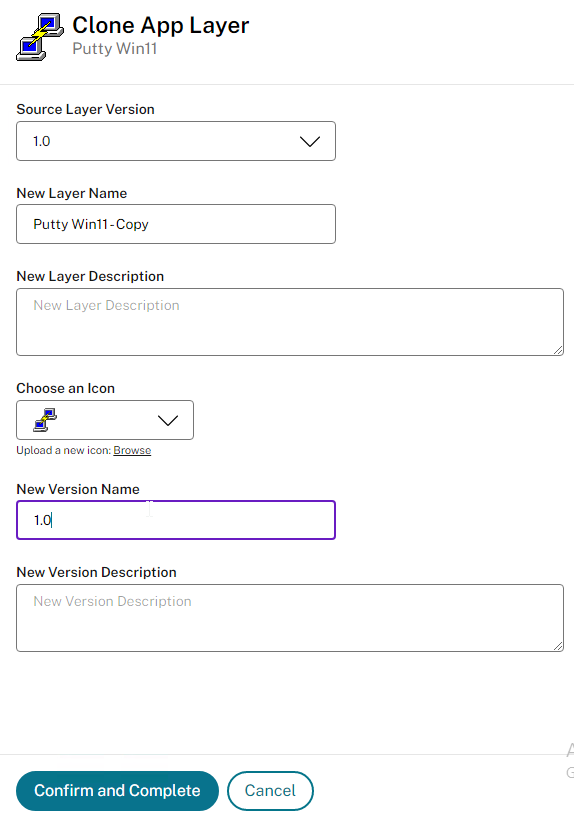
- It takes a bit of time to clone the layer. Use the Task status panel to see when it’s done.

- You can select a particular version of the source layer.
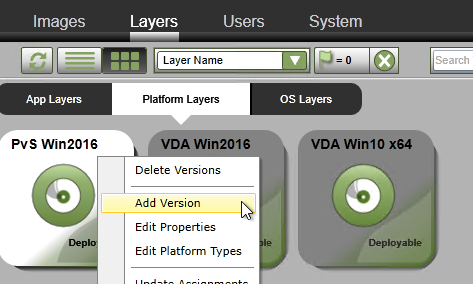
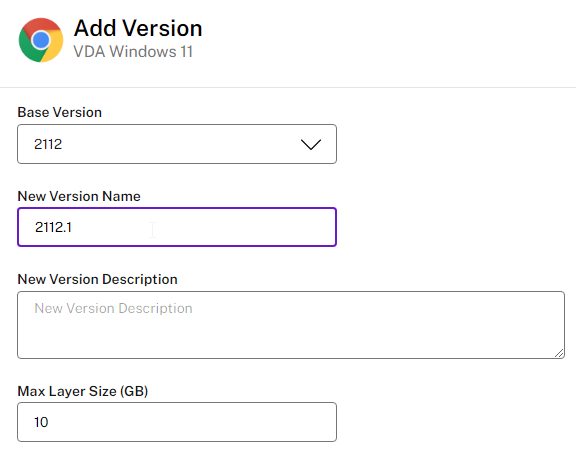
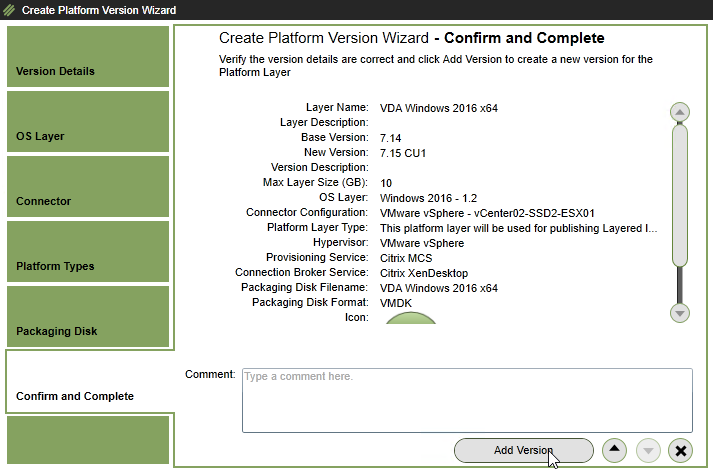
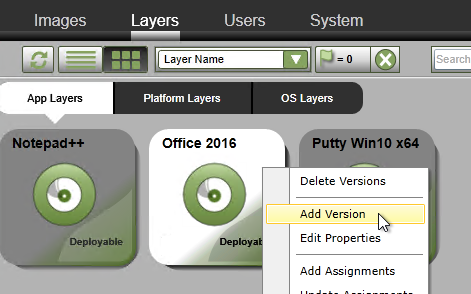
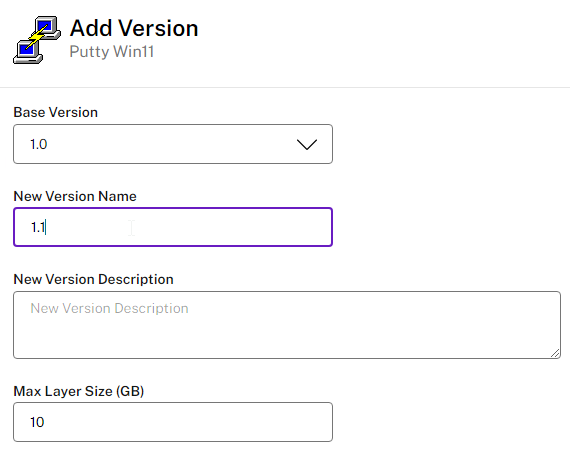
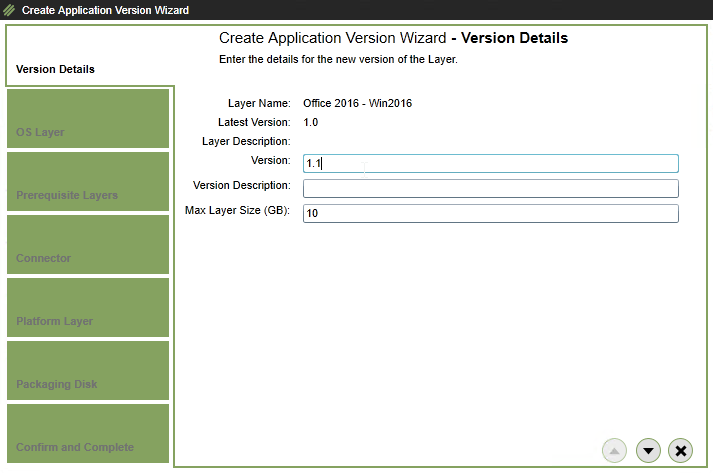
- In the HTML5 interface, select an App Layer, switch to the Version Information page, and then click Add Version. In Silverlight, right-click an App Layer and click Add Version.
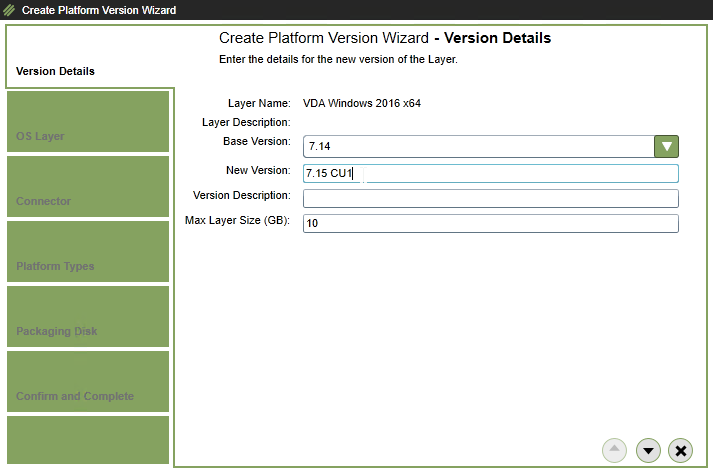
- In the Version Details page, enter a new version, and scroll down or click the down arrow.
- In the OS Layer page, click the down arrow.
- In the Prerequisites Layers page, click the down arrow.
- In the Connector page, select a Connector, and click Confirm and Complete, or click the down arrow.
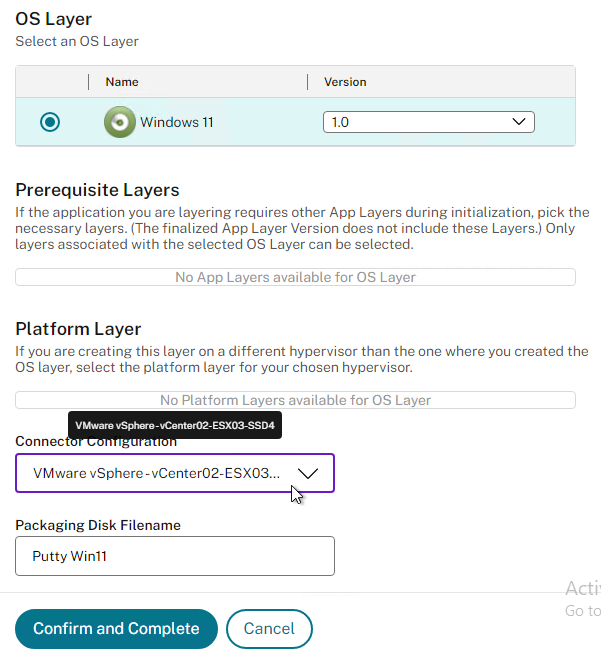

- In the Platform Layer page, click the down arrow.
- In the Packaging Disk page, click the down arrow.
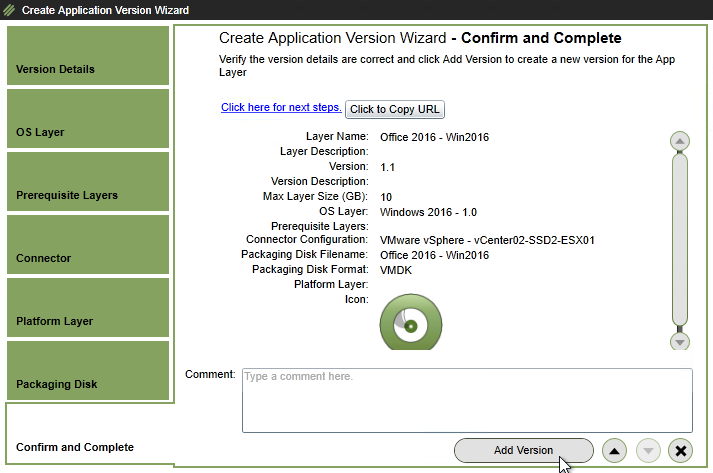
- In the Confirm and Complete page, click Add Version.
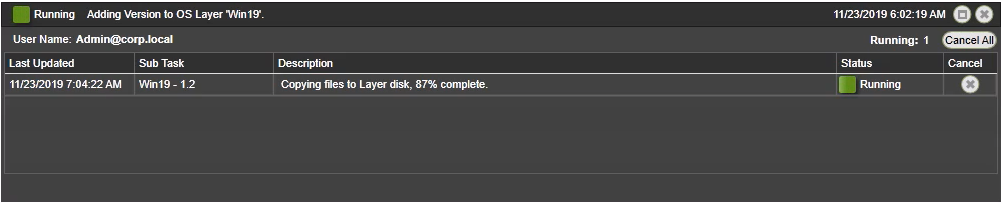
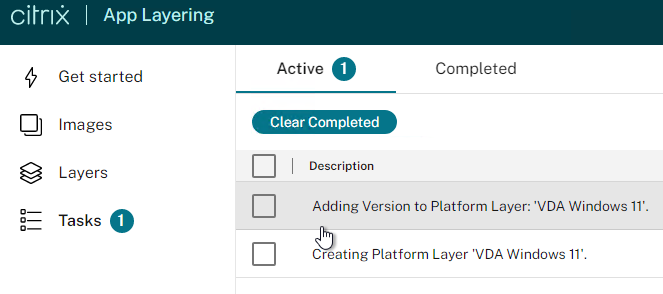
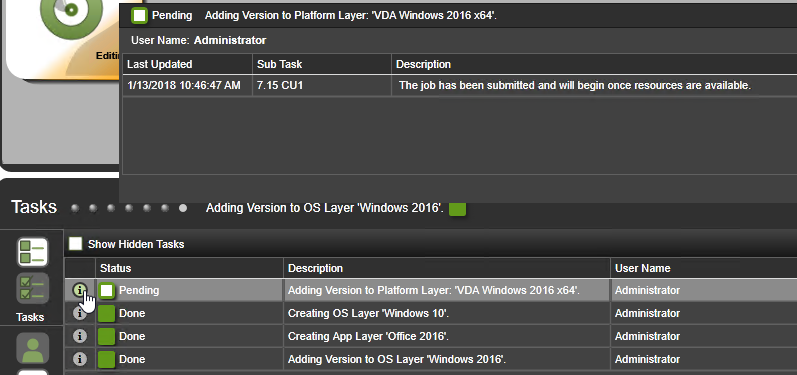
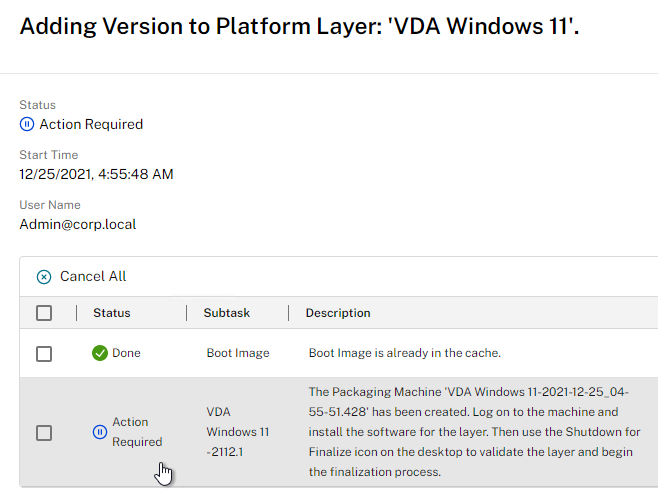
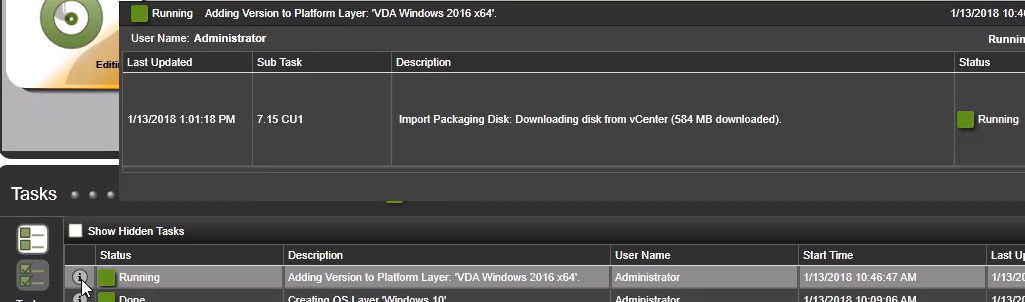
- The task details shows the current progress.
- It eventually says Action Required.
- When the Packaging Machine is deployed, you can connect to its console and perform any desired updates. When you are done performing updates, finalize the layer:
- George Spiers Citrix App Layering Preparation Script: runs a number of tasks to clean out temporary folders, clear out Event Log entries, remove ghost devices from Device Manager, etc. ?
- Double-click the Shutdown for Finalize icon on the desktop. If it finds issues, it will tell you what to do (e.g. reboot needed). Otherwise, it will shut down the VM.
- If Offload Compositing is enabled, then upload happens automatically.
- Otherwise, when done updating the Packaging Machine, right-click the App Layer that is marked as Editing, and click Finalize.
- In the Script Path page, click the down arrow.
- In the Confirm and Complete page, click Finalize.
- Otherwise, when done updating the Packaging Machine, right-click the App Layer that is marked as Editing, and click Finalize.
- View the task details to see the current progress.
- To confirm that you have a new version, in HTML5 interface, select the App Layering and switch to the Version Information tab. In Silverlight, right-click the App Layer, and click Delete Versions.
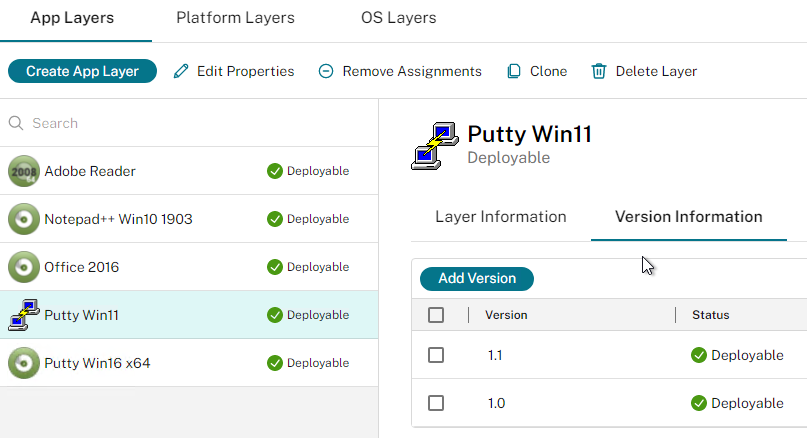

- You can only delete versions that are not assigned to any Image.


- There are two methods of assigning a new version: one image at a time, or multiple images.
- To edit one image:
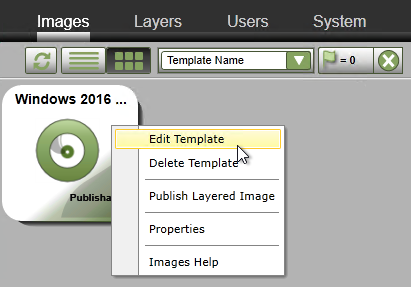
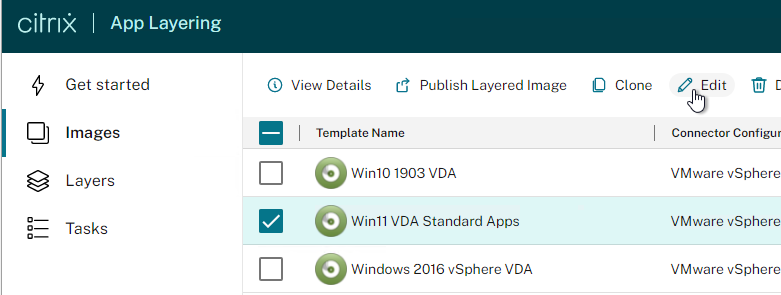
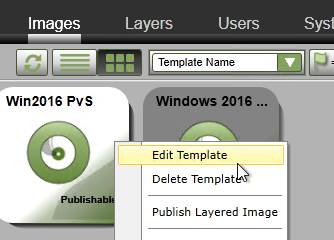
- Go to the Images tab. Select an Image, and click Edit Template.
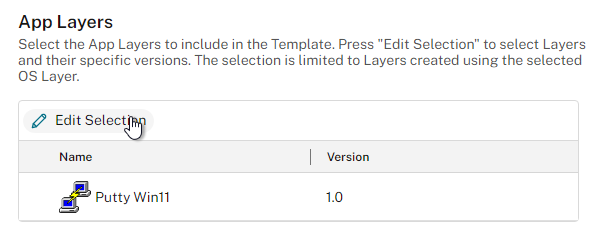
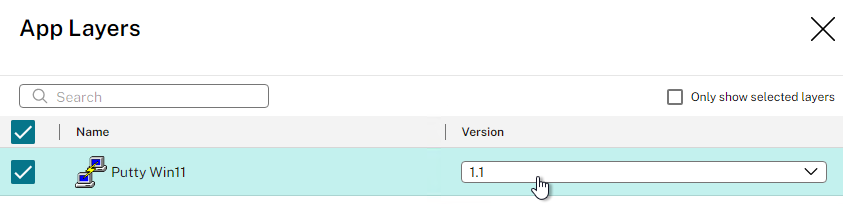
- In HTML5 interface, scroll down to the App Layers section and click Edit Selection. Select the new version and click Save. Then click Confirm and Complete.
- In Silverlight, click the Application Assignment page. Click the plus arrow next to a Layer and select the new version. Then complete the wizard.
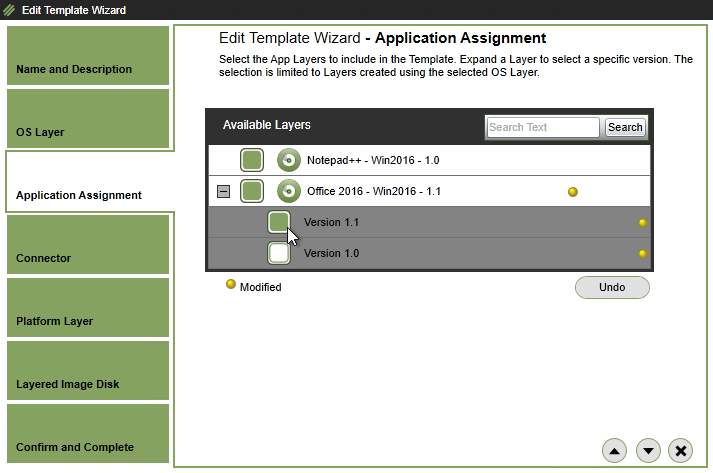
- In Silverlight, click the Application Assignment page. Click the plus arrow next to a Layer and select the new version. Then complete the wizard.
- Go to the Images tab. Select an Image, and click Edit Template.
- To update multiple images:
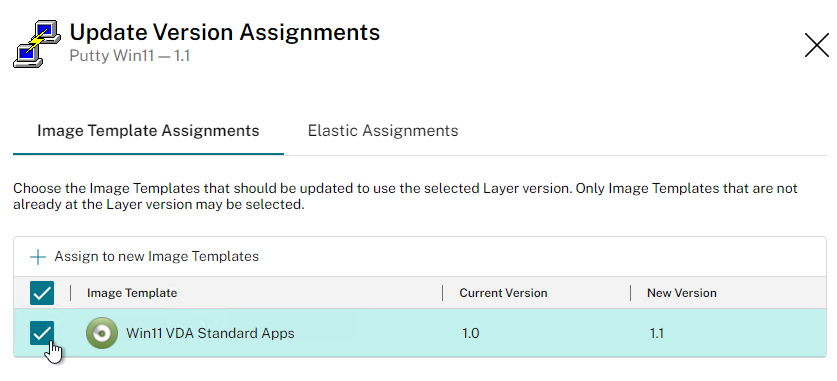
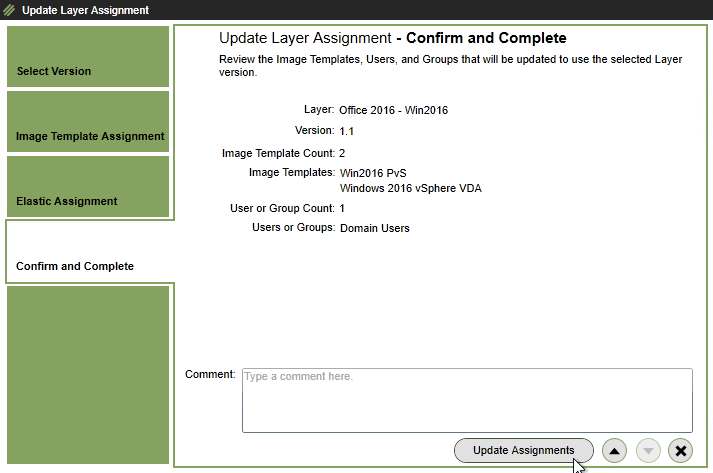
- In HTML5, in the Version Information tab for a Layer, select the version and click Update Assignments.

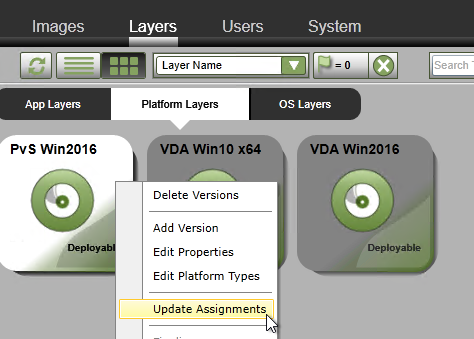
- In Silverlight, right-click the updated layer, and click Update Assignments.
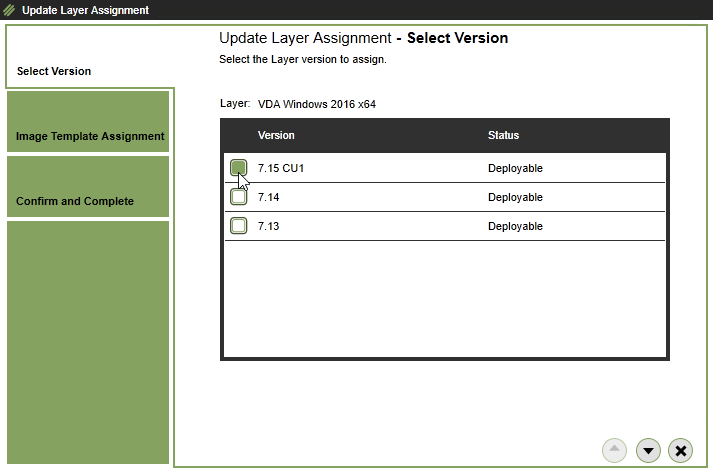
- In the Select Version page, select the version you want to assign, and click the down arrow.

- In Silverlight, right-click the updated layer, and click Update Assignments.
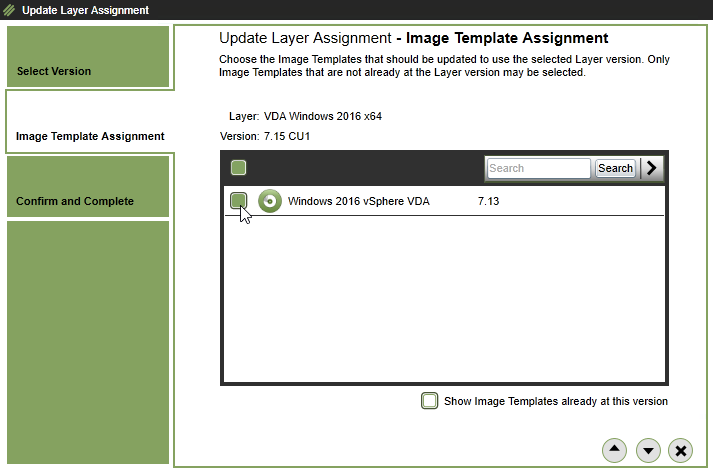
- In the Image Template Assignment tab, select the templates you want to update, and scroll down or click the down arrow.

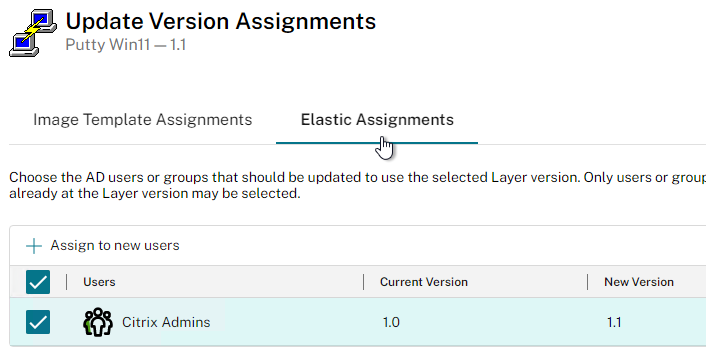
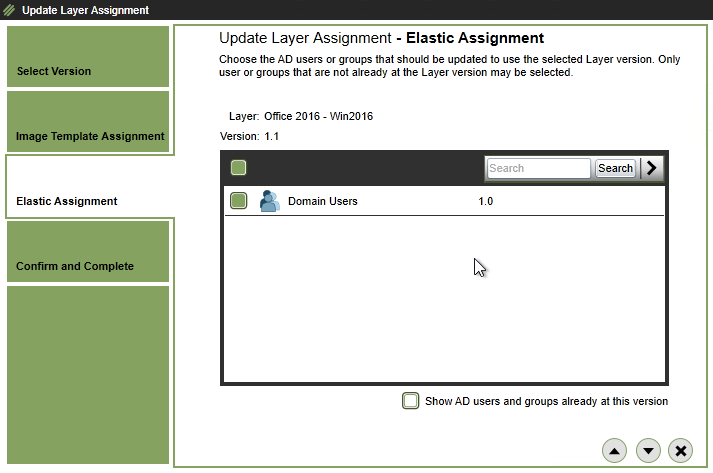
- In the Elastic Assignment tab, if this App Layer is assigned to users, you can update them too. Click the down arrow.
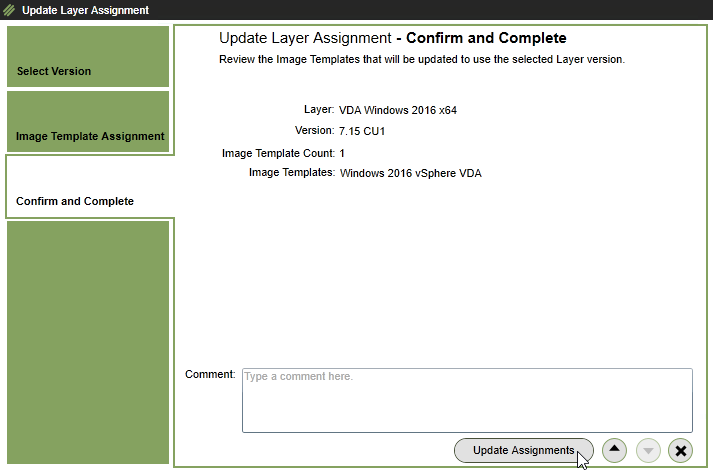
- Click Confirm and Complete, or in the Confirm and Complete page, click Update Assignments.

- In HTML5, in the Version Information tab for a Layer, select the version and click Update Assignments.
- Once an image has a new version assigned, you must republish it.
Export Layers
App Layering 4.3 and newer let you export all layers and versions to the SMB File Share.
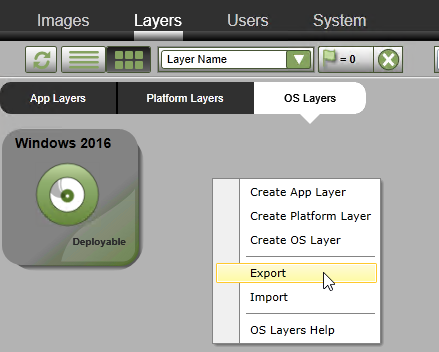
- Go to the Layers tab.
- Right-click on the background, and click Export.
- App Layering 4.4 and newer lets you specify a file share for the exported layers.
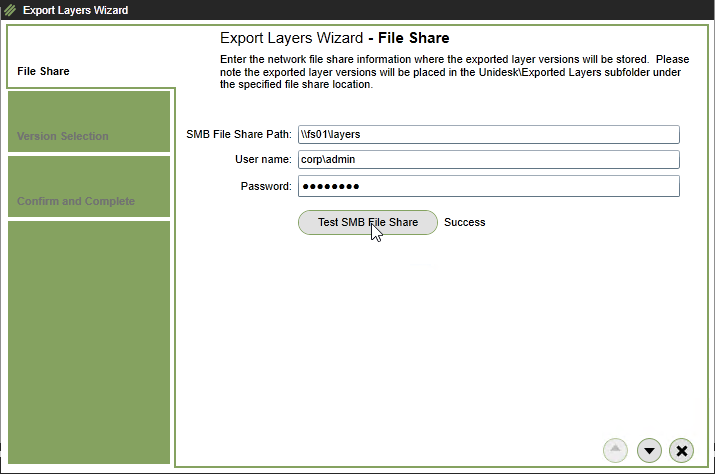
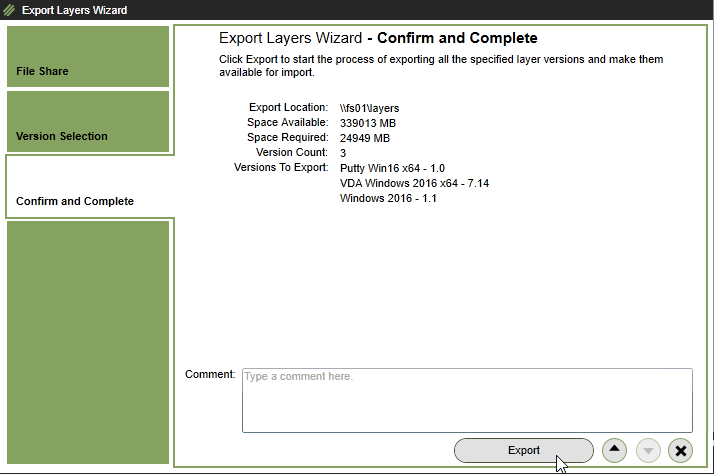
- ELM 4.5 and newer let you select the layers and versions that you want to export. Make your selections, and then click the down arrow.
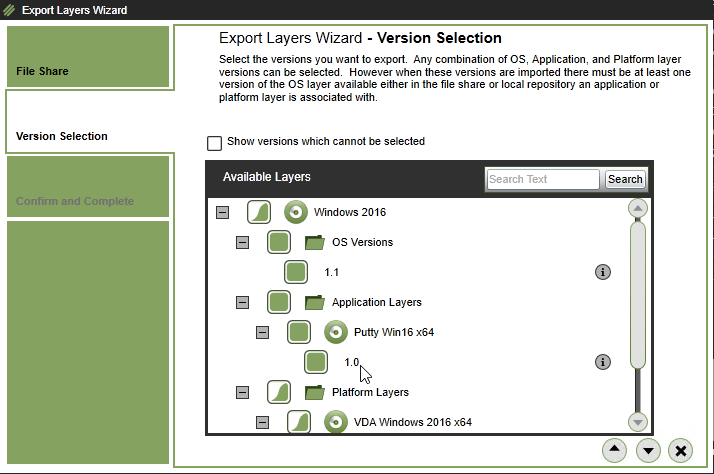
- Review the list of layers/versions it will export, and click Export.
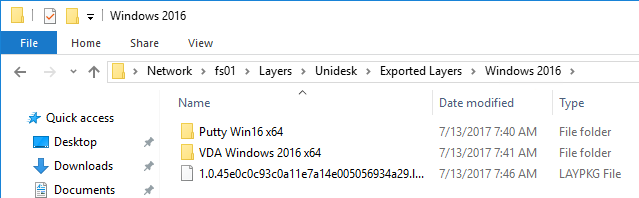
- If you look in your SMB share, in the \Unidesk\Exported Layers folder, you’ll see a folder for the OS Layer, and in there, you’ll see a folder for each Platform and Application Layer.
- After creating new layer versions, if you export layers again, it will only export the layers/versions that haven’t already been exported.

- If you right-click the background, and click Import…
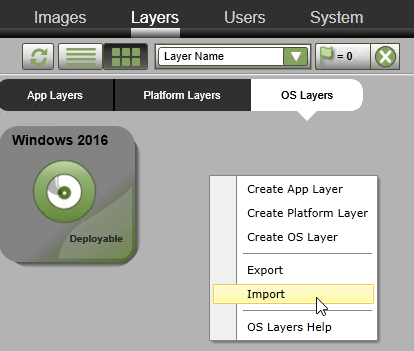
- It only imports the layers/versions that are missing.