Navigation
- Change Log
- Two common methods of installing certificates on Citrix ADC:
- Import the intermediate certificate and bind it.
- Export/Download certificate files from NetScaler
- Replace the management certificate, and then force SSL access for management.
- Update certificates before they expire.
💡 = Recently Updated
Change Log
- 2020 Dec 6 – 13.0 build 71 and newer shows SANs (Subject Alternative Names) in Certificate Details
- Updated screenshots and procedures for ADC 13
Convert .PFX Certificate to PEM Format
You can export a certificate (with private key) from Windows, and import it to Citrix ADC.
To export a Windows certificate in .pfx format
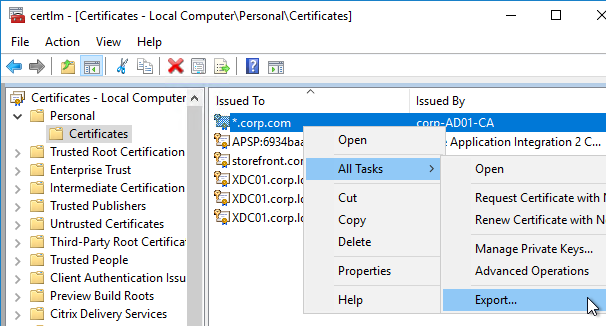
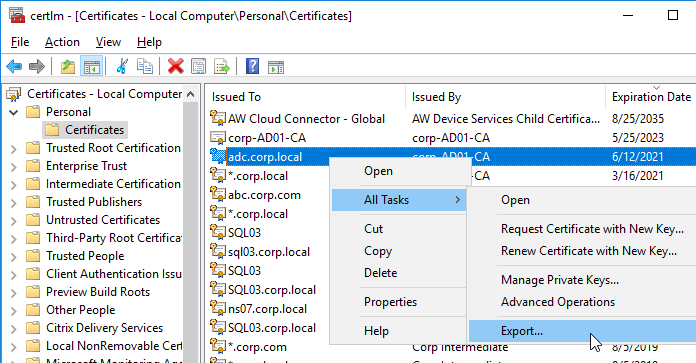
- If Windows Server 2012 or newer, on the Windows server that has the certificate, you can run certlm.msc to open the Certificates console pointing at Local Computer.
- Or, run mmc.exe, manually add the Certificates snap-in, and point it to Local Computer.
- Go to Personal > Certificates.
- Right-click the certificate, expand All Tasks, and click Export.
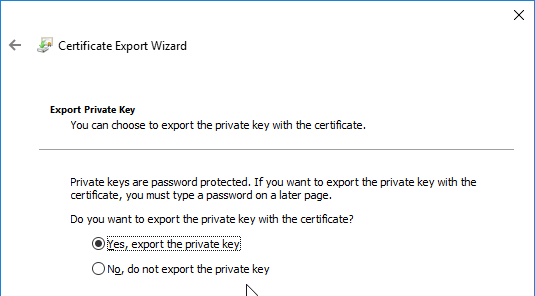
- On the Welcome to the Certificate Export Wizard page, click Next.
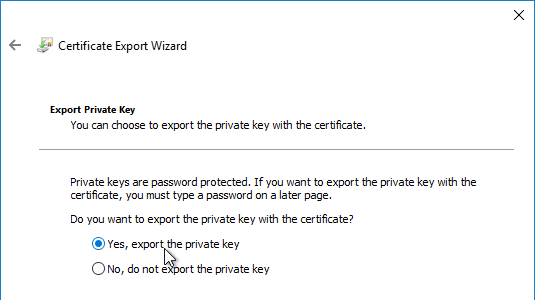
- On the Export Private Key page, select Yes, export the private key, and click Next.
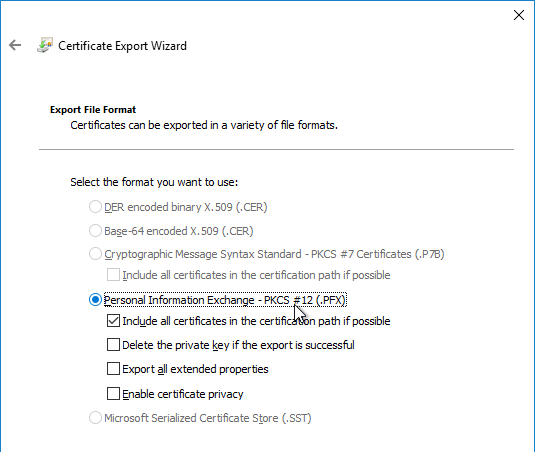
- On the Export File Format page, click Next.
- On the Security page, check the box next to Password, and enter a new temporary password. Click Next.

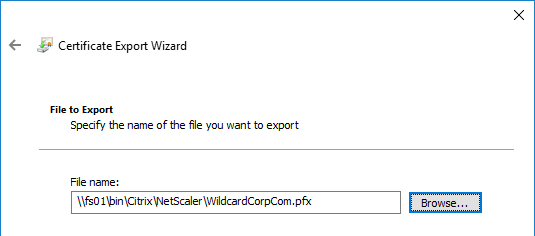
- On the File to Export page, specify a save location and name the .pfx file. Don’t put any spaces in the filename. Click Next.
- In the Completing the Certificate Export Wizard page, click Finish.
- Click OK when prompted that the export was successful.
Import a .pfx file to Citrix ADC
Citrix ADC 13 imports .pfx files and uses them in their native encrypted format.
To import the .pfx file:
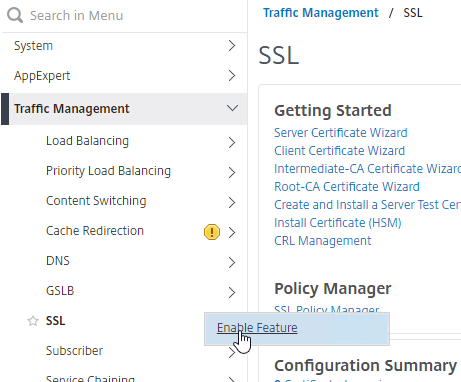
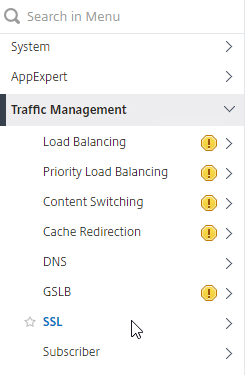
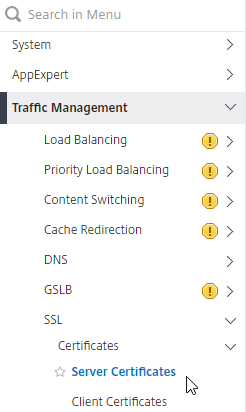
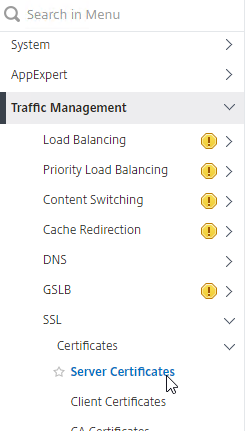
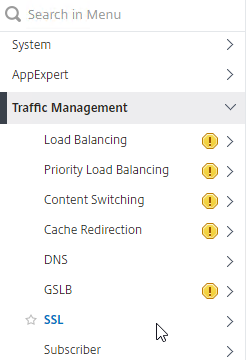
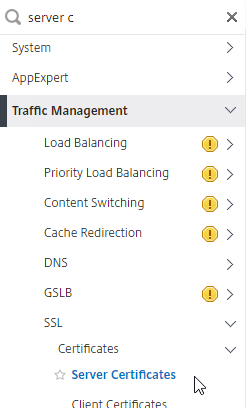
- On the Citrix ADC, expand Traffic Management, and click SSL.
- If the SSL feature is disabled, right-click the SSL node, and click Enable Feature.
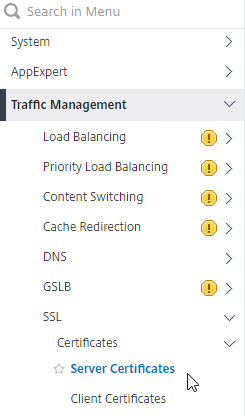
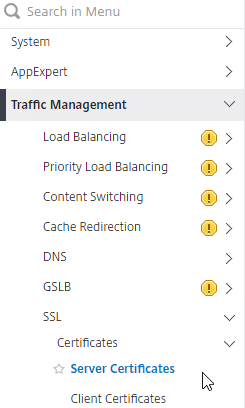
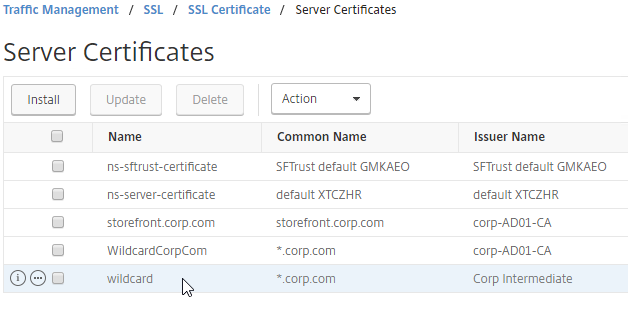
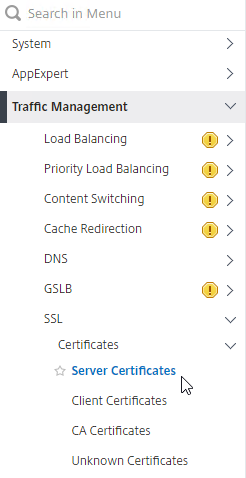
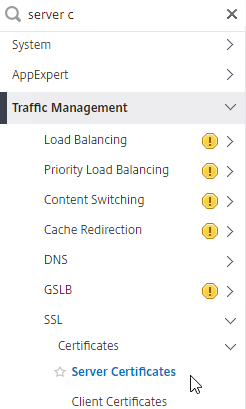
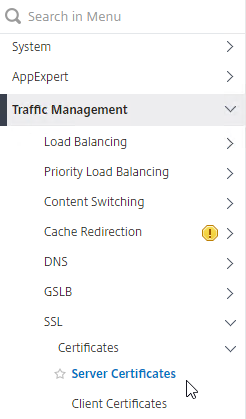
- Go to Traffic Management > SSL > Certificates > Server Certificates.
- There are four different certificate nodes:
- Server Certificates have private keys. These certificates are intended to be bound to SSL vServers.
- Client Certificates also have private keys, but they are intended to be bound to Services so Citrix ADC can perform client-certificate authentication against back-end web servers.
- CA Certificates don’t have private keys. The CA certificates node contains intermediate certificates that are linked to Server Certificates. CA certificates can also be used for SAML authentication, and to verify client certificates.
- Unknown Certificates list the certificates that don’t fall under the other categories. Some SAML certificates (e.g. Azure) show up here.
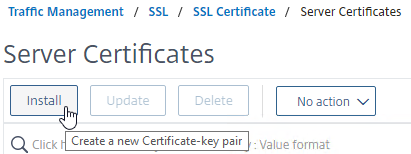
- On the left, click the Server Certificates node.
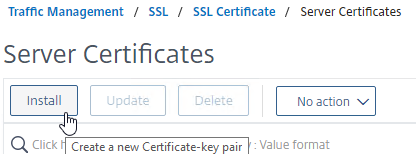
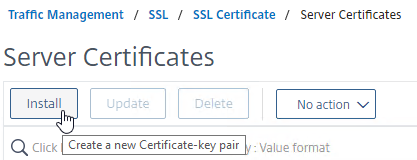
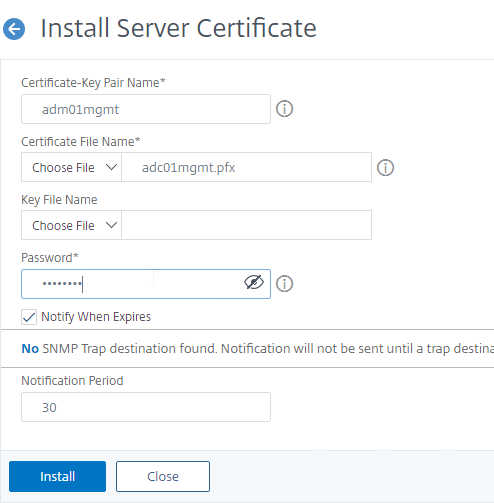
- On the right, click Install.
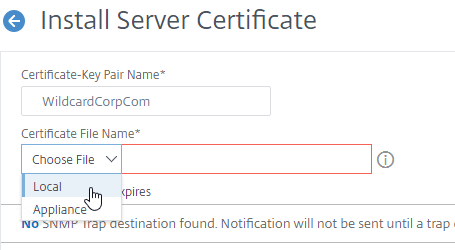
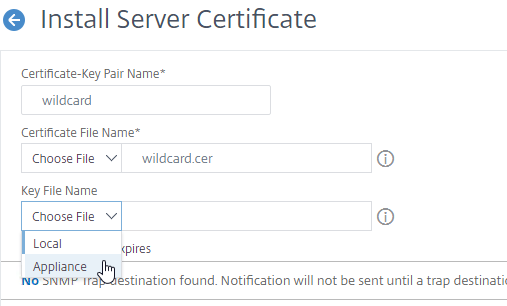
- Give the certificate (Certificate-Key Pair) a name.
- Click the drop-down next to Choose File, select Local, and browse to the .pfx file that you exported earlier.
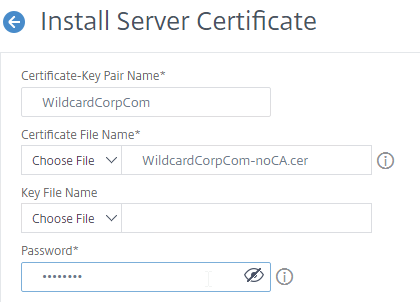
- After browsing to the .pfx file, Citrix ADC will prompt you to enter the Password for the .pfx file. Ignore the Key File Name field.
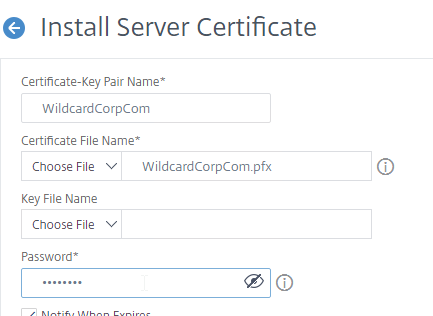
- Then click Install.

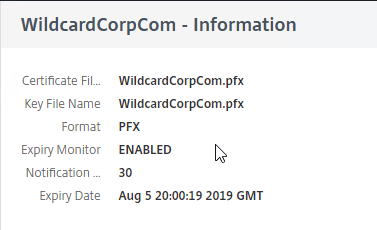
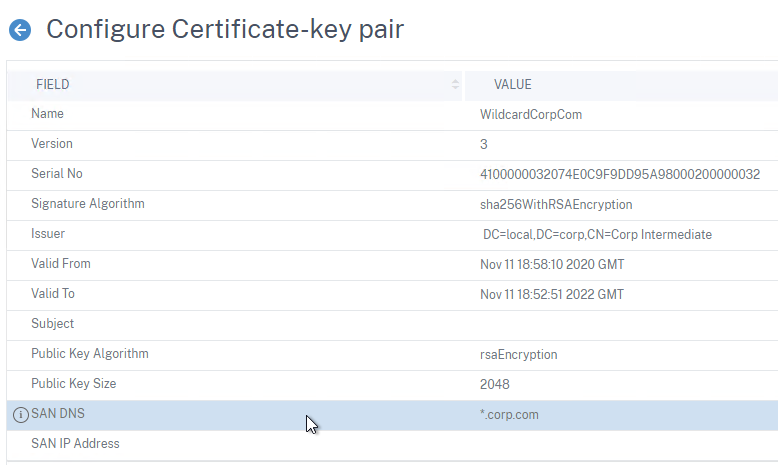
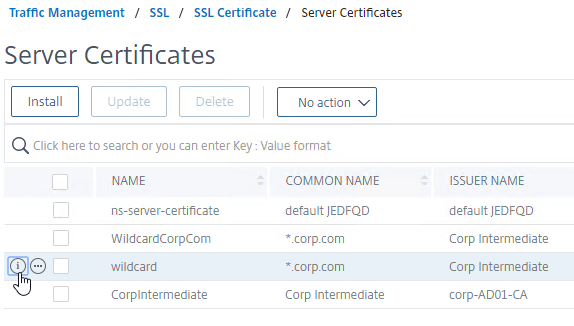
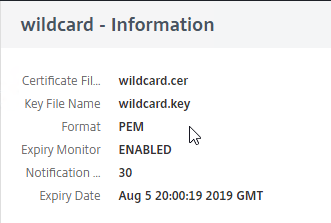
- If you click the information icon next to the new certificate…
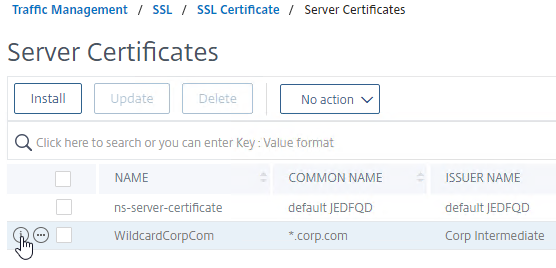
- You’ll see that Citrix ADC uses the file in native .pfx format. No PEM conversion.
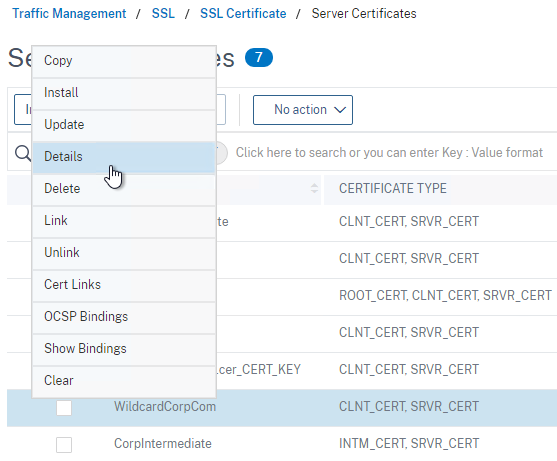
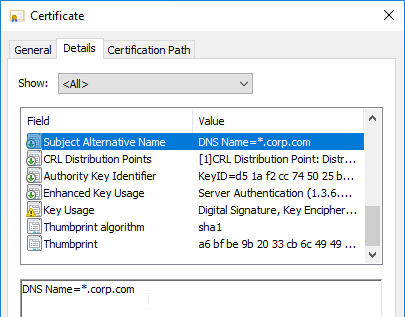
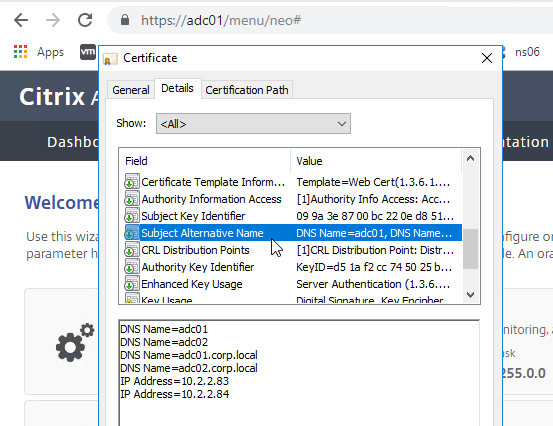
- In 13.0 build 71 and newer, if you right-click the certificate and click Details, you can see the SANs (Subject Alternative Names) in the certificate.
- You can now link an intermediate certificate to this SSL certificate, and then bind this SSL certificate to SSL and/or Citrix Gateway Virtual Servers.
- To automatically backup SSL certificates and receive notification when the certificates are about the expire, deploy Citrix Application Delivery Management (ADM). Also see Citrix CTX213342 How to handle certificate expiry on NetScaler.
To convert PFX to PEM (with Private Key encryption)
If you followed the previous section to import a .pfx in native format, then you can skip this section.
Sometimes you need to convert a .pfx file to PEM format so you can use the PEM certificate on other systems. To use Citrix ADC to convert PFX to PEM, do the following:
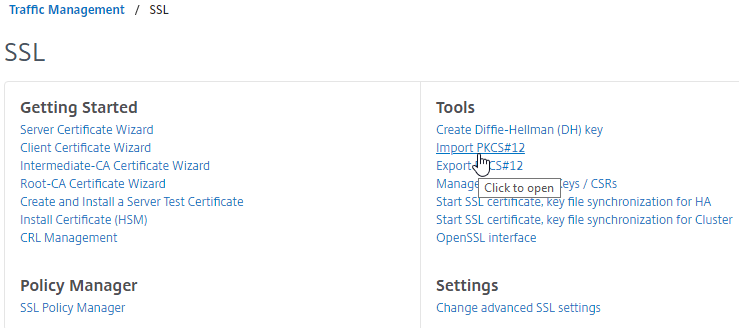
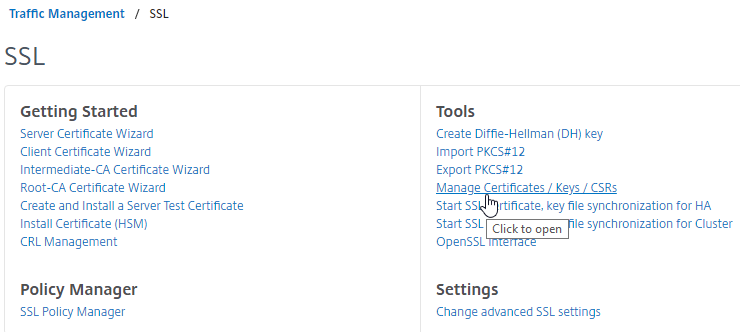
- In the Citrix ADC Configuration GUI, on the left, expand Traffic Management, and click SSL.
- In the right column of the right pane, in the Tools section, click Import PKCS#12.
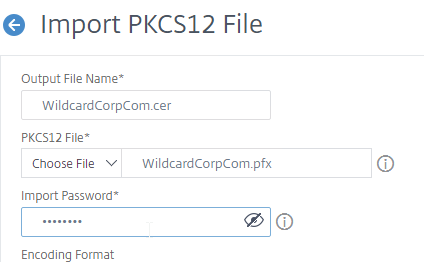
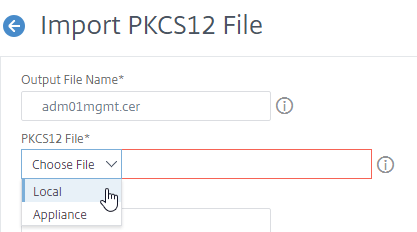
- In the Import PKCS12 File dialog box:
- In the Output File Name field, enter a name for a new file where the converted PEM certificate and private key will be placed. This new file is created under /nsconfig/ssl on the Citrix ADC appliance.
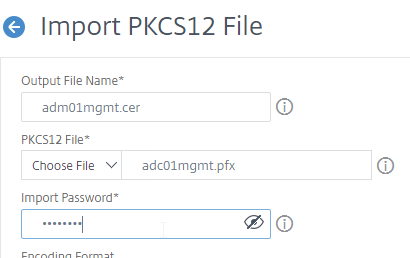
- In the PKCS12 File field, click Choose File, and browse to the .pfx file.
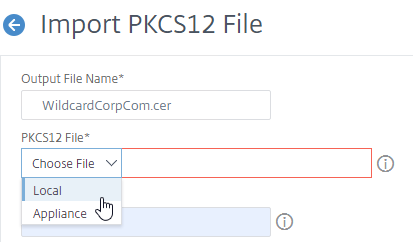
- In the Import Password field, enter the password you specified when you previously exported the .pfx file.
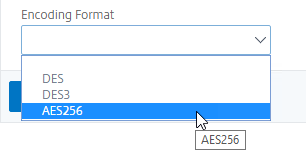
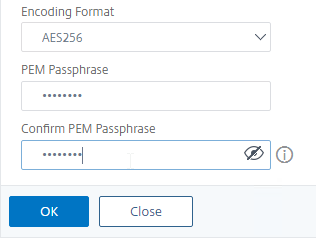
- By default, the private key in the new PEM file is unencrypted. To encrypt the private key, change the Encoding Format selection to AES256 or DES3. This causes the new PEM file to be password protected, and encrypted.
- Enter a permanent password for the new PEM file, and click OK.
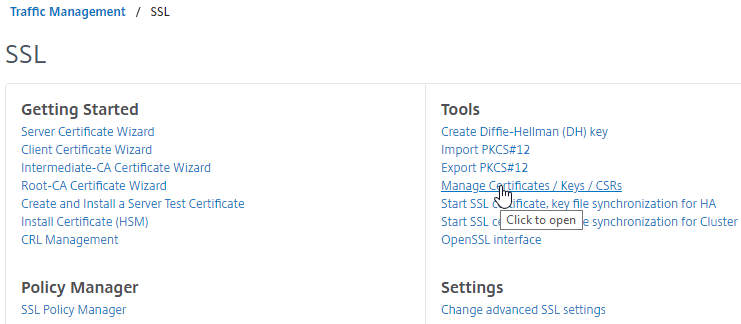
- You can use the Manage Certificates / Keys / CSRs link to view the new PEM file.
- The new file is usually at the bottom of the page.
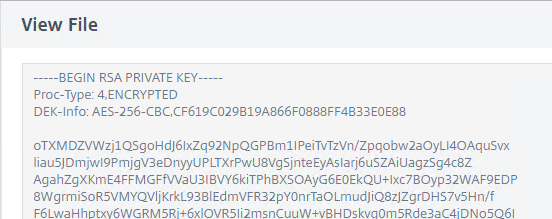
- Right-click the new file, and click View.
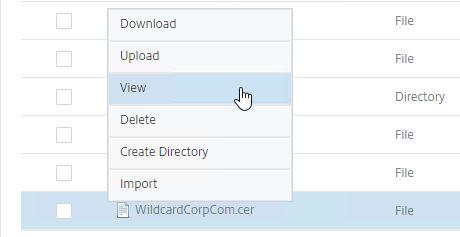
- Notice that the Private Key is encrypted.
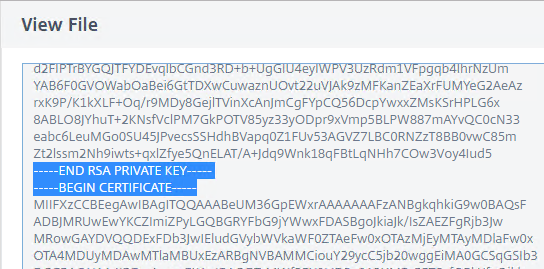
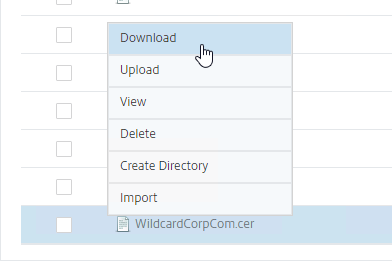
- If you scroll down, notice that the file contains both the certificate, and the RSA Private key.
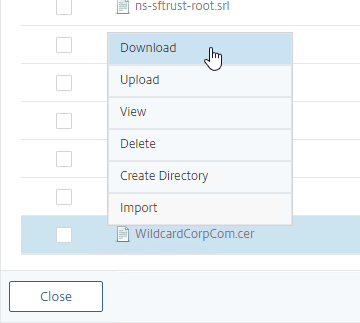
- If you want to use this PEM certificate on a different system, then you can right-click the file and Download it.
Install PEM Certificate on Citrix ADC
If you want to bind the PEM certificate to ADC SSL Virtual Servers, then you must first install the PEM certificate. Or you can import a .pfx file in native format as described earlier.
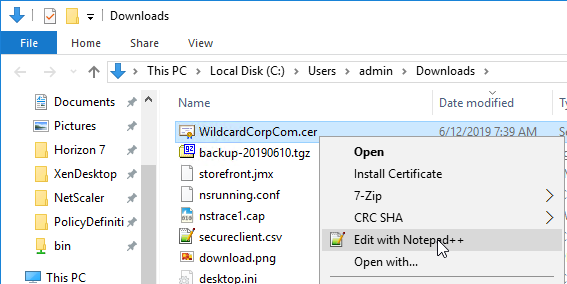
- ADC probably won’t import the PEM certificate file if it contains CA certificates. Download the PEM file.
- Edit the downloaded file.
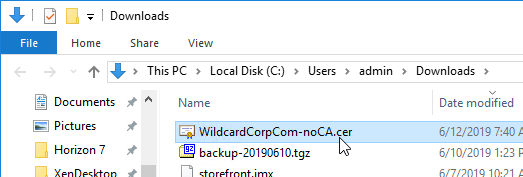
- Scroll down. Skip the first certificate. Then delete the rest of the certificates in the file. When done, you should have a Private Key and one Certificate (the first one in the file).
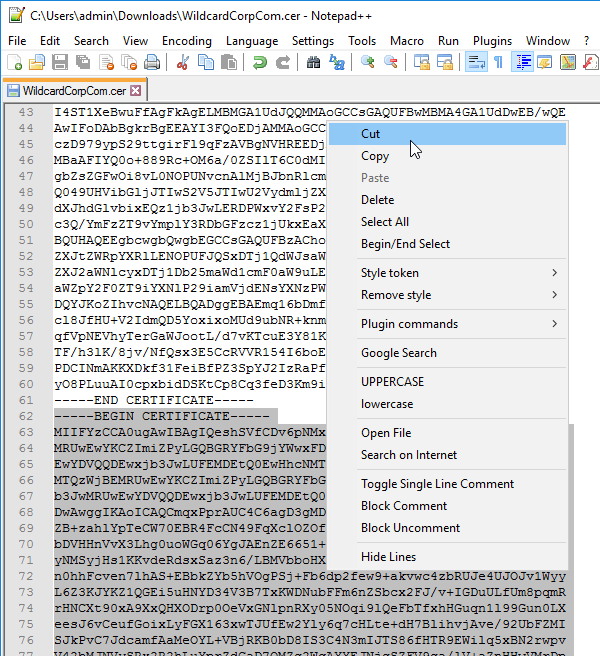
- Save the file with a new name. You can upload the file, or browse to it later when installing the certificate.
- Edit the downloaded file.
- On the left side of the Citrix ADC Configuration GUI, go to Traffic Management > SSL > Certificates > Server Certificates.
- On the right, click Install.
- In the Certificate-Key Pair Name field, enter a friendly name for this certificate.
- In the Certificate File Name field, click the drop-down next to Choose File, and select Local.
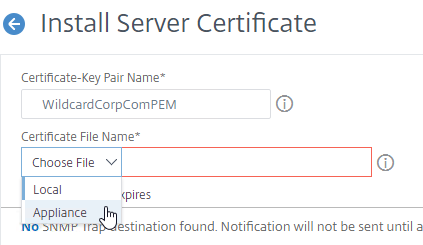
- Browse to the PEM file that you downloaded and edited to remove the CA certificates.
- Citrix ADC will ask you to enter the Password for the encrypted private key.
- Ignore the Key File Name since the converted PEM file contains both the certificate and the key.
- Click Install.

- In 13.0 build 71 and newer, if you right-click the certificate and click Details, you can see the SANs (Subject Alternative Names) in the certificate.
- You can now link an intermediate certificate to this SSL certificate, and then bind this SSL certificate to SSL and/or Citrix Gateway Virtual Servers.
- To automatically backup SSL certificates and receive notification when the certificates are about the expire, deploy Citrix Application Delivery Management (ADM). Also see Citrix CTX213342 How to handle certificate expiry on NetScaler.
- You can also export the certificate files and use them on a different Citrix ADC.
Create Key and Certificate Request
If you want to create free Let’s Encrypt certificates, see John Billekens’ PowerShell script detailed at Let’s Encrypt Certificates on a NetScaler.
You can create a key pair and Certificate Signing Request (CSR) directly on the Citrix ADC appliance. The CSR can then be signed by an internal, or public, Certificate Authority.
Most Certificate Authorities let you add Subject Alternative Names when creating (or purchasing) a signed certificate, and thus there’s no reason to include Subject Alternative Names in the CSR created on Citrix ADC. You typically create a CSR with a single DNS name. Then when submitting the CSR to the Certificate Authority, you type in additional DNS names.
- For a Microsoft Certificate Authority, you can enter Subject Alternative Names in the Attributes box of the Web Enrollment wizard.
- For public Certificate Authorities, you purchase a UCC certificate or purchase a certificate option that lets you type in additional names.
To create a key pair on Citrix ADC
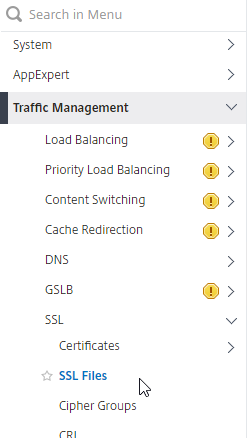
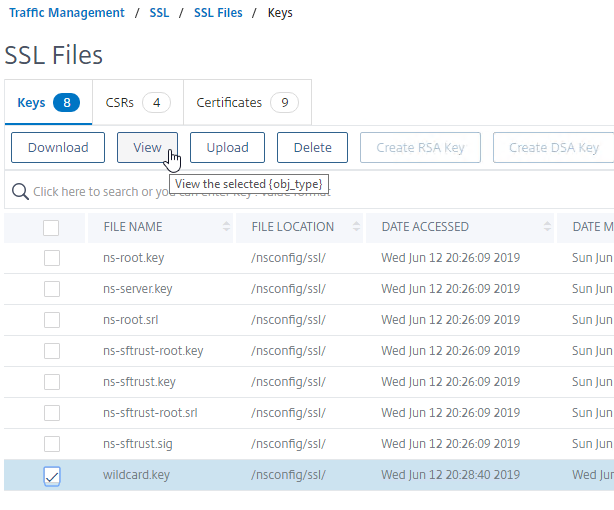
- On the left, expand Traffic Management, expand SSL, and click SSL Files.
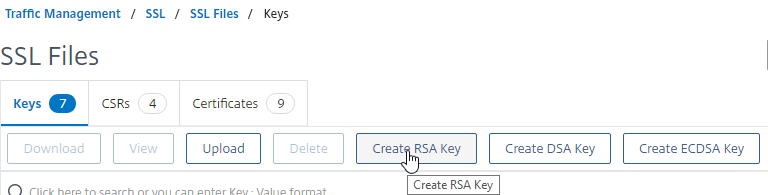
- On the right, switch to the tab named Keys.

- Click the button named Create RSA Key.
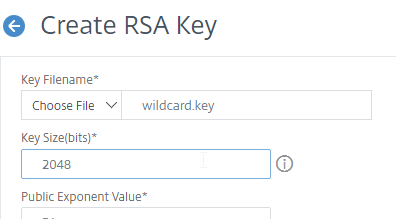
- In the Key Filename box, enter a new filename (e.g. wildcard.key). Key pair files typically have a .key extension.
- In the Key Size field, enter 2048 bits.
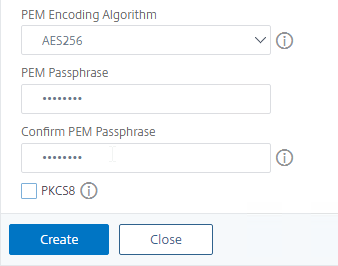
- By default, the private key is unencrypted. To encrypt it, set the PEM Encoding Algorithm drop-down to AES256 or DES3.
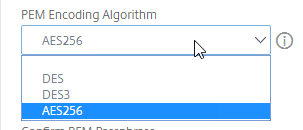
- Enter a password to encrypt the private key.
- Click Create.
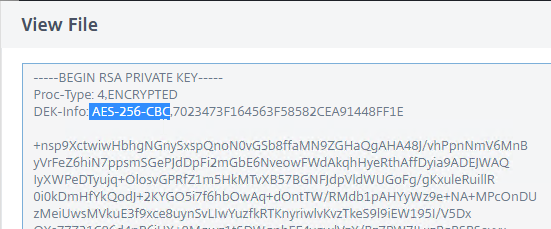
- The new file is probably at the bottom of the list. Select it and click the button named View.
- The Private Key should be encrypted with your chosen encoding algorithm.
To create CSR file
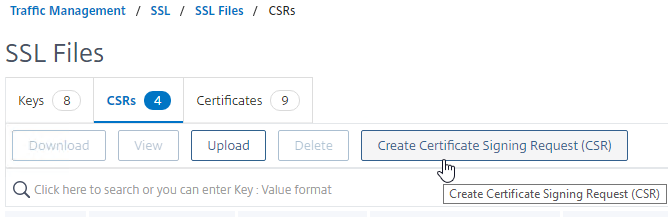
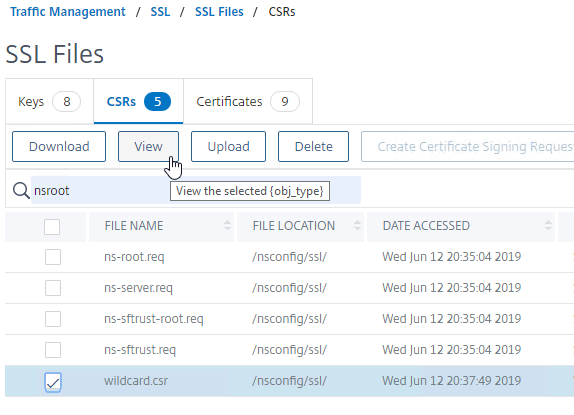
- Back in the SSL Files page, on the right, switch to the tab named CSRs.
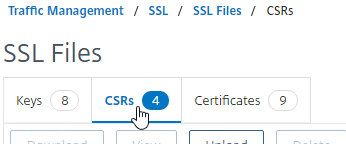
- Click the button named Create Certificate Signing Request (CSR).
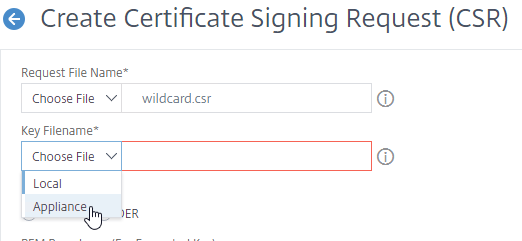
- In the Request File Name field, enter the name of a new CSR file. CSR files typically have .csr or .txt extension.
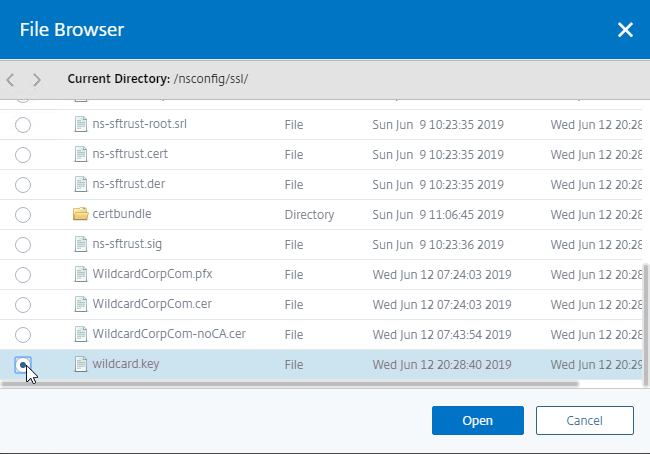
- In the Key Filename field, click Choose File (Appliance) and select the previously created .key file. It’s probably at the bottom of the list.
- If the key file is encrypted, enter the password.
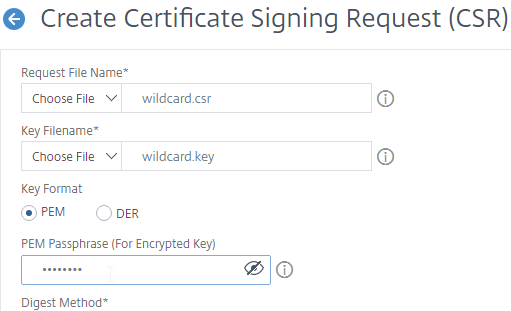
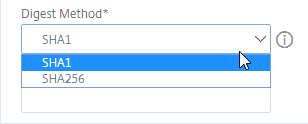
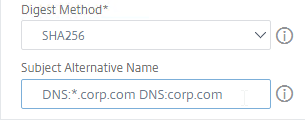
- You can optionally change the CSR Digest Method to SHA256. This only applies to the CSR and does not affect the CA-signed certificate.
- Citrix ADC 13 lets you specify up to three Subject Alternative Names in the CSR. Some Certificate Authorities ignore this field and instead require you to specify the Subject Alternative Names when purchasing the signed certificate. See CTX232305 How to create a SAN CSR in NetScaler 12.0 57.19.
- In the Common Name field, enter the FQDN of the SSL enabled-website. If this is a wildcard certificate, enter * for the left part of the FQDN. This is the field that normally must match what users enter into their browser address bars.
- In the Organization Name field, enter your official Organization Name.
- Enter IT, or similar, as the Organization Unit.
- Enter the City name.
- In the State field, enter your state name without abbreviating.

- Scroll down and click Create.

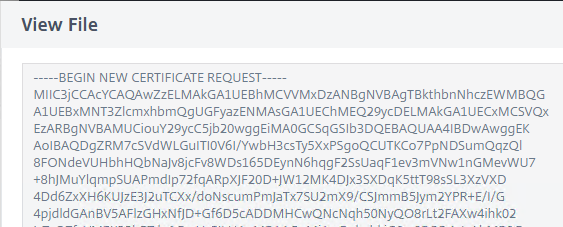
- The new CSR file is at the bottom of the list. You can select the new .csr file, and click the buttons named View or Download.
Get CSR signed by CA, and then install certificate on Citrix ADC
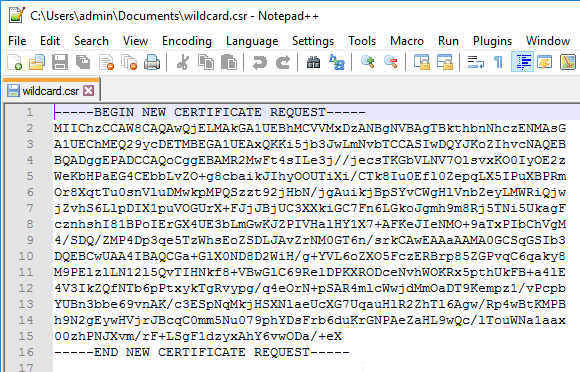
- View the CSR file or open the downloaded .csr file with Notepad, and send the contents to your Certificate Authority.
- Chrome requires every certificate to have at least one Subject Alternative Name that matches the FQDN entered in Chrome’s address bar. Public CAs will handle this automatically. But for Internal CAs, you typically must specify the Subject Alternative Names manually when signing the certificate.

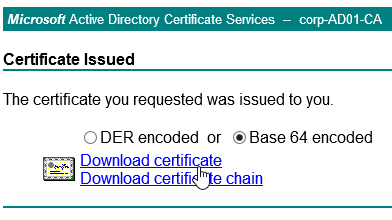
- If the CA asks you for the type of web server, select Apache, or save the CA response as a Base 64 file.
- Chrome requires every certificate to have at least one Subject Alternative Name that matches the FQDN entered in Chrome’s address bar. Public CAs will handle this automatically. But for Internal CAs, you typically must specify the Subject Alternative Names manually when signing the certificate.
- After you get the signed certificate, on the left side of the Citrix ADC Configuration GUI, expand Traffic Management > SSL > Certificates, and click Server Certificates.
- On the right, click Install.
- In the Certificate-Key Pair Name field, enter a friendly name for this certificate.
- In the Certificate File Name field, click the drop-down next to Choose File, and select Local.

- Browse to the Base64 (Apache) .cer file you received from the Certificate Authority.
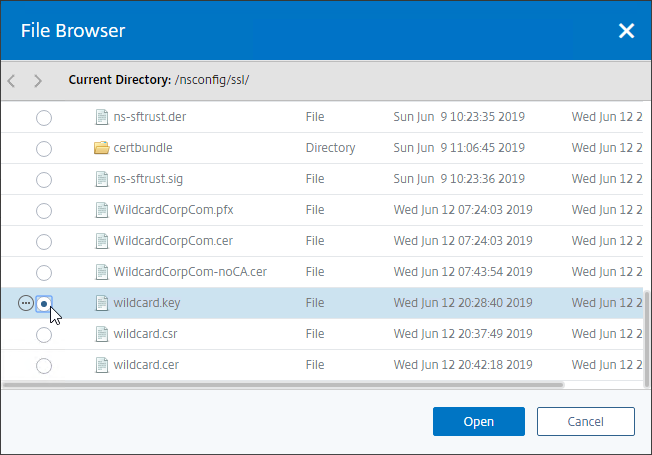
- In the Key File Name field, click the drop-down next to Choose File, and select Appliance.
- Select the key file you created earlier, and click Open. It’s probably at the bottom of the list.
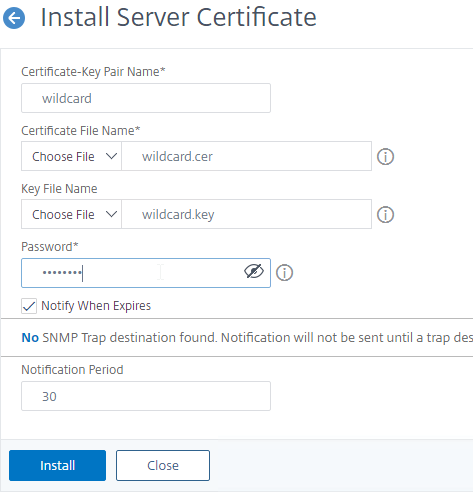
- If the key file is encrypted, enter the password.
- Click Install.
- The certificate is now added to the list.
- In 13.0 build 71 and newer, if you right-click the certificate and click Details, you can see the SANs (Subject Alternative Names) in the certificate.
- You can now link an intermediate certificate to this SSL certificate, and then bind this SSL certificate to SSL and/or Citrix Gateway Virtual Servers.
- To automatically backup SSL certificates and receive notification when the certificates are about the expire, deploy Citrix Application Delivery Management (ADM). Also see Citrix CTX213342 How to handle certificate expiry on NetScaler.
- You can also export the certificate files and use them on a different Citrix ADC.
Intermediate Certificate
If your Server Certificate is signed by an intermediate Certificate Authority, then you must install the intermediate Certificate Authority’s certificate on the Citrix ADC. This Intermediate Certificate then must be linked to the Server Certificate.
Get the correct intermediate certificate
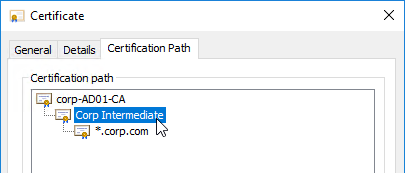
- Log into Windows, and double-click the signed certificate file.

- On the Certification Path tab, double-click the intermediate certificate (e.g. Go Daddy Secure Certificate Authority. It’s the one in the middle).
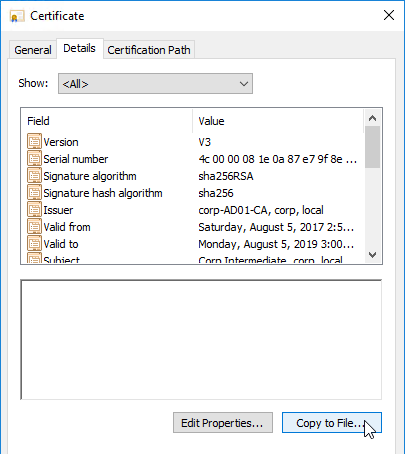
- On the Details tab, click Copy to File.
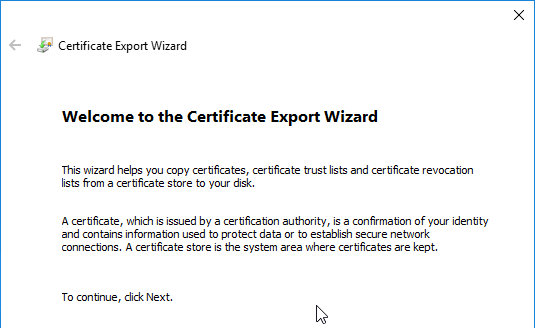
- In the Welcome to the Certificate Export Wizard page, click Next.
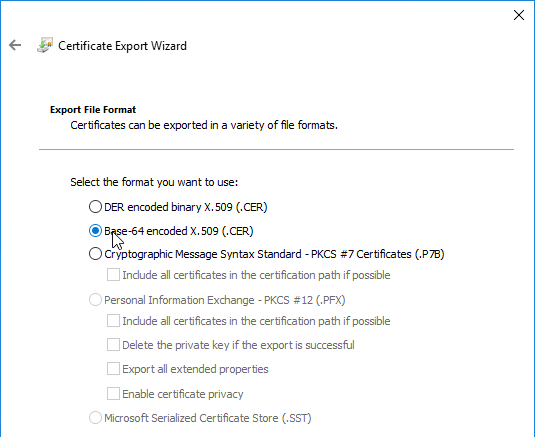
- In the Export File Format page, select Base-64 encoded, and click Next.
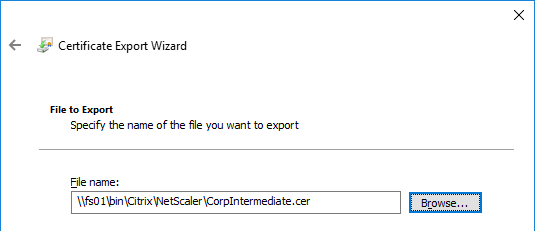
- Give it a file name, and click Next.
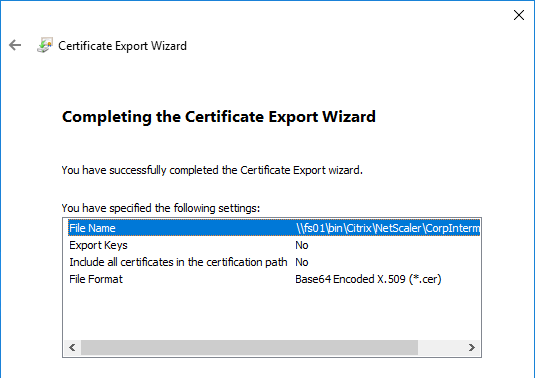
- In the Completing the Certificate Export Wizard page, click Finish.
To import the intermediate certificate
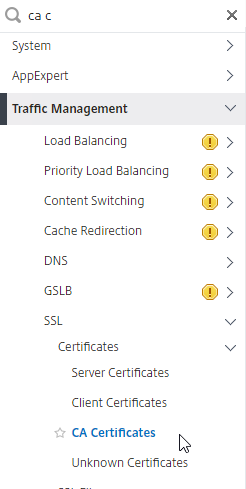
- In the Citrix ADC configuration GUI, expand Traffic Management, expand SSL, expand Certificates, and click CA Certificates.
- On the right, click Install.
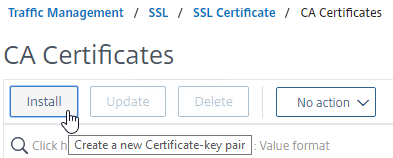
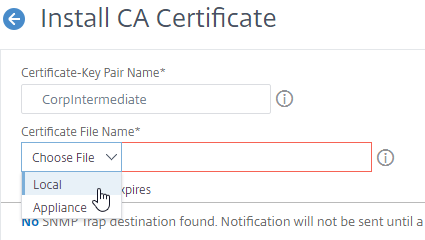
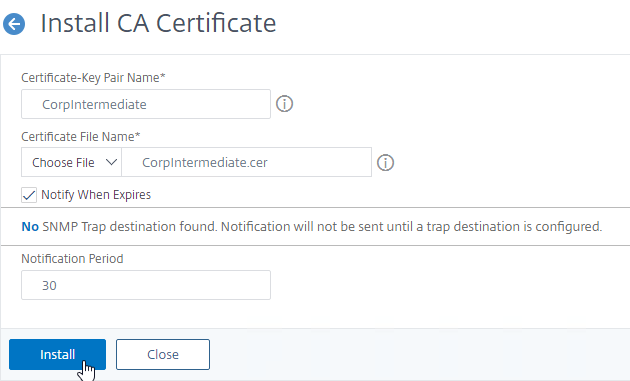
- Name it Intermediate or similar.
- Click the arrow next to Choose File, select Local, and browse to the Intermediate certificate file and open it.
- Click Install.
Link Intermediate Certificate to Server Certificate
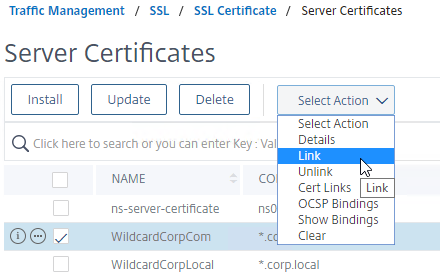
- Go back to Traffic Management > SSL > Certificates >Server Certificates.
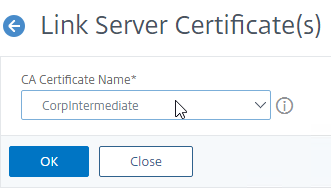
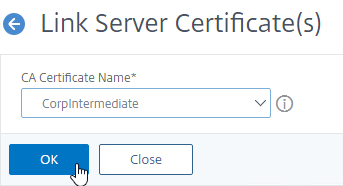
- On the right, right-click the server certificate, and click Link.
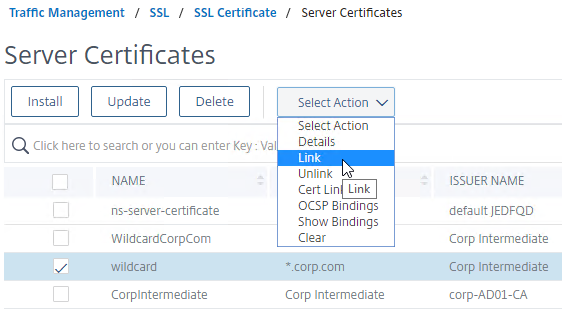
- The previously imported Intermediate certificate should already be selected. Click OK.
- You might be tempted to link the Intermediate certificate to a Root certificate. Don’t do this. Root certificates are installed on client machines, not on Citrix ADC. Citrix ADC must never send the root certificate to the client device. If you run ssllabs.com against your website, SSL Labs might show Contains anchor. If so, then you linked your intermediate to your root when you shouldn’t have.

Export Certificate Files from Citrix ADC
You can easily export certificate files from the Citrix ADC, and import them to a different Citrix ADC.
- In the menu, expand Traffic Management, expand SSL, expand Certificates, and click one of the certificate types.
- Move your mouse over the certificate you want to export, and then click the information icon on the far left.
- Note the file names. There could be one file name or two file names.
- On the left, go to Traffic Management > SSL.
- On the right, in the right column, click Manage Certificates / Keys / CSRs.
- Find the file(s) in the list, right-click the file, and click Download.
- You can only download one file at a time.
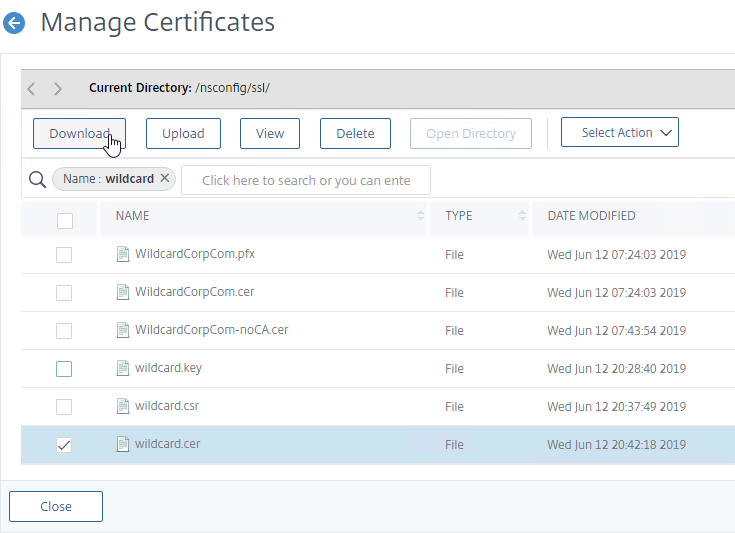
- In the search area, you can enter “Name:myfilename” to filter the list.
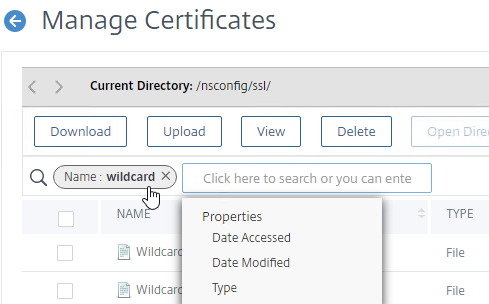
- You might have to increase the number of files shown per page, or go to a different page.

- You can only download one file at a time.
- Also download the files for any linked intermediate certificate.
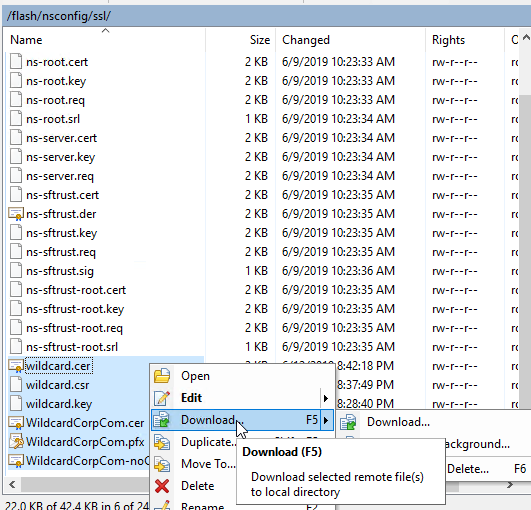
- You can also use WinSCP to download the SSL certificate files from /nsconfig/ssl.
- You can now use the downloaded files to install certificates on a different Citrix ADC.
Replace Management Certificate
You can replace the default management certificate with a new trusted management certificate.
High Availability – When a management certificate is installed on one node of a High Availability pair, the management certificate is synchronized to the other node and used for the other node’s NSIP too. So make sure the management certificate matches the DNS names of both nodes. This is easily doable using a Subject Alternative Name certificate. Here are some SAN names the management certificate should match (note: a wildcard certificate won’t match all of these names):
- The FQDN for each node’s NSIP. Example: adc01.corp.local and adc02.corp.local
- The shortnames (left label) for each node’s NSIP. Example: adc01 and adc02
- The NSIP IP address of each node. Example: 192.168.123.14 and 192.168.123.29
- If you enabled management access on your SNIPs, add names for the SNIPs:
- FQDN for the SNIP. Example: adc.corp.local
- Shortname for the SNIP. Example: adc
- SNIP IP address. Example: 192.168.123.30
If you prefer to create a separate management certificate for each HA node, then see CTP George Spiers How to secure management access to NetScaler and create unique certificates in a highly available setup.
Request Management Certificate
If you are creating a Subject Alternative Name certificate, it’s probably easiest to request a SAN certificate from an internal CA using the MMC Certificates snap-in on a Windows box.:
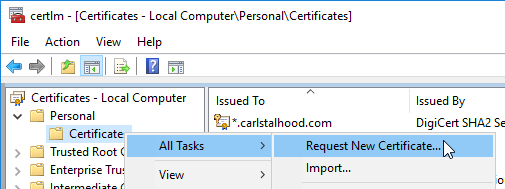
- Open the MMC certificates snap-in by running certlm.msc on a Windows 2012 or newer machine.
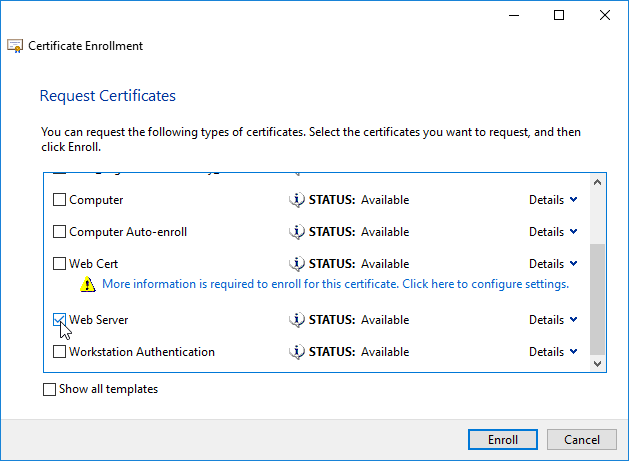
- Go to Personal, right-click Certificate, expand All Tasks, and click Request New Certificate.
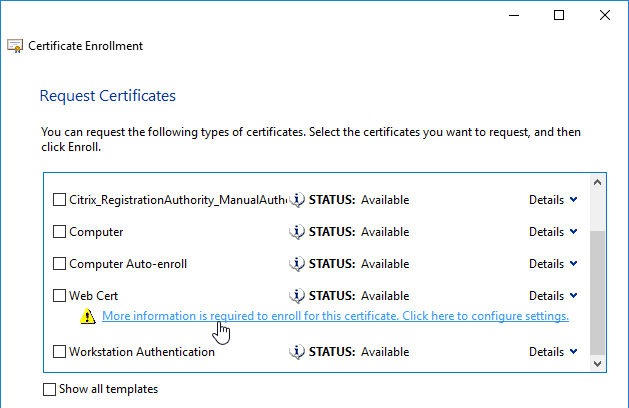
- A web server certificate template should let you specify subject information.
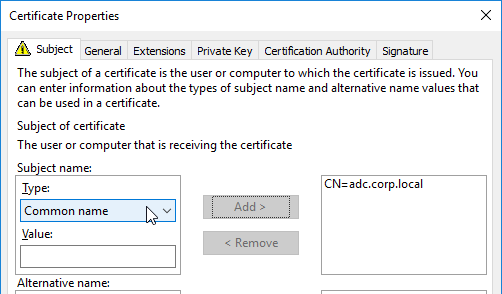
- In the top half, change the Subject name > Type drop-down to Common Name. Enter a DNS name, and click Add to move it to the right.
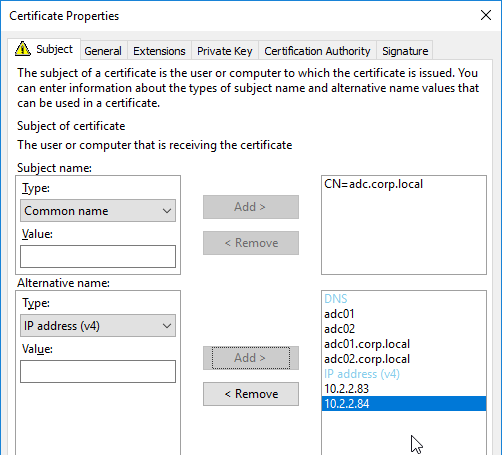
- In the bottom half, change the Alternative Name > Type drop-down to either DNS or IP address (v4).
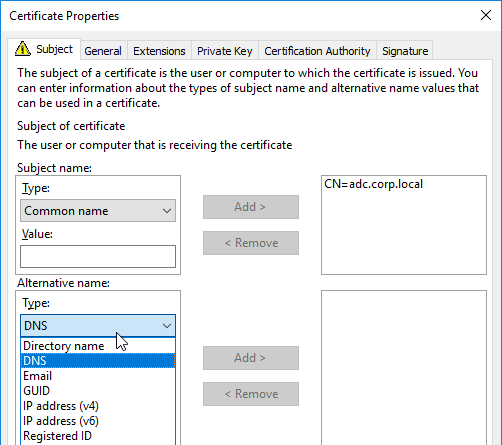
- Type in different names or IPs as detailed earlier, and click Add to move them to the right.
- Switch to the tab named Private Key.
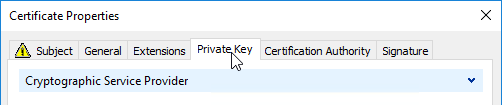
- Expand Key Options, and make sure Mark private key as exportable is checked.
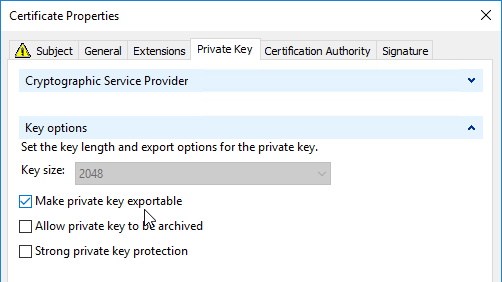
- Click OK. Then finish Enrolling the certificate.
- Export the certificate and Private Key to a .pfx file.
- Then follow one of the procedures below to replace the ADC’s management certificate.
Methods of replacing the Management Certificate
There are two methods of replacing the management certificate:
- In the Citrix ADC GUI, right-click ns-server-certificate, and click Update. This automatically updates all of the Internal Services bindings too. This method is intended for dedicated management certificates, not wildcard certificates. Notes:
- You cannot rename the ns-server-certificate in the Citrix ADC GUI. It remains as ns-server-certificate.
- ns-server-certificate cannot be bound to Virtual Servers, so make sure you are replacing it with a dedicated management certificate.
- Or manually Bind a new management certificate to each of the Internal Services.
Update Certificate Method
The Update Certificate button method is detailed below:
- The Update method doesn’t work with .pfx files so you’ll first have to convert your .pfx to PEM.
- In the Citrix ADC Configuration GUI, on the left, expand Traffic Management, and click SSL.
- In the right column of the right pane, in the Tools section, click Import PKCS#12.
- In the Output File Name field, enter a name for a new file where the converted PEM certificate and private key will be placed. This new file is created under /nsconfig/ssl on the Citrix ADC appliance.
- In the PKCS12 File field, click Choose File, and browse to the .pfx file.
- In the Import Password field, enter the password you specified when you previously exported the .pfx file.
- By default, the private key in the new PEM file is unencrypted. To encrypt the private key, change the Encoding Format selection to AES256 or DES3. This causes the new PEM file to be password protected, and encrypted.
- Enter a permanent password for the new PEM file, and click OK.
- In the Citrix ADC Configuration GUI, on the left, expand Traffic Management, and click SSL.
- You can’t update the certificate while connected to the Citrix ADC using https, so make sure you connect using http.
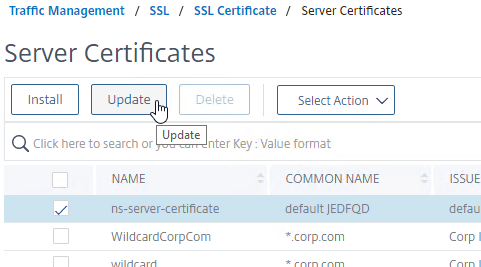
- On the left, expand Traffic Management, expand SSL, expand Certificates, and click Server Certificates.
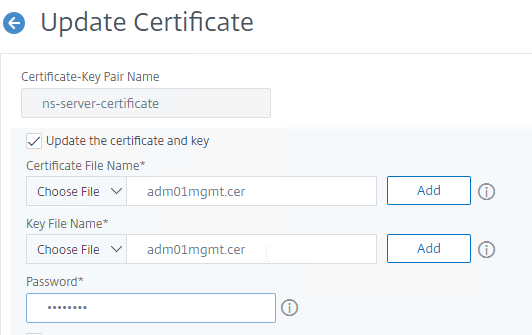
- On the right, right-click ns-server-certificate, and click Update.
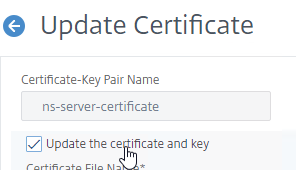
- Check the box next to Click to update the certificate and key.
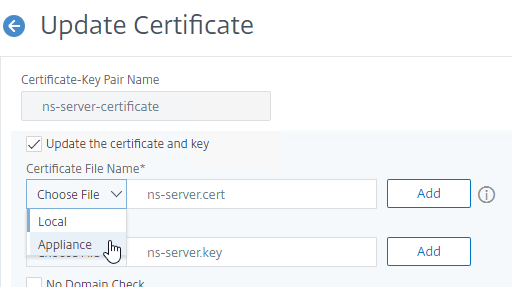
- Click Choose File, and browse to the new PEM (not PFX) management certificate. It could be on the appliance, or it could be on your local machine.
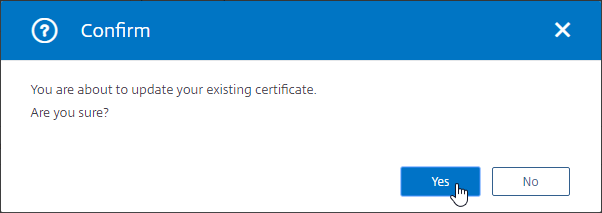
- Click Yes to update the certificate.
- For the Key File Name, browse to the same PEM certificate file.
- If the PEM private key is encrypted, enter the password.
- Check the box next to No Domain Check. Click OK.
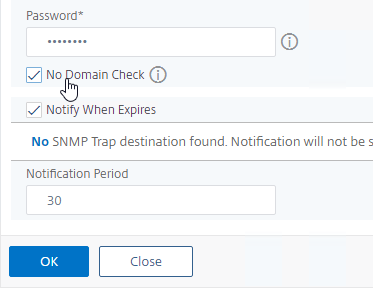
- You can now connect to the Citrix ADC using https protocol. The certificate should be valid (no certificate errors).
Manual Binding Method
The manual Binding to Internal Services method is detailed below:
- You can’t update the certificate while connected to the Citrix ADC using https, so make sure you connect using http.
- On the left, expand Traffic Management, expand SSL, expand Certificates, and click Server Certificates.
- On the right, use the Install button to install the new management certificate, which can be .pfx format, or PEM format.

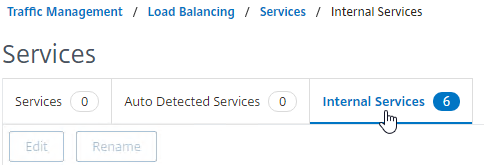
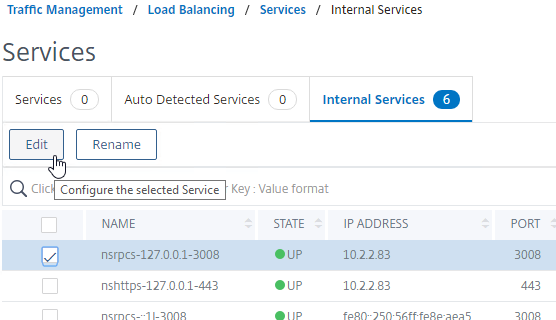
- In the menu, expand Traffic Management, expand Load Balancing, and click Services.
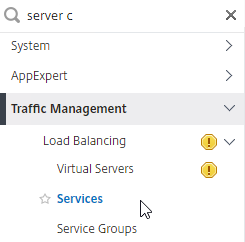
- On the right, switch to the tab named Internal Services.
- Right-click one of the services, and click Edit.

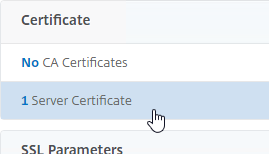
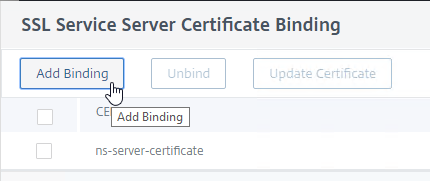
- Scroll down to the Certificate section and click where it says 1 Server Certificate.
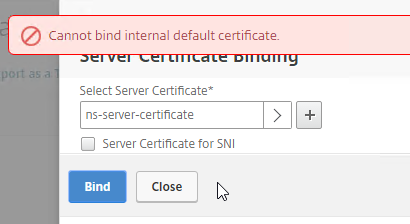
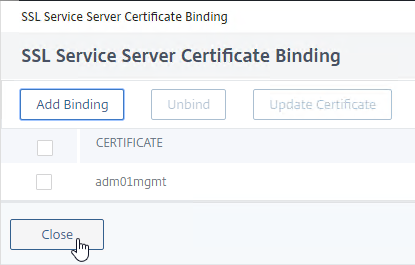
- Click the button named Add Binding.
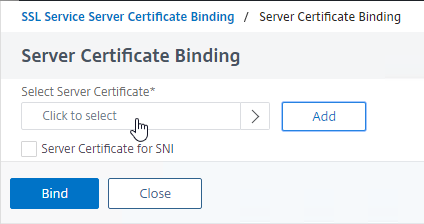
- In the Select Server Certificate field, click where it says Click to select.
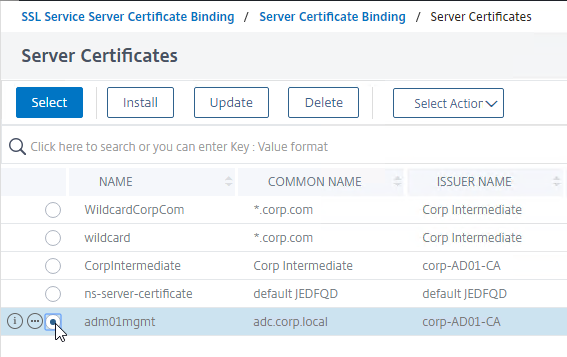
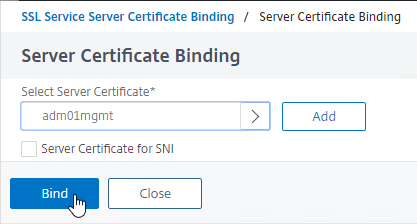
- Click the small circle next to the new management certificate and then click the blue Select button at the top of the page.
- Click Bind.
- Click Close.
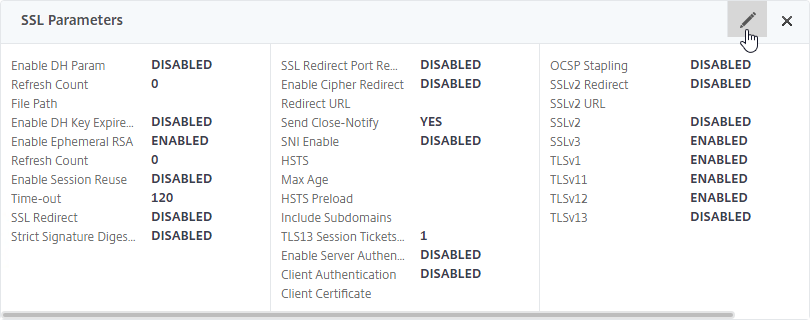
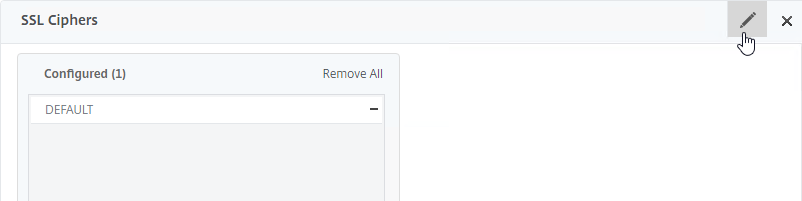
- If Default SSL Profile is not enabled, then you can modify the SSL Parameters and/or Ciphers on each of these Internal Services to disable SSLv3 and bind stronger ciphers.
- Repeat for each of the rest of the internal services. There should be at least 6 services. Additional Internal Services are created for SNIPs that have management access enabled.
Force Management SSL
By default, administrators can connect to the NSIP using HTTP or SSL. This section details how to disable HTTP.
- Connect to the NSIP using https.
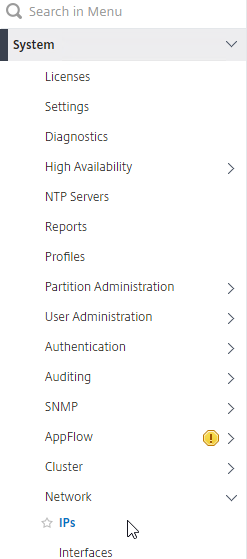
- On the left, expand System, expand Network, and click IPs.
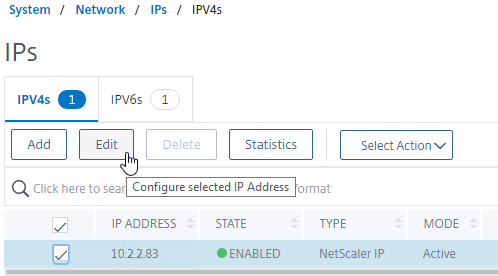
- On the right, right-click your NetScaler IP, and click Edit.
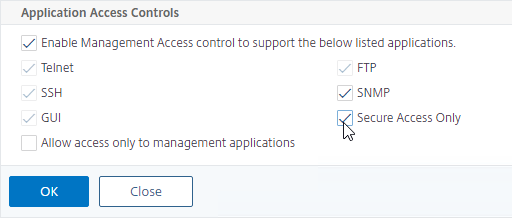
- Near the bottom, check the box next to Secure access only, and then click OK.
set ns ip 10.2.2.126 -gui SECUREONLY
- Repeat this procedure on the secondary appliance.
- Repeat for any SNIPs that have management access enabled.
Also see:
- Citrix CTX204217 How to redirect users from HTTP to HTTPS while accessing NSIP/Management IP. Requires a Responder policy, and a nsapimgr command.
SSL Certificate – Update
There are two options for updating a certificate:
- Create or Import a new certificate to Citrix ADC > Traffic Management > SSL > Certificates > Server Certificates. Then find all of the places the original certificate is bound, and manually replace the original certificate binding with the new certificate. This method is obviously prone to errors.
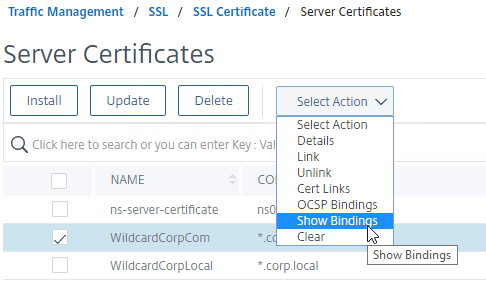
- You can right-click a certificate and click Show Bindings to see where the certificate is being used.
- You can right-click a certificate and click Show Bindings to see where the certificate is being used.
- On Citrix ADC, simply right-click the existing certificate, and click Update. This automatically updates all of the bindings. Much faster and easier.
To update a certificate using the Update method:
- Create an updated certificate, and export it as .pfx file (with private key). Don’t install the certificate onto Citrix ADC yet, but instead, simply have access to the .pfx file.
- In Citrix ADC, navigate to Traffic Management > SSL > Certificates > Server Certificates.
- On the right, right-click the certificate you intend to update, and click Update.

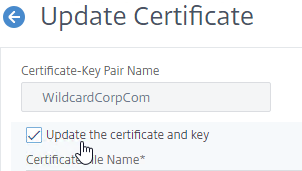
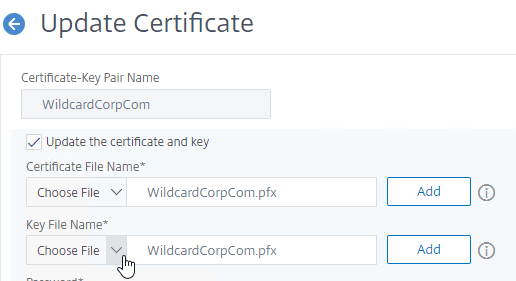
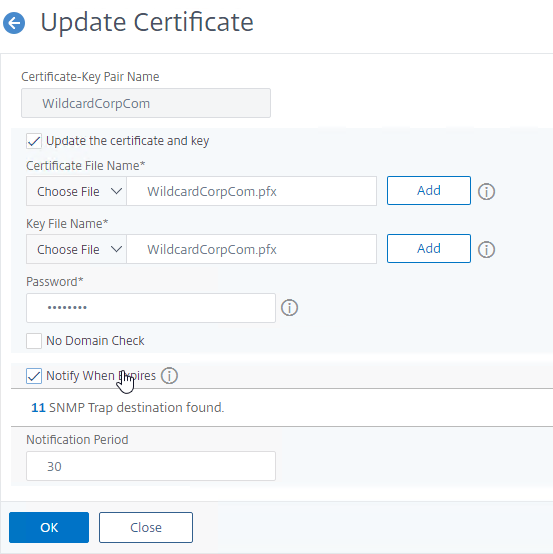
- Check the box next to Update the certificate and key.
- Click Choose File > Local, and browse to the updated .pfx file.
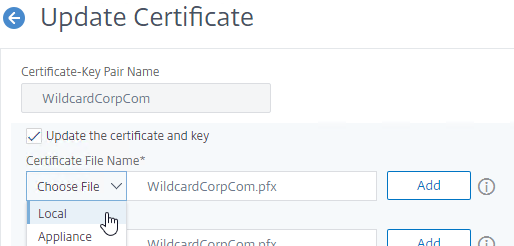
- For Key File Name, browse to the same .pfx file.
- Enter the .pfx file password.
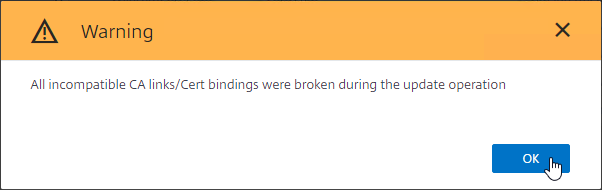
- Click OK. This will automatically update every Virtual Server on which this certificate is bound.
- Click OK when told that cert links were broken.
- Intermediate certificate – After replacing the certificate, you might have to update the cert link to a new Intermediate certificate.
- Right-click the updated certificate, and click Cert Links, to see if it is currently linked to an intermediate certificate.
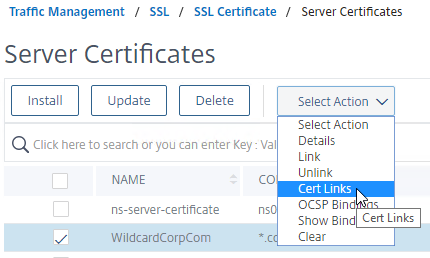
- If not, right-click the updated certificate, and click Link, to link it to an intermediate certificate. If it doesn’t give you an option to link it to, then you’ll first have to install the new intermediate certificate on the Citrix ADC.
- Right-click the updated certificate, and click Cert Links, to see if it is currently linked to an intermediate certificate.
Certificates can also be updated in Citrix Application Delivery Management (ADM).
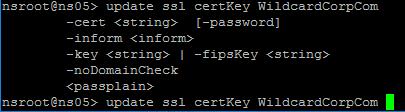
Certificates can be updated from the CLI by running update ssl certKey MyCert. However, the certificate files must be stored somewhere on the appliance, and already be in PEM format.
Hi I have been trying to setup ADC integration with Azure keyvault and I have not been successful. I want to configure automatic certificate rotation for ADC and I have not been able find any useful guide other than citrix document:
https://docs.netscaler.com/en-us/citrix-adc/current-release/fips/support-for-azure-key-vault.html
Unfortunately I have not been able to get it to connect with Azure keyvault.
I am setting up a new Service Group, the end servers are behind a proxy. Wireshark evidences SSL Fails due Incompatible CA, as the CA is a selfsigned Cert shown by the Proxy on top of the end servers.
How can I trust a Self Signed CA and use it to connect to the End Servers? Equivalent for Windows of Add a Trust CA…
Did you enable Server Authentication? https://docs.netscaler.com/en-us/citrix-adc/current-release/ssl/server-authentication.html
Hello, I don’t know if you still check comments and post replies on this, but I’m having an issue and thought it worth asking. I have two virtual ADC. I have a load balancing virtual server using SSL. I had no issues importing my wildcard PFX server certificate and linking the CA cert. I did all that and it worked great. The problem is, my two ADC are in active/passive HA. Whenever they fail over, the VIP shows down and when you look at it, the SSL certificate is not bound. When I go to select it, it’s not there. I have to add it to the Netscaler again, bind it, and then go link the CA cert to that certificate again. I thought, okay, well I just had to do it a 2nd time for the secondary node. When I did it, I made sure that it was called the exact same thing. When it failed over again, the same thing happened. I went through the same steps, and brought it back online. This time, since I knew about the issue, I did a failover manually instead of getting called and fussed at, and it did it again. I’m not sure what’s going on and really hope you might know what I might be doing wrong.
Both nodes are licensed?
If you go to System > High Availability > Nodes, do you see any synchronization errors? Is synchronization enabled?
If you go to System > Diagnostics, there’s a link to start HA files sync that will sync the certificate files. Then go back to System > High Availability > Nodes and do a Force Sync.
If I go to System > High Availability > Nodes, both have green dots, one says sync state “SUCCESS” the other says “ENABLED”. They both say “N/A” under ‘Synchronization Failure Reason’. I did just find an area under System > Diagnostics > Peer node (High Availability). There are 3 columns, ‘Saved Configuration’, ‘Running Configuration’, and ‘Correction Configuration’. At first I thought it was things that needed to be fixed for HA, but looking closer it looks like it’s settings that get applied to the secondary node so that VIPs aren’t active? I could be wrong, but every single command in that column is either an rm or an unset. And it’s for a bunch of other services I’m not having issues with (the ones with the SSL cert are the only ones where I am not just doing a bridge or redirect and have the SSL cert bound to the VIP.
I have also gone into ‘Traffic Management’ > ‘SSL’ > ‘Tools’ > ‘Start SSL certificate key file synchronization for HA’. It says it runs automatically, but I ran it manually anyway, and receive no errors, warnings, or any type of feedback.
ADC sometimes in relation to certificates behaves oddly – I have had couple very weird issues with certificates.
Check
– certificate files in /nsconfig/ssl they are same on both nodes
– ns.conf add ssl certKey multiple configuration entries does not refer to same certificate file
– cetificate file does not contain some unusual charactes (e.g. ‘+’)
– length of certficate name or file name is not 32 characters long – one of weird issue is related to that limit
Such certificate issue can be validated on secondary node.
If you are missing some certificate in GUI take related configuration entry (add ssl certkey) and try to apply it manually in CLI. I guess your will receive error:
ERROR: Resource already exists [certkeyName Contents, ]
Try to use shorter cert/file name.
Please save running configuration before doing force failover
Hello,
I’m trying to install Let’s Encrypt certificate on my ADC like other certificate importing files…., then binding to my VS which is act as ICA proxy, sites load perfectly user can login an click on application starting to load after some seconds workspace client displays an error :The remote SSL peer sent an handshake failure alret!
Only one thing is different in letsencrypt cert compare to old one which works without error is the public key Algorithm is Elliptic Curve on new certificate, i’ve already enabled ECC on vs.
is there anything i should check or configure for letsencrypt certificate ?
Regards
ECDSA ciphers configured? https://docs.netscaler.com/en-us/citrix-adc/current-release/ssl/ciphers-available-on-the-citrix-ADC-appliances/ecdsa-cipher-suite-support-on-mpx-appliances.html
Yes configured and error is same!
Hi Carl,
When I tried to import a .pem certificate into my VPX (NS13.0 88.12.nc) I got the message “Unable to parse certificate bundle file”. I’m looking for this kind of message on the citrix support site, but I didn’t find any solution or workaround for it.
Could you help me, please?
Thanks
It usually means the password for the key is incorrect.
Sometimes it works from the CLI but not from the GUI.
We LB Exchange 2016 on our Netscaler. We have a SSL Cert bound to a content switch. They are renewing that cert (Exchange) next week, I was told by another admin that he had problems importing that cert into Netscaler. He can’t recall what the issue was……any ideas? I was hoping to just add the cert and key file. Current cert is in PEM format. Is it a potential issues as the cert request is from IIS? Thanks.
You can do try the normal method of updating certs in ADC. Right-click the server cert and click Update. Browse to the certificate and key files.
IIS is normally .pfx. ADC also supports .pfx.
If updating from GUI doesn’t work, then I do it from CLI: update ssl certKey
Ok, thank-you.
Thanks Carl! This info really helped me.
Hi, Carl!
Here’s a weird one I’m hoping you can help with. It’s about how SNI-bound wildcard certificates work …. or don’t.
Basic setup:
1x SSL CSW Virtual Server that front-ends some web apps with specific SSL requirements.
1x SSL profile bound to the CSW that has SNI enabled and Client Auth MAndatory (again, special SSL requirements)
1x Default-bound Wildcard cert for “*.domain.tld” bound to the CSW.
1x SNI-bound Wildcard cert for “*.domain.tld” bound to the CSW
1x SNI-bound app cert for “app.domain.tld” bound to the CSW (but from a different issuer than the wildcard)
I’m chasing a two-prong issue:
1. First issue: when a client makes a request to “app.domain.tld,” sometimes they get the correct, SNI-bound certificate back. Sometimes they get the “*.domain.tld” wildcard. I have not determined a pattern on when it does or doesn’t do this, and I can’ tell *which* of the wildcard bindings it’s resolving to do this. Is there a way to tell? Also, how is it making this decision?
2. If I unbind the SNI-bound “*.domain.tld” wildcard, so that all that is left is the SNI-bound app cert and the Default wildcard, it fixes the clients in #1, but then other clients asking for “app2.domain.tld,” which previously just used the wildcard, now start failing TLS handshakes with “Unrecognized name.”
This happens on both 12.1 and 13.0 coded instances. The symptom *looks* like the issue in CTX206768, but as noted, the firmware is way newer than when they first introduced SAN support for SNI-bound certificates, so I can’t imagine that’s the issue.
I’m stumped. I knew a long time ago that I had to double-bind my wildcard on SNI-enabled virtual servers, else I’d experience weird issues like this. But the specific SSL requirements on this particular service really drew out this problem, and I’m having to look at it more closely. All documentation seems to think that enabling SNI in the profile, binding it to the CSW, binding my wildcard as default, and then SNI binding the app-specific certificates should create the correct chain of resolution, but …that definitely doesn’t seem to be the case, and I’m at a loss as to why.
Hoping you have some ideas. :[
Thanks in advance!
Hi Carl – firstly thanks very much for these guides. I’ve used similar ones from yourself in the past and find them to be very thorough and give good tips and gotchas.
Just one query I have…
At our company we always just buy a brand new cert SSL cert every year to replace the current one on our Netscaler as we find it works out cheaper (this is what I mean when I refer to ‘certificate renewal’ below).
I’ve got notes from when we did the SSL certificate renewal on our old on-prem Netscaler which required the conversion of the .pfx to .pem first and then using that .pem certificate as the one to bind to the SSL virtual servers. One of the first steps to renewing the SSL cert on that NetScaler was to run through the Certificate Export wizard on the server used to create the CSR, exporting as a .pfx file with the private key. The notes specifically mention to untick the option “Include all certificates in the certification path if possible” in the Certificate Export wizard.
Would this have been necessary because of the conversion to the .pem file on the NetScaler (which we did via the NetScaler’s web GUI’s “Import PKCS#12” option)?
I see that your screenshot for the same page on the Certificate Export Wizard has the option ticked instead and wondered if you could elaborate on this. Is this because of ADC 13 now being able to handle .pfx files natively (i.e. no need to convert to .pem)?
Also, does that option mean it won’t be necessary to manually import the separate intermediary certificate we’ve also received from our certificate supplier?
We are now using Citrix ADC 13 VPX and intend to renew the certificate by importing the new .pfx file and using that natively (no conversion to .pem), so just looking for clarification on this so I can update our notes on the renewal process.
In theory you can just browse to your PFX and ADC should handle it. However, I’ve had many problems with ADC handling of PFX certs. Sometimes it works, sometimes it doesn’t. On a 12.1 build, I recently had to convert PFX to PEM and then delete all of the chain certs in the converted PEM before it would let me install it. In other cases I had to use CLI instead of GUI to get it to work.
If the PFX has the chain, ADC might import the intermediate, but I would still confirm that it’s actually linked. Right-click the Server Certificate and click Cert Links to confirm.
Thanks very much Carl. Do I install any intermediate certificates under the “Server Certificates” page on the NetScaler rather than the CA Certificates page?
Also is there any need to install certificates under the Client Certificates node? I don’t think we have in the past.
CA Certificates is the typical place.
Client Certificates are usually only used to authenticate to back-end servers.
Thanks Carl
Just trying to get my head around the certification path validation. When I renew the SSL certificate on our Citrix StoreFront server, is it true the StoreFront server presents that certificate to the Citrix ADC and that the Citrix ADC must have a local copy of all certificates listed in the certification path of that presented copy (all of which are linked together) and if it can’t find all of them, it will not trust it?
I’ve got a bit of an oddity…
The new public certificate I downloaded from GoDaddy has three entries listed in the Certification path as follows (from Root CA at top):
1. Go Daddy Root Certificate Authority – G2
2. Go Daddy Secure Certificate Authority – G2
3. SSL certificate (wildcard domain name)
After I completed the CSR on the IIS server I used for the renewal, I then exported it as a .PFX, including private key so that it can then be installed on the Citrix ADC.
However, when I install that PFX file into any Certificate Store on a windows machine, open its Properties and look at the Certification Path, it’s got an additional top-level entry in the certificate path – a “Class 2” certificate:
1. Go Daddy Class 2 Certification Authority
2. Go Daddy Root Certificate Authority – G2
3. Go Daddy Secure Certificate Authority – G2
4. SSL certificate (wildcard domain name)
I this something I should be worried about and is there something I might be missing in the steps for exporting the PFX file from the IIS server prior to import on the Citrix ADC? e.g. should I not be ticking the option to export all possible certificates in the certificate path?
I’d be happy to send a comparison screenshot if the two certificates if there’s a way to do so.
The ADC does not verify certificates presented by back-end servers so ADC doesn’t care if they are trusted or not.
On ADC, import your server certificate, import the Go Daddy Secure Certificate Authority – G2, and then link the server cert to the intermediate. Don’t link any other certificates. ADC will download the server cert and the intermediate cert to the clients. The client will then find a local root cert that signed the intermediate.
Some CAs have cross-signed roots for greater compatibility with client devices. If you link the ADC’s intermediate cert with Go Daddy Root Certificate Authority – G2 then ADC will download that one to the client too. If Go Daddy Root Certificate Authority – G2 is self-signed, then probably nothing different will happen. However, if the ADC’s version of Go Daddy Root Certificate Authority – G2 is cross-signed (different Issuer than subject), then clients will then try to find a different local root cert that signed it.
Carl,
Love your How to’s. I followed your how to last year when I set up our citrix environment and it worked beautifully. It is now a year later and the *xxxx.local wildcard cert has expired and when it did all the apps from the storefront and the director web console stopped over the 3rd shift which was awful. When I got in the next morning I quickly updated the cert via Netscaler–>Traffic Management–>SSL–>SSL Certificate–>Server Certificates. Changed to the new cert on the citrix servers via ISS and restarted ISS.
The problem I have is I still get the message that the site is not secure when I open storefront from a web browser. Also the Director web console Cannot Retrieve any data and basically is useless for administrating anything.
I feel like I did something wrong when I made the new *xxxx.local wildcard cert? Or I’m missing a step and i need to restart or rebind something somewhere. Any help would be greatly appreciated.
Again you are a rock star in the IT crowd I roll in. We all think you are the expert to go to. Thanks again
Citrix Netscaler Gateway version: NS13.0 41.28
When i replace the default certificate and browse to the admin interface bij any of the san DNS names i get the following error:
ERR_SSL_UNRECOGNIZED_NAME_ALERT
When I connect by IP all is ok and my machine trusts the certificate I made with our internal CA which is correctly offered by the NS gateway.
The certificate has the fqdn and short names for the nsips and snip (mgmt access enabled).
And the IPv4 IP entries.
The snip fqdn is the common name.
Services use the default ns frontend profile.
Any idea why/what this could be?
Did you bind the new cert as an SNI cert instead of a Default non-SNI cert? Did you enable SNI on the Internal Services?
As per your instructions I used the update ns-server-certificate, I did not see a way to enable SNI using this method. The default services use the default frontend ssl profile, which has SNI enabled. I cannot add SNI to the ns-server-certificate.
I suspected SNI also, but there just does not seem to be a way to use SNI on the ns-server-certificate itself.
Try uploading a new certificate and swapping out the certificate on the Internal Services.
I tried to add it to snip (management enabled) first to not lose my connection. When binding the certificate directly and selecting SNI i get the following error:
Cannot bind SNI cert on an internal and backend service. SNI cert can be bound only to SSL vserver.
If i do not select SNI i get the same SSL error as before:
ERR_SSL_UNRECOGNIZED_NAME_ALERT
Any thoughts after this?
Is Default SSL Profile enabled? If so, is SNI enabled in the default profile?
Since i cannot reply, no reply button, to your last post i do it here.
Reply to October 28, 2019 at 7:00 am question.
ns_default_ssl_profile_frontend SSL profile used with SNI enabled.
Hi Carl,
I too tried to import a .pfx file but I still get the key-section in the GUI. I could convert the PFX to PEM and had to extract the key manually to install the certificate (ADC 13.0.41.20.nc). It seems to work this way but way from easy.
Regards, Stefan
The key field appears even if not needed. You should be able to ignore the field (leave it blank).
Hi
trying to install .pfx in server certificates on ADC 13 but the browser spinning and finally nothing installed. (I had tried edge,mozilla, IE)
Also from CLI after the cert uploaded with WinCSP the commande add cert key didn’t recognize the password field.
Is something changed on ADC 13 about this? On many previous version I used the same procedure with success
Does the password have special characters? Try a simpler password.
Thanks very much Carl ,
exactly this was the issue too many special characters
Regards
Hi , What was the certificate format? what template was used ?. DigiCert start issuing public TLS/SSL certificates from G2 root and intermediate CA certificate hierarchies. that can be cause . when you are creating certificate can replace with old template .
or
Upgrade to the latest version of Receiver to verify if this resolves the issue.
If you are using SHA2 certificates then the older version of Receiver does not support these certificate. Refer to CTX200114 – Citrix Receiver Support for SHA-2 to view the Receiver versions which supports SHA-2 certificates.
If this does not resolve the issue then proceed to the next section.
For information on Receiver feature updates refer to – Citrix Receiver Feature Matrix.
Missing Root/Intermediate Certificate
This error message suggests that the client device does not have the required root certificate/intermediate certificate to establish trust with the certificate authority who issued the NetScaler server certificate.
May this will help you.