Navigation
- Monitor
- Servers
- Service Group
- Responder
- Load Balancing Virtual Server
- SSL Redirect
- SSL Warning
- CLI Commands
Monitor
- On the left, expand Traffic Management, expand Load Balancing, and click Monitors.
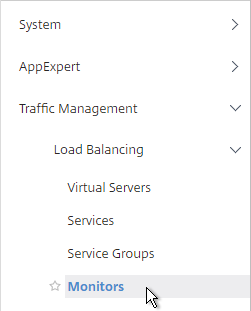
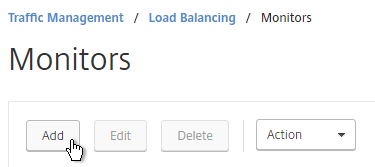
- On the right, click Add.
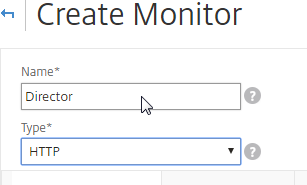
- Name it Director or similar.
- Change the Type drop-down to HTTP.
- If you will use SSL to communicate with the Director servers, then scroll down and check the box next to Secure.

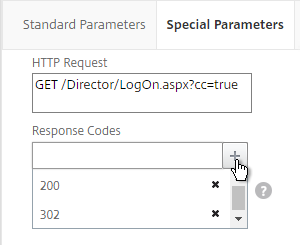
- Switch to the Special Parameters tab.
- In the HTTP Request field, enter
GET /Director/LogOn.aspx?cc=true - If Single Sign-on is enabled on Director, then you might have to add 302 as a Response Code.
- Click Create.
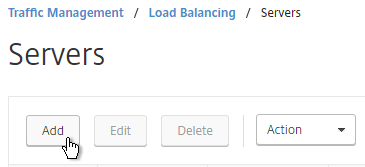
Servers
- On the left, expand Traffic Management, expand Load Balancing, and click Servers.
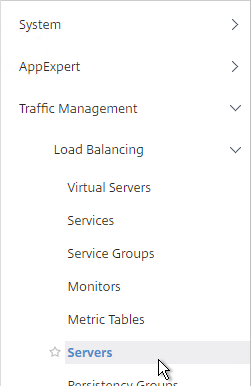
- On the right, click Add.
- Enter a descriptive server name. Usually it matches the actual server name.
- Enter the IP address of the server.
- Enter comments to describe the server. Click Create.
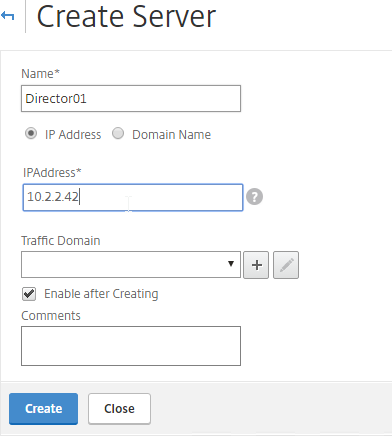
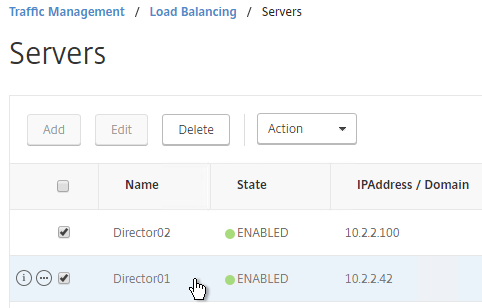
- Continue adding Director servers.
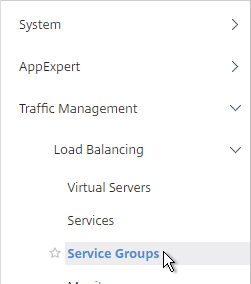
Service Group
- On the left, expand Traffic Management, expand Load Balancing, and click Service Groups.
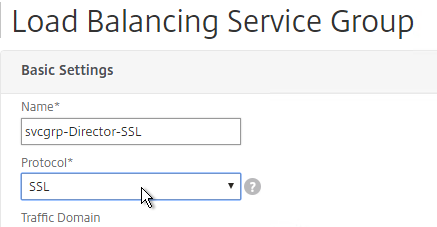
- On the right, click Add.

- Give the Service Group a descriptive name (e.g. svcgrp-Director-SSL).
- Change the Protocol to HTTP or SSL. If the protocol is SSL, ensure the Director Monitor has Secure enabled.
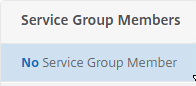
- Scroll down, and click OK.
- Click where it says No Service Group Member.
- If you did not previously create server objects, then enter the IP address of a Director Server. If you previously created server objects, then change the selection to Server Based, and select the server objects.
- Enter 80 or 443 as the port. Then click Create.
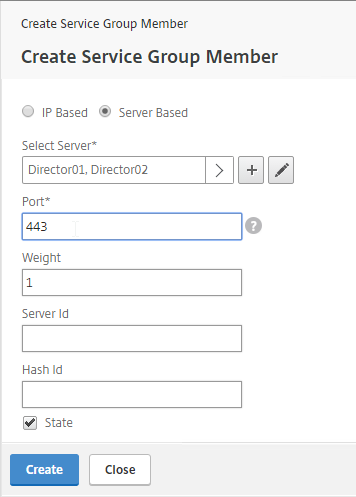
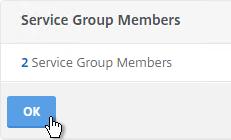
- Click OK.
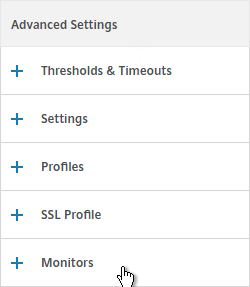
- On the right, under Advanced Settings, click Monitors.
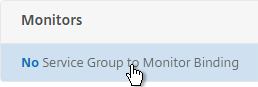
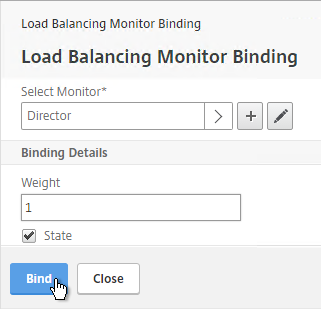
- On the left, in the Monitors section, click where it says No Service Group to Monitor Binding.
- Click the arrow next to Click to select.
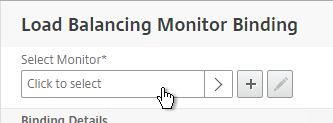
- Select the Director monitor, and click Select.
- Then click Bind.
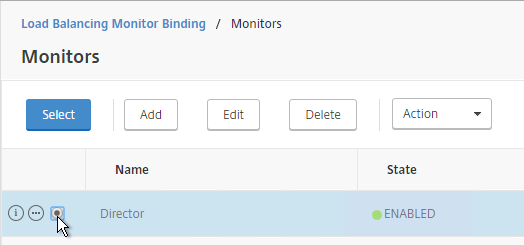
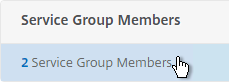
- To verify that the monitor is working, on the left, in the Service Group Members section, click the Service Group Members line.
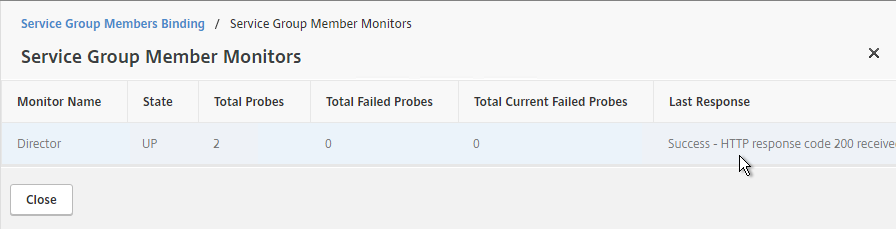
- Highlight a member, and click Monitor Details.

- The Last Response should be Success – HTTP response code 200 received. Click Close twice.
- Then click Done.

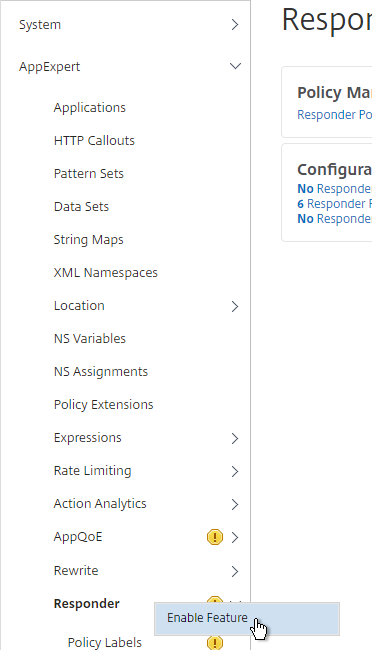
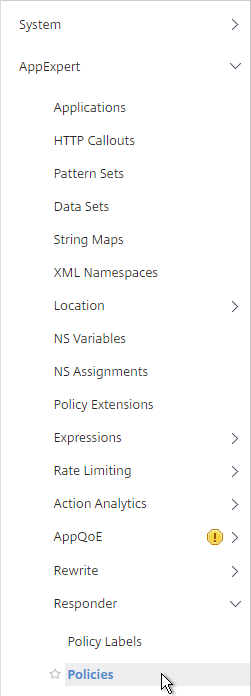
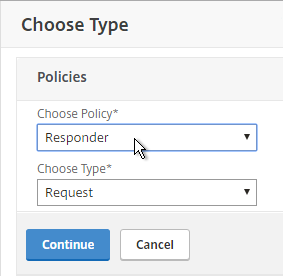
Responder
Create a Responder policy to redirect users from the root page to /Director.
- Go to AppExpert > Responder, and enable the feature if it isn’t already enabled.
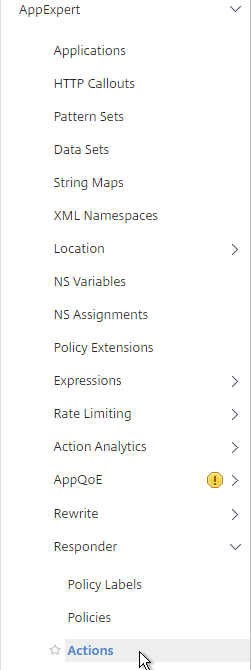
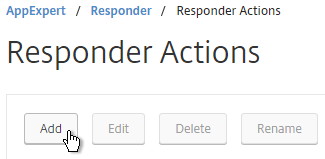
- Go to AppExpert > Responder > Actions.
- On the right, click Add.
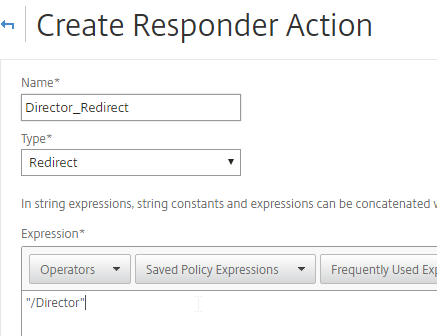
- Give the Action a name (e.g. Director_Redirect).
- Change the Type to Redirect.
- In the Expression box, enter
"/Director", including the quotes. - Click Create.
- Go to AppExpert > Responder > Policies.
- On the right, click Add.
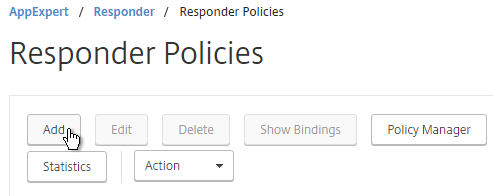
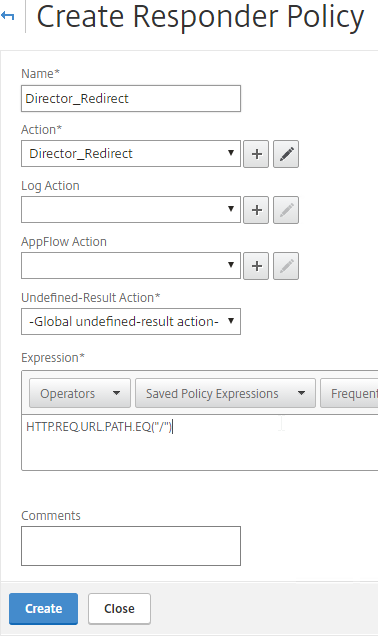
- Give the Policy a name (e.g. Director_Redirect).
- Select the previously created Action.
- In the Expression box, enter
HTTP.REQ.URL.PATH.EQ("/") - Click Create.
Load Balancing Virtual Server
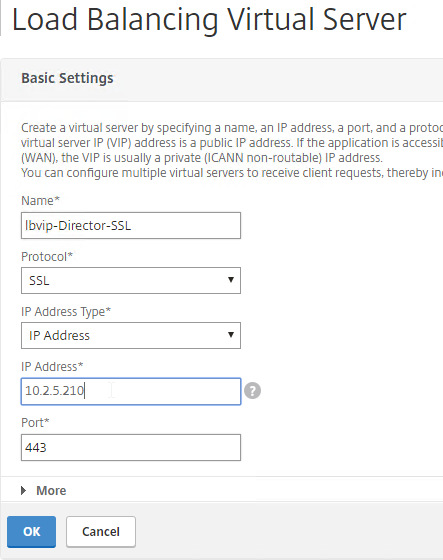
- Create or install a certificate that will be used by the SSL Virtual Server. This certificate must match the DNS name for the load balanced Director servers.
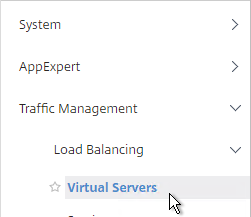
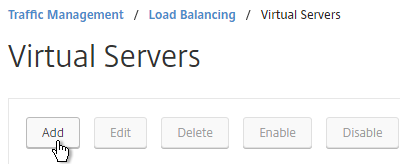
- On the left, under Traffic Management > Load Balancing, click Virtual Servers.
- On the right, click Add.
- Name it lbvip-Director-SSL or similar.
- Change the Protocol to SSL.
- Specify a new internal VIP.
- Enter 443 as the Port.
- Click OK.
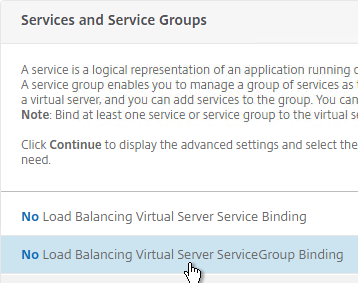
- On the left, in the Services and Service section, click where it says No Load Balancing Virtual Server ServiceGroup Binding.
- Click the arrow next to Click to select.
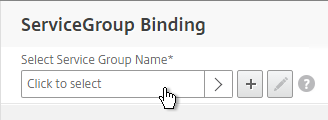
- Select your Director Service Group, and click Select.

- Click Bind.

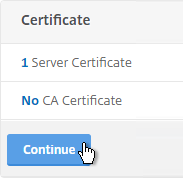
- Click Continue.

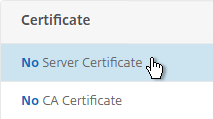
- Click where it says No Server Certificate.
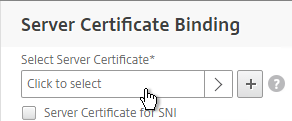
- Click the arrow next to Click to select.
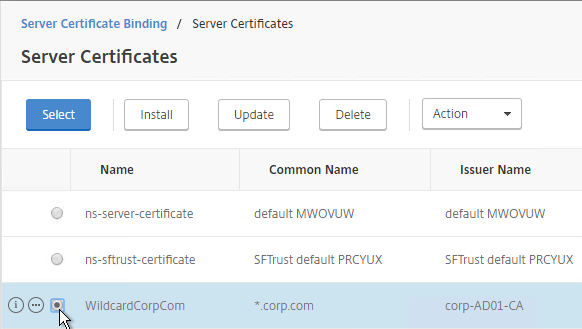
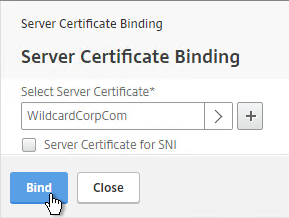
- Select the certificate for this Director Load Balancing Virtual Server, and click Select.
- Click Bind.
- Click Continue.
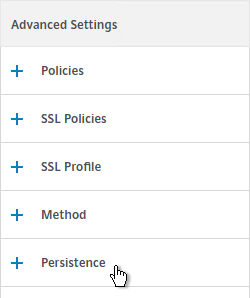
- On the right, in the Advanced Settings column, click Persistence.
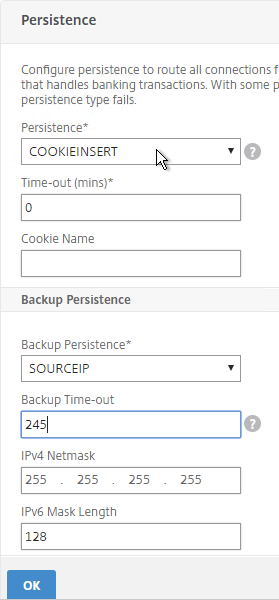
- In the Persistence section, do the following:
- Select COOKIEINSERT persistence.
- Set the Time-out to 0 minutes. This makes it a session cookie.
- Set the Backup Persistence to SOURCEIP.
- Set the Backup Time-out to match the timeout of Director. The default timeout for Director is 245 minutes.
- The IPv4 Netmask should default to 32 bits.
- Click OK.
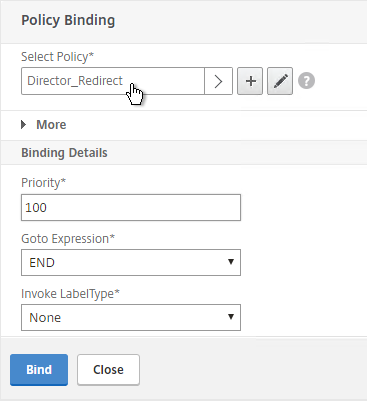
- On the right, in the Advanced Settings section, add the Policies section.
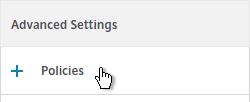
- On the left, in the Policies section, click the plus icon.

- Select Responder in the Choose Policy drop-down, and click Continue.
- Select the previously created Director_Redirect policy, and click Bind.
- If you haven’t enabled the Default SSL Profile, then perform other normal SSL configuration including: disable SSLv3, bind a Modern Cipher Group, and enable Strict Transport Security.
bind ssl vserver MyvServer -certkeyName MyCert

set ssl vserver MyvServer -ssl3 DISABLED -tls11 ENABLED -tls12 ENABLED

unbind ssl vserver MyvServer -cipherName ALL

bind ssl vserver MyvServer -cipherName Modern

bind ssl vserver MyvServer -eccCurveName ALL

bind lb vserver MyvServer -policyName insert_STS_header -priority 100 -gotoPriorityExpression END -type RESPONSE
SSL Redirect
Do one of the following to configure a redirect from HTTP to HTTPS:
- Add a new HTTP load balancer on port 80 and use Responder to redirect.
- Edit the existing SSL vServer and enable Redirect.
- Add a new HTTP load balancer on port 80 and configure the Redirect URL.
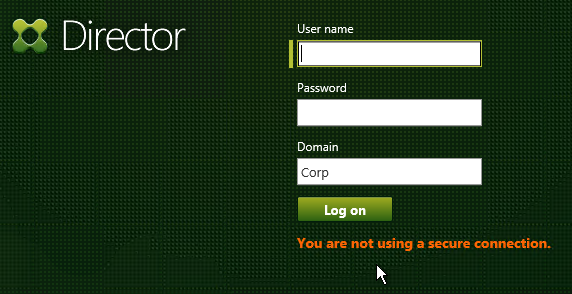
SSL Warning
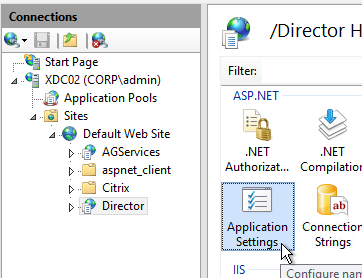
- If you are doing SSL Offload (SSL on front end, HTTP on back end), when connecting to Director, it might complain about “You are not using a secure connection”.
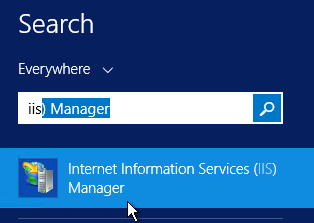
- To turn off this warning, login to the Director servers, and run IIS Manager.
- On the left, navigate to Server > Sites > Default Web Site > Director.
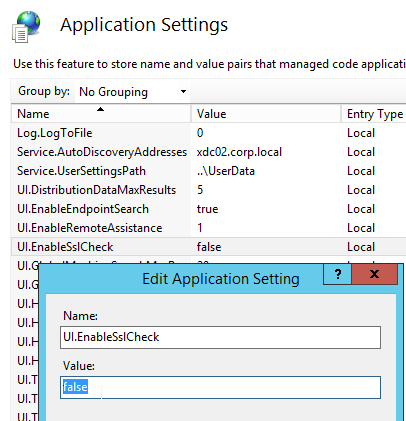
- In the middle, double-click Application Settings.
- Change UI.EnableSslCheck to false.
CLI Commands
Here is a list of NetScaler CLI commands for Director Load Balancing:
add server Director01 10.2.2.18
add server Director02 10.2.2.100
add server 127.0.0.1 127.0.0.1
add service AlwaysUp 127.0.0.1 HTTP 80
add serviceGroup svcgrp-Director-HTTP HTTP
add ssl certKey wildcom -cert WildcardCorpCom_pem -key WildcardCorpCom_pem
add lb vserver lbvip-Director-SSL SSL 10.2.2.210 443 -persistenceType SOURCEIP -timeout 245
add lb vserver lbvip-Director-HTTP-SSLRedirect HTTP 10.2.2.210 80 -persistenceType NONE
add responder action Director_Redirect redirect "\"/Director\"" -responseStatusCode 302
add responder action http_to_ssl_redirect_responderact redirect "\"https://\" + HTTP.REQ.HOSTNAME.HTTP_URL_SAFE + HTTP.REQ.URL.PATH_AND_QUERY.HTTP_URL_SAFE" -responseStatusCode 302
add responder policy Director_Redirect "http.REQ.URL.PATH.EQ(\"/\")" Director_Redirect
add responder policy http_to_ssl_redirect_responderpol HTTP.REQ.IS_VALID http_to_ssl_redirect_responderact
bind lb vserver lbvip-Director-HTTP-SSLRedirect AlwaysUp
bind lb vserver lbvip-Director-SSL svcgrp-Director-SSL
bind lb vserver lbvip-Director-SSL -policyName Director_Redirect -priority 100 -gotoPriorityExpression END -type REQUEST
bind lb vserver lbvip-Director-HTTP-SSLRedirect -policyName http_to_ssl_redirect_responderpol -priority 100 -gotoPriorityExpression END -type REQUEST
add lb monitor Director HTTP -respCode 200 -httpRequest "GET /Director/LogOn.aspx?cc=true" -LRTM DISABLED -secure YES
bind serviceGroup svcgrp-Director-SSL Director01 443
bind serviceGroup svcgrp-Director-SSL Director02 443
bind serviceGroup svcgrp-Director-SSL -monitorName Director
set ssl serviceGroup svcgrp-Director-SSL -tls11 DISABLED -tls12 DISABLED
bind ssl vserver lbvip-Director-SSL -certkeyName wildcom
bind ssl vserver lbvip-Director-SSL -eccCurveName P_256
bind ssl vserver lbvip-Director-SSL -eccCurveName P_384
bind ssl vserver lbvip-Director-SSL -eccCurveName P_224
bind ssl vserver lbvip-Director-SSL -eccCurveName P_521
Thanks for another great how to guide!
Have you seen any issues with MS Edge and smart cards credential prompts?
Chrome works like a champ. With MS Edge, if we go directly to our director servers, MS Edge will pass through our credentials and log in. If we go to the address for our load balancer, the LB works, it plugs in /Director as expected but we get prompted to enter smart card credentials and it won’t take them. If look in the dev tools, Edge there’s a 401 error and that’s what we get if we cancel the pin prompt.
Thanks for the clear instructions to set-up an Director LoadBalancer.
There’s only still one question, if I follow up the responder policy settings for Director it works fine, but when I add the http to https responder as wel, it failed. I would ask you, to explain how to use the director end the https to https responder? policy
You can add a Responder that looks for / and adds /Director to the end and bind this Responder to the 443 Virtual Server. The http to https Responder is usually only needed for the port 80 Virtual Server.
HTTP.REQ.URL.PATH.EQ(/)
I am following these steps, but I’m confronted with an error. I have cross checked my configuration but couldn’t trace the problem.
On the created ServiceGroup, the “Effective state” is down
On the created VirtualServer, both “State” and “Effective State” are down
I have “Failure – No MIP/SNIP available to send the monitor probe” on the assigned monitor.
I actually did not add any SNIP as NetScaler and the Backend Servers (Director) are on the same subnet. I have earlier configured LB for StoreFront on same NetScaler and didn’t experience this problem.
Where should I be looking.
Thanks.
If you want NetScaler to send packets to something, then you need a SNIP.
Thanks carl
My understanding is that NSIP default to MIP or vice versa. So since there is no firewall in question, and both NetScaler and the Servers are in same subnet, I thought the NSIP (MIP) would be used in this case for the communication.
NSIP and MIP are two different things. MIP and SNIP are more similar.
I have now added SNIP and they are now all up.
I guess I got confused with this article “https://www.syxin.com/2014/03/netscaler-nsipsnipmipvip/”. With this statement “The NSIP is also called the Management IP address” under “NSIP – NetScaler IP Address”, and then “A MIP can be considered a default subnet IP (SNIP) address” under “MIP – Mapped IP Address”
Carl
Is it possible that Netscaler can be configured to proxy traffic from one port to another? I have following senario
1. Firewall only allow HTTPS connection on 443
2. Servers that are loadbalanced are listening on 9443 for URL containing specific string for example ‘test’
I can use responder to redirect the incoming HTTPS on 443 to 9443 if the URL containing string ‘test’ no problem. However the original URL https://example.com/test will become https://example.com:9443/test. The firewall will drop the traffic as only 443 is allowed.
Is there a way that LB will receive the incoming HTTPS on 44, send the request to server on 9443 than send the server respond back to the client still on 443 instead using 9443?
Thanks
Eric
Configure your vServer on port 443. Configure your services on port 9443. Bind them together. That’s all you need. No Responder needed.
However, if your webserver responds with a HTML page that has links to 9443, then you need to rewrite those links before the page is sent to the user.