Navigation
- Change Log
- VPX Virtual Hardware – VMXNET3
- Customer User Experience Improvement Program (CUXIP)
- Welcome Wizard
- Licensing:
- 100% CPU
- Upgrade Firmware
- High Availability
- Networking
- DNS Servers
- NTP Servers
- Syslog Server
- SNMP Configuration
- Call Home
- Change nsroot password
- TCP, HTTP, SSL, and Security settings
- Management Authentication – LDAP
- CLI Prompt
- Backup and Restore
💡 = Recently Updated
Change Log
- 2020 Jan 24 – Firmware – added link to CTX267027 CVE-2019-19781 – Vulnerability in Citrix Application Delivery Controller, Citrix Gateway, and Citrix SD-WAN WANOP appliance
- 2019 Mar 5 – Management Authentication – Two Factor – new section
- 2019 Feb 4 – Upgrade Firmware – added link to Citrix CTX241500 Citrix ADC Firmware Release Cycle
- 2018 Nov 1- VPX Virtual Hardware – added link to Magnus Andersson Deploy Citrix ADC VPX On Nutanix AHV
- 2018 Oct 7 – Call Home – Citrix ADC 12.1 build 49 release notes: CallHome is now enhanced to send Citrix ADC usage metrics to Citrix Insight Services (CIS) periodically
- 2018 Oct 6 – VPX Hardware – 12.1 supports ESXi 6.7 – 12.0 does not support ESXi 6.7
- 12.1 supports vMotion – 12.0 does not support vMotion
- 2018 Sep 27 – updated many screenshots for 12.1
- 2018 Aug 1 – Dedicated Management Network – added link to Citrix Blog Post Separating NetScaler Management and Data Traffic for DISA STIGs which also uses Policy Based Routing
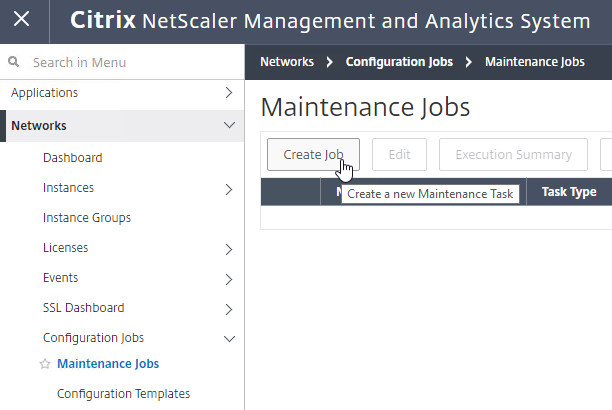
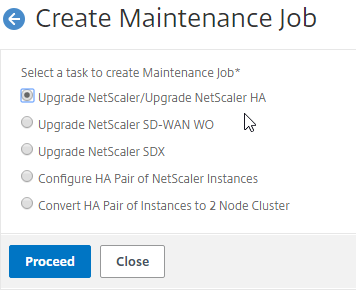
- 2018 Mar 13 – in Firmware Upgrade section, added MAS upgrade method detailed at Creating Maintenance Tasks at Citrix Docs
- 2018 Mar 13 – in Security Settings section, added link to CTP George Spiers How to secure management access to NetScaler and create unique certificates in a highly available setup
- 2018 Feb 8 – in TCP Settings section, added info from Citrix CTX232321 Recommended TCP Profile Settings for Full Tunnel VPN/ICAProxy from NetScaler Gateway 11.1 Onwards
- 2017 Dec 6 – in Dedicated Mgmt section, added config for floating mgmt IP
VPX Virtual Hardware
Magnus Andersson Deploy Citrix ADC VPX On Nutanix AHV
VMware Compatibility (source = Support matrix for 12.1 and Support matrix for 12.0 at Citrix Docs)
- Citrix ADC 12.1 build 49 and newer are supported on ESXi 6.7. NetScaler VPX 12.0 is not supported on ESXi 6.7.
- NetScaler VPX 12 is not supported on ESXi 5.5.
- NetScaler VPX 12 is the first version to support ESXi 6.5.
Citrix ADC 12.1 with E1000 or VMXNET3 supports vMotion. NetScaler 12.0 does not support any form of vMotion.
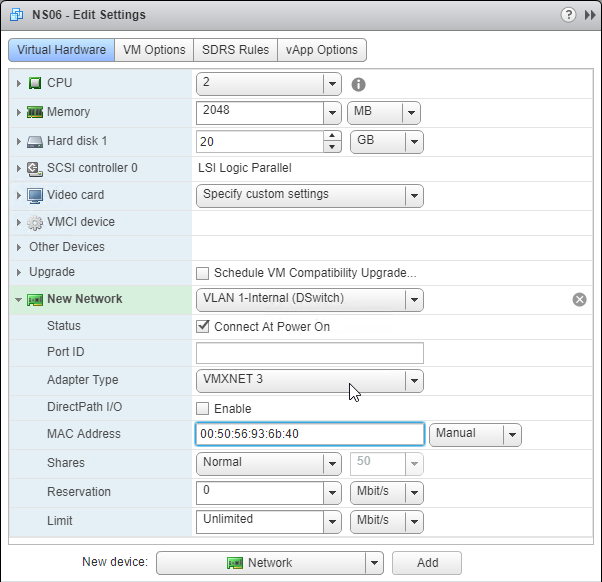
NetScaler ADC VPX supports changing the NIC type to VMXNET3 or SR-IOV. The imported appliance comes with E1000 NICs, so you’ll have to remove all of the existing virtual NICs, and add new VMXNET3 NICs.
- Citrix CTX224576 NetScaler VPX Loses Network Connectivity Intermittently on VMware ESXi After Upgrading to Version 12.0 recommends VMXNET3 as a workaround to network connectivity issues in recent 11.0, 11.1, and 12.0 builds.
- If you choose to use VMXNET3 instead of E1000, make sure all of the NICs are VMXNET3. You cannot mix NIC types.
- If you already licensed your appliance, jot down the E1000 MAC address, and configure the new VMXNET3 NIC with the same MAC address.
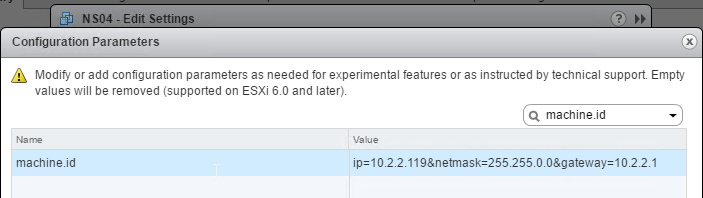
Auto-Provision IP Address
When importing VPX into a hypervisor, you can use VM advanced configuration parameters to set the NSIP. See CTX128250 How to Auto-Provision NetScaler VPX Appliance on a VMware ESX or ESXi Host, and CTX128236 How To Auto-Provision NetScaler VPX on XenServer.
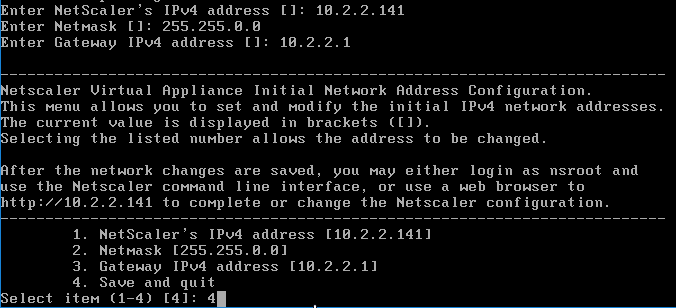
Power On VPX and configure NSIP
- After swapping out the NICs to VMXNET3, power on the NetScaler ADC VPX appliance.

- Configure the management IP from the VM’s console.
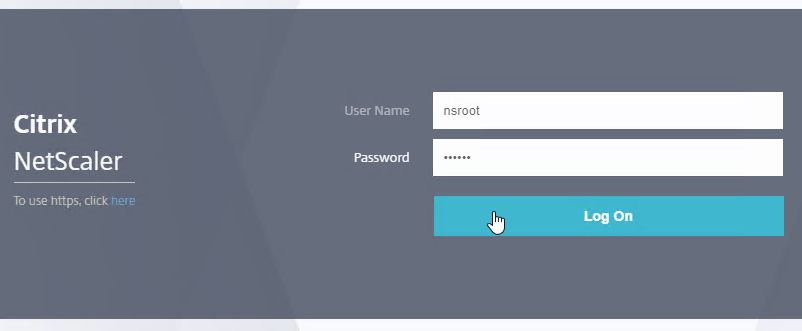
- Then point your browser to the management IP using either http or https and login as nsroot with password nsroot.
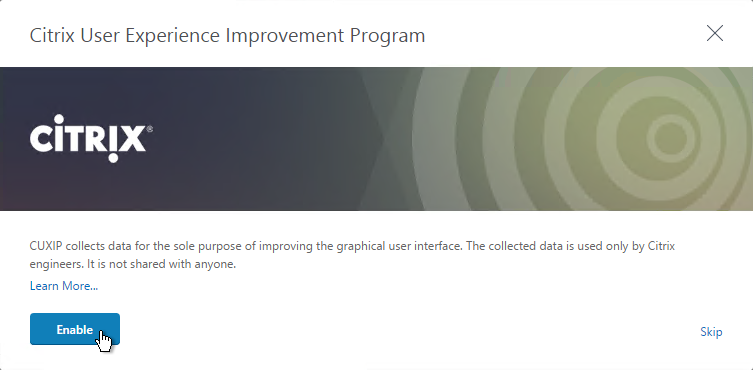
Customer User Experience Improvement Program
- You might be prompted to enable the Customer User Experience Improvement Program. Either click Enable, or click Skip.

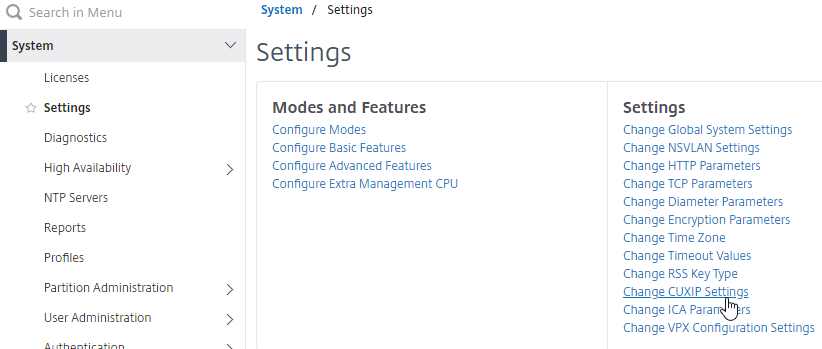
- You can also enable or disable the Customer Experience Improvement Program by going to System > Settings.
- On the right is Change CUXIP Settings.
- Make your selection and click OK.
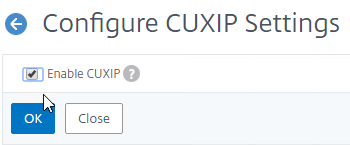
- See https://www.carlstalhood.com/delivery-controller-cr-and-licensing/#ceip for additional places where CEIP is enabled.
set system parameter -doppler ENABLED
Welcome Wizard
NetScaler ADC has a Welcome! Wizard that lets you set the NSIP, hostname, DNS, licensing, etc. It appears automatically the first time you login.
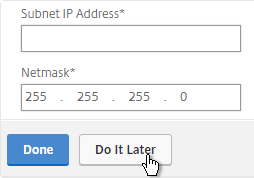
- Click the Subnet IP Address box.
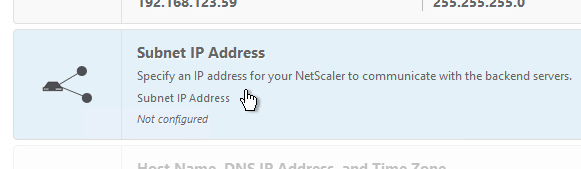
- You can either enter a SNIP for one of your production interfaces, or you can click Do it later and add SNIPs later after you configure Port Channels and VLANs. Note: If you have a dedicated management network, to prevent it from being used for outgoing traffic, don’t put a SNIP on it.
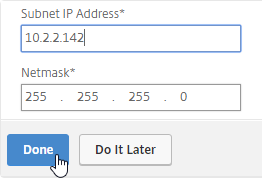
add ns ip 10.2.2.60 255.255.255.0 -type SNIP
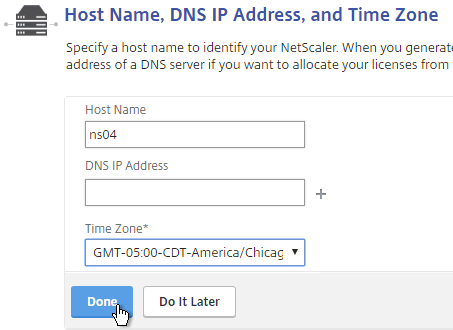
- Click the Host Name, DNS IP Address, and Time Zone box.

- Enter a hostname. In a High Availability pair each node can have a different hostname. You typically create a DNS record that resolves the hostname to the NSIP (management IP).
- Enter one or more DNS Server IP addresses. Use the plus icon on the right to add more servers.
- Change the time zone to GMT-06:00-CST-America/Chicago or similar.
- Click Done.
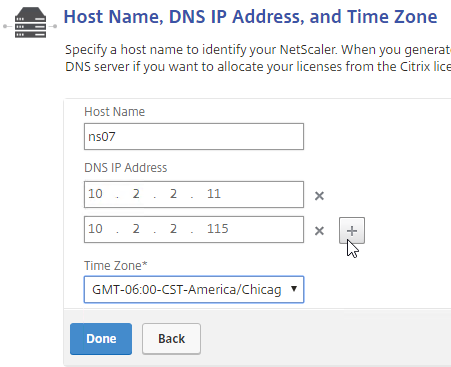
set ns hostname ns02 add dns nameServer 10.2.2.11 set ns param -timezone "GMT-06:00-CST-America/Chicago
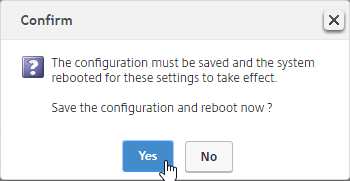
" - Click Yes to save and reboot.
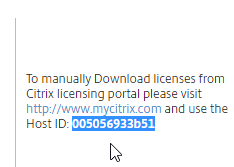
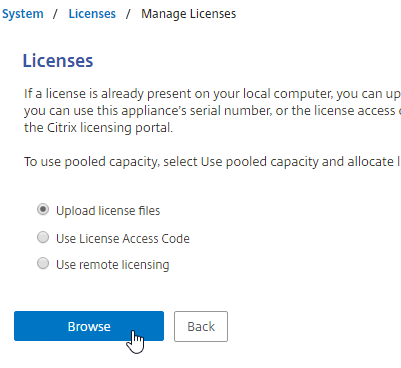
- Click the Licenses box.

- On the far right side of the screen, you’ll see the Host ID. You’ll need this to allocate your licenses at citrix.com. See below for detailed instructions on how to allocate the license to this Host ID.
- On the left, select Upload license files, and click Browse.
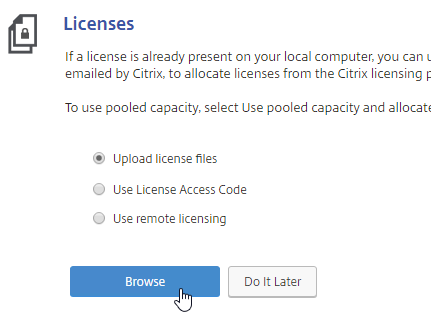
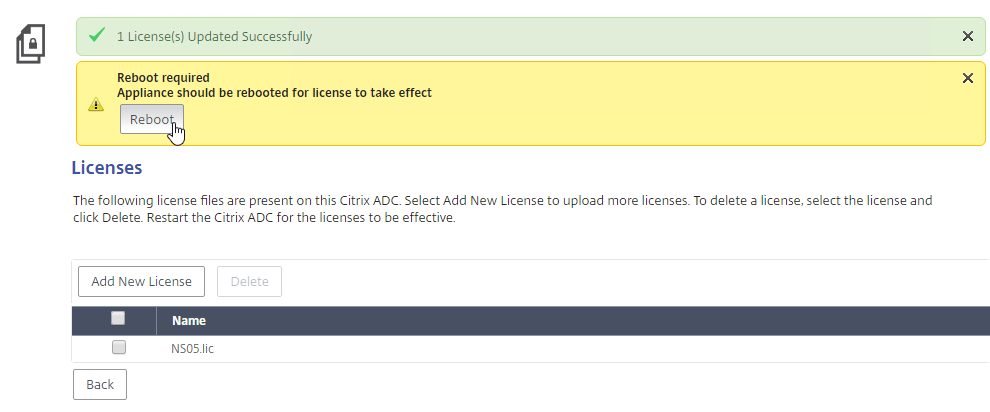
- Browse to the license file, open it, and click Reboot when prompted.
- License files are stored in /nsconfig/license.
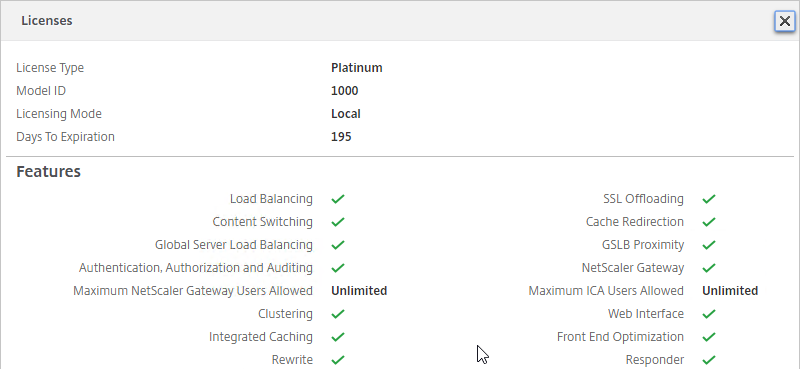
- After the reboot and logging in, a box will pop up showing you the installed license, including Days to Expiration (12.0 build 59 and newer).
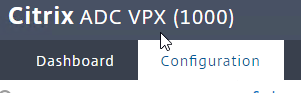
- Also look in the top left corner to make sure it doesn’t say NetScaler VPX (1) or ADC VPX (Freemium). The number in the parentheses should match the MPX or VPX model number.
Licensing – VPX Mac Address
To license a NetScaler ADC VPX appliance, you will need its MAC address.
- Go to the Configuration tab.
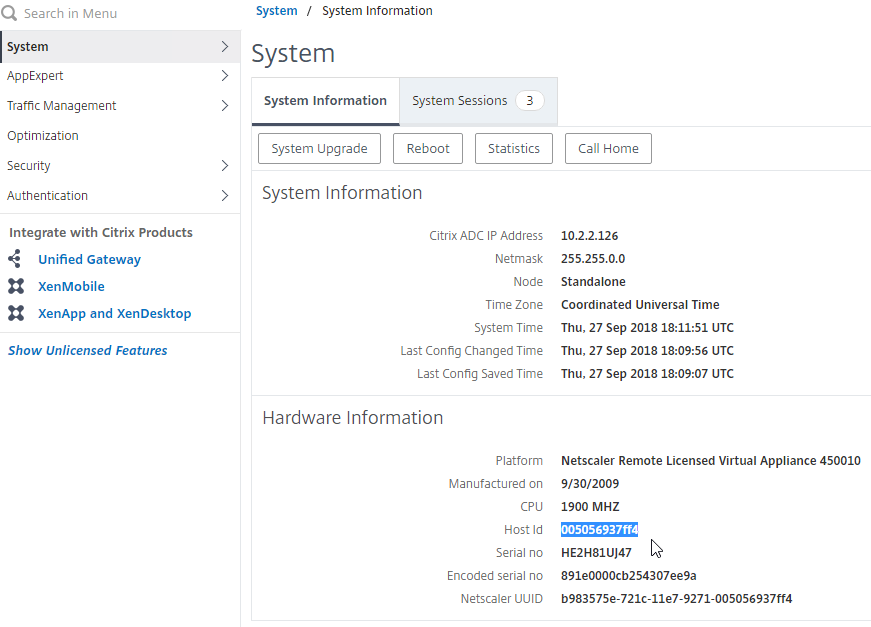
- In the right pane, look down for the Host Id field. This is the MAC address you need for license allocation.
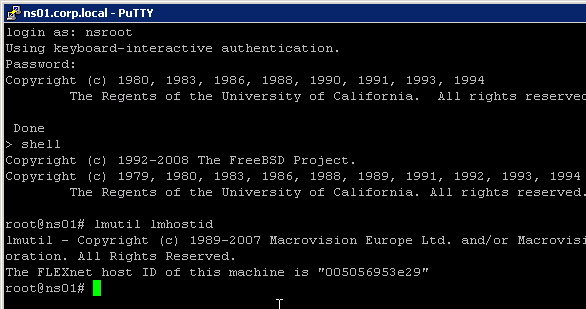
- Another option is to SSH to the appliance and run
shell. - Then run
lmutil lmhostid. The MAC address is returned.
Licensing – Citrix.com
- Login to http://mycitrix.com.
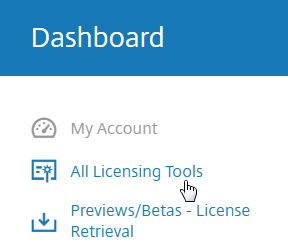
- On the left, click All Licensing Tools.
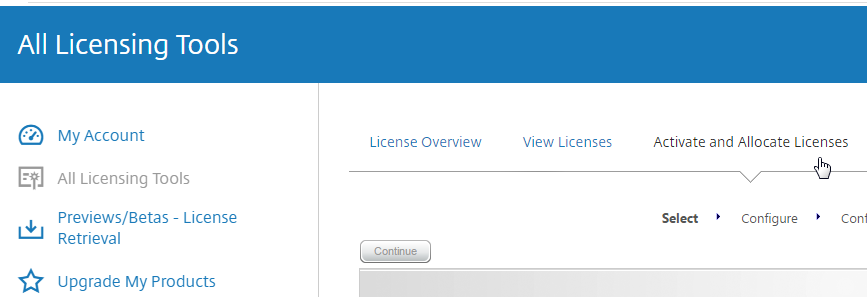
- On the top right, in the horizontal menu, click Activate and Allocate Licenses.
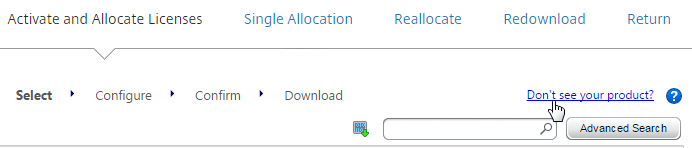
- If you are activating an eval license, click Don’t see your product near the top, and enter the eval license key.
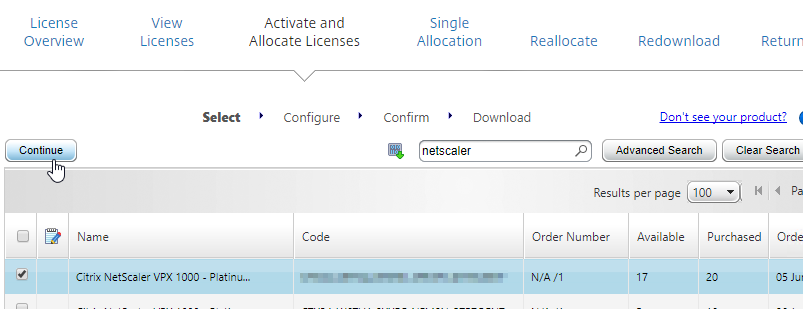
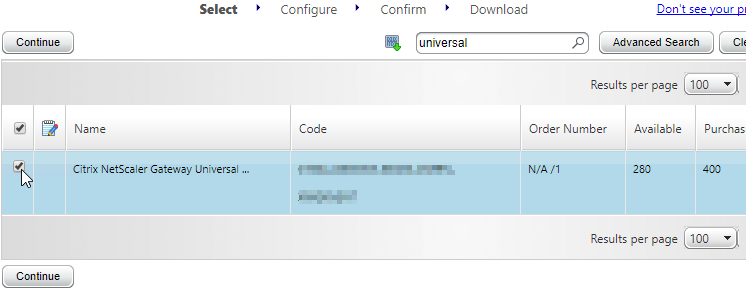
- Otherwise, check the box next to a Citrix NetScaler VPX or MPX license, and click Continue.
- If this is a NetScaler ADC MPX license then there is no need to enter a host ID for this license. so just click Continue.
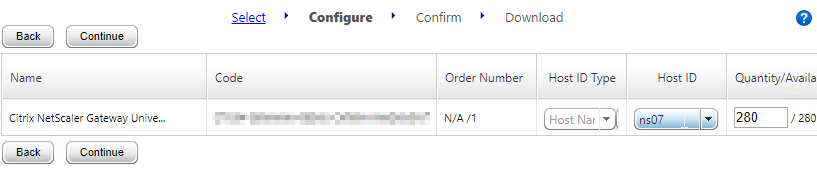
- If this is a NetScaler ADC VPX license, enter the VPX MAC address into the Host ID field. It’s not obvious, but you can enter text in this drop-down field.
- If you have more than one VPX license, change the Quantity field to 1, and then click Continue.

- For a VPX appliance, you can get the Host ID by looking at the System Information page. Click the System node to see this page.
- For a VPX appliance, you can get the Host ID by looking at the System Information page. Click the System node to see this page.
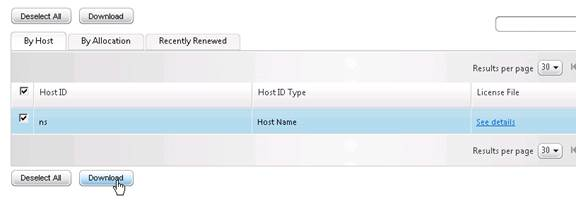
- Click Confirm.

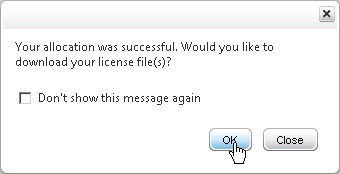
- Click OK when asked to download the license file.
- Click Download.
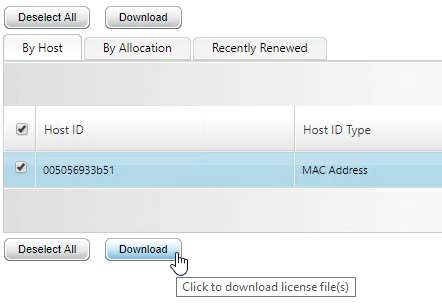
- Click Save and put it somewhere where you can get to it later.
- For NetScaler Standard Edition or higher, at least 500 NetScaler Gateway Universal Licenses are already included in your NetScaler platform license. NetScaler Standard comes with 500 Gateway Universal, NetScaler Enterprise comes with 1,000 Gateway Universal, and NetScaler Platinum comes with unlimited Gateway Universal.
- Note: NetScaler Gateway Enterprise Edition VPX does not come with any Gateway Universal Licenses.
- If you need more Gateway Universal licenses on your NetScaler, you can allocate them now. These licenses can come from XenMobile Enterprise, XenApp/XenDesktop Platinum Edition, NetScaler Platinum Edition, or a la carte.
- Enter your appliance hostname (not Mac address) as the Host ID for all licenses. If you have two appliances in a HA pair, allocate these licenses to the first appliance hostname, then reallocate them to the second appliance hostname.
- Click Confirm.

- Click OK when prompted to download your license file.
- Click Download.
- Click Save.
- If you have two appliances in a High Availability pair with different hostnames then you will need to return the NetScaler Gateway Universal licenses, and reallocate them to the other hostname. The top right horizontal menu bar has a Reallocate option.

Install Licenses on Appliance
If you haven’t already installed licenses on your appliance, then do the following:
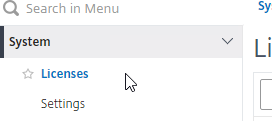
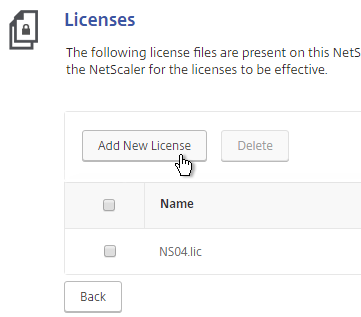
- In the NetScaler Configuration GUI, on the left, expand System, and click Licenses.
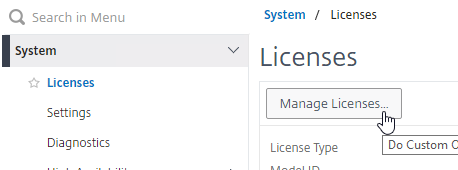
- On the top right, click Manage Licenses.
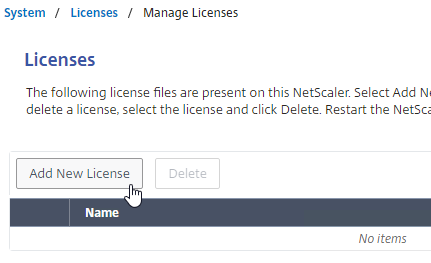
- Click Add New License.
- If you have a license file, select Upload license files, and then click Browse. Select the license file, and click Open.
- License files are stored in
/nsconfig/license.
- License files are stored in
- Click Reboot when prompted. Login after the reboot.
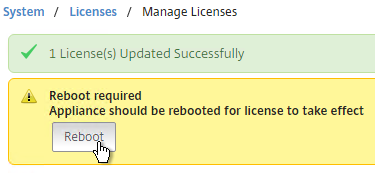
- After rebooting and logging in, a window will appear showing the installed license.
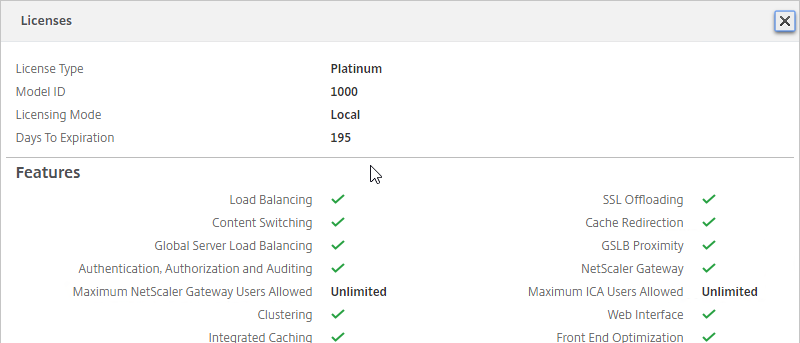
- Notice that Maximum ICA Users Allowed is set to Unlimited.
- Maximum NetScaler Gateway Users Allowed will vary depending on your NetScaler Edition.
- Days to Expiration is shown in 12.0 build 59 and newer.
- Note: the NetScaler SNMP counter allnic_tot_rx_mbits must remain less than the licensed bandwidth or packets will drop.
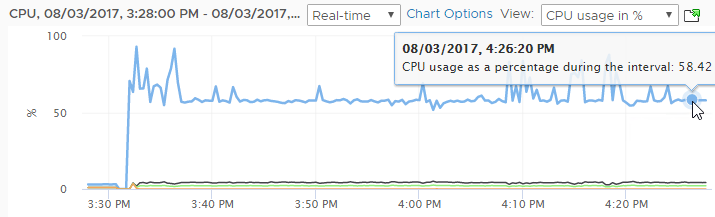
VPX 100% CPU
NetScaler 12 packet engine consumes 100% of the hypervisor CPU. VPX 200 and lower only have one packet engine, so it’s probably consuming around 50% CPU.
You can change this behavior by doing the following:
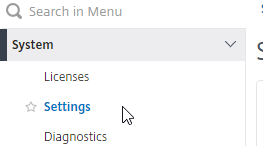
- On the left, go to System > Settings.
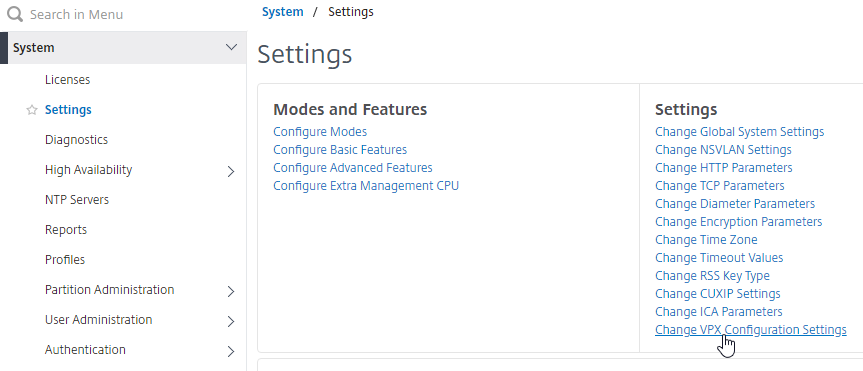
- On the right, in the bottom of the second column, click Change VPX Configuration Settings.
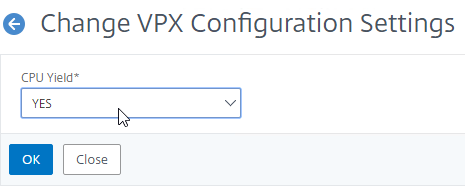
- Change the CPU Yield drop-down to YES, and click OK.
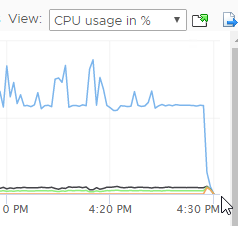
- After making this change, you can see an immediate drop-off in CPU consumption.
Upgrade Firmware
Citrix CTX241500 Citrix ADC Firmware Release Cycle:
- Versions that end in x.1 (e.g 11.1, 12.1, 13.1, 14.1 etc.) get three years of maintenance releases after one year of feature releases (new features).
- Versions that end in x.0 (e.g 12.0, 13.0, 14.0, etc.) get one year of maintenance releases after one year of feature releases (new features).
Citrix CTX220371 Must Read Articles Before and After Upgrading NetScaler
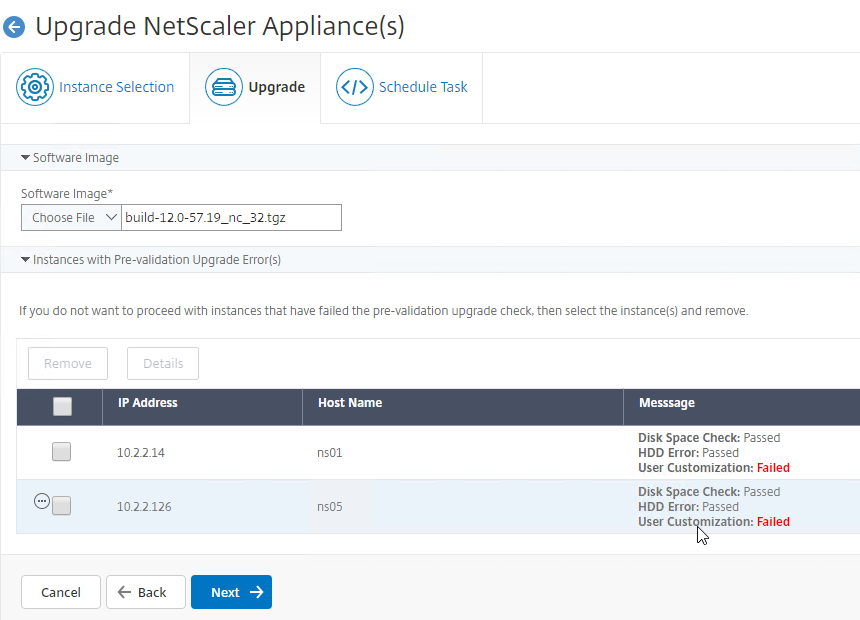
NetScaler MAS can upgrade firmware. With MAS, the firmware upgrade can be scheduled. For more details, see Creating Maintenance Tasks at Citrix Docs. MAS does a precheck to make sure there are no upgrade issues.
To upgrade firmware using the NetScaler management utility (source = Citrix CTX127455 How to Upgrade Software of the NetScaler Appliances in a High Availability Setup):
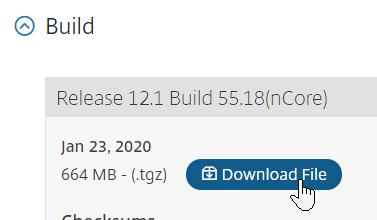
- Download firmware. Ask your Citrix Partner or Citrix Support TRM for recommended versions and builds. 12.0 is End of Maintenance soon so you’ll want 12.1 instead. You want the Build, not the VPX. Note: Firmware for Citrix Gateway is identical to firmware for Citrix ADC.
- Watch the Security Bulletins to determine which versions and builds resolve security issues. You can subscribe to the Security Bulletins at http://support.citrix.com by clicking the Alerts (bell) link on the top right after logging in.

- Watch the Security Bulletins to determine which versions and builds resolve security issues. You can subscribe to the Security Bulletins at http://support.citrix.com by clicking the Alerts (bell) link on the top right after logging in.
- Make sure you Save the config before beginning the upgrade. Doing the save on the primary will cause both nodes to save their configs.

- Transferring the firmware upgrade file to the appliance will be slow unless you license the appliance first. An unlicensed appliance will reduce the maximum speed to 1 Mbps.
- When upgrading from 10.5 or older, make sure the NetScaler Gateway Theme is set to Default or Green Bubbles. After the upgrade, you’ll have to create a new Portal Theme and bind it to the Gateway vServers.
- Start with the Secondary appliance.
- Before upgrading the appliance, consider using WinSCP or similar to back up the /flash/nsconfig directory.
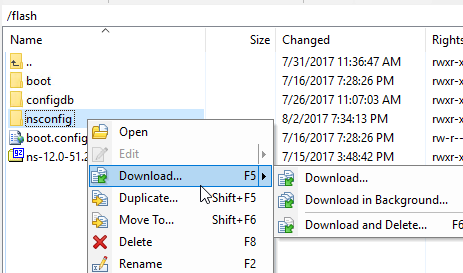
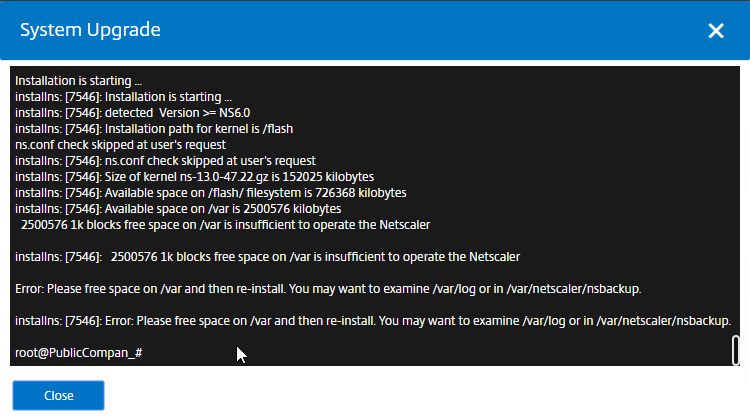
- Disk Cleanup – VPXs usually don’t have enough free space to perform the upgrade.
- If you SSH to the appliance, run
shell, runcd /var, then you can run the following command to see disk space consumption sorted by highest:du -d 1 | sort -n -r
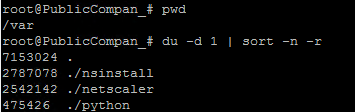
- /var/nsinstall has old firmware upgrades that can be deleted.

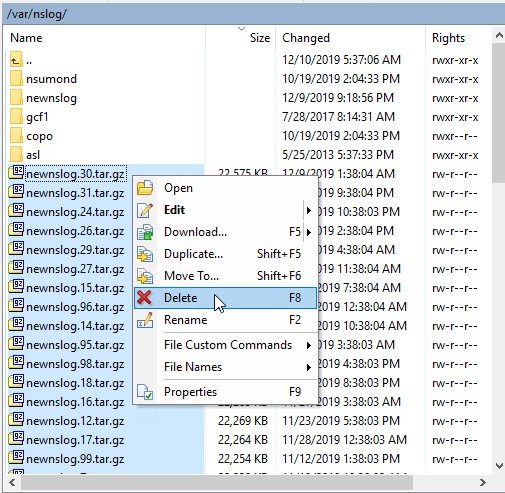
- A common consumer of disk disk is the counter files located in /var/nslog.
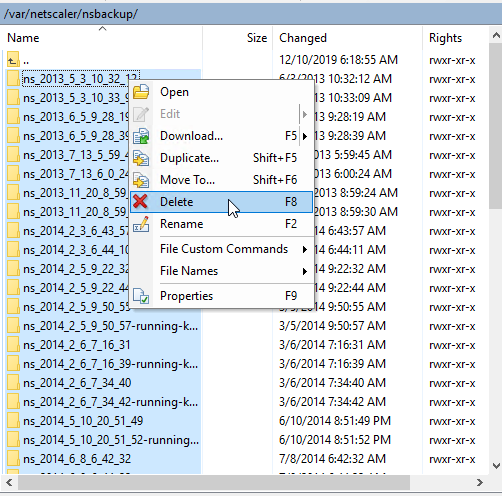
- Check /var/netscaler/nsbackup for old backup files.
- If you SSH to the appliance, run
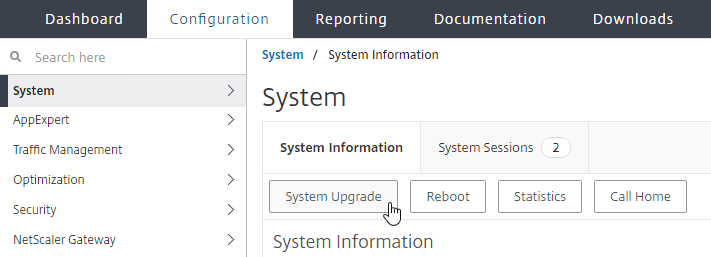
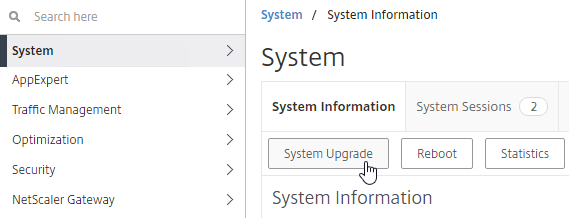
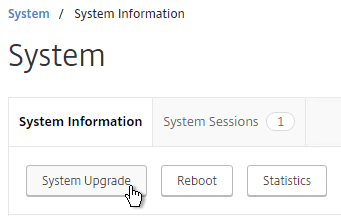
- In the NetScaler GUI, with the top left node System selected, on the right, click System Upgrade.
- Click Choose File, and browse to the build…tgz file. If you haven’t downloaded firmware yet, then you can click the Download Firmware link.
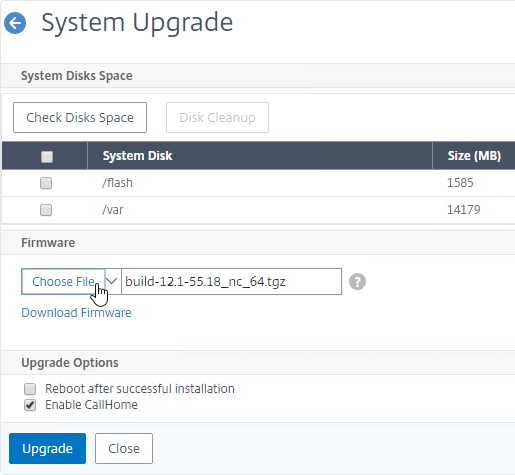
- Click Upgrade.
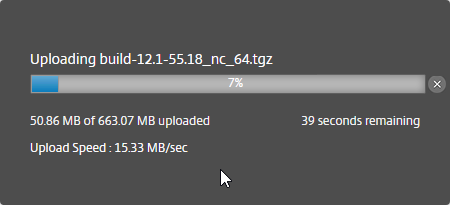
- The firmware will upload.
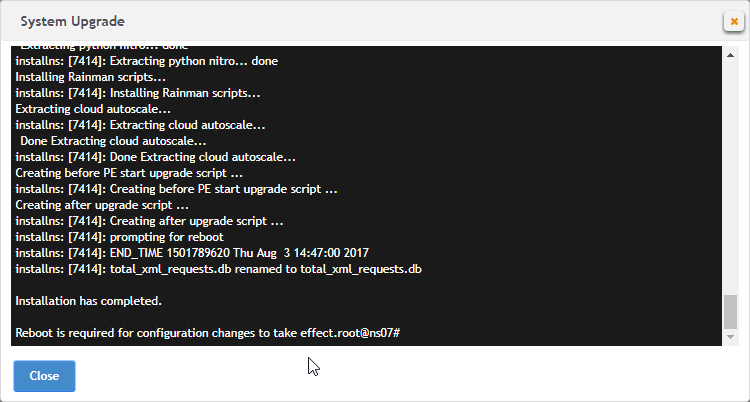
- You should eventually see a System Upgrade window with text in it. Click Close when you see the line indicating that a reboot is required.
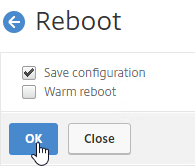
- Go back to the System node. On the right, click the Reboot button.
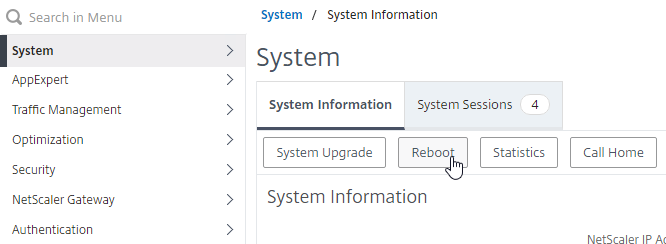
- Click OK to reboot.
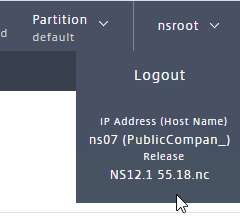
- After the reboot, after you login, you can see the firmware version by clicking your name on the top right of the browser window.
- Once the Secondary is done, failover the pair.
- Then upgrade the firmware on the former Primary.
To install firmware by using the command-line interface
- To upload the software to the NetScaler Gateway, use a secure FTP client (e.g. WinSCP) to connect to the appliance.
- Create a version directory under
/var/nsinstall(e.g. /var/nsinstall/12.0.51.24). - Copy the software from your computer to the
/var/nsinstall/<version>(e.g. /var/nsinstall/12.0.51.24) directory on the appliance. - Open a Secure Shell (SSH) client (e.g. Putty) to open an SSH connection to the appliance.
- At a command prompt, type
shell. - At a command prompt, type
cd /var/nsinstall/<version>to change to the nsinstall directory. - To view the contents of the directory, type
ls. - To unpack the software, type
tar -xvzf build_X_XX.tgz, wherebuild_X_XX.tgzis the name of the build to which you want to upgrade. - To start the installation, at a command prompt, type
./installns. - When the installation is complete, restart NetScaler.
- When the NetScaler restarts, at a command prompt type
whatorshow versionto verify successful installation.
High Availability
Configure High Availability as soon as possible so almost all configurations are synchronized across the two appliances. The synchronization exceptions are mainly network interface configurations (e.g. LACP).
High Availability will also sync files between the two appliances. See CTX138748 File Synchronization in NetScaler High Availability Setup for more information.
- Prepare the secondary appliance:
- Configure a NSIP.
- Don’t configure a SNIP. In Step 2, Subnet IP Address, you can click Do It Later to skip the wizard. You’ll get the SNIP later when you pair it.
- Configure Hostname and Time Zone.
- Don’t configure DNS since you’ll get those addresses when you pair it.

- License the secondary appliance.
- Upgrade firmware on the secondary appliance. The firmware of both nodes must be identical.
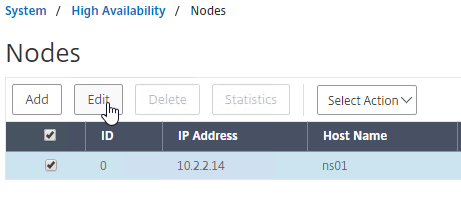
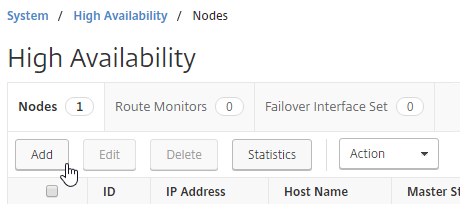
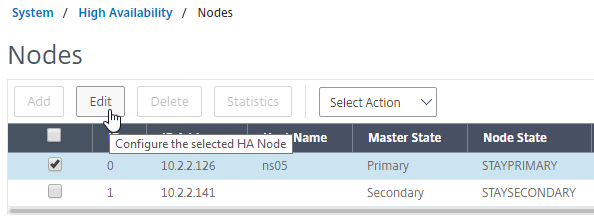
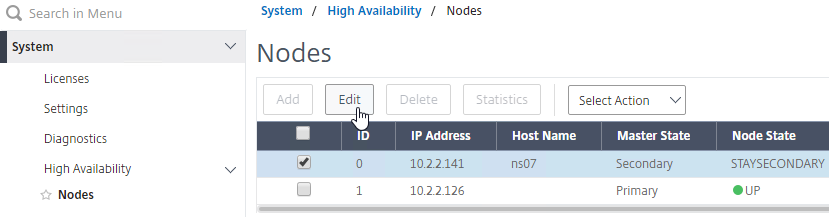
- On the secondary appliance, go to System > High Availability > Nodes. Your build might not have the Nodes node.

- On the right, edit the local node.
- Change High Availability Status to STAY SECONDARY. If you don’t do this then you run the risk of losing your config when you pair the appliances.
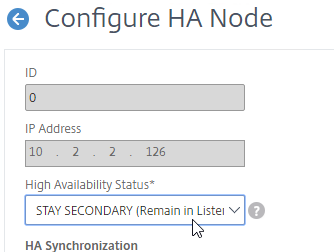
set ha node -hastatus STAYSECONDARY
- On the right, edit the local node.
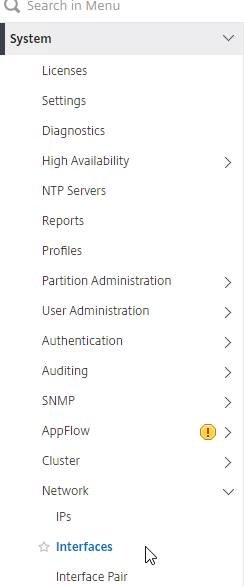
- On the primary appliance, on the left, expand System, expand Network, and click Interfaces.
- On the right, look for any interface that is currently DOWN.
- You need to disable those disconnected interfaces before enabling High Availability. Right-click the disconnected interface, and click Disable. Repeat for the remaining disconnected interfaces.
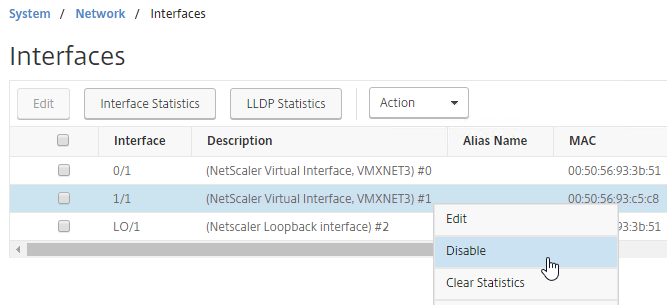
show interface
disable interface 1/1
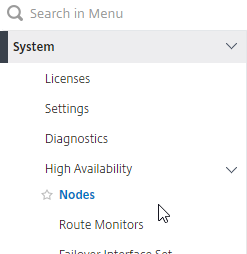
- On the left, expand System, expand High Availability, and click Nodes. Your build of NetScaler might not have a Nodes node.
- On the right, edit node 0.
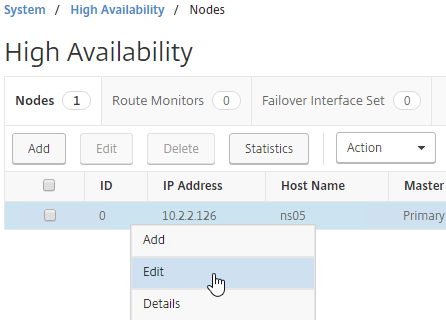
- Change the High Availability Status to STAY PRIMARY, and click OK.
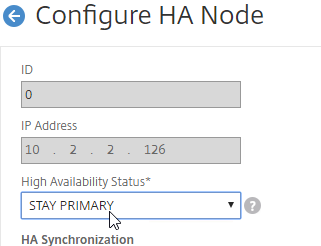
- Change the High Availability Status to STAY PRIMARY, and click OK.
- On the right, click Add.
- Enter the other NetScaler’s IP address.
- Enter the other NetScaler’s login credentials, and click Create.
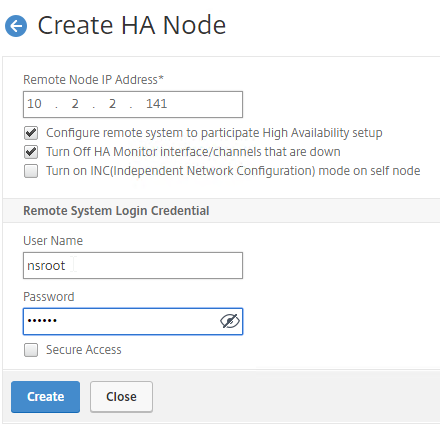
add ha node 1 192.168.123.14
Note: this CLI command must be run separately on each appliance.
- If you click the refresh icon near the top right, Synchronization State will probably say IN PROGRESS.

- Eventually it will say SUCCESS.
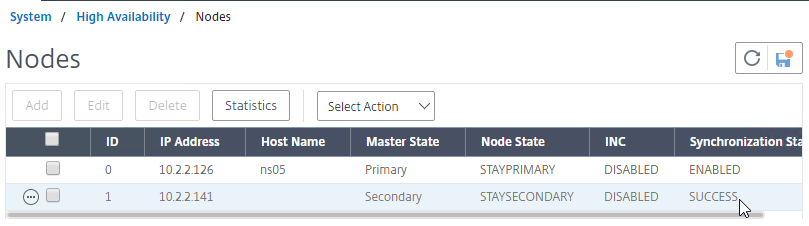
- Eventually it will say SUCCESS.
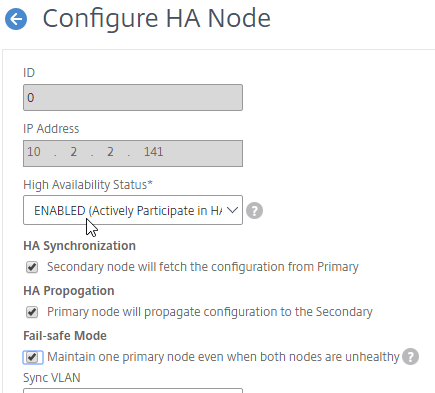
- Edit Node ID 0 (the local appliance).
- Change High Availability State back to ENABLED.
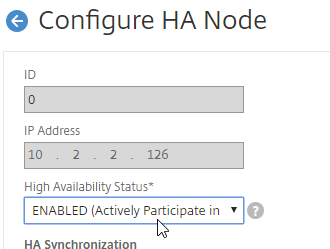
- Under Fail-safe Mode, check the box next to Maintain one primary node even when both nodes are unhealthy. Scroll down, and click OK.
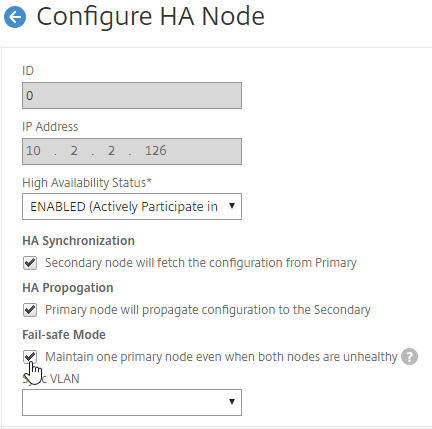
set ha node -failSafe ON
- Change High Availability State back to ENABLED.
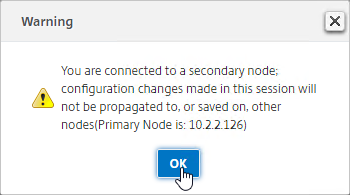
- If you login to the Secondary appliance, you might see a message warning you against making changes. Always apply changes to the Primary appliance.
- On the secondary appliance, go to System > High Availability > Nodes and edit the local node 0.
- Change it from STAY SECONDARY to ENABLED. Also enable Fail-safe Mode. Click OK.
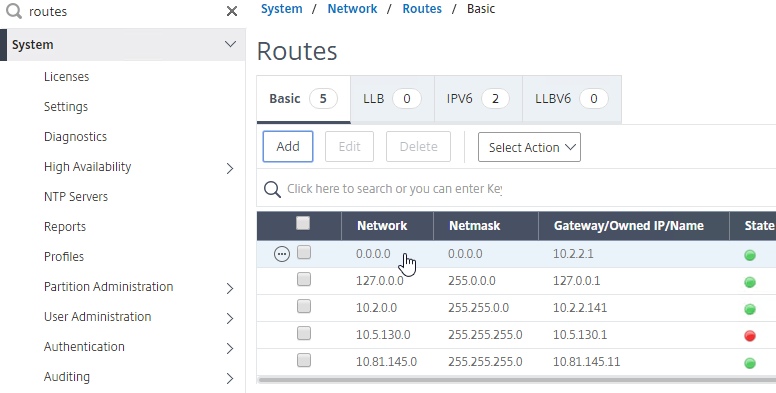
- On the new secondary appliance, go to System > Network > Routes, and make sure you don’t have two 0.0.0.0/0.0.0.0 routes. Joining an appliance to an HA pair causes the default route on the primary appliance to sync to the secondary appliance. But, it doesn’t delete the default gateway that was formerly configured on the secondary appliance.
- From the NetScaler CLI (SSH), run “sh ha node” to see the status. You should see heartbeats on all interfaces. If not, configure VLANs as detailed later..
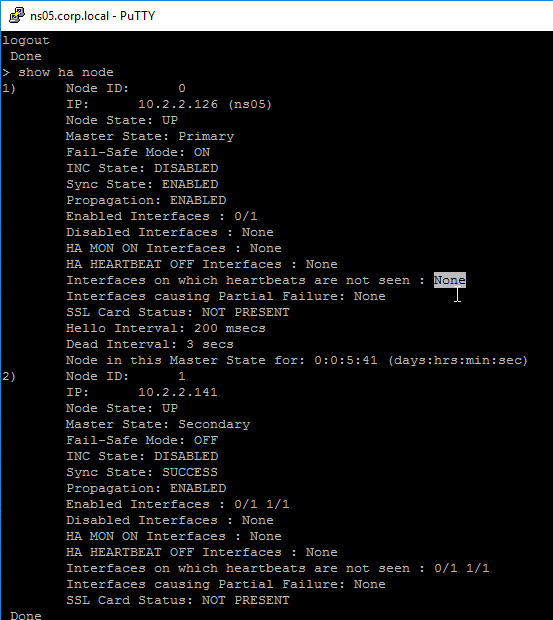
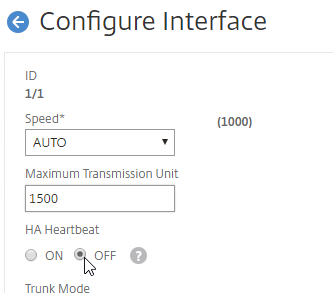
- You can also disable HA heartbeats on specific network interfaces (System > Network > Interfaces).
- Note: Make sure HA heartbeats are enabled on at least one interface/channel.
- Note: this is an interface configuration, so this configuration change is not propagated to the other node.
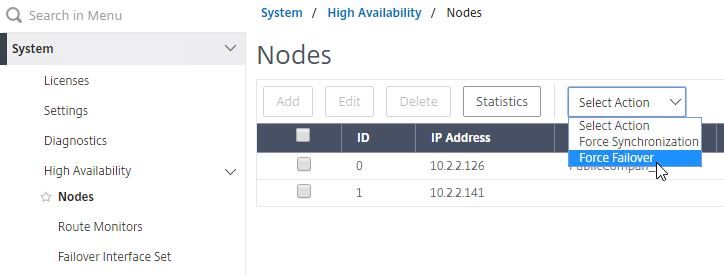
- You can force failover of the primary appliance by going to System > High Availability > Nodes, opening the Actions menu, and clicking Force Failover.

force ha failover
- If your firewall (e.g. Cisco ASA) doesn’t like Gratuitous ARP, see CTX112701 – The Firewall Does not Update the Address Resolution Protocol Table
Port Channels on Physical NetScaler MPX
If you are configuring a NetScaler MPX (physical appliance), and if you plugged in multiple cables, and if more than one of those cables is configured on the switch for the same VLAN(s), then you must bond the interfaces together by configuring a Port Channel.
- On the switch, create a Port Channel, preferably with LACP enabled.
- The Port Channel can be an Access Port (one VLAN), or a Trunk Port (multiple VLANs).
- On the NetScaler, configure LACP on the network interfaces, or create a Channel manually. Both are detailed below.
Also see Webinar: Troubleshooting Common Network Related Issues with NetScaler.
LACP Port Channel
To configure Port Channels on a NetScaler, you can either enable LACP, or you can configure a Channel manually. If your switch is configured for LACP, do the following on NetScaler to enable LACP on the member interfaces.
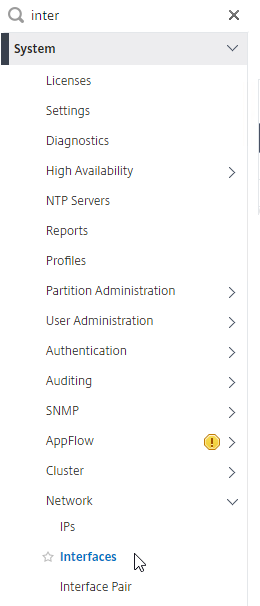
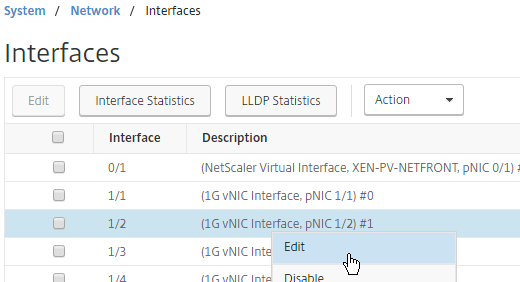
- Go to System > Network > Interfaces.
- On the right, edit one of the Port Channel member interfaces.
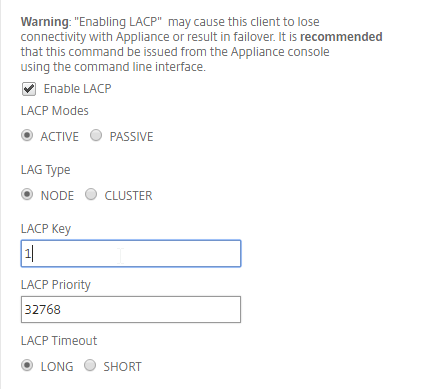
- Scroll down.
- Check the box next to Enable LACP.
- In the LACP Key field, enter a number. The number you enter here becomes the channel number. For example, if you enter 1, NetScaler creates a Channel named LA/1. All member interfaces of the same Port Channel must have the same LACP Key. Click OK when done.
- Continue enabling LACP on member interfaces and specifying the key (channel number). If you are connected to two port channels, one set of member interfaces should have LACP Key 1, while the other set of member interfaces should have LACP Key 2.
- Note: in an HA pair, you must perform this interface configuration on both nodes. The LACP commands are not propagated across the HA pair.
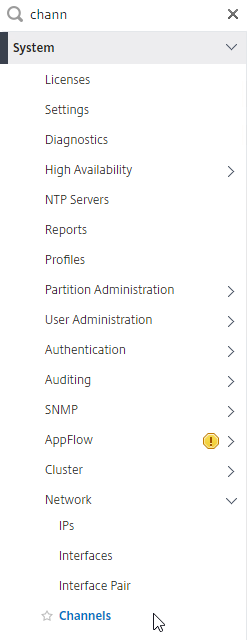
- If you go to System > Network > Channels.
- You’ll see the LACP Channels on the right. These were created automatically.
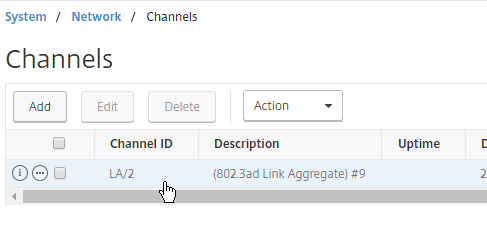
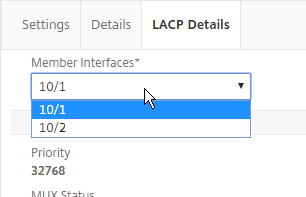
- If you edit a Channel, there’s a LACP Details tab that shows you the member interfaces.
Manual Channel
If your switch ports are not configured for LACP, then you can instead create a Channel manually.
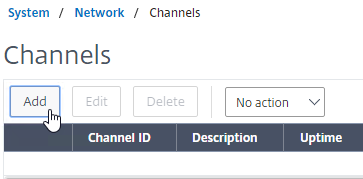
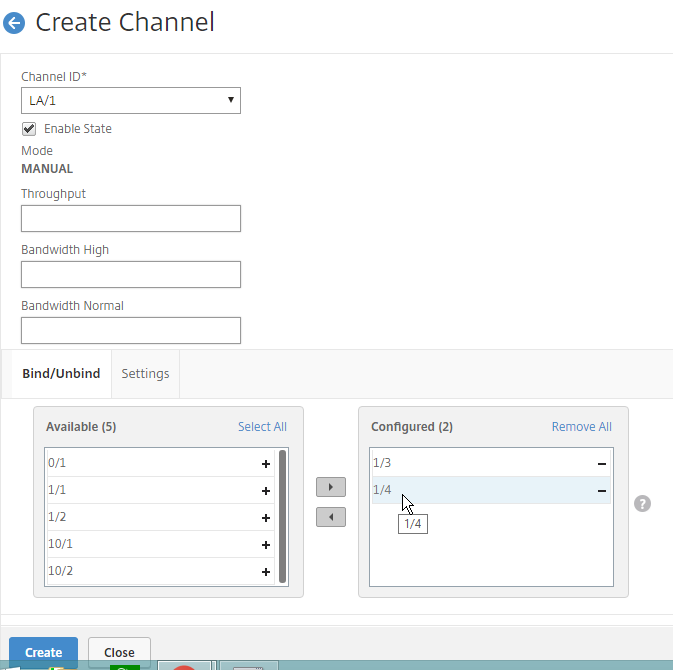
- Go to System > Network > Channels.
- On the right, click Add.
- At the top, choose an unused Channel ID (e.g. LA/1).
- On the bottom, click Add.

- Click the plus icon next to each member interface to move it to the right. Then click Create.
Redundant Interface Set
You can also configure the NetScaler for switch-independent teaming. Create a Channel manually, but select a Channel ID starts with LR instead of LA. This is called Link Redundancy or Redundant Interface Set.

Channel Minimum Throughput
Channels can be configured so that a High Availability failover occurs when the Channel throughput drops below a configured value. For example, if you have four members in a Channel, you might want a High Availability failover to occur when two of the member interfaces fail.
- Go to System > Network > Channels, and edit a Channel.
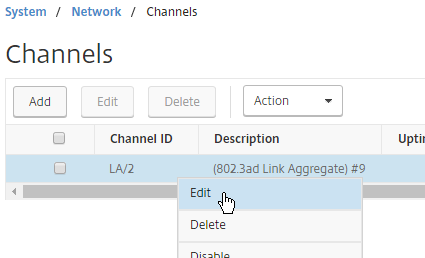
- Near the top, enter a minimum threshold value in the Throughput field. If the total bonded throughput drops below this level, a High Availability failover will occur.
Trunk Port and High Availability
If you are trunking multiple VLANs across the channel, and if every VLAN is tagged (no native VLAN), then a special configuration is needed to allow High Availability heartbeats across the channel.
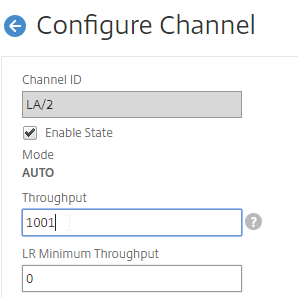
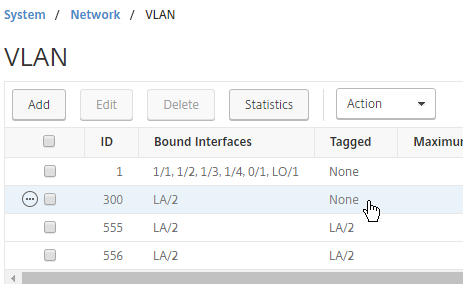
- Go to System > Network > VLAN.
- Add a VLAN object.
- Bind the VLAN to a channel or interface. To bind multiple VLANs to a single interface/channel, the VLANs must be tagged.
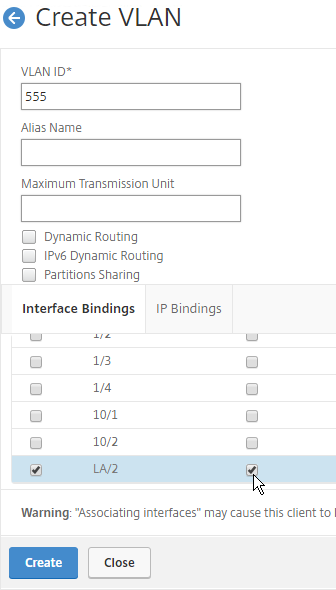
- Configure one of the VLANs as untagged. Only untag one of them. Which one you untag doesn’t matter, except that the same VLAN should be untagged on the other HA node. If your switch doesn’t allow untagged packets, don’t worry, we’ll fix that soon.
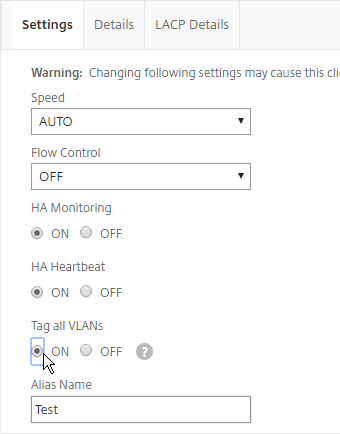
- If your switch doesn’t allow untagged packets, go to System > Network > Channels, and edit the channel.
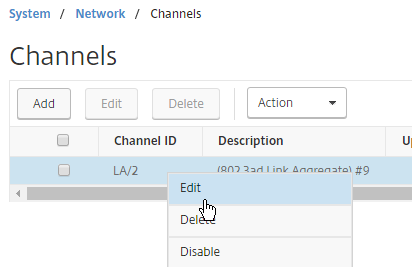
- Scroll down. On the Settings tab, set Tag all VLANs to ON. This causes NetScaler to tag all packets, including the VLAN you formerly marked as untagged. This special configuration is necessary to also tag High Availability heartbeat packets.
- Note: in an HA pair, you must perform this Tagall configuration on both nodes. The Tagall command is not propagated across the HA pair.
Common physical interface configuration
Here is a common NetScaler networking configuration for a physical NetScaler MPX that is connected to both internal and DMZ.
Note: If the appliance is connected to both DMZ and internal, then be aware that this configuration essentially bypasses (straddles) the DMZ-to-internal firewall. That’s because if a user connects to a public/DMZ VIP, then NetScaler could use an internal SNIP to connect to the internal server: in other words, traffic comes into a DMZ VLAN, but goes out an internal VLAN. A more secure approach is to have different appliances for internal and DMZ. Or use NetScaler SDX, partitioning, or traffic domains.
- 0/1 connected to a dedicated management network. NSIP is on this network.
- 0/1 is not optimized for high throughput so don’t put data traffic on this interface. If you don’t have a dedicated management network, then put your NSIP on one of the other interfaces (1/1, 10/1, LA/1, etc.) and don’t connect any cables to 0/1.
- To prevent NetScaler from using this dedicated management interface for outbound data traffic, don’t put a SNIP on this management network, and configure the default gateway (route 0.0.0.0) to use a router on a different data network (typically the DMZ VLAN). However, if there’s no SNIP on this VLAN, and if the default gateway is on a different network, then there will be asymmetric routing for management traffic, since inbound management traffic goes in 0/1, but reply traffic goes out LA/1 or LA/2. To work around this problem, enable Mac Based Forwarding, or configure Policy Based Routing. Both of these options are detailed in the next section.
- It’s easiest if the switch port for this dedicated management interface is an Access Port (untagged). If VLAN tagging is required, then NSVLAN must be configured on the NetScaler.
- 10/1 and 10/2 in a LACP port channel (LA/1) connected to internal VLAN(s). Static routes to internal networks through a router on one of these internal VLANs.
- If only one internal VLAN, configure the switch ports/channel as an Access Port.
- If multiple internal VLANs, configure the switch ports/channel as a Trunk Port. Set one of the VLANs as the channel’s Native VLAN so it doesn’t have to be tagged.
- If the networking team is unwilling to configure a Native VLAN on the Trunk Port, then NetScaler needs special configuration (tagall) to ensure HA heartbeat packets are tagged.
- 1/1 and 1/2 in a LACP port channel (LA/2) connected to DMZ VLAN(s). The default gateway (route 0.0.0.0) points to a router on a DMZ VLAN so replies can be sent to Internet clients.
- If only one DMZ VLAN, configure the switch ports/channel as an Access Port.
- If multiple DMZ VLANs, configure the switch ports/channel as a Trunk Port. Set one of the VLANs as the channel’s Native VLAN so it doesn’t have to be tagged.
- If the networking team is unwilling to configure a Native VLAN on the Trunk Port, then NetScaler needs special configuration (tagall) to ensure HA heartbeat packets are tagged.
Dedicated Management Subnet
Dedicated Management Subnet implies that your NetScaler is connected to multiple VLANs. If you have a subnet that is for NSIP only, and don’t want to use the NSIP subnet for data traffic, then you’ll want to move the default route to a different subnet, which breaks the NSIP. To work around this problem, create a PBR for the NSIP to handle replies from NSIP, and to handle traffic sourced by the NSIP.
Citrix Blog Post Separating NetScaler Management and Data Traffic for DISA STIGs also uses PBRs.
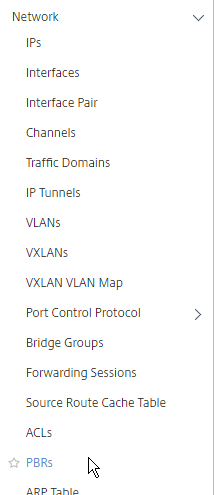
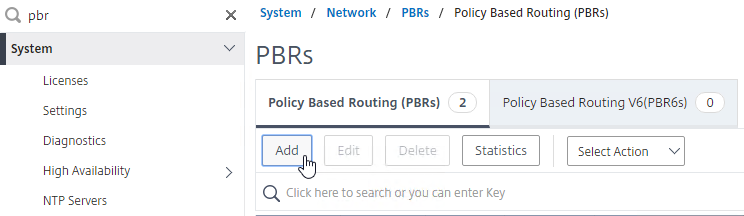
- Go to System > Network > PBRs.
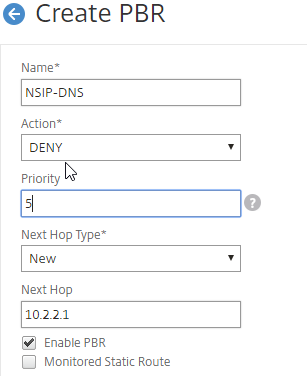
- On the right, click Add.
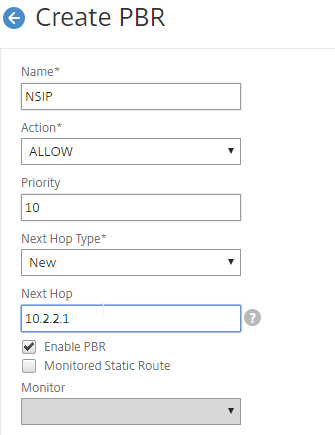
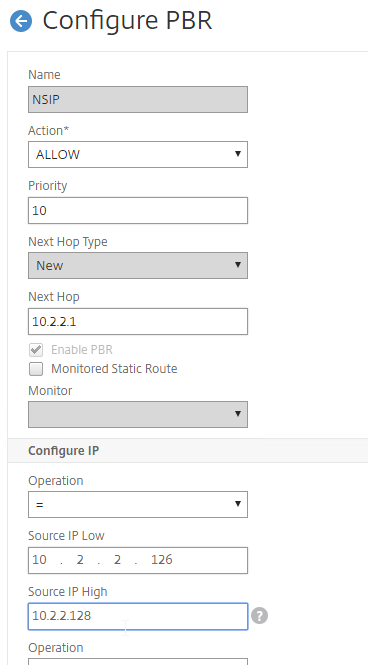
- Give the PBR a name (e.g. NSIP)
- Set the Next Hop Type drop-down to New.
- In the Next Hop field, enter the router IP address that is on the same network as the NSIP.
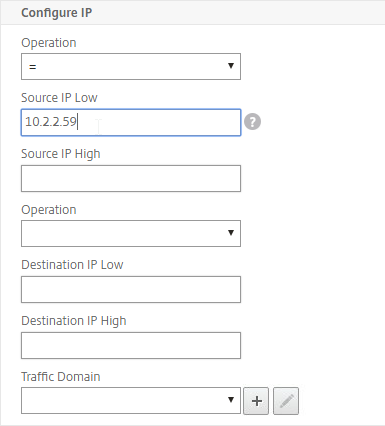
- In the Configure IP section, set the first Operation drop-down to =.
- In the Source IP Low field, enter the NSIP. This causes the PBR to match all traffic with NSIP as the Source IP address.
- In an HA pair, the PBR command applies to both nodes in the pair. To accommodate this, in the Source IP Low field, enter the lower NSIP address. Then in the Source IP High field, enter the higher NSIP address.
- You don’t need anything else.
- Scroll down, and click Create.

- To handle DNS traffic sourced by the NSIP, create another PBR by right-clicking the existing one, and clicking Add.

- Change the name to NSIP-DNS or similar.
- Change the Action drop-down to DENY. This prevents the PBR from overriding normal DNS behavior.
- Change the Priority to a lower number than the original PBR. Scroll down.
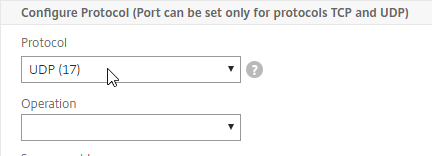
- In the Configure Protocol section, click the Protocol drop-down, and select UDP (17).
- In the Destination section, change the Operation to =.
- In the Destination port Low field, enter 53.
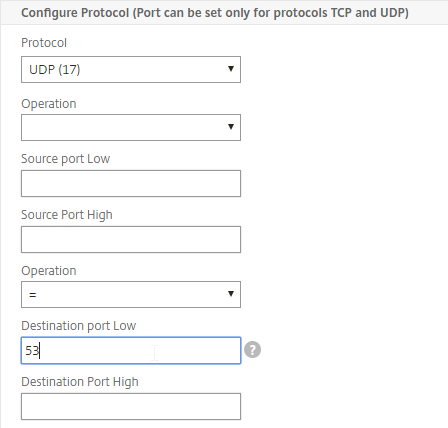
- Scroll down, and click Create.

- Make sure the DENY PBR is higher in the list (lower priority number) than the ALLOW PBR.
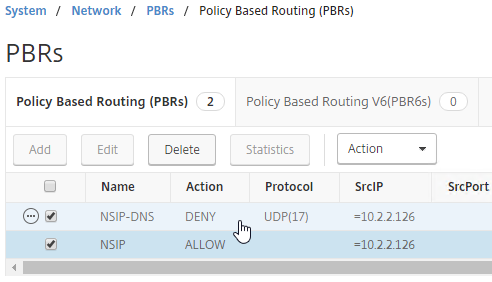
- Then open the Action menu, and click Apply.
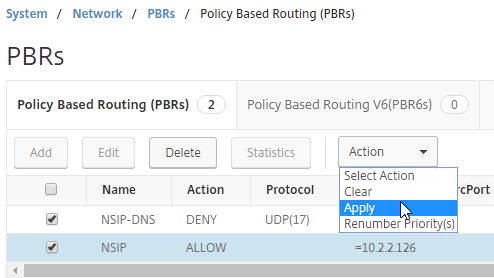
add ns pbr NSIP-DNS DENY -srcIP = 10.2.2.126-10.2.2.127 -destPort = 53 -nextHop 10.2.2.1 -protocol UDP -priority 5
add ns pbr NSIP ALLOW -srcIP = 10.2.2.126-10.2.2.127 -nextHop 10.2.2.1
apply ns pbrs
If you want a floating management IP that is always on the Primary appliance, here’s a method of granting management access without adding a SNIP to the management subnet:
- Create a Load Balancing Service on HTTP 80 on IP address 127.0.0.1. You might already have one called AlwaysUp that is used with SSL Redirects. Note: NetScaler doesn’t allow creating a Load Balancing service on IP address 127.0.0.1 and port 443 (SSL).
- The IP address you enter is 127.0.0.1. When you view the Load Balancing Service, it shows the local NSIP. After a HA failover, the IP Address will change to the other NSIP.
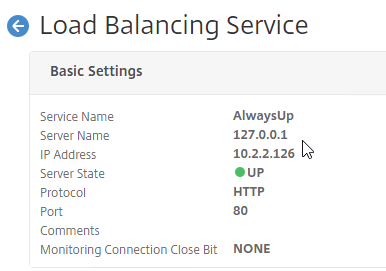
- The IP address you enter is 127.0.0.1. When you view the Load Balancing Service, it shows the local NSIP. After a HA failover, the IP Address will change to the other NSIP.
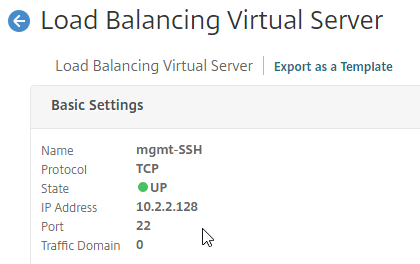
- Create a Load Balancing Virtual Server using a VIP on the management subnet. Protocol = SSL. Port number = 443.

- Bind the AlwaysUp:80 or loopback:80 service to the Load Balancing Virtual Server. In summary: the front end is 443 SSL, while the LB Service is 80 HTTP.
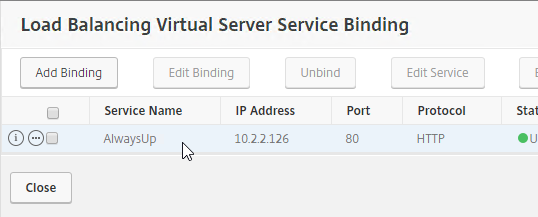
- Bind the AlwaysUp:80 or loopback:80 service to the Load Balancing Virtual Server. In summary: the front end is 443 SSL, while the LB Service is 80 HTTP.
- Add the new VIP to the PBRs so the replies go out the correct interface.
- You should then be able to point your browser to https://Step2VIP to manage the appliance.
- You can perform the same loopback trick for 22 SSH. Create a Load Balancing Service on TCP 22 on IP address 127.0.0.1.
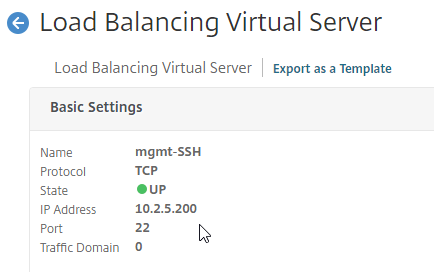
- Create a Load Balancing Virtual Server using the management VIP specified earlier. Protocol = TCP. Port number = 22.
- Bind the loopback:TCP:22 service to the Load Balancing Virtual Server.
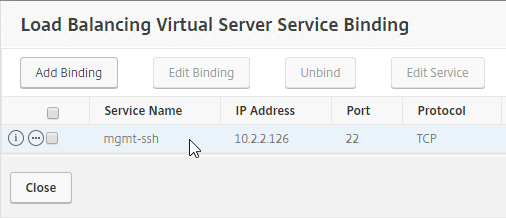
- Bind the loopback:TCP:22 service to the Load Balancing Virtual Server.
- You should then be able to point your SSH Client to <Step2VIP> to manage the appliance.
- CLI Commands for the floating management VIP:
add service AlwaysUp 127.0.0.1 HTTP 80
add service mgmt-SSH 127.0.0.1 TCP 22
add lb vserver mgmt-SSL SSL 10.2.2.128 443
add lb vserver mgmt-SSH TCP 10.2.2.128 22
bind lb vserver mgmt-SSL AlwaysUp
bind lb vserver mgmt-SSH mgmt-SSH
set ns pbr NSIP-DNS DENY -srcIP = 10.2.2.126-10.2.2.128 -destPort = 53 -nextHop 10.2.2.1 -protocol UDP -priority 5
set ns pbr NSIP ALLOW -srcIP = 10.2.2.126-10.2.2.128 -nextHop 10.2.2.1
apply ns pbrs
Multiple Subnets / Multiple VLANs
Citrix CTX214033 Networking and VLAN Best Practices for NetScaler discusses many of the same topics detailed in this section.
If this is a physical MPX appliance, see the previous Port Channel section first.
If you only connected NetScaler to one subnet (one VLAN) then skip ahead to DNS servers.
Configuration Overview
The general configuration process for multiple subnets is this:
- Create a SNIP for each subnet/VLAN.
- Create a VLAN object for each subnet/VLAN.
- Bind the VLAN object to the SNIP for the subnet.
- Bind the VLAN object to the Port Channel or single interface that is configured for the VLAN/subnet.
SNIPs for each VLAN
You will need one SNIP for each connected subnet/VLAN. VLAN objects (tagged or untagged) bind the SNIPs to particular interfaces. NetScaler uses the SNIP’s subnet mask to assign IP addresses to particular interfaces.
NSIP Subnet
The NSIP subnet is special, so you won’t be able to bind it to a VLAN. Use the following SNIP/VLAN method for any network that does not have the NSIP. The remaining interfaces will be in VLAN 1, which is the VLAN that the NSIP is in. VLAN 1 is only locally significant so it doesn’t matter if the switch is configured with it or not. Just make sure the switch has a native VLAN configured, or configure the interface as an access port. If you require trunking of every VLAN, including the NSIP VLAN, then additional configuration is required (NSVLAN or Tagall).
Configure Subnets/VLANs
To configure NetScaler with multiple connected subnets:
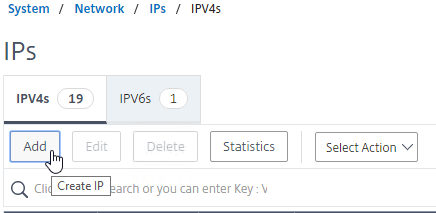
- Add a subnet IP for every network the NetScaler is connected to, except the dedicated management network. Expand System, expand Network, and click IPs.
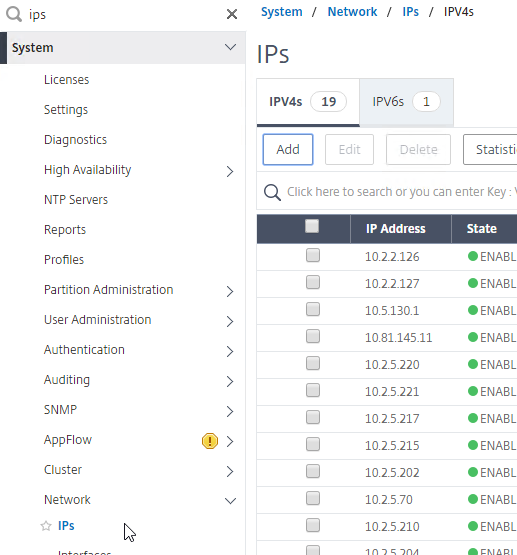
- On the right, click Add.
- Enter the Subnet IP Address for this network/subnet. The SNIP will be the source IP address the NetScaler will use when communicating with any other service/server on this network. The Subnet IP is also known as the Interface IP for the network. You will need a separate SNIP for each connected network (VLAN).
- Enter the netmask for this network.
- Ensure the IP Type is set to Subnet IP. Scroll down.
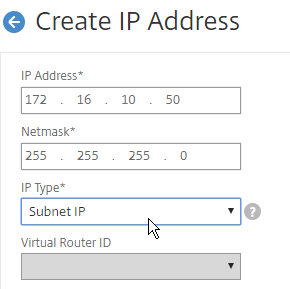
add ns ip 172.16.1.11 255.255.255.0 -type SNIP
- Under Application Access Controls, decide if you want to enable GUI management on this SNIP. This feature can be particularly useful for High Availability pairs, because when you point your browser to the SNIP, only the primary appliance will respond. However, enabling management access on the SNIP can be a security risk, especially if this is a SNIP for a DMZ network.
- Click Create when done. Continue adding SNIPs for each connected network (VLAN).
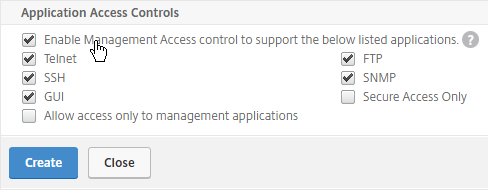
set ns ip 172.16.1.11 -mgmtAccess ENABLED -telnet DISABLED -ftp DISABLED
- On the left, expand System, expand Network, and click VLANs.
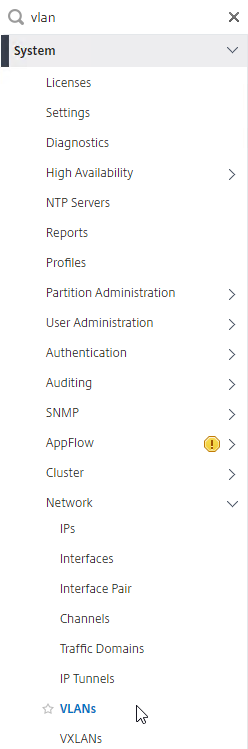
- On the right, click Add.
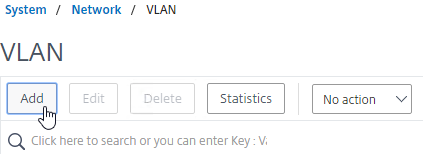
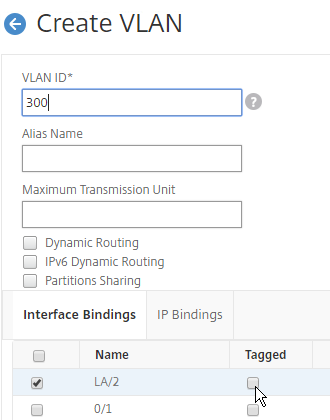
- Enter a descriptive VLAN ID. The actual VLAN ID only matters if you intend to tag the traffic. If not tagged, then any ID (except 1) will work.
- Check the box next to one physical interface or channel (e.g. LA/1) that is connected to the network.
- If this is a trunk port, select Tagged if the switch port/channel is expecting the VLAN to be tagged.
- If your switches do not allow untagged packets, then you will need to use the tagall interface option to tag NetScaler High Availability heartbeat packets. See CTX122921 Citrix NetScaler Interface Tagging and Flow of High Availability Packets
- If you don’t tag the VLAN, then the NetScaler interface/channel is removed from VLAN 1, and instead put in this VLAN ID.
- Switch to the IP Bindings tab.
- Check the box next to the Subnet IP for this network. This lets NetScaler know which interface is used for which IP subnet. Click Create when done.
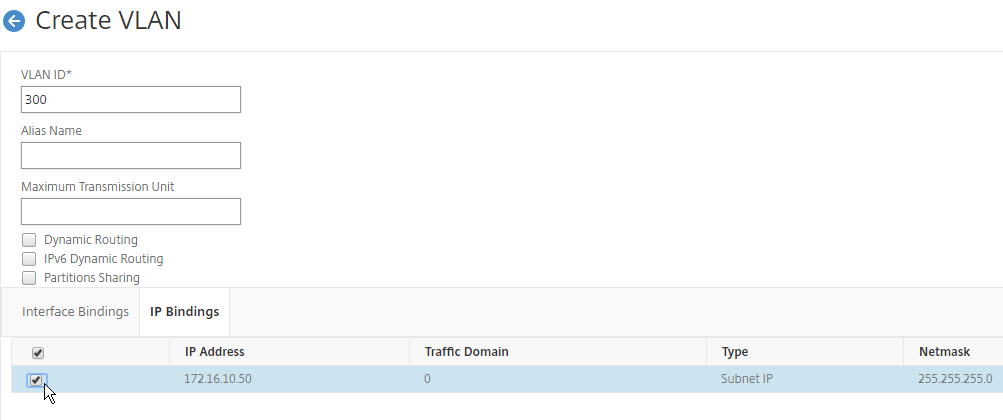
add vlan 50
bind vlan 50 -ifnum LA/1 -IPAddress 172.16.1.11 255.255.255.0
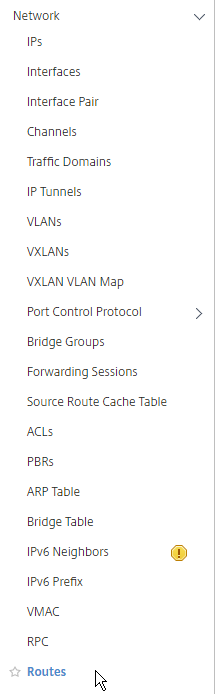
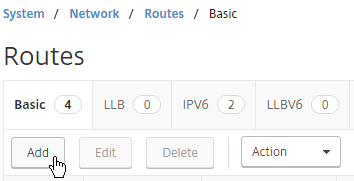
- On the left, expand System, expand Network, and click Routes.
- On the right, click Add.
- Internal networks are usually only accessible through an internal router. Add a static routes to the internal networks
- Make sure NULL Route is set to No.
- Set the Gateway (next hop) to an internal router.
- Then click Create.
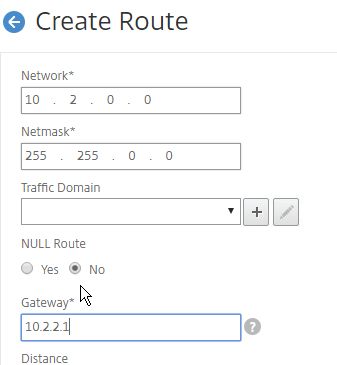
add route 10.2.0.0 255.255.0.0 10.2.2.1
- The default route should be changed to use a router on the DMZ network (towards the Internet). Before deleting the existing default route, either enable Mac Based Forwarding, or create a Policy Based Route, so that the replies from NSIP can reach your machine. You usually only need to do this for dedicated management networks.
- Note: PBR is recommended over MBF, because PBR can handle traffic sourced by NSIP (e.g Syslog traffic), while MBF cannot.
- Mac Based Forwarding sends replies out the same interface they came in on. However, MBF ignores the routing table, and doesn’t handle traffic sourced by the NSIP (e.g. LDAP traffic). To enable MBF:
- On the left, expand System, and click Settings.
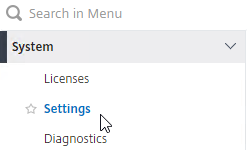
- On the right, in the left column, click Configure modes.
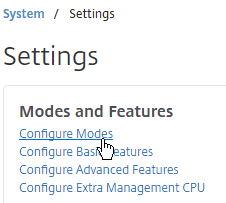
- Check the box next to MAC Based Forwarding (MBF), and click OK. More info on MAC Based Forwarding can be found at Citrix CTX1329532 FAQ: Citrix NetScaler MAC Based Forwarding (MBF).
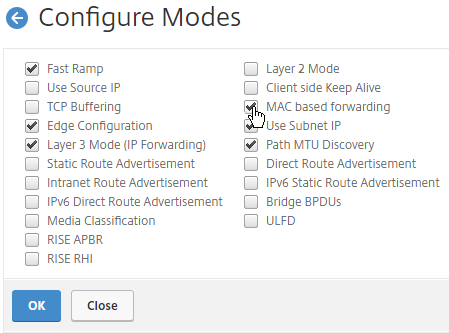
enable mode mbf
- On the left, expand System, and click Settings.
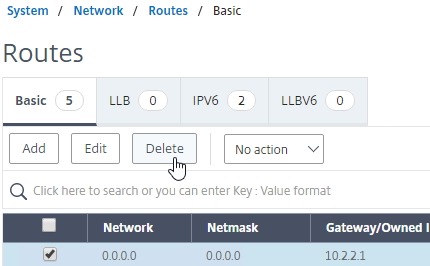
- Go back to System > Network > Routes.
- On the right, delete the 0.0.0.0 route. Don’t do this unless the NetScaler has a route, PBR, or MBF to the IP address of the machine you are running the browser on.
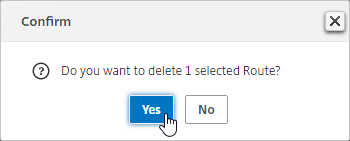
rm route 0.0.0.0 0.0.0.0 10.2.2.1 - Then click Add.
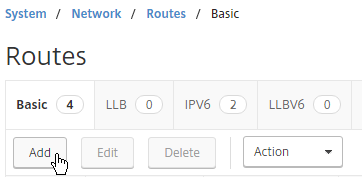
- Set the Network to 0.0.0.0, and the Netmask to 0.0.0.0.
- Make sure NULL Route is set to No.
- Enter the IP address of the DMZ (or data) router, and click Create.
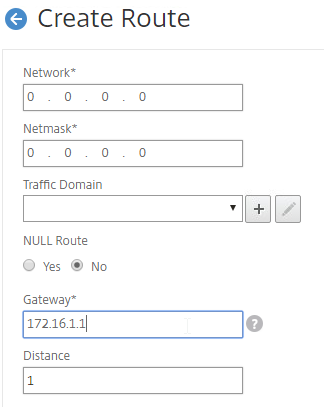
add route 0.0.0.0 0.0.0.0 172.16.1.1
- On the right, delete the 0.0.0.0 route. Don’t do this unless the NetScaler has a route, PBR, or MBF to the IP address of the machine you are running the browser on.
DNS Servers
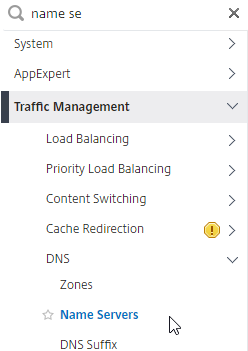
- To configure DNS servers, expand Traffic Management, expand DNS, and click Name Servers.
- On the right, click Add.
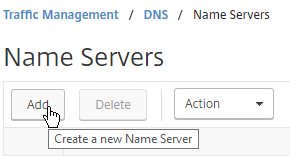
- Enter the IP address of a DNS server, and click Create.
- Note: The NetScaler must be able ping each of the DNS servers, or they will not be marked as UP. The ping originates from the SNIP.
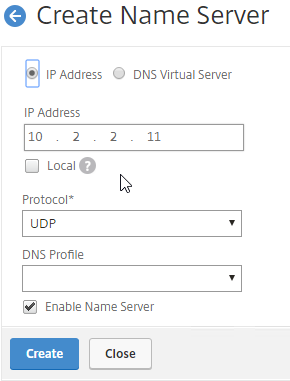
add dns nameServer 10.2.2.11
- NetScaler 12 includes DNS Security Options, which are useful if you use this NetScaler to provide DNS services to clients (e.g. DNS Proxy/Load Balancing, GSLB, etc.). You can configure them at Security > DNS Security.
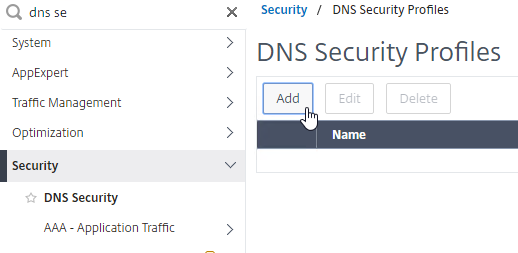
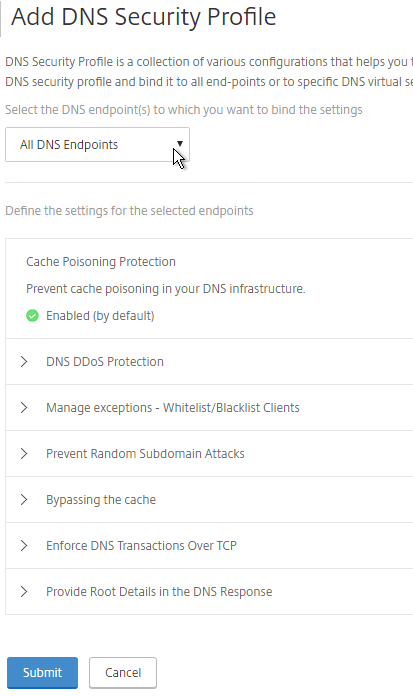
- Additional DNS Security Options are detailed at Mitigating DNS DDoS attacks at Citrix Docs.
NTP Servers
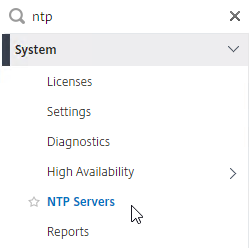
- On the left, expand System, and click NTP Servers.
- On the right, click Add.
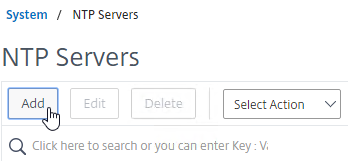
- Enter the IP Address of your NTP Server (or pool.ntp.org), and click Create.
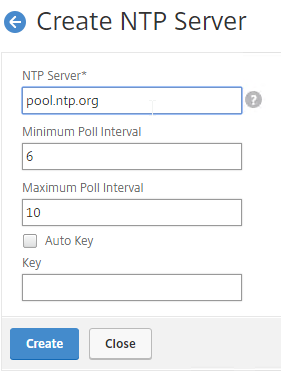
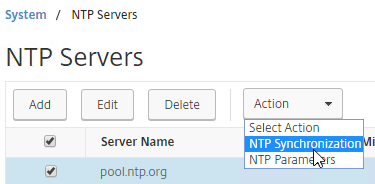
add ntp server pool.ntp.org - On the right, open the Action menu, and click NTP Synchronization.
- Select ENABLED, and click OK.
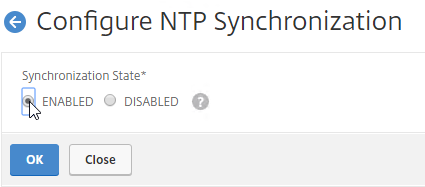
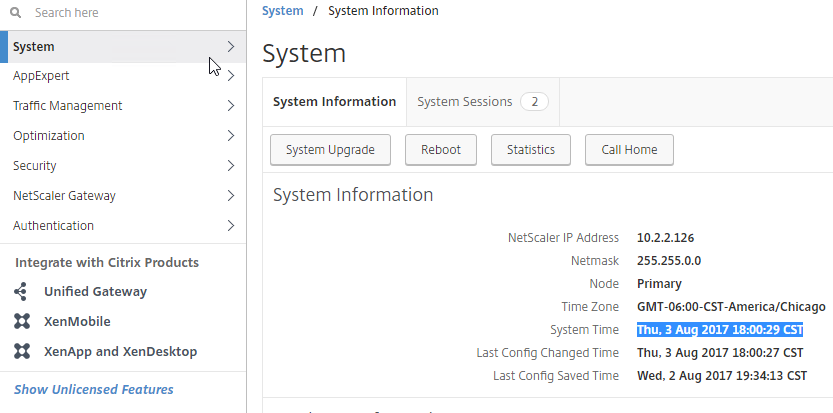
enable ntp sync - You can click the System node to view the System Time.
- If you need to manually set the time, SSH (Putty) to the NetScaler appliances. Run date to set the time. Run date –help to see the syntax.
- Ntpdate –u pool.ntp.org will cause an immediate NTP time update.
SYSLOG Server
Citrix CTX120609 NetScaler Log Rotation and Configuration Using Newsyslog
The NetScaler will, by default, store a few syslogs on the local appliance. You can create a syslog policy to also send the syslog entries to an external server, like NetScaler Management and Analytics System.
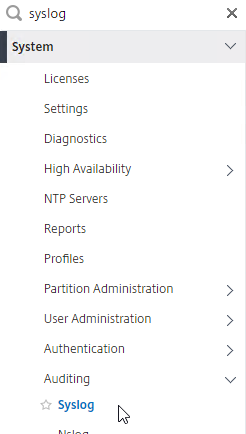
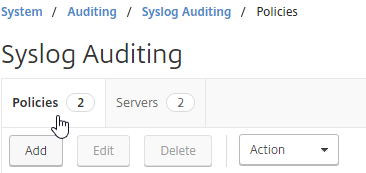
- On the left, expand System, expand Auditing, and click Syslog.
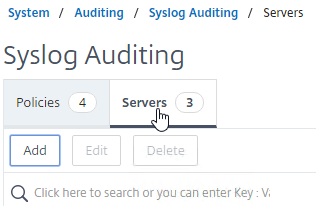
- On the right, switch to the Servers tab, and click Add.
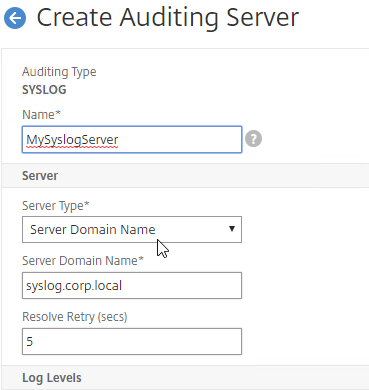
- Enter a name for the Syslog server.
- You can change Server Type to Server Domain Name, and enter a FQDN.
- Enter the IP Address or FQDN of the SYSLOG server, and 514 as the port.
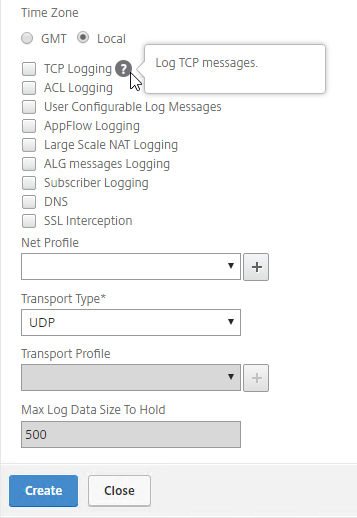
- Configure the Log Levels you’d like to send to it by clicking CUSTOM – typically select everything except DEBUG.
- Select your desired Time Zone.

- You can optionally enable other logging features.
- Then click Create.
add audit syslogAction MySyslogServer 10.2.2.12 -logLevel ALL -timeZone LOCAL_TIME
add audit syslogAction MySyslogServer syslog.corp.local -logLevel ALL -timeZone LOCAL_TIME
- On the right, switch to the Policies tab, and then click Add.
- Give the policy a descriptive name,
- Change the Expression Type selection to Advanced Policy.
- Select the previously created Syslog server.
- And then click Create.
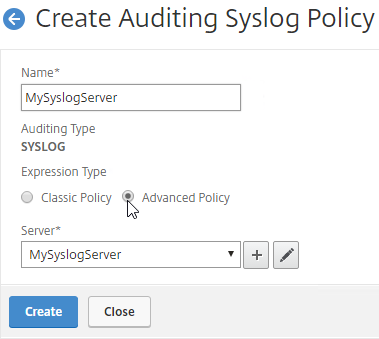
add audit syslogPolicy MySyslogServer ns_true MySyslogServer
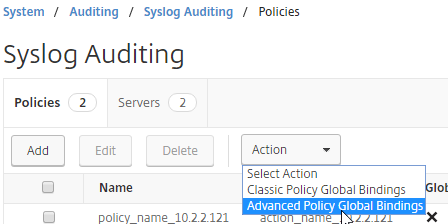
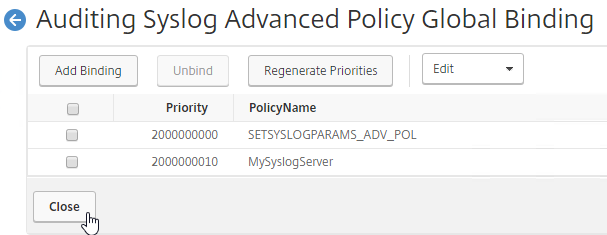
- While still on the Policies tab, open the Actions menu, and click Classic Policy Global Bindings or Advanced Policy Global Bindings, depending on which one you chose when creating the Syslog policy.
- Click Add Binding.
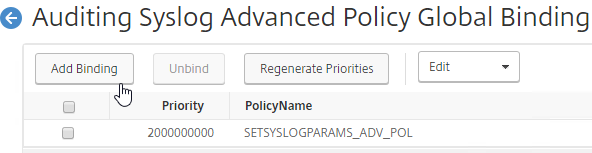
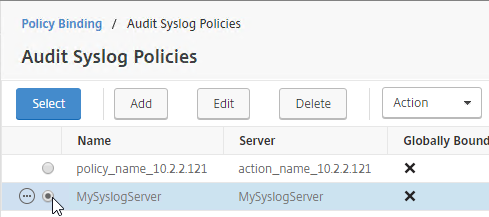
- Click where it says Click to select.
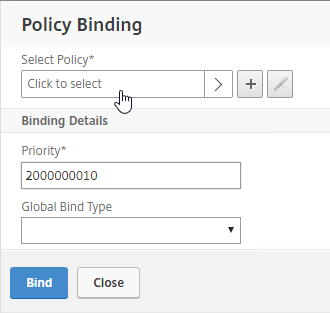
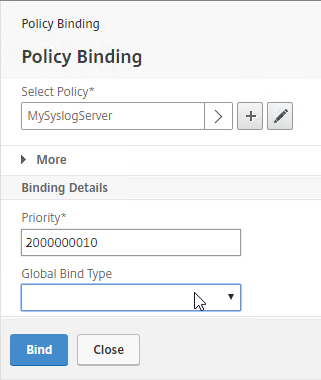
- Click the radio button next to the Syslog policy you want to bind, and click Select.
- If you don’t select anything in Global Bind Type, then it defaults to SYSTEM_GLOBAL.
- Click Bind.
- Click Close.
- If you see a blank screen, click the back button.
bind audit syslogGlobal -policyName MySyslogServer -priority 100
bind system global MySyslogServer -priority 100
- Click Add Binding.
SNMP – MIB, Traps, and Alarms
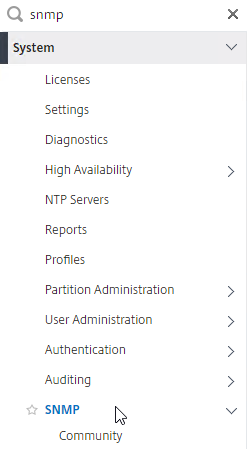
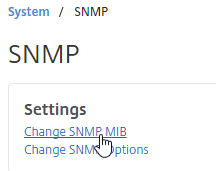
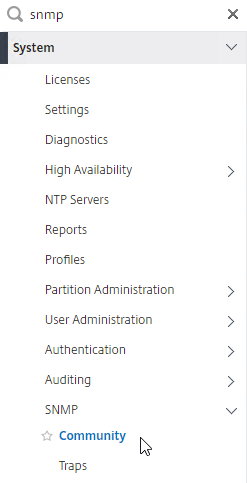
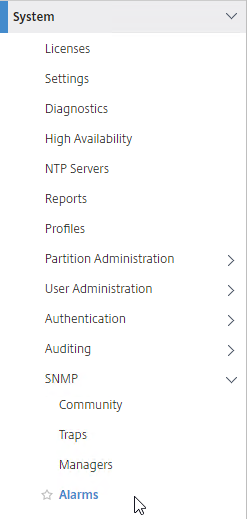
- On the left, expand System, and click SNMP.
- On the right, click Change SNMP MIB.
- Change the fields as desired. Your SNMP tool (e.g. NetScaler Management and Analytics System) will read this information. Click OK.
- This configuration needs to be repeated on the other node.
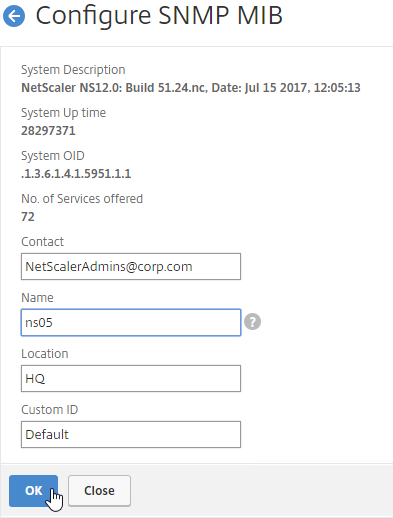
set snmp mib -contact NSAdmins@corp.com -name ns02 -location Corp
- Expand System, expand SNMP, and click Community.
- On the right, click Add.
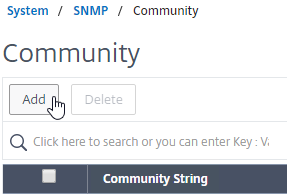
- Specify a community string, and the Permission, and click Create.
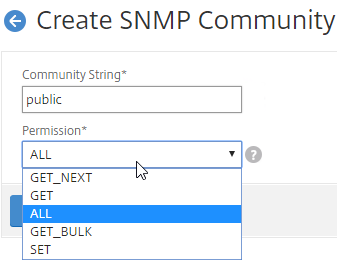
add snmp community public GET
- On the right, click Add.
- On the left, under SNMP, click Traps.
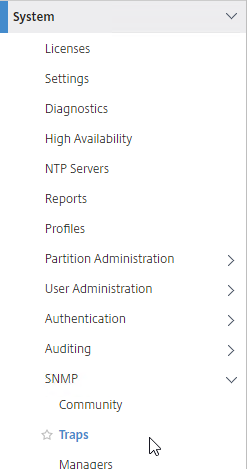
- On the right, click Add.
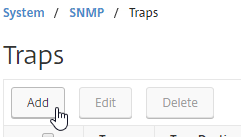
- Specify a trap destination. The fields will vary for V2 vs V3. Click Create.
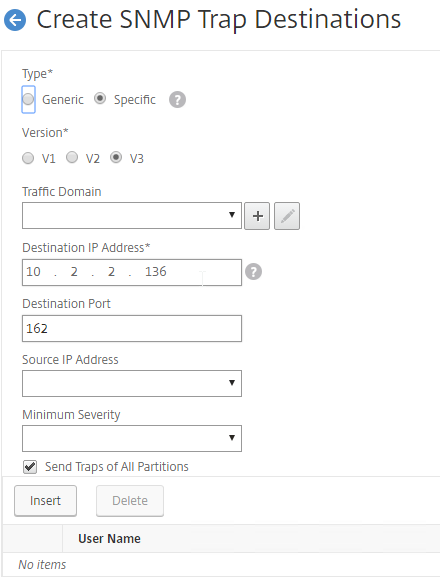
add snmp trap generic 10.2.2.12 -communityName public
add snmp trap specific 10.2.2.12 -communityName public
- On the right, click Add.
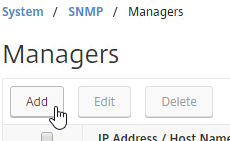
- On the left, under SNMP, click Managers.
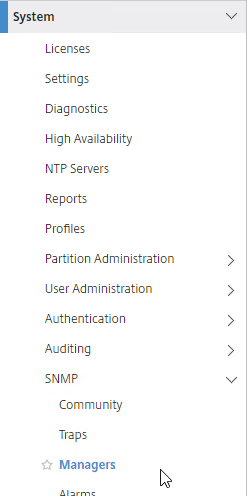
- On the right, click Add. Note: if you do not add a manager then the NetScaler will accept SNMP queries from all SNMP Managers on the network.
- Change the selection to Management Network.
- Specify the IP of the Management Host, and click Create.
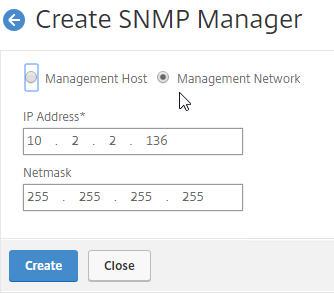
add snmp manager 10.2.2.12
- On the right, click Add. Note: if you do not add a manager then the NetScaler will accept SNMP queries from all SNMP Managers on the network.
- The Alarms node allows you to enable SNMP Alarms and configure thresholds.
- You can open an alarm to set thresholds. For example, CPU-USAGE can be set to 90% alarm, and 50% normal, with a Critical severity.
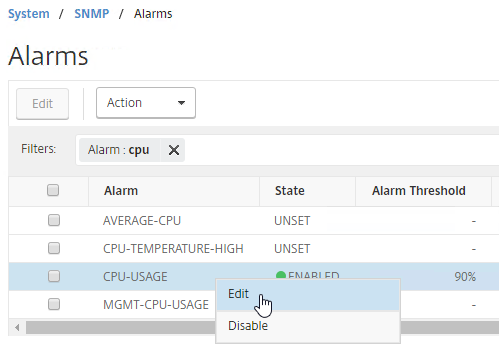
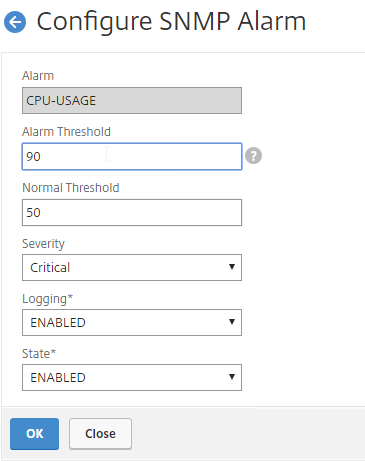
set snmp alarm CPU-USAGE -thresholdValue 90 -normalValue 50 -severity Critical
- You can also configure the MEMORY alarm.
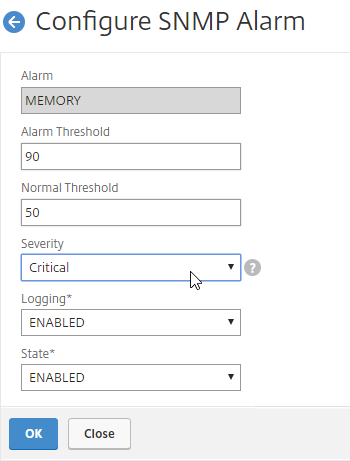
set snmp alarm MEMORY -thresholdValue 90 -normalValue 50 -severity Critical
- You can open an alarm to set thresholds. For example, CPU-USAGE can be set to 90% alarm, and 50% normal, with a Critical severity.
From http://www.slideshare.net/masonke/net-scaler-tcpperformancetuningintheaolnetwork: In addition to the usual OIDs, we have found these very useful to warn of potential problems.
- ifTotXoffSent – .1.3.6.1.4.1.5951.4.1.1.54.1.43
- ifnicTxStalls – .1.3.6.1.4.1.5951.4.1.1.54.1.45
- ifErrRxNoBuffs – .1.3.6.1.4.1.5951.4.1.1.54.1.30
- ifErrTxNoNSB – .1.3.6.1.4.1.5951.4.1.1.54.1.31
Call Home
Citrix Blog Post – Protect Your NetScaler From Disaster With Call Home!: If you have a physical NetScaler (MPX or SDX) with an active support contract, you many optionally enable Call Home to automatically notify Citrix Technical Support of hardware and software failures.
Call Home at Citrix Docs has information on how it work.
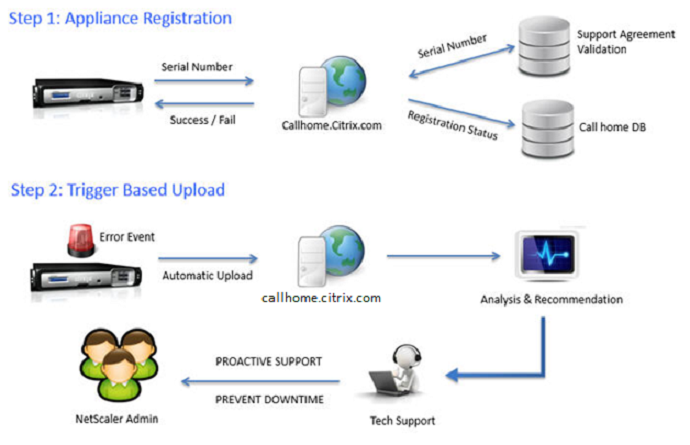
From the Citrix ADC 12.1 build 49 release notes: CallHome is now enhanced to send Citrix ADC usage metrics to Citrix Insight Services (CIS) periodically. Citrix collects the data to understand how the appliance works and how to improve the product. By default, CallHome sends the metrics once in every 7 days. For more information, see https://docs.citrix.com/en-us/netscaler/12-1/system/configuring-call-home.html.
To enable Call Home:
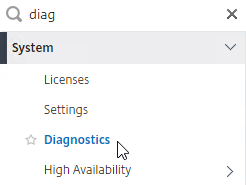
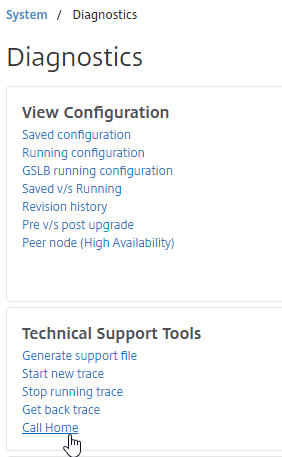
- On the left, expand System, and click Diagnostics.
- On the right, in the left column, in the Technical Support Tools section, click Call Home.
- Check the box next to Enable Call Home.
- Optionally enter an email address to receive notifications from Citrix Technical Support. Click OK.
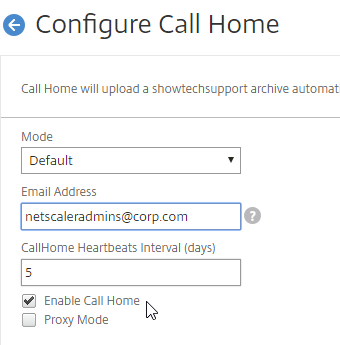
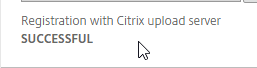
- If you go back into Call Home, it should indicate if registration succeeded or failed. Successful registration requires an active support contract.
Change nsroot Password
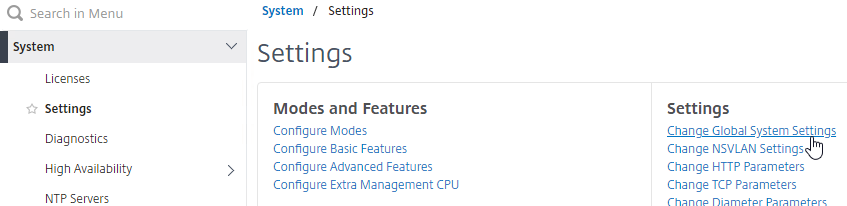
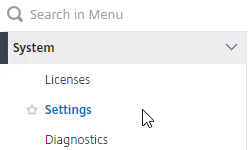
- If you want to force strong passwords for local accounts, go to System > Settings, and on the right, click Change Global System Settings
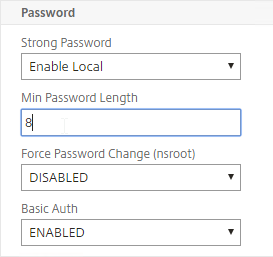
- Scroll down to the Password section.
- You can change Strong Password to Enable Local, and also specify a Min Password Length. Click OK.
- Expand System, expand User Administration, and click Users.
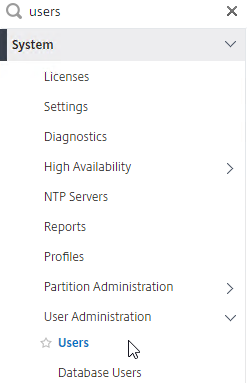
- On the right, right-click nsroot, and click Change Password.
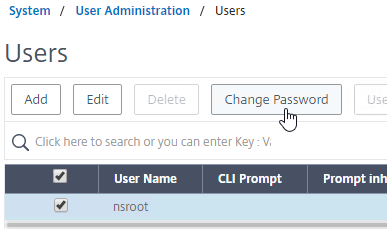
- Specify a new password, and click OK.
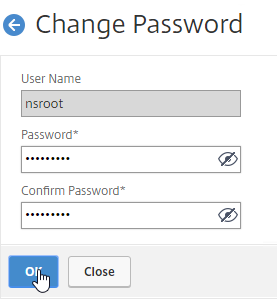
set system user nsroot Passw0rd
TCP, HTTP, SSL, and Security Settings
Citrix Docs Introduction to best practices for Citrix ADC MPX, VPX, and SDX security
Best practice settings:
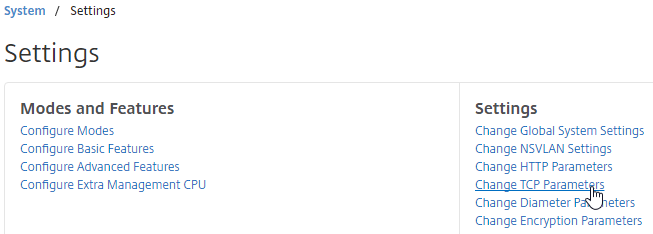
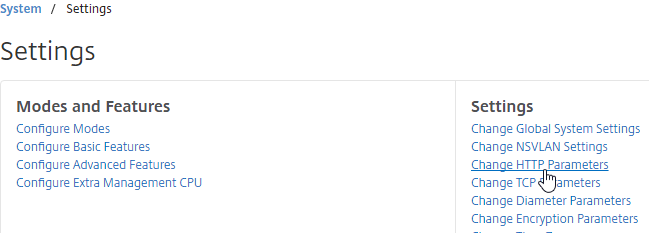
- On the left, expand System, and click Settings.
- On the right, in the right column, click Change TCP parameters.
- Check the box for Window scaling (near the top).
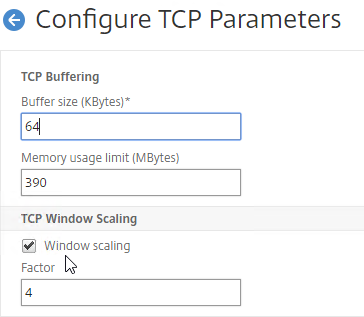
- Scroll down, and check the box for Selective Acknowledgement. Click OK.
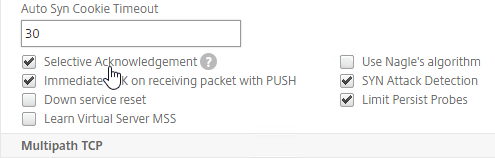
set ns tcpParam -WS ENABLED -SACK ENABLED
- Check the box for Window scaling (near the top).
- On the right, click Change HTTP parameters.
- Under Cookie, change the selection to Version1. This causes NetScaler to set Cookie expiration to a relative time instead of an absolute time.
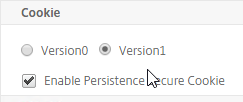
set ns param -cookieversion 1
- Check the box next to Drop invalid HTTP requests.
- Scroll down, and click OK.

set ns httpParam -dropInvalReqs ON
- Under Cookie, change the selection to Version1. This causes NetScaler to set Cookie expiration to a relative time instead of an absolute time.
- From Citrix CTX232321 Recommended TCP Profile Settings for Full Tunnel VPN/ICAProxy from NetScaler Gateway 11.1 Onwards:
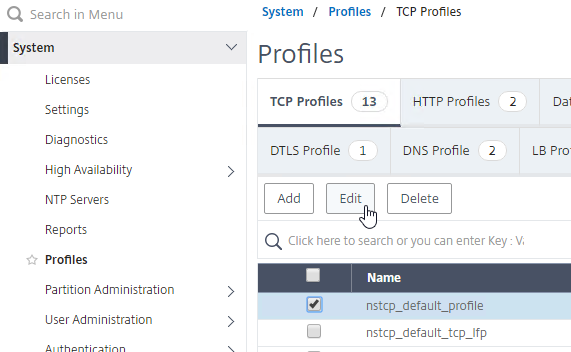
- Expand System, and click Profiles.
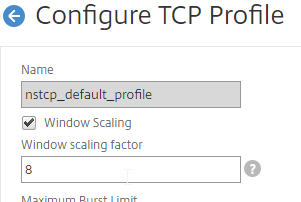
- On the right, on the TCP Profiles tab, edit the nstcp_default_profile.
- Enable Window Scaling with a factor of 8.
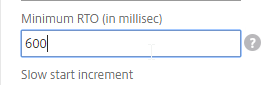
- Set Minimum RTO (in millisec) = 600.
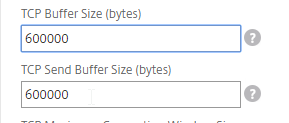
- Set TCP Buffer Size (bytes) = 600000
- Set TCP Send Buffer Size (bytes) = 600000
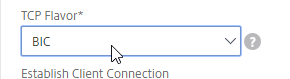
- Change TCP Flavor = BIC.
- Enable Use Nagle’s algorithm.
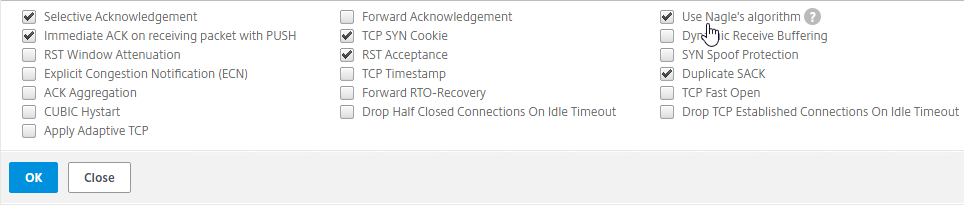
- Click OK when done.
- You can run the following command to see statistics on the dropped packets:
nsconmsg -g http_err_noreuse_ -d stats
- See CTX209398 Addressing false positives from CBC and MAC vulnerability scans of SSHD to harden SSHD by editing /nsconfig/sshd_config with the following. Then run
kill -HUP `cat /var/run/sshd.pid`to restart SSHD.Ciphers aes128-ctr,aes192-ctr,aes256-ctr MACs hmac-sha1,hmac-ripemd160
Citrix Knowledgebase articles:
- CTX228148 How to Lock Down the NetScaler Management Interfaces with ACLs
- Also see CTP George Spiers How to secure management access to NetScaler and create unique certificates in a highly available setup
- CTX109011 How to Secure SSH Access to the NetScaler Appliance with Public Key Authentication
- CTX127917 How to Configuring the Rate Limiting Feature of a NetScaler Appliance to Mitigate a DDoS Attack
- CTX131681 How to Use NetScaler Appliance to Avoid Layer 7 DDoS Attacks
- CTX209398 Addressing false positives from CBC and MAC vulnerability scans of SSHD
The following security configurations are detailed by Jason Samuel at Mitigating DDoS and brute force attacks against a Citrix Netscaler Access Gateway:
- Maximum logon attempts on NetScaler Gateway Virtual Server
- Rate Limiting for IP.SRC and HTTP.REQ.URL.
- nstcp_default_XA_XD_profile TCP profile on the NetScaler Gateway Virtual Server.
- Syslog logging
- External website monitoring
- Obfuscate the Server header in the HTTP response
- Disable management access on SNIPs
- Change nsroot strong password, use LDAP authentication, audit local accounts
- Don’t enable Enhanced Authentication Feedback
- SSL – disable SSLv3, deny SSL renegotiation, enable ECDHE ciphers, disable RC4 ciphers.
- 2-factor authentication
- NetScaler Management & Analytics System
- Review IPS/IDS & Firewall logs
Management Authentication – LDAP
Load balancing of LDAP servers is strongly recommended. If you bound multiple LDAP servers instead of load balancing them, NetScaler ADC would try each of the LDAP servers, and for incorrect passwords, will lock out the user sooner than expected. But if you instead load balance your LDAP servers, the authentication attempt will only be sent to one of them.
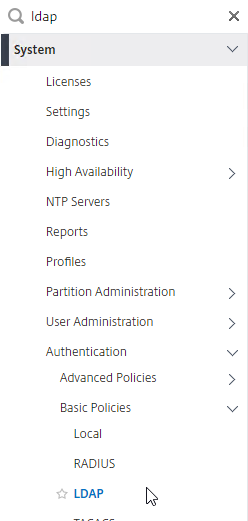
- Expand System, expand Authentication, expand Basic Policies, and then click LDAP.
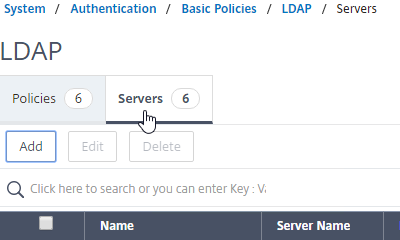
- On the right, switch to the Servers tab. Then click Add.
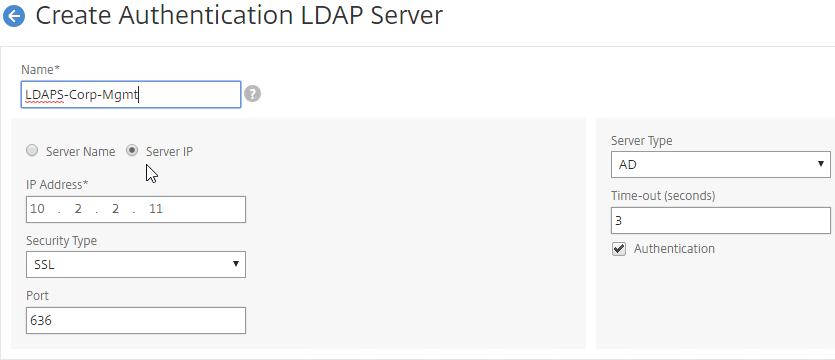
- Enter LDAPS-Corp-Mgmt or similar as the name. If you have multiple domains, you’ll need a separate LDAP Server per domain so make sure you include the domain name. Also, the LDAP policy used for management authentication will be different than the LDAP policy used for NetScaler Gateway.
- Change the selection to Server IP. Enter the VIP of the NetScaler load balancing vServer for LDAP.
- Change the Security Type to SSL.
- Enter 636 as the Port. Scroll down.
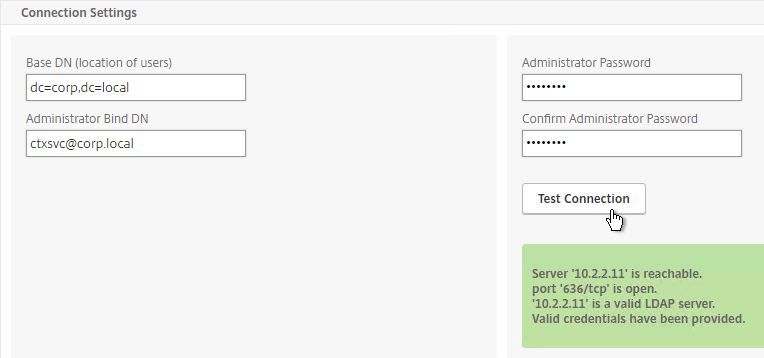
- In the Connection Settings section, enter your Active Directory DNS domain name in LDAP format as the Base DN.
- Enter the credentials of the LDAP bind account in userPrincipalName format.
- Check the box next to BindDN Password and enter the password. Click Test Connection. Scroll down.
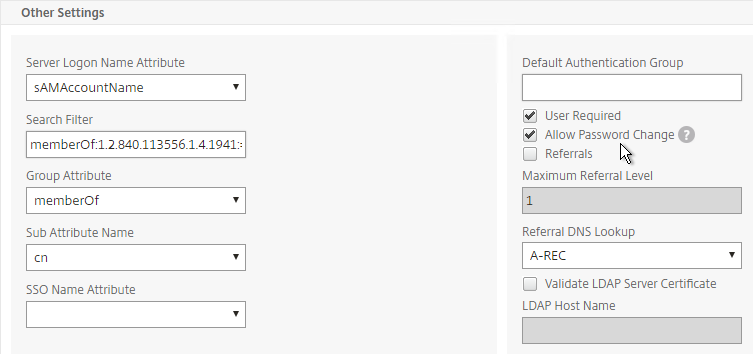
- In the Other Settings section, use the drop-down next to Server Logon Name Attribute, Group Attribute, and Sub Attribute Name to select the default fields for Active Directory.
- On the right, check the box next to Allow Password Change.
- It is best to restrict access to only members of a specific group. In the Search Filter field, enter memberOf=<GroupDN>. See the example below:
memberOf=CN=NetScaler Administrators,OU=Citrix,DC=corp,DC=localYou can add :1.2.840.113556.1.4.1941: to the query so it searches through nested groups. Without this, users will need to be direct members of the filtered group.memberOf:1.2.840.113556.1.4.1941:=CN=NetScaler Administrators,OU=Citrix,DC=corp,DC=local
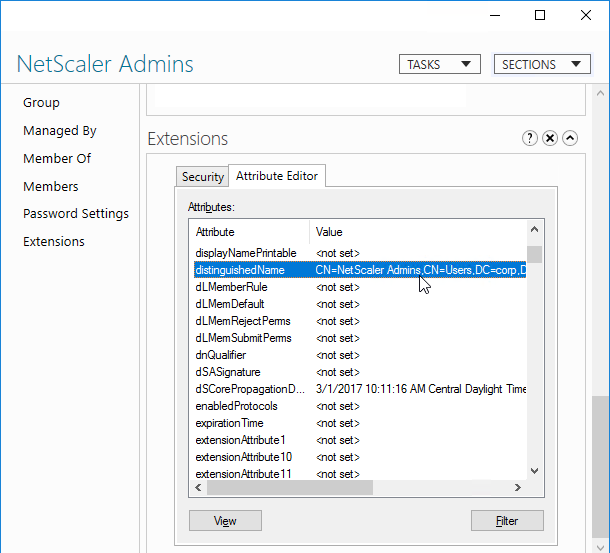
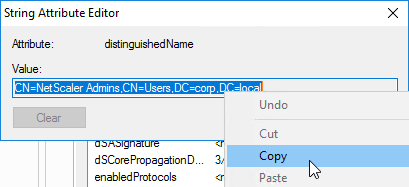
Citrix 132802 How to Use the ldapsearch Utility on the NetScaler Gateway Enterprise Edition Appliance to Validate a Search FilterAn easy way to get the full distinguished name of the group is through Active Directory Administrative Center. Double-click the group object, and switch to the Extensions page. On the right, switch to the Attribute Editor tab.Scroll down to distinguishedName, double-click it, and then copy it to the clipboard.
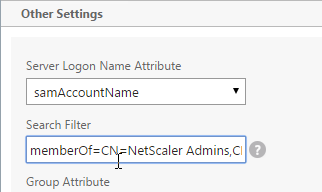
 Back on the NetScaler, in the Search Filter field, type in memberOf=, and then paste the Distinguished Name right after the equals sign. Don’t worry about spaces.
- Scroll down and click More to expand it.
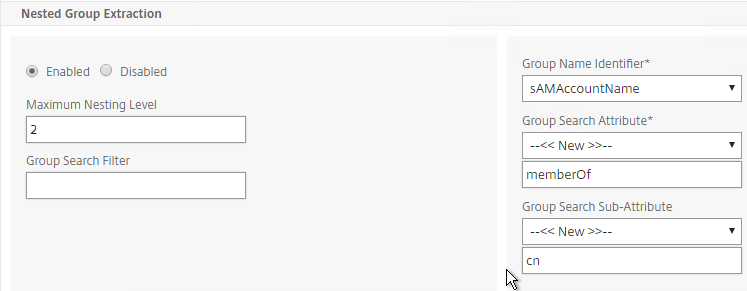
- For Nested Group Extraction, if desired, change the selection to Enabled.
- Set the Group Name Identifier to samAccountName.
- Set Group Search Attribute to –<< New >>–, and enter memberOf.
- Set Group Search Sub-Attribute to –<< New >>–, and enter CN.
- Example of LDAP Nested Group Search Filter Syntax
- Scroll down, and click Create.

add authentication ldapAction Corp-Mgmt -serverIP 10.2.2.210 -serverPort 636 -ldapBase "dc=corp,dc=local" -ldapBindDn "corp\\ctxsvc" -ldapBindDnPassword Passw0rd -ldapLoginName samaccountname -searchFilter "memberOf=CN=NetScaler Admins,CN=Users,DC=corp,DC=local" -groupAttrName memberOf -subAttributeName CN -secType SSL -passwdChange ENABLED
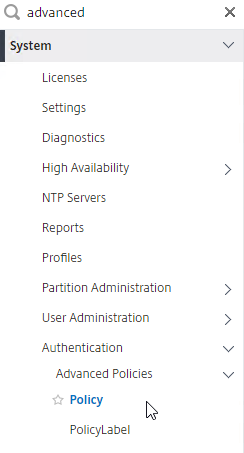
- On the left, go to System > Authentication > Advanced Policies > Policy.
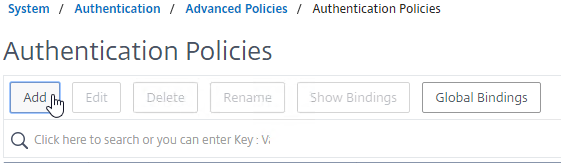
- On the right, click Add.
- Enter the name LDAPS-Corp-Mgmt or similar.
- Change the Action Type drop-down to LDAP.
- Select the previously created LDAPS-Corp-Mgmt server.
- On the bottom, in the Expression area, type in true.
- Click Create.

add authentication Policy LDAPS-Corp-Mgmt -rule true -action LDAPS-Corp-Mgmt
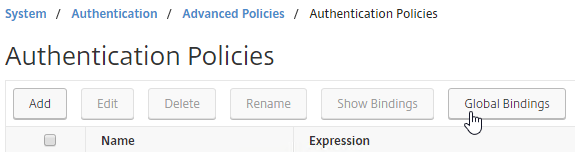
- Click Global Bindings in the right pane.
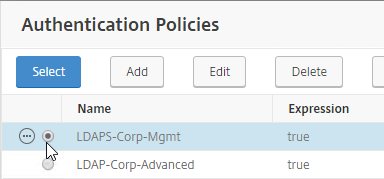
- Click where it says Click to select.
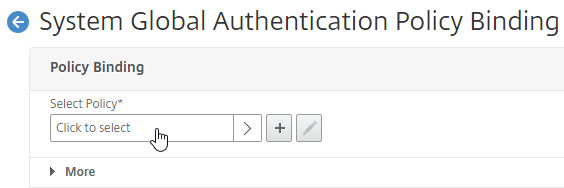
- Click the radio button next to the newly created LDAP policy, and click Select.
- Click Bind.
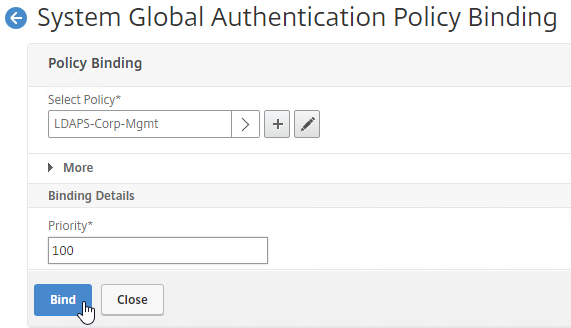
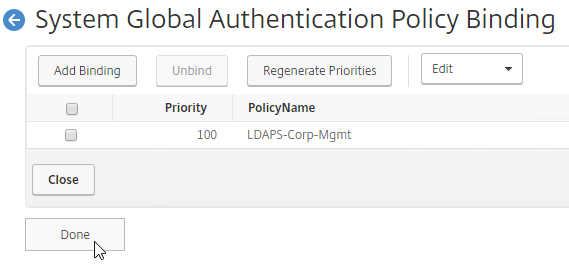
- Click Done.
bind system global LDAPS-Corp-Mgmt -priority 100 -gotoPriorityExpression NEXT
- Click where it says Click to select.
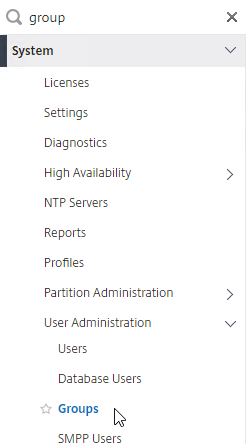
- Under System, expand User Administration, and click Groups.
- On the right, click Add.

- In the Group Name field, enter the case sensitive name of the Active Directory group containing the NetScaler administrators.
- In the Command Policies section, click Bind.
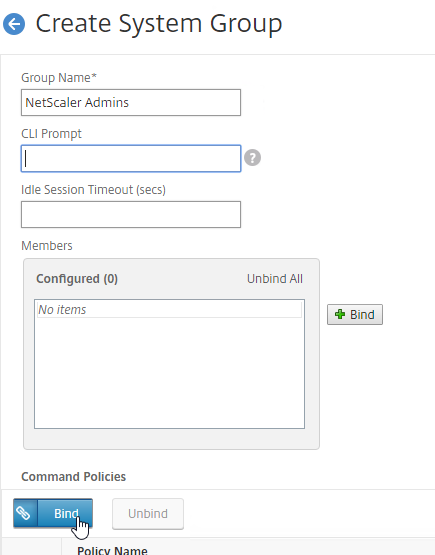
- Select the superuser policy, and click Insert.
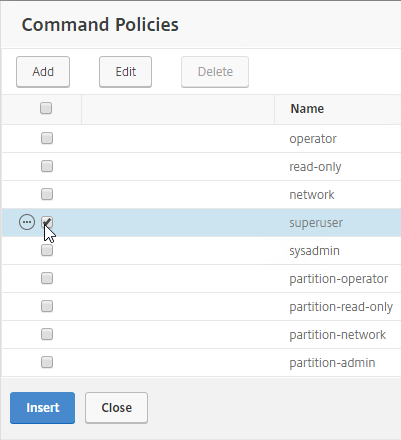
- Scroll down, and click Create.

add system group "NetScaler Admins" -timeout 900
bind system group "NetScaler Admins" -policyName superuser 100
- On the right, click Add.
- To prevent somebody from creating an nsroot account in LDAP (Active Directory) and then using that external nsroot account to login to ADC, disable external authentication on the local nsroot account.
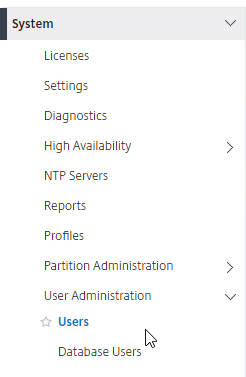
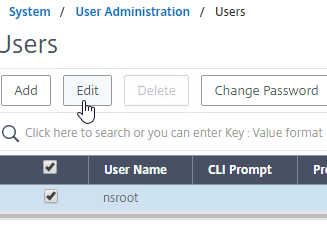
- On the left, go to System > User Administration > Users.
- On the right, edit the nsroot user.
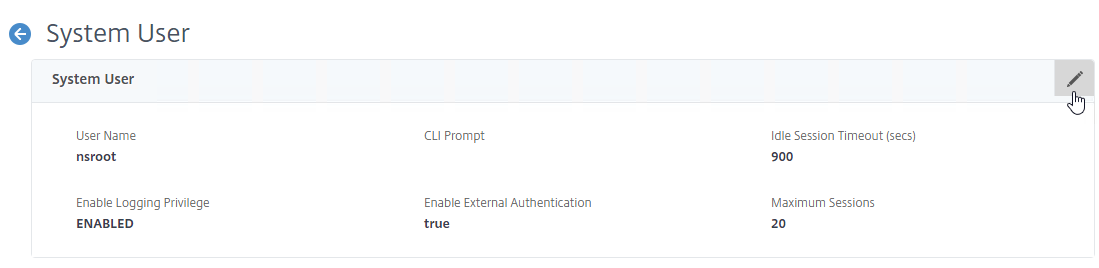
- At the top of the page, in the System User section, click the pencil icon.
- Uncheck the box next to Enable External Authentication and then click Continue.
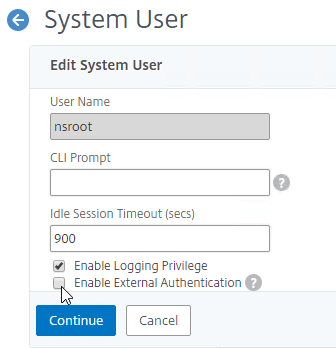
- Click Save and then click Done.
- On the left, go to System > User Administration > Users.
- If you logout:
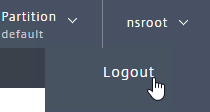
- You should be able to login to NetScaler ADC using an Active Directory account.
Management Authentication – Two Factor
Citrix ADC 12.1 build 51 and newer support two factor authentication for management access. The technology is based on nFactor but works in all editions of ADC (no licensing restrictions). Here’s a summary of the configuration steps with more detail coming later:
- The first authentication factor must be an Advanced Authentication Policy that is bound globally. Classic Authentication Policies will not work.
- Create a Login Schema to ask for the second factor password (i.e. passcode).
- This Login Schema is for second factor only and has no effect on the first factor. The second factor Login Schema should only ask for a single password prompt. It doesn’t appear to be possible to ask for both factors using the same Login Schema.
- Login Schema for the second factor does not use the normal nFactor language files and you instead must hard code the password prompt label for the second factor logon field directly in the Login Schema .xml file.


- Create an Advanced Authentication Server and Policy for the second factor (e.g. RADIUS).
- Create an Authentication Policy Label with Feature Type set to RBA_REQ. This is not the default so make sure you change the Feature Type drop-down field.
- When creating the Policy Label, select the Login Schema for the second factor.
- Bind the second factor Advanced Authentication Policy to the Policy Label.
- Go to Global Bindings for Authentication, edit the existing authentication binding, click Next Factor, and select your new Policy Label. That’s it.
Here are detailed configuration instructions for adding a second authentication factor to the management logon page.
- Login Schema XML File:
- Point WinSCP to your ADC appliance.
- Navigate to /nsconfig/loginschema/LoginSchema and download the SingleAuth.xml file.
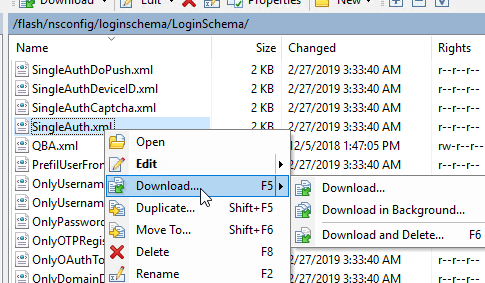
- Rename the file to MgmtNextFactor.xml or something like that.
- Edit the file.
- Look for the <Requirement> element with ID of passwd. Then look for the Label and set the Text field to whatever you want displayed on the second password page. Save the file when done.
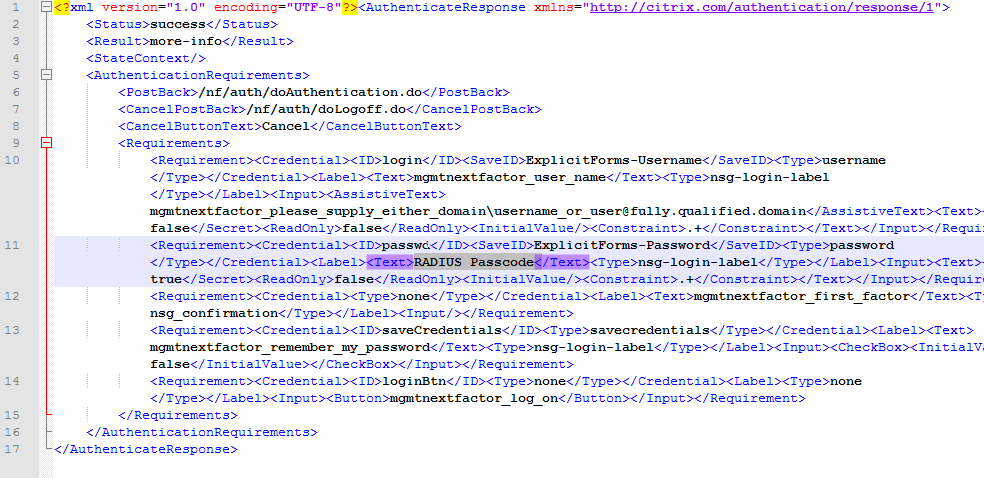
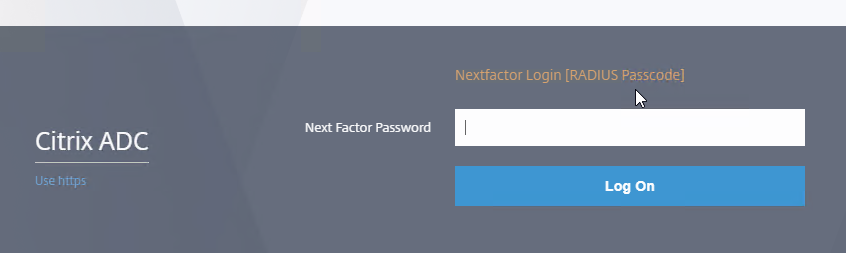
- The Label Text you enter will be shown on the second factor logon page.
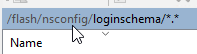
- In WinSCP, change the directory to /nsconfig/loginschema, which is one directory up from where you downloaded the file.
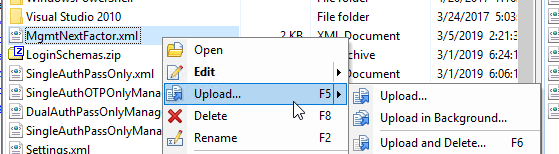
- Upload your modified file.
- RADIUS Authentication Server:
- Follow the link for instructions to create a RADIUS Server. Only create the Server object. The Policy object will be created later when creating the Authentication Policy Label.
add authentication radiusAction RADIUSMgmt -serverName 10.2.2.42 -serverPort 1812 -radKey b746744 -encrypted -encryptmethod ENCMTHD_3
- Follow the link for instructions to create a RADIUS Server. Only create the Server object. The Policy object will be created later when creating the Authentication Policy Label.
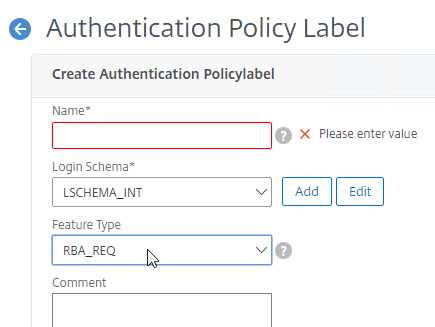
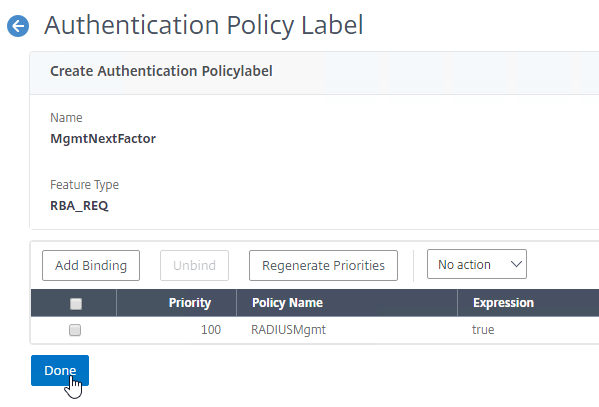
- On the left, go to System > Authentication > Advanced Policies > Policy Label.
- On the right, click Add.
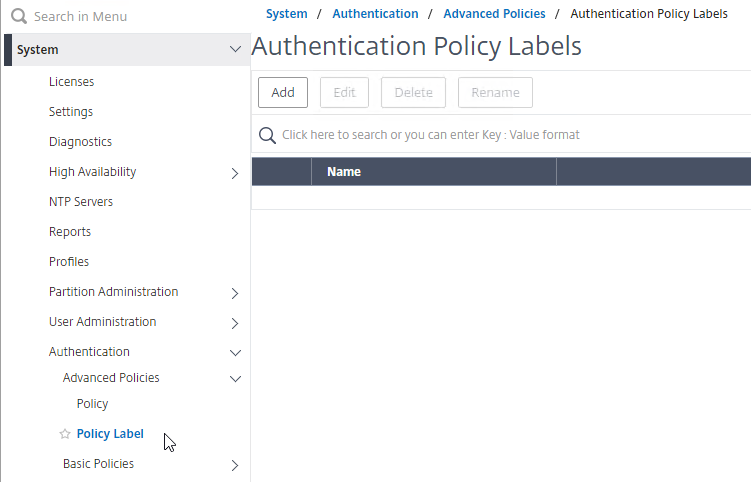
- Name the Policy Label MgmtNextFactor or similar.
- In the Login Schema field, click Add.
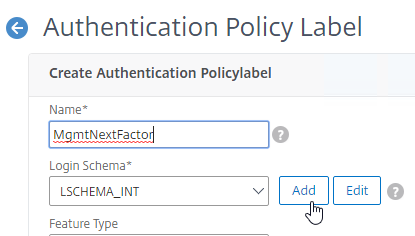
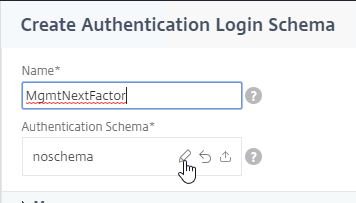
- Name the Login Schema MgmtNextFactor or similar.
- In the Authentication Schema field, click the pencil icon.
- On the left, select the Login Schema .xml file you uploaded earlier.
- On the top right, click the blue Select button. Do NOT click Create on the bottom left until you’ve clicked this Select button.
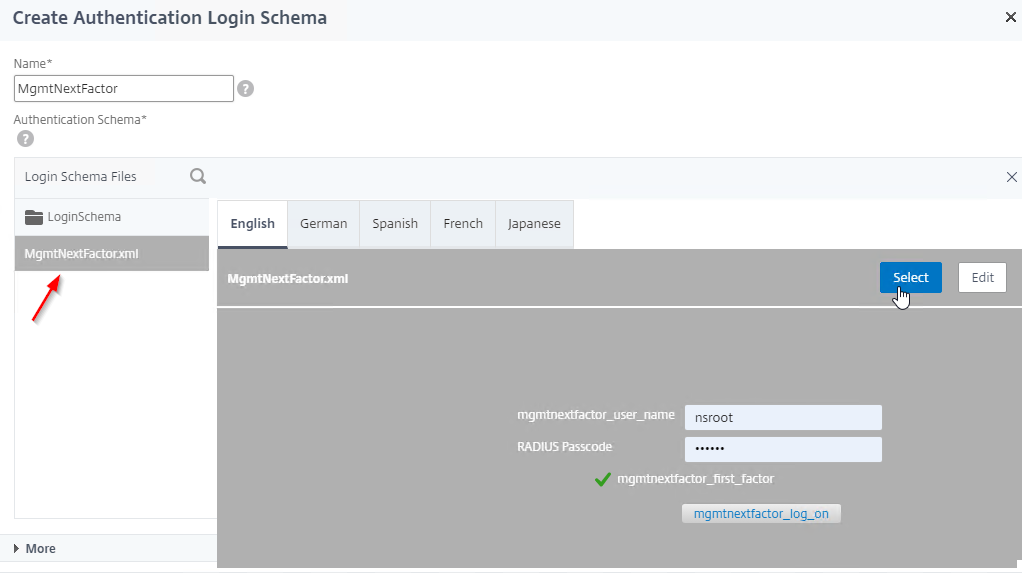
- The window collapses showing you the Login Schema file that you selected. Now you can click Create.
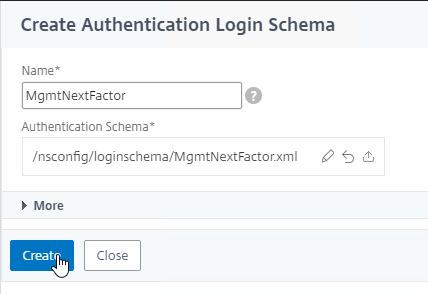
add authentication loginSchema MgmtNextFactor -authenticationSchema "/nsconfig/loginschema/MgmtNextFactor.xml"
- Back in the Authentication Policy Label screen, notice that you can edit the Login Schema object from here.
- Change the Feature Type drop-down to RBA_REQ. If you don’t do this, then you won’t be able to bind this later.

- Click Continue.
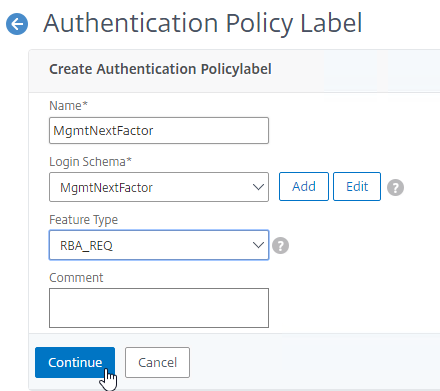
add authentication policylabel MgmtNextFactor -type RBA_REQ -loginSchema MgmtNextFactor
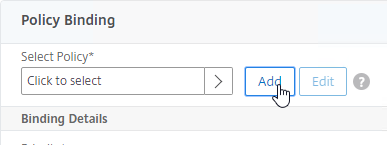
- In the Policy Label Policy Binding field, click Add.
- Name the Authentication Policy RADIUSMgmt or similar.
- Change the Action Type drop-down to RADIUS.
- Select the RADIUS server that you created earlier. Or you can Add one from here.
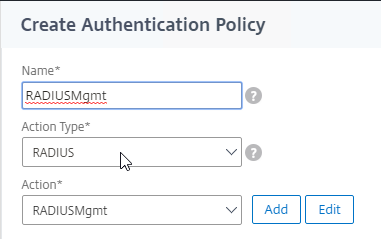
- In the Expression box, enter the word true and then click Create.
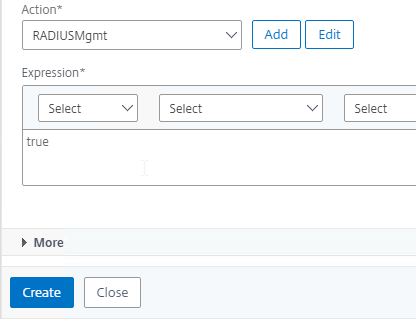
add authentication Policy RADIUSMgmt -rule true -action RADIUSMgmt
- Back in the Policy Label Policy Binding screen, click Bind.

bind authentication policylabel MgmtNextFactor -policyName RADIUSMgmt -priority 100 -gotoPriorityExpression NEXT
- The Authentication Policy Label configuration is complete so click Done.
- On the left, go to System > Authentication > Advanced Policies > Policy.
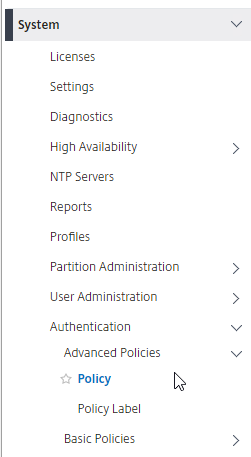
- On the right, click the Global Bindings button.

- You should already have an Advanced Authentication Policy bound globally.
add authentication ldapAction LDAPS-Corp-Mgmt -serverIP 10.2.2.11 -serverPort 636 -ldapBase "dc=corp,dc=local" -ldapBindDn ctxsvc@corp.local -ldapBindDnPassword 5054fc33f673bf4c5c6 -encrypted -encryptmethod ENCMTHD_3 -ldapLoginName sAMAccountName -groupAttrName memberOf -subAttributeName cn -secType SSL -passwdChange ENABLED

add authentication Policy LDAPS-Corp-Mgmt -rule true -action LDAPS-Corp-Mgmt

bind system global LDAPS-Corp-Mgmt -priority 100 -gotoPriorityExpression END
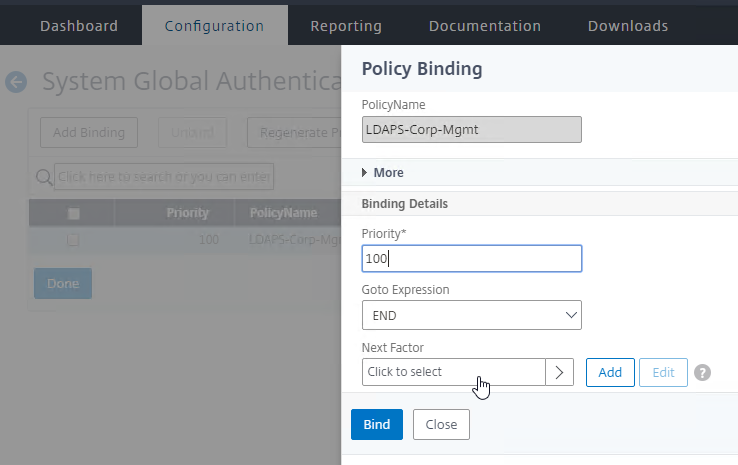
- Right-click your existing global binding and click Edit Binding.
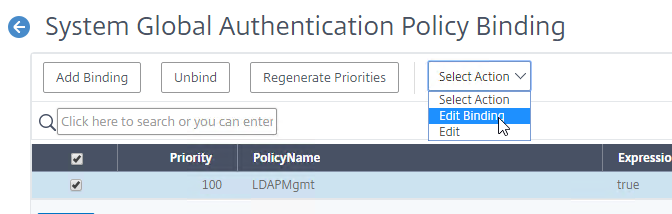
- In the Next Factor field, click where it says Click to select.
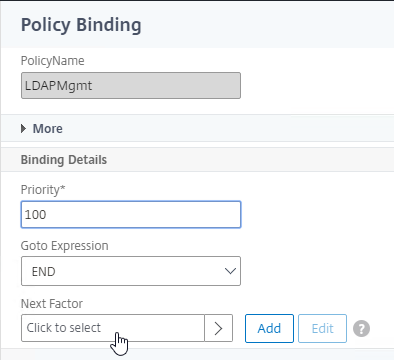
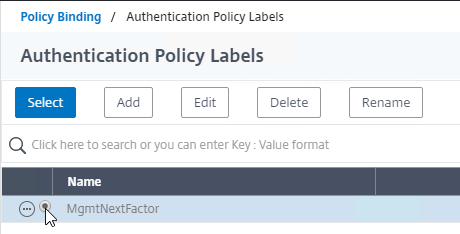
- Click the small circle next to your Management Next Factor Policy Label and then click the blue Select button at the top of the page.
- Back in the Policy Binding screen, click Bind.
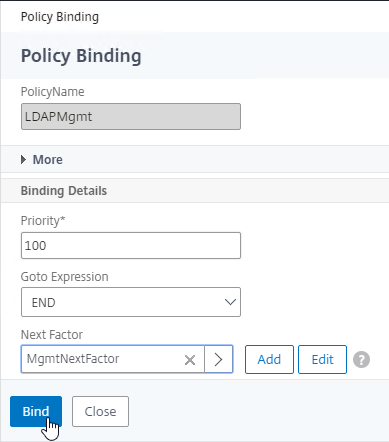
bind system global LDAPS-Corp-Mgmt -priority 100 -nextFactor RADIUSMgmt -gotoPriorityExpression END
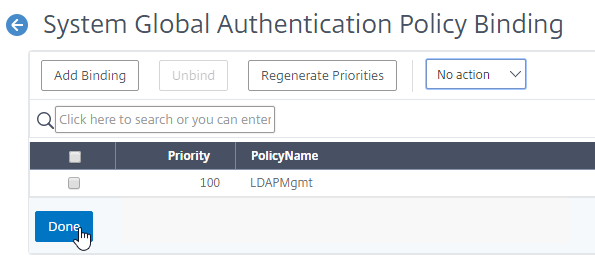
- Click Done to close the Global Authentication Policy Binding screen.
CLI Prompt
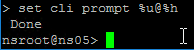
- When you connect to the NetScaler CLI prompt, by default, the prompt is just a
>.

- You can run
set cli prompt %u@%hto make it the same as a UNIX prompt. See Citrix Docs for the cli prompt syntax.
Backup and Restore
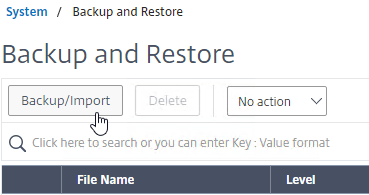
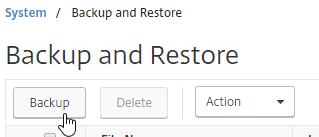
- On the left, expand System, and click Backup and Restore.
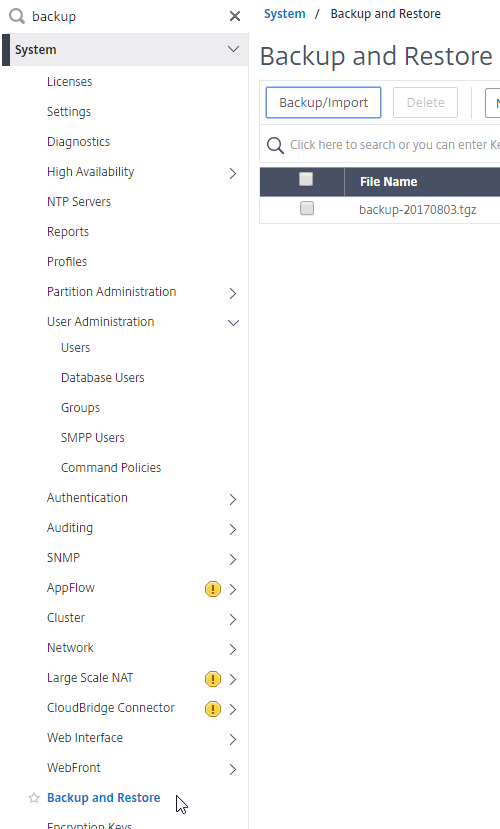
- On the right, click Backup/Import.
- Give the backup file a name.
- For Level, select Full, and click Backup.
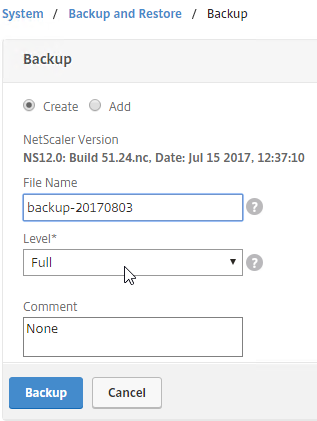
- Once the backup is complete, you can download the file.
For a PowerShell script, see John Billekens Create offline backups of the NetScaler config
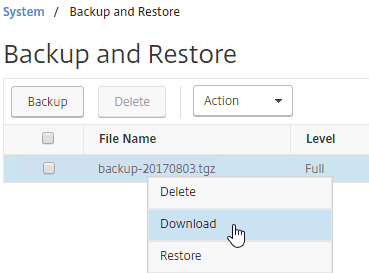
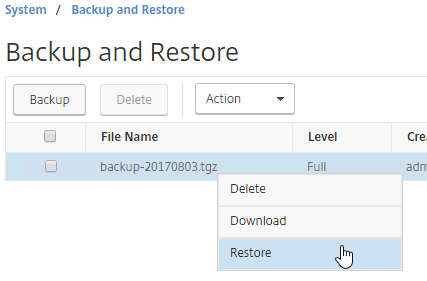
To restore:
- If you want to restore the system, and if the backup file is not currently on the appliance, you click the Backup button. Yes, this seems backwards.
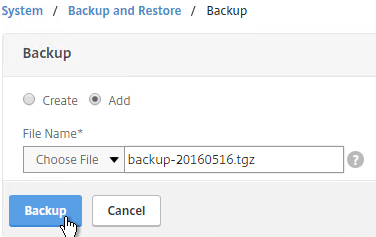
- Change the selection to Add.
- Browse Local to the previously downloaded backup file.
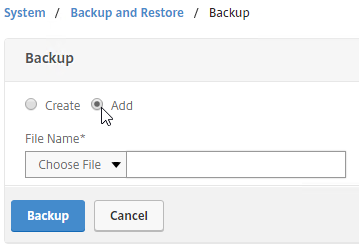
- Then click Backup. This uploads the file to the appliance and adds it to the list of backup files.
- Now you can select the backup, and click Restore.
Please help fill a documentation gap re HA Monitoring…
Is HA monitoring on Interface (or channel) a separate thing from HA heartbeat monitor for appliance up/down status? I.e., if I have HA monitoring turned on and HA heartbeat turned off, will failover occur if the channel fails, regrdless of the fact that HA heartbeats cannot be seen? Put another way, is HA monitoring of a channel dependent on heartbeats?
Heartbeats monitor the entire device. If no heartbeats on any interface, then the paired device is down and this device assumes primary role.
HA Monitoring monitors a single interface or channel. If that interface/channel is down, then failover.
As always, thanks so much for the quick answer. Cheers.
Hey Carl,
I have an HA pair with LACP Channels. I enabled ha monitoring and ha heartbeats on the channels which immediately took the devices down until i unplugged the ports.
My current configuration is as follows
management ip on its own vlan running from port 0/1
LA/2 created with 2 ports which has 2 vlans assigned and tagged to it (10/12)
LA/1 created with 2 ports which has 1 vlan assigned to it and not tagged (1097)
HA node monitoring sync vlan is set to nothing right now with the options to choose from of 1 and 1097.
All channels and interfaces have ha monitoring/heartbeats disabled except 0/1
I know i am missing something minor, but any thoughts on why the devices went down once i enabled ha monitoring on both the channels?
Is Tag All enabled on the Channel? Do your switch ports require all packets to have VLAN Tags (no native VLAN)?
Is Fail-Safe enabled on your HA nodes?
Hello Carl,
thank you very much for the whole site, it’s really like gold for Citrix Administrators.
I’ve a question about PBR with a dual network card setup (first for admin, second to handle traffic data) : I do not succeed to make it work like you explained, I do require to add to the PBR rule a “-destIP” flag like :
add ns pbr NSIP ALLOW -srcIP = 10.2.2.126-10.2.2.127 -destIP 10.2.2.1-10.2.2.254 -nextHop 10.2.2.1
If I do not add the flag, I can not reach my appliance anymore from another machine in the same LAN, but the appliance can still ping it. It’s really make me crazy!
Regards
sdx 14040: mgmt interface is 0/1, my nsip is 192.168.10.10/24 with .1 as gateway (vlan 10), my vpx instance nsip is 10.10.100.100/24 with .1 as gateway (vlan 100). 0/1 is connected to my cisco switch as an access port in vlan 10, my vpx instance has no way of reaching its gateway through 0/1, can 0/1 be configured as a trunk to receive multiple vlan tags, if not how do i fix this?
I think you can as long as the trunk is configured with an untagged VLAN (aka native VLAN) for your SVM.
i just made my switchport a trunk and lost comm to the sdx…what am i doing wrong?
Did you specify a native VLAN on the trunk?
no, i am allowing all…here is my config (cisco 6509):
interface g7/46
switchport
switchport trunk encapsulation dot1q
switchport mode trunk
no shut
I don’t see the native VLAN config. Google the instructions.
Hi Carl,
Regarding HA Heartbeat tagging for switch that doesn’t allow native vlan; untag on one of the VLAN interface and enable tagall on LACP interface. Can this be done with out a downtime?
> bind vlan 254 -ifnum LA/2 -tagged OFF
> set interface LA/2 -tagall ON
There will downtime equivalent to how long it takes you to run both commands. You could do it on secondary first, failover and then do it on former primary.
Thanks Carl. we plan to execute as suggested.
quick detail, in our case we have native vlan configured on the switch but it is local to the switch. so same as having no native vlan.
Hello Carl,
Thanks a million ! Your documentation helped me to configure VPX HA on SDX successfully.
Cheers,
Charu.
Hello, this problem has been bothering me,thank you very much,when I use MPX to build a netscaler cluster, and want to use four 1Gb port to configure one port channel, use to carry the cluster backplane,I think nsip will work on this port channel,Is this correct?If so, does mgmt (0/1) port need to be connected?
ADC listens for all ADC-owned IP addresses across all interfaces. If you need to tag the NSIP VLAN, then configure NSVLAN on each node. https://docs.citrix.com/en-us/citrix-adc/current-release/clustering/cluster-faqs.html#how-can-i-configureun-configure-the-nsvlan-on-a-cluster
Hello Carl,
It is possible to use an additional physical interface only for heartbeats and synchronization, and that it does not go through a switch but is a direct cable.
Regards
See https://support.citrix.com/article/CTX109013#Twelve
You can designate specific interfaces that support HA Heartbeat. It’s probably best to have multiple interfaces to avoid split brain.
VLAN tagging can be easily handled for heartbeat packets.
Hi Carl,
The “backup and Restore” procedure also applies to rebuild a VPX? I need to create another VPX, and restore all the config from the previous one. The reason is that the original one has HDD errors.
Thx!
Santiago
Yes, as long as the interfaces are the same.
Hi Carl,
I’m looking for a solution to synchronize my icons to the secondary vpx, stored in /var/netscaler/logon/. After a failover my bookmarks show white icons, reffering to the images that aren’t sync’d.
I’ve managed to copy the files manually. The nsfsyncd.list file doesn’t list this directory.
Any idea how I can make this work ?
I have been asked to inquire about creating a custom monitor for certain ServiceGroups that checks a specific file for a word or a file name. I am looking for some guidance on how to set this up.
Hi Carl,
Again thank you for this.
We have a customer who has an akamai WAF deployment and they want Netscaler to act as proxy.
Netscaler is working in imperva WAF while if we try to test it using akamai its not working.
We are modifying the host file of windows workstation using public IP address of akamai pointing to FQDN of Netscaler gateway VIP when testing akamai.
Can you help us advise on this please? Thanks
Regards
Is Akamai terminating the Citrix Gateway SSL Connection and then re-encrypting? I don’t think that works.
Hi Carl,
We have got same problem. I’ll try and describe our setup little bit. When our website is routed through Akamai, using HTML 5 browser we are able to access published applications. However, when we try to access it through CItrix Work Space App we are thrown with an error stating “The published resource is not available currently. Please contact your system administrator for further assistance”.
Could you help us in finding out why this issue occurs when traffic is routed through Akamai for WAF and necessary steps to mitigate the issue?
Reagrds
Hi Carl
I know this is a basic question but still requesting here.
We are building a new Xendesktop environment , we have one Citrix url https://mycitrix.service.com, the request is if the user is internal to network he should get authenticated via LDAP only, if user comes via external network he should get authenticated via LDAP and Radius. How can we achieve this.
The easy way is to create two Gateway vServers on different VIPs. Then configure internal DNS to resolve to one of the Gateways and external DNS to resolve to the other Gateway.
Another option is to configure two Gateways with the same VIP but with different Listen Policies.
Thank you Carl 👍
Hi Carl, thanks for your effort , I just have a question from your experience , is it ok / compatible to upgrade NetScaler 5650 version 11.1 build 52.13 directly to 12.1 build 55.18 ? or do I have to go through version 12.0x in between ?
You can usually jump straight to the desired version.
Carl I have a silly question, but I will ask. Does NetScaler check back with Citrix on licensing. I am building a new instance VPX to replace one that is currently production. Can I reallocate the license in the portal to the MAC address of the new one in order to activate all features then configure it after which I will shutdown the other? ( I am porting the config over). Or will reallocating to the new MAC address somehow affect the production instance. I am pretty sure it does not but I want to be certain for obvious reasons. Old VPX is 12.1 new is 13
Thanks
You can technically reallocate the license without breaking the old installed license.
Hi Carl.
I am a little lost because I need to configure my NS to send the Appliance logs, it has logs like “nsroot accepted password” “nsroot failed password” “many attempts ..”.
That is, as part of Auth, Secure, Messages ..
I would appreciate your advice.
I just did the cipher mitigation step #6, CTX209398, and afterward my HA pair were unable to sync with each other. The following day, I couldn’t SSH into either node from SecureCRT, or even use the Web GUI.
After going into vsphere’s remote console for the two VPX VMs, deleting the two lines of modified code in /nsconfig/sshd_config and rebooting again, everything starting working.
I guess I’d exercise caution before editing cipher suites based off a Citrix article that was last updated in mid 2017.
I am using a 2 x Netscaler 12.0 VPX in Azure with a Azure Standard load balancer in front of the Netscalers. The httpaccess.log shows the source IP as 127.0.0.2 instead of the real source IP. Is there setting that would show the real source IP instead of 127.0.0.2?
Hi Carl
First, I wanna say I am a big fan of your work.
I don’t know if this is the right place for my question but I will ask it anyway. It’s a question regarding Netscaler licensing.
The company where I work now bought 2 Netscaler VPX Standard Editions in 2013. I think at that time the top release was 10.5 or 11.
Well, something happened to those vms until this spring when I took this position (guess they were decommissioned) because now only one Netscaler is functional (Netscaler VPX (5) with firmware 11.0 Build: 62.10.nc) and the Host Id of this VPX can’t be found in My Citrix account. This Netscaler was used as the Production Netscaler for a XenApp 6.5 site.
After my arrival i migrated the environment to 7.15 LTSR and that same Netscaler is still used.
My plans are to update the Netscaler to a version as high as possible and in the meantime maintain LTSR compliance.
I did the following test:
– installed a test Netscaler from OVF (version 13.0)
– changed the MAC of the vm to one that had a license in MyCitrix account
– I added the lic file linked to that Host ID
For my complete surprise, it’s working without any issue.
I must add that we are in support period only for Virtual Apps and Desktop.
Now comes the question. From Citrix point of view is this practice correct? If not, what Netscaler version will be ok?
Thank you in advance.
Regards,
Catalin
I don’t recommend 13.0 at this time due to GUI bugs. Instead, I recommend the latest 12.1 release.
The 5 Mbps license is probably a free Developer Edition license, or maybe an old free VPX Express license. I assume the license has an expiration date. If you’ve purchased licenses, then you should be able to see them at mycitrix.com, assuming you logged in with an account that is linked with the licensed organization.
Hi Carl
Thank you for the quick reply.
So I thought at first, but I can see in the lic files that the license is permanent:
INCREMENT CNS_SSE_SERVER CITRIX 2013.0930 permanent
In MyCitrix account I can see 2 licenses: Citrix NetScaler VPX Express – Standard Edition with a valid Purchase date and Expiration Date: N/A
So, if I use a 12.1 Netscaler image and license it with a valid lic file then we’re ok regarding Citrix licensing?
Thank you again.
Regards,
Catalin
Your SA date on the license is 2013.0930, which means technically it’s not supposed to work on any NetScaler firmware newer than 10.1.
If you deploy new ADC appliances without licensing, then they automatically get Freemium edition, which is Standard Edition (load balancing) but without Gateway. The old VPX Express license included Gateway.
Hi Carl
Ok, makes sense now.
Thank you again.
Regards,
Catalin
This is an older comment where do you stand on latest version of 13.0..or later?
The latest builds still have bugs. But there are new features (e.g. TLS EMS) that you might need that are only in 13.0.
Hi Carl,
I’m struggling with the VLANs in NS12.1. I have a Service running VLAN 1 on IF 0/1. This one has to move to VLAN 300.
So,
– i’ve patched IF 0/2 to the switch. The Switch-Port has a multiple vlan trunk configuration (cisco), because multiple Services will be delivered to different subnets (VLANs).
– I’ve changed the Loadbalancing Server-IP to the new IP (10.172.128.12/26).
– I’ve changed the Loadbalancing virtual Server IP to the new IP (10.172.128.12/26).
– Linked the Service to the modified Server IP (srv_10.172.128.12)
– I’ve set IF 0/2 to trunk mode=ON, left trunk allowed vlan list empty, set Tag All VLANs to off.
– I’ve created a SNIP (10.172.128.9/26)
– I’ve Setup a VLAN, Bound it to IF 0/2, set it tagged and made IP-Binding to previous created SNIP
– NS created a route to 10.172.128.0/26, with Gateway 10.172.128.9 automatically
The Monitor keeps signalling the Service State as down. When viewing the Network vizualizer, the SNIP 10.172.128.9 is highlighted with IF 0/2 but 10.172.128.12 is not highlighted with any IF.
I tried to add VLAN 300 to allowed vlan list, the TAGALL flag, but the Service keeps in state down.
Any idea what i’m missing?
Are the Virtual IP and Server IP two different IPs? I think you’re showing the same IP for both.
Master Carl. What are your recommendations for configuring HA on a pair of VPXs (on esxi). Interface monitoring is not available and the “traffic” interface is not passing heartbeat packets. Seeing “Interfaces on which heartbeat packets are not seen: 1/1”. I have this interface configured with multiple tagged vlans.
If I go into esxi and disable the network interface, failover does not happen. I did create a monitored static route using the default route which is reachable only via that interface. This worked, but I have a feeling that it is not optimal.
Thanks for your insight.
On ADC, go to VLANs and untag one of them that’s on 1/1. Then go to Interfaces, edit 1/1 and enable Tag All. Repeat on the second node. This configuration should enable heartbeats.
Hello Carl,
(Sorry I do not speak English)
I have a question about netscaler interface.
I have an url to connect to our servers Citrix https://citrix.societe.com from the internal (LAN IP address) and from outside (from public IP address)
Meanwhile I would like to know if it is possible to set up a rule to say:
– Since the internal everybody has access.
– From outside only users in an AD group
cordially
Is AAA enabled on the vServer? If not, how would ADC know what groups the users are in?
Or are you asking about Citrix Gateway?
nFactor authentication can achieve this goal.
Is it possible to setup HA with more than two VPX machines?
Clustering can go up to 32 nodes.
Thank you. But a pure HA setup consists of two devices maximum?
Correct.
I am trying to upgrade my appliance but getting message that there is no enough space.
I have practically cleared the /var/log to the barest minimum and /var/NetScaler/nsbackup is to tally empty.
How safe is it to empty the content of /tmp? Or is there a way to expand the appliance vdisk?
Thanks
Anything in /var/crash or /var/core? Or maybe prior upgrades in /var/nsinstall.
You can run du -h -d 1 /var to see disk consumption.
Hi Carl.
I have one ADC that hosts several types of servers: HDX proxy, RDP proxy and a VPN. I wanted a user to get a specific RDP proxy session profile, but the only way I know to do that is by creating a AAA user. That gets him the RDP proxy session profile, but it breaks his access to the other servers like the HDX proxy. Now all he gets is the one RDP proxy session profile even if he’s logged onto the HDX proxy.
How can I accomplish the same using a classic policy expression? I know how to create an advanced policy expression to assign a policy to a given user, but my ADC has a ton of classic expressions, so it doesn’t let me bind advanced policies. I am running firmware 12.1.
This is a bit of a nightmare for me, so I appreciate any help you can give me. Thank you, Carl.
rommel
With Classic expressions, your only option is AAA Users/Groups. When you bind Classic Session Policies, whichever bind point has lowest priority will win. If you want vServer policy to win over AAA user policy, then bind the policy to vServer with lower priority number than AAA user.
When I connect to GUI on Secondary Netscaler i can see configurations are blank , when i do fail over and make it primary i am able to see all the configuration.
Unable to understand what could be the issue , could you please hel
If both Netscalers are in HA or cluster, that’s how it works. Changes can only be performed on the primary.
Thanks
Very much appreciate your time and instructions, Carl!
I am unable to download any file (backup, CSRs, Citrix Gateway config) through the UI. Logged in w/NSROOT. Using Chrome, I get no error or response whatsoever. In IE, I get “Error File not found”. The Google oracle doesn’t seem to have any knowledge on the issue. Licensed VPX 10, Release: NS12.1 50.28.nc
That’s a known issue. Upgrade your firmware to 12.1.50.31 or newer.
Carl, at the end of the Syslog Auditing section, you say “If you see a Blank Screen, hit the Back Button”.
After I upgraded to 12.0.60.9, I’m seeing a lot of blankness when using IE throughout the entire ADC, not just Syslog. And a Refresh does not populate/fix the screen.
Firefox seems to display most things better, but IE is terrible. It’s made it difficult to manage my ADC’s using IE (since that’s our supported corporate browser).
Have you heard of this issue with some of these newer versions?
Could it just be some IE setting that our Security Team has pushed down?
I gave up on IE a long time ago and instead try to always use Chrome when managing NetScaler appliances.
Hi Carl
Hope you are doing good!!
We are planing to migrate from Netscaler VPX to MPX by using HA sync method. once it is finished will remove the exiting VPX. Both VPX and MPX (8200) having version 10.5 with the different build version. I am looking for information that can we sync the configuration by using HA by two different build version. I need your urgent help to perform this activity.
Different build versions will definitely not work.
Different hardware is not supported in a HA configuration.
The supported methods are to export the configs from existing appliance and import to new appliance. If you move the existing IPs, you’ll have to somehow avoid IP conflict. Or you can change the IP addresses and DNS records.
Hi Carl,
Thank you very much for your kind support!!
Is there any article to do import and export configuration. If have please share with me to refer that one when migration.
Use WinSCP to download /nsconfig/ssl and upload to new appliance.
Go to System > Diagnostics, click Running Configuration and save to a file. You can edit the IP addresses in the config file. Remove networking configurations if you’re already configured them on a new appliance. Once satisfied, you can import to the new HA pair. If existing IPs, you’ll need to power off or disconnect the old appliance first.
A Citrix Partner can also help you with the migration.
Thank you so much for your help i really appreciate it 🙂
You are awesome Carl! I was having issues with MPX 8005 to VPX 1000 migration. Staff and students weren’t able to access the Storefront. I just watched the consultant downgrade the VPXes to 12.0, alot of backing up and saving running config, and force sync’d from MPX to VPX. Then “yes” for the CPU yield on the VPX. I found your articles after the consultant had gotten Citrix up and running. Your articles document the same procedures, I watched the consultant performed. Thanks for sharing! I will bookmark this site for future references.
Hi Carl
I am having issues with the PBR for NSIP dns traffic.
It works perfectly for my primary appliance since the floating SNIP is active there but it does not work for the secondary, as SNIP is the only one that is reachable to my DNS servers on the internal network. Is there any way to make this work?
Another option is to load balance DNS. CTP Simon Gottschlag says that you don’t need the DNS PBR if you use a DNS LB VIP instead of directly to DNS Name Servers.
Hi Carl
I tried to create a DNS LB VIP which is on the same subnet as the SNIP. i add that virtual server under Traffic Management > Dns > Name Servers
I tried but its not working now on my Primary appliance but working on Secondary.
I tried to configure a floating management IP with a dedicated management network. You can access the WebGUI but its not possible to authenticate with the nsroot user –> Invalid user/password. Can you verify this? The interesting fact is that SSH access over the LB-VIP is working flawless.
Did you ever find a solution for this? We recently had this happen after updating from v12.1 48.13 to v12.1 49.37… SSH also works fine for us…
I added a SNIP to the management network. Its just a temporary workaround.
I would love to know if you found a solution to this it now being a few months later. Still in 12.1 51.16 it seems like the WebGUI cannot be authenticated to by any account, either local or external, but SSH works correctly for both.
Hi Carl,
I am currently setting up a VPX 12 for testing under vmware. I have set up a VPX with multiple network interface in different vlans and configured one SNIP for each VLAN.
However, when accessing a resource in one of the configured VLAN, I expect a direct hop using the associated SNIP. Using traceroute, I notice that it is actually going through the NSIP VLAN.
Any help on the issue will be much appreciated.
Thanks
Create a VLAN for each network don’t tick the tag option. Create subnet IPs relevant to each network. In the VLAN there is a second tab for subnets tick the relevant IP range to associate it to the VLAN. Also there there is an option to associate that same VLAN to an interface, check the MAC is the same in VMware to be sure you have the correct interface i.e 1/1 VLAN 10. That will then setup direct routing.
Hi Guy,
Thanks for the response.
Please note VLANs are already created and associated to the interfaces. Also, SNIPs are also associated to the corresponding VLAN. The route table also shows the direct routing.
However, direct routing does not seems to work. I have had the same config on NS 11.1 and that works fine.
There is a part in Carl’s notes about amending the default route, perhaps you need to disassociate the interfaces.
The issue was with the PBR which was created for the dedicated management vlan as explained above.
Once this was disabled, direct routing works fine.
The PBRs are definitely not a panacea. I’m still looking for a better solution for emulating a dedicated management network.
Excellent as ever. One thing – set ns param -timezone “GMT-05:00-CDT-America/Chicago” should be set ns param -timezone “GMT-06:00-CST-America/Chicago”
Hi Carl,
I have an existing NetScaler setup but rebuilding it in a new location and trying to improve on the existing implementation.
Question around configuration of interfaces / VLANS Subnet IPs for SNIPs.
I have an internal network where the server VLANS are all separated out by firewalls rather than just routers. I have about 4 main server VLANS where the majority of serves are… Should I setup a VMWARE trunk direct to the Netscaler appliance then tag all traffic on the netscaler, rather than allowing the hypervisor to tag all the traffic. Or should I have multiple interfaces that sit on each of the VMWARE networks so it has direct access on to the server VLANs. I currently have it so that there is one SNIP interface that the network team have add rules into the firewall to permit traffic to the destination server & port.. adding direct connections would release some of this extra configuration.
Configuration of DMZ:
Second question is, the DMZ Netscaler currently has an external internal and management interface NIC. This is mainly for Gateway / storefront access. Should this be configured as a next hop if there is an internal Netscaler that does the main load balancing.
Thanks Carl,
I have XenDesktop Platinum licenses, Any idea if Netscaler VPX edition is free for use if only using for ICA connections?
Unfortunately, the free NetScaler no longer includes NetScaler Gateway ICA Proxy. The cheapest appliance is probably the NetScaler Gateway Enterprise VPX. http://store.citrix.com/store/citrix/en_US/pd/ThemeID.37713000/productID.316319200
Hello Carl,
We are planning to upgrade NetScaler MPX firmware from 11.1 to 12.0 build 57.19. and need to have backup in case we need to roll back.
I tried to take a backup of NetScaler VPX and restore it in GUI /command line. The restore says ‘restore successful’ or ‘Done’ on command line but it does not restore any objects to NetScaler config. I have tried it a few times.
Please advise.
Thanks
I usually extract the files from the backup, and then restore /nsconfig/ssl and /nsconfig/ns.conf.
Thanks Carl
SDX v12.0-56.20
SNMP – MIB, Traps, and Alarms
3. Expand System, expand SNMP, and click Community.
Community Don’t exist, is there something I do wrong?
I see it in my GUI. Browser cache issue? Do you have a Custom Theme (customtheme.tar.gz) configured?
If and LDAP policy is bound globally to authenticate for management, will authentication fallback to local if the LDAP server is down?
Yes. nsroot works, yes? Or are you asking how it works if you have the same account in both? In that case, set you local account to a different password and see if it works.
Hi Carl, thanks for this article.
We had a BPR for the NSIP and we had to create the other PBR that you mentioned to prevent the PBR from overriding normal DNS behavior. Without that we could not resolve DNS to connect to webroot in order to update IP reputation.
Can you explain me how is the normal DNS behavior and why that pbr overrides that behavior?
Its clear that the second PBR is necessary, but I do not understand why the first pbr overrides that behavior.
thanks for your help.
I suspect NetScaler does something special for DNS requests. PBR overrides normal routing, so denying DNS from PBR means normal routing handles it.
Deploying Netscaler VPX 200, how do you configure the netscaler authentication to work with ADFS that we have already had configure?
For management? I don’t think that’s possible.
Carl, wasn’t sure where to ask this but hoping you have seen. I just notice this start happening after the last security upgrade to user login that occurred a couple of month ago…When the LDAP policies are globally bound and are unable to connect to the servers the nsroot login no longer functions either, so if something happens like the LDAP services account gets the password changes, you have no access to the NetScaler since the nsroot account doesn’t seem to be allowing logins either. When I reset the LDAP password back the LDAP began working as well as the local nsroot account. This is a problem since you can get locked out totally if LDAP connections are lost, have you seen this, any idea of how to prevent this from occurring.
Thanks,
Hi Carl, Great Article.
I run into an issue after upgrading to NS12 “Certificate with key size greater than RSA512 or DSA512 bits not supported” while installing the cert. Could this be a license issue or something else?
Any help will be appreciated
Thanks
Yep, you need to be licensed.
Thanks Carl! I was able to work on this today. I had to remove the uploaded License and reinstall it. After, i was able to make it work.
Thanks
hello Carl, I try to setup my NS with 3 difference network one nic card for outside dmz difference vlan, one nic card for administrator difference vlan and one nic card for back end to server farm on other vlan, how do I config this? please advise thanks
Hi, Carl!
Penny for your thoughts: what’s the most effective way to trigger an SNMP alert for a LB virtual server object that has gone down because of a failed service state but has a backup virtual server bound to it. I have some rules built in our SolarWinds environment that look for the OFS and DOWN MIB’s, and for virtual server objects that have no backup defined, these have worked just fine.
I recently, however, set up a downtime page and configured our VMWare IDM virtual server to make use of it. Now when (not if, sadly, but *when*) IDM fails, the effective state of the virtual server object remains up, and my SNMP alarms don’t fire.
I’ve done a bit of digging to see what SNMP or any other metric the NetScaler uses to know this – I know the expression editor has a few entries you can key on to know how many connections hit a backup virtual server – but I’ve not had any luck so far. 🙁
Thanks!
Entitydown alarm doesn’t report this?
So, it turns out it does. I figured out the issue: SolarWinds’s SNMP Trap Viewer tool requires a preceding asterisk when filtering on Trap Details. I didn’t realize that, and since I was looking for a very specific LB Vsrv object, I didn’t have a preceding asterisk on the filter.
Go figure. :/
Thank Carl for another easy to follow article.
My question, I think I can upgrade directly from 10.5 to 12 but do I need to backup the customization folder in /var/customizations before upgrade?
If you have customizations, I recommend disabling the customizations, upgrade, then redo the customizations, but this time with a Portal Theme.
Hi Carl
I faced the problem when I update VmWare from ESXi 6.0 11 till ESXi 6.5 13
Netscaler VPX won’t boot fatal trap 9 general protection fault
Hi Carl,
I have created a PBR for my managment traffic but am unable to change the default route on the ADC.
No such resource [(network, netmask, gateway, , (0.0.0.0, 0.0.0.0, 10.21.105.1, ]
I have a SNIP in the network 10.21.105.0/24
Any idea on how to solve this?
Hi Carl,
Thanks so much for this.
My ADC appliance cannot forward syslog/logs to my ADM Server.
As advised by the network administrator I need to create a traffic domain for my management/nsip traffic going to my adm server. It means that on my adc config it creates 2 default gateway(1 for snip and 1 for nsip) but this is not a good practice since we only need 1 priority gateway which is for snip(data traffic).
Question : Does creating PBR for management(nsip) traffic can resolve this issue?
Again, Thanks so much Carl for the effort.
Regards
Yes, PBR will handle this. PBR matches all NSIP-sourced traffic and can route it through a NSIP-specific router.
Hello Carl,
Thanks so much! After long days of troubleshooting now my ADM servers can now receive logs from the ADC and can now able generate web insights analytics by creating PBR. 🙂
Again, thanks so much, Carl! You are a big help to us Citrix Administrators! 🙂
Regards