Navigation
- Change Log
- nFactor Overview
- AAA Virtual Server
- Login Schema
- Advanced Authentication Policies
- Authentication Policy Label
- nFactor for Citrix Gateway
- Sample Configurations:
💡 = Recently Updated
Change Log
- 2019 Mar 6 – nFactor Overview – added link to ADC Virtual Server Configuration Extractor script which now includes a nFactor visualizer
- 2019 Jan 17 – Login Schema XML – added link to CTP Sam Jacobs at SYN229 – nFactor and Login Schemas
- 2018 Oct 15 – Login Schema XML – added link to Morten Kallesoee nFactor – adding custom links
- 2018 Oct 6 – updated screenshots for Citrix ADC 12.1
- Overview – Workspace app 1809 and newer with Citrix Gateway (NetScaler) 12.1 build 49 and newer support nFactor (and OTP) authentication.
- 2018 Oct 1 – Sample Configurations – Added CTX237992 How to send domain\SamAccountname to Radius Client with domain drop down
- 2018 Sep 27 – Sample Configurations – added Citrix Blog Post describing nFactor RADIUS with reversed PIN for Duress detection
- 2018 July 13 – new sample config Group Extraction, followed by LDAP (Active Directory), or Azure MFA (NPS)
- 2018 May 27 – Login Schema XML – added link to Citrix Common Authentication Forms Language Citrix Developer Documentation
- 2018 Feb 4 – in the Sample Configurations section, added link to Manuel Kolloff NetScaler Gateway: SAML with multiple IDPs using nFactor
- In the Sample Configurations section, added link to CTX231525 nFactor – Modifying Username for Radius Server
- 2018 Jan 21 – in Sample Configurations section, added link to CTX231790 NetScaler Unified Gateway for Applications with Different Login Site Requirements Including Step Up Authentication
- In Sample Configurations section, added link to CTX229505 nFactor: Process second password before processing first password.
nFactor Overview
nFactor lets you configure an unlimited number of authentication factors. You are no longer limited to just two factors.
Each authentication factor performs the following tasks:
- Collect credentials from the user. These credentials can be anything supported by Citrix ADC, including:
- SAML assertion
- Client Certificate
- OAuth OpenID Connect
- Kerberos ticket
- StoreFrontAuth – authentication is delegated to Citrix StoreFront
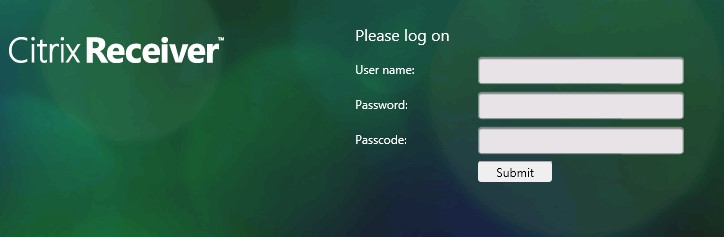
- Forms-based authentication (traditional web-based logon page) for LDAP, RADIUS, etc.
- Multiple passwords can be collected with one form.
- Or prompt the user multiple times throughout the authentication chain.
- The logon page can contain a domain drop-down.
- Endpoint Analysis Scan – either pre-authentication, or post-authentication.
- EULA
- Google reCAPTCHA
- Swivel
- Use a drop-down to select an authentication method
- This factor’s credentials are evaluated. The results can be:
- Authentication success
- Authentication failure
- Group extraction
- Attribute extraction from SAML, Certificate, etc.
- Based on the evaluation results, do one of the following:
- Allow access
- Select next factor
- Deny access
- If there’s a Next Factor, repeat these steps, until there are no more Next Factors to evaluate.
- The Next Factor can also do one of the following:
- Prompt the user for more credentials
- If the Login Schema asked for multiple passwords, evaluate the already entered next set of credentials.
- Use a policy expression to select another Next Factor (no authentication). This is typically used with group extraction so that groups determine the Next Factor.
Here are some nFactor use cases, but the combinations are almost limitless:
- Choose Authentication method based on Active Directory group: Logon screen asks for user name only. Extract user’s groups from Active Directory. Based on user’s Active Directory groups, either ask user for client certificate, or ask user for LDAP password. If LDAP, the username doesn’t need to be entered again.
- Ask for Certificate first:
- If client certificate is valid, perform LDAP only.
- If no client certificate, perform LDAP + RADIUS
- Two-factor with passwords checked in specific order: Display logon screen with two password fields. Check the first password. If the first password succeeds, then check the second password. This lets you check RADIUS before LDAP.
- Run Endpoint Analysis first:
- If passes, perform LDAP only.
- If fails, perform LDAP + RADIUS
- See Sample Configurations later for many more combinations.
All new authentication methods added to Citrix ADC require nFactor configuration and are not supported on native Citrix Gateway. These new authentication methods include:
- StoreFrontAuth – authentication is delegated to Citrix StoreFront
- Native OTP (one-time password) – e.g. Google Authenticator
- Self-Service Password Reset (SSPR)
nFactor is a AAA feature, which means you need Citrix ADC Advanced Edition (aka NetScaler Enterprise Edition) or Citrix ADC Premium Edition (aka NetScaler Platinum Edition). Citrix ADC Standard Edition and Citrix Gateway VPX are not entitled for nFactor.
Citrix ADC supports two types of authentication policies – Classic, and Advanced (aka Default). You can bind Classic Authentication Policies directly to Citrix Gateway Virtual Servers, but today you cannot bind Advanced Authentication Policies to Citrix Gateway. The only way to use Advanced Authentication Policies with Citrix Gateway is to configure nFactor on a AAA Virtual Server and then link the AAA Virtual Server to the Gateway Virtual Server.
- Workspace app 1809 and newer with Citrix Gateway (NetScaler) 12.1 build 49 and newer support nFactor authentication. Older Receivers and older NetScalers don’t support nFactor, so you’ll instead have to use a web browser.

nFactor configuration summary (detailed instructions below):
- Each factor is a combination of Advanced Authentication Policies and Login Schema.
- Advanced policy means it uses an Advanced (Default Syntax) expression as opposed to the classic syntax expression traditionally used in Citrix Gateway authentication policies.
- Login Schema is a custom HTML form where users enter credentials.
- The first factor (Advanced Authentication Policies and Login Schema) is bound directly to a AAA Virtual Server.
- Next factors are bound to Authentication Policy Labels. These Labels are then chained to Advanced Authentication Policies in prior factors.
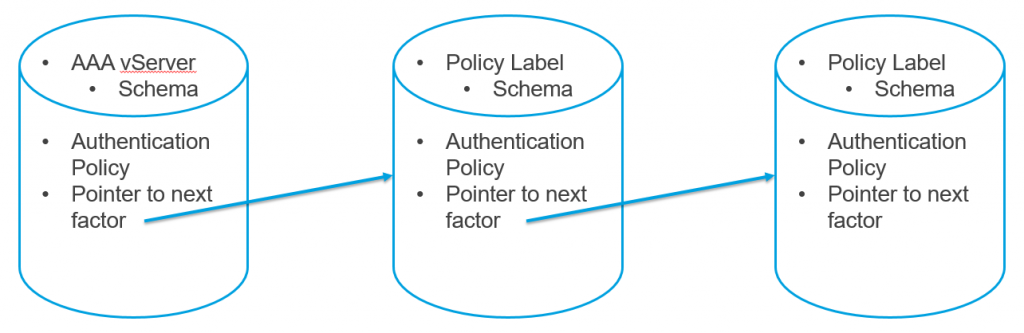
- AAA vServer > Advanced Authentication Policy > Next Factor > Authentication Policy Label > Advanced Authentication Policy > Next Factor > Authentication Policy Label > … until there are no more Next Factors configured.
- Authentication Profile links AAA vServer with Citrix Gateway.
Also see:
- Citrix CTX222713 Concepts, Entities and Terms used for nFactor Authentication through NetScaler.
- Jacob Rutski NetScaler nFactor Authentication
This article will detail how to configure nFactor from top to bottom.:
- Create AAA vServer
- Create Login Schema Profiles
- Create Login Schema Policy – select Login Schema Profile, bind Login Schema Policy to AAA vServer
- Create Authentication Actions – LDAP, RADIUS, etc.
- Create Advanced Authentication Policies – select Authentication Action, bind Advanced Authentication Policy to AAA vServer
- Create Authentication Policy Labels – bind Login Schema, bind Advanced Authentication Policies
- Edit Advanced Authentication Policy binding and select Next Factor Authentication Policy Label.
- Create Citrix Gateway Traffic Policy for Single Sign-on to StoreFront.
- Create Authentication Profile
- Edit Citrix Gateway – bind Authentication Profile, bind Traffic Policy
Once you are familiar with nFactor, due to the way the objects are linked together, it’s probably easier to configure it from bottom up:
- Create Authentication Actions – LDAP, RADIUS, etc.
- Create Advanced Authentication Policies – select Authentication Action
- Create Login Schema Profiles
- Create Authentication Policy Labels – bind Login Schema, bind Advanced Authentication Policies
- Create Login Schema Policy – select Login Schema Profile
- Create AAA vServer – bind Login Schema, bind Advanced Authentication Policies, select Next Factor Authentication Policy Label
- Create Citrix Gateway Traffic Policy for Single Sign-on to StoreFront.
- Create Authentication Profile
- Edit Citrix Gateway – bind Authentication Profile, bind Traffic Policy
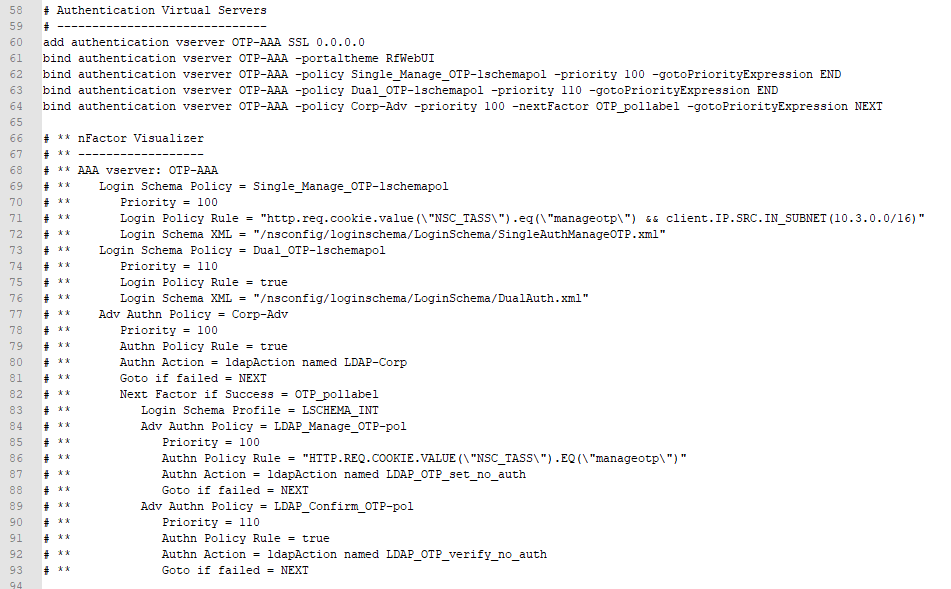
It can be difficult to visualize a nFactor configuration so my ADC Virtual Server Configuration Extractor script now includes a nFactor visualizer. Here’s an example for a Native OTP configuration.
AAA Virtual Server
Create AAA Virtual Server
To use nFactor with Citrix Gateway, you first configure it on a AAA Virtual Server. Then you later link the AAA Virtual Server to the Citrix Gateway Virtual Server.
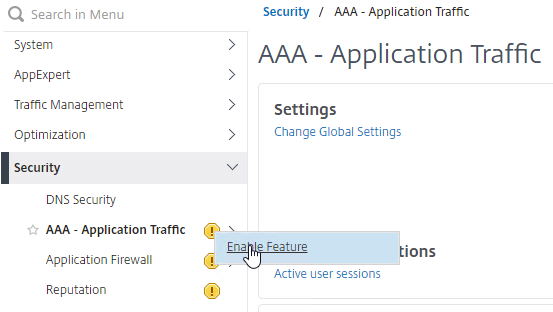
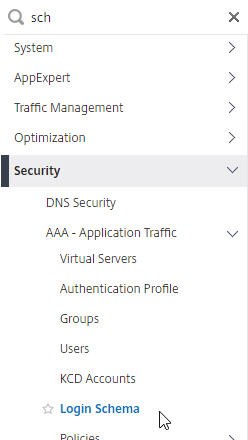
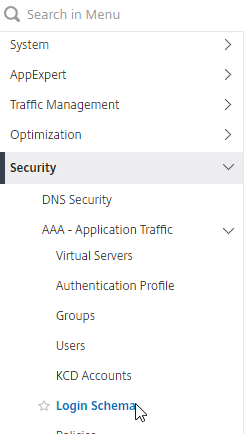
- If AAA feature is not already enabled, on the left menu, expand Security, right-click AAA – Application Traffic, and click Enable Feature.
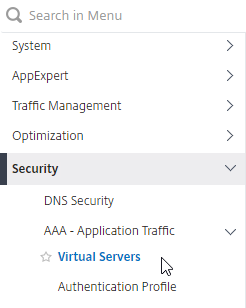
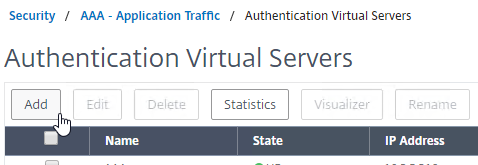
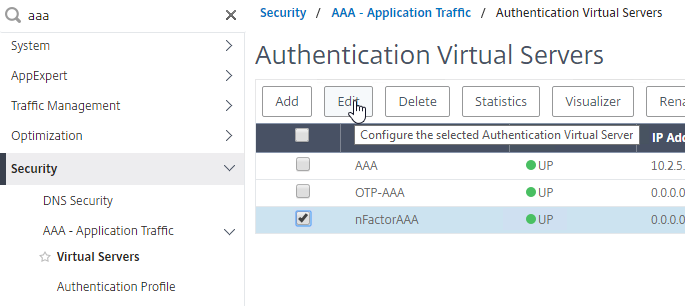
- Go to Security > AAA > Virtual Servers.
- On the right, click Add.
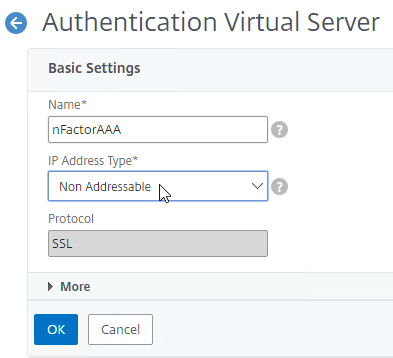
- Give the Virtual Server a name.
- If you are only using this AAA Virtual Server for Citrix Gateway, then you can change the IP address Type to Non Addressable. It’s also possible to content switch to AAA (Citrix CTX201949 One Public IP for AAA-TM Deployments on NetScaler).
- Click OK.
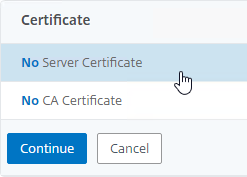
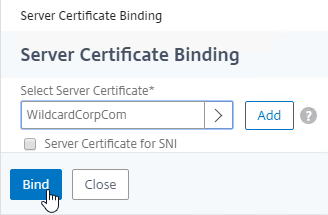
- In the Certificates section, click where it says No Server Certificate.
- Click where it says Click to select.
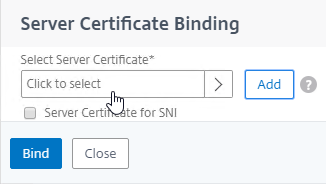
- Click the radio button next to a certificate for the AAA Virtual Server, and click Select. Since this AAA Virtual Server is not directly addressable, the chosen certificate doesn’t matter.
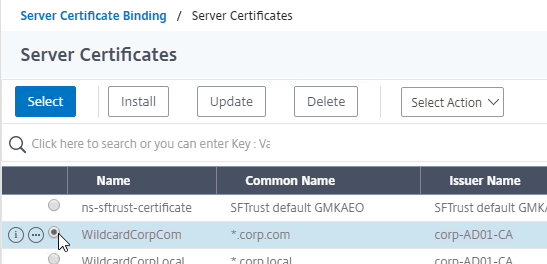
- Click Bind.
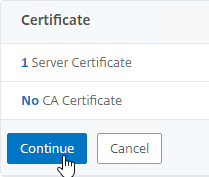
- Click where it says Click to select.
- Click Continue to close the Certificate section.
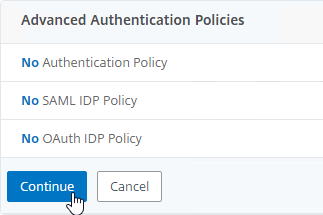
- You probably don’t have any Advanced Authentication Policies yet, so just click Continue.
Bind Portal Theme to AAA Virtual Server
If this AAA Virtual Server is used not just for Citrix Gateway but also directly addressable for traffic management (Load Balancing, Content Switching), then you might want to change the AAA Portal theme.
- Go to Citrix Gateway > Portal Themes, and add a theme. You create the theme under Citrix Gateway, and then later bind it to the AAA Virtual Server.
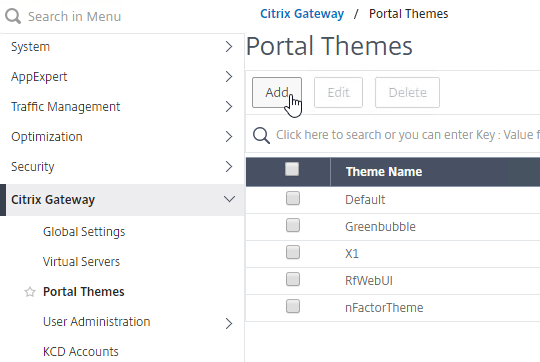
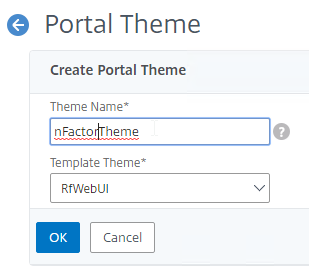
- Create a theme based on the RfWebUI Template Theme.
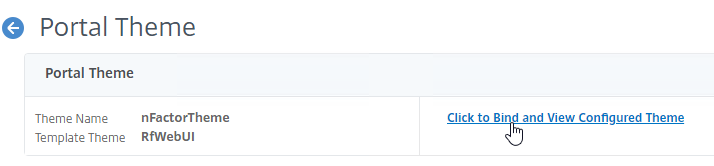
- After adjusting the theme as desired, at the top of the portal theme editing page, Click to Bind and View Configured Theme.
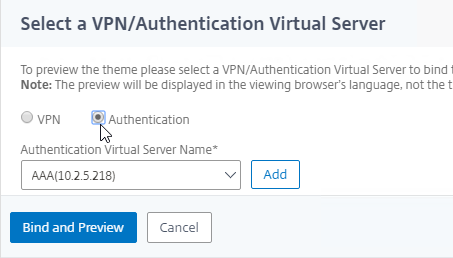
- Change the selection to Authentication.
- Use the Authentication Virtual Server Name drop-down to select the AAA Virtual Server, and click Bind and Preview. You can close the preview window.
Client Certificate Authentication
If one of your authentication Factors is client certificate, then you must perform some SSL configuration on the AAA Virtual Server:
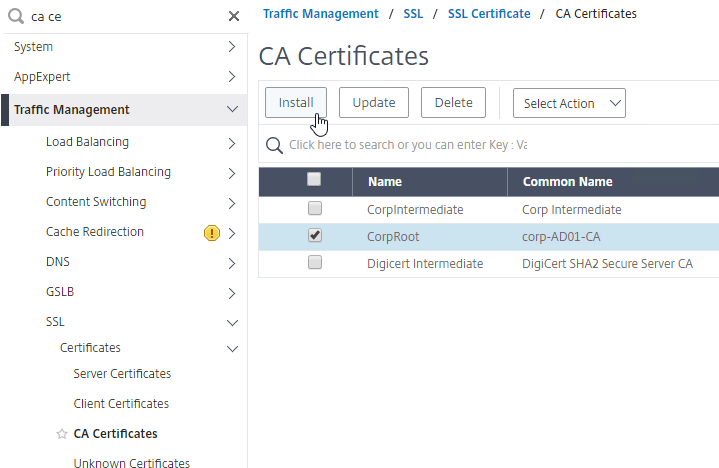
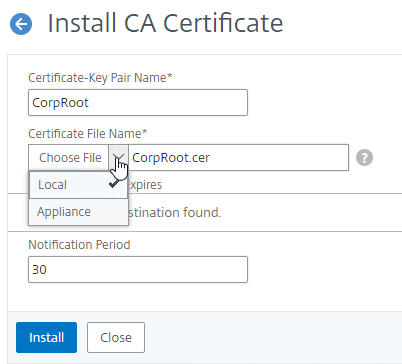
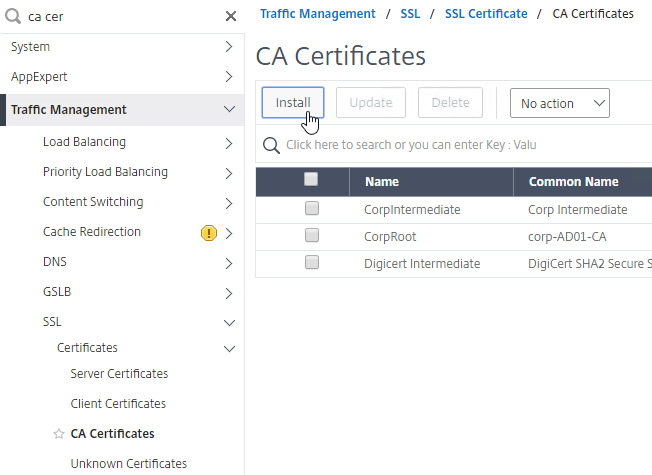
- Go to Traffic Management > SSL > Certificates > CA Certificates, and install the root certificate for the issuer of the client certificates. Root certificates do not have a key file.
- Go to Traffic Management >SSL > Change advanced SSL settings.
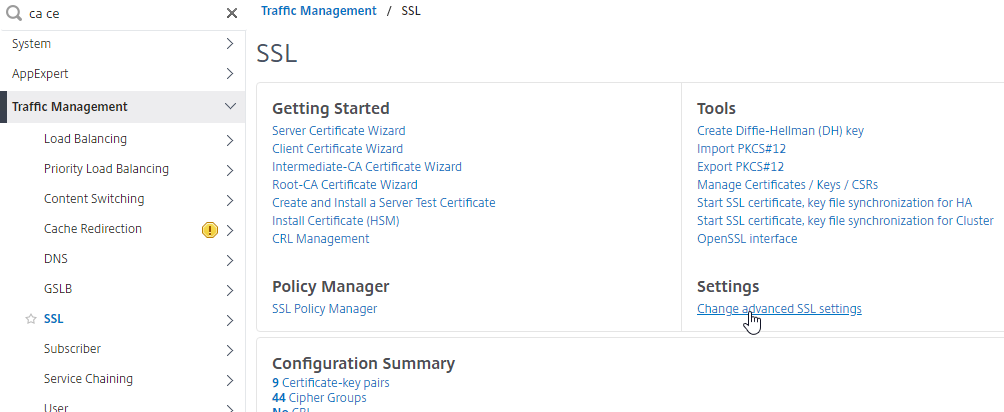
- Scroll down. If you see Default Profile: ENABLED, then you must use an SSL Profile to enable Client Certificate Authentication. Otherwise, you can enable Client Certificate Authentication directly on the AAA Virtual Server in the SSL Parameters section.
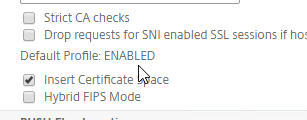
- Scroll down. If you see Default Profile: ENABLED, then you must use an SSL Profile to enable Client Certificate Authentication. Otherwise, you can enable Client Certificate Authentication directly on the AAA Virtual Server in the SSL Parameters section.
- If Default SSL Profiles are enabled, then create a new SSL Profile with Client Authentication enabled:
- On the left menu, expand System, and click Profiles.
- On the top right, switch to the SSL Profile tab.
- Right-click the ns_default_ssl_profile_frontend profile, and click Add. This copies settings from the default profile.
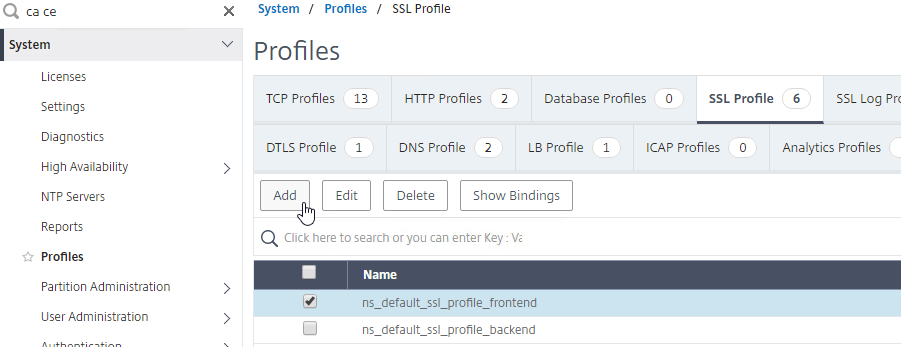
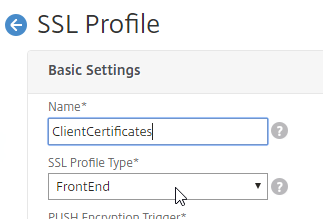
- Give the Profile a name. The purpose of this profile is to enable Client Certificates.
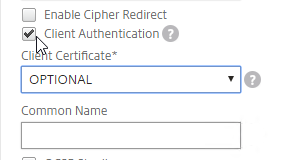
- Scroll down and find the Client Authentication checkbox. Check the box.
- Change the Client Certificate drop-down to OPTIONAL.
- Copying the default SSL Profile does not copy the SSL Ciphers so you’ll have to redo them.
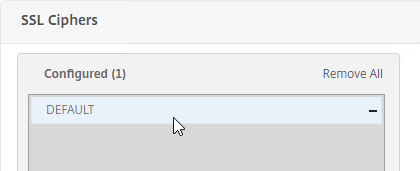
- Click Done when done creating the SSL Profile.
- Go to Security > AAA – Application Traffic > Virtual Servers, and edit a AAA vServer.
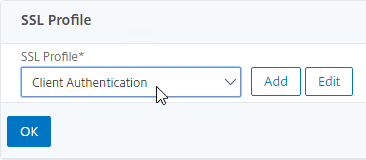
- Scroll down to the SSL Profile section and click the pencil.

- Change the SSL Profile drop-down to the profile that has Client Certificates enabled. Click OK.
- Scroll down this article until you reach the instructions to bind the CA certificate.
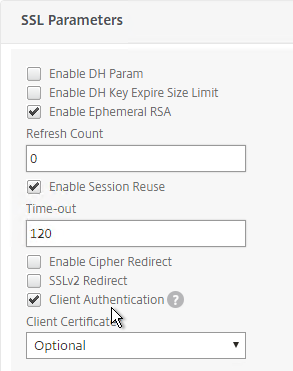
- If default SSL Profiles are not enabled:
- Go to Security > AAA > Virtual Servers, and edit an existing AAA Virtual Server.
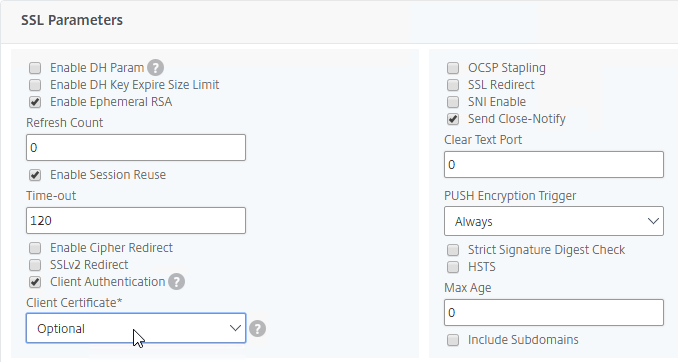
- On the left, in the SSL Parameters section, click the pencil icon.

- Check the box next to Client Authentication.
- Make sure Client Certificate drop-down is set to Optional, and click OK.
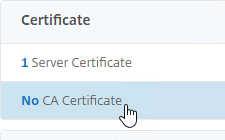
- Go to Security > AAA > Virtual Servers, and edit an existing AAA Virtual Server.
- On the left, in the Certificates section, click where it says No CA Certificate.
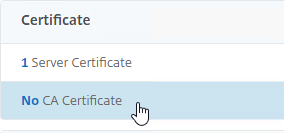
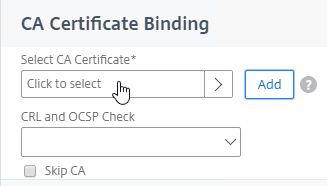
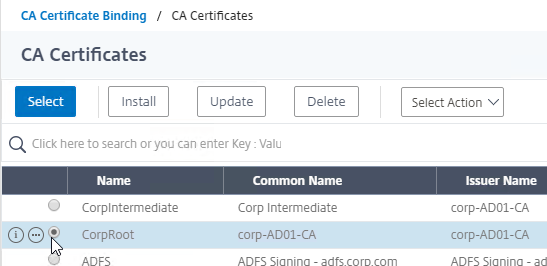
- Click to select.
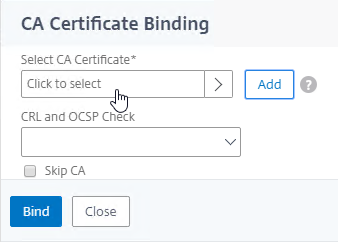
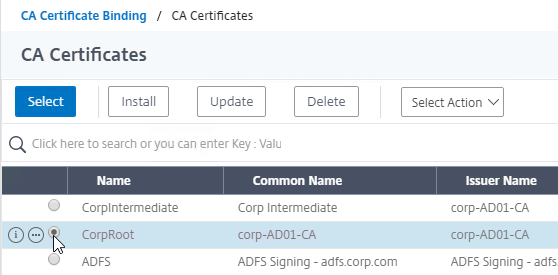
- Click the radio button next to the root certificate for the issuer of the client certificates, and click Select.
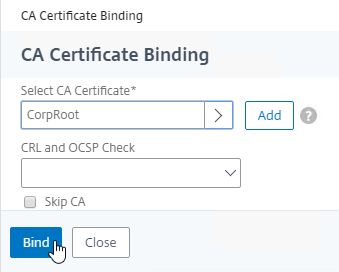
- Click Bind.
Login Schema
Login Schema XML File
Login Schema is an XML file providing the structure of forms-based authentication logon pages.
nFactor implies multiple authentication Factors that are chained together. Each Factor can have different Login Schema pages/files. In some authentication scenarios, users could be presented with multiple logon screens.
Or you can have one Login Schema gather information that can be passed on to multiple Factors, so that the later Factors don’t need to display another Login Schema. This is particularly useful for traditional two-password logon screens (LDAP + RADIUS), since each password is evaluated in a separate Factor:
- The first password is evaluated in the first factor (e.g. LDAP). If successful, then proceed to the second factor.
- The second factor (e.g. RADIUS) evaluates the second password. However, the second password has already been entered, so there’s no need to ask the user for it again. To prevent a Login Schema from being shown to the user, select noschema (LSCHEMA_INT) in the Authentication Policy Label.
Several Login Schema .xml files are included with Citrix ADC under /nsconfig/loginschema/LoginSchema.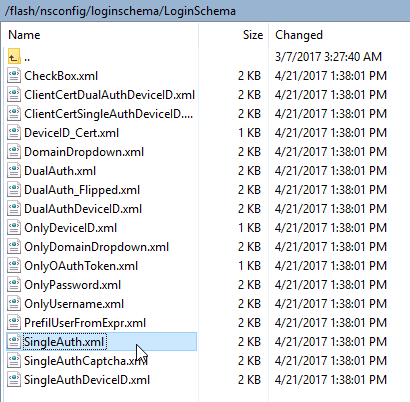
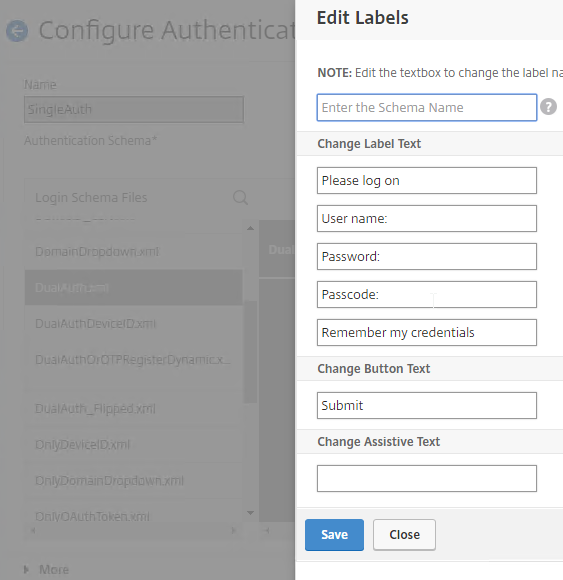
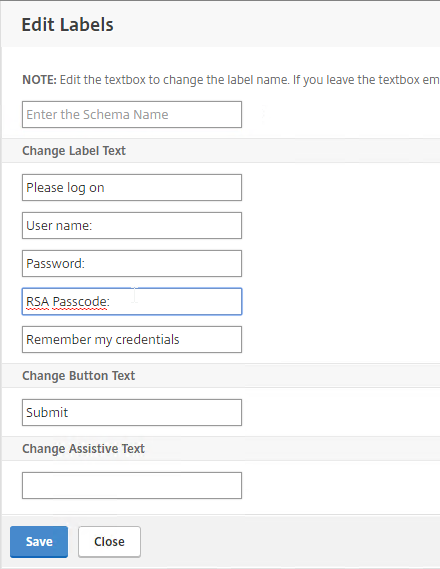
You can edit the Login Schema labels from within the Citrix ADC management GUI. When the labels are changed, Citrix ADC copies the Login Schema to a new .xml file based on the Schema Name entered in this widow, or based on the original file name.
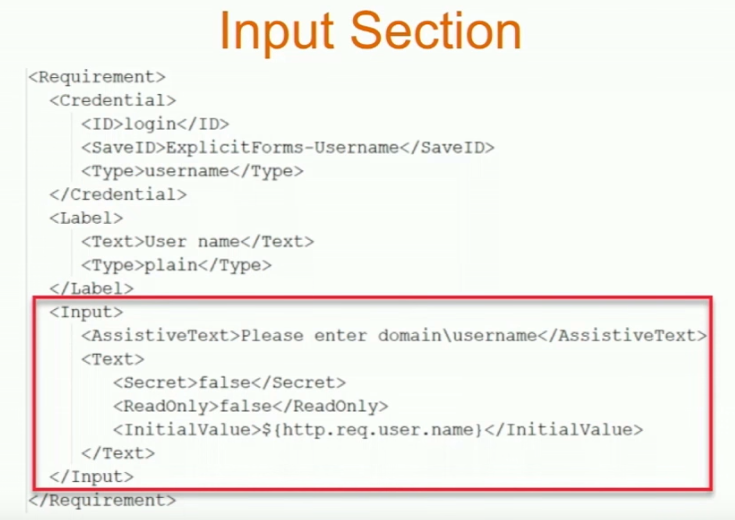
Or you can use WinSCP to connect to the appliance, duplicate one of the existing .xml files, and edit it as desired. For example, you can configure fields (InitialValue tag) to pre-fill information from previous Factors, as shown below:

The structure of the Login Schema is documented at Citrix Common Authentication Forms Language Citrix Developer Documentation.
CTP Sam Jacobs at SYN229 – nFactor and Login Schemas explains how to customize the .xml file.
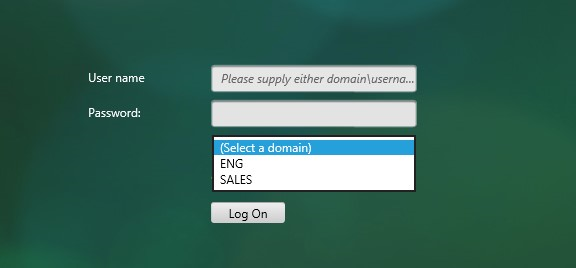
The login schema can also contain a domain drop-down. See CTX201760 nFactor – Domain Drop-Down in First Factor then Different Policy Evaluations Based on Groups for a sample configuration.
Login Schema and Authentication Factor can be a EULA. See Citrix CTX226488 How to Configure EULA as an Authentication Factor in NetScaler nFactor.

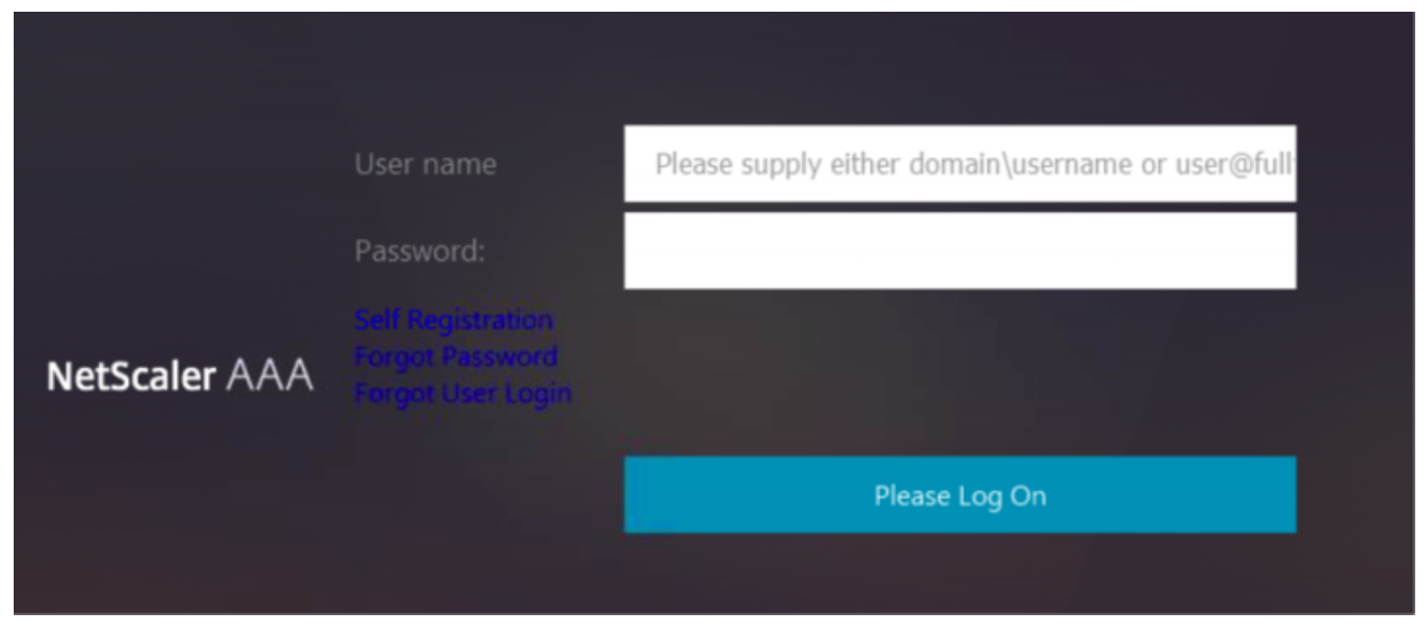
Citrix CTX219545 Custom Login Labels in NetScaler nFactor Authentication: add a Requirement element with a Label sub-element to the Login Schema .xml file. Then use JavaScript to populate the label with any desired HTML. Another example is Morten Kallesoee nFactor – adding custom links.
Several more samples can be found later.
Login Schema Profile
To configure a Login Schema Profile:
- Create or Edit a Login Schema .XML file based on your nFactor design.
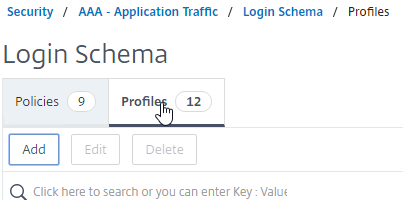
- Go to Security > AAA > Login Schema.
- On the right, switch to the Profiles tab, and click Add.
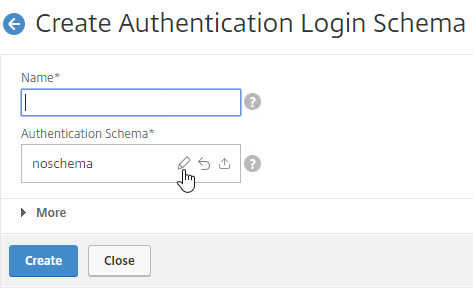
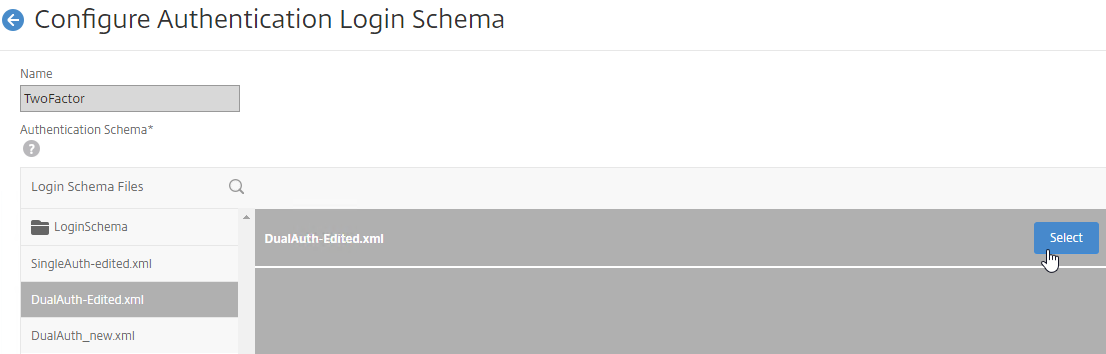
- In the Authentication Schema field, click the pencil icon.
- Click the LoginSchema folder to see the files in it.
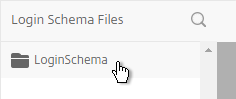
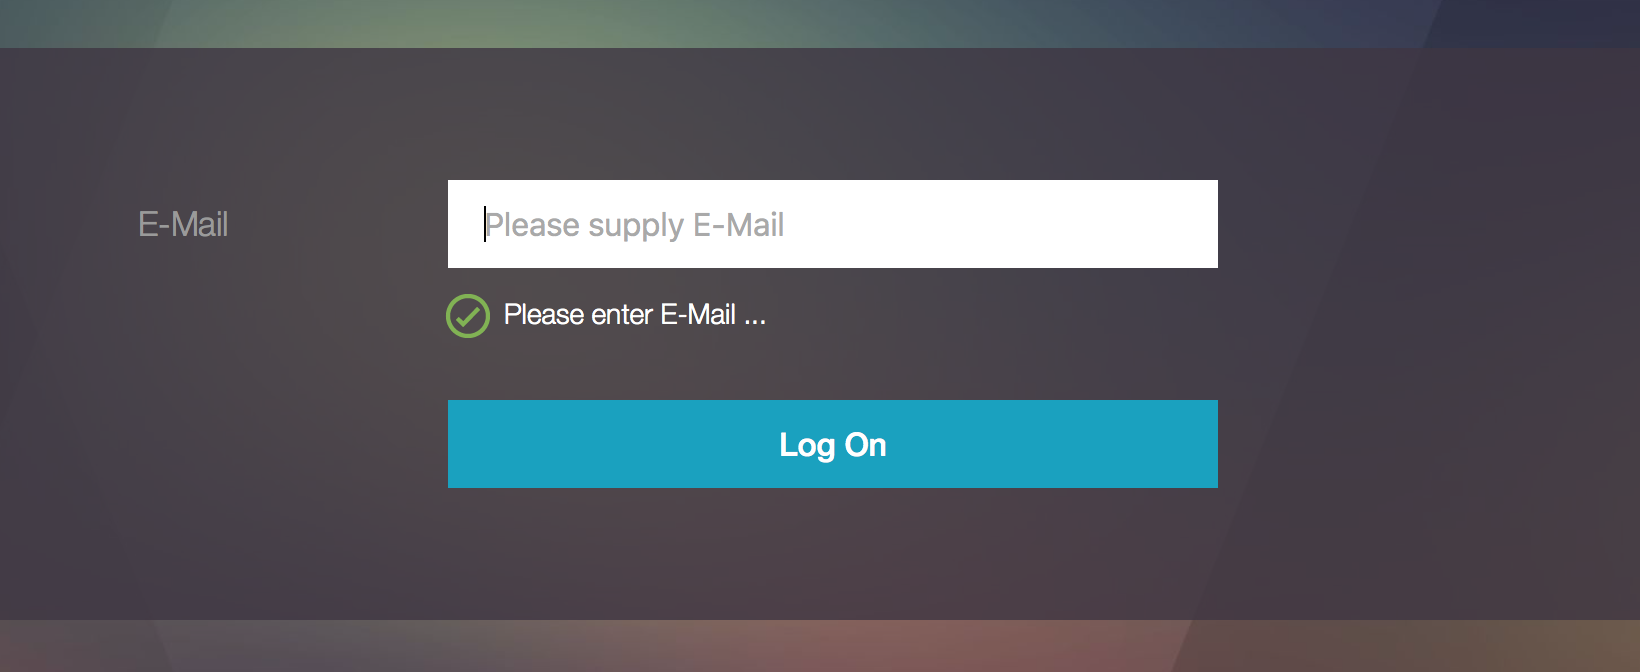
- Select one of the files. You can see a preview on the right. The labels can be changed by clicking the Edit button on the top right.
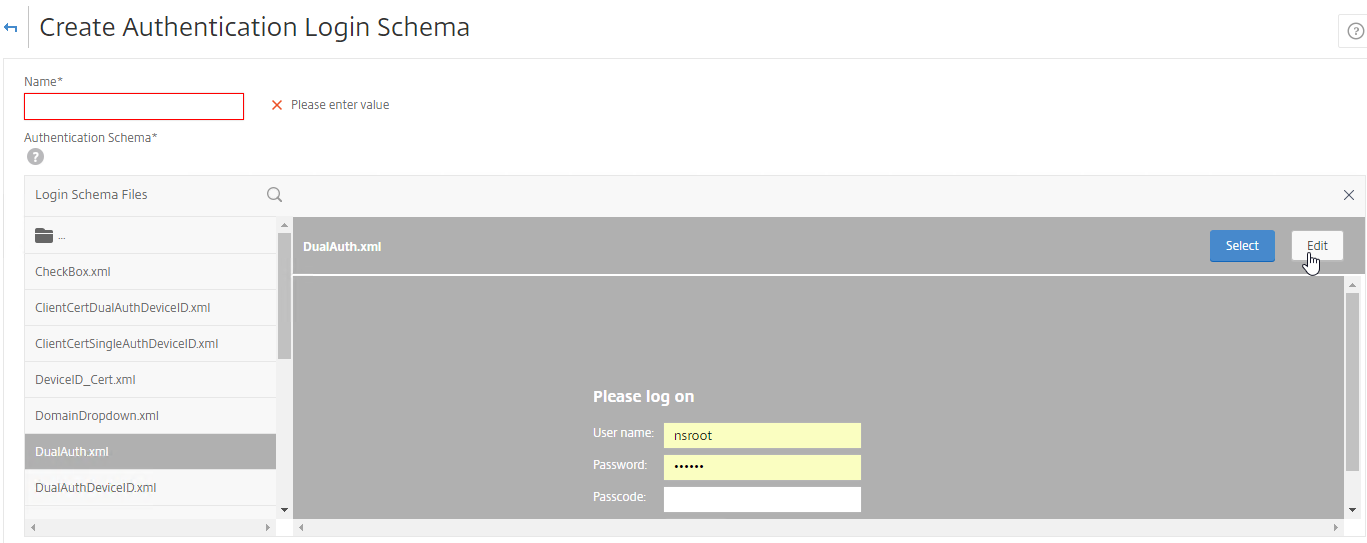
- When you Save the changes, a new file is created under
/nsconfig/LoginSchema.
- On the top right, click Select.

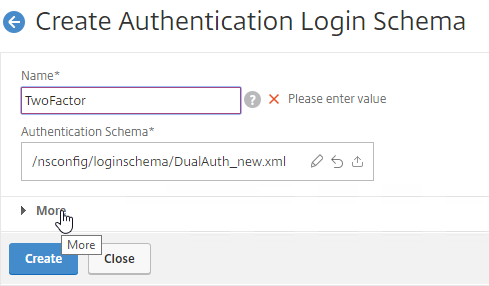
- Give the Login Schema a name, and click More.
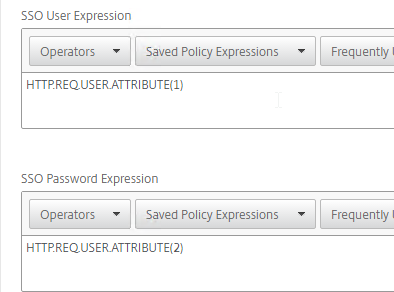
- You typically need to use the entered credentials elsewhere. For example, you might need to use the username and one of the passwords to later Single Sign-on to StoreFront. Near the bottom of the Login Schema Profile, click More, and enter unique values for the indexes. These values can be between 1 and 16.
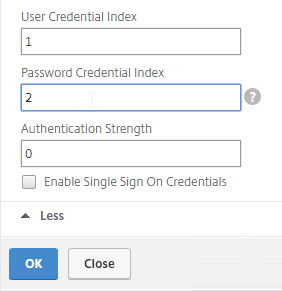
- Later you reference these index values in a Traffic Policy/Profile by using the expression HTTP.REQ.USER.ATTRIBUTE(#).
- Later you reference these index values in a Traffic Policy/Profile by using the expression HTTP.REQ.USER.ATTRIBUTE(#).
- Click Create to create the Login Schema profile.

Note: if you later edit the Login Schema .xml file, the changes might not be reflected until you edit the Login Schema Profile, and Select the .xml file again.
Login Schema Policy
To bind a Login Schema Profile to a AAA vServer, you must first create a Login Schema Policy. Login Schema Policies are not required when binding the Login Schema Profile to an Authentication Policy Label, as detailed later.
To create and bind a Login Schema Policy:
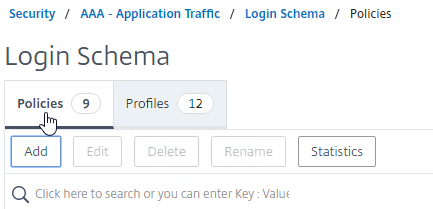
- On the left, go to Security > AAA > Login Schema.
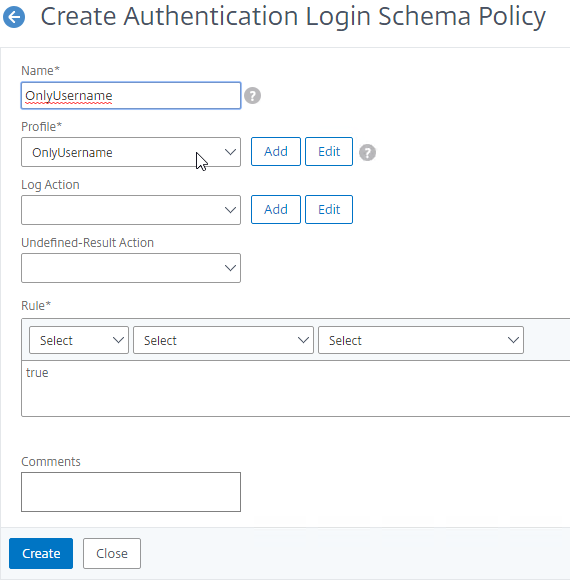
- On the right, switch to the Policies tab, and click Add.
- Use the Profile drop-down to select the Login Schema Profile you already created.
- Enter a Default Syntax expression (e.g. true) in the Rule box, and click Create.
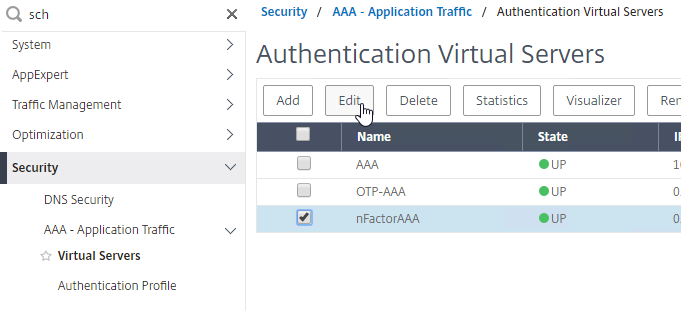
- On the left, go to Security > AAA > Virtual Servers, and edit an existing AAA Virtual Server.
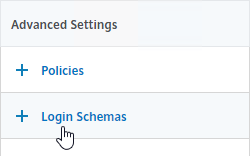
- On the right, in the Advanced Settings column, click Login Schemas.
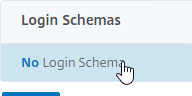
- On the left, in the Login Schemas section, click where it says No Login Schema.
- Click where it says Click to select.
- Click the radio button next to the Login Schema policy, and click Select. Only Login Schema Policies appear in this list. Login Schema Profiles (without a policy) do not appear.
- Click Bind.
Advanced Authentication Policies
Authentication policies are a combination of policy expression, and policy action. If the expression is true, then evaluate the authentication action.
The Action is always an authentication server (LDAP, RADIUS, etc.).
The policy expression can be either in classic syntax, or in the newer default syntax.
The policy type is either Basic or Advanced. Basic policies can only use classic syntax. Advanced policies only use the newer default syntax. Both types of policies use the same Actions (authentication servers).
nFactor requires Advanced Authentication Policies; Basic policies won’t work.
Note: Citrix Gateway 12.0 and newer have deprecated Basic Authentication Policies (Classic Syntax). The only way to bind an Advanced Authentication Policy (Default Syntax) to Gateway is through nFactor and AAA.
Create Advanced Authentication Policy
You will need Authentication Actions/Servers (e.g. LDAP, RADIUS, CERT, SAML, etc.)
- When creating an Advanced Authentication Policy, there’s a plus (Add) icon that lets you create Authentication Actions/Servers.
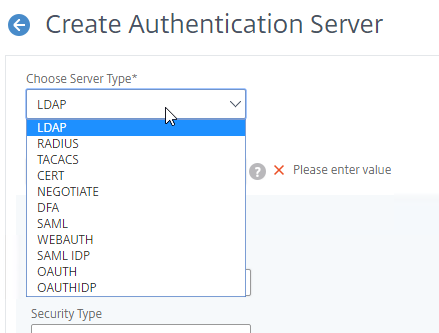
- Or you can create Authentication Actions (Servers) prior to creating the Advanced Authentication Policy. The Authentication Servers are located under Authentication > Dashboard. On the right, click Add and select a Server Type. The instructions for creating these Authentication Servers is not detailed here. See the Authentication – NetScaler 12 / Citrix ADC 12.1 procedures.

To create an Advanced Authentication Policy:
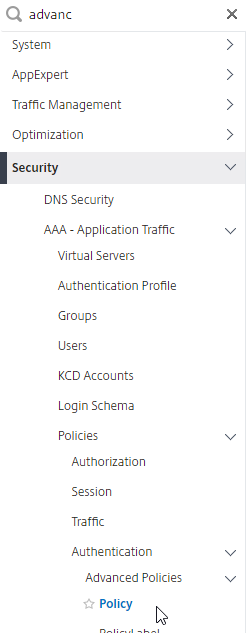
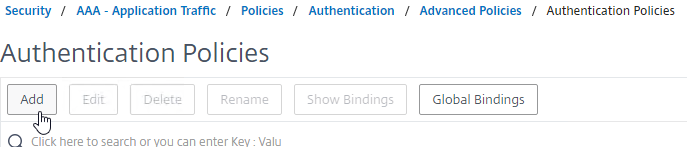
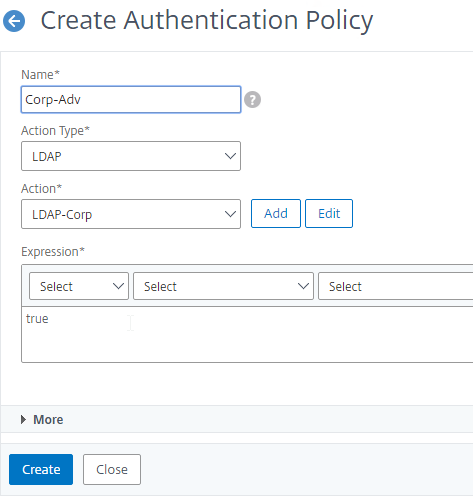
- Go to Security > AAA > Policies > Authentication > Advanced Policies > Policy.
- On the right, click Add. You typically create at least one Authentication Policy for each Factor. When you create multiple Authentication Policies for one Factor, Citrix ADC checks each authentication policy in priority order until one of them succeeds.
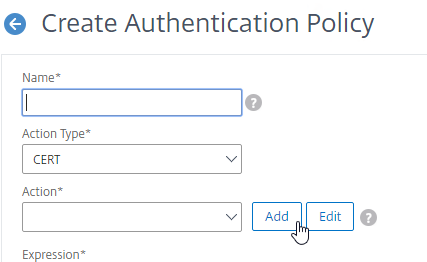
- Use the Action Type drop-down to select the Action Type (e.g. LDAP). Typically each Factor is a different type of Authentication Action.
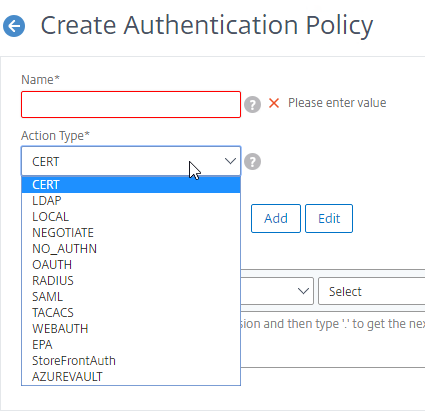
- If you don’t currently have any Actions configured, or if you want to create a new one, click the plus icon (Add button) next to the Action drop-down. The Actions/Servers are created in the normal fashion (not detailed here).
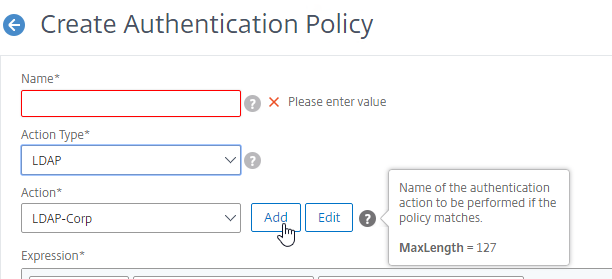
- In the Expression box, enter an expression using the Default Syntax. ns_true won’t work because that’s Classic syntax. There’s an Expression Editor link on the right. Or hit Ctrl+Space to see your options. true is a valid Default expression. Click Create when done.
- Create more Advanced Authentication Policies as needed for your nFactor design.
Bind First Factor Advanced Authentication Policy to AAA
Only the Advanced Authentication Policies for the first Factor are bound directly to the AAA Virtual Server. The Advanced Authentication Policies for the Next Factors are bound to Authentication Policy Labels as detailed in the next section.
- Go to Security > AAA > Virtual Servers.
- Edit an existing AAA Virtual Server.
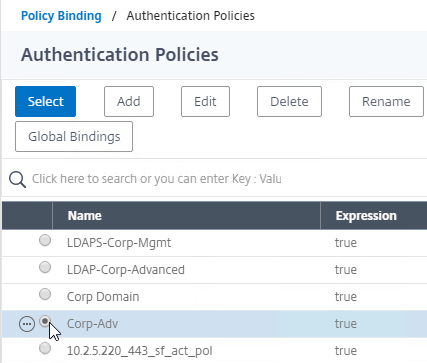
- On the left, in the Advanced Authentication Policies section, click where it says No Authentication Policy.
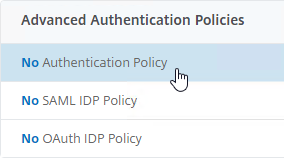
- Click where it says Click to select.

- Click the radio button next to the Advanced Authentication Policy, and click Select.
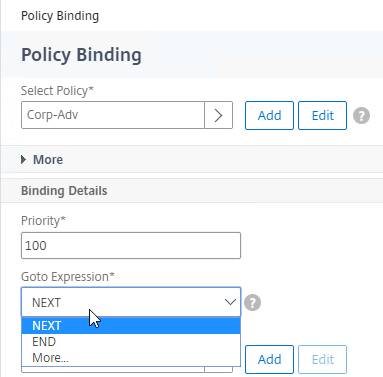
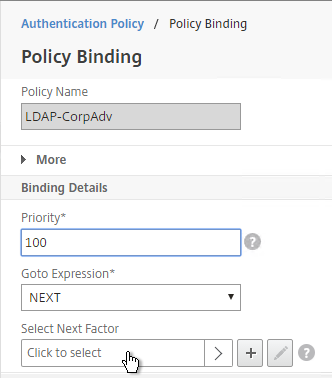
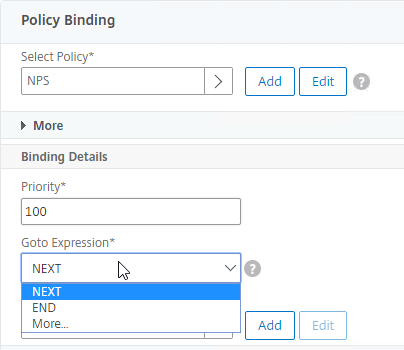
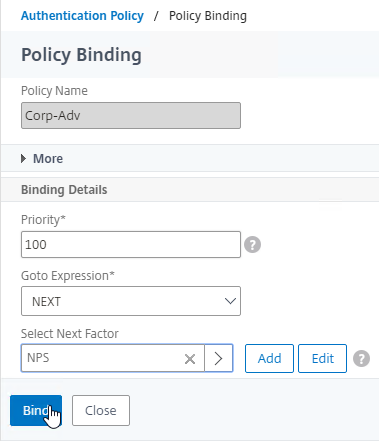
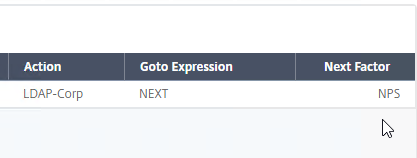
- In the Binding Details section, if this Advanced Authentication Policy fails, then the Goto Expression determines what happens next. If it is set to NEXT, then the next Advanced Authentication Policy bound to this AAA Virtual Server is evaluated. If it is set to END, or if there are no more Advanced Authentication Policies bound to this AAA Virtual Server, then authentication is finished and marked as failed.
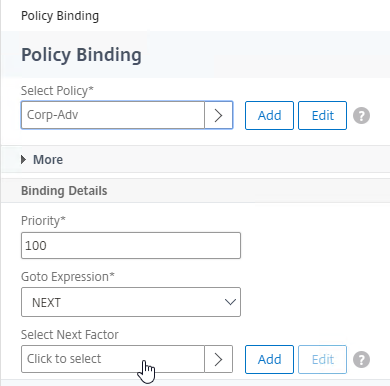
- The Select Next Factor field can optionally point to an Authentication Policy Label as detailed in the next section. The Next Factor is only evaluated if this Advanced Authentication Policy succeeds.
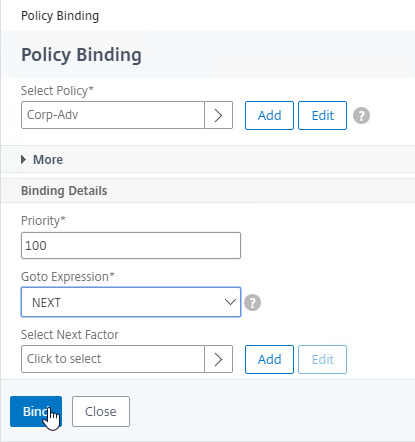
- Click Bind.
LDAP Group Extraction
Sometimes you only want to extract a user’s groups from Active Directory, but you don’t actually want to authenticate with LDAP. These extracted groups can then be used to select the next authentication Factor.
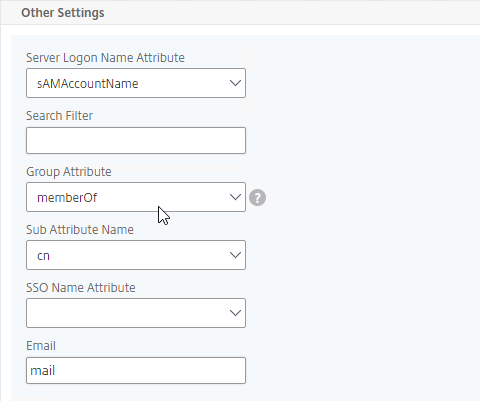
To configure an LDAP Action/Server for only group extraction:
- When creating or editing an LDAP Server/Action, make sure Authentication is unchecked.
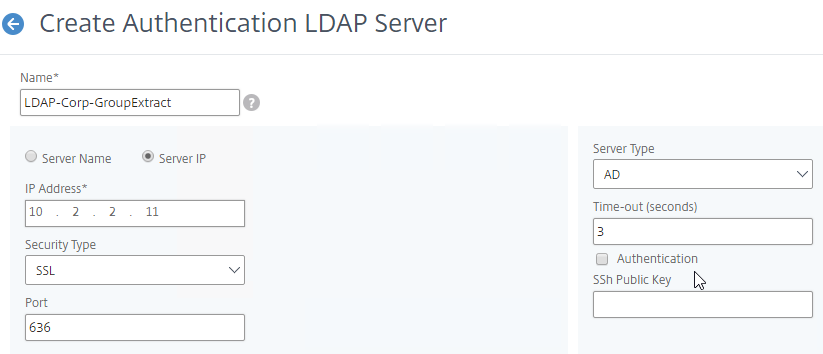
- In the Other Settings section, make sure Group Attribute and Sub Attribute Name are filled in.
Authentication Policy Label
When configuring the first Factor, you bind two objects directly to the AAA Virtual Server:
- Login schema – for forms-based authentication
- Advanced Authentication Policy
When binding the Advanced Authentication Policy to the AAA Virtual Server, there’s a field to Select Next Factor. If the Advanced Authentication Policy succeeds, then the Next Factor is evaluated.
The Next Factor is actually an Authentication Policy Label.
Authentication Policy Labels contain three objects:
- Login Schema
- Advanced Authentication Policies
- Next Factor – the next Authentication Policy Label
Here’s the flow:
- User connects to AAA or Citrix Gateway Virtual Server.
- If forms-based authentication, the Login Schema bound to the AAA Virtual Server is displayed.
- Advanced Authentication Policies bound to the AAA Virtual Server are evaluated.
- If the Advanced Authentication Policy succeeds, go to the configured Next Factor, which is an Authentication Policy Label.
- If Next Factor is not configured, then authentication is complete and successful.
- If the Advanced Authentication Policy fails, and if Goto Expression is Next, then evaluate the next bound Advanced Authentication Policy.
- If none of the Advanced Authentication Policies succeed, then authentication failed.
- If the Advanced Authentication Policy succeeds, go to the configured Next Factor, which is an Authentication Policy Label.
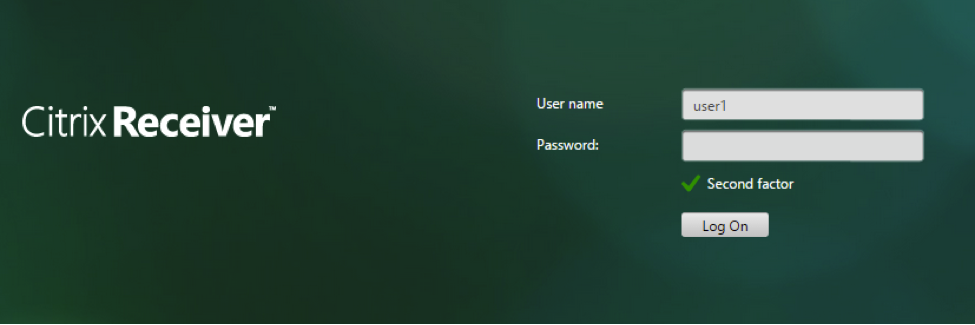
- If the Next Factor Authentication Policy Label has a Login Schema bound to it, display it to the user.
- Evaluate the Advanced Authentication Policies bound to the Next Factor Authentication Policy Label.
- If the Advanced Authentication Policy succeeds, go to the configured Next Factor, which is an Authentication Policy Label.
- If Next Factor is not configured, then authentication is complete and successful.
- If the Advanced Authentication Policy fails, and if Goto Expression is Next, then evaluate the next bound Advanced Authentication Policy.
- If none of the Advanced Authentication Policies succeeds, then authentication failed.
- If the Advanced Authentication Policy succeeds, go to the configured Next Factor, which is an Authentication Policy Label.
- Continue evaluating the Next Factor Authentication Policy Label until authentication succeeds or fails. You can chain together an unlimited number of Authentication Policy Labels.
If you are binding a Login Schema to an Authentication Policy Label, then you only need the Login Schema Profile. There’s no need to create a Login Schema Policy.
Not every Factor needs a Login Schema (logon web page). It’s possible for a prior Factor to gather all of the credential information, and simply pass it on to the next Factor. If you don’t need a Login Schema for a particular Authentication Policy Label, simply select LSCHEMA_INT, which is mapped to noschema. Or create a new Login Schema Profile based on noschema.
Create Authentication Policy Label
To create an Authentication Policy Label:
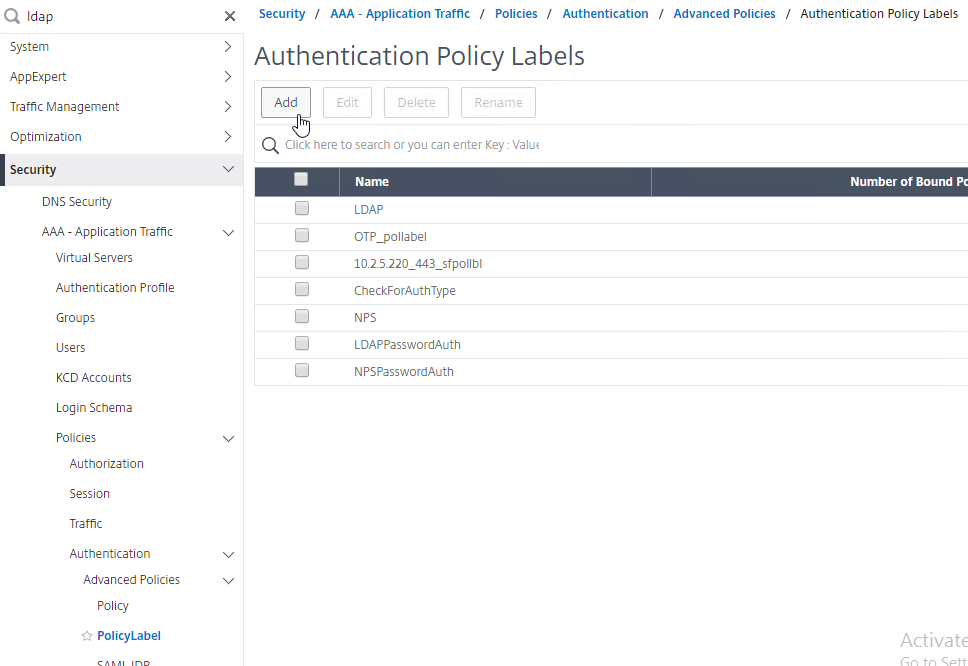
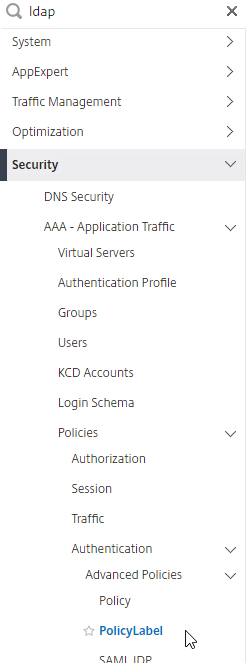
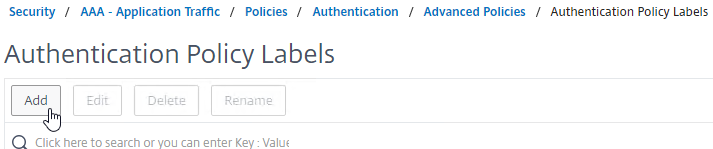
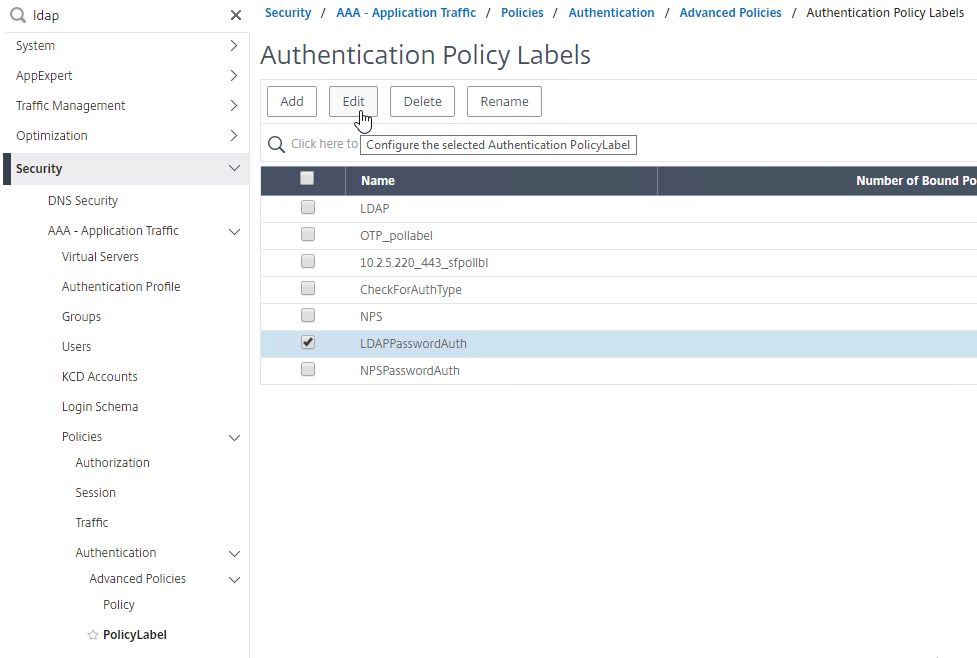
- Authentication Policy Labels are configured at Security > AAA > Policies > Authentication > Advanced Policies > PolicyLabel.
- On the right, click Add.
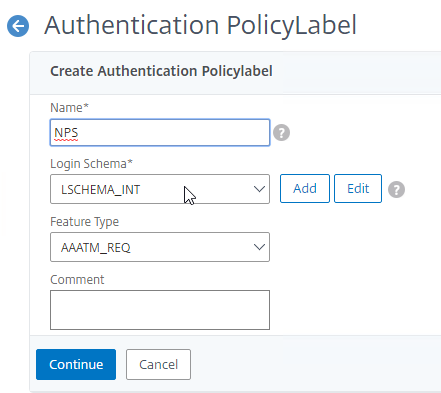
- Give the Policy Label a name.
- Select a Login Schema Profile. This can be a Login Schema Profile that is set to noschema (LSCHEMA_INT) if you don’t actually want to display anything to the user. Then click Continue.
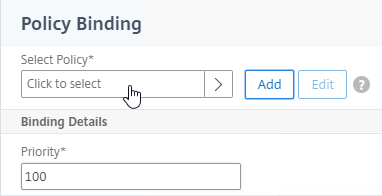
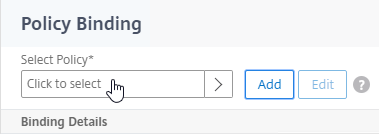
- In the Policy Binding section, click where it says Click to select.
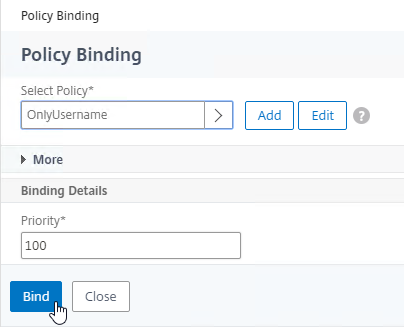
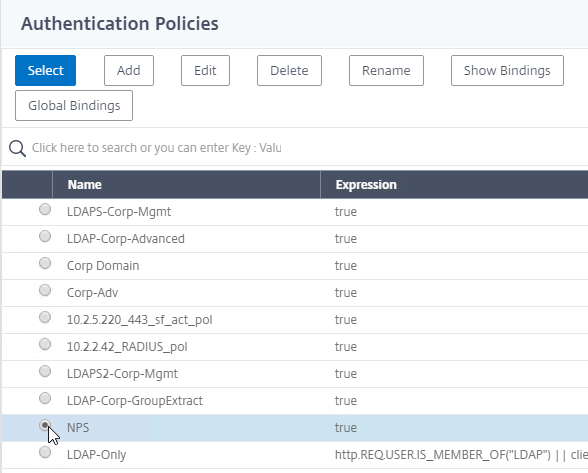
- Click the radio button next to an Advanced Authentication Policy that evaluates this Factor. Click Select.
- Use the Goto Expression drop-down to select NEXT or END. If you want to bind more Advanced Authentication Policies to this Factor, then select NEXT.
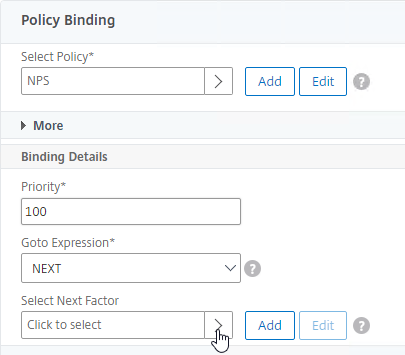
- In the Select Next Factor field, if you want to chain another Factor, click where it says Click to select, and bind the next Authentication Policy Label (Next Factor). You can click the Add button to create another Policy Label.
- Or don’t select anything, and if this Advanced Authentication Policy succeeds, then authentication is successful and complete. This ends the chaining.
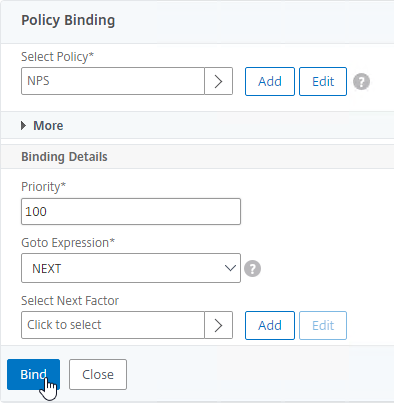
- Click Bind when done.
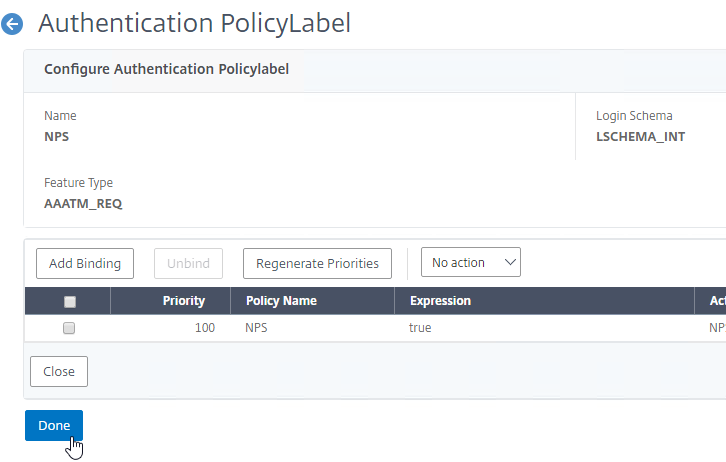
- You can click Add Binding to add more Advanced Authentication Policies to this Policy Label (Factor). Note: each Label is a separate factor. If your intent is multi-factor, then create a separate Label for the next factor.

- When done, click Done.
Bind Authentication Policy Label
Once the Policy Label (Factor) is created, you bind it to an existing Advanced Authentication Policy binding. This is how you chain Factors together. You can select a Next Factor (Policy Label) in two places:
- Edit an existing AAA Virtual Server that has an Advanced Authentication Policy already bound to it and edit the binding to include the Next Factor.
- Edit a different Policy Label, and edit an Advanced Authentication Policy binding to include the Next Factor.
To add a Policy Label Next Factor to a AAA Virtual Server:
- Edit an existing AAA Virtual Server that has an Advanced Authentication Policy already bound to it.
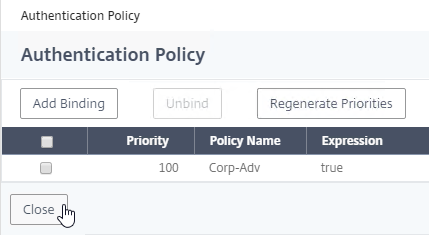
- On the left, in the Advanced Authentication Policies section, click the existing Authentication Policy bindings.
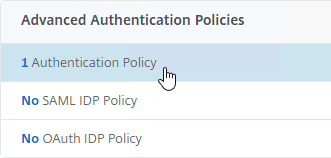
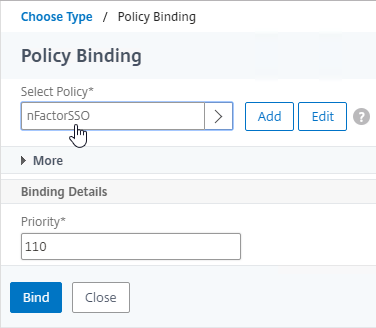
- Right-click an existing binding, and click Edit Binding.
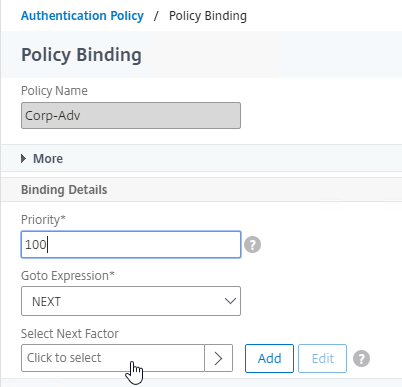
- In the Select Next Factor field, click where it says Click to select.
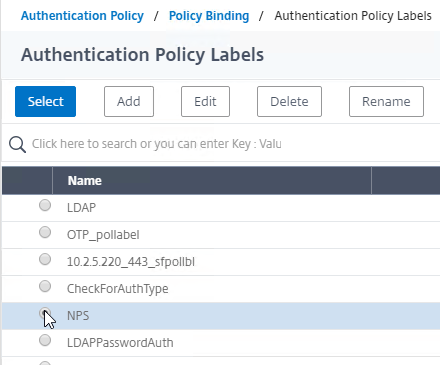
- Click the radio button next to the Policy Label for the Next Factor, and click Select.
- Click Bind.
- The far right shows the Next Factor.
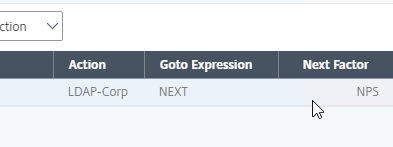
- Click Close.
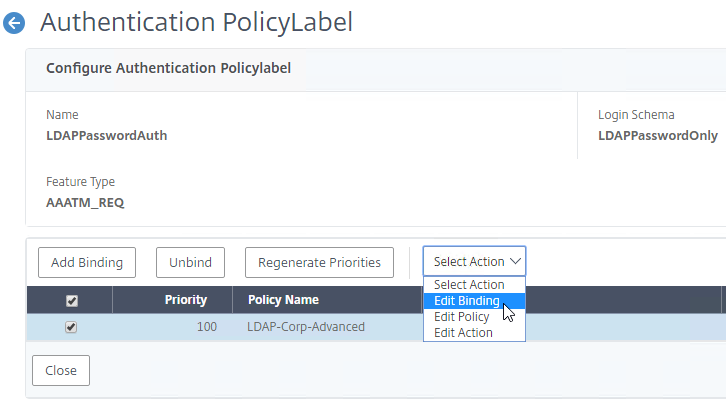
To add a Policy Label Next Factor to a different Policy Label:
- Go to Security > AAA – Application Traffic > Policies > Authentication > Advanced Policies > PolicyLabel.
- On the right, edit a different Policy Label.
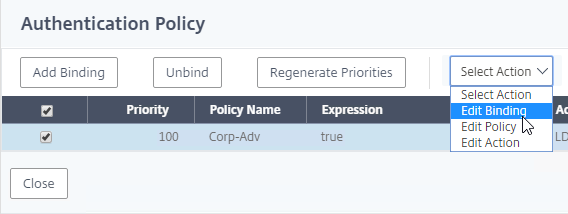
- Highlight an existing Advanced Authentication Policy binding, open the Action menu, and click Edit Binding.
- In the Binding Details section, next to Select Next Factor, click Click to select.
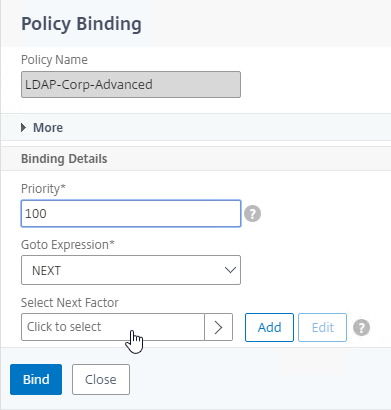
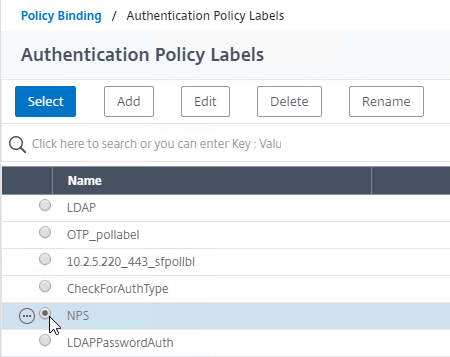
- Click the radio button next to a Policy Label for the next factor, and then click the blue Select button on the top of the window.
- Click Bind.
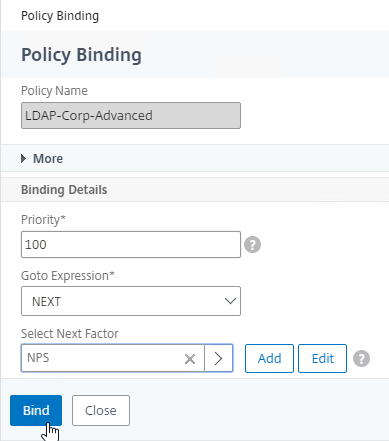
- On the far right, you can see the configured Next Factor.
- Click Close to close the PolicyLabel.
nFactor for Citrix Gateway
AAA Authentication Profile
Authentication Profile links a AAA Virtual Server to Citrix Gateway and enables nFactor on Citrix Gateway.
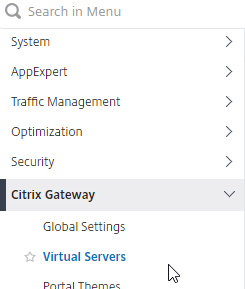
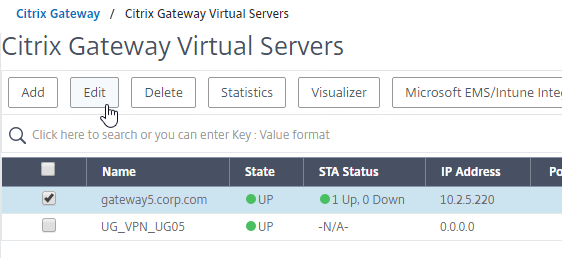
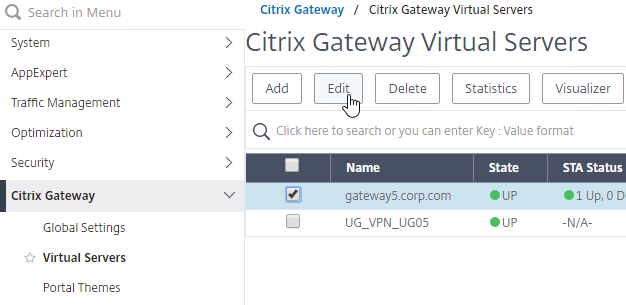
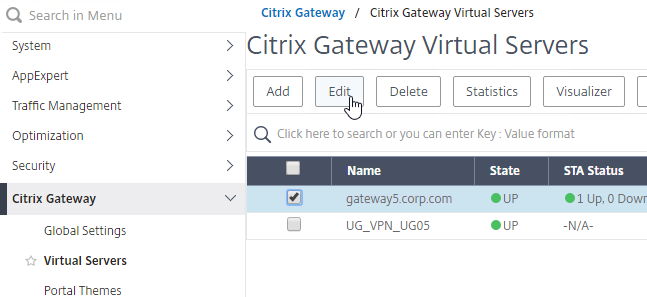
- Go to Citrix Gateway > Virtual Servers.
- On the right, edit an existing Gateway Virtual Server.
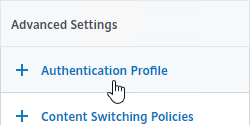
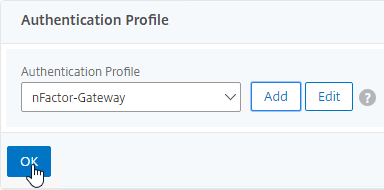
- On the right, in the Advanced Settings column, click Authentication Profile.
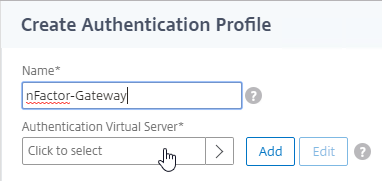
- On the left, click the plus icon (Add button) next to the Authentication Profile drop-down.

- Give the Authentication Profile a name.
- In the Authentication Virtual Server field, click where it says Click to select.
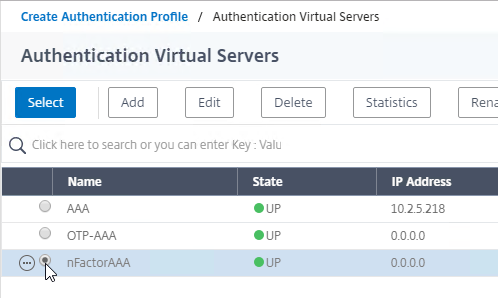
- Click the radio button next to the AAA Virtual Server that has Login Schema, Advanced Authentication Policy, and Authentication Policy Labels configured. The AAA Virtual Server does not need an IP address. Click Select.
- Then click Create.
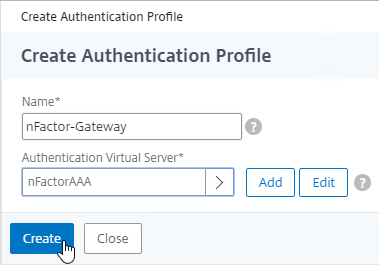
- And click OK to close the Authentication Profile section.
- If one of your Factors is client certificates, then you’ll need to configure SSL Parameters and CA certificate as detailed in the next section.
- When you browse to your Gateway, you’ll see the nFactor authentication screens.
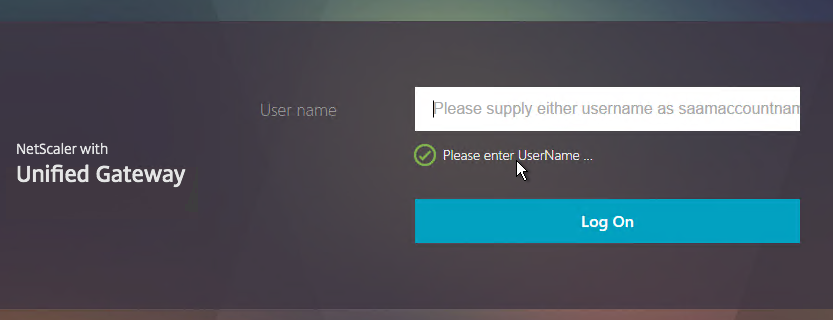
- Workspace app 1809 and newer with Gateway/ADC 12.1 build 49 and newer should support nFactor authentication. Older clients with older builds do not support nFactor, so those users will have to use a web browser.
- CTX223386 nFactor Authentication with Native Clients from NetScaler 11.1: Although Native Receiver Clients can now leverage advanced authentication policies, they still interact using legacy Gateway protocol. That is, Native Clients do not yet support nFactor wire protocol. Gateway acts intelligently based on the clients that are interfacing with it. That is, for Browser client, Gateway redirects to advanced login page with all customizations. For a Native Receiver client, Gateway responds according to the legacy protocol. Since Native clients do not process LoginSchema (even if it is sent), Gateway processes the configured LoginSchema, learns the configured factors, and sends hint to the clients in response to /vpn/index.html.
Gateway Client Certificate Authentication
If one of your authentication Factors is certificate, then you must perform some SSL configuration on the Citrix Gateway Virtual Server:
- Go to Traffic Management > SSL > Certificates > CA Certificates, and install the root certificate for the issuer of the client certificates. Certificate Authority certificates do not need key files.
- If default SSL Profiles are enabled, then you should have already created an SSL Profile that has Client Authentication enabled.
- Go to Citrix Gateway > Virtual Servers, and edit an existing Citrix Gateway Virtual Server that is enabled for nFactor.
- If default SSL Profiles are enabled:
- Scroll down to the SSL Profile section, and click the pencil icon.

- In the SSL Profile drop-down, select the SSL Profile that has Client Authentication enabled and set to OPTIONAL.

- Scroll down to the SSL Profile section, and click the pencil icon.
- If default SSL Profiles are not enabled:
- On the left, in the SSL Parameters section, click the pencil icon.

- Check the box next to Client Authentication.
- Make sure Client Certificate drop-down is set to Optional, and click OK.
- On the left, in the SSL Parameters section, click the pencil icon.
- On the left, in the Certificates section, click where it says No CA Certificate.
- Click where it says Click to select.
- Click the radio button next to the root certificate for the issuer of the client certificates, and click Select.
- Click Bind.

- You might have to also bind any Intermediate CA Certificates that issued the client certificates.
Traffic Policy for nFactor Single Sign-on to StoreFront
When performing Single Sign-on to StoreFront, nFactor defaults to using the last entered password. If LDAP is not the last entered password, then you need to create a Traffic Policy/Profile to override the default nFactor behavior.
- Go to Citrix Gateway > Policies > Traffic.
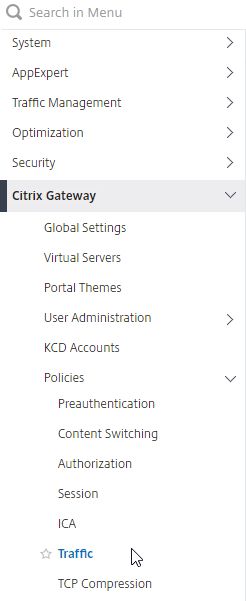
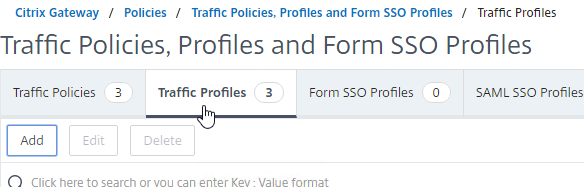
- On the right, switch to the Traffic Profiles tab.
- Click Add.
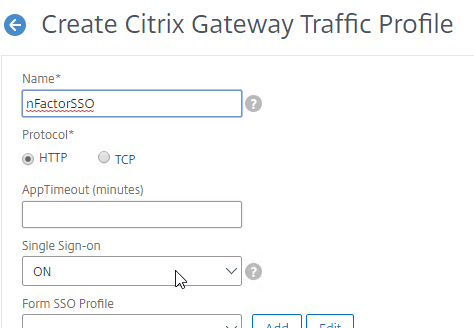
- Give the Traffic Profile a name.
- In the Protocol section, select HTTP.
- Set Single Sign-on to ON. Scroll down.
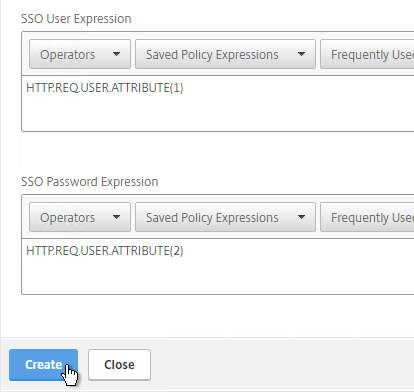
- In the SSO Expression fields, enter an HTTP.REQ.USER.ATTRIBUTE(#) expression that matches the indexes specified in the Login Schema.
- Click Create.
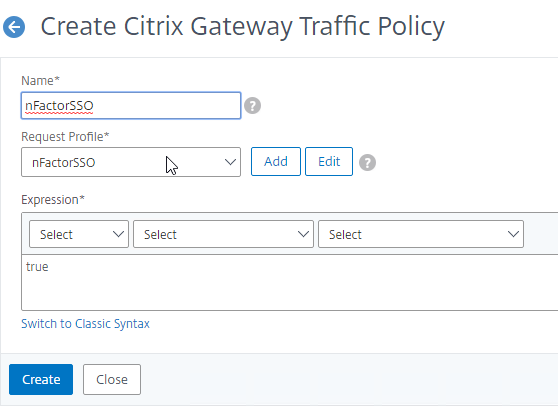
- On the right, switch to the Traffic Policies tab, and click Add.
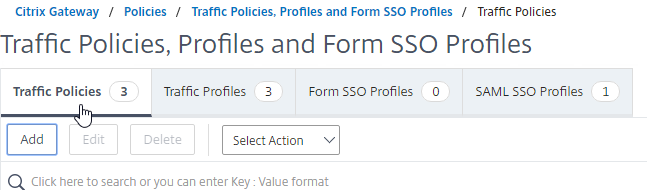
- Give the policy a name.
- Select the previously created Traffic Profile.
- Enter an Advanced Expression (e.g. true), and click Create.
- Edit an existing Citrix Gateway Virtual Server.
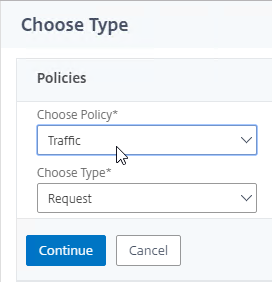
- Scroll down to the Policies section and click the plus icon.

- Select Traffic > Request, and click Continue.
- Select the previously created Traffic Policy, and click Bind.
Sample Configurations
From Citrix Docs: Sample deployments using nFactor authentication:
- Get two passwords up-front, pass-through in next factor. Read
- Username and 2 passwords with group extraction in third factor. Read
- Configure nFactor to process the second password before the first password, Read
- Modify first factor username for second factor. Read
- NO_AUTHN authentication policy expression checks first factor POST Body login value for UPN format. If true, Next Factor is noschema Login Schema with User Expression that transforms the HTTP.REQ.USER.NAME to DOMAIN\Username before passing to second factor authentication policy.
- Group extraction followed by certificate or LDAP authentication, based on group membership. Read
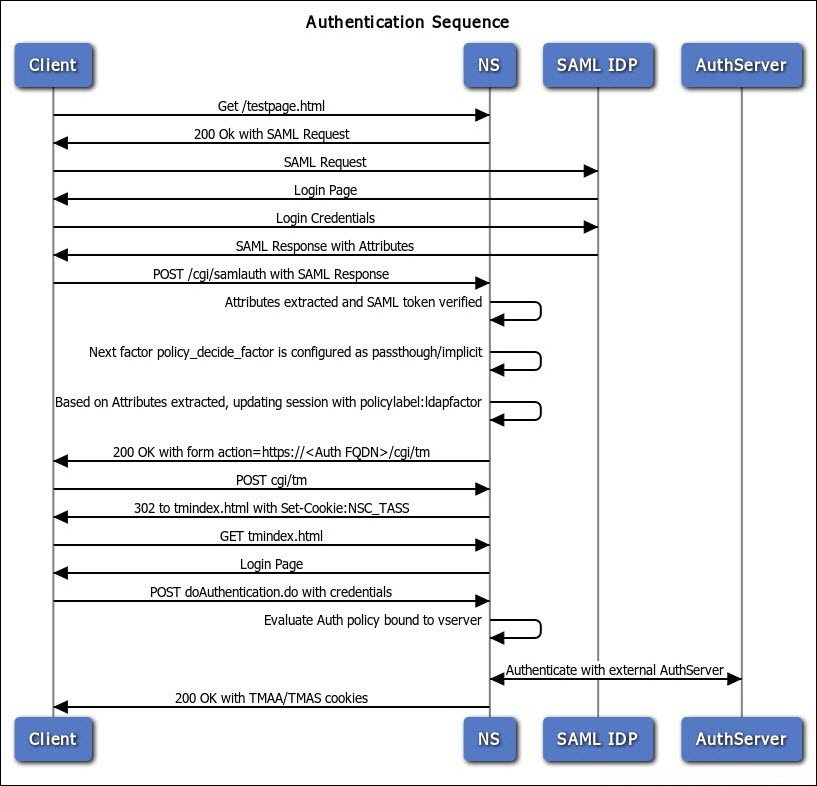
- SAML followed by LDAP or certificate authentication, based on attributes extracted during SAML. Read
- SAML in first factor, followed by group extraction, and then LDAP or certificate authentication, based on groups extracted. Read
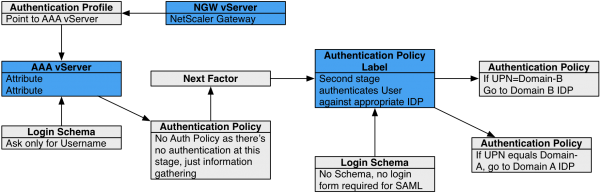
- Capture email address in first factor, and then choose one of multiple SAML iDP based on email address suffix. Read (Manuel Kolloff)
- Prefill user name from certificate. Read
- Certificate authentication followed by group extraction for 401 enabled traffic management virtual servers. Read
- Certificate fallback to LDAP in same cascade; one virtual server for both certificate and LDAP authentication. Read
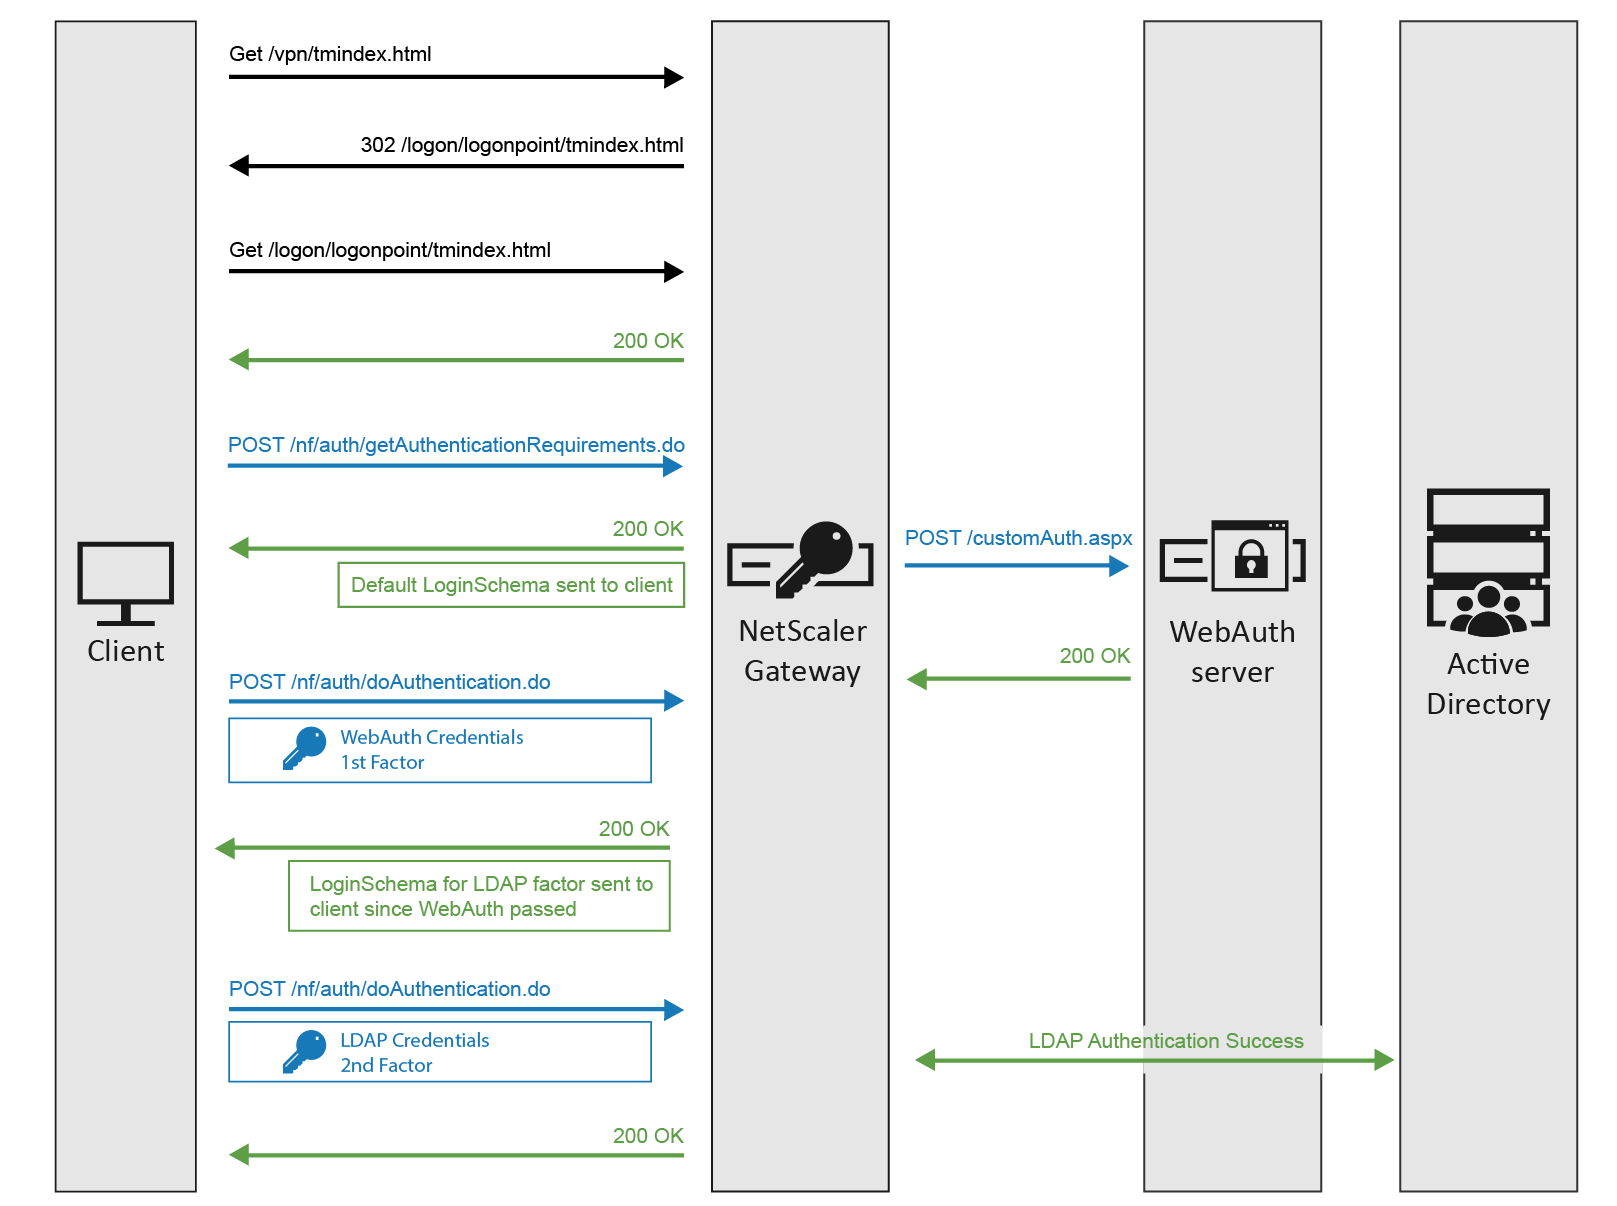
- LDAP in first factor and WebAuth in second factor. Read
- WebAuth in first factor, LDAP in second factor. Read
- Domain drop down in first factor, then different policy evaluations based on selected domain. Read

- Domain drop-down, then send Domain\Username to RADIUS. Read
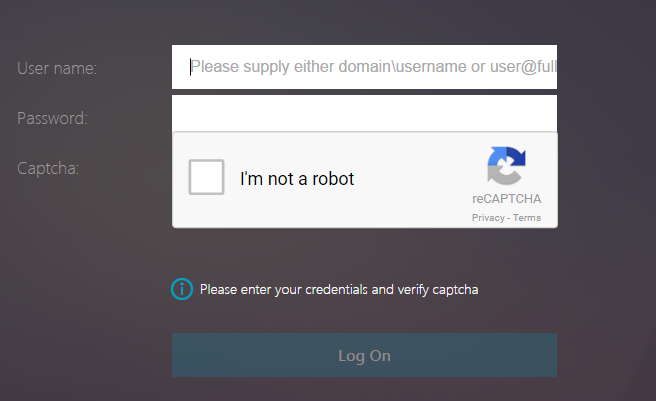
- Google reCAPTCHA first factor, LDAP second. Read (George Spiers)
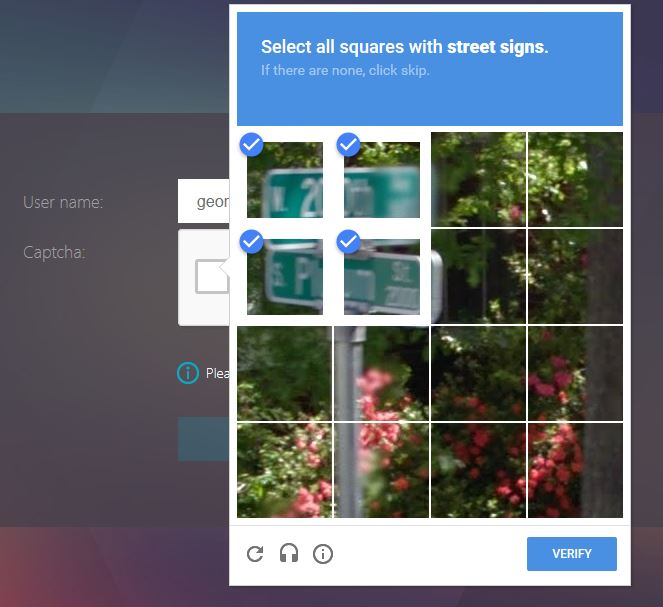
- Supporting reCaptcha with NetScaler nFactor. Read
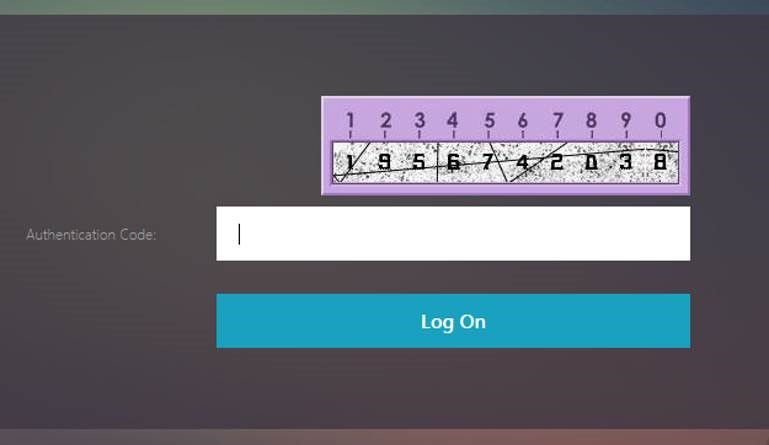
- CTX225938 nFactor – Customizing UI to Display Images – e.g. Swivel
- With 12.0 version of NetScaler, EPA is blended into the authentication framework thereby making EPA a conditional or on-demand feature. This reduces the need for multiple virtual servers by allowing for all the clients to gain access to a single virtual server. See CTX223597 Concepts and Entities Used for EPA in nFactor Authentication Through NetScaler.
- Configure Post-Authentication EPA (Endpoint Analysis) Scan as a Factor. Read
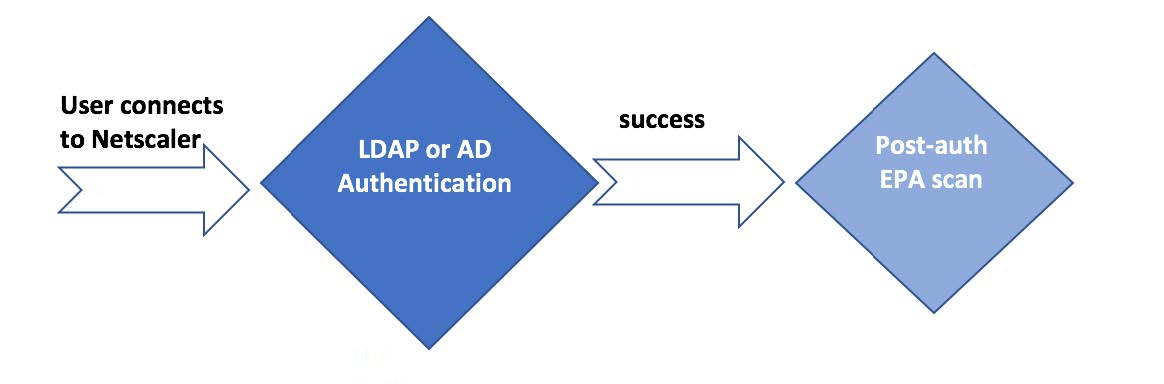
- Configure Pre-Authentication EPA (Endpoint Analysis) Scan as a Factor. Read
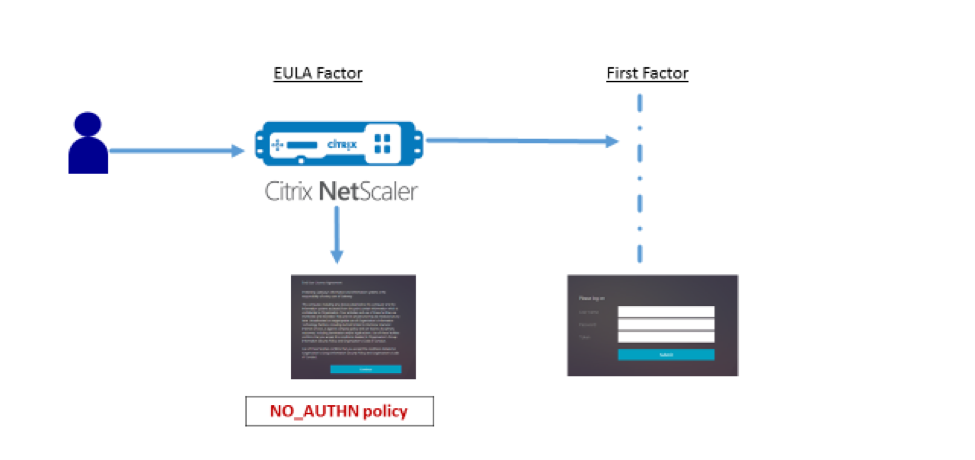
- Configure EULA (End User License Agreement) as an Authentication Factor. Read
- Show a drop-down box in the logon form and automatically hide or show certain fields based on drop-down selection. Read

- Step-up authentication – i.e. one Unified Gateway website needs single factor, while other website needs multi-factor. Read
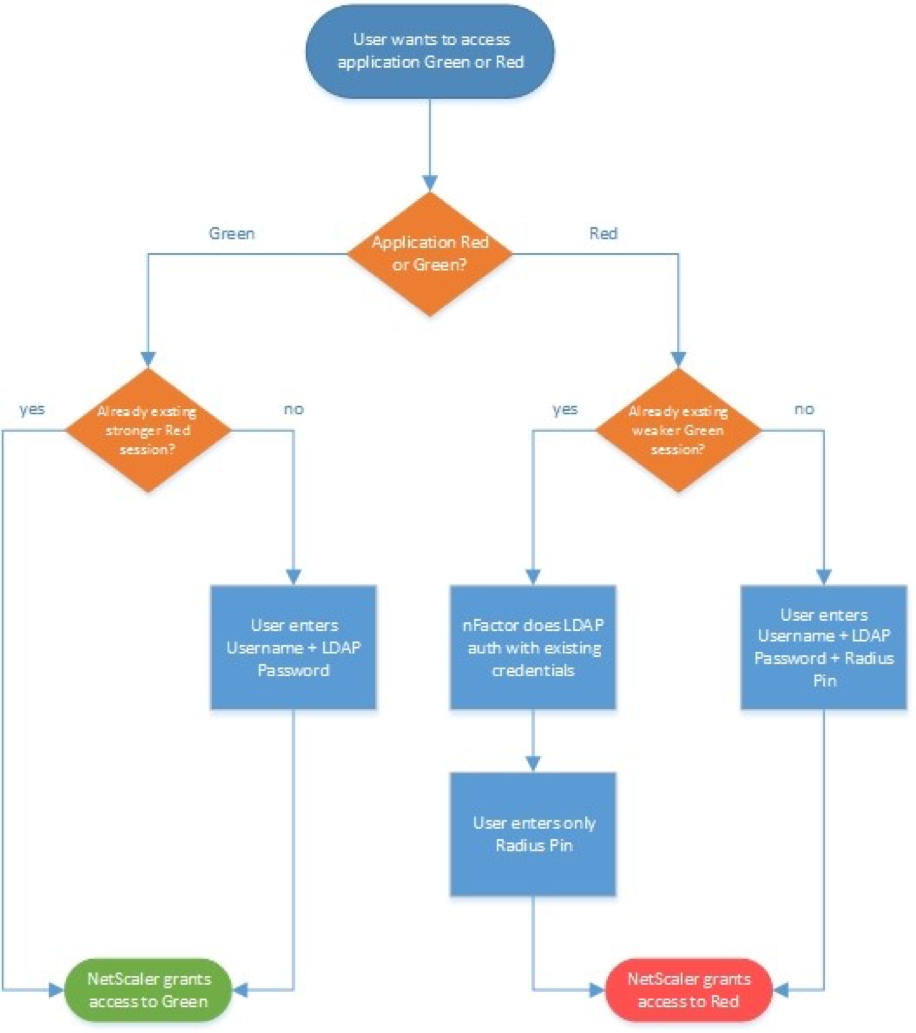
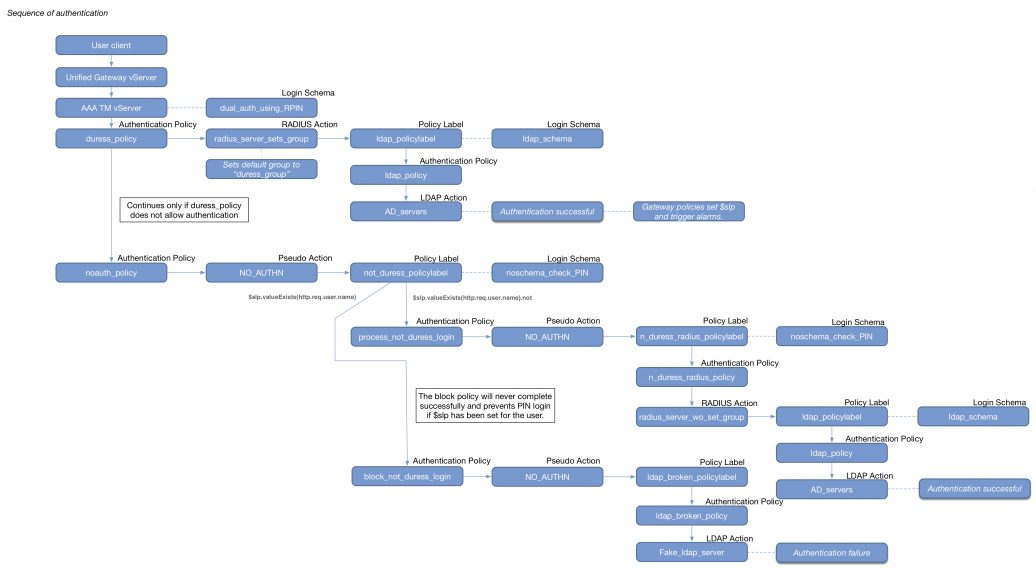
- RADIUS authentication with reversed PIN – if user enters reversed PIN, then user is under duress. This sample configuration has some interesting components: Read 💡
- Policy Extension Function using the Lua language
- Usage = HTTP.REQ.BODY(1000).TYPECAST_NVLIST_T(’=’,’&’).VALUE(”passwd1”).RPIN
- NetScaler Variable of type Map with Expiration timer
- Responder to set the variable
- Variable identifies duress state for four hours
- Custom syslog message (audit messageaction) triggered by a Responder
- Default Authentication Group to put duressed user on site/farm with Session Recording enabled
- nFactor sequence:
- Policy Extension Function using the Lua language
Certificate auth: If Successful, LDAP only. If Failure, LDAP+RADIUS
This scenario is described in Citrix Blog Post Configuration Notes on nFactor
The authentication process flows like this:
- User connects to NetScaler Gateway.
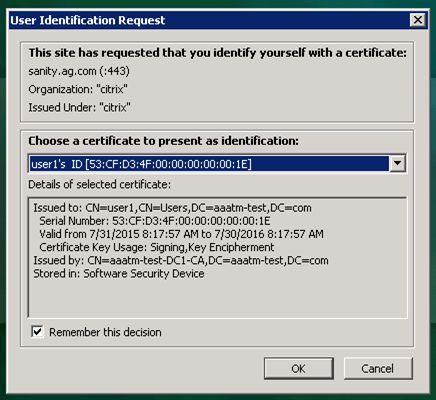
- NetScaler Gateway asks user for certificate.
- If user selects a certificate, NetScaler Gateway compares certificate signature to the CA certificate that is bound to the NetScaler Gateway. If it doesn’t match, then user certificate is ignored.
- Bound to the NetScaler Gateway Virtual Server is an Authentication Profile, which links NetScaler Gateway to AAA nFactor.
- Certificate authentication: The lowest priority number authentication policy on the AAA Virtual Server is Certificate. If there’s a valid user certificate:
- Extract the user’s userPrincipalName from the certificate.
- Next Factor = policy label that displays a logon screen (Single-factor Login Schema)
- The username field is pre-populated with the userPrincipalName attribute extracted from the certificate.
- User is prompted to enter the LDAP password only.
- LDAP policy/server is configured to use userPrincipalName to login to LDAP.
- If successful, NetScaler Gateway authentication is complete. Next step is to Single Sign-on to StoreFront.
- If LDAP authentication fails, then NetScaler Gateway authentication fails, and the user is prompted to try LDAP-only authentication again.
- LDAP authentication: If certificate authentication fails, try next authentication policy bound to the AAA Virtual Server, which is a different LDAP Policy.
- Bound to the AAA Virtual Server is a Dual Factor Login Schema that asks for username, LDAP password, and RADIUS password.
- LDAP policy/server is configured to use sAMAccountName to login to LDAP. SAMAccountName means users don’t have to enter full userPrincipalName.
- If LDAP authentication is successful:
- Put username in Credential Index 1 and put password in Credential Index 2. These will later be used by a Traffic Policy to Single Sign-on to StoreFront.
- Proceed to next factor (Policy Label), which is RADIUS.
- If LDAP authentication fails, NetScaler Gateway login fails, and the user is prompted to try two-factor authentication again.
- RADIUS authentication: the second factor Policy Label is configured with Noschema. This means no additional logon form is displayed because the RADIUS password was already collected in the previous factor.
- When multiple passwords are collected, they are tried in order. The first password was used by the previous factor. The second password is tried by this factor (Policy Label).
- RADIUS policy/profile attempts authentication.
- If RADIUS authentication is successful, NetScaler Gateway authentication is complete. Next step is Single Sign-on to StoreFront.
- If RADIUS authentication fails, NetScaler Gateway login fails, and the user is prompted to try two-factor authentication again.
- Single Sign-on to StoreFront: NetScaler Gateway uses the last password collected by nFactor to Single Sign-on with StoreFront. If the last password is LDAP, then no additional configuration is needed. If the last password is not LDAP, then a Traffic Policy/Profile is needed.
- Bound to the NetScaler Gateway Virtual Server is a Traffic Policy.
- The Traffic Policy/Profile users Credential Index 1 for username and Credential Index 2 for Password. These are the same indexes configured in the Dual Factor Login Schema.
The order of configuration doesn’t match the authentication flow because some objects have to be created before others.
# Create Auth vServer, bind server cert, bind CA cert for client certificates
# Enable Optional client certificates
add authentication vserver nFactorAAA SSL 0.0.0.0 443
bind ssl vserver nFactorAAA -certkeyName WildCorpCom
bind ssl vserver nFactorAAA -certkeyName CorpRoot -CA -ocspCheck Optional
set ssl vserver nFactorAAA -clientAuth ENABLED -clientCert Optional -ssl3 DISABLED

# Create auth policy for LDAP-UPN. UPN is extracted from certificate.
add authentication ldapAction Corp-UserPrincipalName -serverIP 10.2.2.220 -serverPort 636 -ldapBase "dc=corp,dc=local" -ldapBindDn "corp\\ctxsvc" -ldapBindDnPassword "MyPassword" -ldapLoginName userPrincipalName -groupAttrName memberOf -subAttributeName CN -secType SSL -passwdChange ENABLED
add authentication Policy Corp-UserPrincipalName -rule true -action Corp-UserPrincipalName

# Create PolicyLabel LDAPPasswordOnly with Single-factor Login Schema
# Login Schema has InitialValue with username from certificate.
add authentication loginSchema SingleAuth -authenticationSchema "/nsconfig/loginschema/LoginSchema/SingleAuth-Corp.xml"
add authentication policylabel LDAPPasswordOnly -loginSchema SingleAuth
bind authentication policylabel LDAPPasswordOnly -policyName Corp-UserPrincipalName -priority 100 -gotoPriorityExpression NEXT

# Create Cert policy and bind to AAA vServer with LDAPPasswordOnly PolicyLabel as Next Factor
# Cert policy must have lower priority number (higher priority) than LDAP-SAM policy
# Cert is evaluated first. If succeed, ask for LDAP password. If fails, ask for two factor.
add authentication certAction Cert_Auth_Profile -userNameField SubjectAltName:PrincipalName
add authentication Policy Cert_Auth_Policy -rule true -action Cert_Auth_Profile
bind authentication vserver nFactorAAA -policy Cert_Auth_Policy -priority 100 -nextFactor LDAPPasswordOnly -gotoPriorityExpression NEXT

# Create LDAP-SAM Auth Policy for two-factor
# Only evaluated if cert auth fails. Login Schema asks for user, password, and passcode.
add authentication ldapAction Corp-Gateway -serverIP 10.2.2.220 -serverPort 636 -ldapBase "dc=corp,dc=local" -ldapBindDn "corp\\ctxsvc" -ldapBindDnPassword "MyPassword" -ldapLoginName samaccountname -groupAttrName memberOf -subAttributeName CN -secType SSL -passwdChange ENABLED
add authentication Policy Corp-SAMAccountName -rule true -action Corp-Gateway

# Create RADIUS Auth Policy for two-factor
add authentication radiusAction RADIUS-Action -serverIP 10.2.2.42 -serverPort 1812 -radKey MyKey
add authentication Policy RADIUS-Policy -rule true -action RADIUS-Action

# Create Dual-factor Login Schema and bind directly to AAA vServer
# This Login Schema is only shown if Cert auth fails
add authentication loginSchema DualAuth -authenticationSchema "/nsconfig/loginschema/LoginSchema/DualAuth.xml" -userCredentialIndex 1 -passwordCredentialIndex 2
add authentication loginSchemaPolicy DualAuth -rule true -action DualAuth
bind authentication vserver nFactorAAA -policy DualAuth -priority 100 -gotoPriorityExpression END

# Create RADIUS Policy Label with noschema and RADIUS Auth Policy
# Already got passcode from previous factor so don't show Login Schema again
add authentication loginSchema Noschema -authenticationSchema noschema
add authentication policylabel NoSchema-RADIUS -loginSchema Noschema
bind authentication policylabel NoSchema-RADIUS -policyName RADIUS-Policy -priority 100 -gotoPriorityExpression NEXT

# Bind LDAP-SAM Auth Policy to AAA vServer with RADIUS as next factor
# LDAP-SAM Auth Policy must have higher priority number (lower priority) than Cert Policy
bind authentication vserver nFactorAAA -policy Corp-SAMAccountName -priority 110 -nextFactor NoSchema-RADIUS -gotoPriorityExpression NEXT

# Create Authentication Profile to link AAA with Gateway. Bind to Gateway.
add authentication authnProfile nFactor -authnVsName nFactorAAA -AuthenticationHost aaa.corp.com
add vpn vserver gateway.corp.com SSL 10.2.2.220 443 -icaOnly ON -dtls ON -Listenpolicy NONE -tcpProfileName nstcp_default_XA_XD_profile -appflowLog ENABLED -authnProfile nFactor

# Enable Optional Client certs on Gateway
set ssl vserver gateway.corp.com -clientAuth ENABLED -clientCert Optional -ssl3 DISABLED
bind ssl vserver gateway.corp.com -certkeyName CorpRoot -CA -ocspCheck Optional

# Create Traffic Policy to SSON to StoreFront. Bind to Gateway.
add vpn trafficAction nFactorSSO http -kcdAccount NONE -userExpression "http.req.user.attribute(1)" -passwdExpression "http.req.user.attribute(2)"
add vpn trafficPolicy nFactorSSO ns_true nFactorSSO
bind vpn vserver gateway.corp.com -policy nFactorSSO -priority 100
Group Extraction, followed by LDAP (Active Directory), or Azure MFA (NPS)
Azure MFA is available as a plug-in for Microsoft Network Policy Server (NPS), which is a Microsoft RADIUS server and built-in Windows Server Role.
NPS performs both AD authentication, and Azure MFA authentication. NetScaler sends the user’s AD password to NPS. NPS verifies AD, and then the NPS Azure MFA plug-in calls the user (or push notification to the user). If both AD and MFA are successful, then NPS sends back RADIUS-Accept.
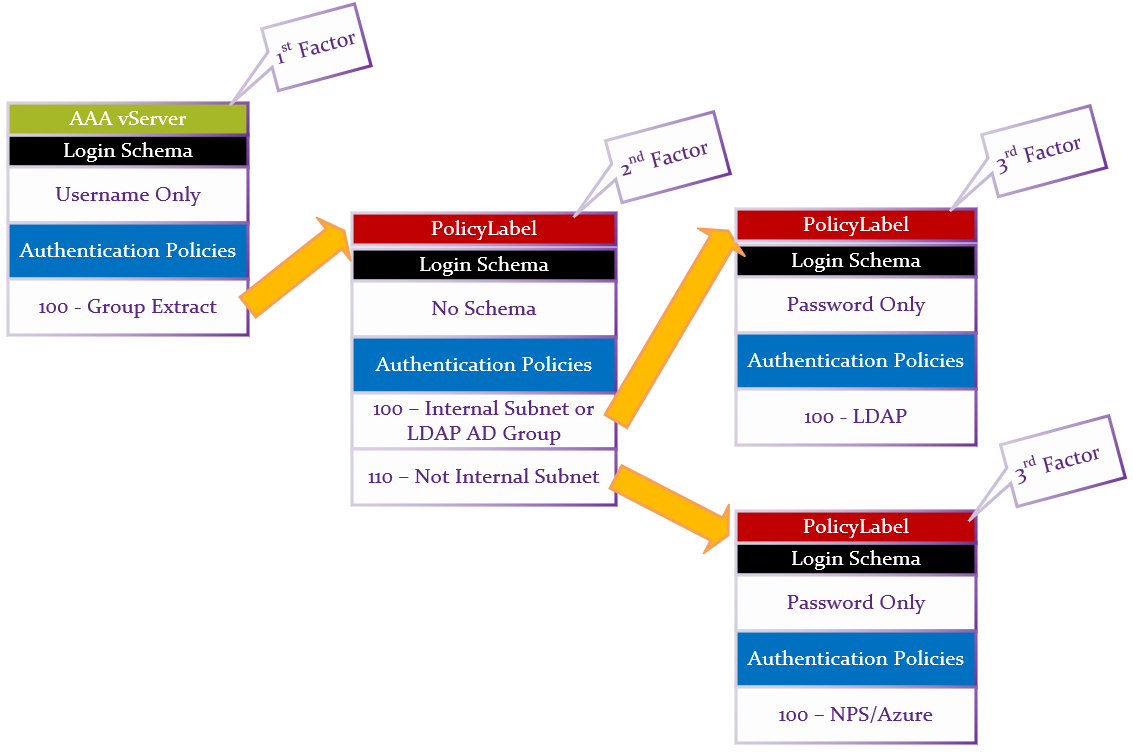
Summary:
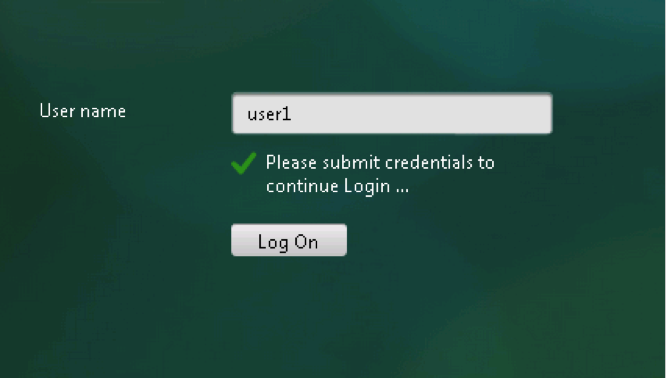
- First factor Login Schema asks for Username only.
- LDAP Group Extraction (with Authentication disabled) reads the user’s groups from AD.
- Second factor checks for group membership and sends to one of two different third factors.
- If user is in LDAP Group, or Client IP is on internal network, then perform LDAP-only authentication.
- Login schema asks for AD password.
- LDAP Policy authenticates with LDAP Server (Active Directory).
- Otherwise, perform RADIUS (two-factor) authentication.
- Login schema asks for AD password.
- Note: NPS with MFA plugin only needs the AD password. Alternatively, you could use a Login Schema that asks for both LDAP password and RADIUS password.
- RADIUS Policy uses the entered AD password to authenticate to Microsoft NPS and Azure MFA.
- Login schema asks for AD password.
CLI Commands. Note, these objects are created in the required order, which is backwards from how you would want to configure them.
- Add cert for AAA vServer. Link the cert to Intermediate.
add ssl certKey WildcardCorpCom -cert WildcardCorpCom.pfx -key WildcardCorpCom.pfx -inform PFX -passcrypt "myPassword"

link ssl certKey WildcardCorpCom Intermediate
- Enable AAA feature if not already enabled.
enable ns feature AAA
- Create first factor LDAP Action (LDAP Server) and LDAP Policy (expression) for Group Extraction. Authentication is disabled. This is the first factor that is bound directly to the AAA vServer.
add authentication ldapAction LDAP-Corp-GroupExtract -serverIP 10.2.2.11 -serverPort 636 -ldapBase "dc=corp,dc=local" -ldapBindDn ctxsvc@corp.local -ldapBindDnPassword MyPassword -ldapLoginName sAMAccountName -groupAttrName memberOf -subAttributeName cn -secType SSL -authentication DISABLED

add authentication Policy LDAP-Corp-GroupExtract -rule true -action LDAP-Corp-GroupExtract
- Create a third-factor LDAP Action (LDAP Server) and Authentication Policy (expression) for Active Directory Authentication. This is the authentication factor if user is in the LDAP Users group.
add authentication ldapAction LDAP-Corp -serverIP 10.2.2.11 -serverPort 636 -ldapBase "dc=corp,dc=local" -ldapBindDn ctxsvc@corp.local -ldapBindDnPassword MyPassword -ldapLoginName sAMAccountName -groupAttrName memberOf -subAttributeName cn -secType SSL -passwdChange ENABLED

add authentication Policy LDAP-Corp -rule true -action LDAP-Corp
- Create a third-factor RADIUS Action (RADIUS Server) and Authentication Policy (expression) for NPS.
add authentication radiusAction NPS -serverIP 10.2.2.42 -serverPort 1812 -radKey MySecret

add authentication Policy NPS -rule true -action NPS
- Create the second factor NO_AUTHN authentication policies to determine the next factor based on the user’s group membership. NO_AUTHN means don’t authenticate. Instead, these policies will have a Next Factor that points to the Authentication Policies that we created earlier. If the policy expression is true, then go to Next Factor. Next Factor is configured later when binding these policies to the second factor PolicyLabel. Note: the group name is case sensitive and must match the Active Directory group name.
add authentication Policy LDAP-Only -rule "http.REQ.USER.IS_MEMBER_OF(\"LDAP\") || client.IP.SRC.IN_SUBNET(10.2.2.0/24)" -action NO_AUTHN

add authentication Policy TwoFactor -rule "client.IP.SRC.IN_SUBNET(10.2.2.0/24).NOT" -action NO_AUTHN
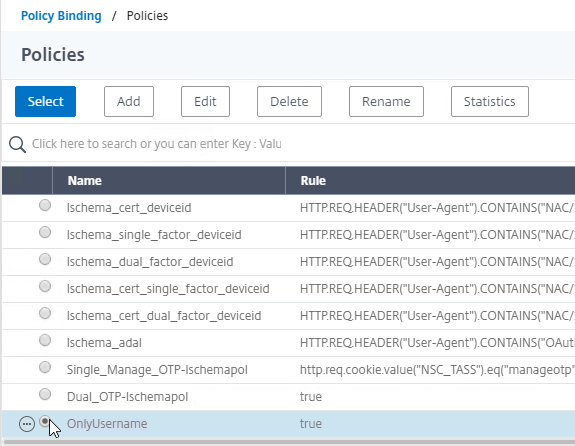
- Create first factor Login Schema Profile for username-only group extraction. You can copy the built-in OnlyUsername.xml and modify it with your desired labels. Since this Login Schema Profile is bound to the AAA vServer, it needs a Login Schema Policy (expression). The other two Login Schema Profiles are bound to PolicyLabels and thus don’t need Login Schema Policies.
add authentication loginSchema OnlyUsername -authenticationSchema "/nsconfig/loginschema/LoginSchema/OnlyUsername.xml"

add authentication loginSchemaPolicy OnlyUsername -rule true -action OnlyUsername
- Create third factor Login Schema Profile for AD Authentication. The .xml file is copied from the built-in PrefillUserFromExpr.xml but with modified labels for AD authentication. The username is pre-filled in from the first factor.
add authentication loginSchema LDAPPasswordOnly -authenticationSchema "/nsconfig/loginschema/LDAPPassword.xml"
- Create third factor Login Schema Profile for NPS Authentication. The .xml file is copied from the built-in PrefillUserFromExpr.xml but with modified labels for NPS authentication. The username is pre-filled in from the first factor.
add authentication loginSchema NPSPasswordOnly -authenticationSchema "/nsconfig/loginschema/NPSPassword.xml"
- Create third factor PolicyLabel for Active Directory authentication with Active Directory Login Schema and Active Directory Authentication Policy.
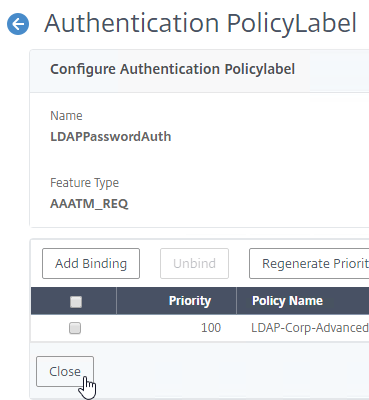
add authentication policylabel LDAPPasswordAuth -loginSchema LDAPPasswordOnly

bind authentication policylabel LDAPPasswordAuth -policyName LDAP-Corp -priority 100 -gotoPriorityExpression NEXT
- Create third factor PolicyLabel for NPS authentication with NPS Login Schema and NPS Authentication Policy.
add authentication policylabel NPSPasswordAuth -loginSchema NPSPasswordOnly

bind authentication policylabel NPSPasswordAuth -policyName NPS -priority 100 -gotoPriorityExpression NEXT
- Create second factor PolicyLabel with Policies that choose Next Factor. This PolicyLabel is processed before the two we just created.
add authentication policylabel CheckForAuthType -loginSchema LSCHEMA_INT

bind authentication policylabel CheckForAuthType -policyName TwoFactor -priority 90 -gotoPriorityExpression NEXT -nextFactor NPSPasswordAuth

bind authentication policylabel CheckForAuthType -policyName LDAP-Only -priority 100 -gotoPriorityExpression NEXT -nextFactor LDAPPasswordAuth
- Create AAA vServer. Bind Login Schema Policy (username only) and Group Extraction Policy.
add authentication vserver AAA SSL 10.x.x.218 443
bind authentication vserver AAA -policy OnlyUsername -priority 100 -gotoPriorityExpression END
bind authentication vserver AAA -policy LDAP-Corp-GroupExtract -priority 100 -nextFactor CheckForAuthType -gotoPriorityExpression NEXT
- Perform additional steps not detailed here:
- For Traffic Management:
- Create a Session Policy and bind it to the AAA vServer.
- Enable authentication on the Load Balancing or Content Switching vServer.
- For NetScaler Gateway, create an Authentication Profile, and bind it to the Gateway vServer.
- For Traffic Management:
Hi Carl,
I only have RSA authenticaion i.e. single factor auth for my SSL VPN users. We are on 13.1.51.15 and we use Nfactor Adv. Auth policies. Now the requirement has come up where i need to first check if the users are not member of a “VPN_deny” AD group, if they are member of “VPN_Deny” group then prohibit access to the SSL VPN session. If they are not a member of the “VPN_Deny” group then allow access to SSL VPN. I am just trying to understand what is the best possible way to skin a cat?
Add an LDAP factor with group extraction enabled. It will need to collect the username. If you don’t want the user’s password, then disable Authentication on the LDAP factor.
Add a AAA Group called VPN_Deny and bind a Session Policy that enables ICA Proxy and sets the WI address to an error website.
Hi Carl,
Amazing article, I am looking for a way to show the user that the Citrix gateway is asking for MFA approval on their phone. Currently when they click login the page just spins as if it is loading but it is actually waiting for them to click approve on their authentication app.
Thanks in advance!
James
You can add a footer to the logon page. There isn’t much you can do with RADIUS, but switching to SAML might provide a better user experience.
Hi Carl,
I am trying to configure nfactor in my netscaler version 13.0
i have followed the artcile to create the login schema etc. and the page looks good. I wanted to add domain field on this page. Do you know how do i add the domain field? should i just update the schema xml file?
Like this? https://support.citrix.com/article/CTX201760/how-to-configure-domain-dropdown-in-first-factor-then-different-policy-evaluations-based-on-groups
Hi Carl ,
Not not like this https://support.citrix.com/article/CTX201760/how-to-configure-domain-dropdown-in-first-factor-then-different-policy-evaluations-based-on-groups
I have a session policy for Citrix gateway looking for cookie domain. I just want to add a domain field on the landing page so that the session policy can be applied. We did that with X1 theme couple of years ago that time the code was needed to be done in one of the js along with a rewrite policy. But I am not able to figure out how exactly I do with nfactor and rfwebgui theme. I am able to update the schema xml to add the domain field, I have the domain field now but the JS code needs to be done so that the validation can be done. At the moment without domain I get error “not a privileged user” auth (ldap and rsa) works.
Thanks
Amey
Here’s info on the Javascript for nFactor – https://docs.citrix.com/en-us/citrix-adc/current-release/aaa-tm/authentication-methods/multi-factor-nfactor-authentication/nfactor-extensibility.html
Assuming you can’t simply bind the session profile to the user AD group, there are a couple ways you can do this depending on how your nfactor flows:
1. The easiest way…
– In your schema file for drop down you will have lines like:
MyDomABCD
– Use a Session policy of:
AAA.LOGIN.DOMAIN.EQ(“ABCD”)
2. If you have nfactor flow that goes beyond authentication, e.g., eula…
On your LDAP server definition (> More) add “distinguishedName” as an Attribute field. Let’s say Attribute 3
– Use a Session policy of:
AAA.USER.ATTRIBUTE(3).TO_UPPER.CONTAINS(“MYDOM.CORP.COM”)
For the above just use a string that is unique to the domain in the distinguished name of the user.
My post appears to have been altered when parsed because I had actual XML…
For MyDomABCD
Display=MyDOM, Value=ABCD
Thanks Phil.
I am trying to write a session policy expression to check for domain to allow authorization.
i tried this syntax
i tried this syntax – AAA.LOGIN.DOMAIN.EQ(abc.com) but it fails with syntax error
Expression syntax error [DOMAIN.EQ(^corpau.wbc, Offset 20]
any suggestions?
Hi:
Domain name enclosed in quotes, like AAA.LOGIN.DOMAIN.EQ(“abc.com”)? That is missing from what you’ve provided.
I have tried to use the nfactor example but in adaptive auth hosted in citrix cloud. When i tried to use the expression “client.IP.SRC.IN_SUBNET(10.2.2.0/24)” it doesn’t work as adaptive auth picks up the public IP(internet) rather the local IP. Any suggestions on how i detect internal and external IP’s but using netscalers in citrix cloud/azure!
If you want to match all internal users, then ask your networking team what public IPs they use for Internet browsing.
Hi.. This is what i have done.
i have created the nfactor for 1st page username and password(LDAP) and next page is for radius time based token but after it comes back with error from storefront cannot complete the request.
i already tried delegating the auth to gateway and configuring the store gateway authentication to domain but it is still failing.. Any suggestion ?
It’s probably sending the wrong password to StoreFront. Edit your LDAP Login Schema and check the box to use it as SSO Credentials.
Another option is to edit the Login Schemas and put password in a AAA Attribute and then configure a VPN (Gateway) Traffic Policy to send the password to StoreFront.
Hi Carl, we were trying the same thing. But enabling SSO checkbox in the Login Schema is not available in ADC standard licenses. So nFactor is part of Standard, LDAP and Radius also no problem in classic way. But LDAP and Radius using nFactor is impossible in Standard because of missing SSO option.
Hi Carl,
This unfortunately seems not be possible with pure ‘Citrix Gateway’ License.
NS replies ‘This feature needs enterprise or platinum license’.
Do you have any idea how to get Two-Factor Auth (LDAP + RADIUS) working with NS nFactor & Storefront SSO with pure ‘Citrix Gateway’ license?
Thanks!
Hi carl,
Can you please insight with start to end steps ir article. Which help me to configure the scenario “ when a connection reaches the NetScaler Gateway VIP, the NetScaler Gateway should allow or deny access to users who are members of a particular Active Directory group. Also NetScaler should allow access to those users who are connecting from a certain subnet” there is an citric article CTX208695 , but it does not have end to end steps to achieve the requirement
Thanks
LDAP Policies have an LDAP Search Filter that you can use to prevent logins from anybody that’s not in a specific AD group.
For VPN connections (not ICA Proxy), there’s a setting in the Session Policy called Groups Allowed to Login.
Or you can bind different session policies to AAA Groups and the Gateway Virtual Server. The lower priority session policy on the Gateway Virtual Server would send users to an error page, while the higher priority session policy on the AAA group would send the user to the StoreFront webpage.
this video for customizing xml is unavailable.. could you please update this link.
https://www.youtube.com/watch?v=dQRJo1Dm_Aw
I haven’t found another source. Maybe you can ask Sam Jacobs if it’s posed somewhere else.
Dear Carl,
we are using Citrix Netscaler ADC 12.1 with two factor authentification via nFactor.
After logon via username und LDAP password, the next screen showes up to enter the token-code sent via Radius.
In the screen to enter the token-code there is still “password” insteat of token at the edge.
Is there a way to change password to token ? Some of our users tries to enter their LDAP password insteat of their token
;-(
King regards
I believe that can be easily changed under the Portal Theme. If you don’t have it selected already it would be under the Login Page option.
Is there a Doc or a how to guide that shows me how to add the domain in a UPN format before sending to Radius. im trying to do this in basic auth but im guessing its not possible in Basic so would need to go nFactor. if i go nfactor that means ill need to add LDAP in tehre too so taht i can satisfy the 2 factor auth that our security needs.
Maybe you can use this as an example – https://support.citrix.com/article/CTX237992
Hello,
We are implementing two factor authentication and Citrix support send us your article as reference.
First factor in our case is the smart card/certificate and LDAP is second one.
Authentication to Storefront works fine. but when launching the applications we are prompted for Certificate and PIN.
This is totally not expected behavior, as LDAP is set as second factor and in session policy the credential index was set as Secondary which should be used for SSO in our understanding.
Could you please give us any tip what we might be missing ?
Thank you in advance.
But how can I specify that I want any user hitting my netscaler gateway to use MFA, but I do NOT want anyone logging into the management page to use MFA?
Configure nFactor at an Authentication (AAA) Virtual Server. Then create an Authentication Profile for the Gateway Virtual Server that links it to the Authentication Virtual Server. nFactor will then only be used for Gateway and not for management.
MFA with Radius and LDAP first will not be possible. Editing the Login Page is not availible in the ADC Standard. By that the Single Sign On is not avalible to activate at the LoginPage setting. By that the Single Sign On /Auth Pass trough to the Storefront is not availible. It will only work with LDAP as the last/only step of authentication. Anything wrong?
In Standard Edition, are you able to create a Login Schema Profile and then click More to see additional fields including the checkbox for “Enable Single Sign On Credentials”?
Nope, i cannot create a now Login Schema Profile. I can open an existing, but i cannot save the change. Then i get an info about insufficient license. ADC Standard is not enough.
Hi Carl,
Thanks for your precise documentation. I’s very helpful for me.
since 13.0-67.39 nFactor should be availible with standard license. Here i found that here https://docs.citrix.com/en-us/citrix-adc/downloads/release-notes-13-0-67-39.html. We have that version, but i cannot follow your instruction, because the GUI part under “Security” the “AAA”-part is still missing and cannot be actived because of the standard license.
I requested the support regarding that, and he told me: yes, nFactor EPA is available since that version, but only to configure by CLI.
Also the use of the nFactor Visualizer, is not available, but Citrix document here https://docs.citrix.com/en-us/citrix-adc/current-release/aaa-tm/multi-factor-nfactor-authentication.html show it as availible with that version. This Visualizer should be avalible in Security > AAA – Application Traffic > nFactor Visualizer > nFactor Flows but that is the missing part.
Any Ideas? Do you have an manual to configure nFactor EPA by CLI?
Best Greetings Hilmar
Click “Show Unlicensed Features”. Also see https://support.citrix.com/article/CTX285241
Hi Carl, i cannot find that “Show Unlicensed Features” switch. I asked the support, they haven’t heard that switch, they cannot help. Where i can find it?
Thanks in advance
Best greetings Hilmar
It’s at the bottom of the left menu, below where it says “Unified Gateway” and “XenApp and XenDesktop”.
Hi Carl, ok, strange. I have that in a ADC VPX Platinum Demo version, but not in ADC VPX Standard (no Demo). Both same version 13.0 build 67. Same Browser (Chrome). Strange stuff.
Greets Hilmar
For accessibility, I want assistive text for an input field, e.g., “Enter your User Name” that appears on the hover but not in the field. Is there a tag for that?
Carl, this is way more complicated than i want to set up. What is the basics to do nfactor for LDAP and RSA. but have one login page to get the user/pw/and token, log the user in, no other boxes pop-ups, etc. I got a third of the way down this and with all the side detours am totally lost. I just want to convert teh classic expressions to nfactor. That is all.
Login Schema based on DualAuth.xml. Login Schema policy for the Login Schema profile. The Login Schema will probably need AAA Attribute numbers so you can get the LDAP Password for later single sign-on to StoreFront. Bind the Login Schema Policy to the AAA vServer.
Advanced Advanced Authentication Policy for RADIUS. Create a Policy Label with no Login Schema. Bind the RADIUS policy.
Advanced Authentication Policy for LDAP and bind it to the AAA vServer. In Next Factor field, select the RADIUS Policy Label.
In Gateway vServer, create Authentication Profile and choose the AAA vServer.
Create a Traffic Policy that gets the password from the AAA attribute and bind the Traffic Policy to the Gateway.
Carl – Using nFactor: users are prompted for username/pwd, Next factor is AzureMFA, only if users members of a group. Either way, logins are successful. But users are prompted twice for username/pwd (back-to-back). Then everything proceeds just fine.
I’ve followed these instructions: https://jkindon.com/2018/03/05/azure-mfa-nps-extensions-with-netscaler-nfactor-authentication/
Had a couple of calls with Citrix Support but they cannot figure it out. Any suggestions?
Thanks!
I wonder if you can configure NPS to no longer do Active Directory authentication and instead just do MFA.
Or, I wonder if you can collect credentials once (one Login Schema) and use those same credentials for either LDAP or RADIUS. Login Schema gets username/password. First factor checks group membership. Second factor is either LDAP or RADIUS (but not both).
I think NPS has a setting that lets users login even if the user hasn’t been enrolled in MFA, which means you can use NPS for all users, not just MFA users.
Hi Carl, is there a way to add footer below the logon button? I had rewrite policy that worked on the legacy auth, but it no longer work with n-factor. I simply just want to add some text to tell user where to reset password.
In SingleAuth.xml, there is a singleauth_first_factor. You might be able to move the entire row below the loginBtn. Then edit /var/netscaler/logon/LogonPoint/custom/strings.es.json with your desired text.
Hi Carl: The more I use nfactor, the more I prefer over lagacy methods. That said, I run into gotchas… My latest – the “Groups allowed to Login” on session profiles no longer seems to work. Is there an alternative? I’d prefer not to add into LDAP policies as there are multiple groups that can exist in multiple domains.
Hey Carl,
I was looking to implement nFactor authentication to an existing Citrix Gateway. I was looking to hit a page where the users enter just the username. AD group extraction would take place and IF the users were a member of the security group, they would get username and PIN + RSA token box for login. If the users were NOT a member of the security group, they would get a standard LDAP (username/password) for login. I’ve got it set so far where I get the main ‘Enter username’, and the group extraction works providing a PIN + RSA login as well as the non Security Group members receiving just a username/password for login. The problem I have is that after I enter my credentials, I get looped back to the ‘enter username’ or the first page the users see prior to extraction. So I never get passed into StoreFront. I login to my Citrix Gateway where I have the AAA Authentication vServer Authentication profile bound.
I think somewhere the ‘NEXT’ in one of the policy labels is what’s causing my problem but am not sure.
Do you have a Responder policy doing a redirect?
Negative. I followed a CTX article that outlined the steps but there was no responder policy in the config. Is that a requirement for this to work?
When I bind the Auth Profile to my current Citrix gateway, it seems like the session policy which normally would direct to the load balanced storefront VIP isn’t working. Keep in mind before nFactor, I was using basic LDAP (primary) and Radius (secondary) and bad it all working. But for now I can’t seem to get to storefront.
I want to know if webauth can be used as the only factor in authentication process. We just want to use encrypted key within the URL to authenticate on the webAuth server. I have configured the lb vserver and auth vserver but i still get the authentication prompt for 401 authentication and can enter any character for username and password and it works. can someone tell me how can i avoid getting auth prompt.
Hi Carl,
Thanks for a great article!!! I always refer to your articles before I configure any Citrix Technologies.
I have a requirement to have NetScaler Gateway configured with LDAP with a domain drop down menu + Radius Authentication. Users are internal.
Radius Authentication is carried out by a common server but AD Authentication goes to different AD Domains.
Any guidance would be highly appreciated.
Carl we currently use Mobile pass for our MFA which uses basic authentication policies primary/secondary auth for LDAP/Radius with Receiver and receiver for web expressions on the polices. We are looking at moving to a new MFA solution OKTA that will be using Radius. Is it possible to use both MFA solutions on a single NS GW Virtual server during the cut over period? could Nfactor do it ? with group extraction at the first factor eg if you belong to the AD group Mobile pass you are then passed to the next factor LDAP/Radius for Mobilepass or if you belong to the AD group OKTA you are passed to the next factor which will use LDAP/Radius for OKTA ?
nFactor can do it, yes. If both methods have the same number of password fields, you can collect all passwords in the first Login Schema. Otherwise, your first schema might be username only so you can extract the groups and then display another schema in a later factor.
Hi, Can you do nfactor Auth using a different admin partion as when i try to set a AAA portal them it tells me “operation not permitted” and another article is telling me that i need to add a portal theme before i can do any customisations.
https://docs.citrix.com/en-us/citrix-adc/13/aaa-tm/multi-factor-nfactor-authentication/nfactor-extensibility.html
Hey guys,
I’ve configured the netscaler with AAA more than a year ago and it was working fine.
Then the license was expired and after the renew all AAA features were disabled.
After reaktivating the needed features, no divices were registered anymore.
When the users try to register new devices, the netscaler only showes “System Error”.
Even in the row of the devices one devices with name “System Error” is shown.
Does anybody know the Error oder have a clue where I can find a matching log?
I thought that the database may be corrupted but I can not find anything..
Thanks
Interesting read, we offer a netscaler authentication solution ourselves as it makes sense to offer as broad a range of authentication solutions as possible.
Carl
You have any point for doing interal MFA for internal users only? I can send them through the NSG, but wanted to ask if there is a better way?
Most SAML providers have a MFA option. StoreFront has some native support for SAML without NetScaler.
Carl,
I am implementing nFactor with native OTP. I have slightly different case that Citrix set by default. All my users are external. As result I can not block /manageotp for external users.
Instead I used Stan Demburg approach you mentioned in your article. (https://www.irangers.com/netscaler-native-otp-limit-enrollment-one-device/)
It mostly work with exception of NSC_TASS cookies not always getting set properly. Sometimes “NSC_TASS”=manageotp cookie present even when user has not put /manageotp URL an otherwise. Brower restart helps, but this is annoying.
But my main problem is next. I want to implement next flow:
1) If user did not register OTP let him in without OTP.
2) If user registered OTP let him in after OTP verification as second factor.
3) If user did not register OTP and hit /manageotp just ask user name/password and let register OTP device
4) If user registered OTP and hit /manageotp just ask user OTP verification and let to ManageOtp website (add/remove other devices)
Stan Demburg page works for first 3 no problems.
I am having problem with number 4.
I have added extra policy if user has registered OTP and “NSC_TASS”=manageotp.
As soon as I add new PolicyLable with LoginSchema to get OTP passcode and bind it for manageotp it stop working.
It does show custom LoginSchema to ask user to enter OTP but after verifying it redirect user to StoreFront web site instead of manageOTP.
All problem is in this extra LoginSchema profile. If it has custom UI to ask OTP it redirects to Store Front, if I put LSCHEMA_INT it redirect to manageOTP without OTP verification.
Do I need something special into this custom .xml file to redirect it to manageOTP to make it work?
I think I am missing something here.
Thanks a lot.
Stan helped me to figure it out.
So if anyone interested problem was you cannot do OTP verification for manageotp as last Authentication step. After I added SecondFactor to OTP validation and point it to new Policy Label with LSCHEMA_INT and normal authentication everything started to work.
Hi Carl As always thank you for your time and dedication.
I followed your script. I am wanting to implement TOTP.
The problem that I am facing I enter https://website.com/manageotp .
I get the page to enter my domain credentials. I then presented with a page with manage my device. So I add a new device expecting to get the QR Code , however I am not preseneted with teh QR Code to scan. I select the option to add new device and then it says device not found.
Would you be able to point me in the right direction.
I am using LDAP , (Changed the port to 389) and changed http.REQ.USER.ATTRIBUTE to AAA.User.ATTRIBUTE
This is the script that I am using
add ssl certKey WildcardCorpCom -cert WildcardCorpCom.pfx -key WildcardCorpCom.pfx -inform PFX -passcrypt “abc”
add authentication ldapAction LDAP-Corp -serverIP 10.2.2.11 -serverPort 636 -ldapBase “dc=corp,dc=local” -ldapBindDn ctxsvc@corp.local -ldapBindDnPassword abc -encrypted -encryptmethod ENCMTHD_3 -ldapLoginName sAMAccountName -groupAttrName memberOf -subAttributeName cn -secType SSL -passwdChange ENABLED -Attribute2 userParameters
add authentication ldapAction LDAP_OTP_set_no_auth -serverIP 10.2.2.11 -serverPort 636 -ldapBase “dc=corp,dc=local” -ldapBindDn admin@corp.local -ldapBindDnPassword abc -encrypted -encryptmethod ENCMTHD_3 -ldapLoginName sAMAccountName -groupAttrName memberOf -subAttributeName cn -secType SSL -authentication DISABLED -OTPSecret UserParameters
add authentication ldapAction LDAP_OTP_verify_no_auth -serverIP 10.2.2.11 -serverPort 636 -ldapBase “dc=corp,dc=local” -ldapBindDn admin@corp.local -ldapBindDnPassword abc -encrypted -encryptmethod ENCMTHD_3 -ldapLoginName sAMAccountName -searchFilter “userParameters>=#@” -groupAttrName memberOf -subAttributeName cn -secType SSL -authentication DISABLED -OTPSecret UserParameters
add authentication Policy Corp-Adv -rule true -action LDAP-Corp
add authentication Policy LDAP_Manage_OTP-pol -rule “HTTP.REQ.COOKIE.VALUE(\”NSC_TASS\”).EQ(\”manageotp\”)” -action LDAP_OTP_set_no_auth
add authentication Policy LDAP_Confirm_OTP-pol -rule true -action LDAP_OTP_verify_no_auth
add authentication loginSchema Dual_OTP-lschema -authenticationSchema “/nsconfig/loginschema/LoginSchema/DualAuth.xml” -passwordCredentialIndex 1
add authentication loginSchema Single_Manage_OTP-lschema -authenticationSchema “/nsconfig/loginschema/LoginSchema/SingleAuthManageOTP.xml”
add authentication loginSchemaPolicy Single_Manage_OTP-lschemapol -rule “http.req.cookie.value(\”NSC_TASS\”).eq(\”manageotp\”) && client.IP.SRC.IN_SUBNET(10.3.0.0/16)” -action Single_Manage_OTP-lschema
add authentication loginSchemaPolicy Dual_OTP-lschemapol -rule true -action Dual_OTP-lschema
add authentication policylabel OTP_pollabel -loginSchema LSCHEMA_INT
bind authentication policylabel OTP_pollabel -policyName LDAP_Manage_OTP-pol -priority 100 -gotoPriorityExpression NEXT
bind authentication policylabel OTP_pollabel -policyName LDAP_Confirm_OTP-pol -priority 110 -gotoPriorityExpression NEXT
add authentication vserver OTP-AAA SSL 0.0.0.0
bind ssl vserver OTP-AAA -certkeyName WildcardCorpCom
bind authentication vserver OTP-AAA -portaltheme RfWebUI
bind authentication vserver OTP-AAA -policy Single_Manage_OTP-lschemapol -priority 100 -gotoPriorityExpression END
bind authentication vserver OTP-AAA -policy Dual_OTP-lschemapol -priority 110 -gotoPriorityExpression END
bind authentication vserver OTP-AAA -policy Corp-Adv -priority 100 -nextFactor OTP_pollabel -gotoPriorityExpression NEXT
add vpn trafficAction OTP-trafficprofile http -passwdExpression “http.REQ.USER.ATTRIBUTE(1)”
add vpn trafficPolicy OTP-trafficpol true OTP-trafficprofile
add authentication authnProfile OTP-authnprofile -authnVsName OTP-AAA
add vpn vserver Gateway.corp.com SSL 10.2.5.220 443 -downStateFlush DISABLED -Listenpolicy NONE -authnProfile OTP-authnprofile
set ssl vserver Gateway.corp.com -sslProfile ns_default_ssl_profile_frontend
add vpn sessionAction “Receiver For Web” -transparentInterception OFF -defaultAuthorizationAction ALLOW -SSO ON -icaProxy ON -wihome “https://storefront2.corp.com/Citrix/StoreWeb” -ntDomain corp.local -clientlessVpnMode OFF -storefronturl “https://storefront2.corp.com”
add vpn sessionPolicy “Receiver For Web” “HTTP.REQ.HEADER(\”User-Agent\”).CONTAINS(\”CitrixReceiver\”).NOT” “Receiver For Web”
bind vpn vserver Gateway.corp.com -portaltheme RfWebUI
bind vpn vserver Gateway.corp.com -policy “Receiver For Web” -priority 100 -gotoPriorityExpression NEXT -type REQUEST
bind vpn vserver Gateway.corp.com -policy OTP-trafficpol -priority 100 -gotoPriorityExpression END -type REQUEST
bind ssl vserver Gateway.corp.com -certkeyName WildcardCorpCom
Does your LDAP bind account have permission to modify the userParameters attribute? Try a domain admin account. Or does the attribute already contain data?
Carl , you are a genius , I was running the aaad.debug yesterday and say that that was the problem. I am amazed that just by reading my problem you came up with the problem , that I took 2 days to uncover. There is no way that I can use a domain admin account , so it is now finding the correct way to give the AD Users write permissions to all users userparameter attribute.
HI Carl. Once again thank you for your awesome advice. So the OTP works and tested. But when I login it states that “cannot complete request” Am I correct in asumeing that this script is to setup OTP only and not configure storefront?
That usually means the Traffic Policy is not configured correctly to send the user’s AD password to StoreFront. What do you see in StoreFront Server > Event Viewer > Applications and Services > Citrix Delivery Services.
Hi there are no error messages , I am not sure if this is correct , but the script below does not configure storefront on the netscaler. In my newbie knowledge , I see no STA servers. I am using LDAP. I followed you rscript to the T , well I thinks so. I can do the entire OTP. but I cannot get past the “cannot complete your request” With OTP I can connect to my Storefront with OTP it is as if it is not making a connection. Sorry for my newbie explaination.
See https://www.carlstalhood.com/netscaler-gateway-12-ica-proxy/. I normally start with fully functional ICA Proxy before I add OTP.
Hi Carl , I managed to sort out my problem. It was a severe case of a problem between the chair and the keyboard.My problme of “cannot complete request” was due to me using the incorrect storefront URL. Your instructions are spot on. You are the serious go to guy . Thank you for taking the time to post.
Hi Carl.
How would one go about when configuring LDAP as first factor and Oauth with OpenID Connect as second factor?
Hello
I have setup MFA on our netscaler but when logging in with a UPN eg user@domain.com the auth request is not sent to the RADIUS server and the logon succeeds with no challenge. However, if i use a samAccountname to login eg user_domain.com the LDAP query fails but it does then process the RADIUS request. I need to get the RADIUS auth working with the UPN. Can you help
Thanks
Did you bind the RADIUS policy and LDAP policy in the same Factor? They should be separate factors. More specifically, LDAP should be bound directly to the AAA vServer. Then RADIUS should be in a Policy Label that is configured as Next Factor for the AAA vServer LDAP Authentication Policy.
Hi Tim,
There is a chance you need to convert UPN to SAMAccount name before you will send it to RADIUS.
Check this article – it might help: https://support.citrix.com/article/CTX231525
Regards,
Hi Carl,
Is there any way to have “reject”/”deny” action?
Like f5 “deny” in APM (https://devcentral.f5.com/Portals/0/Users/184/04/114104/apm1_thumb.png)
for example, I want to do some check on user group membership using non_auth policies (and many other non auth scenarios), how can I reject the user if his fails?
reject/deny = reset auth session and cookies and send the user back to first factor.
You can create Policy Label with no login schema and each NOAUTH authentication policy only checks for group membership. If none of them succeed, then the user is denied login.
Now i’m getting this.
“No active policy during authentication”
Carl,
Have you been able to get Two-Factor or nFactor to work with Receiver LTSR or Workspace App on Android/iOS?
I see the article referenced above about the Legacy protocol which doesn’t work with Native Receiver/Workspace.
Is it possible to use those custom XML schemas to allow Native Receivers to work? I can get MFA to work with Android devices on initial logon, but subsequent logons don’t prompt the MFA challenge-response, it just errors out.
Thanks!
Hi Carl,
Do you know if Netscaler has support for sending the username from 1. factor username-password to 2. factor OpenID Connect(or SAML)? So that when reaching the 2. factor OIDC or SAML IDP the username is already presented for the IDP without the user having to enter it again.
Here’s a similar thread where the OP asked to turn it off, which I assume means the NetScaler can do it. https://discussions.citrix.com/topic/388292-netscaler-as-saml-sp-in-2nd-factor/
Hi Carl,
thanks for your article and detailled informations.
Just a tip to your script section for “Certificate auth: If Successful, LDAP only. If Failure, LDAP+RADIUS”
If you use the “SingleAuth.xml” login schema, the UPN or samaccountname is NOT extracted from the certificate (tested with 12.1 49.23)
to make this function i create the login schema “CertExtract.xml” from George Spiers listed here:
<?xml version=”1.0″ encoding=”UTF-8″?>
<AuthenticateResponse xmlns=”http://citrix.com/authentication/response/1″>
<Status>success</Status>
<Result>more-info</Result>
<StateContext />
<AuthenticationRequirements>
<PostBack>/nf/auth/doAuthentication.do</PostBack><CancelPostBack>/Citrix/Authentication/ExplicitForms/CancelAuthenticate</CancelPostBack><CancelButtonText>Cancel</CancelButtonText>
<Requirements><Requirement><Credential><ID>login</ID><SaveID>ExplicitForms-Username</SaveID><Type>username</Type></Credential><Label><Text>Benutzername:</Text><Type>plain</Type></Label><Input><AssistiveText>Please supply either domain\username or user@fully.qualified.domain</AssistiveText><Text><Secret>false</Secret><ReadOnly>true</ReadOnly><InitialValue>${HTTP.REQ.USER.NAME}</InitialValue><Constraint>.+</Constraint></Text></Input></Requirement><Requirement><Credential><ID>passwd</ID><SaveID>ExplicitForms-Password</SaveID><Type>password</Type></Credential><Label><Text>Kennwort:</Text><Type>plain</Type></Label><Input><Text><Secret>true</Secret><ReadOnly>false</ReadOnly><InitialValue/><Constraint>.+</Constraint></Text></Input></Requirement>
<Requirement><Credential><Type>none</Type></Credential><Label><Text>Bitte geben Sie Ihr Kennwort ein</Text><Type>confirmation</Type></Label><Input /></Requirement>
<Requirement><Credential><ID>saveCredentials</ID><Type>savecredentials</Type></Credential><Label><Text>Remember my password</Text><Type>plain</Type></Label><Input><CheckBox>
<InitialValue>false</InitialValue></CheckBox></Input></Requirement><Requirement><Credential><ID>loginBtn</ID><Type>none</Type></Credential><Label><Type>none</Type></Label><Input><Button>Anmelden</Button></Input></Requirement></Requirements></AuthenticationRequirements>
</AuthenticateResponse>
Regards
Julian
Hello Carl!
Does nFactor works with SecureHub on the enrolled XenMobile mobile devices?
Hello Carl,
Great article on nFactor! I have a question about it and hope you can help!
I am looking to implement a NetScaler Unified Gateway with 2-factor authentication with minimal cost. The client needs a software- and a hardware OTP token as the second factor OTP token.
To minimize CAPEX and OPEX I would like to use nFactor authentication feature of the NetScaler in combination with a software OTP token (for example Google Authenticator) and a hardware OTP token. Not simultaneously, but one or the other. A hardware OTP token is required in specific use cases where use of a smartphone is not allowed.
What I wasn’t able to find in the documentation is whether hardware OTP tokens are supported with the nFactor authentication feature and if that is the case, which one’s are.
For example one of these hardware tokens: https://www.hidglobal.com/products/cards-and-credentials/activid/one-time-password-tokens
Thanks!
Kind regards,
Damir
“NetScaler supports RFC6238 TOTP generation i.e., any TOTP client which complies with RFC 6238 TOTP generation will be supported (https://tools.ietf.org/html/rfc6238)” https://support.citrix.com/article/CTX228454
You might have to contact the vendor to verify RFC 6238 compliance.
Damir, you would be able to offer an inexpensive solution from Duo with OpenSource Yubikeys. They are cheap and I have used them with Duo for Citrix NetScaler gateway. I’m sure they’d work with other AAA features and what not as well.
Web page did not show error message if 1 of factors fail. It just stuck on login attempt, but on Netscaler log it is possible to see access deny log.
Does anyone have this problem?
Can you use the Microsoft authenticator app with this setup? Thanks
That should work.
@RT – I don’t think you can have Duo do the GUI with nFactor at this time. You can, however, configure it to automatically execute the user’s default authentication method, bypassing the need for the GUI.
Here’s a link to a write-up someone else did on how they set it up.
https://imgur.com/a/OW1y7
Did anyone get nFactor to work with Duo? Duo doesn’t have a login schema (spoke to their support) so I am unable to get it to present the standard duo push gui.