Navigation
This post is for 6.4 and older. See vRealize Operations for Horizon 6.5 and newer.
- Planning
- Download Files
- Deploy vROps Appliance
- Configure vSphere Adapter
- Install Horizon Adapter 6.4 PAK File
- Install Horizon Broker Agent 6.4
- Desktop Agent 6.4
💡 = Recently Updated
Planning
What’s New: VMware vRealize Operations 6.5:
- Log Insight integration
- vRealize Business for Cloud integration
- Automatic upgrade of in-guest End Point Operations agents
- Higher scalability
- Webhooks for connections with other platforms (e.g. Slack)
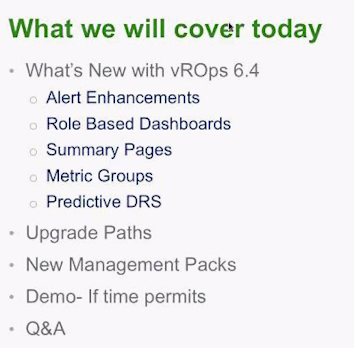
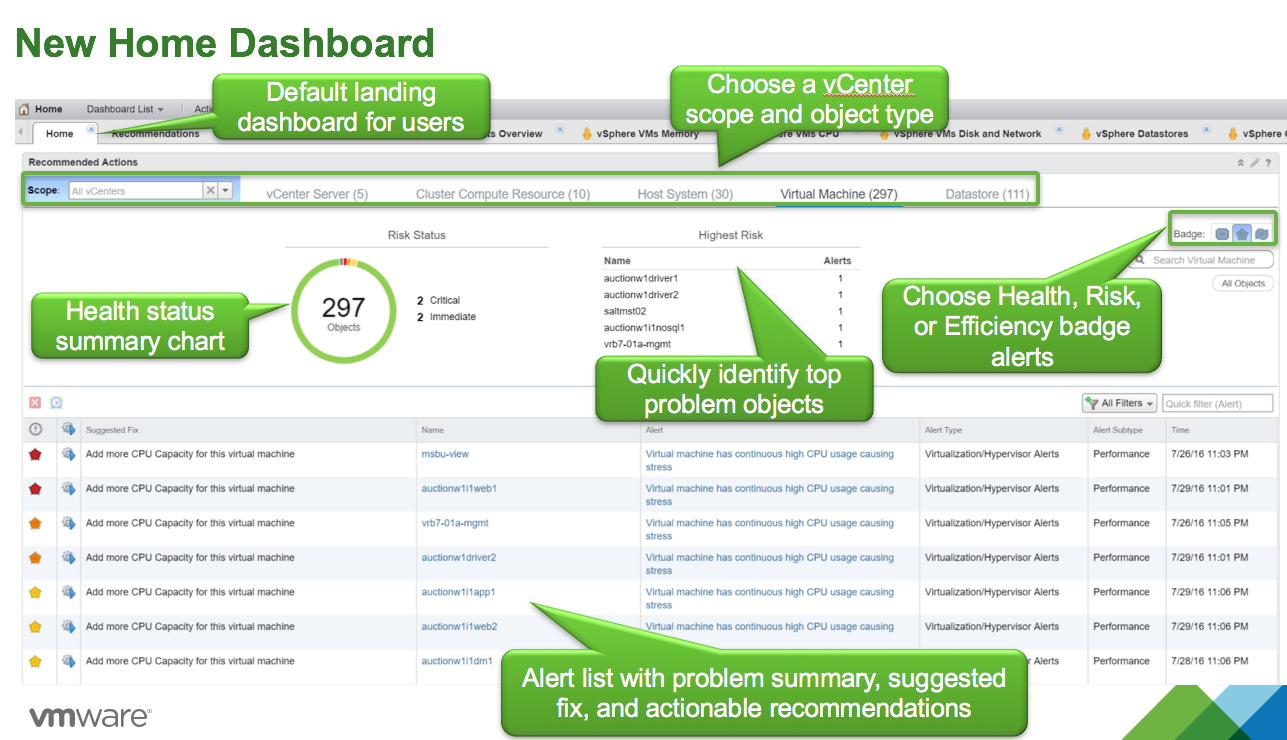
VMware Blog Post VMware vRealize Operations for Horizon and Published Applications 6.4, Part 1: What’s New: In this release, you will find the following features:
- App Volumes – Monitors AppStack attach time during the user login process.
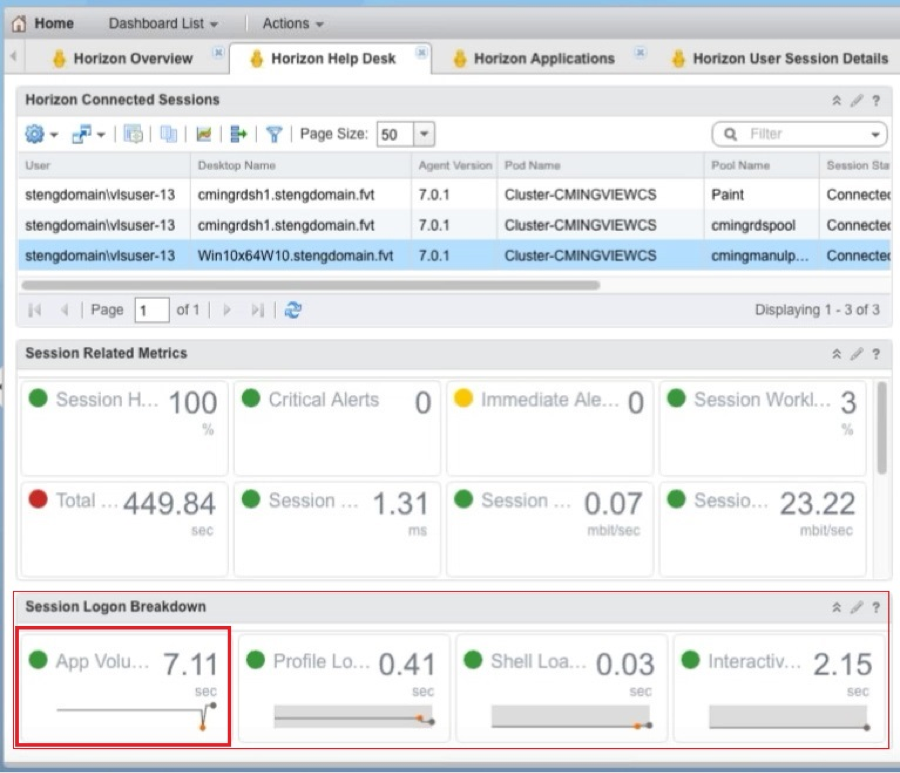
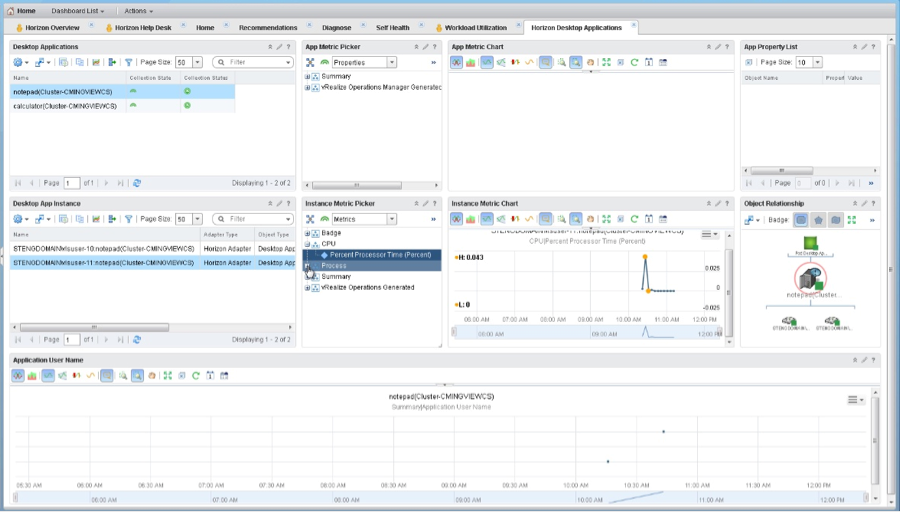
- Application usage – Reports who used which applications and when, for RDSH applications and desktops, and also for virtual desktops.
- Application CPU and Memory Usage Reporting – configure the Horizon Adapter in vROps to watch specific processes.
- Application-crash alerts – Notifies administrators of application crashes.
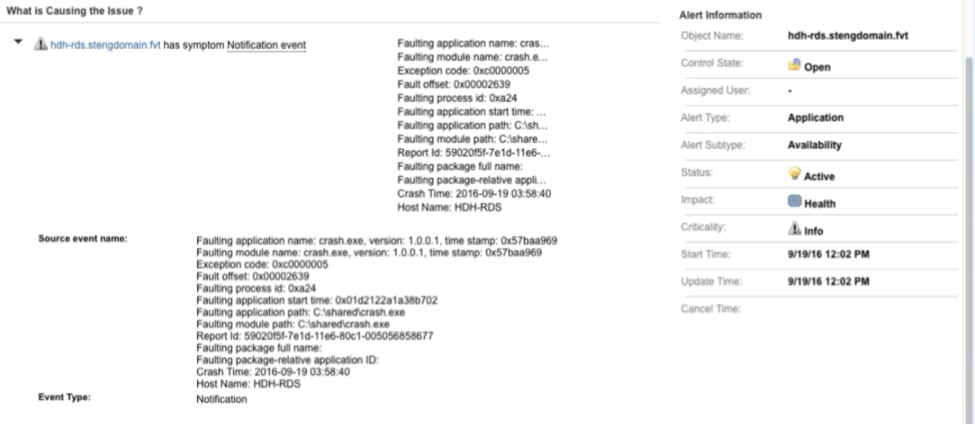
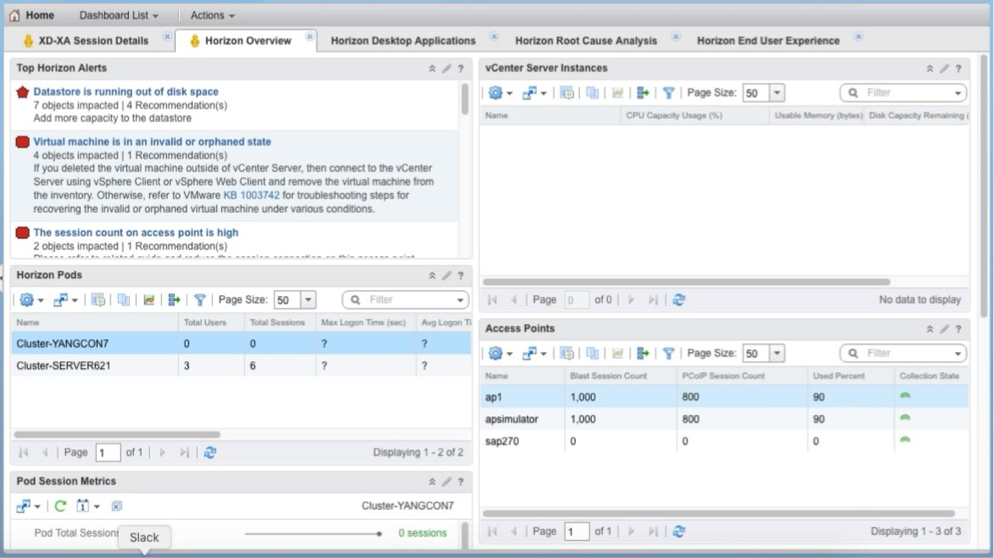
- Root-cause analysis dashboard – Quickly pinpoints what is causing user issues.
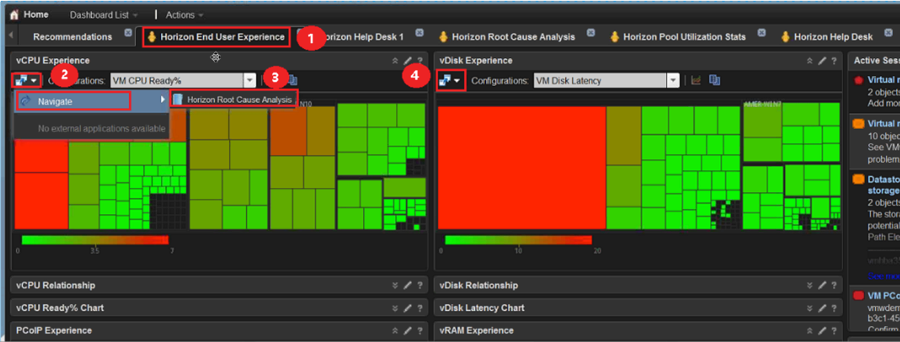
- Cloud Pod Architecture – Quickly identifies the pod that is hosting a user or session, and the pod host.

- Access Point – Alerts administrators about Access Point capacity.
vROps Webinar Series 2016 – Part 12 – What’s New with vROps 6.4 – 1 hour, 13 minute YouTube video.
vRealize Operations 6.3: What’s New, Hint it just got even better at VMware Blogs contains screenshots of the new features in vROps 6.3.
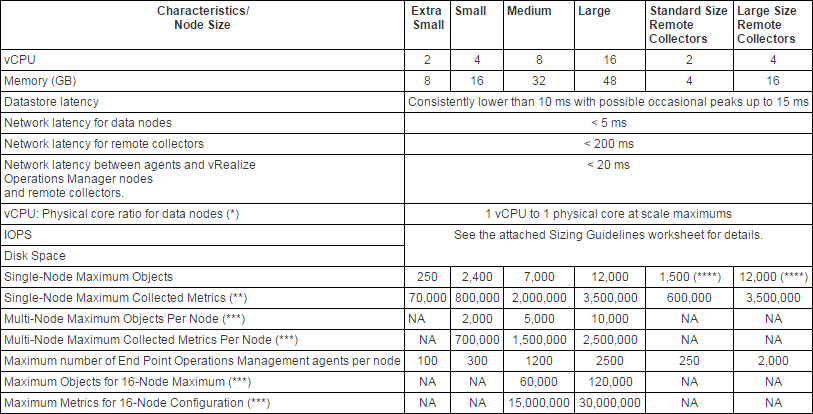
VMware 2146615 vRealize Operations Manager 6.3 Sizing Guidelines:
Download Files
- Download vRealize Operations Manager 6.4 appliance, which is listed on vROps for Horizon download page. Or download vRealize Operations Manager 6.5 appliance. VMware’s Product Interoperability Matrix indicates that both versions are compatible.
- Go to the download page for vRealize Operations for Horizon 6.4.
- Download the vRealize Operations for Horizon Adapter.
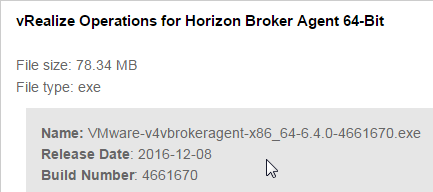
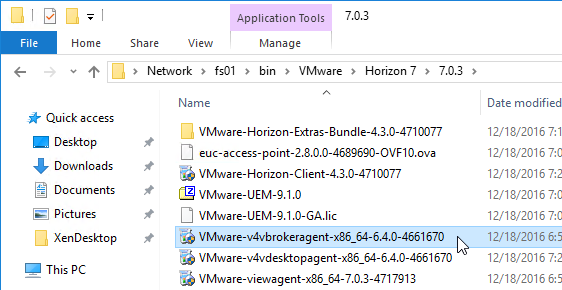
- Download the vRealize Operations for Horizon Broker Agent 64-Bit.
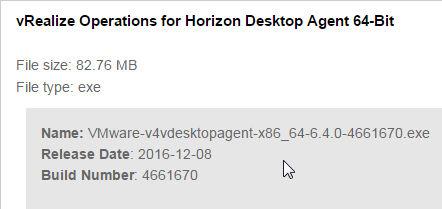
- Download the vRealize Operations for Horizon Desktop Agent.
Deploy Appliance
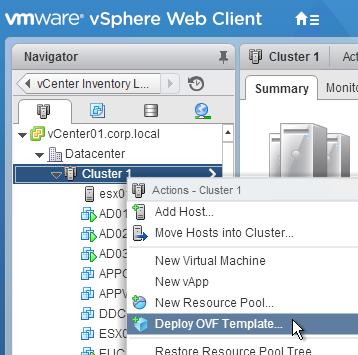
- In vSphere Web Client, navigate to the vCenter object, right-click it, and click Deploy OVF Template.
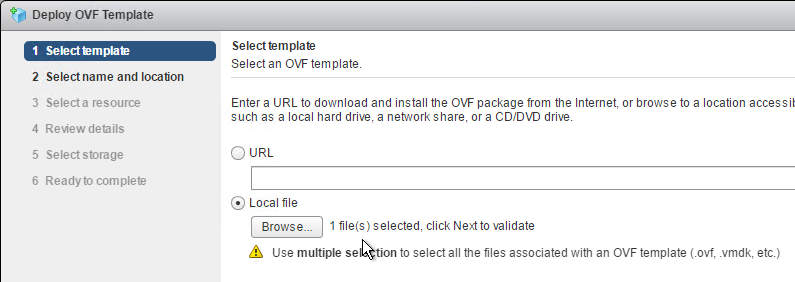
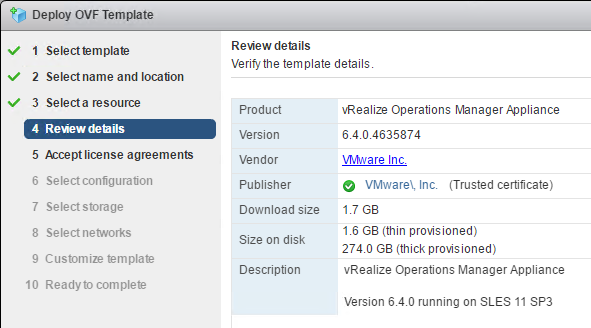
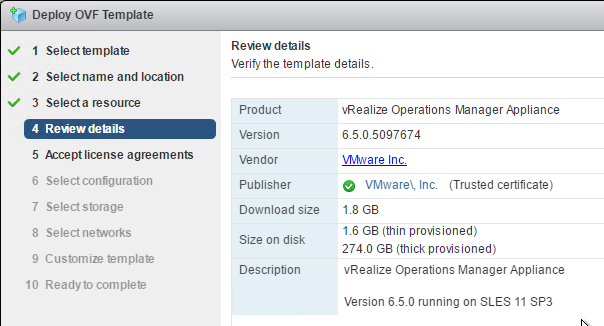
- In the Select Source page, select Local file, browse to the vRealize Operations 6.4 .ova file, or vRealize Operations 6.5 .ova file, and click Next.
- In the Review details page, click Next.
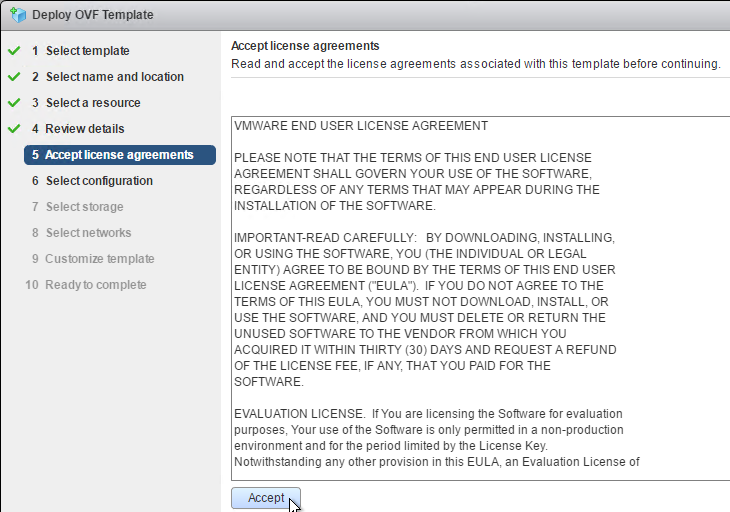
- If you see a Accept EULAs page, click Accept, and then click Next.
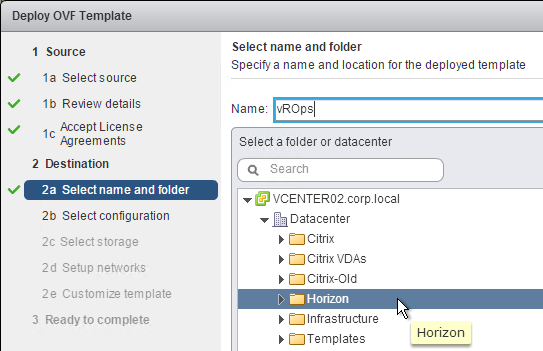
- In the Select name and folder page, enter a name for the appliance, select a folder, and click Next.
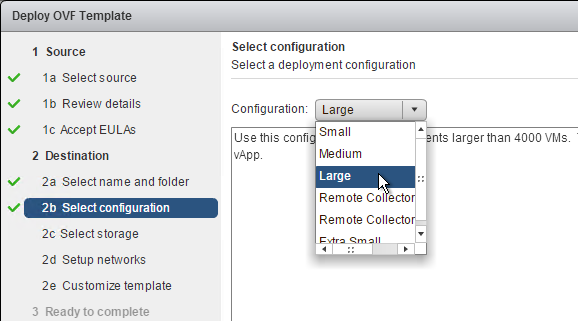
- If you see a Deployment Configuration page, select a size, and then click Next.
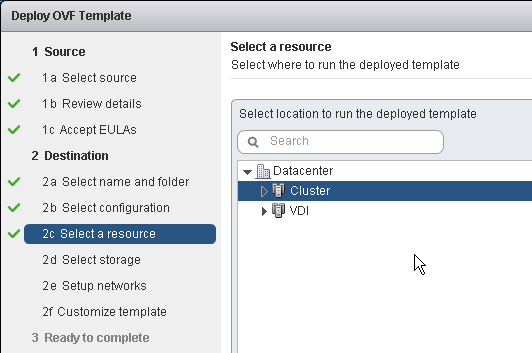
- In the Select a resource page, select a cluster, and then click Next.
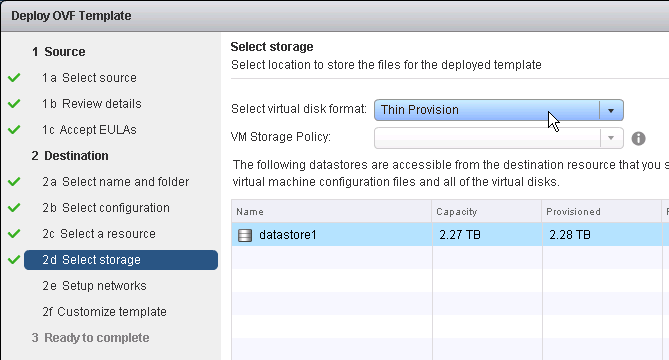
- In the Storage page, select Thin Provision, select a datastore, and then click Next.
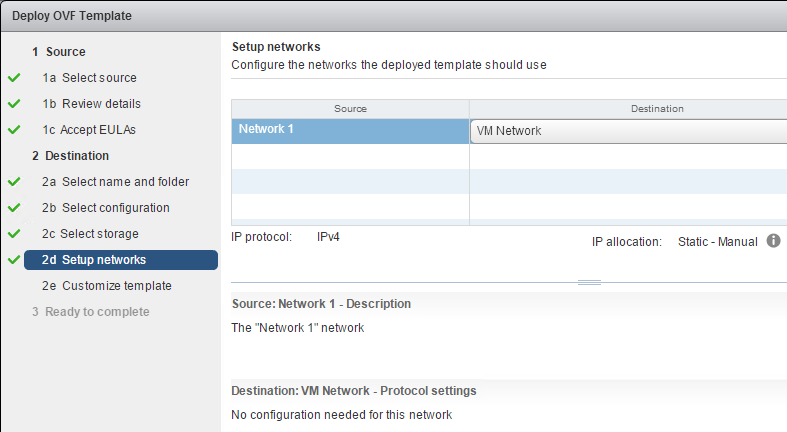
- In the Setup networks page, select a port group and click Next.
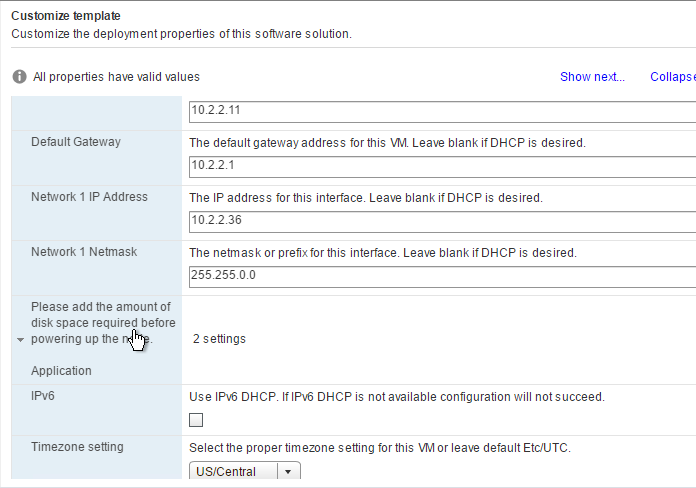
- In the Customize template page, select a time zone.
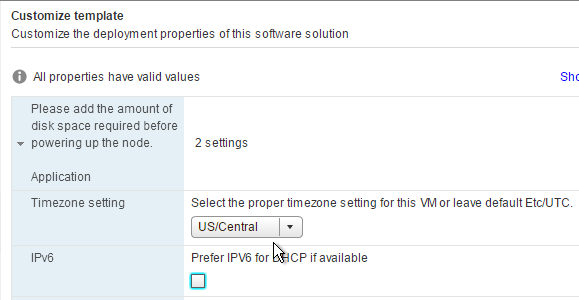
- Expand Networking Properties.
- Enter the IP address information for the appliance. You can also specify the time zone. Then click Next.
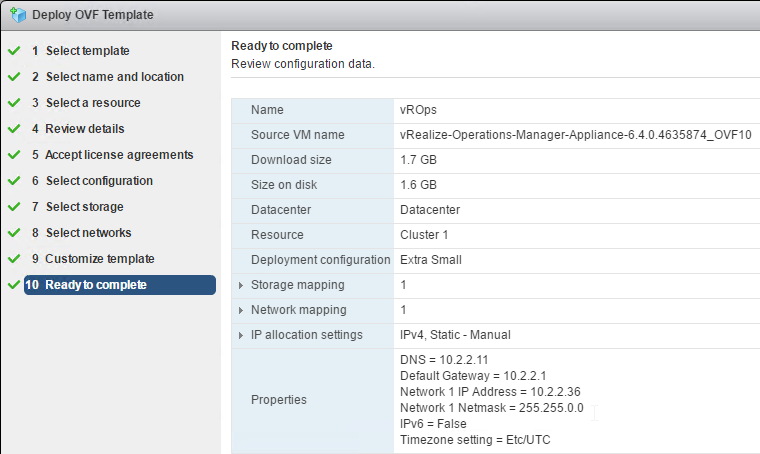
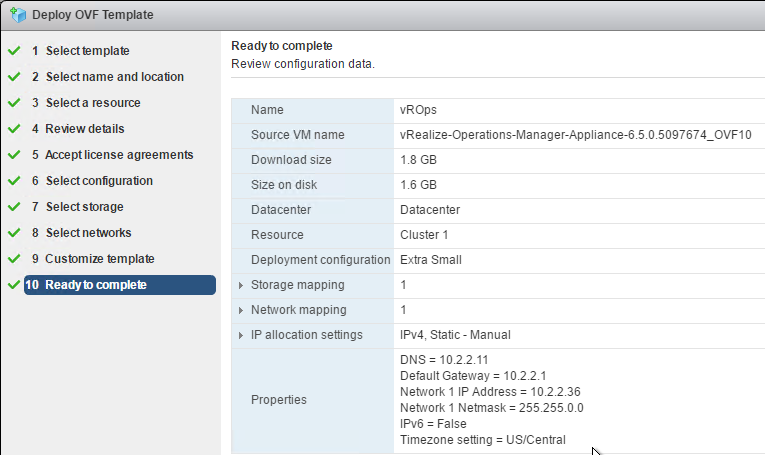
- In the Ready to Complete page, check the box next to Power on after deployment, and then click Finish.
Create Cluster
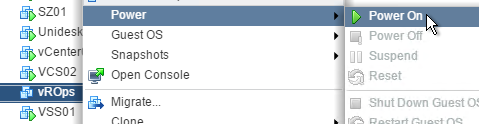
- Power on the new virtual appliance.
- Wait for the appliance to start.
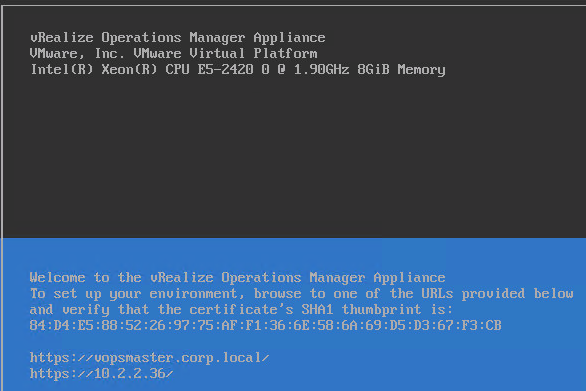
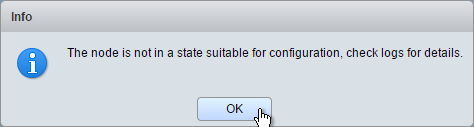
- Use a browser to go to https://IPAddress/admin. If you see a Service unavailable message, wait a couple minutes and try again.
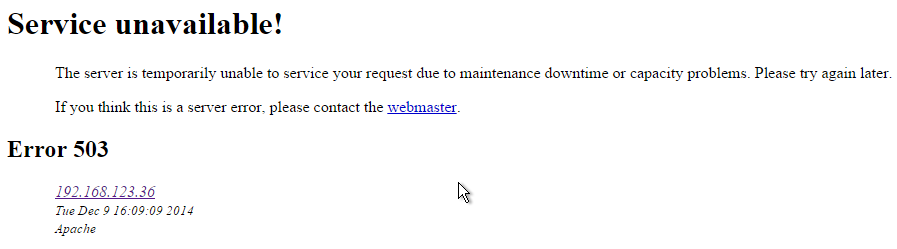
- You might also see this message. Try again.
- On the bottom of the page, click New Installation.
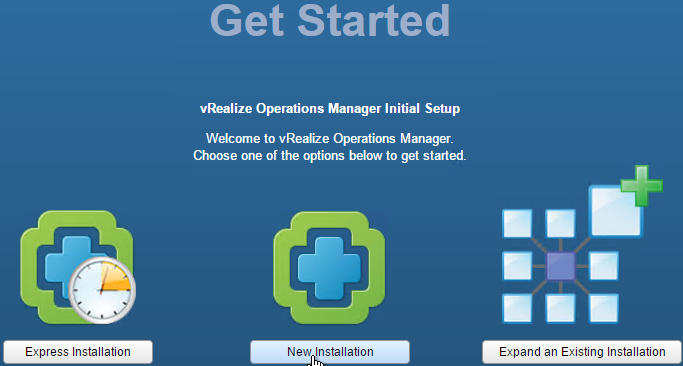
- In the Getting Started page, click Next.

- In the Set Administrator Password page, enter a password based on the listed requirements. Click Next.

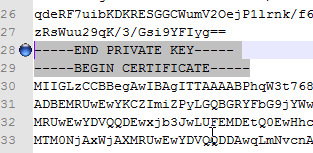
- In the Choose Certificate page, you can upload a PEM certificate.
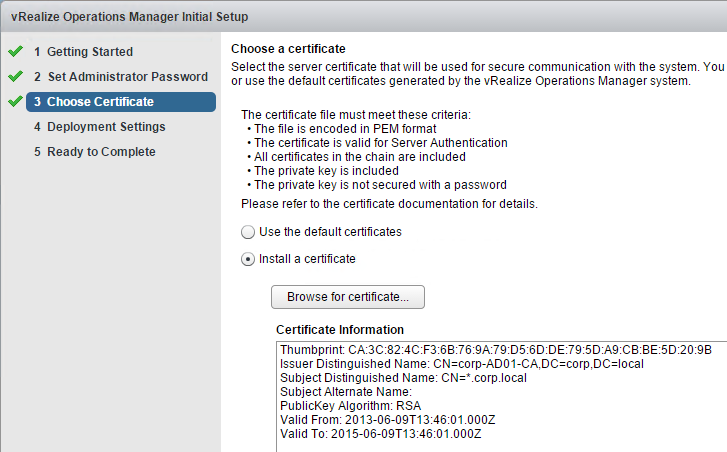
The Certificate file must have .pem extension. It will not accept any other extension. Also, make sure the certificate file has both the certificate and keyfile. If there are intermediate Certificate Authorities, add them to the PEM file. Click Next when done.
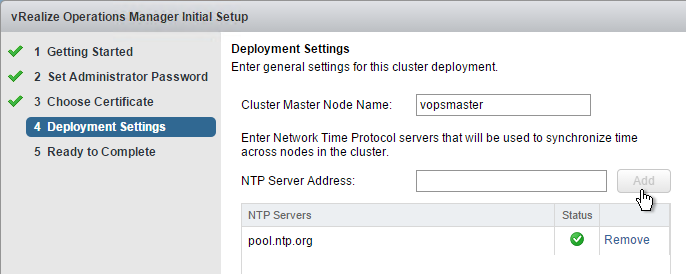
- In the Deployment Settings page, enter a name for the master node.
- Enter a NTP Server Address and click Add. Then click Next.
- In the Ready to Complete page, click Finish.
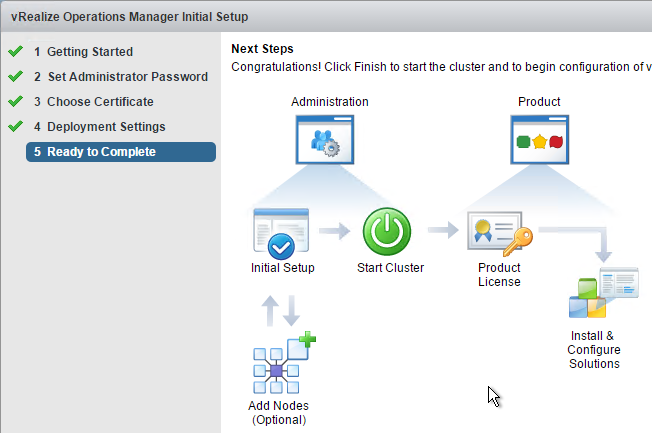
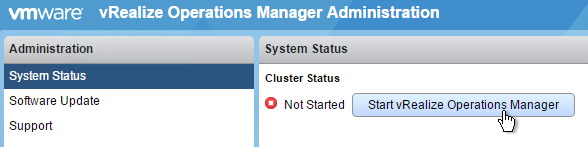
Start Cluster
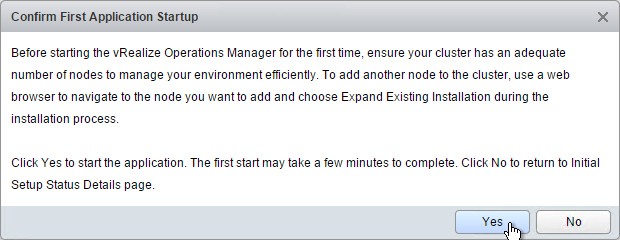
- From the https://IPAddress/admin page, click Start vRealize Operations Manager.
- Click Yes. This will take several minutes.
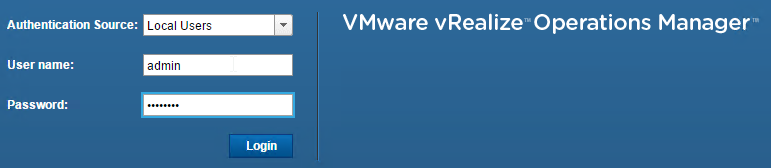
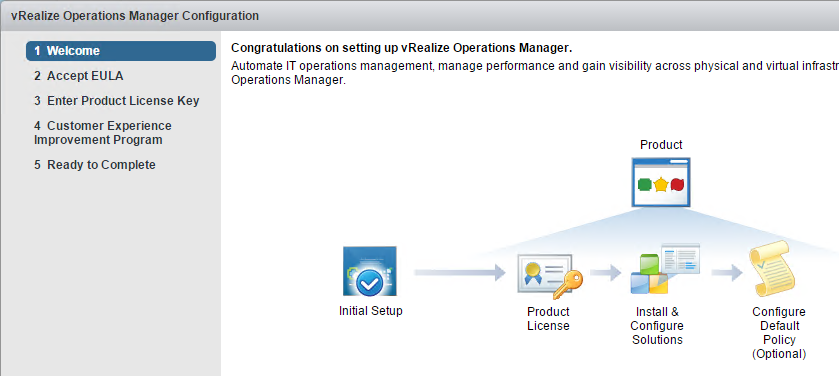
- Log into the appliance.
- On the Welcome page, click Next.
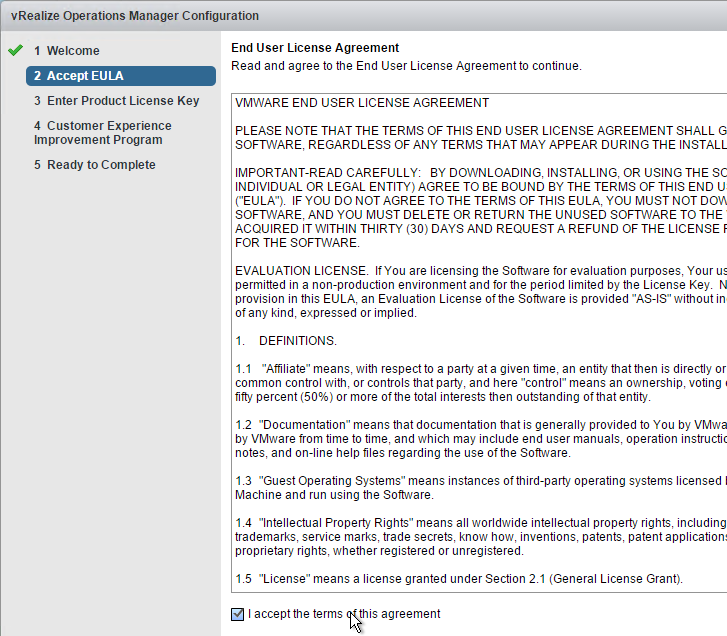
- In the Accept EULA page, check the box next to I accept the terms, and click Next.
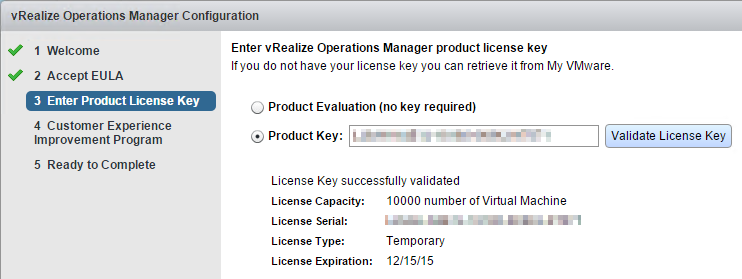
- In the Enter Product License Key page, enter the vRealize Operations license key, click Validate License Key, and click Next. Note: there is a separate license for vROps for Horizon that will be entered later.
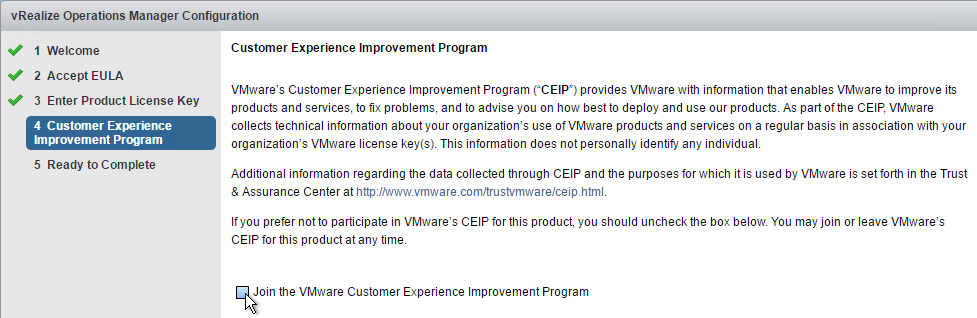
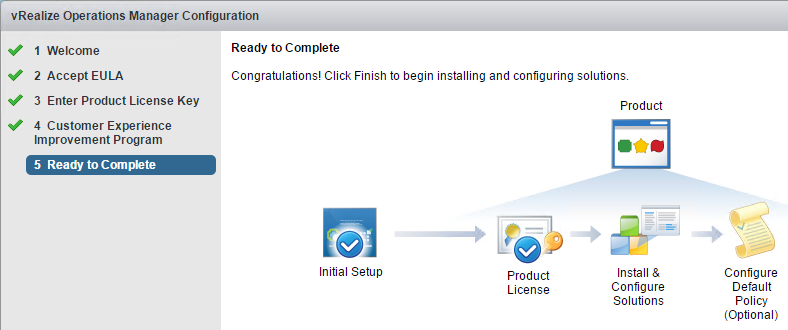
- In the Customer Experience Improvement Program page, make a choice, and click Next.
- In the Ready to Complete page, click Finish.
Patch/Upgrade Appliance
- Download the Upgrade Pack or Hot Patch from the vRealize Operations 6.4 download page or vRealize Operations 6.5 download page.
- Use a browser to go to https://vROpsIP/admin and login as admin.

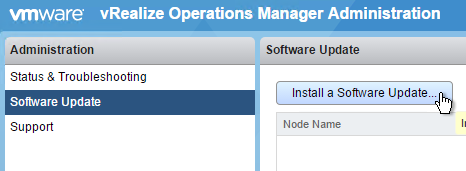
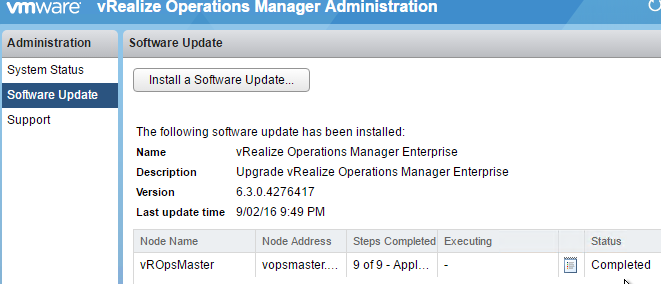
- On the left, switch to the Software Update page.
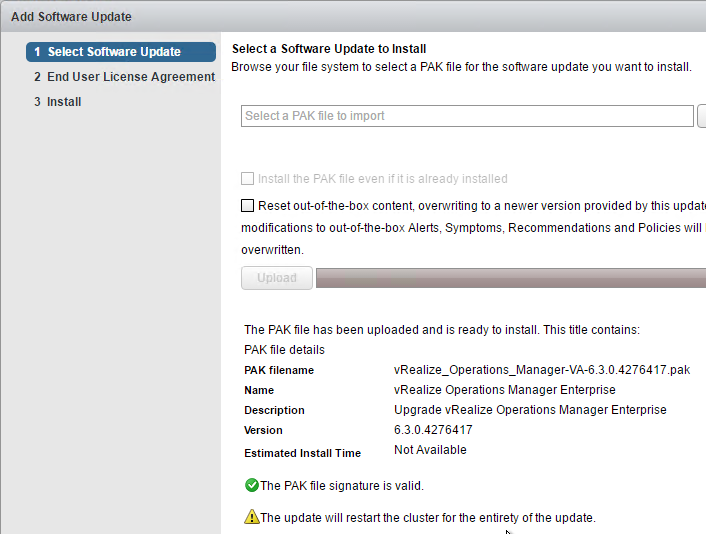
- On the right, click Install a Software Update.
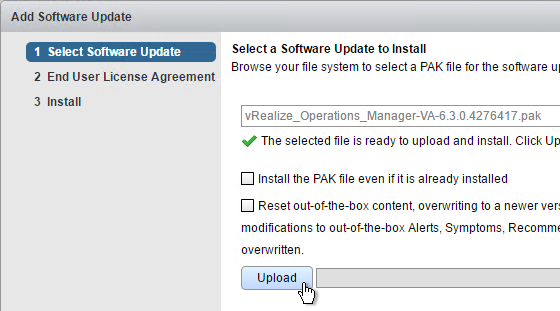
- Click Browse and browse to an upgrade or Hot Patch .pak file downloaded from vmware.com. You must upgrade the operating system first (.pak file name containing VA-OS), and then upgrade vRealize Operations Manager (file name without OS in it).

- Click Upload.

- Click Next.
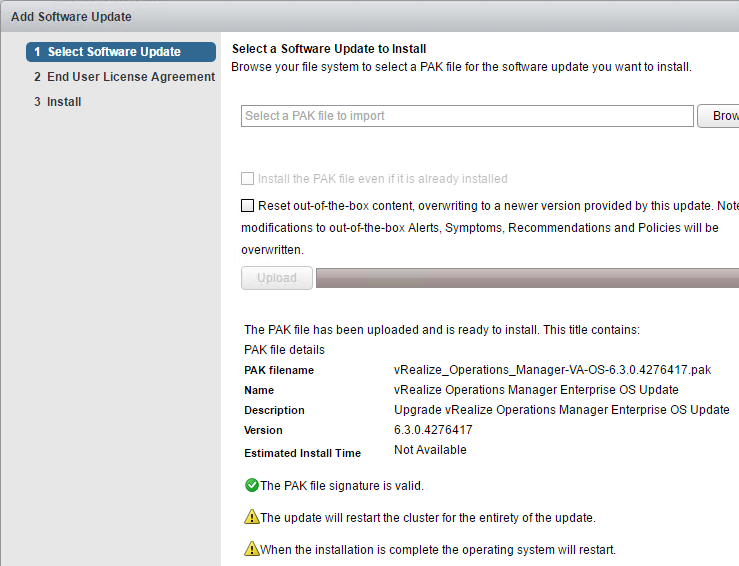
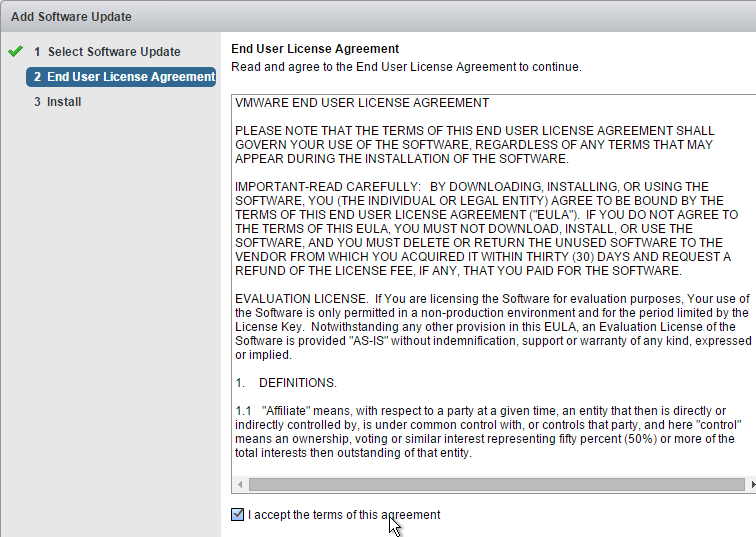
- In the End User License Agreement page, check the box next to I accept the terms and click Next.
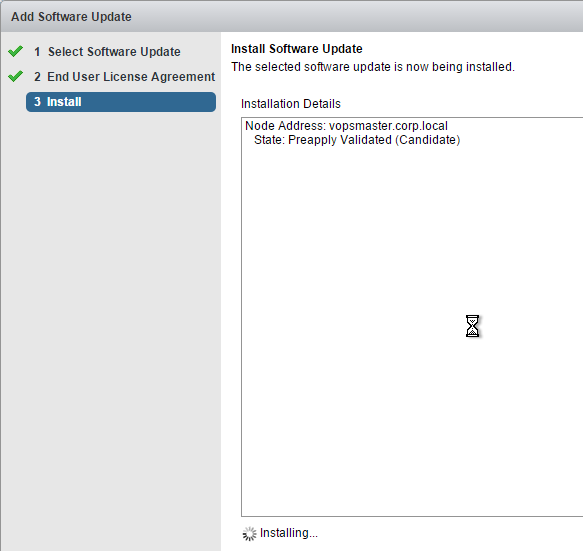
- Installation begins.
- After rebooting and logging in again, the Software Update page shows that the update has been completed.
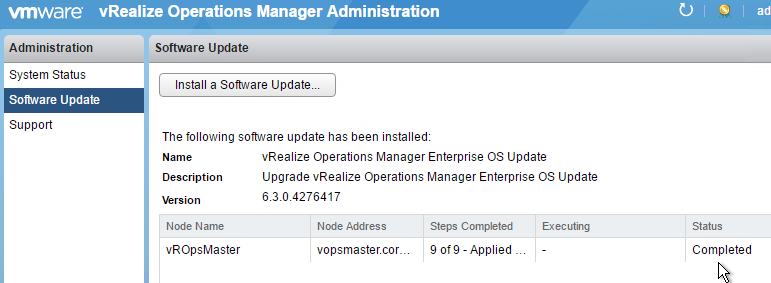
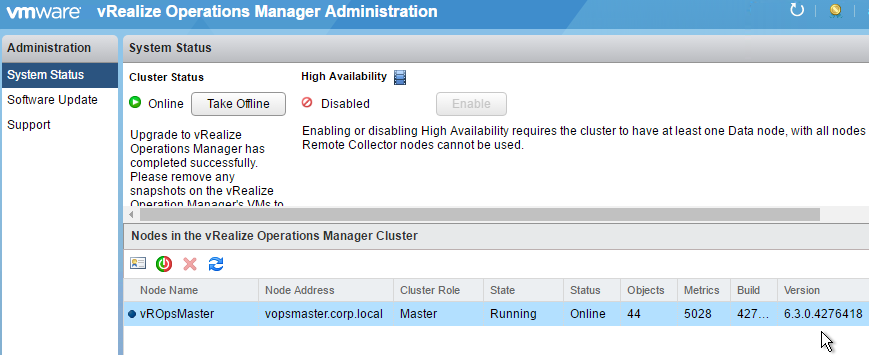
- After upgrading both the OS and vROps, the System Status page should show version 6.4.0.4276418.
Configure vSphere Adapter
- Login to the appliance.
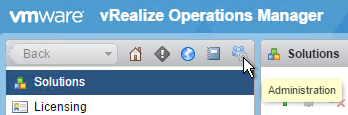
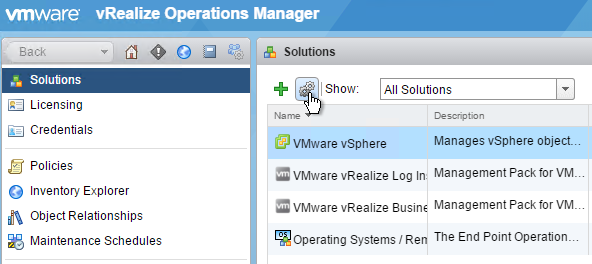
- Go to Administration > Solutions.
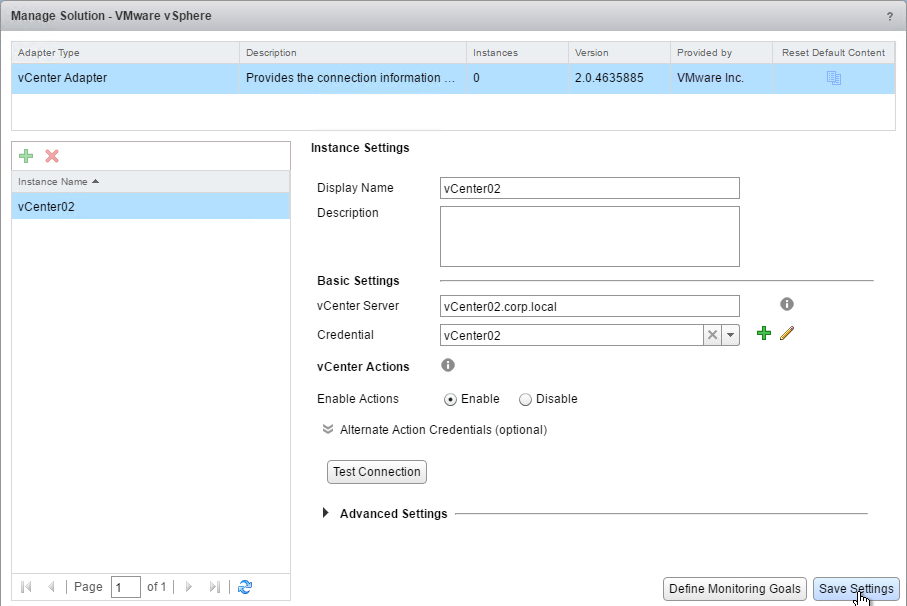
- Highlight the VMware vSphere Solution, and click the Configure button in the toolbar.
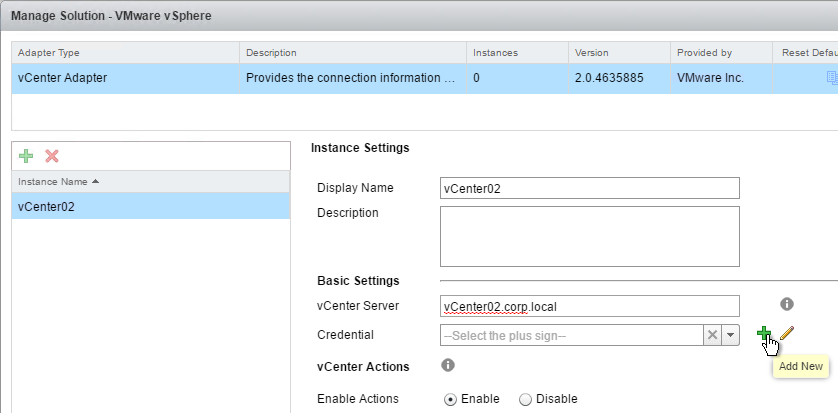
- In the Configure adapters page, highlight the vCenter Adapter.
- On the bottom, enter a name for the vCenter adapter.
- Enter the address of the vCenter server.
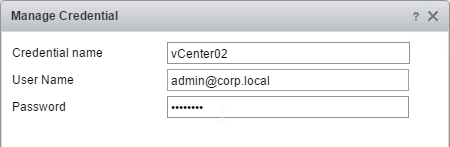
- Click the plus icon to add a Credential.
- Enter credentials for the vCenter server, and click OK.
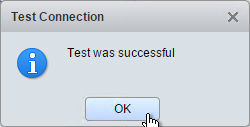
- Click Test Connection.
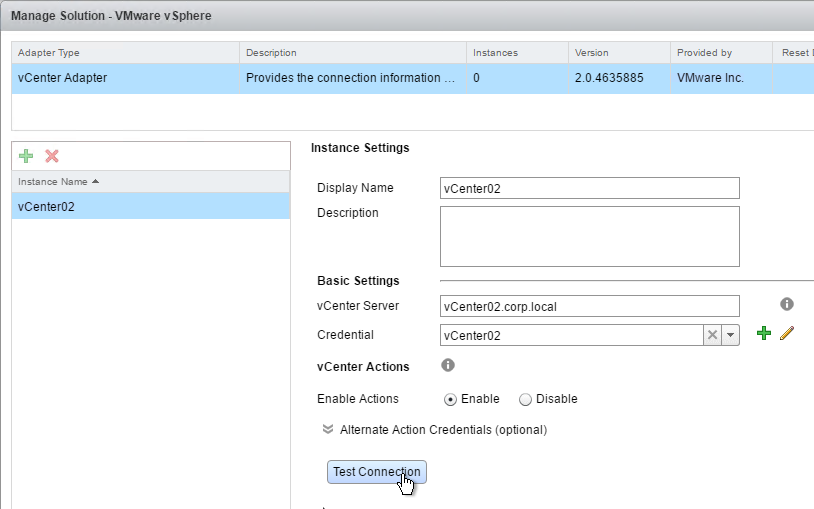
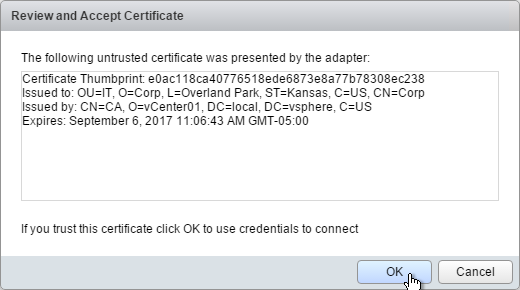
- Click OK to accept the certificate.
- Click OK to acknowledge that the test was successful.
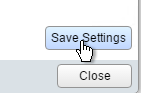
- Click Save Settings when done.
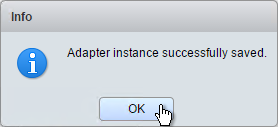
- Click OK to acknowledge that adapter instance was successfully saved.
- Click Close.
- Note: it takes four weeks for vRealize Operations to determine dynamic thresholds.
- Additional adapters can be downloaded from VMware Solution Exchange – https://solutionexchange.vmware.com/store
vSphere SSON
- In the vRealize Operations console, go to Administration > Authentication Sources.
- On the right, click the green plus icon.
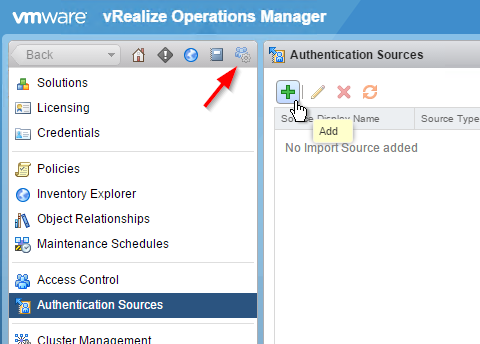
- Enter a display name.
- From the Source Type drop-down select SSO SAML.
- Enter the FQDN of the Platform Services Controller.
- Enter credentials of an account that is in the Single Sign-on Admins group.
- Select Grant administrator role to vRealize Operations Manager for future configuration.
- Click Test.
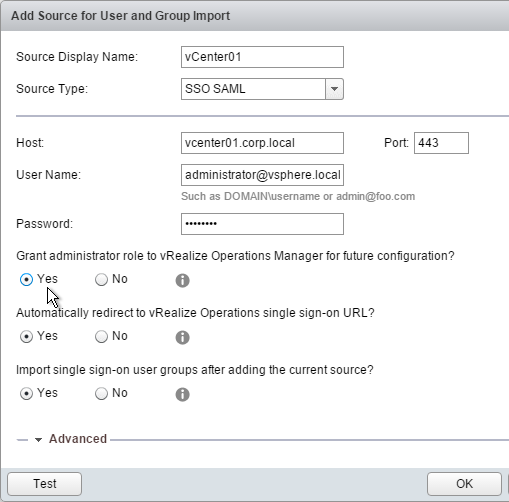
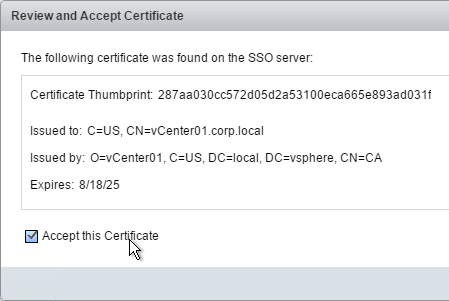
- Check the box to Accept this Certificate, and click OK.
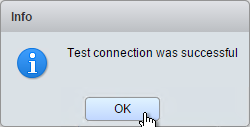
- Click OK to acknowledge that the test was successful.
- Click OK.
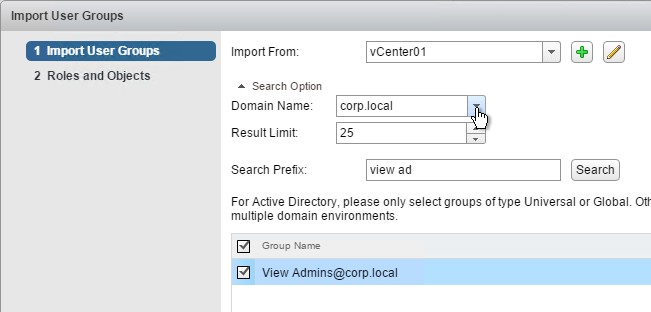
- The Import User Groups wizard launches automatically. In the Import User Groups page, enter a group name, click Search, and then select the group. Click Next.
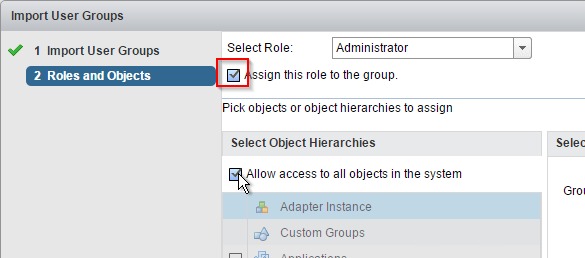
- On the Roles and Objects page, from the Select Role drop-down select Administrator.
- Check the box next to Assign this role to the group.
- Check the box next to Allow access to all objects in the system. Click Finish.
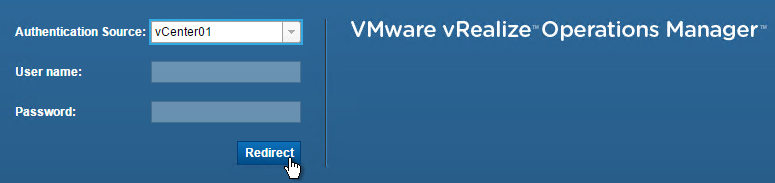
- You can now login using a vCenter Single Sign-on account.
Session Timeout
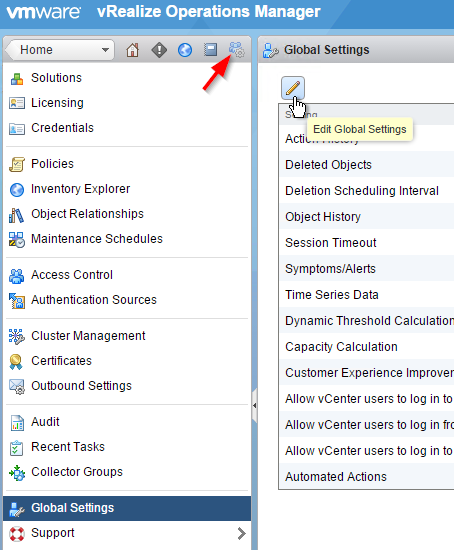
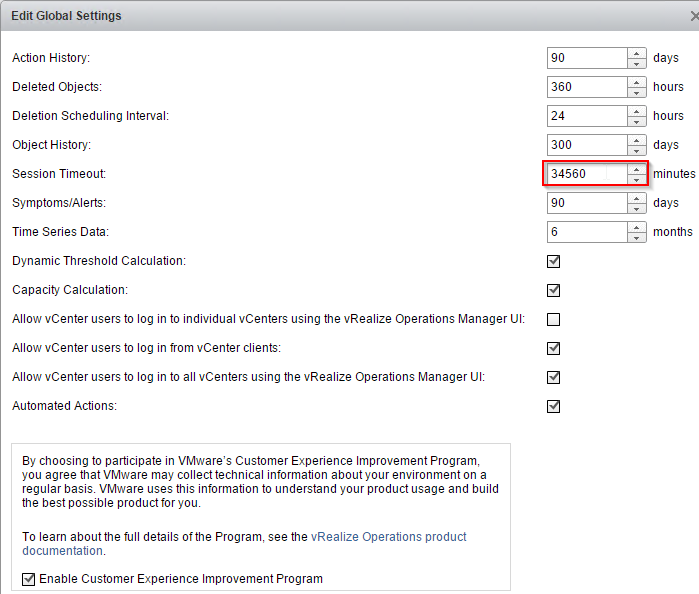
- The vRealize Operations webpage defaults to 30 minutes timeout. To change it, go to Administration > Global Settings and click the pencil icon.
- The maximum value for Session Timeout is 34560. Click OK.
Alerting
- In vRealize Operations console, go to Administration > Outbound Settings.
- On the right, click the green plus icon.

- From the Plugin Type drop-down select Standard Email Plugin.
- Give the Instance a name.
- Enter the SMTP information and click Test.
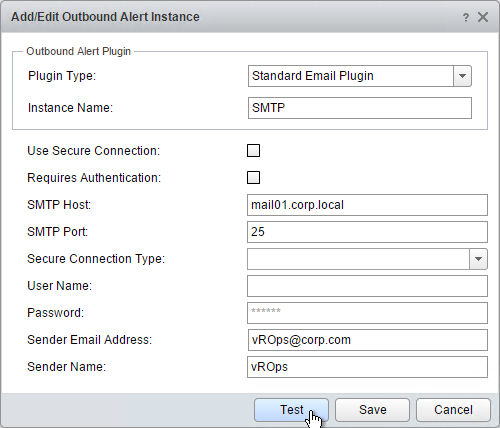
- Click OK to acknowledge that the test was successful.
- Then click Save.

- You can then go to Content > Notifications, and create notifications.
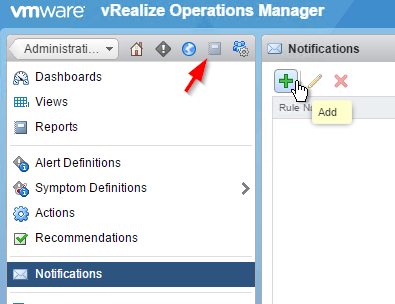
- Give the rule a name.
- For Method, select the Standard Email Plugin and the instance you created earlier.
- Enter recipients.
- Select Triggers and Criticality. Click Save.

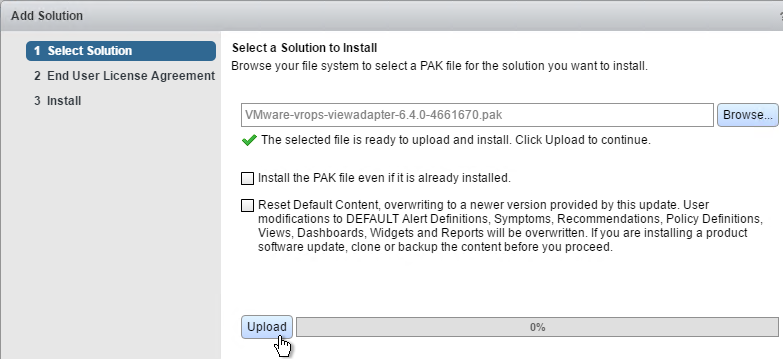
Install Horizon Adapter 6.4 PAK File
- Login to the vRealize Operations appliance web page.
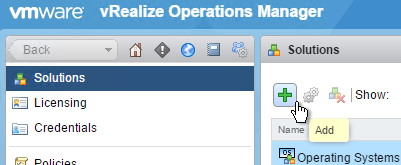
- Go to Administration > Solutions.
- On the right, click the green plus icon.
- In the Select Solution page, click Browse.
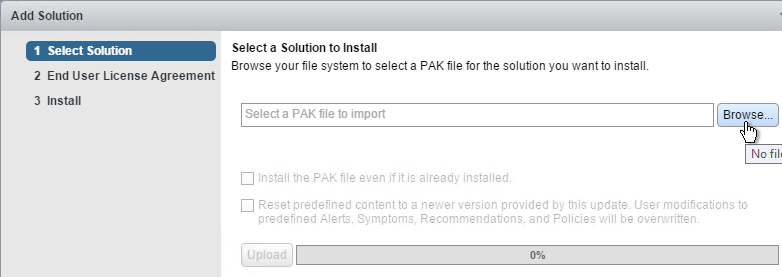
- Browse to VMware-vrops-viewadapter-6.4…pak and select it.

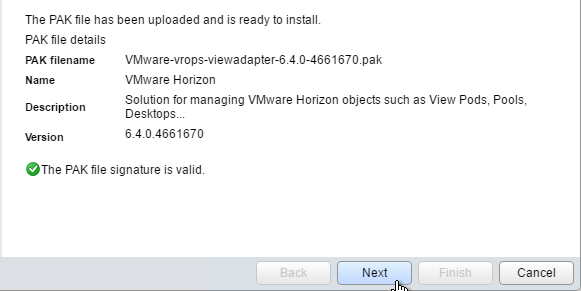
- Click Upload.
- Click Next.
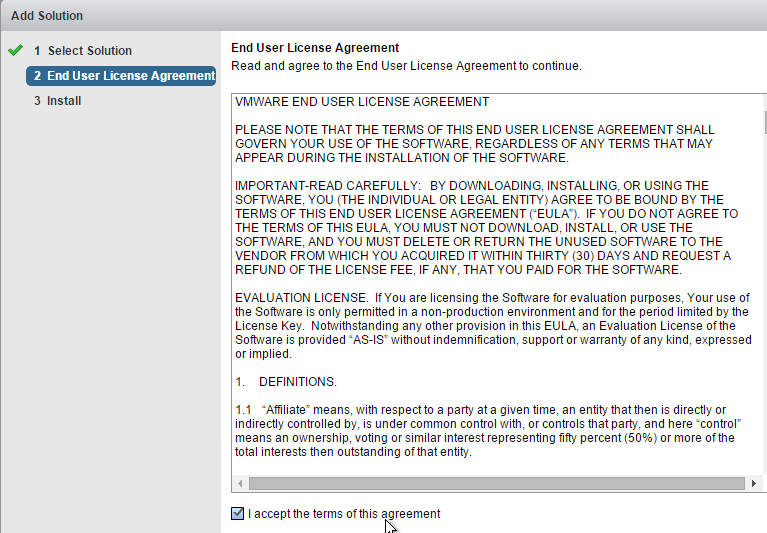
- In the End User License Agreement page, check the box next to I accept the terms, and click Next.
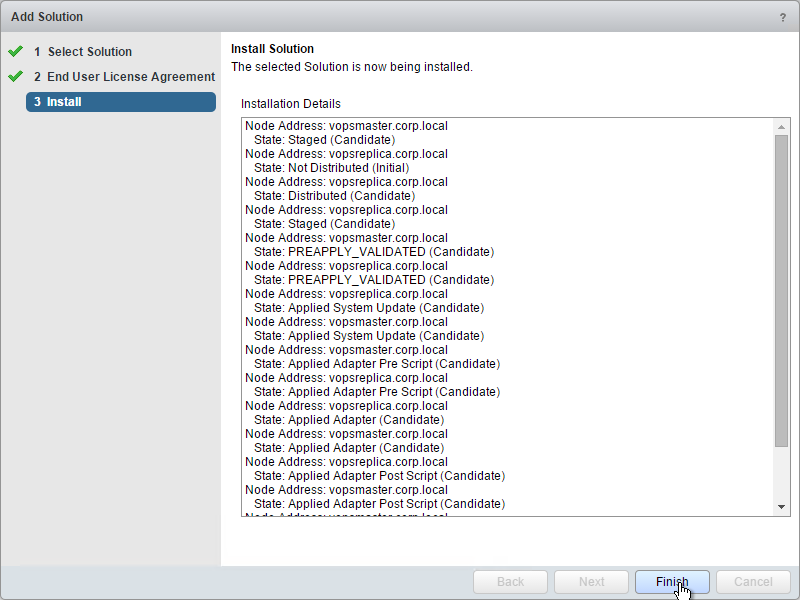
- After it’s done installing, in the Install page, click Finish.
Horizon Adapter Licensing
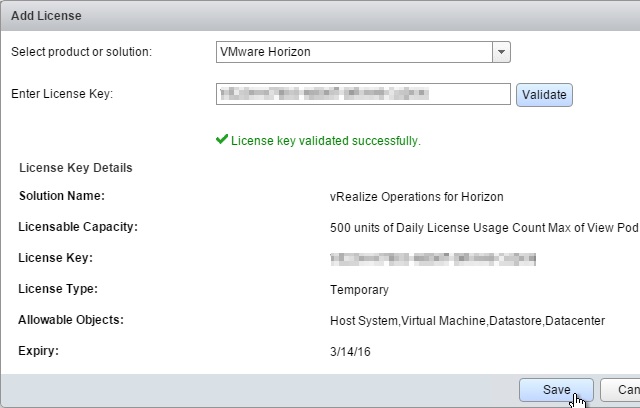
- In the vRealize Operations web page, go to Administration > Licensing.
- On the right, click the green plus icon.
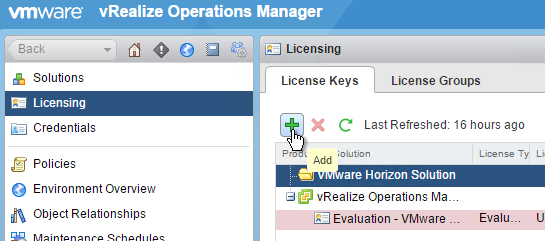
- Select VMware Horizon.
- Enter the vROps for Horizon license key and click Validate. Note: this key is different than the vRealize Operations key.
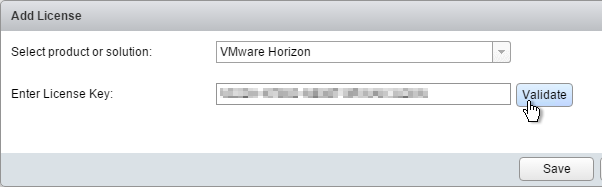
- Click Save.
Configure Horizon Adapter
Here are some guidelines regarding the Horizon adapter:
- You can only have one Horizon adapter per vRealize Operations appliance.
- Each adapter can handle up to 10,000 virtual desktops.
- Multiple Horizon pods can point to a single adapter.
Do the following to create and configure a Horizon adapter:
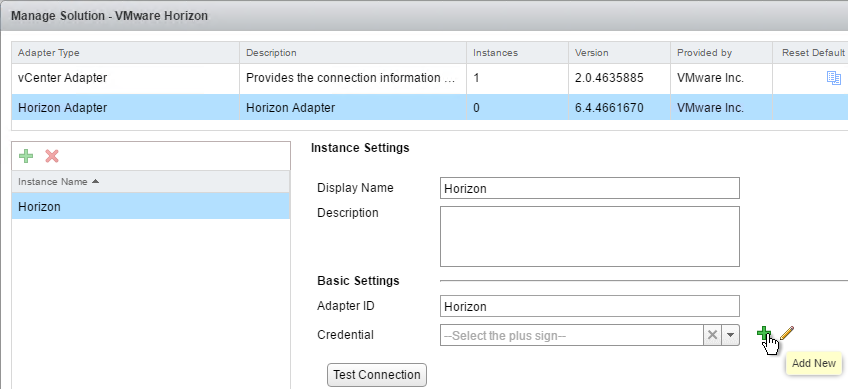
- In vRealize Operations Manager, go back to Administration > Solutions.
- On the right, highlight the VMware Horizon adapter, and click the Configure icon.
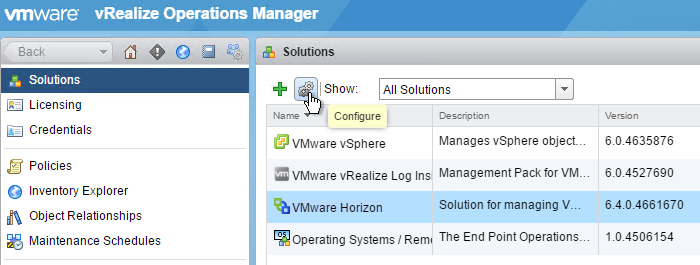
- On the top part, highlight the Horizon Adapter.
- On the bottom, give the adapter a Display Name and an Adapter ID.
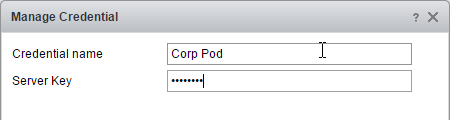
- Click the green plus icon to add a credential.
- Give the credential a name. Enter a new password (shared key), and click OK. You’ll use this password later.
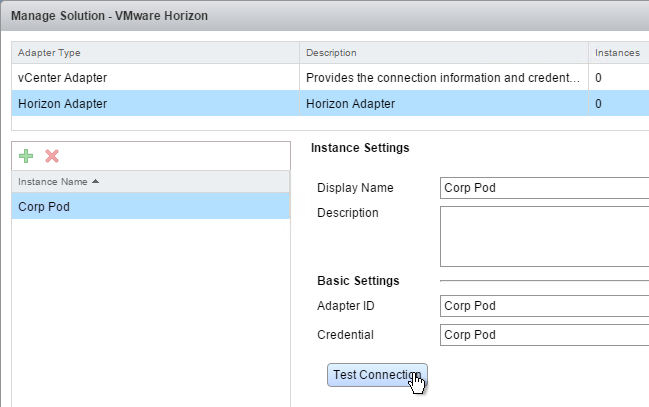
- Click Test Connection.
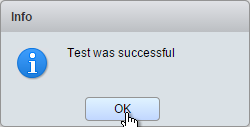
- Click OK to acknowledge that the test was successful.
- On the bottom right, click Save Settings.
- Click OK.
- Then click Close.
Enable SSH
VMware Knowledgebase article – Enabling SSH access in vRealize Operations Manager 6.0.x (2100515):
- Connect to the vRealize Operations Manager virtual machine console.
- Press Alt+F1, and login as root.
Note: By default there is no root password configured. - Start the SSH service by running the command:
service sshd start - To configure SSH to start automatically run this command:
chkconfig sshd on
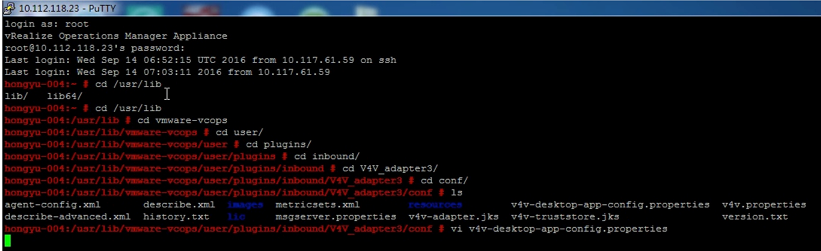
Appliance Firewall for Horizon Adapter
- Login as root to the CLI of the appliance using SSH, or the virtual machine console.
- Use vi to edit the file /opt/vmware/etc/vmware-vcops-firewall.conf.
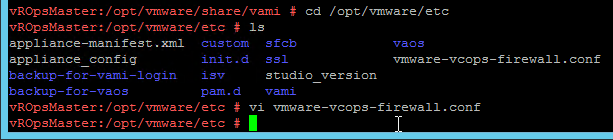
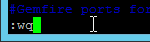
- Look for the TCPPORTS line that adds 3091:3094. Right below that line, add a new line containing TCPPORTS=”$TCPPORTS 3099:3101″. In vi, press i to enter insert mode and then press <Esc> to exit insert mode.

- Enter :wq to save the file and exit.
- Run /etc/init.d/vmware-vcops-firewall restart.

- If you have vRealize Operations for Horizon Desktop Agents that are older than 6.2, then you’ll need to enable TLS 1.0 by editing the properties file. See Create an Instance of the Horizon Adapter at pubs.vmware.com for more information.
- If you have more than 1,000 Desktop Agents, see VMware 2096607 Adjusting the ARP cache on a vRealize Operations Manager remote collector node
Install Horizon Broker Agent
- Login to one View Connection Server in your pod. Only install the Broker Agent on one View Connection Server in each pod.
- Run the downloaded VMware-v4vbrokeragent-x86_64-6.4.0.exe.
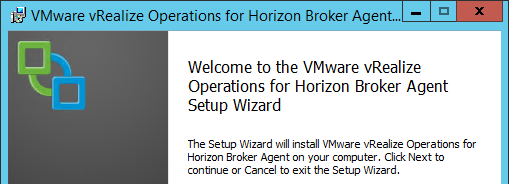
- In the Welcome to the VMware vRealize Operations for Horizon Broker Agent Setup Wizard page, click Next.
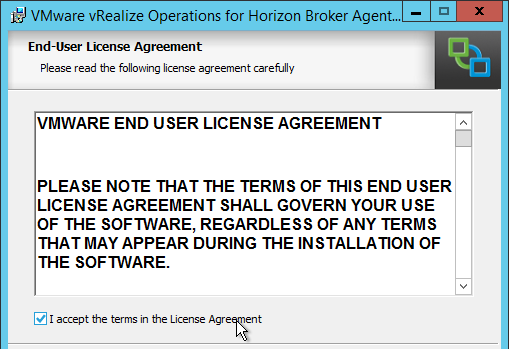
- In the End-User License Agreement page, check the box next to I accept the terms and click Next.
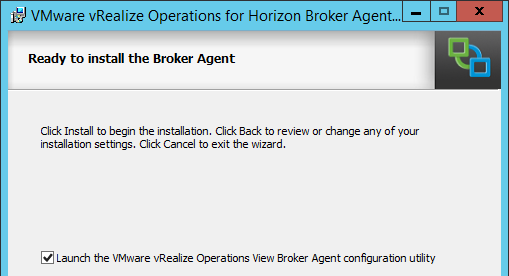
- In the Ready to install the Broker Agent page, click Install.
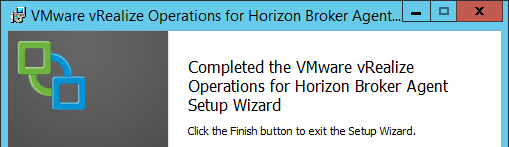
- In the Completed the VMware vRealize Operations for Horizon Broker Agent Setup Wizard page, click Finish.
Configure Horizon Broker Agent
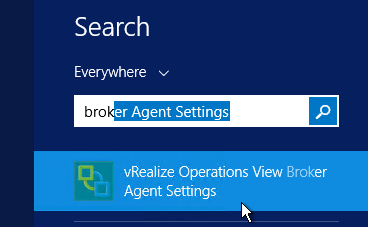
- The Configuration tool will appear immediately after installation. Or launch vRealize Operations View Broker Agent Settings from the Start Menu.
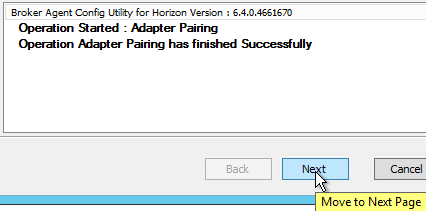
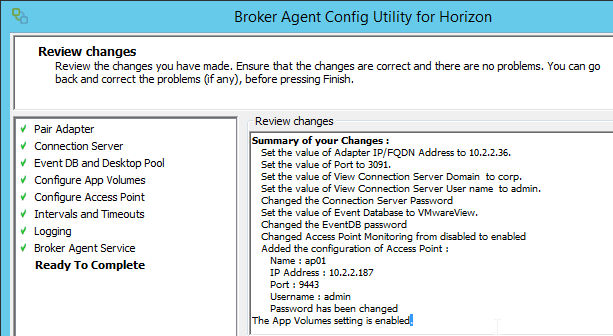
- In the Pair Adapter page, enter the IP address of the vRealize Operations appliance, enter 3091 for the port, enter the adapter password, and click Pair.
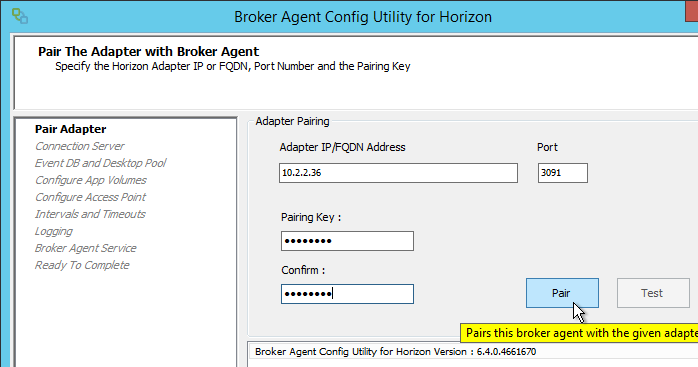
- After broker pairing is successful, click Next. If this doesn’t work, make sure the firewall ports are opened on the vRealize Operations appliance.
- In the View Connection Server page, enter credentials for Horizon View, and click Test.
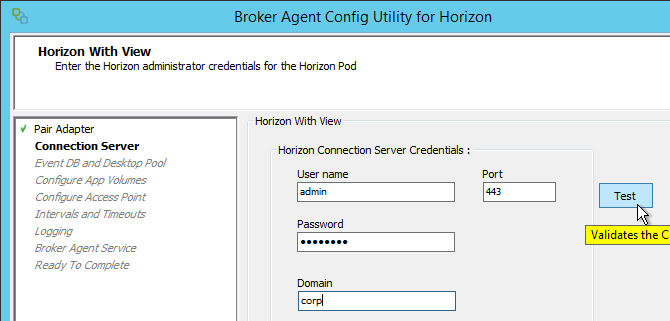
- Then click Next.
- In the Event DB and Desktop page, enter the SQL credentials to access the Events database, and click Test.
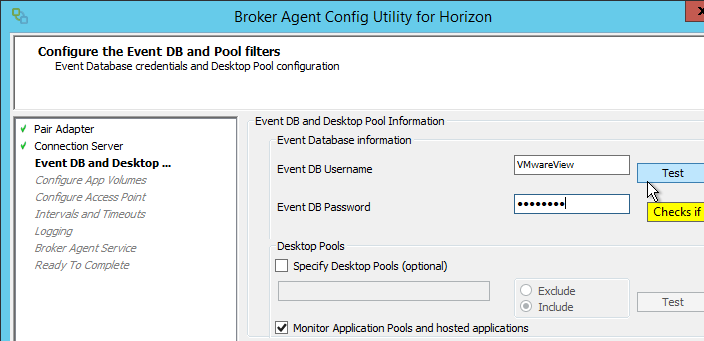
- Then click Next.
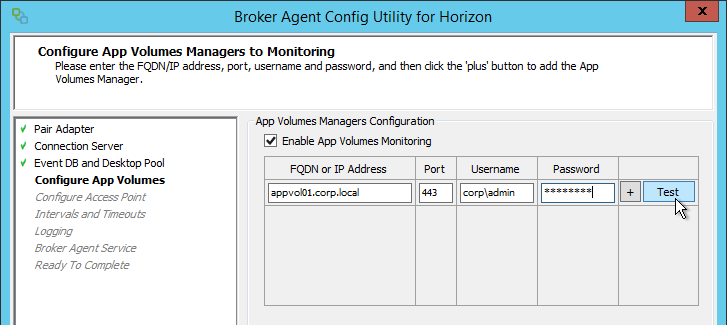
- In the Configure App Volumes Managers to Monitoring page, enter the App Volumes info and click Test. Click the plus icon to move it to the bottom. Then click Next.
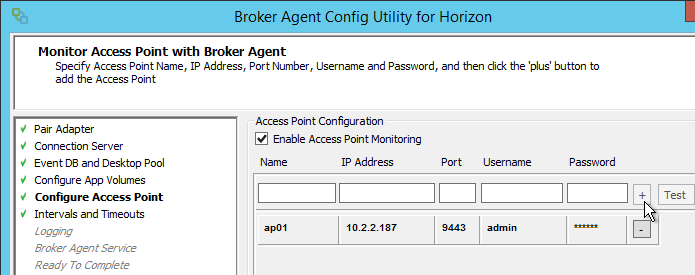
- In the Monitor Access Point with Broker Agent page, enter a name, enter the Access Point IP, enter 9443 as the port, enter the admin credentials, and click Test.
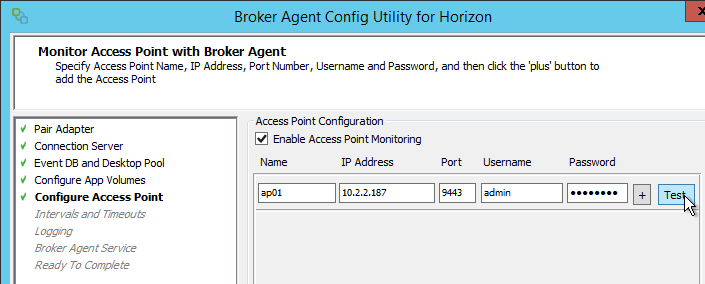
- Click the plus icon to move the Access Point appliance to the bottom. Then click Next.
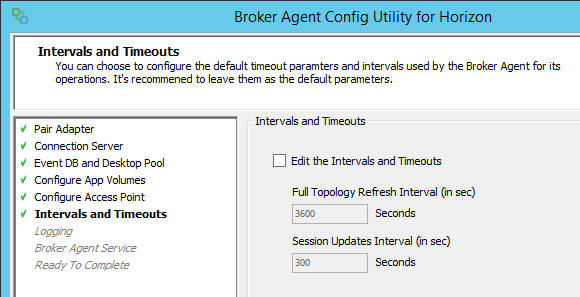
- In the Intervals and Timeouts page, click Next.
- In the Configure the Logging parameters page, click Next.

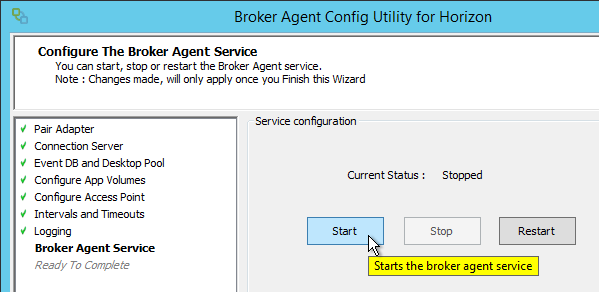
- In the Broker Agent Service page, click Start. Then click Next.
- In the Review changes page, click Finish.
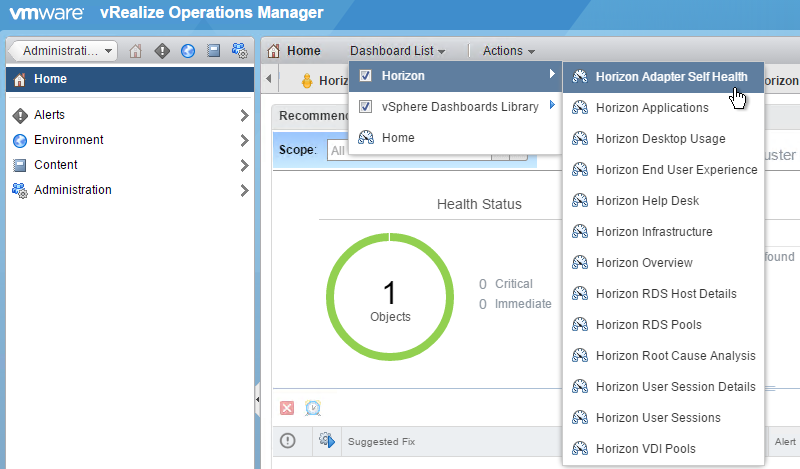
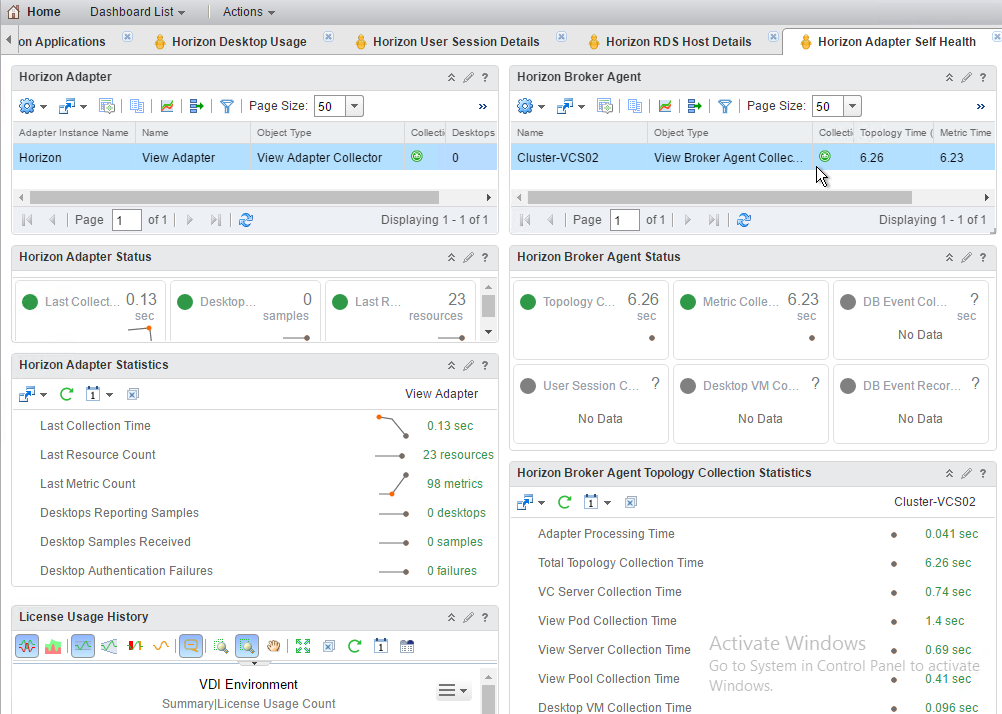
- In the vRealize Operations web console, from the Home page, you can view the Horizon Adapter Self Health dashboard to verify that the adapter and broker agent are functional.
Desktop Agent
The Desktop Agent should be installed on every Horizon Agent machine. Horizon 7 Agents come with vROps Desktop Agents. If you’re not running the latest version of Horizon 7 Agent, then upgrade the vROps Desktop Agent on those machines.
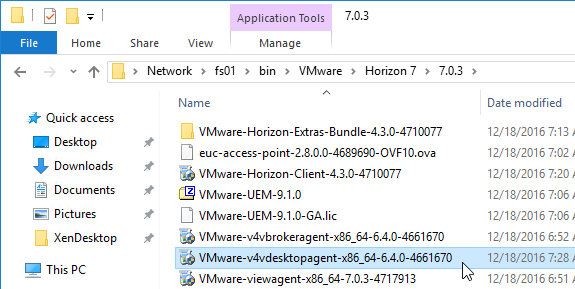
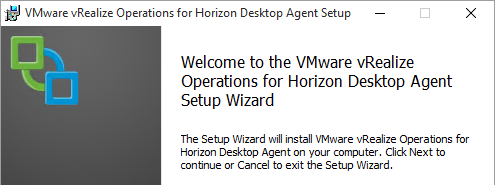
- Run the downloaded vRealize Operations for Horizon Desktop Agent 6.4.0 (VMware-v4vdeskopagent-x86_64-6.4.0.exe).
- In the Welcome to the VMware vRealize Operations for Horizon Desktop Agent Setup Wizard agent, click Next.
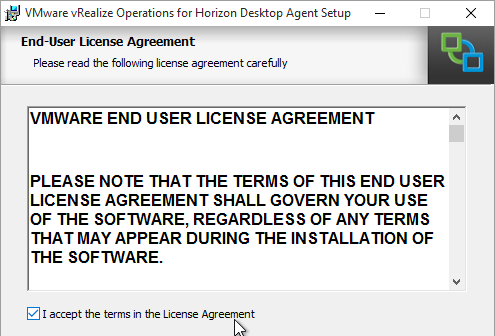
- In the End-User License Agreement page, check the box next to I accept the terms in the License Agreement and click Next.
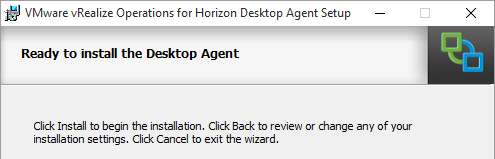
- In the Ready to install the Desktop Agent page, click Install.
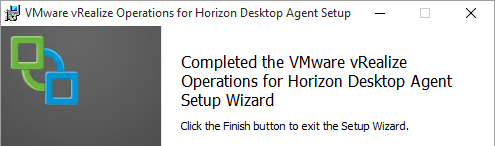
- In the Completed the VMware vRealize Operations for Horizon Desktop Agent Setup Wizard page, click Finish.
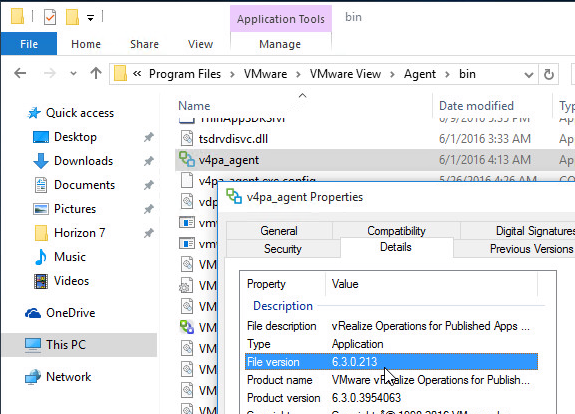
- If you go to C:\Program Files\VMware\VMware View\Agent\bin and view the properties of the v4pa_agent.exe file, then you’ll see the installed version of the Desktop Agent.
Related Pages
- Back to VMware Horizon 7
Has anyone else had an issue in which the Broker Agent Config Utility will not connect to the All Volumes server due to the password being too long? Ran into this today and wanted to share.
I installed 6.4 in two environments – my lab (running Horizon 7.2) and another prod environment I’m working on (running 7.0.3 components)
I entered the View Event database configuration in the wizard on both – and it tested out OK. However the View Self Health tab doesn’t show any data for Horizon Broker Agent Event DB Collection Statistics, except for around the time the agent was originally configured. I also notice that the logs on the connection server (specifically the v4v_brokeragent_svc log) – the ViewEvent last record time only shows from around the time I ran the configuration tool. Has anyone seen this? Is it even a problem? My data seems to be flowing in both environments, and I’m not sure what would be missing if that service isn’t running correctly.
When using a remote collector for does the broker agent point to the Vrops Manager IP or the remote collector IP? Also do you need to configure the firewall on the remote collector appliance?
On the Connection server config part of the broker agent i get a message:
This is NOT a valid View Connection Server or the supplied credentials are incorrect… But if i sign inn to the Connection sever on the Admin page i can log on..
I am unable to see any of my view clients in vRops, any idea why?
I keep getting the alert “Not receiving data from Desktop agent” I am running vROps 6.2, Horizon View Adapter 6.2 and I have a pool that is running Desktop Agent 6.2.
Please help!!
Carl, do you need to install the Broker Agent on all the Connection Servers or just one?
Just one per pod.
Never mind…….VMware documentation states yes. Only install on one Connection Server per pod.
Thanks for this guide – v useful
https://goo.gl/Vo5y7o
In Horizon View 5.2 and later and Horizon with View 6.0.x or VMware Horizon 6 version 6.1 environments, the desktop agent is installed as part of the View Agent installation.
I’ve been told by VMware only use the Operation Manager Agent for Horizon that ships with the View Agent. Different versions of the Ops Mgr Agent may not work correctly with the Horizon Agent. Not sure how true this is in real life, but maybe better apply “if it ain’t broke don’t fix it” and only layer on the “slightly newer” Ops Mgr Agent if instructed by VMware.
Should the updated Desktop Agent be installed on Horizon Agents older than 6.2 or do we have to stick with the Desktop Agent included in those older Horizon Agents? What can the Desktop Agent be installed on?