Navigation
This article applies to all 7.x versions of Citrix Provisioning, including 2411, 2402 LTSR, and 2203 LTSR.
- Change Log
- Planning and Versions
- Citrix License Server Version
- Upgrade
- vDisk Storage
- Installs/Upgrades
- Database Configuration
- Troubleshooting – Networking Services Don’t Work After Reboot
- Firewall
- Disable BIOS Boot Menu
- Private Mode vDisk – No Servers Available for vDisk
- Multi-homed Provisioning Server
- Antivirus Exclusions
- TFTP High Availability
- DHCP Failover
- Health Check
💡 = Recently Updated
Change Log
- 2025 March 7 – updated Versions section with Citrix Provisioning 2402 LTSR CU2
- 2025 Jan 9 – updated Versions section with Citrix Provisioning 2203 LTSR CU6
- 2024 Dec 4 – updated Versions section and Install sections with Citrix Provisioning 2411
- 2024 April 30 – updated Versions section with Citrix Provisioning 1912 LTSR CU9
- 2023 Mar 20 – updated Versions section and Install sections with Citrix Provisioning 2303
- Join PVS Farm to Citrix Cloud
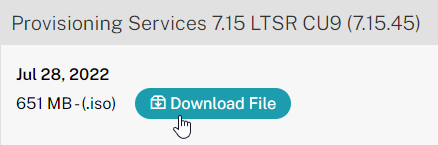
- 2022 July 29 – updated Versions section with PVS 7.15.45 (from LTSR 7.15 Cumulative Update 9)
Planning and Versions
CTX220651 Best Practices for deploying PVS in multi-geo environments: ensure that Provisioning farms do not span data centers with a network latency that can affect communications between the Provisioning Servers and the SQL database
SQL 2019 is supported with Citrix Provisioning 2003 and newer.
Citrix Provisioning Firewall Rules
The most recent Current Release version of Citrix Provisioning is 2411.

For LTSR CVAD, deploy the Citrix Provisioning version that matches your CVAD version:
- For Citrix Virtual Apps and Desktops (CVAD) 2402 LTSR, deploy Citrix Provisioning 2402 LTSR CU2

- For Citrix Virtual Apps and Desktops (CVAD) 2203 LTSR, deploy Citrix Provisioning 2203 LTSR CU6.

- For Citrix Virtual Apps and Desktops (CVAD) 1912 LTSR, deploy Citrix Provisioning 1912 LTSR Cumulative Update 9 (CU9).

- For XenApp and XenDesktop 7.15 LTSR, deploy 7.15.45 (7.15 LTSR Update 9). 7.15.45 is the version included in XenApp/XenDesktop LTSR 7.15 Cumulative Update 9. Yes, it’s confusing.
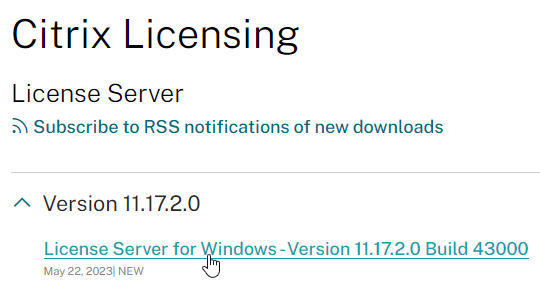
Citrix License Server Version
Upgrade the Citrix Licensing server to the latest version. Citrix now requires the latest License Server version and is configured to upload license telemetry data.
Upgrade
Windows Server 2022 is supported with Citrix Provisioning 2203 and newer.
VMware ESXi 8.0 is supported with Citrix Provisioning 2212 and newer.
SCVMM 2022 is supported with Citrix Provisioning 2203 and newer.
If you are upgrading from an older version of Citrix Provisioning, do the following:
- In-place upgrade the Citrix License Server.
- In-place upgrade the Provisioning Console.
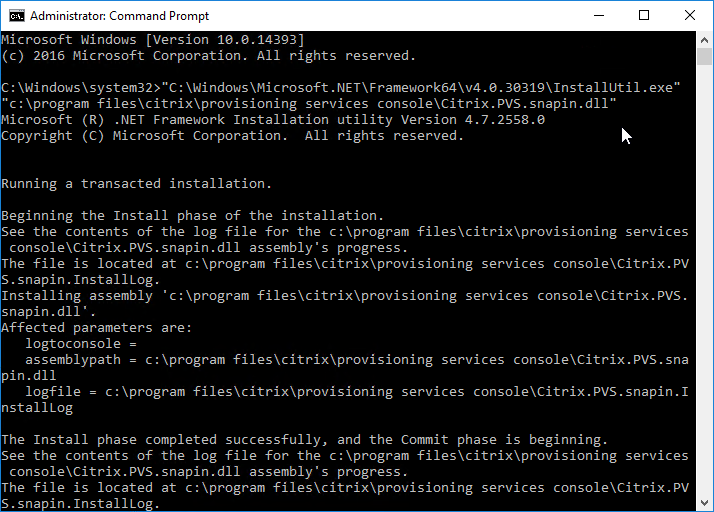
- Re-register the Citrix.PVS.snapin.dll snap-in:
"C:\Windows\Microsoft.NET\Framework64\v4.0.30319\InstallUtil.exe" "c:\program files\citrix\provisioning services console\Citrix.PVS.snapin.dll"
- If upgrading from 7.15.3000 to 7.15.4000, then manually upgrade the snap-ins. See CTX256773 Powershell SnapIns are not upgraded from PVS 7.15 LTSR CU3 to 7.15 LTSR CU4 after the upgrade is complete
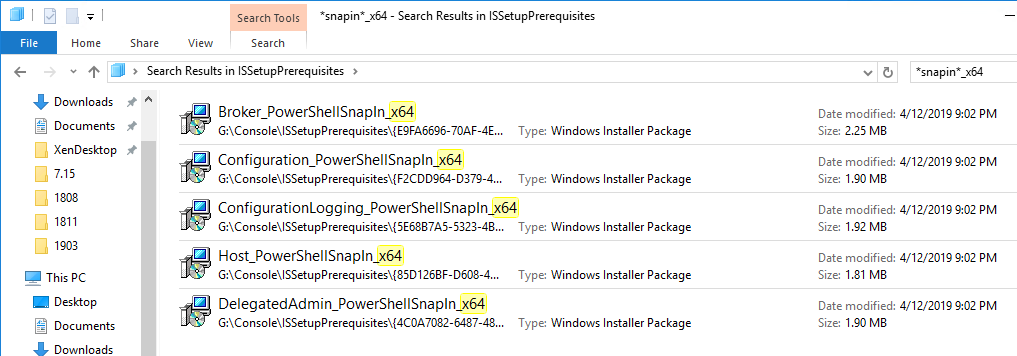
- Re-register the Citrix.PVS.snapin.dll snap-in:
- In-place upgrade the Provisioning Server. If you have two or more Provisioning servers, upgrade one, and then the other. If High Availability is configured correctly, then the Target Devices should move to a different Provisioning server while a Provisioning server is being upgraded.
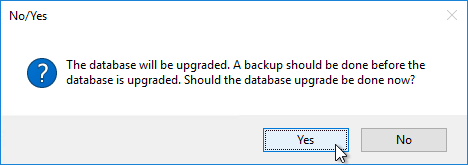
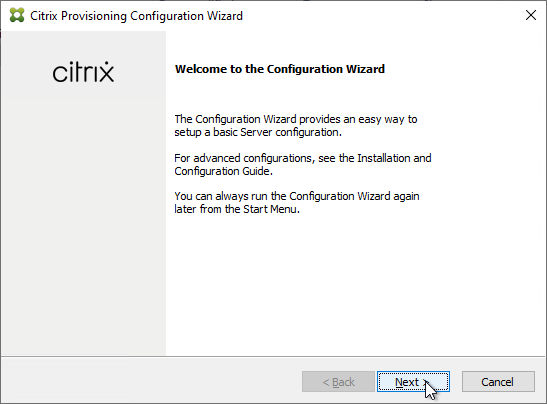
- After the first Provisioning server is upgraded, run the Configuration Wizard. You can generally just click Next through the wizard. At the end, you’ll be prompted to upgrade the database. Then upgrade the remaining Provisioning servers and run the Config Wizard on each of them too.
- After the first Provisioning server is upgraded, run the Configuration Wizard. You can generally just click Next through the wizard. At the end, you’ll be prompted to upgrade the database. Then upgrade the remaining Provisioning servers and run the Config Wizard on each of them too.
- Upgrade the Target Device Software inside each vDisk. Don’t do this until the Provisioning servers are upgraded (Target Device Software must be same version or older than the Provisioning Servers).
- If your Target Devices are 7.6.1 or newer, you can create a Maintenance version, boot an Updater Target Device, and in-place upgrade the Target Device Software.
- If your Target Devices are older, then you must reverse image.
vDisk Storage
Do the following on both Provisioning Servers. The vDisks will be stored locally on both servers. You must synchronize the files on the two servers: either manually (e.g. Robocopy), or automatically (e.g. DFS Replication).
Create D: Drive
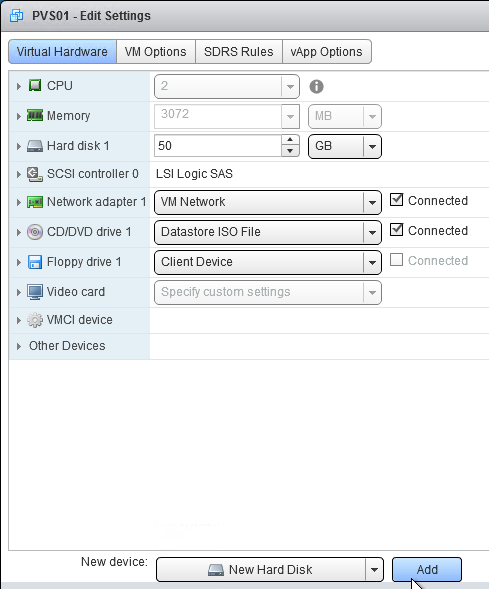
- In the vSphere Web Client, edit the settings for each of the Provisioning server virtual machines.
- On the bottom, use the drop-down list to select New Hard Disk, and click Add.
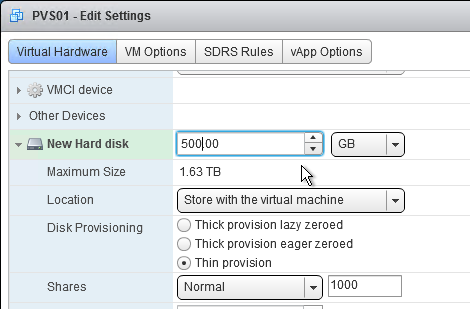
- Expand the New Hard disk by clicking the arrow next to it.
- Change the disk size to 500 GB or higher. It needs to be large enough to store the vDisks. Each full vDisk is 40 GB plus a chain of snapshots. Additional space is needed to merge the chain.
- Feel free to select Thin provision, if desired. Click OK when done.
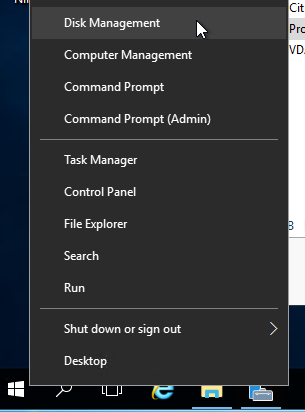
- Login to the session host. Right-click the Start Button, and click Disk Management.
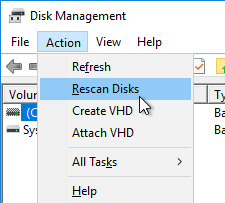
- In the Action menu, click Rescan Disks.
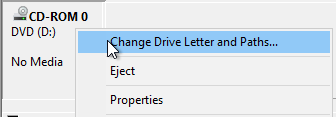
- On the bottom right, right-click the CD-ROM partition, and click Change Drive Letters and Paths.
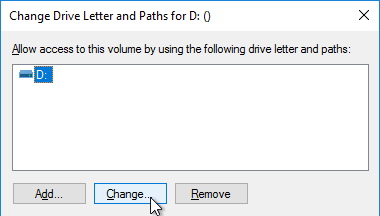
- Click Change.
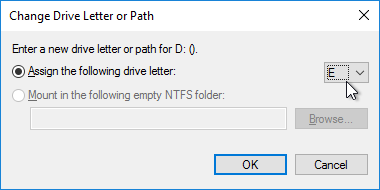
- Change the drive letter to E:, and click OK.
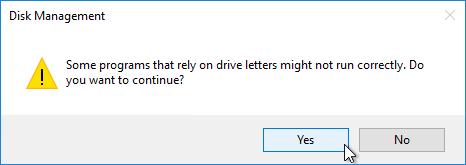
- Click Yes when asked to continue.
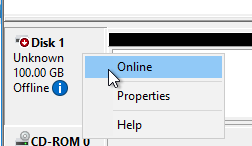
- Right-click Disk 1 and click Online.
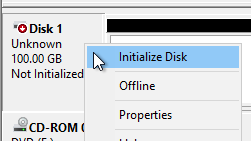
- Right-click Disk 1 and click Initialize Disk.
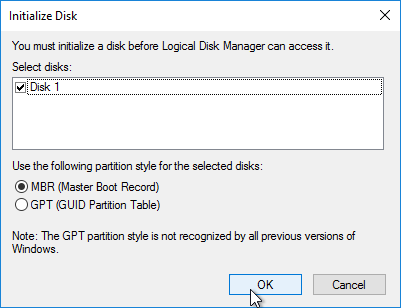
- Click OK to initialize the disk.
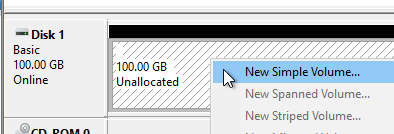
- Right-click the Unallocated space, and click New Simple Volume.
- In the Welcome to the New Simple Volume Wizard page, click Next.
- In the Specify Volume Size page, click Next.
- In the Assign Drive Letter or Path page, select D: and click Next.
- In the Format Partition page, change the Volume label to vDisks and click Next.

- In the Completing the New Simple Volume Wizard page, click Finish.
- If you see a pop-up asking you to format the disk, click Cancel since Disk Management is already doing that.
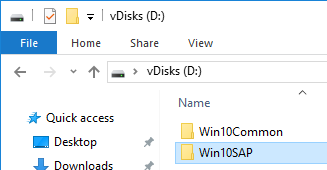
vDisk Folders
On the new D: partition, create one folder per Delivery Group. For example, create one called Win10Common, and create another folder called Win10SAP. Each vDisk is composed of several files, so its best to place each vDisk in a separate folder. Each Delivery Group is usually a different vDisk.
Robocopy Script
Here is a sample robocopy statement to copy vDisk files from one Provisioning server to another. It excludes .lok files and excludes the WriteCache folders.
REM Robocopy from PVS01 to PVS02
REM Deletes files from other server if not present on local server
Robocopy D:\vDisks \\pvs02\d$\vDisks *.vhd *.vhdx *.avhd *.avhdx *.pvp /b /mir /xf *.lok /xd WriteCache /xo
Citrix Blog Post vDisk Replicator Utility has a GUI utility script that can replicate vDisks between Provisioning Sites and between Provisioning Farms.


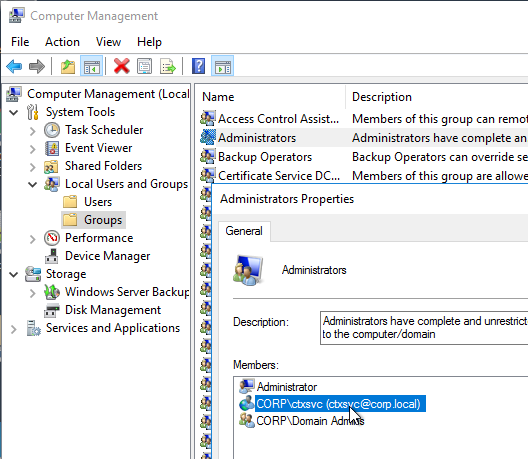
Service Account
Provisioning Services should run as a domain account that is in the local administrators group on both Provisioning servers. This is required for KMS Licensing.
Provisioning Console Install/Upgrade
The installation and administration of Citrix Provisioning 2411 and older (including LTSR versions 2203 and 1912) are essentially identical.
Operating System – Windows Server 2022 is supported with Citrix Provisioning 2203 and newer.
Hypervisor – VMware ESXi 8.0 is supported with Citrix Provisioning 2212 and newer. VMware VSAN 8 is supported with Citrix Provisioning 2311 and newer.
- SCVMM 2022 is supported with Citrix Provisioning 2203 and newer. See CTX131239 Supported Hypervisors for Citrix Virtual Apps and Desktops and Provisioning (Provisioning Services).
BIOS – Citrix Provisioning 2311 and newer no longer support BIOS. See Converting BIOS vDisks to UEFI at Citrix Docs.
If you want to automate the installation and configuration of Citrix Provisioning, see Dennis Span Citrix Provisioning Server unattended installation.
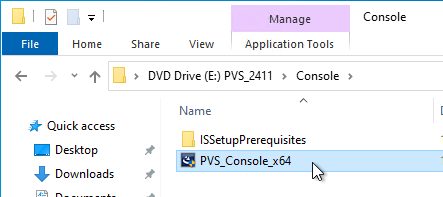
To manually install Provisioning Console, or in-place upgrade the Provisioning Console:
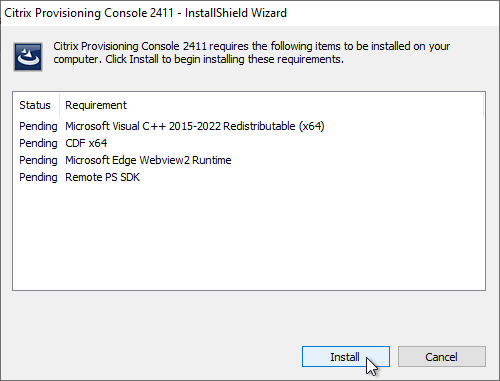
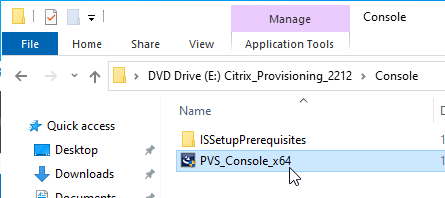
- Go to the downloaded Citrix Provisioning, and in the Console folder, run PVS_Console_x64.exe.
- Click Install.
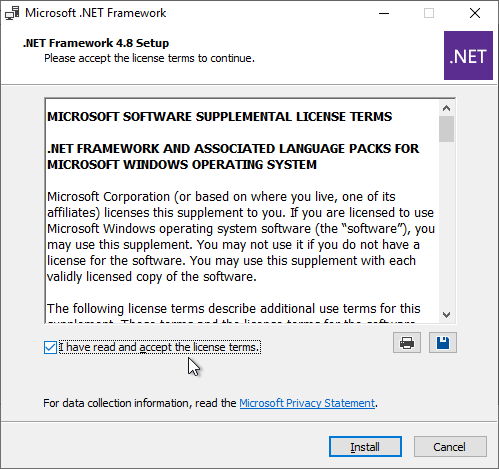
- If you see the .NET Framework Setup page:
- Check the box next to I have read and accept the license terms, and click Install.
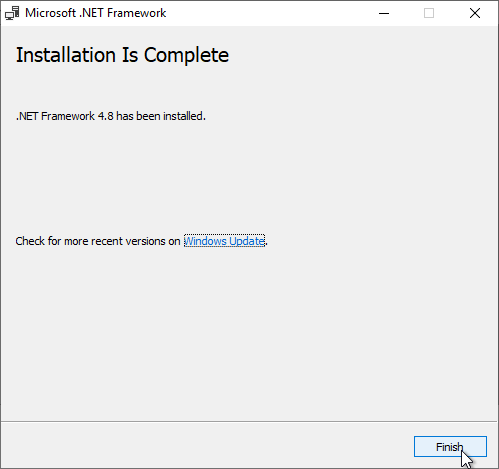
- In the Installation Is Complete page, click Finish.
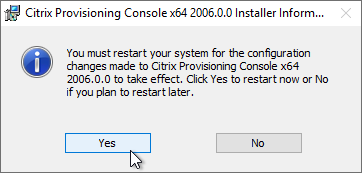
- Click Restart Now.
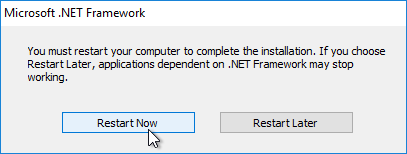
- Restart the PVS_Console_x64.exe installer.
- Click Install.
- Check the box next to I have read and accept the license terms, and click Install.
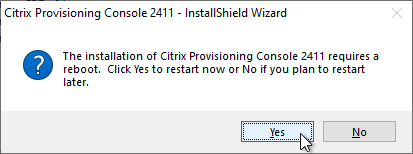
- Click Yes to reboot when prompted. Then restart the installation.
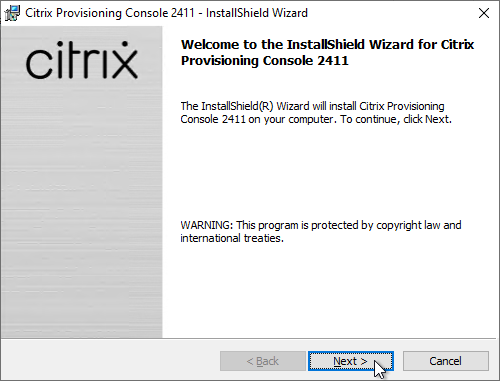
- In the Welcome to the InstallShield Wizard for Citrix Provisioning Console x64 page, click Next.
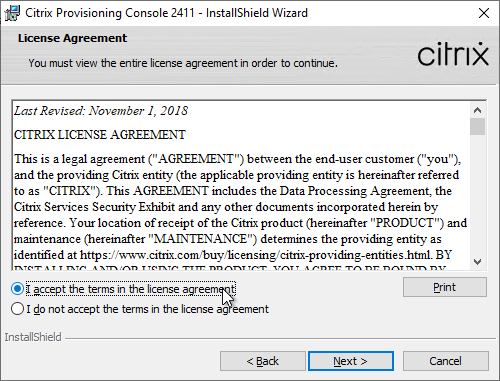
- In the License Agreement page, select I accept the terms, and click Next.
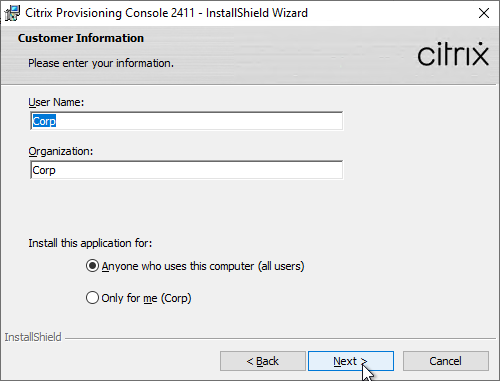
- In the Customer Information page, click Next.
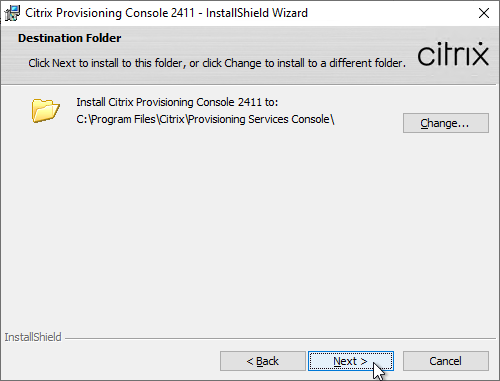
- In the Destination Folder page, click Next.
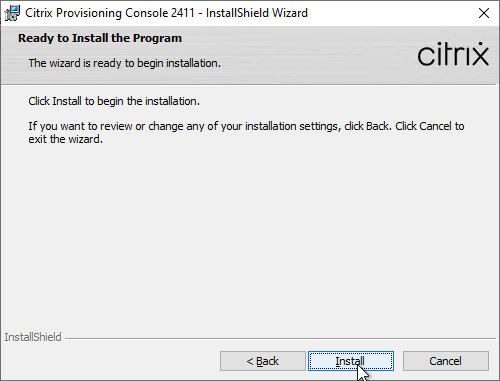
- In the Ready to Install the Program page, click Install.
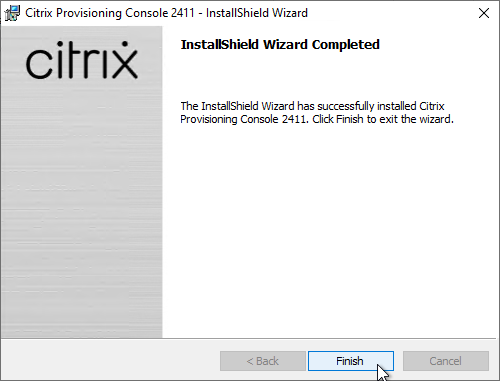
- In the InstallShield Wizard Completed page, click Finish.
- Click Yes if you are prompted to restart.
After upgrading the Console, re-register the PowerShell snap-in. This is required for the Citrix App Layering Agent.
"C:\Windows\Microsoft.NET\Framework64\v4.0.30319\InstallUtil.exe" "c:\program files\citrix\provisioning services console\Citrix.PVS.snapin.dll"
Provisioning Server – Install/Upgrade
The installation and administration of Citrix Provisioning 2411, 1912 LTSR CU9, 7.15.45, 7.6.9 and other 7.x versions are essentially identical.
Operating System – Windows Server 2022 is supported with Citrix Provisioning 2203 and newer.
Hypervisor – VMware ESXi 8.0 is supported with Citrix Provisioning 2212 and newer. VMware VSAN 8 is supported with Citrix Provisioning 2311 and newer.
- SCVMM 2022 is supported with Citrix Provisioning 2203 and newer. See CTX131239 Supported Hypervisors for Citrix Virtual Apps and Desktops and Provisioning (Provisioning Services).
BIOS – Citrix Provisioning 2311 and newer no longer support BIOS. See Converting BIOS vDisks to UEFI at Citrix Docs.
You can in-place upgrade Provisioning Server. The Provisioning Servers must be upgraded before the vDisks’ Target Device Software are upgraded. While upgrading one Provisioning Server, all Target Devices are moved to the other Provisioning Server assuming that vDisk High Availability is properly configured.
To install/upgrade Provisioning server:
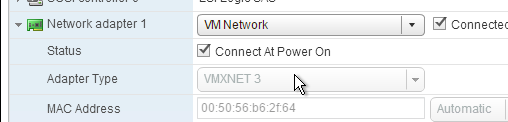
- If vSphere, make sure the Provisioning server virtual machine Network Adapter Type is VMXNET 3.
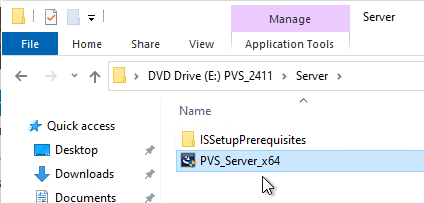
- Go to the downloaded Provisioning ISO, and in the Server folder, run PVS_Server_x64.exe.
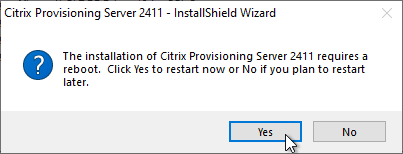
- Click Install when asked to install prerequisites.
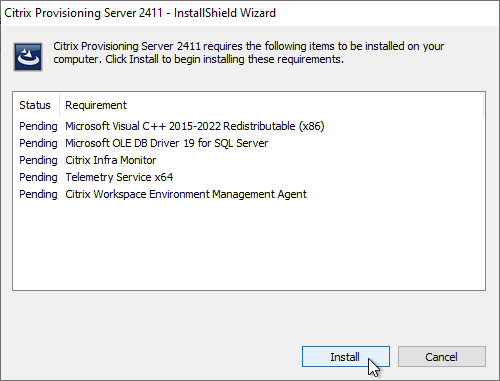
- Click Yes to reboot. After the restart, relaunch the installer.
- Note: there’s a long delay before the installation wizard appears.
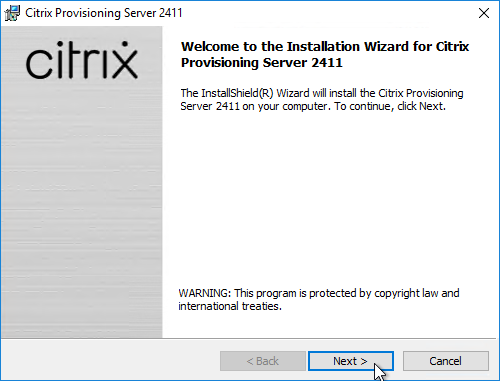
- In the Welcome to the Installation Wizard for Citrix Provisioning Server x64 page, click Next.
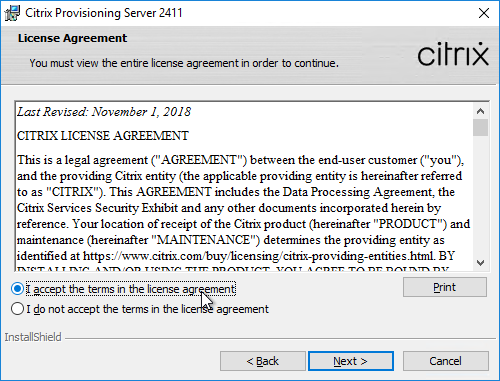
- In the License Agreement page, select I accept the terms, and click Next.
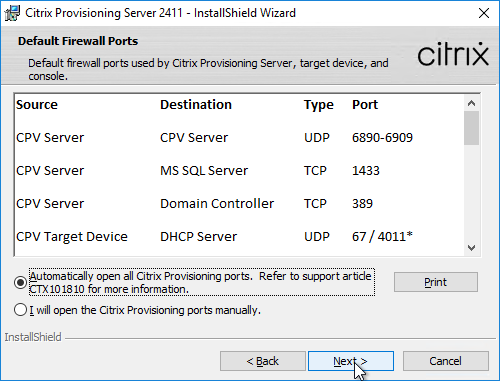
- In Citrix Provisioning 1811 and newer, you’ll see a Default Firewall Ports page. You can optionally select Automatically open all Citrix Provisioning ports in Windows Firewall. If you later use the Citrix Provisioning Console to change the ports, then the Windows Firewall rules need to be adjusted manually since the Citrix Provisioning Console won’t do it for you.
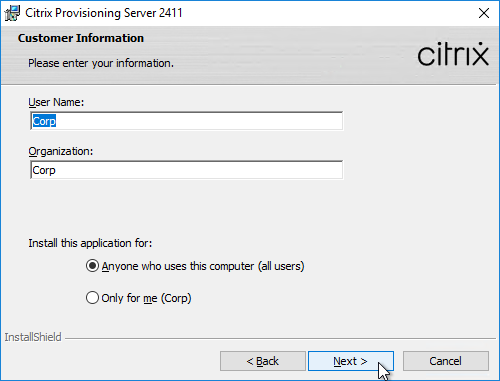
- In the Customer Information page, select Anyone who users this computer, and click Next.
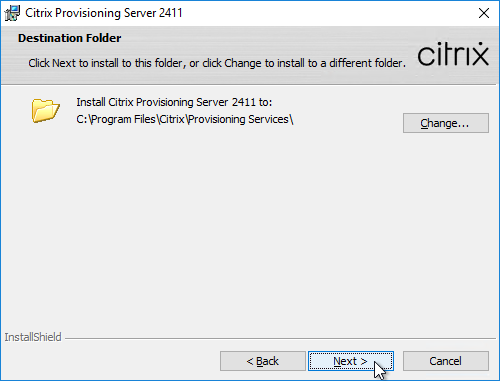
- In the Destination Folder page, click Next.
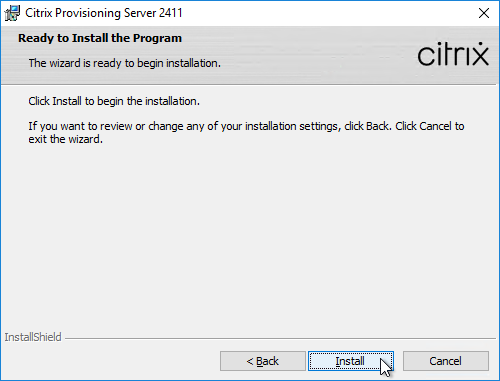
- In the Ready to Install the Program page, click Install.
- In the Installation Wizard Completed page, click Finish.
Database Script
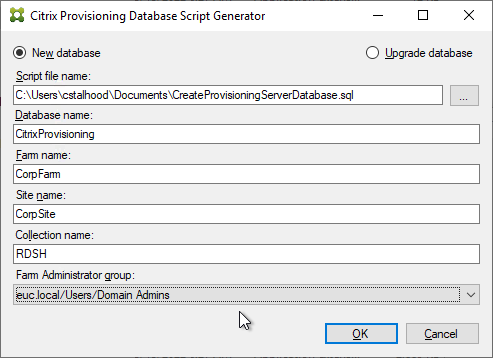
By default, the Citrix Provisioning Configuration Wizard will try to create the database using the credentials of the person that is running the Wizard. This isn’t always feasible. An alternative is to create a script that a DBA can run on the SQL server.
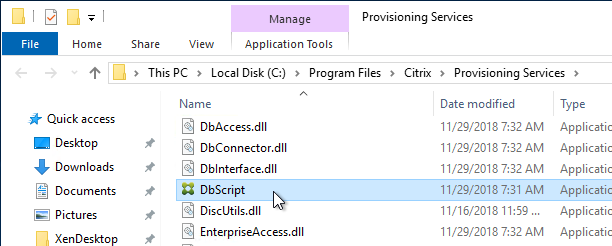
- Go to C:\Program Files\Citrix\Provisioning Services and run DBScript.exe.
- Change the selection to New database for 2012 or higher.
- Enter a path to save the script file.
- Fill in the other fields.
- Select an Active Directory group containing your Citrix administrators, and click OK.
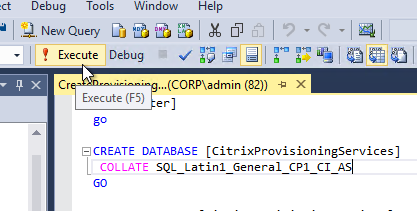
- In SQL Server Management Studio, open the SQL script.
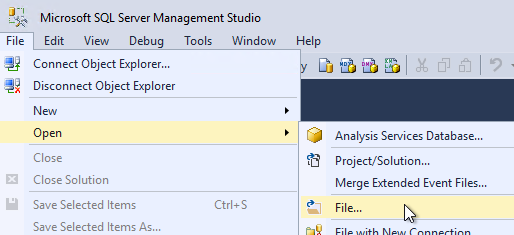
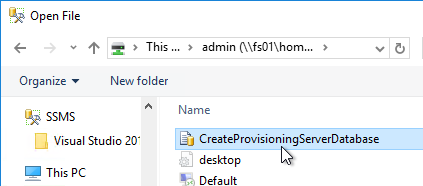
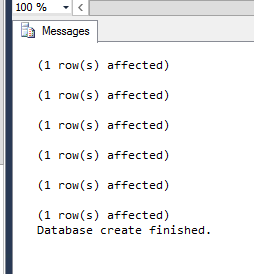
- Execute the script to create the database.
- The person that runs the Citrix Provisioning Configuration Wizard will need db_owner permission to the new Citrix Provisioning database.
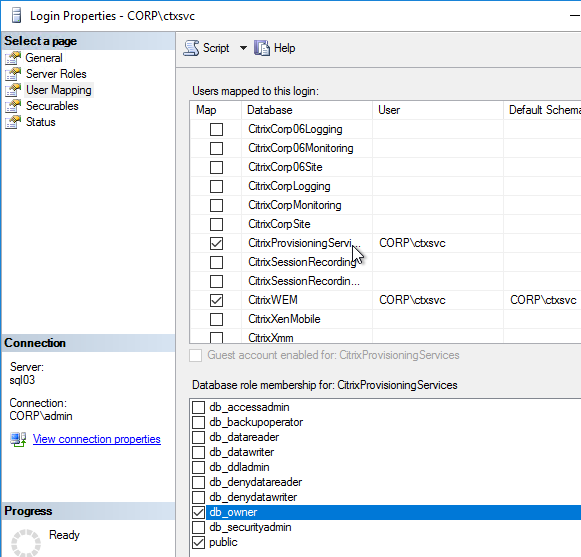
- Create a Windows service account that will run the services on the Citrix Provisioning server. This account must have a SQL login on the SQL server containing the Citrix Provisioning database. The Citrix Provisioning Configuration Wizard will grant this account the correct permissions in the database.
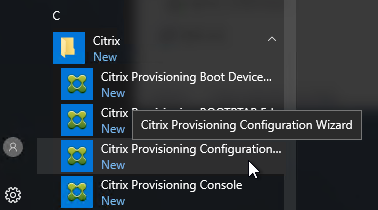
Configuration Wizard – New Farm
- If you used DBScript.exe to pre-create the database, skip to Configuration Wizard – Join Farm.
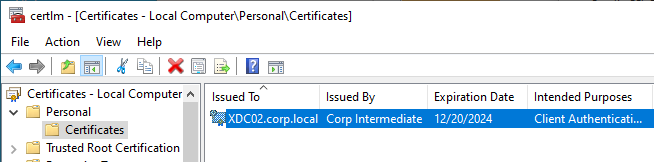
- Certificate – Joining PVS to CVAD site requires a valid certificate on the PVS server.
- For SQL AlwaysOn Availability Group, see CTX201203 SQL Server AlwaysOn Configuration for PVS 7.6. In summary: Use the wizard to create the database instance. In SQL, create the Availability Group. Then reconfigure Citrix Provisioning Server to point to the SQL AlwaysOn listener.
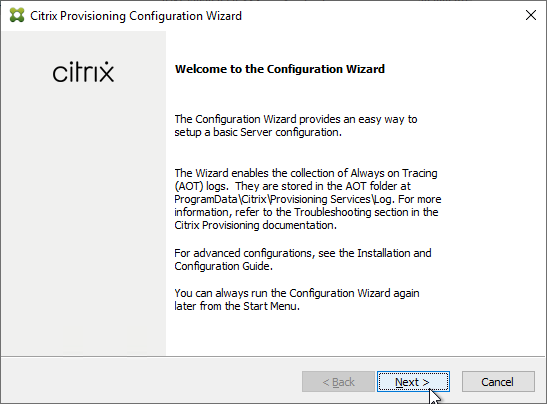
- The Citrix Provisioning Configuration Wizard launches automatically. If the database wasn’t pre-created, then the person running the wizard must have dbcreator and securityadmin roles on the SQL Server. If true, click Next. If not true, then cancel the wizard and launch it as somebody that does have those roles.
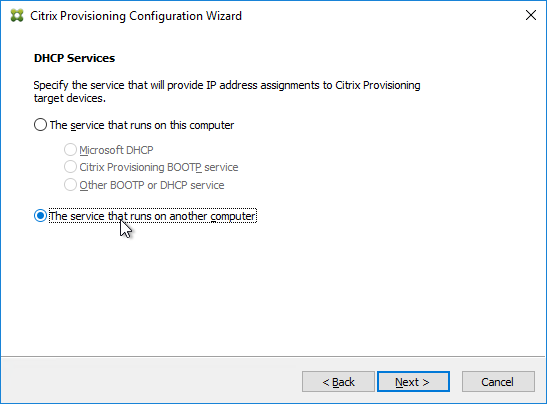
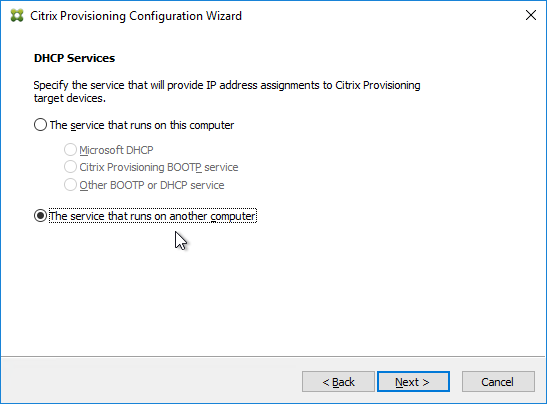
- The DHCP Services page appears. DHCP is typically hosted on a different server so select The service that runs on another computer. It is also possible to install DHCP on the Provisioning Servers. Click Next.
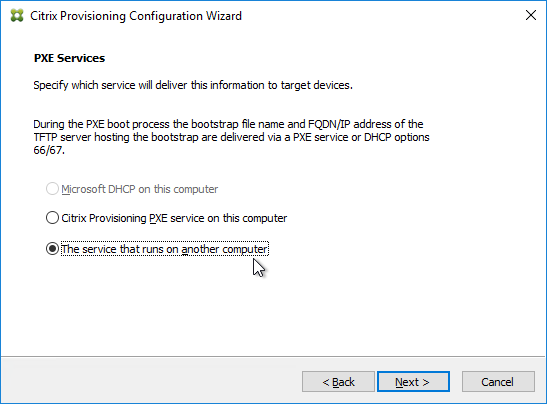
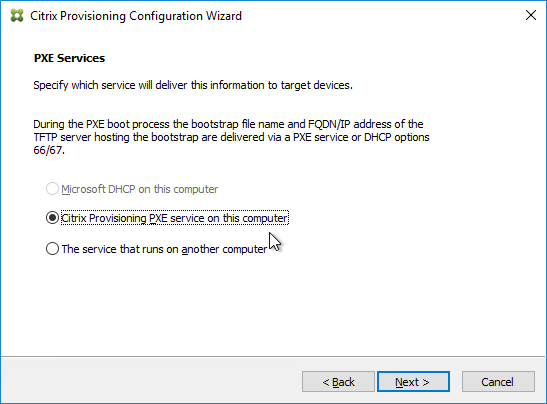
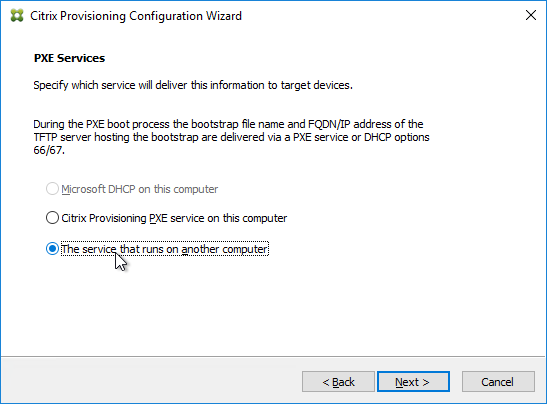
- In the PXE Services page, if you intend to use Boot Device Manager (BDM or ISO) instead of PXE, then change the selection to The service that runs on another computer, which disables the PXE service.
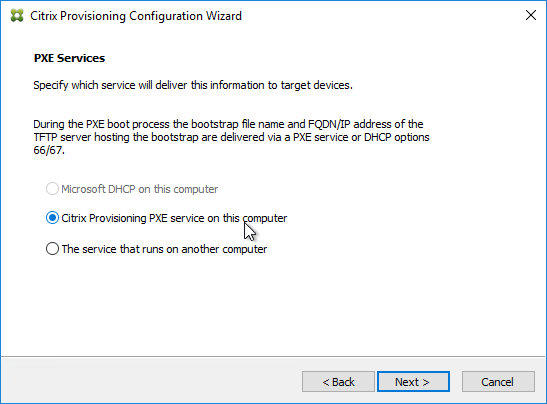
- If your Target Devices and Provisioning Servers are on the same broadcast network, then change the selection to Citrix Provisioning PXE service on this computer.
- Click Next.
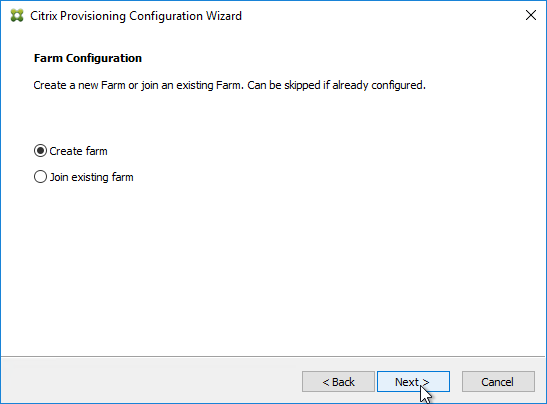
- In the Farm Configuration page, choose Create Farm, and click Next.
- In the Database Server page, enter the name of the SQL server. Citrix Provisioning 2203 and newer has an option for specifying credentials to the SQL server.
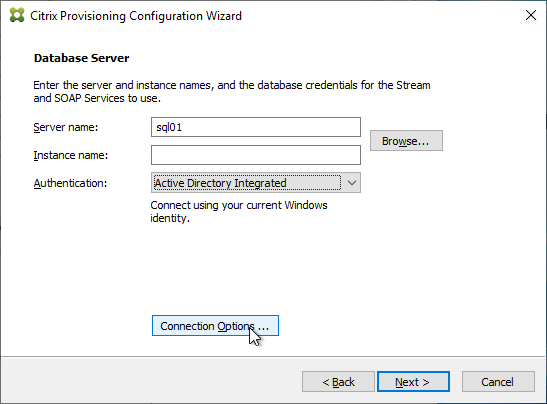
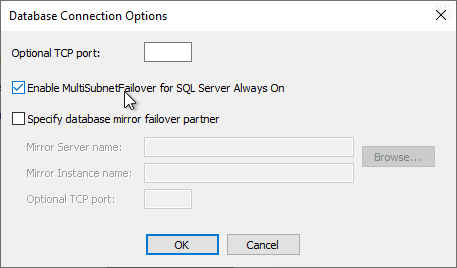
- In Citrix Provisioning 2203 and newer, click the Connection Options button and there’s an option for Enable MultiSubnetFailover for SQL Always On. There’s also an Optional TCP port field. Click OK and then click Next.
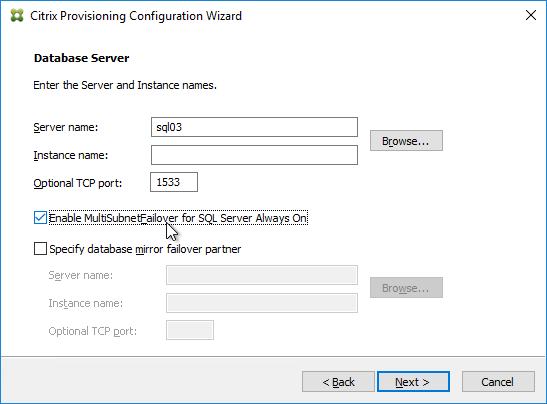
- Older versions of Provisioning have an option for MultiSubnetFailover on the Database Server page. Click Next.
- In Citrix Provisioning 2203 and newer, click the Connection Options button and there’s an option for Enable MultiSubnetFailover for SQL Always On. There’s also an Optional TCP port field. Click OK and then click Next.
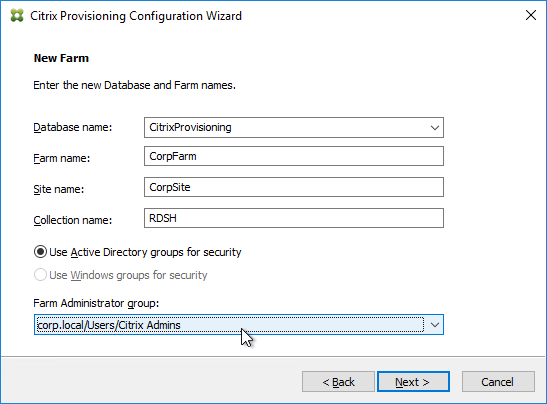
- In the New Farm page, enter the following:
- Enter a descriptive Database name. Put the word Citrix in the database name so the DBA knows what it is for.
- Enter a descriptive Farm name.
- Enter a descriptive Site name.
- Enter a descriptive Collection name. All of these names can be changed later.
- Select the Active Directory group that will have administrator permissions to Citrix Provisioning, and click Next. If you don’t see your group here, select any group you belong to, and you can fix it later in the console.
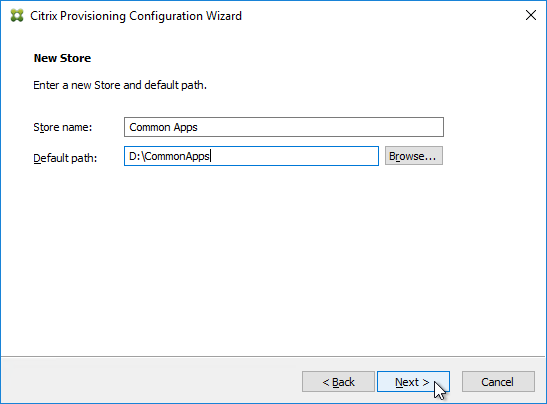
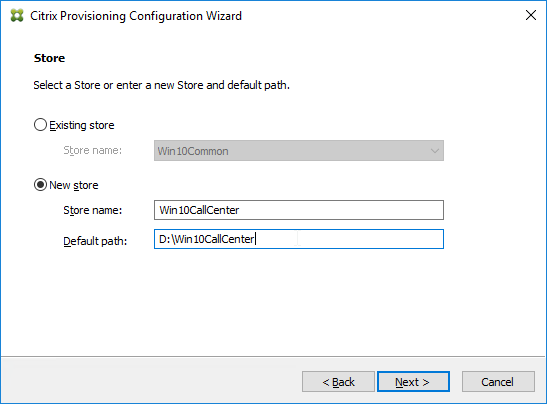
- In the New Store page, browse to one of the vDisk folders, and give the store a name. Then click Next.
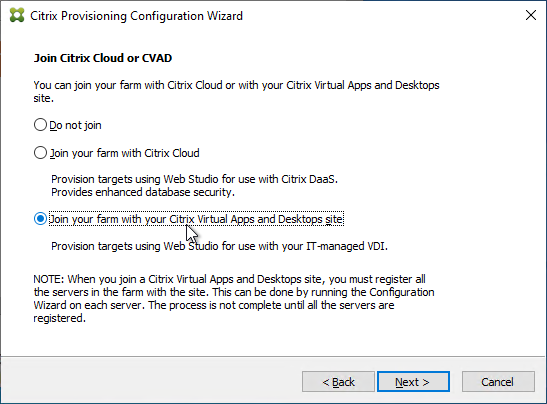
- You can optionally join the Provisioning Farm to CVAD or Citrix Cloud so that you can use Web Studio to provision Targets. The CVAD option is available in Citrix Provisioning 2311 and newer.
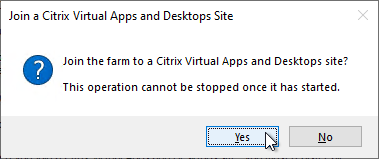
- Click Yes to join the farm to a CVAD Site.
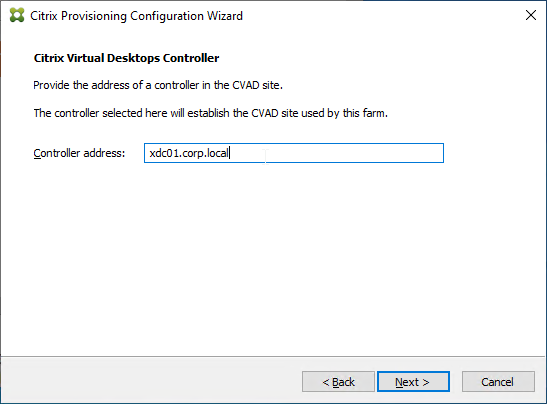
- In the Citrix Virtual Desktops Controller page, click Next.
- Later in the wizard, an SSL certificate is required on the PVS server.

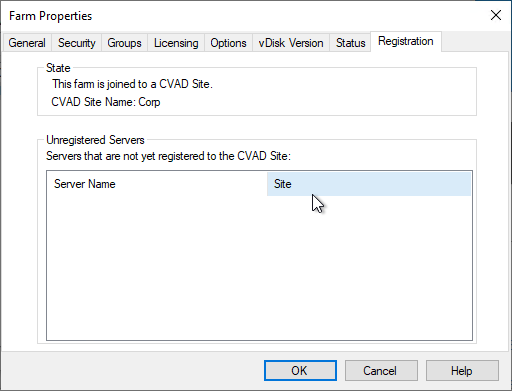
- The Registration tab in Provisioning Console > Farm Properties shows the status of CVAD Site registration.
- Click Yes to join the farm to a CVAD Site.
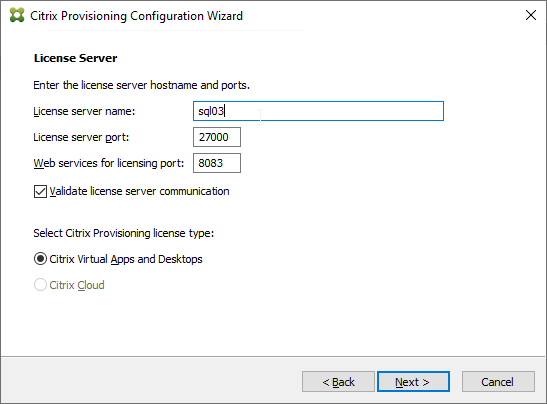
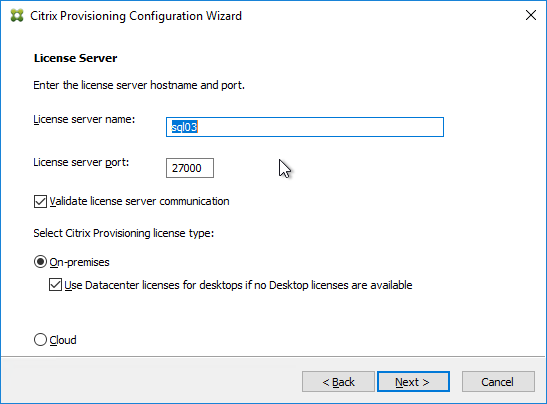
- In the License Server page, enter the name of your Citrix license server, check the box next to Validate license server communication, and click Next.
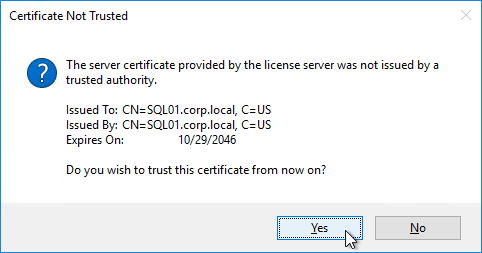
- Click Yes to trust the license server certificate.
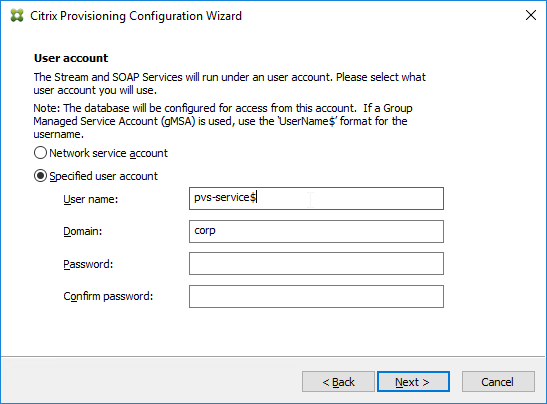
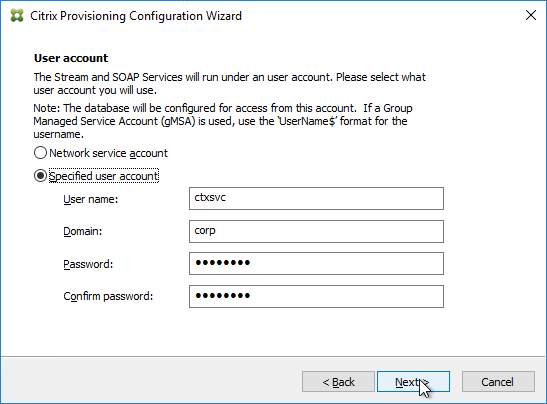
- In the User account page, notice it defaults to Network service account. This won’t work with KMS licensing so change it to Specified user account. Enter credentials for an account that is a local administrator on all Provisioning servers, and click Next. Note: Provisioning 7.16 and newer support Group Managed Service Accounts.
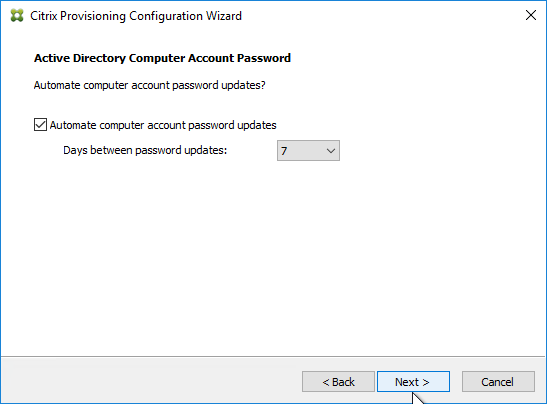
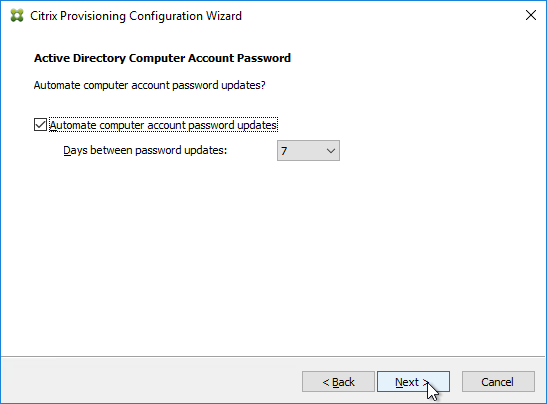
- In the Active Directory Computer Account Password page, check the box, and click Next.
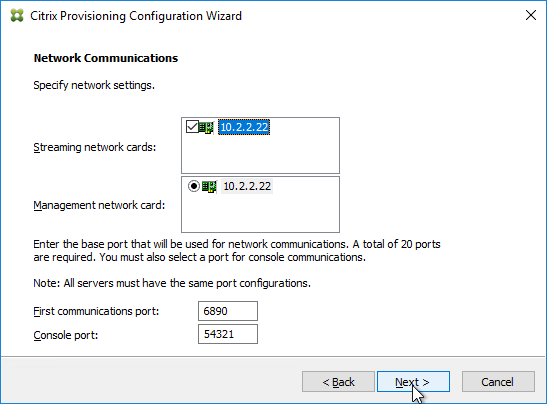
- In the Network Communications page, click Next.
- In the TFTP Option and Bootstrap Location page, check the box, and click Next.

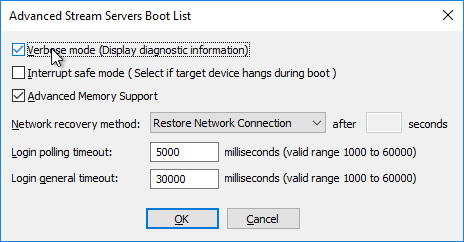
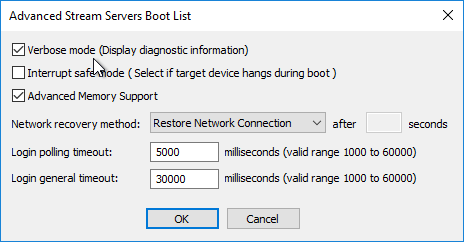
- In the Stream Servers Boot List page, click Advanced.
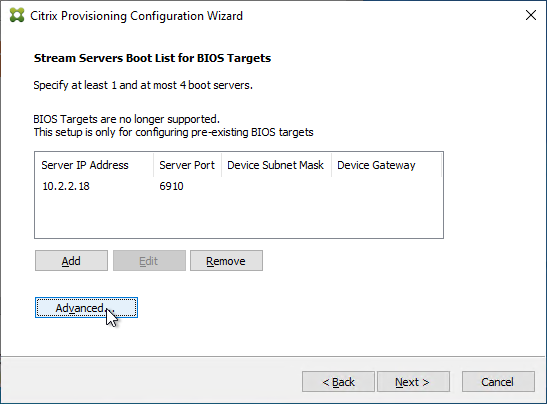
- Check the box next to Verbose mode, click OK, and then click Next.
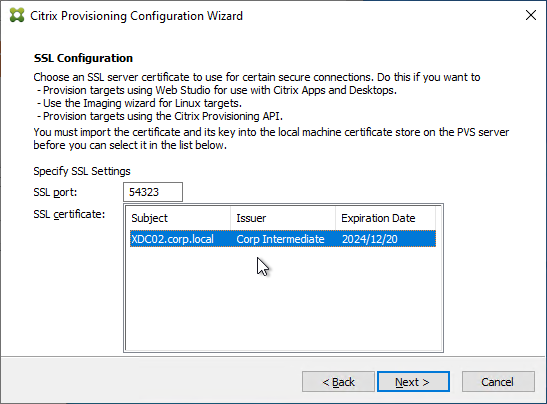
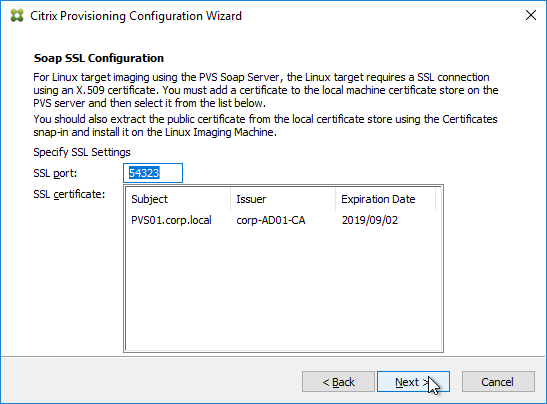
- If Provisioning 7.12 or newer, in the SSL Configuration page, click Next.
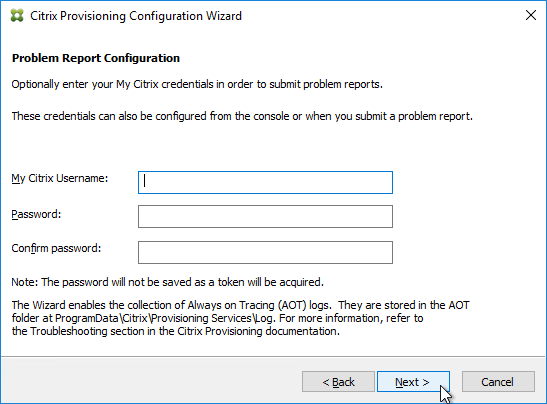
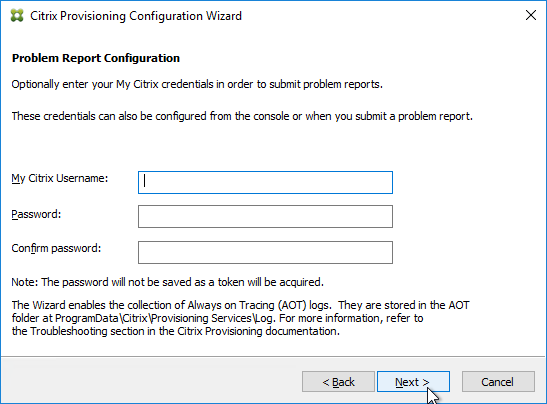
- If you see the Problem Report Configuration page, enter your MyCitrix credentials and click Next.
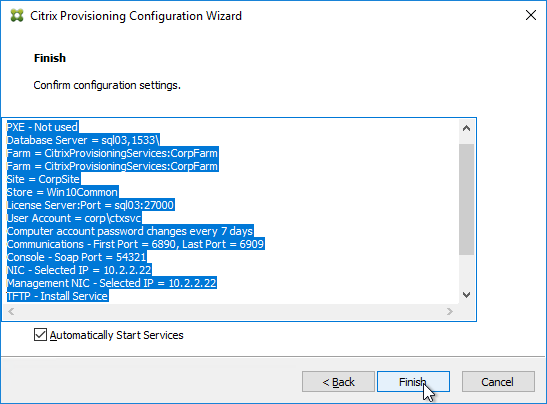
- In the Finish page, click Finish.
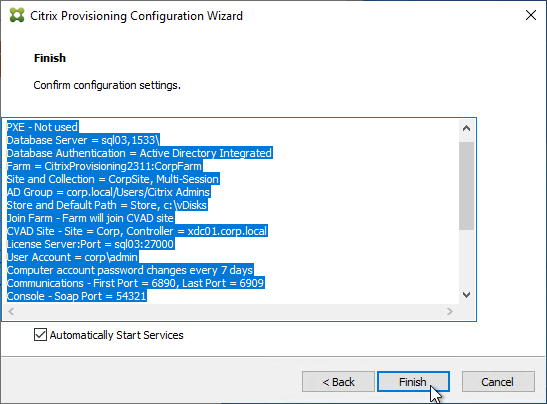
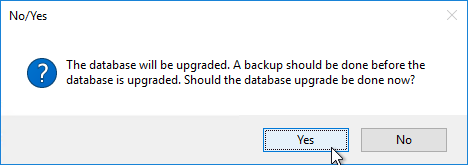
- If you are upgrading, then you might be asked to upgrade the database. Click Yes.
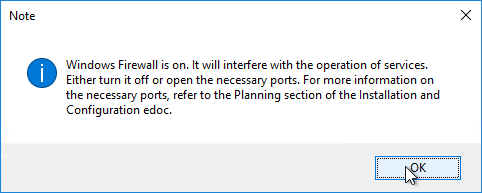
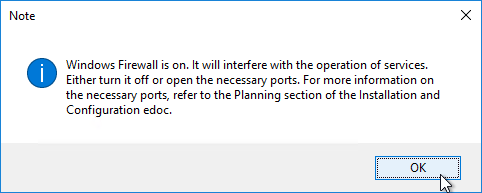
- Click OK if you see the firewall message.
- In the Finish page, click Done.

From Running the Configuration Wizard silently at Citrix Docs: Now that you have a configured server, you can run "C:\Program Files\Citrix\Provisioning Services\ConfigWizard.exe" /s to produce an .ans file at "C:\ProgramData\Citrix\Provisioning Services\ConfigWizard.ans". This .ans file can be modified and copied to additional Provisioning servers. "C:\Program Files\Citrix\Provisioning Services\ConfigWizard.exe" /a reads the .ans file and applies the configuration silently.
Configuration Wizard – Join Farm
- The Configuration Wizard launches automatically.
- There are two methods of handling SQL permissions:
- The person running the wizard must have db_owner on the database and securityadmin role on the SQL Server. This allows the wizard to add the service account to SQL logins and grant it access to the database.
- Or the person running the wizard can be limited to just db_owner permission to the database. The service account must be added manually to SQL logins by a DBA.
- The DHCP Services page appears. DHCP is typically hosted on a different server so select The service that runs on another computer. It is also possible to install DHCP on the Provisioning Servers. Click Next.
- In the PXE Services page, if you intend to use Boot Device Manager (BDM or ISO) instead of PXE, then change the selection to The service that runs on another computer, which disables the PXE service.
- If your Target Devices and Provisioning Servers are on the same broadcast network, then change the selection to Citrix Provisioning PXE service on this computer.
- Click Next.
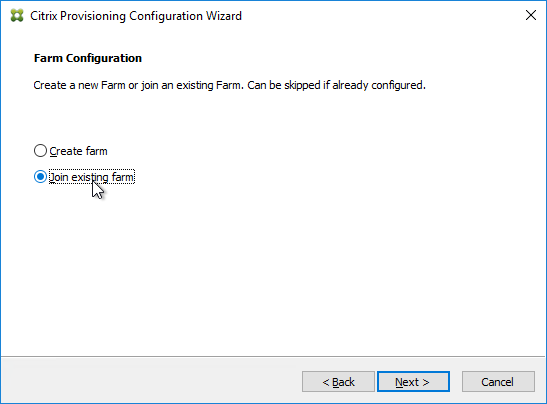
- In the Farm Configuration page, click Join existing farm.
- In the Database Server page, enter the name of the SQL server. Citrix Provisioning 2203 and newer has an option for specifying credentials to the SQL server.
- In Citrix Provisioning 2203 and newer, click the Connection Options button and there’s an option for Enable MultiSubnetFailover for SQL Always On. There’s also an Optional TCP port field. Click OK and then click Next.
- Older versions of Provisioning have an option for MultiSubnetFailover on the Database Server page. Click Next.
- In Citrix Provisioning 2203 and newer, click the Connection Options button and there’s an option for Enable MultiSubnetFailover for SQL Always On. There’s also an Optional TCP port field. Click OK and then click Next.
- In the Existing Farm page, select the database, and click Next.

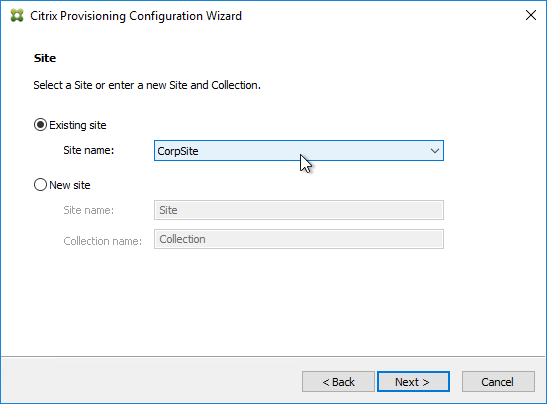
- In the Site page, select an existing site, and click Next.
- If you used the script to create the database, then there probably are no stores defined. Do so now.
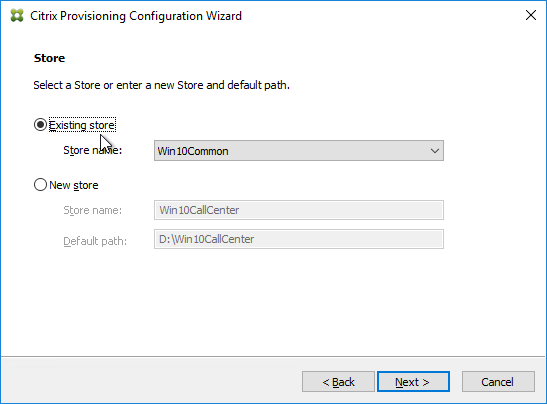
- Otherwise, in the New Store page, select the existing store, and click Next.
- In the License Server page, click Next.
- In the User account page, notice it defaults to Network service account. This won’t work with KMS licensing so change it to Specified user account. Enter credentials for an account that is a local administrator on all Provisioning servers, and click Next. Note: Provisioning 7.16 and newer support Group Managed Service Accounts.

- In the Active Directory Computer Account Password page, check the box, and click Next.
- In the Network Communications page, click Next.

- In the TFTP Option and Bootstrap Location page, check the box, and click Next.

- In the Stream Servers Boot List page, click Advanced.
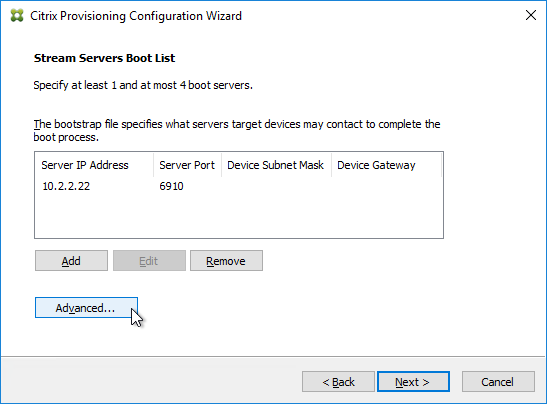
- Check the box next to Verbose mode, click OK, and then click Next.
- If Provisioning 7.12 or newer, in the Soap SSL Configuration page, click Next.
- If Provisioning 7.11 or newer, in the Problem Report Configuration page, enter your MyCitrix credentials, and click Next.
- In the Finish page, click Finish.
- Click OK if you see the firewall message.
- In the Finish page, click Done.

Troubleshooting – Networking Services Don’t Work After Reboot
If your PXE service or TFTP service does not work after a reboot of the Provisioning server, do the following:
- One option is to set the Citrix PVS PXE Service, Citrix PVS TFTP Service, and Citrix PVS Two-stage boot Service to Automatic (Delayed Start).
- The TFTP and Two-stage Boot services can be delayed by setting registry keys.
- Keys = HKLM\System\CurrentControlSet\services\BNTFTP (and PVSTSB)\Parameters
- Value = InitTimeoutSec (DWORD). 1 – 4 seconds. Default is 1.
- Value = MaxBindRetry (DWORD). 5 – 20 retries. Default is 5.
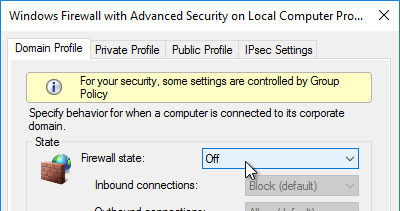
Disable Firewall
Disable the Windows Firewall to allow communication to all Citrix Provisioning Server ports. Or, see Citrix Provisioning Firewall Rules and manually open all required ports. If you change the ports in the Citrix Provisioning Console, then you’ll need to adjust the Windows Firewall rules accordingly.
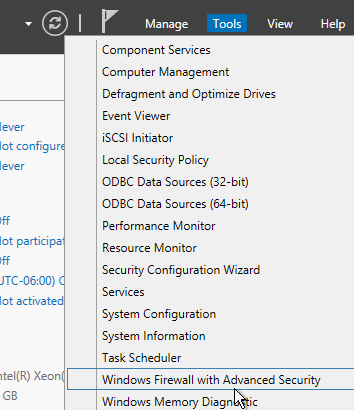
- In Server Manager, click Tools, and click Windows Firewall with Advanced Security.
- Click Windows Firewall Properties.
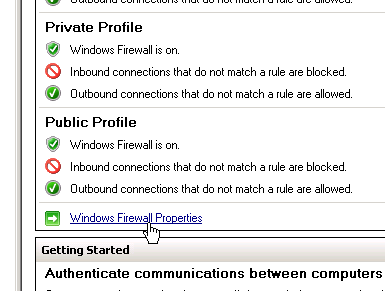
- On the Domain Profile tab, change the Firewall state to Off.
Disable BIOS Boot Menu
The versioning process in Citrix Provisioning will present a boot menu when booting any version except Production.
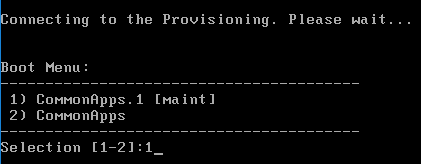
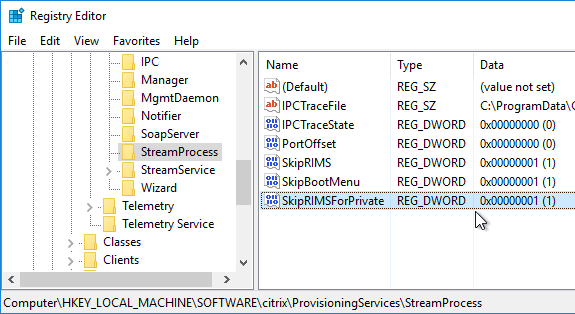
- To avoid this, create the DWORD registry value HKLM\Software\Citrix\ProvisioningServices\StreamProcess\SkipBootMenu on both Provisioning Servers and set it to 1. Note: the location of this key changed in Provisioning Services 7.0 and newer.
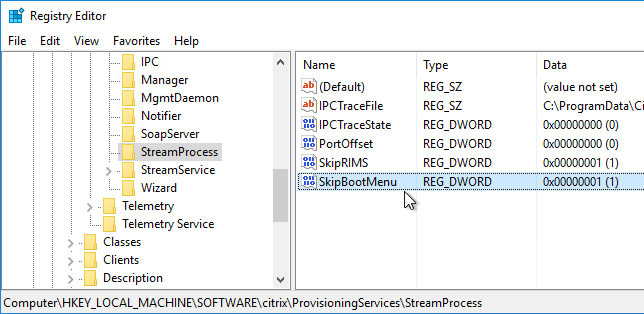
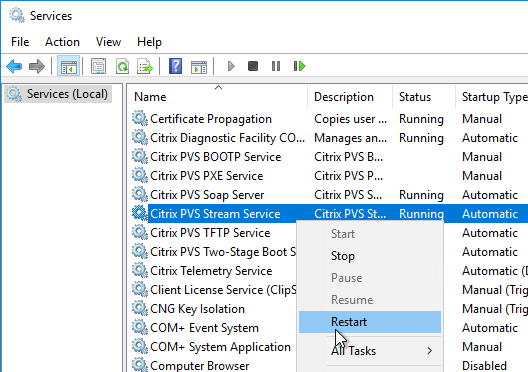
- Then restart the Citrix PVS Stream Service.
Private Mode vDisk – No Servers Available for vDisk
Citrix CTX200233 – Error: “No servers available for disk”: When you set a vDisk to Private Image mode (or new Maintenance version), if the Target Device is not connected to the server that contains the vDisk then you might see a message saying “No Servers Available for vDisk”.
- To avoid this, create the DWORD registry value HKLM\Software\Citrix\ProvisioningServices\StreamProcess\SkipRIMSForPrivate on both Provisioning Servers and set it to 1. Note: the location of this key changed in Provisioning Services 7.0.
- Then restart the Citrix PVS Stream Service.
Multi-Homed Provisioning Server
From slide 20 of http://www.slideshare.net/davidmcg/implementing-and-troubleshooting-pvs:, Multi-homed Provisioning server is not recommended but if you insist, and if running Provisioning 6.1 or older, configure the following. Provisioning 7.7 configuration wizard should have asked you for the management NIC.
- HKLM\Software\Citrix\ProvisioningServices\IPC
- New Reg_Sz (string) named IPv4Address with the IP of the NIC for IPC
- HKLM\Software\Citrix\ProvisioningServices\Manager
- New Reg_Sz (string) named GeneralInetAddr with the IP of the NIC and port
- e.g. 10.1.1.2:6909
Citrix 133877 Timeout Error 4002 in Provisioning Server Console after Clicking “Show Connected Devices“: when there are multiple streaming NICs assigned to the Provisioning Server, when Show Connected Devices was clicked in the Provisioning console, the following symptoms might be experienced: Server timeout error 4002, unusual delay of 3 to 4 minutes to list the connected devices, or Provisioning console stops responding. Complete the following to resolve the issue:
- On the Provisioning Server machine, under HKLM\software\citrix\provisioningServices\Manager key, create registry DWORD RelayedRequestReplyTimeoutMilliseconds, and set it to 50 ms (Decimal).
- Create a DWORD RelayedRequestTryTimes, and set it to 1.
- Open the Provisioning Server console and test by selecting the Show Connected Devices command.
Antivirus Exclusions
Citrix’s Recommended Antivirus Exclusions
Endpoint Security, Antivirus, and Antimalware Best Practices at Citrix Docs TechZone contains a list of recommended exclusions for Citrix Provisioning.
Citrix Blog Post Citrix Recommended Antivirus Exclusions: the goal here is to provide you with a consolidated list of recommended antivirus exclusions for your Citrix virtualization environment focused on the key processes, folders, and files that we have seen cause issues in the field:
- Set real-time scanning to scan local drives only and not network drives
- Disable scan on boot
- Remove any unnecessary antivirus related entries from the Run key
- Exclude the pagefile(s) from being scanned
- Exclude Windows event logs from being scanned
- Exclude IIS log files from being scanned
See the Blog Post for exclusions for each Citrix component/product including: StoreFront, VDA, Controller, and Provisioning. The Blog Post also has links to additional KB articles on antivirus.
Microsoft’s virus scanning recommendations
(e.g. exclude group policy files) – http://support.microsoft.com/kb/822158.
TFTP High Availability
BIOS machines have multiple methods of booting into PVS:
- PXE (network boot) on same subnet as Citrix Provisioning Servers.
- PXE (network boot) on different subnet as Citrix Provisioning Servers. DHCP Scope Options 66 and 67 required.
- Boot ISO created by Citrix Provisioning Boot Device Manager.
- Boot partition created by the Citrix Provisioning Virtual Desktops Setup Wizard.
EFI/UEFI machines have two methods of booting into PVS:
- PXE (network boot) on same subnet as Citrix Provisioning Servers. DHCP Scope Option 11 required.
- PXE (network boot) on different subnet as Citrix Provisioning Servers. DHCP Scope Options 66, 67, and 11 required.
If PXE booting on same subnet as Provisioning Servers, then make sure the PXE service is running on the Citrix Provisioning Servers. When your target device boots, it will broadcast a PXE Request message to the entire subnet. One of the Provisioning Servers PXE services will reply with the IP address of the TFTP service on the local Provisioning Server.
- If EFI/UEFI, the bootstrap file cannot be modified to contain the Provisioning Server addresses so you must instead configure DHCP Scope Option 11 with those addresses. See CTX208519 Configuring PVS for High Availability with UEFI Booting and PXE service.
If your Target Devices are not on the same VLAN/subnet as the Provisioning Servers, then use Boot ISO or Boot Partition.
HA for DHCP Scope Options:
- DHCP Scope Option 66 (TFTP Server address) only supports a single address. For High Availability, either DNS Round Robin your TFTP servers, or configure Citrix ADC to load balance TFTP. TFTP service runs on the Citrix Provisioning Servers.
- Citrix CTX131954 Implementation Guide – High Availability for TFTP
- NetScaler has native load balancing support for TFTP protocol.

- For EFI/UEFI, for DHCP Scope Option 67, see Unified Extensible Firmware Interface (UEFI) pre-boot environments at Citrix Docs for the correct file name.
DHCP Failover
The DHCP infrastructure must be highly available. And session hosts should be configured with DHCP Reservations. With multiple DHCP servers, any reservation should be created on all DHCP servers hosting the same DHCP scope. The easiest way to accomplish this is with the DHCP Failover feature in Windows Server 2012 and newer.
- Build two DHCP servers on Windows Server 2012 or newer.
- Create a scope for the Provisioning Target Devices.
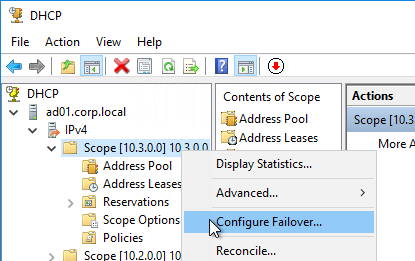
- Right-click the existing scope, and click Configure Failover.
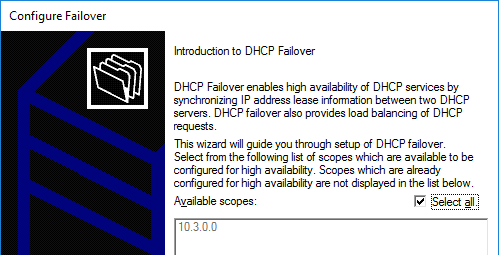
- In the Introduction to DHCP Failover page, click Next.
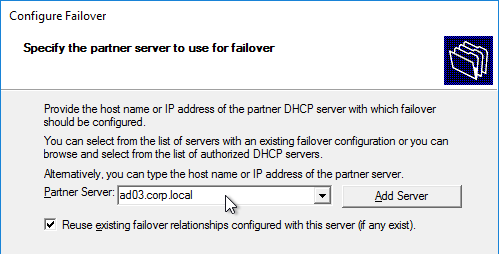
- In the Specify the partner server to use for failover page, enter the name of the other DHCP server, and click Next.
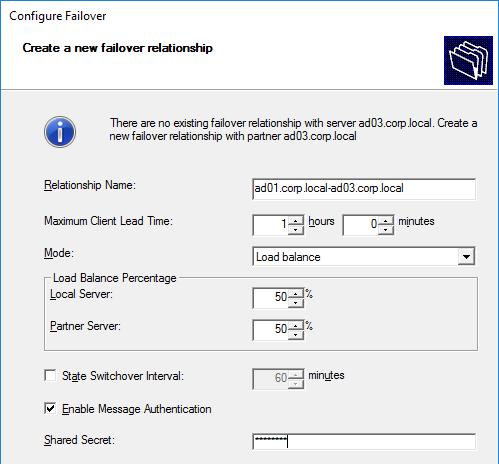
- In the Create a new failover relationship page, enter a Shared Secret, and click Next.
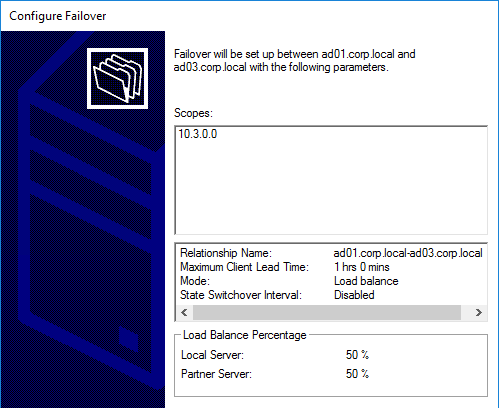
- Click Finish.
- Click Close.

Health Check
CTP Sacha Thomet’s PowerShell script to view the health/status of the Provisioning environment. Emails an HTML Report. For Provisioning 7.7 and newer, see https://blog.sachathomet.ch/2015/12/29/happy-new-script-pvs-7-7-healthcheck/.

# Enable MultiSubnetFailover for SQL Server Always on #
Hello Carl and readers,
in a Citrix environment where all PVS server are already in the status ‘Farm is already configured’, for each of those PVS server is it sufficient in Citrix Provisioning Configuration Wizard -> Farm Configuration -> Join existing farm -> Database Connection Options to simply checkmark ‘Enable MultiSubnetFailover for SQL Server Always On’ while no Citrix user sessions are persisting?
Or could this damage the database.
If so what best practice would you suggest?
Thanks in advance and kind regards
Bernd
We have 4 identical pvs servers configured to use a store located on isilon share. The isilon uses smartconnect providing ip’s for the share.
1 server has no issues and when opening the console enumerates the disk’s and the store. 3 other the console freezes when doing the same. Accessing the share via explorer under the pvs service account happens without issues. MCLI get diskinfo, works ok on the 1 server but on the three other returns “cannot connect to server”!!! Tnc port connectivity is ok. 54321,54322.
Where to look what is causing the issue.
Is the streaming service running as a service account and does the service account have Full Control of the share and NTFS? https://docs.citrix.com/en-us/provisioning/current-release/advanced-concepts/managing-high-availability/ha-shared-store-config
I successfully upgraded to 2402 LTSR CU1 today, but I had lots of issues like v_storm mentioned in his comment. The config wizard was crashing for me. I tried 2203 LTSR CU5 and had the same exact issues.
The registry fix listed in CTX338544 works. My first symptom was the configuration wizard was crashing right when it was supposed to auto kick off (post-update). I did not try manually installing the update suggested in the article, but that may work too.
Upgrading Citrix Provisioning and Virtual Apps & Desktops from 1912 to 2402. For the vDisks I found one article that says to do the Target Device Software before the VDA. I’ve only found that once in a Citrix article. It’s not noted too many places.
Is this the suggested order? Is there a risk to upgrading the VDA first?
https://docs.citrix.com/en-us/provisioning/current-release/upgrade shows vDisks last.
I meant the agent software (Target Device Software & VDA). The article says this.
When upgrading a virtual disk within a Citrix Virtual Apps and Desktops deployment, upgrade the master target device software before upgrading the VDA software.
Just wondering if there was an issue if I did the VDA first or should I wait to do it until after the Target Device software.
That’s so you can quickly deploy the updated vDisk once the server is upgraded.
I think I should have adjusted how I asked the question. While I’m upgrading, it’s not an in-place upgrade except for the server OS VDAs themselves. I’ve built a new 2402 parallel environment because of an OS upgrade for the infrastructure. However, I’m moving the existing VDAs from 1912 to the 2402 environment.
My plan was to do the site migration, then circle back and do the PVS migration. Certain reasons call for this phased approach. I was planning to upgrade the VDA software when I migrated sites, then do the target device software when I did PVS.
I know this doesn’t quite follow the flow of the upgrade order in the documentation. Just wondering now if I should hold off on the VDA upgrade until after I do PVS and then do all
vDisks updates.
Docs says “When upgrading a virtual disk within a Citrix Virtual Apps and Desktops deployment, upgrade the master target device software before upgrading the VDA software.”
Target Device software goes in the vDisk. It can’t be newer than the PVS server.
Carl,
After we updated to 2402 we are no longer able to Copy Target Device Properties > Select Vdisk assignment, and paste. It says successful but does not change the assignment once pasted.
We have 3 citrix sites and they are all behaving the same. Not seeing anything in the event logs. Have you encountered this before?
I’ve encountered the same issue, you’re not alone. No workaround found yet.
I have the same issue. This is fixed in CU1 I am told by our Citrix TAM.
Same Issue just upgraded last Night. Was told there was no CU1 for Provisioning…
All,
There is a delay on the Release of CU1 for Provisioning services only for 2402 LTSR. There is a Private fix available through your support contract that you can get for this issue. It is an easy fix:
+ Close pvs console.
+ Make sure no one else is using the console
+ Rename “C:\Program Files\Citrix\Provisioning Services Console\EnterpriseManager.dll” to “EnterpriseManager.dll.BKP”
+ Paste New: EnterpriseManager.dll to “C:\Program Files\Citrix\Provisioning Services Console\”
That’s it. run the console and test.
-Enjoy
Ray Z
Citrix Private Fix – CVADHELP-25504
Thanks Ray!
After upgrading to 2402 LTSR the upgraded server shows “down” in the PVS console.
The same PVS console can connect to the upgraded server and all services are running on the upgraded server. What’s wrong here.
Hi Carl,
We have 2203 cu4 PVS and targets, Win10 (BIOS) image. If i upgrade the PVS servers to 2402 LTSR – would i be able to stream the Win10 (Bios) image to the machines?
Existing vDisks are not affected but all new vDisks must be EFI.
Doing a new 2402 build and web studio is new to me, i normally split roles out
Would you recommend installing web studio on the delivery controllers (i guess having it on multiple also gives some resiliency to web studio)
or should i spin out a VM for web studio dedicated.
I wasled to believe you don’t want anything else on the ddcs, but citrix seems to recommend web studio to be on them
Site isnt too large ~ 500 users, two DDCs
Installing Web Studio also installs IIS so make sure your security team is OK with that on the Delivery Controllers.
No worries, In terms of best practice from a Citrix standpoint though, would it be recommended on the DDCs (i can see the benefits in terms of simplicity, availability etc)
If you were standing up a new site would you be comfortable installing it on DDCs
Security ill have review it in any case but i dont forsee an issue at this point
I usually install it on the DDCs.
Hello Carl,
Is there a way to change the PVS IP address on the Delivery Controllers?
I have 2 Delivery Controllers and 2 extra PVS servers. The Delivery Controllers still have the old IP address of a PVS server that no longer exists. Accordingly, I cannot add new machines in machine catalogs because it cannot find them because it is looking for the old PVS server.
Please help and thanks in advance!
On PVS Server, use the Virtual Apps and Desktops Setup Wizard or the Streamed VM Setup Wizard to push the devices to Delivery Controllers. https://docs.citrix.com/en-us/provisioning/2402-ltsr/configure/xendesktop-setup-wizard
I did both and also followed the instructions. The Streamed VM Setup Wizard did not ask me about the PVS servers. In the Citrix Virtual Desktops Setup Wizard, I selected BD Boot and there was still no PVS query. Is there another way?
An alternative way of adding an existing VM to a machine catalog would also be sufficient for me.
Thank you very much!
Are you asking how to change the boot method for the target devices? What method do they use today? If BDM partition, you can right-click the Device Collection, expand Target Device, and click Update BDM Partitions.
No, my problem is that I accidentally removed a VM from a machine catalog. When I tried to add it again via Citrix Studio, it couldn’t find it because it had entered the wrong IP address as the PVS server.
So that I can add the machine to the catalog again, I wanted to add the PVS server correctly to the delivery controller on which the Citrix Studio is running, but unfortunately I don’t know how.
I ran the wizards according to your recommendation, but nothing changed.
Try the Export Devices wizard by right-clicking the PVS Site.
Hello Carl,
I have an OnPremise solution installed in the company with version 2203 LTSR. I have updated the Citrix components to 2402 LTSR and after the update they worked as usual. I then wanted to update the PVS. When I update the PVS, the Studio and Citrix Site Manager do not work. I am asked 3 times to log in to Citrix Cloud, after logging in I realize that the configuration of the Studio or the Site Manager are no longer there and I should enter the address of the Delviery Controller. When I enter and confirm this, it tells me that it cannot reach them – although there are no network-side problems and no firewall-side problems either. Please help me so that I can install the update and use the new PVS version.
Kind Regards
Is PVS on a separate server from Delivery Controller? Newer PVS installs Citrix Cloud SDK, which should not be installed on Delivery Controller.
No, the PVS is installed on a Delivery Controller. So how can I fix this Problem?
Move it to a separate server. Uninstall all SDK from the Delivery Controller. Then install the SDK from the CVAD ISO under /x64/Desktop Delivery Controller.
Thank you, it worked!
Hi,
After making an image dump to the provisiong i got this error
trying to change properties
i get this error culture is not supported, parameter name:culter 3072 (0x0c00) is an invalid culture identifier
Installed 2311 on windows 2022….
upgraden the master image from 2203 to 2311 (xenapp vda etc)
Hi there Carl I would appreciate your input on this on:
https://discussions.citrix.com/topic/419063-cannot-join-new-pvs-server-to-farm-related-to-streamprocess/
It always fails on “Configuring Services”. We simply want to add a new PVS server to a farm that has been running for over a year. I assume the service account has the correct permissions on the sql server because it’s been active already for so long.
Hi Luan,
Were you able to have this sorted out? I am running in to the exact same problem.
Kr,
Hich
Hi
I have been using Citrix PVS for years to stream Windows, starting with XP, then Windows 7, and currently Windows 10 22H2. Now I want to switch to Windows 11 22H2. Is that possible, and if so, are there any instructions available? The workstations are capable of running Windows 11 22H2.
Best regards
You will need UEFI instead of BIOS. Otherwise, there shouldn’t be anything different.
OK, so you mean with this Bootfile => pvsnbpx64.efi?
No. Make sure your vDisk is based on a UEFI-enabled machine. Make sure your template VM is based on a UEFI-enabled machine. For Windows 11, you should encrypt both machines and add a vTPM. You will need a DHCP Option to specify the PVS Server addresses for the UEFI bootstrap.
Thank you, is there a step-by-step description available?
Hi
The migration with P2PVS end always with this error:
Mittwoch, 14. Juni 2023 16:53:28
06/14/23 16:53:28: Citrix Provisioning 7.33.0 Copyright (c) 2001-2022 Citrix Systems, Inc. All rights reserved.
06/14/23 16:53:28: Microsoft Windows 6.2.9200 Client
06/14/23 16:53:28: Suite=0x00000100
06/14/23 16:53:28: Processor Architecture: x64
06/14/23 16:53:28: Number of processors: 8
06/14/23 16:53:28: WindowsFreePercentage that can be set in [parameters] section of P2PVS.ini: 25
06/14/23 16:53:28: PartitionOffsetBase that can be set in [parameters] section of P2PVS.ini: 1048576
06/14/23 16:53:28: VolumeDiscoveryTimeoutAsSeconds that can be set in [parameters] section of P2PVS.ini: 30
06/14/23 16:53:28: VolumeShadowCopyPollTimeAsMs that can be set in [parameters] section of P2PVS.ini: 0
06/14/23 16:53:55: Physical to VHDX started at Mittwoch, 14. Juni 2023 16:53:55
06/14/23 16:53:55: Gathering Volume Shadow Copy Writer metadata…
06/14/23 16:53:58: Adding volume \\?\Volume{AFA8309B-092E-11EE-B058-D45DDF1A2768}\ to snapshot…
06/14/23 16:53:58: Preparing for backup…
06/14/23 16:53:58: Gathering writer status…
06/14/23 16:53:58: Committing shadow copies…
06/14/23 16:54:02: Gathering writer status…
06/14/23 16:58:31: Failed to write secondary GUID partition table header. (0xE0210015)
06/14/23 16:58:31: Physical to VHDX stopped at Mittwoch, 14. Juni 2023 16:58:31
06/14/23 16:58:31: Physical to VHDX lasted 275.7 seconds
I also tried with the P2PVS.exe from 2305, no changes.
Do you have any idea why this error occur?
Bios Mode is UEFI
Secure Boot is ON
2 Partitions one EFI 100 MByte one C: 80 GByte
The volume Volume{AFA83…. is Drive c:
Best regards
Bertand
HI,
please can someone share the actual Best Practice regarding the TCP Offloading Settings for a PVS Server and for Windows Server 2019 Terminalserver on a ESXi 7 Host (DL380Gen10)
Are you asking if TcpOffload should be disabled? There is debate around this. I’d try both enabled and disabled and see if there’s any difference in performance or retries.
I am on the side of DisableTaskOffload is NOT required. This comes from the original PVS product architect. Since PVS 6.0 running on Server 2008 R2 or later, DisableTskOffload is not required. He tried for years to get that recommendation changed in the CTX articles and product documentation.
Another thing rarely mentioned is Receive Side Scaling (RSS). If that option is available in your NIC properties, it should be enabled. RSS enables the TCP network stack to get one thread per vCPU assigned to the VM. If your VM has 4 vCPU, that would give four threads to the TCP stack, greatly improving throughput and performance.
Yes TCPOffload Options, so try and error for every envirorement shuold be the best?
Any rekommandation PVS Servers and Terminalservers on different Clusters with an external paketfilter?
You usually minimize hops between the Target Devices and PVS Servers. In PVS, network traffic is the same as storage traffic and should be optimized accordingly.
We have configured Citrix PVS in Azure, However the the Target device fails to boot from the vdisk, it directly boot from the harddisk
just FYI… i copied the BDM.exe over to the target device and ran the setup from the target device to get the BDM.iso created – the BDM.iso resides in the EFI format disk (Msft virtual disk)
Could you please assist on how to get the target device stream from the PVS server using the vdisk
Hey Carl
I this issue atm:
When i stop the stream service on PVS1, failover to PVS2 does not work. The other way around it does work. Do you have any ideas? The infrastructure is 2203. PVS servers have two network cards, 1 for pxe boot, 1 for management.
Does your bootstrap include both servers?
Both servers show the same vDisk Replication Status? HA is enabled on the vDisk?
Bootstrap contains both servers. By HA enabled on Vdisk do you mean load balancing? Replication status is also green on both servers
Carl, we are testing new targets with UEFI, we have always used BDM partition, no PXE or TFTP, however you write that for UEFI and PVS one option is to use DHCP Option 11. My question is can we continue to use BDM and just add Option 11 to DHCP scope with a list of PVS server IP’s, or do we need TFTP and PXE and move away from BDM for UEFI targets?
I’m not sure. Try it and see if it works.
https://docs.citrix.com/en-us/provisioning/current-release/configure/configure-uefi.html#configuring-bootstraps
https://xenit.se/blog/2017/04/18/citrix-pvs-uefi-boot-targets/
Hi Carl,
Do you have experience with CIFS share store with more PVS servers
and vdisk versioning? Our experience in large environment after several years is that random vdisk corruption occurs in this configuration.
It looks that issue usually occurs on maintenance machine when there are write
operations to vdisk and the PVS servers decide to rebalance the machines between servers. The promoted version usually cannot boot or there are detected errors with chkdsk.
Thnx.
Peter
My customers that tried it usually move to local storage.
I am a huge fan and proponent of local PVS server storage for the Store and vDisks.
Thank you Carl S. and Carl. W.
In our usecase there are more advantages to use shared storage (we have hundreds of PC, tens of images and several vdisk/PC admistrators …)
and also we need to have HA working in case that one server need to go under maintenance. Because of this we have decided to use cifs shared storage.
How you solve with local PVS storage high availability for clients?
Clients (PC) need to be rebooted and boot from another server, right?
Thanks.
Put the same vDisk on multiple servers. In PVS Console, edit the vDisk and enable High Availability. It will find the vDisk file on multiple servers. If PVS Server fails, it automatically reconnects to a different PVS server that is streaming the same vDisk file.
I 100% agree with CS, as that is what I always did. I used a Robocopy script to copy vDisks from my “master” PVS server to the other PVS servers. No customer ever had an issue or outage from using vDisks on local PVS servers.
I understand. But our another problem is that we have several “image” administrators and they do not have access to PVS servers directly and their storage. They are maintaining updates of vdisks (versions) from their PC with PVS console, promoting them into production, based on user’s feedback revert to previous versions ASAP etc. sometime several times during one day.
I cannot really imagine how to manage this – how the image administrator will start the copying process etc. I have some ideas but from my point of view it makes whole process more complicated 🙁
With CIFS share storage is everything working fine (fast and simple), there are “only” problems with updates – random image corruption and it usually occurs when the computer in maintenance mode is migrating (because of load balance) between PVS servers. Is there any way how to “sticky” specific computer to specific PVS server? It is possible to set this on the vdisk (disable load balance and make it sticky to specific PVS server and it work fine – no image corruption was detected), but this is not good way, because sometimes image administrator forget to enable back load balancing of the vdisk 🙁
Thanks.
Hi Carl and Citrix fellow mates!
I am pretty new to the PVS side of the house but learning as we go.
We are in the middle of a migration from 7.15 to 1912 LTSR CU5 but my question is how do I make the URLS from 7.15 flip over to 1912 so that 1912 will be live for testing, like what areas I need to change, not 100% sure on this one. Is it on the netscaler? or storefront? or studio? or workspace? PVS or all etc? am confused so any guidance will be awesome.
Are you load balancing? If so, just change the servers behind your load balancing VIP.
For testing, you’ll probably want a new load balancing VIP. Then edit the HOSTS file in your testing machines to point the old FQDN to the new VIP.
Hi Carl
Is this setting “DisableTaskOffload” on both PVS-Server and Target-Device still applicable in today’s “Provisioning – v2212” configurations?
Thanks
Not sure. Many people argue against it.
Even Citrix internally can’t agree. I’ve heard them say “it’s not necessary anymore, but we still recommend adding it, ‘just in case’.”
NO IT IS NOT NEEDED. The previous PVS architect and I spent a couple of years trying to get that recommendation removed from CTX articles and product documentation. You only need DisableTaskOffload if you are running PVS on a server OS earlier than WIndows Server 2008 R2 OR you are still running PVS 5.x.
PVS 6 and later running on Windows Server 2008 R2 and later have their own TCP code and stack.
Has anyone run across this issue, PVS version 2206, Infoblox DHCP scopes, using BDM, both win10 and server 2022 are getting a new IP address on each reboot. This is only occurring for PVS VM’s, if I just build a win10 VM on this same network, reboots maintain the same IP.
Maybe you need “Ignore UID” https://docs.infoblox.com/space/BloxOneDDI/35455001 and https://support.citrix.com/article/CTX200036/error-a-duplicate-ip-address-was-assigned-on-provisioning-server-target-devices
I will take a look at the UID setting in infoblox, im not seeing this problem in a separate datacenter using ltsr 1912, im assuming the infoblox settings are identical.
As for the citrix article, we are not using PXE, would this still apply?
A few things i left out, where i do not have this issue is with PVS LTSR 1912, and also the firmware is Bios, where as the problem VM’s are PVS 2206 and im using UEFI for firmware.
Here is an example of RSS enabled(default) and disabled
I agree with Webster, that it should not be needed. But testing it shows if disabled the data copy is much faster. When I see things like this, It’s hard to say it’s not needed anymore. hard to say. I would test it and see if it helps in any environment.
https://worldofeuc.slack.com/archives/CKL5UCNCX/p1690539978619389
Hello Carl, I have a question about updateing the PVS Server Windows OS to 2019. Its currently 2012R2 and we use 2 PVS Servers in HA and a mirror Database. 1912 CU3.
How to update the OS underneath it? Normally I would spawn a new Server install 2019 and install PVS. Then give it same name and ip as the old one which gets turned off before. Will DB recognize it?
Or do I need to install a new PVS Server, with new name and ip and add it into the HA, then uninstall and remove one of the old.
Or is the a totally other way?
Thanks for your opinion on that.
Hi Chris, not Carl here but i can share my thoughts about this with you because i did nearly the same a few weeks ago. My way was to install two new Windows servers with of course new IPs, install PVS on them and join them to the existing farm. Afterwards copy / clone the PVS Server properties from the existing ones to the two new servers in the PVS console. Make sure the Servers are active for your vDisks Stores. Alter the DHCP Scope options -> For my environment it was option 011 and 066 and add the new PVS Server IPs. For tests i stopped the stream service on the old PVS Servers and booted a few devices. If the test are fine, remove the old PVS servers from the farm and the DHCP Scope options.
Carl, you wrote that “Bios Machines have Multiple methods of booting into PVS:” But “EFI/UEFI machines have two methods of booting into PVS:” These two options being PXE boots only, are we not able to use BDM with UEFI, I have built vdisks that are streaming fine using BDM Partition and UEFI enabled as the firmware. Is the BDM partition with UEFI unsupported, or am i missing something here?
BDM Partition on C: drive is probably fine. But on UEFI, BDM ISO and PXE image can’t be modified to include the PVS Server IP Addresses, so those addresses must be delivered through some other method (DHCP scope option).
Carl,
As always, thanks for everything you do for the EUC community. I have a question concerning disk formatting for Citrix PVS vdisk storage. It’s been quite some time, but back around the 2016 timeframe, there were many article floating around regarding the use of ReFS formatting of the pVS Store disk, in lieu of the traditional NTFS. I’m curious if this is still a viable recommendation, or if it’s even supported by Citrix. This relates to a new setup of CVAD/PVS 2203 LTSR. Thanks for any information you can provide.
ReFS makes it faster to Create Base versions (merge snapshots). I’m not aware of Citrix not supporting ReFS.
Hi all,
We also faced several issues regarding January &/ February Updates 2022, where the PVS Configuration Wizard did not start properly. As a solution we had to set the regkey, SkipForestLevelTrust, which is described by Citrix here https://support.citrix.com/article/CTX338544
@Carl, do you know maybe, what kind of services could fail, while this key is set to 1?
Thanks in advance
V
Hi all,
I can (unfortunately) reply by myself. When doing so, it won’t hurt your infrastructure as long as you don’t use citrix over two different domains. If you manage citrix server systems at one domain and the worker/vdi at the other one you have to a domaintrust. If you then disable the regkey as also written down by citrix, you are welcome to have issues with PVS server.
Then you should apply the Hotfixes provided by citrix – which are already mentioned in the Citrix Blog I posted before.
Regards
V
Hi,
Just want to share my thoughts about TFTP High Availability. In the documentation from Citrix and mentioned in this article it states that one of the options to achieve TFTP High Availability is to use a DNS round robin name as a DHCP option 66. Today i found out that the DNS resolving for option 66 actually takes place on DHCP server level and not the DHCP client (as i always presumed). So this means the round robin mechanism does not work from a PVS target perspective and therefore could result in TFTP not being High Available as the DHCP server will deliver the same TFTP adress every time for option 66.
Am i missing something?