Navigation
This article applies to all 7.x versions of Citrix Provisioning, including 2411, 2402 LTSR, and 2203 LTSR.
- Change Log
- Planning and Versions
- Citrix License Server Version
- Upgrade
- vDisk Storage
- Installs/Upgrades
- Database Configuration
- Troubleshooting – Networking Services Don’t Work After Reboot
- Firewall
- Disable BIOS Boot Menu
- Private Mode vDisk – No Servers Available for vDisk
- Multi-homed Provisioning Server
- Antivirus Exclusions
- TFTP High Availability
- DHCP Failover
- Health Check
💡 = Recently Updated
Change Log
- 2025 March 7 – updated Versions section with Citrix Provisioning 2402 LTSR CU2
- 2025 Jan 9 – updated Versions section with Citrix Provisioning 2203 LTSR CU6
- 2024 Dec 4 – updated Versions section and Install sections with Citrix Provisioning 2411
- 2024 April 30 – updated Versions section with Citrix Provisioning 1912 LTSR CU9
- 2023 Mar 20 – updated Versions section and Install sections with Citrix Provisioning 2303
- Join PVS Farm to Citrix Cloud
- 2022 July 29 – updated Versions section with PVS 7.15.45 (from LTSR 7.15 Cumulative Update 9)
Planning and Versions
CTX220651 Best Practices for deploying PVS in multi-geo environments: ensure that Provisioning farms do not span data centers with a network latency that can affect communications between the Provisioning Servers and the SQL database
SQL 2019 is supported with Citrix Provisioning 2003 and newer.
Citrix Provisioning Firewall Rules
The most recent Current Release version of Citrix Provisioning is 2411.

For LTSR CVAD, deploy the Citrix Provisioning version that matches your CVAD version:
- For Citrix Virtual Apps and Desktops (CVAD) 2402 LTSR, deploy Citrix Provisioning 2402 LTSR CU2

- For Citrix Virtual Apps and Desktops (CVAD) 2203 LTSR, deploy Citrix Provisioning 2203 LTSR CU6.

- For Citrix Virtual Apps and Desktops (CVAD) 1912 LTSR, deploy Citrix Provisioning 1912 LTSR Cumulative Update 9 (CU9).

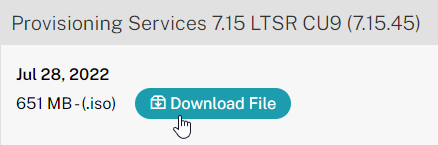
- For XenApp and XenDesktop 7.15 LTSR, deploy 7.15.45 (7.15 LTSR Update 9). 7.15.45 is the version included in XenApp/XenDesktop LTSR 7.15 Cumulative Update 9. Yes, it’s confusing.
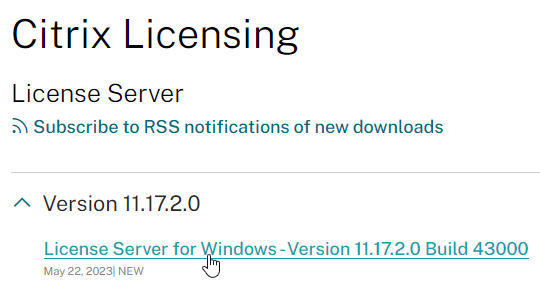
Citrix License Server Version
Upgrade the Citrix Licensing server to the latest version. Citrix now requires the latest License Server version and is configured to upload license telemetry data.
Upgrade
Windows Server 2022 is supported with Citrix Provisioning 2203 and newer.
VMware ESXi 8.0 is supported with Citrix Provisioning 2212 and newer.
SCVMM 2022 is supported with Citrix Provisioning 2203 and newer.
If you are upgrading from an older version of Citrix Provisioning, do the following:
- In-place upgrade the Citrix License Server.
- In-place upgrade the Provisioning Console.
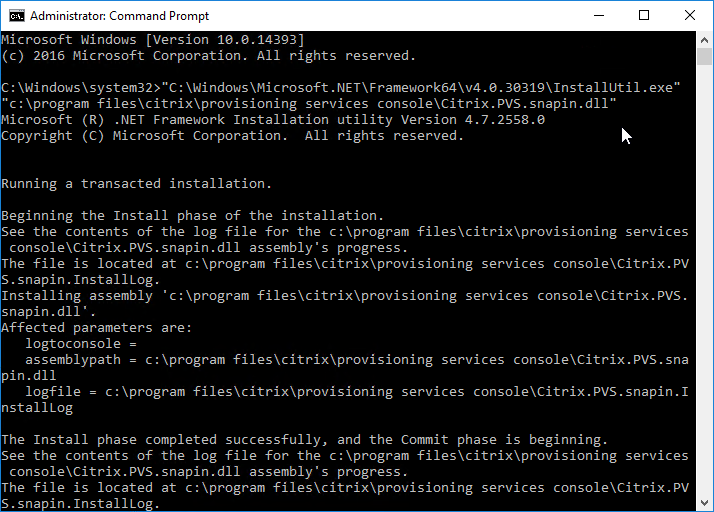
- Re-register the Citrix.PVS.snapin.dll snap-in:
"C:\Windows\Microsoft.NET\Framework64\v4.0.30319\InstallUtil.exe" "c:\program files\citrix\provisioning services console\Citrix.PVS.snapin.dll"
- If upgrading from 7.15.3000 to 7.15.4000, then manually upgrade the snap-ins. See CTX256773 Powershell SnapIns are not upgraded from PVS 7.15 LTSR CU3 to 7.15 LTSR CU4 after the upgrade is complete
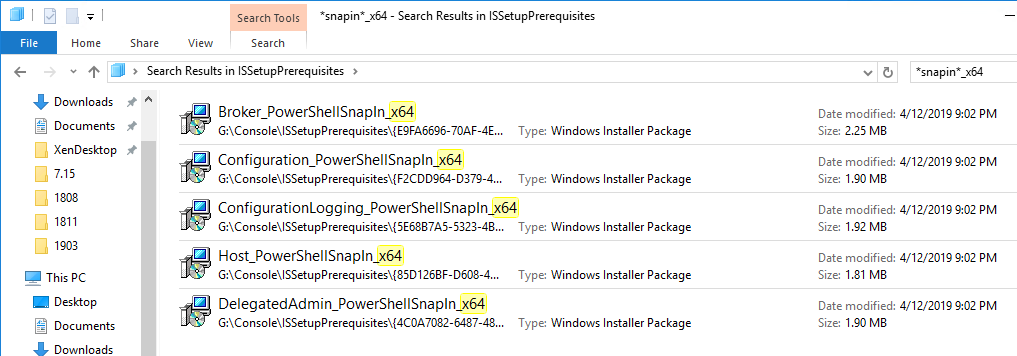
- Re-register the Citrix.PVS.snapin.dll snap-in:
- In-place upgrade the Provisioning Server. If you have two or more Provisioning servers, upgrade one, and then the other. If High Availability is configured correctly, then the Target Devices should move to a different Provisioning server while a Provisioning server is being upgraded.
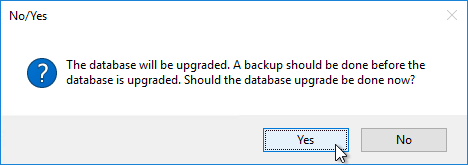
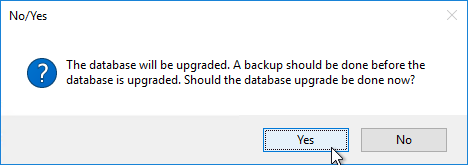
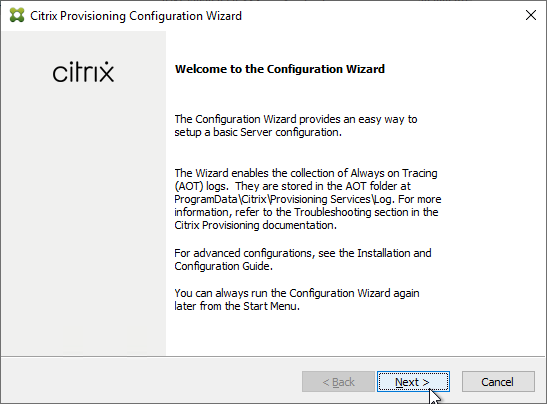
- After the first Provisioning server is upgraded, run the Configuration Wizard. You can generally just click Next through the wizard. At the end, you’ll be prompted to upgrade the database. Then upgrade the remaining Provisioning servers and run the Config Wizard on each of them too.
- After the first Provisioning server is upgraded, run the Configuration Wizard. You can generally just click Next through the wizard. At the end, you’ll be prompted to upgrade the database. Then upgrade the remaining Provisioning servers and run the Config Wizard on each of them too.
- Upgrade the Target Device Software inside each vDisk. Don’t do this until the Provisioning servers are upgraded (Target Device Software must be same version or older than the Provisioning Servers).
- If your Target Devices are 7.6.1 or newer, you can create a Maintenance version, boot an Updater Target Device, and in-place upgrade the Target Device Software.
- If your Target Devices are older, then you must reverse image.
vDisk Storage
Do the following on both Provisioning Servers. The vDisks will be stored locally on both servers. You must synchronize the files on the two servers: either manually (e.g. Robocopy), or automatically (e.g. DFS Replication).
Create D: Drive
- In the vSphere Web Client, edit the settings for each of the Provisioning server virtual machines.
- On the bottom, use the drop-down list to select New Hard Disk, and click Add.
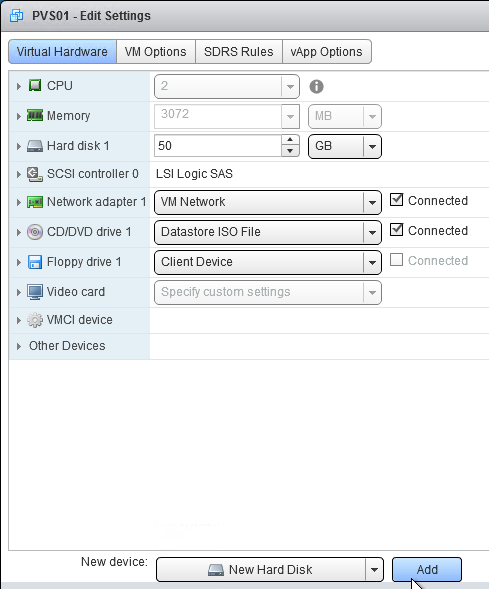
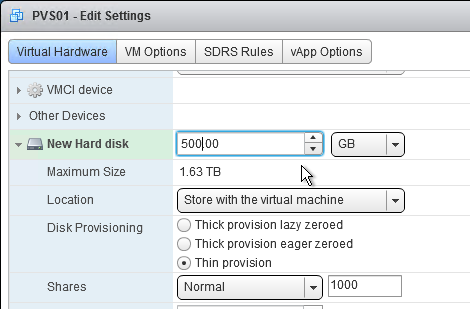
- Expand the New Hard disk by clicking the arrow next to it.
- Change the disk size to 500 GB or higher. It needs to be large enough to store the vDisks. Each full vDisk is 40 GB plus a chain of snapshots. Additional space is needed to merge the chain.
- Feel free to select Thin provision, if desired. Click OK when done.
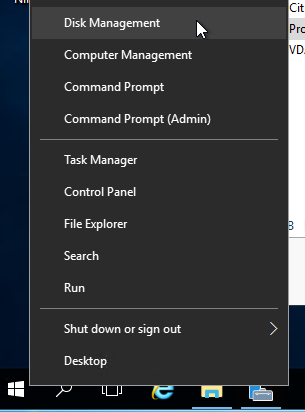
- Login to the session host. Right-click the Start Button, and click Disk Management.
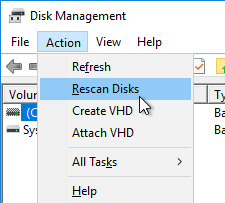
- In the Action menu, click Rescan Disks.
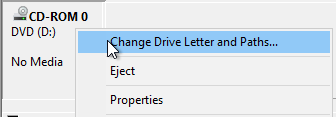
- On the bottom right, right-click the CD-ROM partition, and click Change Drive Letters and Paths.
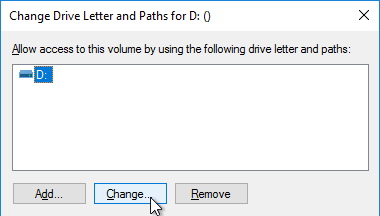
- Click Change.
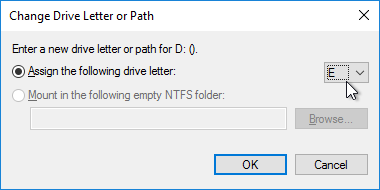
- Change the drive letter to E:, and click OK.
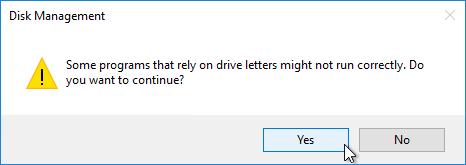
- Click Yes when asked to continue.
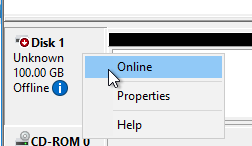
- Right-click Disk 1 and click Online.
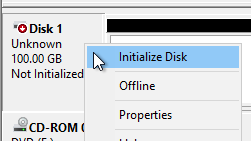
- Right-click Disk 1 and click Initialize Disk.
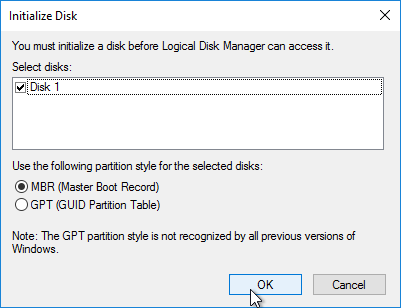
- Click OK to initialize the disk.
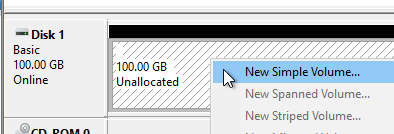
- Right-click the Unallocated space, and click New Simple Volume.
- In the Welcome to the New Simple Volume Wizard page, click Next.
- In the Specify Volume Size page, click Next.
- In the Assign Drive Letter or Path page, select D: and click Next.
- In the Format Partition page, change the Volume label to vDisks and click Next.

- In the Completing the New Simple Volume Wizard page, click Finish.
- If you see a pop-up asking you to format the disk, click Cancel since Disk Management is already doing that.
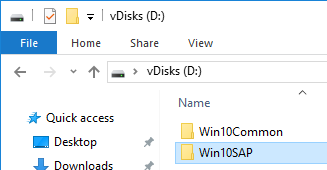
vDisk Folders
On the new D: partition, create one folder per Delivery Group. For example, create one called Win10Common, and create another folder called Win10SAP. Each vDisk is composed of several files, so its best to place each vDisk in a separate folder. Each Delivery Group is usually a different vDisk.
Robocopy Script
Here is a sample robocopy statement to copy vDisk files from one Provisioning server to another. It excludes .lok files and excludes the WriteCache folders.
REM Robocopy from PVS01 to PVS02
REM Deletes files from other server if not present on local server
Robocopy D:\vDisks \\pvs02\d$\vDisks *.vhd *.vhdx *.avhd *.avhdx *.pvp /b /mir /xf *.lok /xd WriteCache /xo
Citrix Blog Post vDisk Replicator Utility has a GUI utility script that can replicate vDisks between Provisioning Sites and between Provisioning Farms.


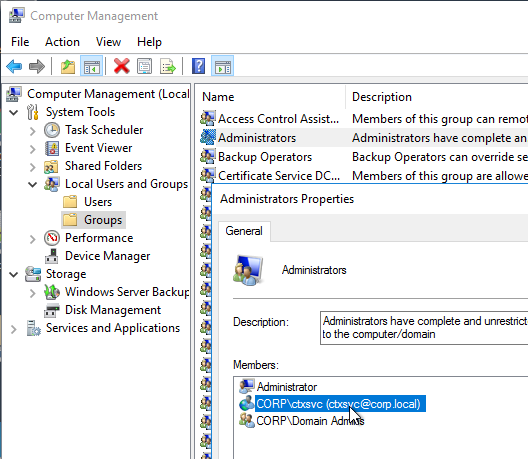
Service Account
Provisioning Services should run as a domain account that is in the local administrators group on both Provisioning servers. This is required for KMS Licensing.
Provisioning Console Install/Upgrade
The installation and administration of Citrix Provisioning 2411 and older (including LTSR versions 2203 and 1912) are essentially identical.
Operating System – Windows Server 2022 is supported with Citrix Provisioning 2203 and newer.
Hypervisor – VMware ESXi 8.0 is supported with Citrix Provisioning 2212 and newer. VMware VSAN 8 is supported with Citrix Provisioning 2311 and newer.
- SCVMM 2022 is supported with Citrix Provisioning 2203 and newer. See CTX131239 Supported Hypervisors for Citrix Virtual Apps and Desktops and Provisioning (Provisioning Services).
BIOS – Citrix Provisioning 2311 and newer no longer support BIOS. See Converting BIOS vDisks to UEFI at Citrix Docs.
If you want to automate the installation and configuration of Citrix Provisioning, see Dennis Span Citrix Provisioning Server unattended installation.
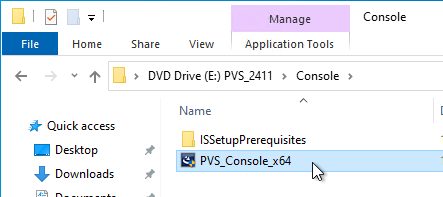
To manually install Provisioning Console, or in-place upgrade the Provisioning Console:
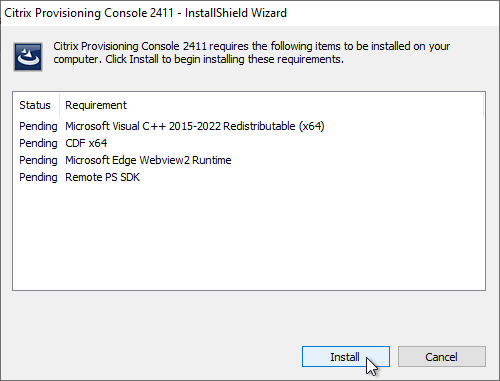
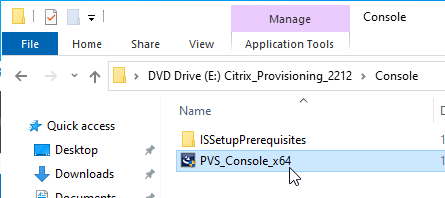
- Go to the downloaded Citrix Provisioning, and in the Console folder, run PVS_Console_x64.exe.
- Click Install.
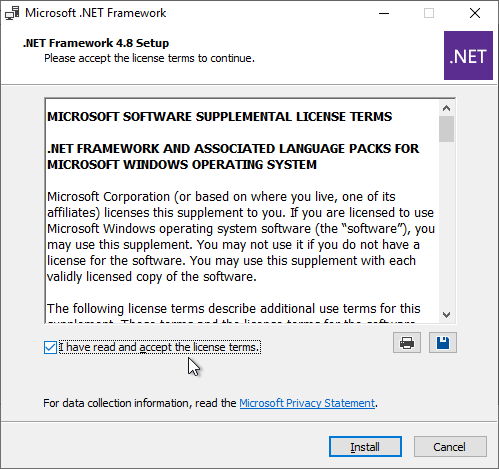
- If you see the .NET Framework Setup page:
- Check the box next to I have read and accept the license terms, and click Install.
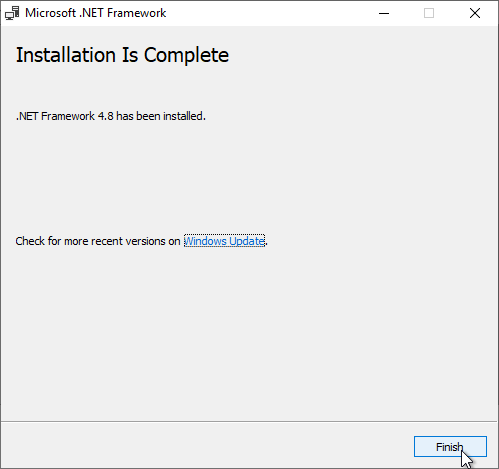
- In the Installation Is Complete page, click Finish.
- Click Restart Now.
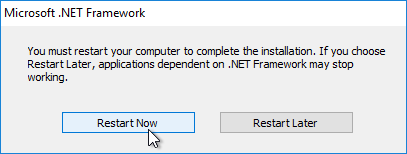
- Restart the PVS_Console_x64.exe installer.
- Click Install.
- Check the box next to I have read and accept the license terms, and click Install.
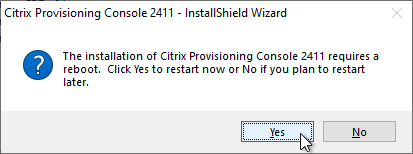
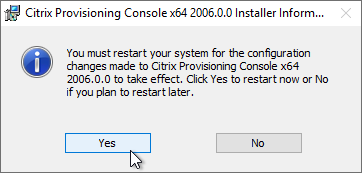
- Click Yes to reboot when prompted. Then restart the installation.
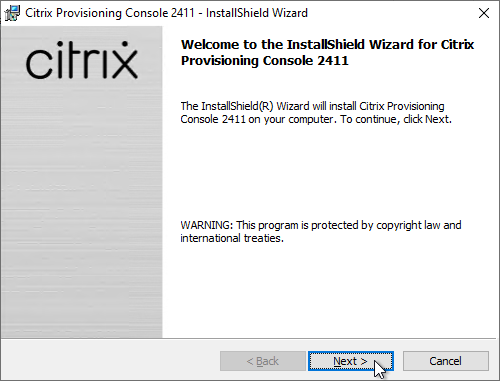
- In the Welcome to the InstallShield Wizard for Citrix Provisioning Console x64 page, click Next.
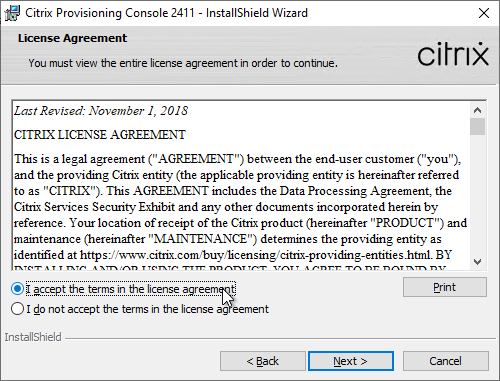
- In the License Agreement page, select I accept the terms, and click Next.
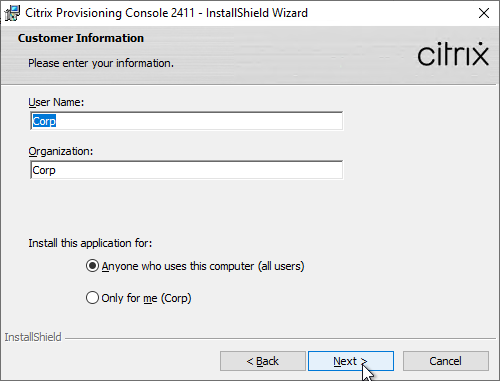
- In the Customer Information page, click Next.
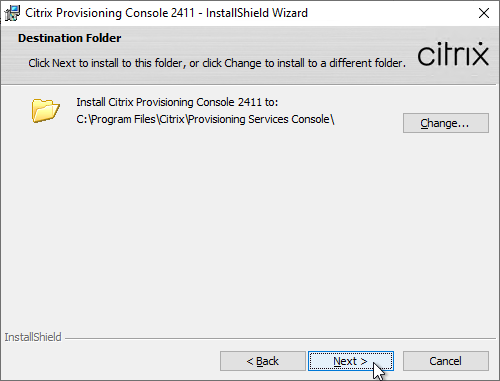
- In the Destination Folder page, click Next.
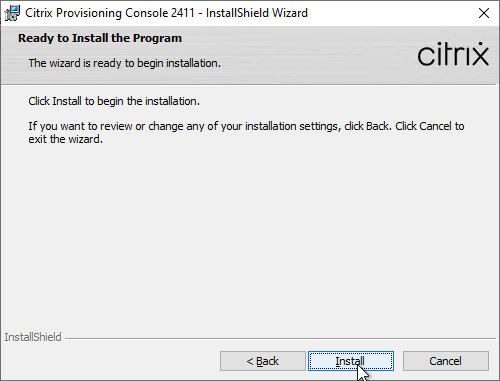
- In the Ready to Install the Program page, click Install.
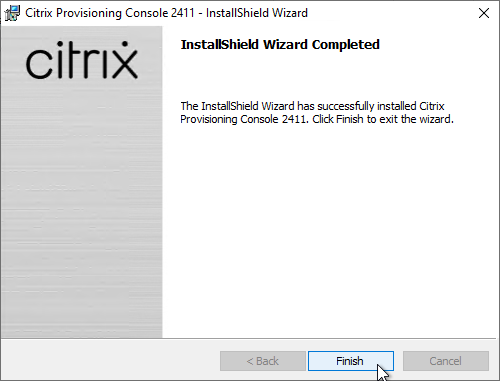
- In the InstallShield Wizard Completed page, click Finish.
- Click Yes if you are prompted to restart.
After upgrading the Console, re-register the PowerShell snap-in. This is required for the Citrix App Layering Agent.
"C:\Windows\Microsoft.NET\Framework64\v4.0.30319\InstallUtil.exe" "c:\program files\citrix\provisioning services console\Citrix.PVS.snapin.dll"
Provisioning Server – Install/Upgrade
The installation and administration of Citrix Provisioning 2411, 1912 LTSR CU9, 7.15.45, 7.6.9 and other 7.x versions are essentially identical.
Operating System – Windows Server 2022 is supported with Citrix Provisioning 2203 and newer.
Hypervisor – VMware ESXi 8.0 is supported with Citrix Provisioning 2212 and newer. VMware VSAN 8 is supported with Citrix Provisioning 2311 and newer.
- SCVMM 2022 is supported with Citrix Provisioning 2203 and newer. See CTX131239 Supported Hypervisors for Citrix Virtual Apps and Desktops and Provisioning (Provisioning Services).
BIOS – Citrix Provisioning 2311 and newer no longer support BIOS. See Converting BIOS vDisks to UEFI at Citrix Docs.
You can in-place upgrade Provisioning Server. The Provisioning Servers must be upgraded before the vDisks’ Target Device Software are upgraded. While upgrading one Provisioning Server, all Target Devices are moved to the other Provisioning Server assuming that vDisk High Availability is properly configured.
To install/upgrade Provisioning server:
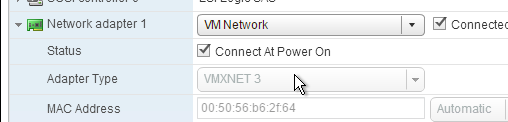
- If vSphere, make sure the Provisioning server virtual machine Network Adapter Type is VMXNET 3.
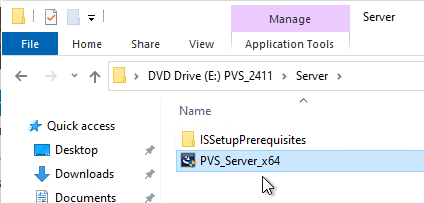
- Go to the downloaded Provisioning ISO, and in the Server folder, run PVS_Server_x64.exe.
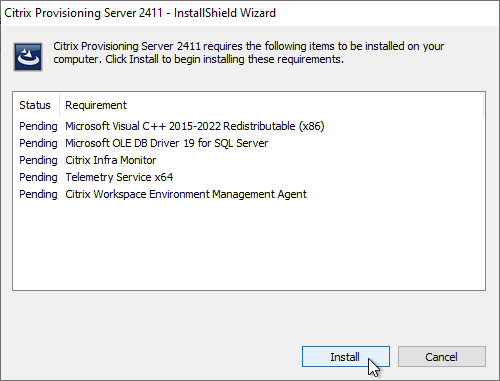
- Click Install when asked to install prerequisites.
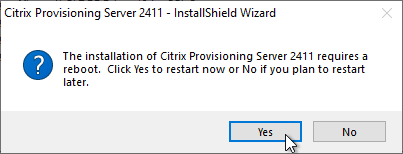
- Click Yes to reboot. After the restart, relaunch the installer.
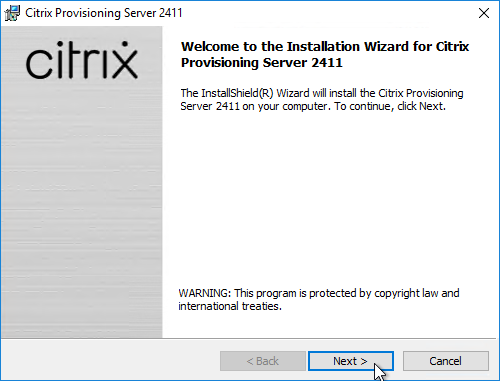
- Note: there’s a long delay before the installation wizard appears.
- In the Welcome to the Installation Wizard for Citrix Provisioning Server x64 page, click Next.
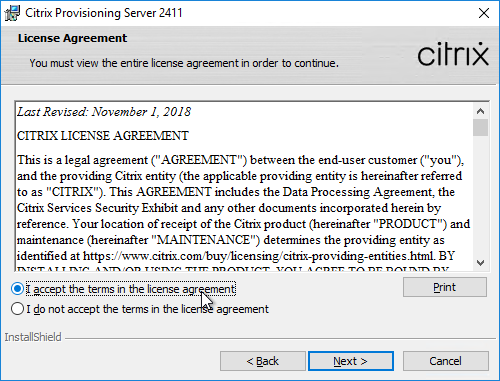
- In the License Agreement page, select I accept the terms, and click Next.
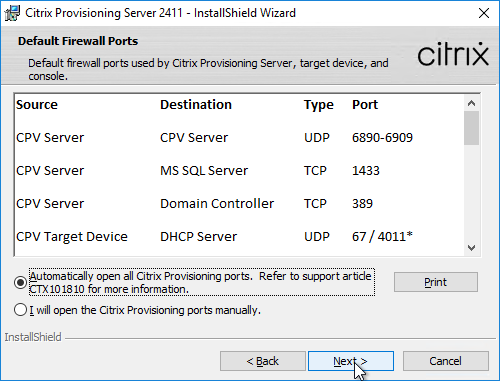
- In Citrix Provisioning 1811 and newer, you’ll see a Default Firewall Ports page. You can optionally select Automatically open all Citrix Provisioning ports in Windows Firewall. If you later use the Citrix Provisioning Console to change the ports, then the Windows Firewall rules need to be adjusted manually since the Citrix Provisioning Console won’t do it for you.
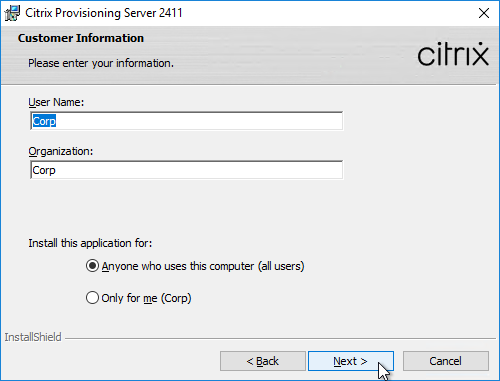
- In the Customer Information page, select Anyone who users this computer, and click Next.
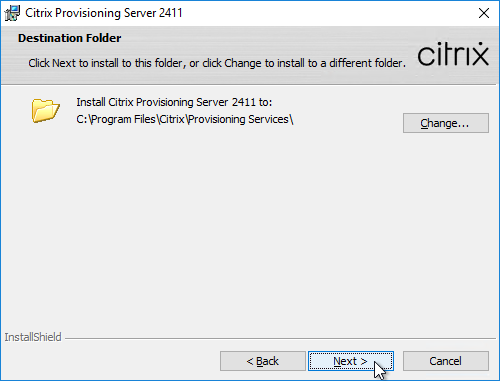
- In the Destination Folder page, click Next.
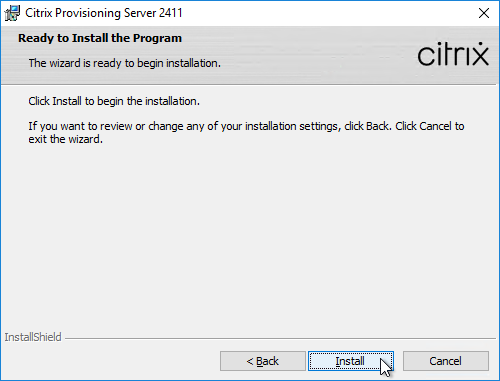
- In the Ready to Install the Program page, click Install.
- In the Installation Wizard Completed page, click Finish.
Database Script
By default, the Citrix Provisioning Configuration Wizard will try to create the database using the credentials of the person that is running the Wizard. This isn’t always feasible. An alternative is to create a script that a DBA can run on the SQL server.
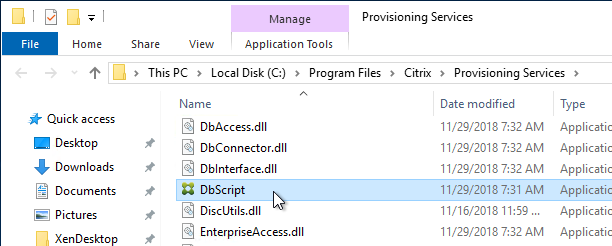
- Go to C:\Program Files\Citrix\Provisioning Services and run DBScript.exe.
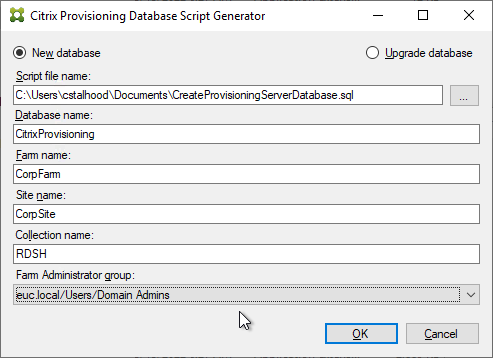
- Change the selection to New database for 2012 or higher.
- Enter a path to save the script file.
- Fill in the other fields.
- Select an Active Directory group containing your Citrix administrators, and click OK.
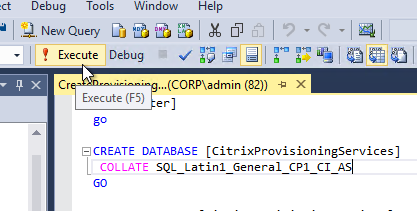
- In SQL Server Management Studio, open the SQL script.
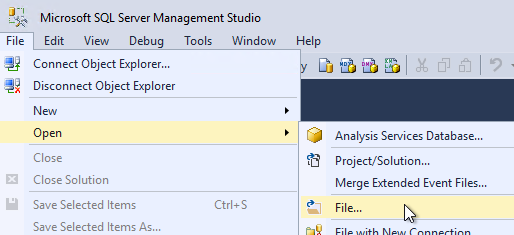
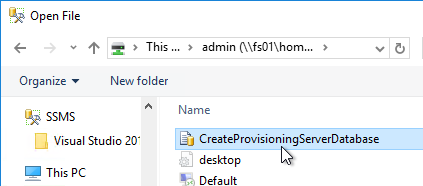
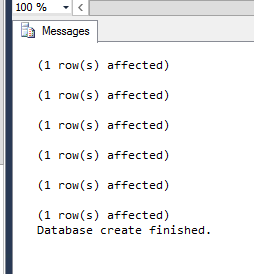
- Execute the script to create the database.
- The person that runs the Citrix Provisioning Configuration Wizard will need db_owner permission to the new Citrix Provisioning database.
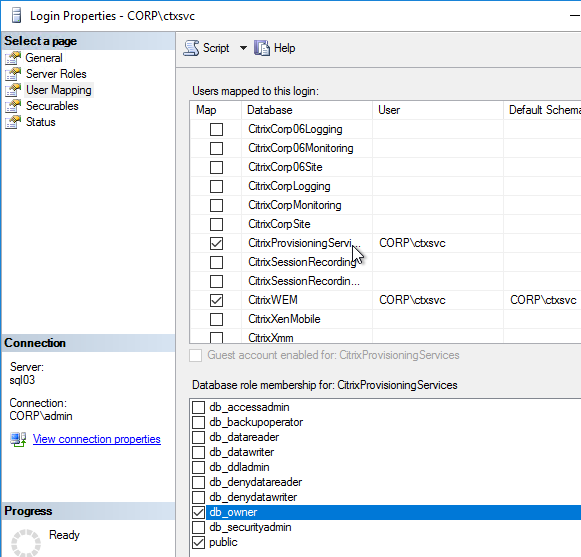
- Create a Windows service account that will run the services on the Citrix Provisioning server. This account must have a SQL login on the SQL server containing the Citrix Provisioning database. The Citrix Provisioning Configuration Wizard will grant this account the correct permissions in the database.
Configuration Wizard – New Farm
- If you used DBScript.exe to pre-create the database, skip to Configuration Wizard – Join Farm.
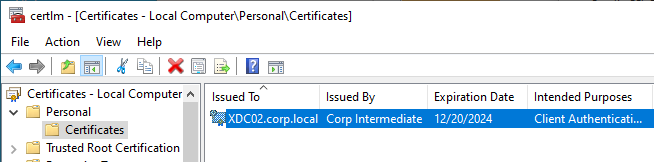
- Certificate – Joining PVS to CVAD site requires a valid certificate on the PVS server.
- For SQL AlwaysOn Availability Group, see CTX201203 SQL Server AlwaysOn Configuration for PVS 7.6. In summary: Use the wizard to create the database instance. In SQL, create the Availability Group. Then reconfigure Citrix Provisioning Server to point to the SQL AlwaysOn listener.
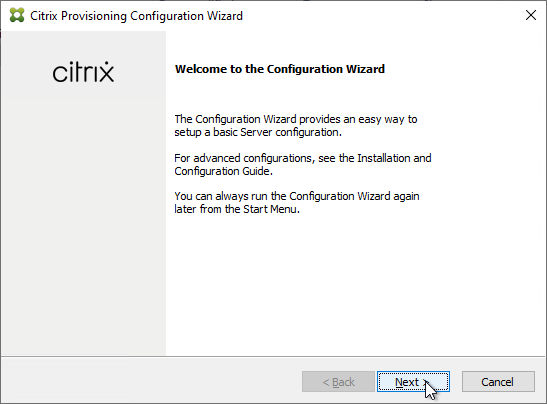
- The Citrix Provisioning Configuration Wizard launches automatically. If the database wasn’t pre-created, then the person running the wizard must have dbcreator and securityadmin roles on the SQL Server. If true, click Next. If not true, then cancel the wizard and launch it as somebody that does have those roles.
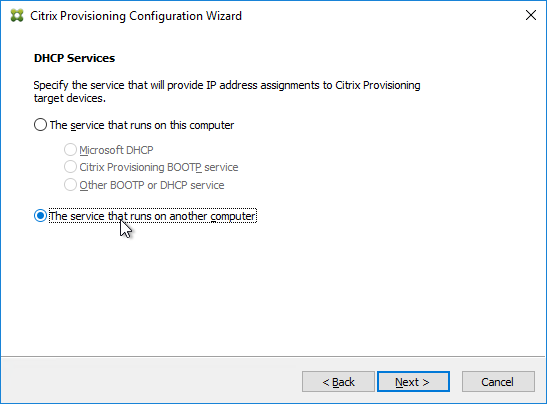
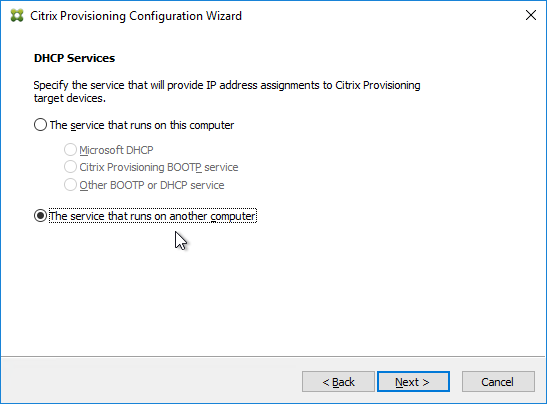
- The DHCP Services page appears. DHCP is typically hosted on a different server so select The service that runs on another computer. It is also possible to install DHCP on the Provisioning Servers. Click Next.
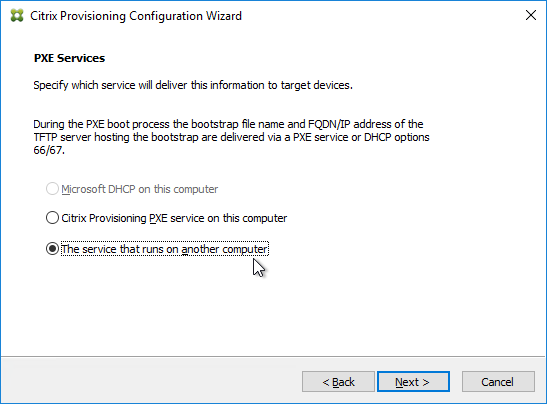
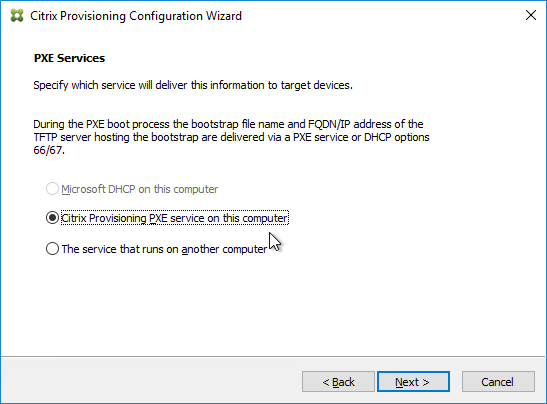
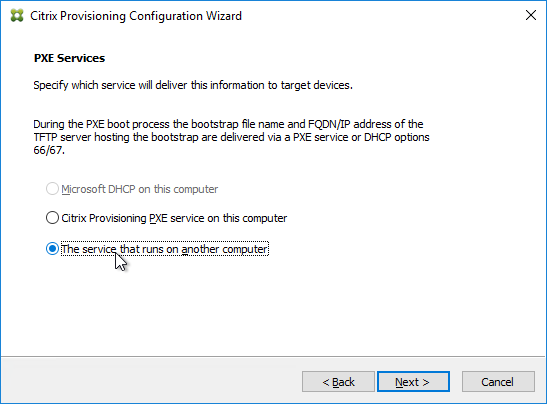
- In the PXE Services page, if you intend to use Boot Device Manager (BDM or ISO) instead of PXE, then change the selection to The service that runs on another computer, which disables the PXE service.
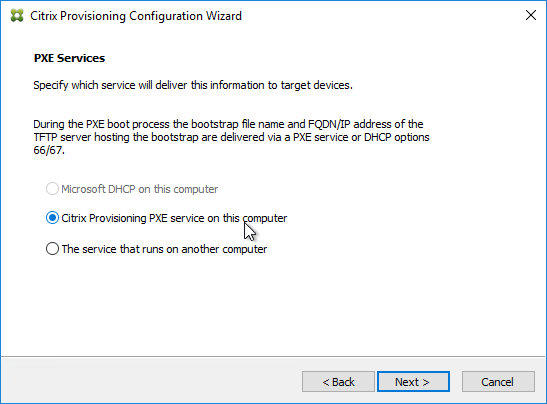
- If your Target Devices and Provisioning Servers are on the same broadcast network, then change the selection to Citrix Provisioning PXE service on this computer.
- Click Next.
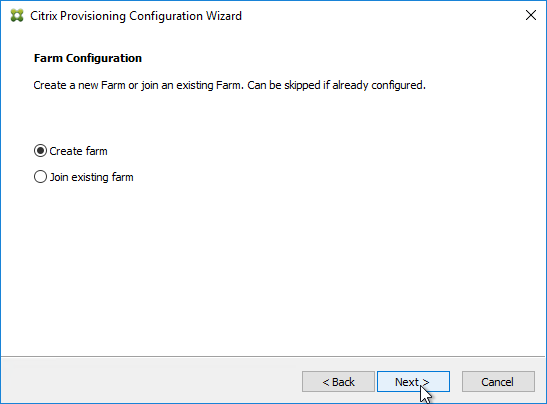
- In the Farm Configuration page, choose Create Farm, and click Next.
- In the Database Server page, enter the name of the SQL server. Citrix Provisioning 2203 and newer has an option for specifying credentials to the SQL server.
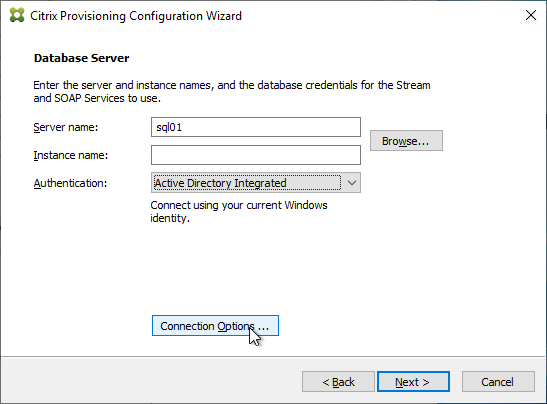
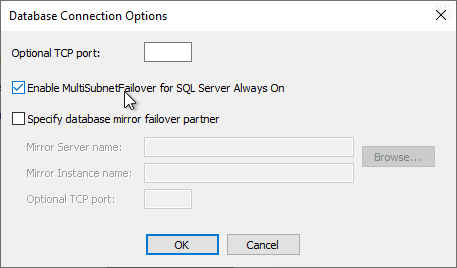
- In Citrix Provisioning 2203 and newer, click the Connection Options button and there’s an option for Enable MultiSubnetFailover for SQL Always On. There’s also an Optional TCP port field. Click OK and then click Next.
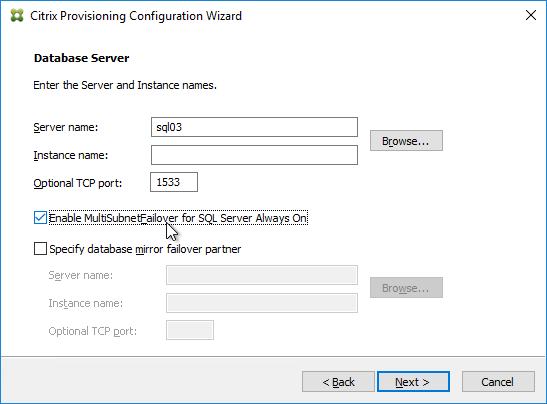
- Older versions of Provisioning have an option for MultiSubnetFailover on the Database Server page. Click Next.
- In Citrix Provisioning 2203 and newer, click the Connection Options button and there’s an option for Enable MultiSubnetFailover for SQL Always On. There’s also an Optional TCP port field. Click OK and then click Next.
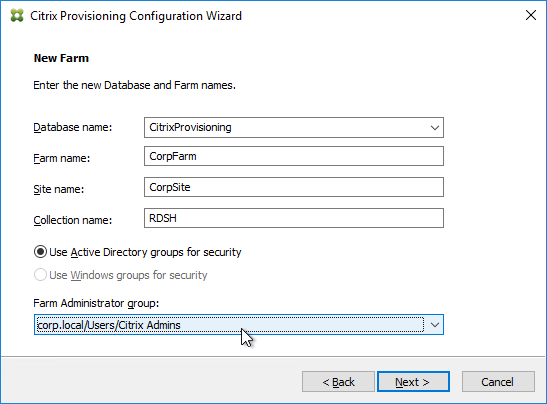
- In the New Farm page, enter the following:
- Enter a descriptive Database name. Put the word Citrix in the database name so the DBA knows what it is for.
- Enter a descriptive Farm name.
- Enter a descriptive Site name.
- Enter a descriptive Collection name. All of these names can be changed later.
- Select the Active Directory group that will have administrator permissions to Citrix Provisioning, and click Next. If you don’t see your group here, select any group you belong to, and you can fix it later in the console.
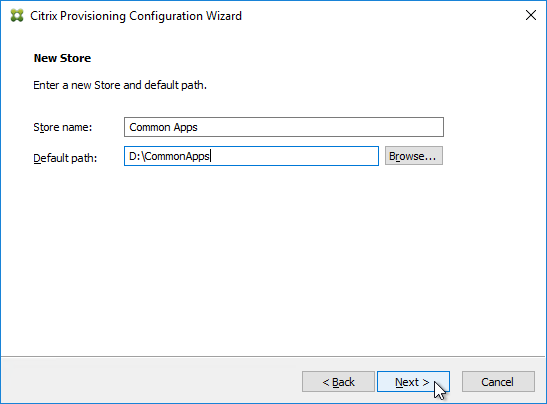
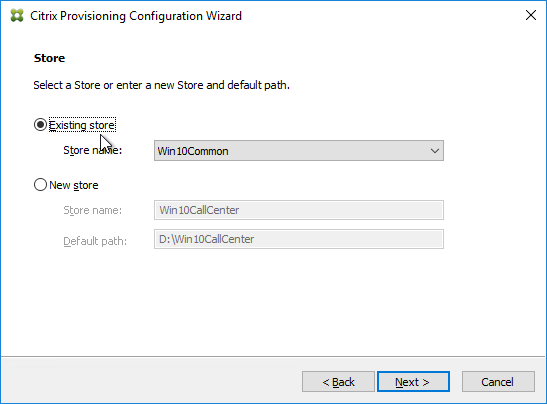
- In the New Store page, browse to one of the vDisk folders, and give the store a name. Then click Next.
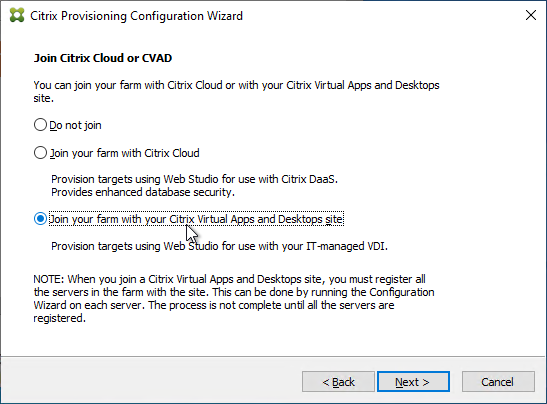
- You can optionally join the Provisioning Farm to CVAD or Citrix Cloud so that you can use Web Studio to provision Targets. The CVAD option is available in Citrix Provisioning 2311 and newer.
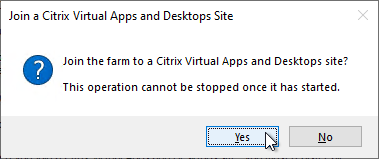
- Click Yes to join the farm to a CVAD Site.
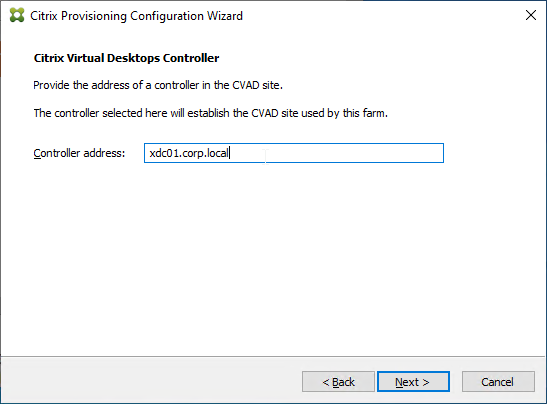
- In the Citrix Virtual Desktops Controller page, click Next.
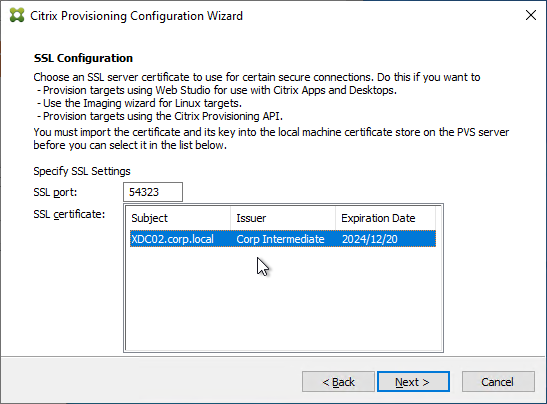
- Later in the wizard, an SSL certificate is required on the PVS server.

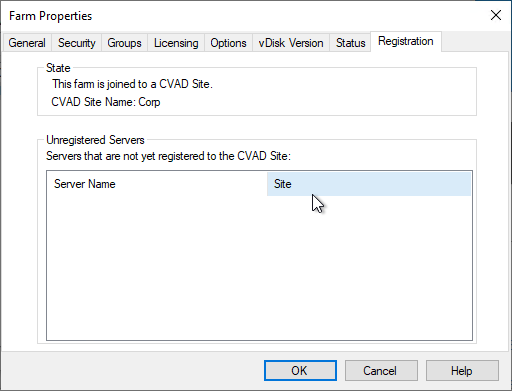
- The Registration tab in Provisioning Console > Farm Properties shows the status of CVAD Site registration.
- Click Yes to join the farm to a CVAD Site.
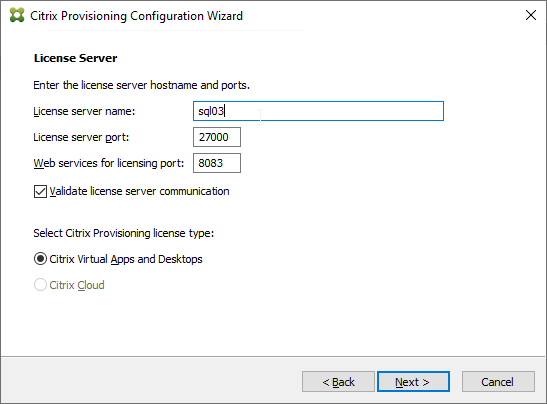
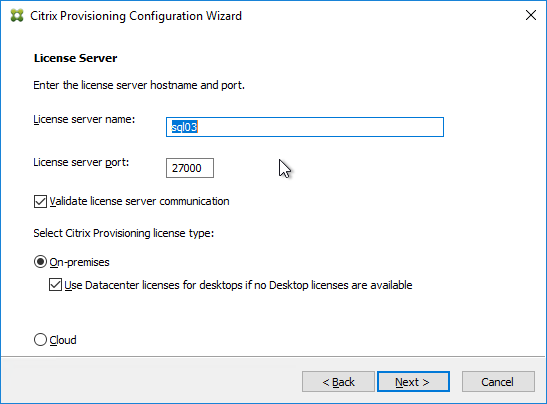
- In the License Server page, enter the name of your Citrix license server, check the box next to Validate license server communication, and click Next.
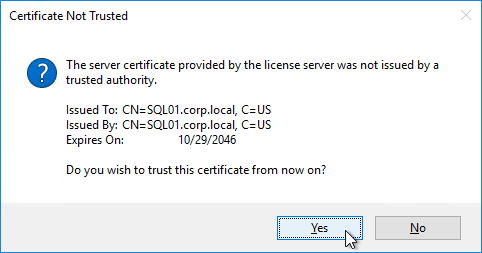
- Click Yes to trust the license server certificate.
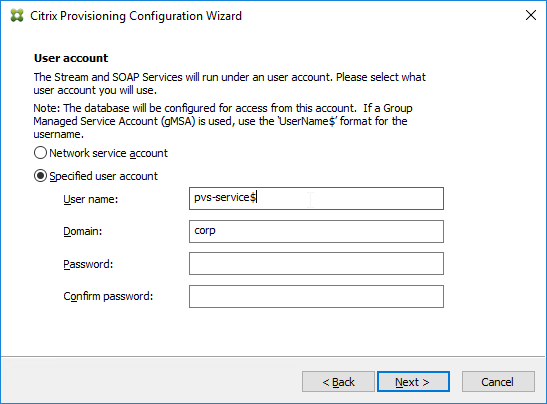
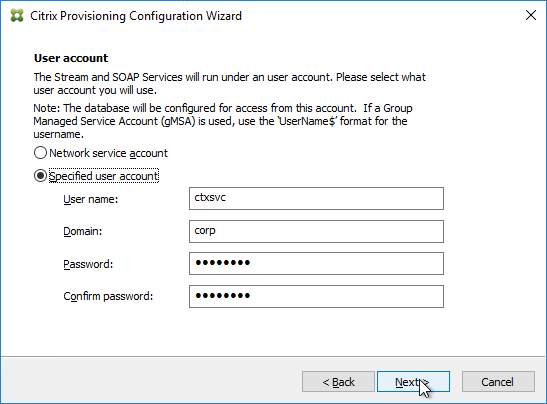
- In the User account page, notice it defaults to Network service account. This won’t work with KMS licensing so change it to Specified user account. Enter credentials for an account that is a local administrator on all Provisioning servers, and click Next. Note: Provisioning 7.16 and newer support Group Managed Service Accounts.
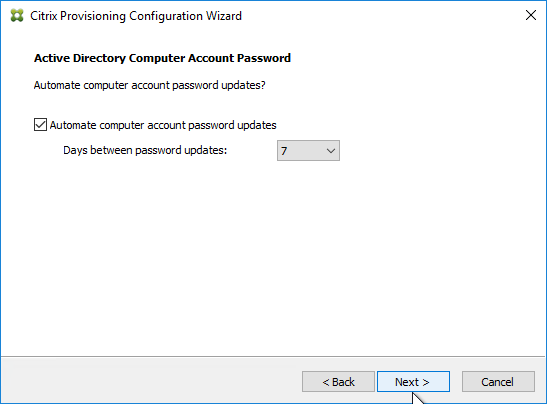
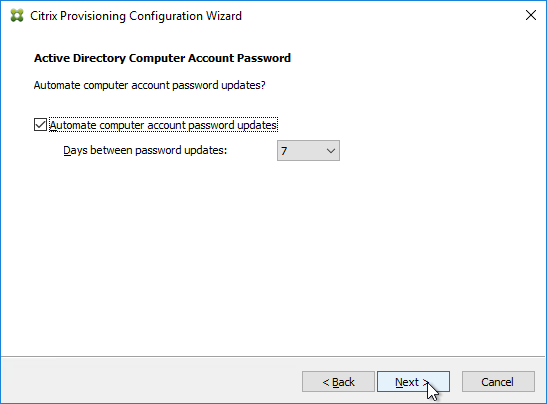
- In the Active Directory Computer Account Password page, check the box, and click Next.
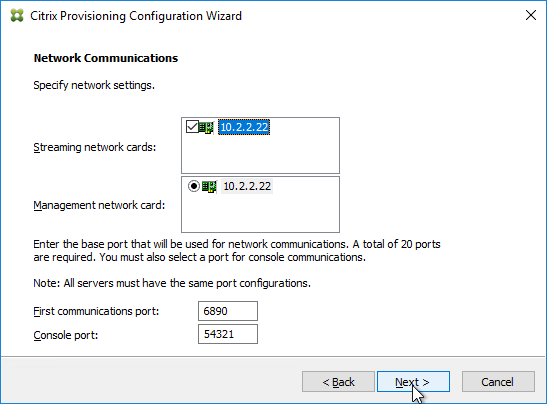
- In the Network Communications page, click Next.
- In the TFTP Option and Bootstrap Location page, check the box, and click Next.

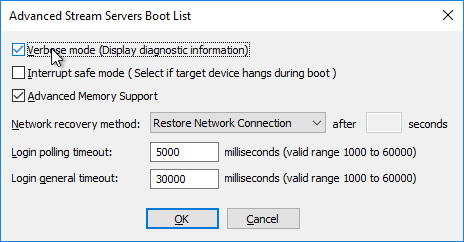
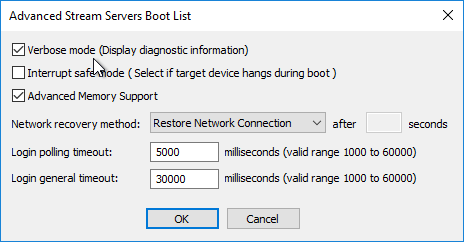
- In the Stream Servers Boot List page, click Advanced.
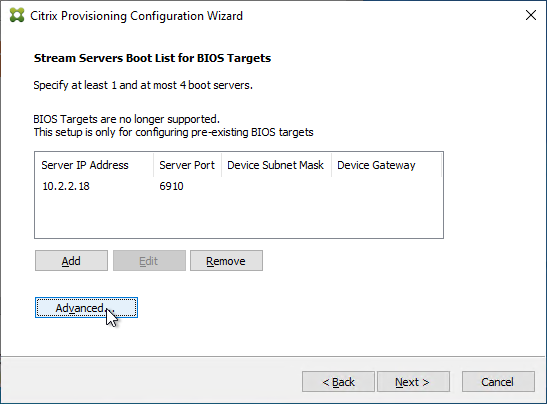
- Check the box next to Verbose mode, click OK, and then click Next.
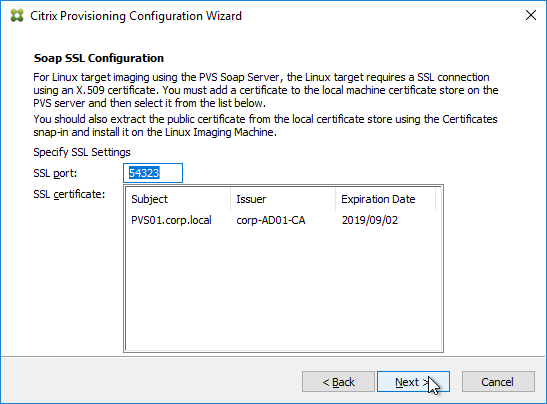
- If Provisioning 7.12 or newer, in the SSL Configuration page, click Next.
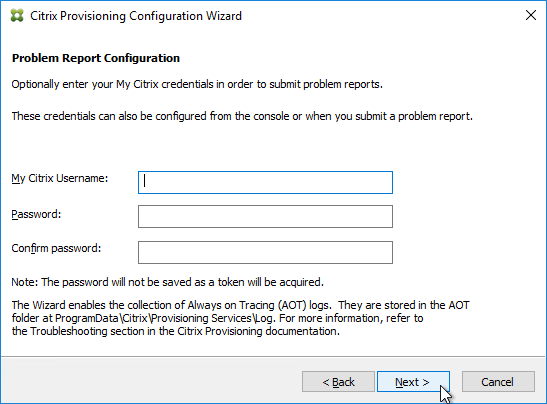
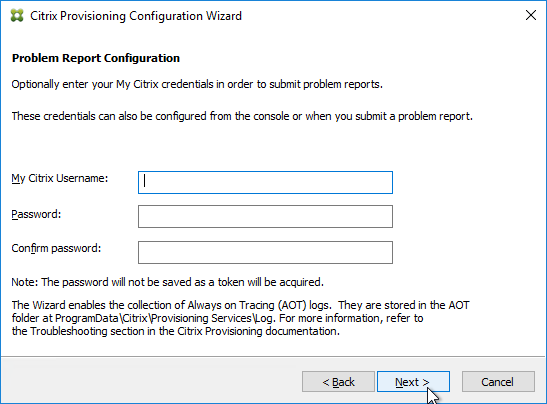
- If you see the Problem Report Configuration page, enter your MyCitrix credentials and click Next.
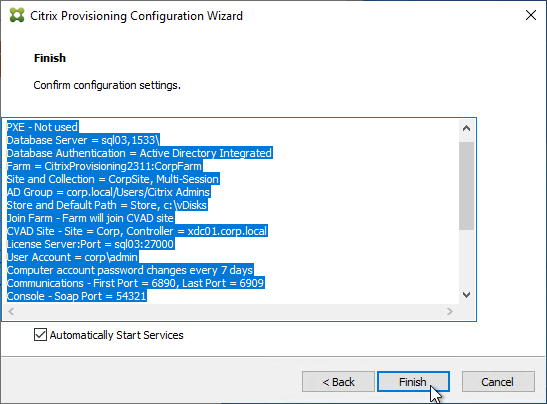
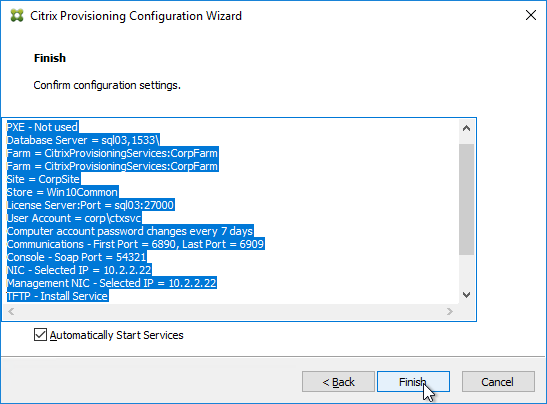
- In the Finish page, click Finish.
- If you are upgrading, then you might be asked to upgrade the database. Click Yes.
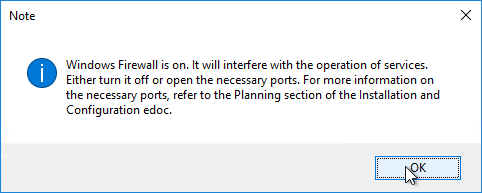
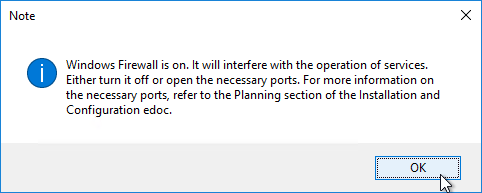
- Click OK if you see the firewall message.
- In the Finish page, click Done.

From Running the Configuration Wizard silently at Citrix Docs: Now that you have a configured server, you can run "C:\Program Files\Citrix\Provisioning Services\ConfigWizard.exe" /s to produce an .ans file at "C:\ProgramData\Citrix\Provisioning Services\ConfigWizard.ans". This .ans file can be modified and copied to additional Provisioning servers. "C:\Program Files\Citrix\Provisioning Services\ConfigWizard.exe" /a reads the .ans file and applies the configuration silently.
Configuration Wizard – Join Farm
- The Configuration Wizard launches automatically.
- There are two methods of handling SQL permissions:
- The person running the wizard must have db_owner on the database and securityadmin role on the SQL Server. This allows the wizard to add the service account to SQL logins and grant it access to the database.
- Or the person running the wizard can be limited to just db_owner permission to the database. The service account must be added manually to SQL logins by a DBA.
- The DHCP Services page appears. DHCP is typically hosted on a different server so select The service that runs on another computer. It is also possible to install DHCP on the Provisioning Servers. Click Next.
- In the PXE Services page, if you intend to use Boot Device Manager (BDM or ISO) instead of PXE, then change the selection to The service that runs on another computer, which disables the PXE service.
- If your Target Devices and Provisioning Servers are on the same broadcast network, then change the selection to Citrix Provisioning PXE service on this computer.
- Click Next.
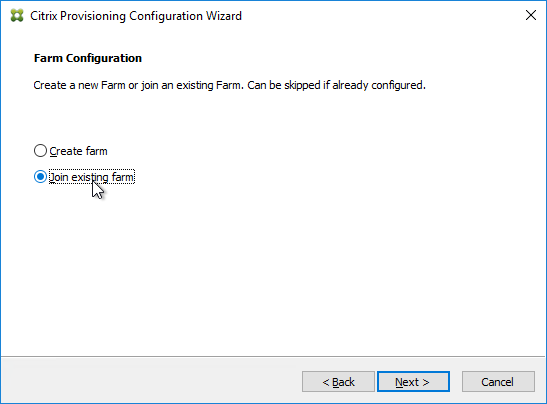
- In the Farm Configuration page, click Join existing farm.
- In the Database Server page, enter the name of the SQL server. Citrix Provisioning 2203 and newer has an option for specifying credentials to the SQL server.
- In Citrix Provisioning 2203 and newer, click the Connection Options button and there’s an option for Enable MultiSubnetFailover for SQL Always On. There’s also an Optional TCP port field. Click OK and then click Next.
- Older versions of Provisioning have an option for MultiSubnetFailover on the Database Server page. Click Next.
- In Citrix Provisioning 2203 and newer, click the Connection Options button and there’s an option for Enable MultiSubnetFailover for SQL Always On. There’s also an Optional TCP port field. Click OK and then click Next.
- In the Existing Farm page, select the database, and click Next.

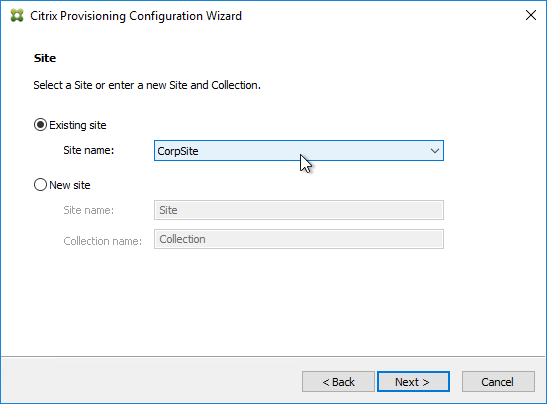
- In the Site page, select an existing site, and click Next.
- If you used the script to create the database, then there probably are no stores defined. Do so now.
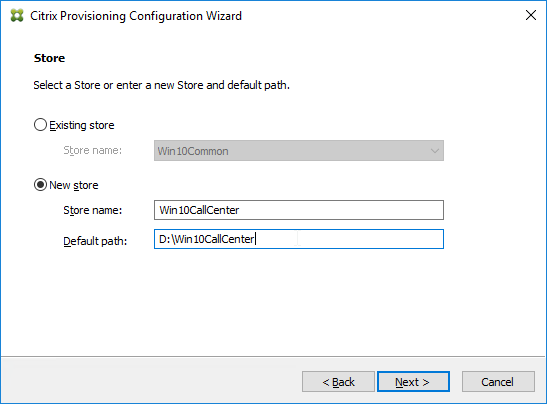
- Otherwise, in the New Store page, select the existing store, and click Next.
- In the License Server page, click Next.
- In the User account page, notice it defaults to Network service account. This won’t work with KMS licensing so change it to Specified user account. Enter credentials for an account that is a local administrator on all Provisioning servers, and click Next. Note: Provisioning 7.16 and newer support Group Managed Service Accounts.

- In the Active Directory Computer Account Password page, check the box, and click Next.
- In the Network Communications page, click Next.

- In the TFTP Option and Bootstrap Location page, check the box, and click Next.

- In the Stream Servers Boot List page, click Advanced.
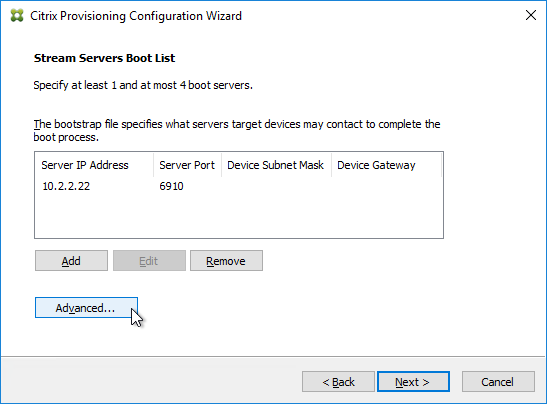
- Check the box next to Verbose mode, click OK, and then click Next.
- If Provisioning 7.12 or newer, in the Soap SSL Configuration page, click Next.
- If Provisioning 7.11 or newer, in the Problem Report Configuration page, enter your MyCitrix credentials, and click Next.
- In the Finish page, click Finish.
- Click OK if you see the firewall message.
- In the Finish page, click Done.

Troubleshooting – Networking Services Don’t Work After Reboot
If your PXE service or TFTP service does not work after a reboot of the Provisioning server, do the following:
- One option is to set the Citrix PVS PXE Service, Citrix PVS TFTP Service, and Citrix PVS Two-stage boot Service to Automatic (Delayed Start).
- The TFTP and Two-stage Boot services can be delayed by setting registry keys.
- Keys = HKLM\System\CurrentControlSet\services\BNTFTP (and PVSTSB)\Parameters
- Value = InitTimeoutSec (DWORD). 1 – 4 seconds. Default is 1.
- Value = MaxBindRetry (DWORD). 5 – 20 retries. Default is 5.
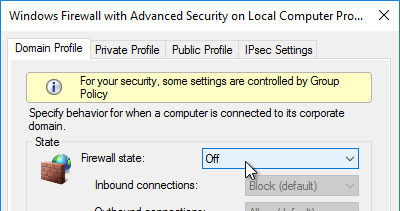
Disable Firewall
Disable the Windows Firewall to allow communication to all Citrix Provisioning Server ports. Or, see Citrix Provisioning Firewall Rules and manually open all required ports. If you change the ports in the Citrix Provisioning Console, then you’ll need to adjust the Windows Firewall rules accordingly.
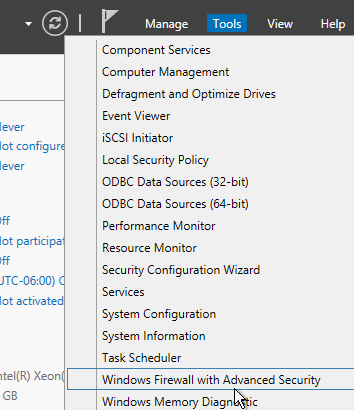
- In Server Manager, click Tools, and click Windows Firewall with Advanced Security.
- Click Windows Firewall Properties.
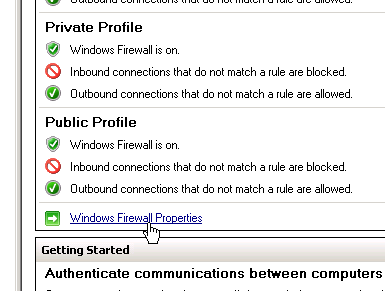
- On the Domain Profile tab, change the Firewall state to Off.
Disable BIOS Boot Menu
The versioning process in Citrix Provisioning will present a boot menu when booting any version except Production.
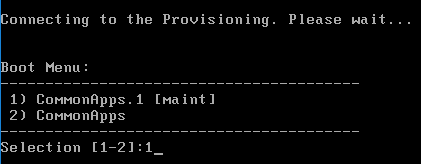
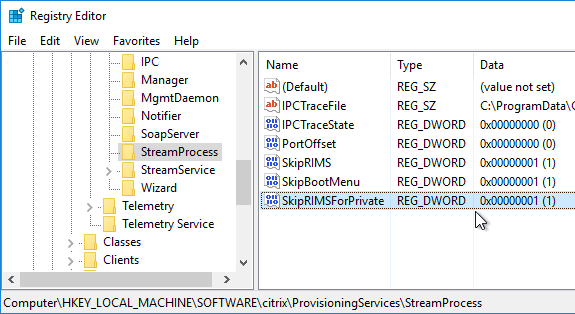
- To avoid this, create the DWORD registry value HKLM\Software\Citrix\ProvisioningServices\StreamProcess\SkipBootMenu on both Provisioning Servers and set it to 1. Note: the location of this key changed in Provisioning Services 7.0 and newer.
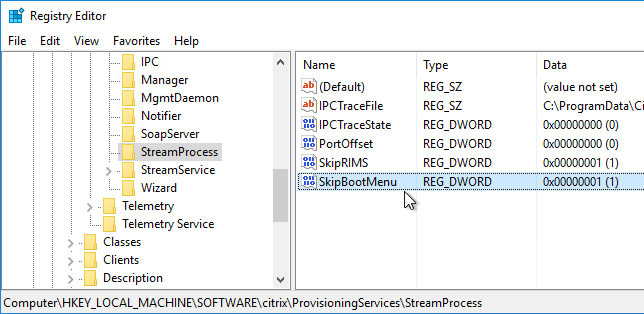
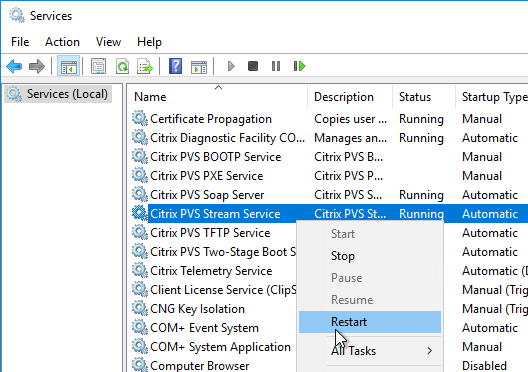
- Then restart the Citrix PVS Stream Service.
Private Mode vDisk – No Servers Available for vDisk
Citrix CTX200233 – Error: “No servers available for disk”: When you set a vDisk to Private Image mode (or new Maintenance version), if the Target Device is not connected to the server that contains the vDisk then you might see a message saying “No Servers Available for vDisk”.
- To avoid this, create the DWORD registry value HKLM\Software\Citrix\ProvisioningServices\StreamProcess\SkipRIMSForPrivate on both Provisioning Servers and set it to 1. Note: the location of this key changed in Provisioning Services 7.0.
- Then restart the Citrix PVS Stream Service.
Multi-Homed Provisioning Server
From slide 20 of http://www.slideshare.net/davidmcg/implementing-and-troubleshooting-pvs:, Multi-homed Provisioning server is not recommended but if you insist, and if running Provisioning 6.1 or older, configure the following. Provisioning 7.7 configuration wizard should have asked you for the management NIC.
- HKLM\Software\Citrix\ProvisioningServices\IPC
- New Reg_Sz (string) named IPv4Address with the IP of the NIC for IPC
- HKLM\Software\Citrix\ProvisioningServices\Manager
- New Reg_Sz (string) named GeneralInetAddr with the IP of the NIC and port
- e.g. 10.1.1.2:6909
Citrix 133877 Timeout Error 4002 in Provisioning Server Console after Clicking “Show Connected Devices“: when there are multiple streaming NICs assigned to the Provisioning Server, when Show Connected Devices was clicked in the Provisioning console, the following symptoms might be experienced: Server timeout error 4002, unusual delay of 3 to 4 minutes to list the connected devices, or Provisioning console stops responding. Complete the following to resolve the issue:
- On the Provisioning Server machine, under HKLM\software\citrix\provisioningServices\Manager key, create registry DWORD RelayedRequestReplyTimeoutMilliseconds, and set it to 50 ms (Decimal).
- Create a DWORD RelayedRequestTryTimes, and set it to 1.
- Open the Provisioning Server console and test by selecting the Show Connected Devices command.
Antivirus Exclusions
Citrix’s Recommended Antivirus Exclusions
Endpoint Security, Antivirus, and Antimalware Best Practices at Citrix Docs TechZone contains a list of recommended exclusions for Citrix Provisioning.
Citrix Blog Post Citrix Recommended Antivirus Exclusions: the goal here is to provide you with a consolidated list of recommended antivirus exclusions for your Citrix virtualization environment focused on the key processes, folders, and files that we have seen cause issues in the field:
- Set real-time scanning to scan local drives only and not network drives
- Disable scan on boot
- Remove any unnecessary antivirus related entries from the Run key
- Exclude the pagefile(s) from being scanned
- Exclude Windows event logs from being scanned
- Exclude IIS log files from being scanned
See the Blog Post for exclusions for each Citrix component/product including: StoreFront, VDA, Controller, and Provisioning. The Blog Post also has links to additional KB articles on antivirus.
Microsoft’s virus scanning recommendations
(e.g. exclude group policy files) – http://support.microsoft.com/kb/822158.
TFTP High Availability
BIOS machines have multiple methods of booting into PVS:
- PXE (network boot) on same subnet as Citrix Provisioning Servers.
- PXE (network boot) on different subnet as Citrix Provisioning Servers. DHCP Scope Options 66 and 67 required.
- Boot ISO created by Citrix Provisioning Boot Device Manager.
- Boot partition created by the Citrix Provisioning Virtual Desktops Setup Wizard.
EFI/UEFI machines have two methods of booting into PVS:
- PXE (network boot) on same subnet as Citrix Provisioning Servers. DHCP Scope Option 11 required.
- PXE (network boot) on different subnet as Citrix Provisioning Servers. DHCP Scope Options 66, 67, and 11 required.
If PXE booting on same subnet as Provisioning Servers, then make sure the PXE service is running on the Citrix Provisioning Servers. When your target device boots, it will broadcast a PXE Request message to the entire subnet. One of the Provisioning Servers PXE services will reply with the IP address of the TFTP service on the local Provisioning Server.
- If EFI/UEFI, the bootstrap file cannot be modified to contain the Provisioning Server addresses so you must instead configure DHCP Scope Option 11 with those addresses. See CTX208519 Configuring PVS for High Availability with UEFI Booting and PXE service.
If your Target Devices are not on the same VLAN/subnet as the Provisioning Servers, then use Boot ISO or Boot Partition.
HA for DHCP Scope Options:
- DHCP Scope Option 66 (TFTP Server address) only supports a single address. For High Availability, either DNS Round Robin your TFTP servers, or configure Citrix ADC to load balance TFTP. TFTP service runs on the Citrix Provisioning Servers.
- Citrix CTX131954 Implementation Guide – High Availability for TFTP
- NetScaler has native load balancing support for TFTP protocol.

- For EFI/UEFI, for DHCP Scope Option 67, see Unified Extensible Firmware Interface (UEFI) pre-boot environments at Citrix Docs for the correct file name.
DHCP Failover
The DHCP infrastructure must be highly available. And session hosts should be configured with DHCP Reservations. With multiple DHCP servers, any reservation should be created on all DHCP servers hosting the same DHCP scope. The easiest way to accomplish this is with the DHCP Failover feature in Windows Server 2012 and newer.
- Build two DHCP servers on Windows Server 2012 or newer.
- Create a scope for the Provisioning Target Devices.
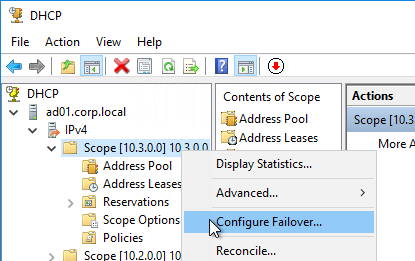
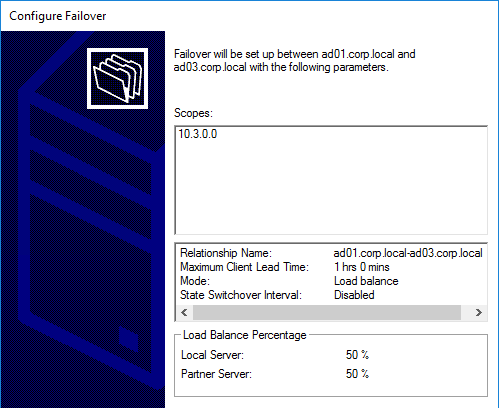
- Right-click the existing scope, and click Configure Failover.
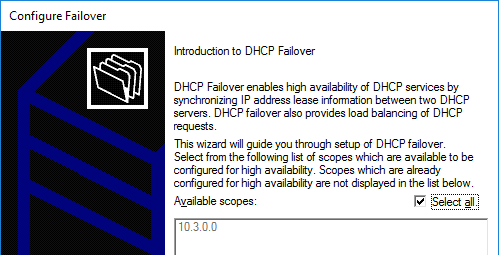
- In the Introduction to DHCP Failover page, click Next.
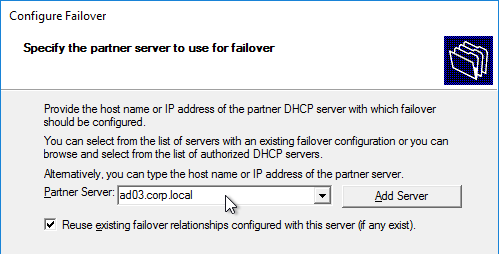
- In the Specify the partner server to use for failover page, enter the name of the other DHCP server, and click Next.
- In the Create a new failover relationship page, enter a Shared Secret, and click Next.
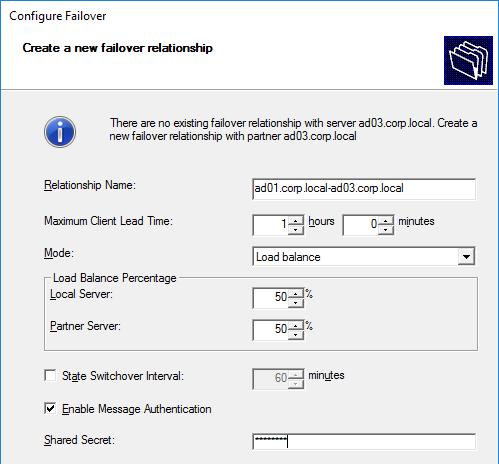
- Click Finish.
- Click Close.

Health Check
CTP Sacha Thomet’s PowerShell script to view the health/status of the Provisioning environment. Emails an HTML Report. For Provisioning 7.7 and newer, see https://blog.sachathomet.ch/2015/12/29/happy-new-script-pvs-7-7-healthcheck/.

Hi Carl,
Hope you are doing well, my query is around database migration for PVS, please let me know if there is a powershell script that can be used to point the PVS databases to the new database server. Basically, we have a new database server and have to point the existing PVS servers to the new database server. Thanks in advance
Regards
Venkatesh K
Just run the PVS Config Wizard and enter the new database server.
Hi Carl,
Thanks for your response, is there a powershell script that i can use as there are multiple PVS servers that have to be migrated?
Thanks in advance
Venkatesh K
After pvs diskless boot, the client BIOS Boot Menu can only display 10 menus. Is there any parameter configuration? I want to add 20 virtual disks to a client. When the client starts, the BIOS Boot Menu can display 20 menus. Currently only the first 10 virtual disk menus can be displayed, too many entries, 1 omitted
I am trying to upgrade the Provisioning Services Target Device from 7.15CU6 to 1912CU2 and it fails and rolls back. Any clues as to what could cause this? I was able to in the past to upgrade from CU5 to CU6 without issues.
Hi Carl,
Recently I have installed CU2 on server PVS server 1912 environment and after upgrade citrix provisioning console is not opening.
getting below error when open console :-
The database login failed. Ensure the appropriate permissions exist to access the database.
Login failed for user ‘domain name\machine name$’.
strange thing is that there is no such domain account with machine name$
In the event viewer getting below error message:-
All the services are up and running fine.
Cannot establish a connection to the database because an attempt to log in failed. Please check your database connection settings in the registry and your permissions on your database server.
Please let me know if anyone have any solution for the same.
You can run the PVS Config Wizard and enter a service account.
Hello Carl,
I just update Citrix Provision Services from 7.15 CU3 το 7.15 CU5 successfully with no error but i never got an update database message. All seems fine and i considered it that there is no database changes from CU3 to CU5.
Our experience has shown that SysAdmin SQL permissions are needed when adding a PVS server to a site or creating a site. DB_owner permissions were not sufficient.
Or you can use the PVS DBScript tool.
Usually dbcreator and securityadmin are needed if you let the config wizard create the database or update it.
Is the provisioning server should be upgraded before the agent is upgraded? 7.15 CU4 is the server. When the agent is upgraded from the same version to 1912 LTSR, it gives an error that “can not connect to the server version prior to 7.24”
Correct. Provisioning Server must be same version or newer than the Target Device software.
Hello Carl.
I’ve updated PVS to 1912 LTRS (from 7.15) and now the target device freezes after 10 minutes or so. The VMs are running on Hyper-V. I’v left some devices with the target version 7.15 and those work ok.
Are you aware of any reported issues?
Sorry, I don’t have any Hyper-V customers. You might have to open a support case.
While running pvs configuration wizard. I get cLR20r3 event and wizard has stopped working
Carl,
Is this setting “DisableTaskOffload” still needed in the v1909 on W2K19?
Thanks
There’s a big debate about that in one of my Slack teams. Some people say no. But Citrix documentation says yes.
What would be the update then in respect of IPv6?
Disable it, set preference to IPv4 or leave it as it is?
According to Citrix still disable it with 2006: https://docs.citrix.com/en-us/citrix-virtual-apps-desktops/manage-deployment/ipv6.html
So what is your opinion on this Carl? We are having an internal debate at my company as well. Is this a question of “is it necessary anymore” or “there is a downside to doing it and maybe we shouldn’t.” If citrix docs still say to do it and its just a matter of a little more configuration it seems risky not to configure offload…etc.
I usually configure it. You can try without and see if reboots take too long.
Hi Carl
When upgrading from v1903 to v1909, would it still be necessary to upgrade the database?
Thanks
I suspect that some upgrades don’t update the SQL database schema.
Carl, we have an initiative to move our 4 load balanced PVS servers over to a new larger network. Both networks are in the same DMZ, so firewall should not be an issue. Currently we have target devices in both the old and new network streaming from these PVS servers. We also have the current IP addresses of these 4 PVS servers listed in option 11 of the DHCP scope for both the old and new networks. Do you have a list of steps or a Citrix article that outline how to change the IP addresses of these PVS servers while still allowing all of our target devices to remain functional? Thank you in advance for any guidance you can provide.
Same subnet? Or different subnet?
If different subnet, you can change the DHCP scope option for the subnet. If same subnet, then you create DHCP reservations and configure DHCP Options for the reservation.
We are looking to change the IP address of the PVS servers from one subnet to another (not to an IP address in the same subnet).For example, they would be going from (10.10.1.100 though 10.10.1.103) to (10.10.20.100 through 10.10.20.103). It is a different subnet and VLAN where we would like to get these PVS servers to.
Are you taking an outage? If not, then you can build new PVS servers on the new IPs, change DHCP, and the Targets will boot to the new PVS servers. Once all are rebooted, then remove the old PVS servers.
We aren’t looking to take an outage. Is it not possible to change the IP of the current PVS server from the old subnet over to the new subnet (even if it is done over a couple of days)? Since we have 4 PVS server, can we change the IP address of the PVS servers over to the new network one at a time since they all host the same vDisks and are load balanced?
Probably. But at some point you need to change the DHCP options.
In regards to the DHCP options, I imagine we would change the DHCP options for the scope of the new subnet to have the IP addresses of the PVS servers in the new subnet once they have been moved. Do you happen to have the steps for changing the IP address of a PVS server to an address in the new network or a Citrix article that would outline that? Thank you for all of the information you have provided!
You should be able to change the NIC address and then re-run the Citrix Provisioning Config Wizard. If you’re using the built-in BIOS Bootstrap, then you’ll need to update that too (right-click server > Configure Bootstrap).
Carl
I have been tasked to setup PVS in a HA configuration. If you have a link or some doco. to point me to that would be great. If you could also answer a couple of questions. Does the HA for PVS require windows clustering to make it work and is there a preference for installing PVS on a virtual machine or a physical machine? In regards to the HA do you have to oversize the machines so if one of the machines go down the other machine can handle the entire load?
No clustering needed. The Target Devices can stream the same vDisk from multiple Citrix Provisioning servers.
Multiple PVS servers share a SQL database.
Multiple PVS servers must be able to open identical vDisk files. Commonly the vDisk files are replicated to each PVS server. Or you can store them in a UNC share.
Inside Citrix Provisioning Console, make sure Load Balancing is enabled on the vDisks.
Make sure the Target Devices are caching to the local memory/disk and are not caching to the Citrix Provisioning servers.
Make sure the Target Device bootstrap contains multiple PVS server addresses.
Dedicating a physical server to just PVS is probably overkill. PVS sizing depends on the number of Target Devices and the number of actively streamed vDisks.
Why are all Citrix products such a pain to set up with SQL always on.
PVS has a convenient checkbox for MultiSubnetFailover. The other products do not. WEM is probably the worst for AlwaysOn setup.
However CTX201203 https://support.citrix.com/article/CTX201203 states that “As of PVS 7.6, MultiSubnetFailover is not supported when connecting to a SQL Server AlwaysOn High Availability Group. ”
So:
a) it seems that selecting MultisubnetFailover is not of any benefit?
and
b) if you have a SQL Always on Availability Group stretched across the same subnet, then MultiSubnetFailover is again not required?
Hi Carl,
one of our master image computer object deleted from AD, after that trust relationship failed.
We have restored computer object but issue still persist. we need to patch the master image and we are unable to login into it. could you please suggest us.
Is your master image booting from PVS? If so, right-click on your powered off Target Device, expand Active Directory, and there’s an option to reset the account.
You don’t know the local administrator password? If not, then I think there are ways of booting from an ISO that lets you reset the local password.
We are not having local administrator password.
Hi Carl, currently we have both DHCP and PVS on same server , now we have to configure different DHCP server. how can we do that ?
Are you moving DHCP to a different subnet?
If same subnet, build your new DHCP servers with scope, activate the scope, and then disable DHCP on the PVS servers.
If different subnet, build your new DHCP servers, configure scope and activate it, in your router for the target devices configure the router to forward DHCP requests to the new DHCP servers, and then disable DHCP on the PVS servers.
yes , we are moving DHCP to different subnet. And also while configuring PVS , we selected DHCP services as The service that runs on this computer. so do we want to change that now ? if yes , how to do that ? because we are changing DHCP to other server.
In Services, one of the services is DHCP. Just stop it and disable it.
Or, run the Citrix Provisioning Wizard, and change DHCP to disabled.
Hi Carl
well, if coming from 1808 and trying an upgrade to 1906 there are 2 things to remember:
1) if upgrading the VDA, remove the MCS I/O service components (installed as a default now) by removing them changing installed components (otherwise PVS vDisk won’t boot, if using PVS)
2) If upgrading PVS from 1808 remove! PVS prior, upgrade won’t succeed otherwise (https://docs.citrix.com/en-us/provisioning/current-release/upgrade.html)
Hi Carl,
This is regarding newly built PVS environment with following details;
Windows 2016 Standard Edition (No windows patches applied yet)
Citrix 7.15 LTSR CU3 Provisioning services
Windows 10 build 1809
After creating PVS disk and target devices when pool of 10 VDI’s gets started out of which 5 may gets hung at PVS disk found or windows logo and further nothing happens till force reboot performed over hung target devices.
There is one point under your documentation is to remove SATA drive (SATA controller for my CD/DVD drive removed and switched to IDE) for PVS which is already in place
Followed some Citrix blogs where I could see below points;
Network Task offload setting to be enabled using registry setting over PVS servers and target devices, which is done
Disable Telemetry services on VDA (even disabled over PVS servers)
Interrupt Safe Mode” is not enabled in the BOOT.ISO configuration
Network adapter is VMXNET3
Applied workaround script solution to restart unregistered target devices
Tried different versions of ARDBP32.bin files
Still the problem is there further to this Citrix case was opened and at the back of CDF trace logs got some information pointing to network layer where packets are getting dropped
Few lines from Citrix response as below
78 DiskIO IOS_READ_EXT_REQUEST sRead [0x00000200 512]
78 DiskIO IOS_READ_EXT_REQUEST sRead [0xae824a00 512]
PVS 84 Login LS_RECONNECT_REQUEST_CODE_V2 IO reconnect
Still issue persist in mean time PVS has been upgraded to CU3 from CU2 where this issue initially observed.
Any additional help would be really great
Lastly wanted to thank you for all your practical documentation which is actually better than Citrix ones 🙂
Hello Carl,
Is there any powershell command to update the bootstrap file from the database? (in the GUI you can press the button, read Servers from Database) but I can’t find the powershell command to do the same. I can use powershell to add servers to the file, but I want to use the option read from database…
Best regards
Ooh and of course, I love your website.
CTP Dennis Span suggested this:
(Get-PvsServerInfo).IP.IPAddressToString | Set-PvsServerBootstrap -ServerName $ComputerName -Name “ARDBP32.bin”
Hi Carl,
Thanks for the swift answer!
I tried above command, but only to result in errors.
A collegue of mine wrote his own script function.
########
function Update-PVSBootstrap ($computername = $env:computername){
$IP=Get-PvsServer|select IP -ExpandProperty Ip
$IP=$IP.IPAddressToString
switch ($IP.Count)
{
1 {Set-PvsServerBootstrap -ServerName $computername -name ARDBP32.BIN -Bootserver1_Ip $IP[0] -Bootserver1_Port 6910}
2 {Set-PvsServerBootstrap -ServerName $computername -name ARDBP32.BIN -Bootserver1_Ip $IP[0] -Bootserver1_Port 6910 -Bootserver2_Ip $IP[1] -Bootserver2_Port 6910}
3 {Set-PvsServerBootstrap -ServerName $computername -name ARDBP32.BIN -Bootserver1_Ip $IP[0] -Bootserver1_Port 6910 -Bootserver2_Ip $IP[1] -Bootserver2_Port 6910 -Bootserver3_Ip $IP[2] -Bootserver3_Port 6910}
4 {Set-PvsServerBootstrap -ServerName $computername -name ARDBP32.BIN -Bootserver1_Ip $IP[0] -Bootserver1_Port 6910 -Bootserver2_Ip $IP[1] -Bootserver2_Port 6910 -Bootserver3_Ip $IP[2] -Bootserver3_Port 6910 -Bootserver4_Ip $IP[3] -Bootserver4_Port 6910}
default { ‘1-4 servers supported, $ip.Count found’ }
}
}
#########
When running update-pvsbootstrap all is filled with the right addresses.
Be aware if one changed the portnumber, change is also in this script.
Needs to be run on all PVS servers, so I’m still looking for a script which can be run after the installation of a PVS server and which connects to all pvs server and sets the right bootstrap information
🙂
So for all the powershell addicts out there.
$PVSSites = Get-PVSSite
ForEach($PVSSite in $PVSSites)
{
$PVSServers = Get-PVSServer -SiteName $PVSSite.SiteName
ForEach($PVSServer in $PVSServers)
{
Update-PVSBootstrap $PVSServer.ServerName
}
}
Carl,
You are the man 🙂 Thanks this is working great!
My worries are gone for the weekend. Now I can enjoy my beer.
have a great weekend!
Wanted to know the pros and con of having target devices on the same VLAN as the Provisioning servers vs on different vlan.
Thanks,
If on the same VLAN, then there’s no need to configure boot ISOs or DHCP Scope Options. Just let the VMs do a PXE boot and any of the PVS servers will respond. If cross-subnets, then you have to use Boot ISO, Boot partition, or TFTP load balancing to enable redundant TFTP servers.
Hi Carl, I have installed pvs 7.15 LTSR server on windows 2012. I have created DB using script. When I try to connect to farm from provisioning services console, “The SELECT permission was denied on the object ‘DatabaseVersion’, database ” error occurs. Any fix to resolve this issue ?
What service account did you configure? Did you use the Citrix Provisioning Configuration Wizard to specify the service account?
Hi Carl, Issue is resolved when I manually provided db permissions to the service account. One more thing, does this domain service account need permissions in active directory to create or delete objects.
Hi Carl
Just upgrading PVS from 7.6 to 7.15.9 and this message popped up:
“Citrix 7.15 LTSR CU3 Warning – Automount disabled. Citrix 7.15 LTSR CU3 – Provisioning Services x64 requires automount to be enabled in order to mount the vDisk. Please enable automount through diskpart.”
Our existing vDisk’s on PVS agent 7.6 wouldn’t boot, we found that the ‘Citrix PVS PXE Service’ had been set to manual, started it and vDisks boot fine. This behaviour was unexpected.
I guess the first problem can be fixed when we reverse engineer the build, but didn’t expect this warning popup.
Regards
RussC
hi, does anyone uses paravirtualized adapter under vmware for the pvs server where the vDisks are? i have not seen that PVSCSI is not supported on a PVS Server, i get a lot more performance with the PVSCSI on a Test Machine, because we have a Pure Storage with SSD. kind regards, sebastian
hi carl, can you help?
PVS 1808 to 1811 , please uninstall PVS Server 1808 and then install PVS Server 1811. what the hell is that? i want only upgrade my PVS System. Why i must uninstall something?
regards
frank
I’m the “other” Carl. The official line for upgrading PVS has always been to uninstall the previous version and install the new. All the data and farm info is in the SQL database. When you install 1811, you will tell the installer to join an existing farm, point it to the SQL server and database and life is good.
This doesn’t take long to uninstall and reinstall.
Hope this helps
The “other” Carl
hmm i am sure, i never uninstall old version before upgrade. also there is no info that you must uninstall your old version before. i make many upgrades from PVS, but this message today is surprising me, i dont see that on no upgrade before!
I don’t recall seeing that. But it’s shouldn’t be a big deal if you have more than one Citrix Provisioning server.
I stand corrected. There is an upgrade option.
https://docs.citrix.com/en-us/provisioning/current-release/upgrade/upgrade-servers-in-farm.html
But it sounds like the upgrade wizard uninstalls the current PVS software.
Upgrading the first Provisioning Server
To upgrade:
To upgrade the server and database, run the new version of the server software on the server, then select the “Automatically close and attempt to restart applications” option. If this option is not selected and a “File in use” screen displays, select the “Do not close applications option.”
Install the Console on this server or on a server used to manage the farm. For details on installing the Console, refer to Installing Citrix Provisioning Server Software.
In the Configuration Wizard, select the option to join a farm that is already configured. Running the wizard starts the services. For details, refer to the instructions on how to join an existing farm in Configuration Wizard Tasks.
Just did an 1808 to 1811 upgrade. There is a popup that states:
“Please uninstall PVS Server 1808 and then install PVS Server 1811”
So, same as from the 4.x, 5.x, 6.x, and 7.x days. Uninstall the previous version and install the new version. What’s the song? “Same as it ever was, same as it ever was, same as it ever was”
OK, I went back and installed PVS 7.0 and went through version by version upgradeds to 1811. Here is what I found.
7.0 to 7.1 no uninstall
7.1 to 7.6 CU5 no uninstall
7.6 to 7.7 no uninstall
7.7 to 7.8 no uninstall
7.8 to 7.9 no uninstall
7.9 to 7.11 no uninstall
7.11 to 7.12 no uninstall
7.12 to 7.13 no uninstall
7.13 to 7.14 no uninstall
7.14 to 7.15 CU2 no uninstall
7.15 to 7.16 no uninstall
7.16 to 7.17 no uninstall
7.17 to 7.18 no uninstall
7.18 to 1808.1 no uninstall
1808 to 1811 uninstall required
What about using ReFS filesystem for storing your target device vdisks? This could possible increase boot performance and merge times when using VHDX vdisk.
https://www.jgspiers.com/speeding-up-citrix-pvs-merge-boot-times-with-vhdx-uefi-refs/
I think the better word is “improve”. You improve boot performance and merge times. I don’t think using ReFS “increases” merge times when using VHDX.
Using ReFS as Store Filesystem can crash the vDisks. Promoted versions of vDisks will crash and you won’t be able to create further versions or merge.
Tested it with Server 2019 and PVS Version 1811, 1903 and 1906.
We had no performance increase in merge or boot times.
Anyone have any luck using PowerShell to set vDisks to “Newest Released” after setting an override? I can’t seem to find out if you can do this.
https://docs.citrix.com/en-us/provisioning/7-15/downloads/PvsSnapInCommands.pdf
(Add)(Get)(Remove)Set-PvsDiskVersion
According to my PVS documentation script, if the Access property is 3, then they have manually selected a version to boot from.
If the Access property is 0 and IsPending is False then they are using “Newest released”
uint Access: Read-only access of the Disk Version. Values are: 0
(Production), 1 (Maintenance), 2 (MaintenanceHighestVersion), 3
(Override), 4 (Merge), 5 (MergeMaintenance), 6 (MergeTest), and 7 (Test)
Min=0, Max=7, Default=0
bool IsPending: Read-only true when the version ScheduledDate has not
occurred. Default=false
uint Version: Read-only version number. The base disk is version 0, the
other version numbers are in part of the file name. Default=0
Your instructions mention to disable windows firewall on the target. Is that a requirement, or could you create rules for all of the PVS specific communication?
I think I have the rules listed at https://www.carlstalhood.com/netscaler-firewall-rules/#pvs
Thanks I was using those, but saw the instructions to disable it. I’ve always had it disabled but there is now an ask to have it enabled. Just wanted to make sure it wasn’t a PVS requirement to have it disabled, just a way to avoid issues.
I figure there enough holes to justify disabling the host firewall. I don’t think PVS installer opens any of the rules automatically.
I just updated that section to indicate the alternative of manually opening the ports. Thanks.
Hi Carl, We are planning to install pvs 7.15 LTSR on win2k12, our current version of pvs is 6.1. This will be a parallel upgrade. we would like to use the exising vdisks in the new server for few months. Could you advise how to upgrade or move the vdisks to new pvs servers
I have a customer who wants to Co-Locate PVS on their Delivery Controller.
I have some concerns about doing this. Has anyone done this before?
I’ve never done it. PVS Server can consume resources.
Hi Carl,
I have an existing PVS site running on SQL Express in a separate “Public” domain (no trusts set up). I’m upgrading the Windows OS and PVS and the customer wants the PVS database to come into the “Corporate” domain and sit on the Corporate SQL cluster.
I have backed up and moved the SQL Express DB to the Corporate cluster, but when i go to join, i’m un-trusted. Do you know of any way around this? Once i’m able to query the SQL Cluster, i can add service account credentials for the connection.
Can you think of any way around this or am i going to have to stick with Public domain SQL Express?
I don’t think PVS supports SQL authentication so it would need to be Windows authentication, either the computer account, or the service account.
Carl,
i use provision server 7.15 try to add host vsphere to PVS it keep give me error (Connection failed!
Failed to connect to the remote server. ( Unable to locate server. [The underlying connection was closed: An unexpected error occurred on a send.] )
but if i connect direct to the esxi host it work but not the vcenter, can you give adivise? thanks
What version of vSphere? If 6.7, then be aware that 6.7 is not supported yet.
Is the vCenter certificate trusted by PVS?
Any problems adding the vCenter Connection in XenDesktop? If not, you could use the XenDesktop Setup Wizard.
I have the same problem carl. PVS 7.15 LTSR CU2 with vsphere 6.0.0. Both streaming wizard and xendesktop wizard gives same error. cannot connect to the hypervisor at https://vcenter.fqdn/sdk. failed to connect to the remote server.
Is this problem being solved? I have the same issue
Hi Timothy, This solution worked for me: http://knowcitrix.com/cannot-connect-to-the-hypervisor-at-vcenter-failed-to-connect-to-remote-server-pvs-error/
Carl,
First of all, long time follower, thank you for all of your posts. You’ve gotten me out of a lot of sticky spots.
Second and mainly, have you ever seen sporadic instances where PVS Target Devices configured with a scheduled reboot, fail on start with:
No entry found in Database for device
Press any key to continue………
After a restart, the vm PXE boots without issue.
Restart is configured on the Delivery Group
XenDesktop 7.15 LTSR CU1
PVS 7.15 LTSR
Target Device 2012 R2,
PVS 7.15
VDA 7.15 CU1
How are they booting? PXE? DHCP Options? ISO?
What PVS server are the logging into? Does that PVS server connect to the same database as the others?
What hypervisor? Is the MAC address of the device changing?
Hi Carl, Greetings.
I am in urgent need of upgrade our PVS Servers from 7.1 to 7.15, because our target devices are running with 100% CPU. I have logged a call with Citrix and they recommended to upgrade our PVS Servers.
Root Cause: We are using a very old version (Close to 4 years ago) of our Cvhdbus driver on PVS Servers.
Could you please help me with the high level plan to upgrade our PVS Servers.
Can I directly upgrade PVS Servers from version 7.1 to 7.15 using this article?
Can I directly upgrade the target devices vsidk using the versioning method.
Thanks and regards,
Harry
PVS Servers can be in-place upgraded from 7.1 to 7.15. Start there.
For the Target Devices, you will need to reverse image them to upgrade the Target Device software. The versioning method won’t work until after you’re on 7.6.1 or newer.
hi, just upgraded my pvs console from 7.15 to 7.17 and got the following error.
—————————
Application Error
—————————
An unhandled exception occurred and the application will exit. Please report the information below. Press Ctrl-C to copy the data to the clipboard.
Methode nicht gefunden: “!!0[] System.Array.Empty()”.
Stack Trace:
bei ADSupport.PublicFunctions.GetOneTimeADInfo()
bei System.Threading.ExecutionContext.RunInternal(ExecutionContext executionContext, ContextCallback callback, Object state, Boolean preserveSyncCtx)
bei System.Threading.ExecutionContext.Run(ExecutionContext executionContext, ContextCallback callback, Object state, Boolean preserveSyncCtx)
bei System.Threading.ExecutionContext.Run(ExecutionContext executionContext, ContextCallback callback, Object state)
bei System.Threading.ThreadHelper.ThreadStart()
—————————
OK
—————————
any ideas??
Try this:
https://support.citrix.com/article/CTX234351
Carl, thank you for the wealth of information you provide. I do have a few of questions for you though. We are currently planning our upgrade for our PVS servers from 7.13 CR to 7.15 LTSR.
1) Are we able to upgrade the PVS servers to 7.15 LTSR before we upgrade our XenApp/XenDesktop farm from 7.6 LTSR to 7.15 LTSR?
2) If so, are we able to install PVS 7.15.2 LTSR components (Server, Console, and Target Device software) without installing 7.15 LTSR or 7.15 LTSR CU1 first?
3) In regards to the XenApp/XenDesktop upgrade from 7.6 LTSR, would you recommend upgrading? Or do you recommend setting up new databases and new VMs for the controllers?
Thanks in advance!
There’s no connection between PVS and XenDesktop other than the XenDesktop Setup Wizard. But I don’t think there’s any version dependency there either. Yes, you can upgrade to 7.15.2 first.
I usually in-place upgrade, assuming there’s a quick rollback plan. Any plans to change the operating system version?
Carl,
I have been using MCS on Xenapp 7.8 but I am planning on testing PVS. Can I use PVS side-by-side with MCS? I could not find anything that prevents hybrid environment. Do you know of any rissks involved?
Yep. They are independent of each other. They must be different Catalogs.
Thanks Carl.
hola donde podre encontrar una version del pvs 7.15 o 7.16 que no sea del sitio de citrix me podran ayudar
If you don’t see them at https://www.citrix.com/downloads/provisioning-services/, then you might have to call Citrix Customer Care. I assume your licenses are not expired.
Hello Carl!
Can be the same PVS-Server in 2 different Sites?
I don’t think so. Why?
Carl, created SQL script using DBScript.exe. When I try to execute script in SQL server, created DB with errors
Msg 5039, Level 16, State 1, Line 56
MODIFY FILE failed. Specified size is less than or equal to current size.
Msg 5039, Level 16, State 1, Line 56
MODIFY FILE failed. Specified size is less than or equal to current size.
By deleting DB size lines in the script, error is gone.
Good afternoon Carl, I am planning to installing PVS 7.16 (building a new environment XA/Xd 7.15 LTSR). I ran into an issue, our networking team is not allowed to use DHCP in our datacenter. Is there any alternate way to install and config like PVS 7.16 using DNS or BDM? If you have ever done this type of support, please could you guide me or provide me any document you may have related to this scenario. Thank you for your help in advance.
You can create a Boot ISO that contains a static IP address. But you’d probably need a different ISO for each Target Device.
Hi Carl
Just upgraded our PVS from 7.13 to 7.16, however we still have some Windows-7 clients.
Since VDA 7.15 works with controller 7.16, what would you advise in respect of PVS-Agent on Windows-7.
Would 7.15 PVS-Agent be used or I can upgrade straight to 7.16?
Thanks
According to https://docs.citrix.com/en-us/provisioning/current-release/system-requirements.html, Windows 7 is supported for 7.16, so there’s probably no harm in deploying PVS Target Device 7.16.
Hey Carl, great post as usual thank you. Just had a question on target device software. If the PVS server is upgraded from say 7.9 to 7.15.1 LTSR is the new version backward compatible with the 7.9 target device software version?
Yes. But you should get your Target Devices upgraded. PVS Servers must be upgraded before the Target Devices since newer TD Software won’t work with older PVS Servers.
Hi Carl, can u upload some docs on configuration of bootstrap in pvs server…i have some issue with vdisk as its version not showing active on some servers.
Are you saying that when you right-click the vDisk and click Replication Status, the vDisk is not green on every server? Either the file size and timestamp is not identical, or there’s a problem with the PVS Services. What vesion are you running?
I am already running my PVS on 7.15 LTSR. Now we have the CU1 update available. After the PVS servers are upgraded to CU1, do we need to upgrade database via script since it is the same version?
Not sure. The PVS Config Wizard should tell you if a database upgrade is needed or not.
I just completed the upgrade from 7.15 LTSR to 7.15 LTSR CU1. The setup wizard did not prompt for DB upgrade. My SQL DB was already in SQL 2016. So everything seems to be good.
Hi Carl, On running an upgrade on Windows 2008 R2 from 7.12 to 7.16 I have issues. I have upgraded the same VM from many previous version without issue over the years.
The first thing I noticed were the expected Soap and Stream services set as manual and no Logon credentials set, as they had been before the upgrade.
If I try to put the service account in and start the Soap service, I then notice in the Windows Application event log
Service cannot be started. System.MissingMethodException: Method not found: ‘!!0[] System.Array.Empty()’.
at SoapServer.SoapService.StartCeip()
at System.ServiceProcess.ServiceBase.ServiceQueuedMainCallback(Object state)
Application: SoapServer.exe
Framework Version: v4.0.30319
Description: The process was terminated due to an unhandled exception.
Exception Info: System.MissingMethodException
Stack:
at ADSupport.PublicFunctions.GetComputerDomain(Boolean ByRef)
at ADSupport.PublicFunctions.GetOneTimeADInfo()
at System.Threading.ExecutionContext.RunInternal(System.Threading.ExecutionContext, System.Threading.ContextCallback, System.Object, Boolean)
at System.Threading.ExecutionContext.Run(System.Threading.ExecutionContext, System.Threading.ContextCallback, System.Object, Boolean)
at System.Threading.ExecutionContext.Run(System.Threading.ExecutionContext, System.Threading.ContextCallback, System.Object)
at System.Threading.ThreadHelper.ThreadStart()
Uninstall and reinstall?
You might have to contact Citrix Support.
Why do you re-register the snapIn for the Citrix Console after Upgrading?
It usually is no longer registered. App Layering agent requires it to be registered.
Also see https://support.citrix.com/article/CTX226178
Hi! Would you say disabletaskoffload is still applicable for the PVS servers?
Excerpt CTX117374:
Provisioning Server and Target Device
HKEY_LOCAL_MACHINE\SYSTEM\CurrentControlSet\Services\TCPIP\Parameters\
Key: “DisableTaskOffload” (dword)
Value: “1”
I have not needed it. But there’s probably no harm in enabling it.
As per https://support.citrix.com/article/CTX117374 updated in 2018:
“Note: DisableTaskOffload is still required.”
Hello Carl,
I have installed PVS 7.15 on 3 Windows 2016 servers. I need to install the DHCP role on the PVS server. As per MS, we can only put 2 DHCP servers in cluster. At present we are deploying Hosted Shared Desktops but in future we would be deploying VDIs as well. What would you recommend in this scenario ?
Hi carl i am upgrading PVS 7.6 to 7.15 and I have 2008 R2 Data Base do I need to update the database to 2012 or no
See https://support.citrix.com/article/CTX114501
Hi Carl,
of cause your article is great. I’m now learning PVS with version 7.13. And I found no “versions” -menu item with right click on any vDisks. That means under “properties” is direct “LoadBalancing” without “versions” to see, as describted in all docs. Could give me some tips?
Thanks in advance.
YY
Is the vDisk in Standard Image mode?
Thank you so much. That is the problem;-))
Carl, planning an in-place upgrade from 7.11 to 7.15. I know during initial fresh install you can generate a DB script. When doing an upgrade can you do the same to provide a script to DBAs or does an upgrade only allow DB update from the in-place install?
Yes. If you run DBScript, there’s an option for upgrade.