Navigation
This article applies to StoreFront 3.0.9000 and older. For newer versions, see the newer article.
- Change Log
- Installation / Upgrade to 3.0.9000
- Rename Default Store
- Edit HOSTS File to resolve Gateway and StoreFront FQDNs
- SSL Certificate on StoreFront servers
- SSL Encryption of Delivery Controllers
- StoreFront Base URL
- Authentication Configuration
- Remove Citrix Online Icons
- Receiver for HTML5 – Enable and Upgrade
- Receiver for Web – Timeout
- Receiver for Web – Pass-through Authentication
- Unified Receiver Experience
- Customize Receiver Appearance
- Default Tab
- Propagate Changes to other StoreFront servers in Server Group
- Default Web Page in IIS to redirect to Receiver for Web
- Receiver Deployment:
- Auto-favorite Published Apps
💡 = Recently Updated
Change Log
- 2020 Nov 20 – updated article for StoreFront 3.0.9000
- 2020 Sep 8 – updated article for StoreFront 3.0.8001 to fix a security vulnerability
- 2019 Aug 21 – updated article for StoreFront 3.0.8000 to fix a security vulnerability
- 2019 Feb 8 – updated article for StoreFront 3.0.7000
- 2018 Sep 18 – updated article for StoreFront 3.0.6000
Installation / Upgrade
StoreFront Versions – The following StoreFront versions have very similar configurations:
- XenApp/XenDesktop 7.6.9000 (LTSR CU9) comes with StoreFront 3.0.9000.
- StoreFront 3.0.8001. – fixes a security vulnerability
- XenApp/XenDesktop 7.6.8000 (LTSR CU8) comes with StoreFront 3.0.8000. – 3.0.8000 was released early to fix a security vulnerability
- XenApp/XenDesktop 7.6.7000 (LTSR CU7) comes with StoreFront 3.0.7000.
- XenApp/XenDesktop 7.6.6000 (LTSR CU6) comes with StoreFront 3.0.6000.
- XenApp/XenDesktop 7.6.5000 (LTSR CU5) comes with StoreFront 3.0.5000.
- XenApp/XenDesktop 7.6.4000 (LTSR CU4) comes with StoreFront 3.0.4000.
- XenApp/XenDesktop 7.6.3000 (LTSR CU3) comes with StoreFront 3.0.3000.
- XenApp/XenDesktop 7.6.2000 (LTSR CU2) comes with StoreFront 3.0.2000.
- XenApp/XenDesktop 7.6.1000 (LTSR CU1) comes with StoreFront 3.0.1000.
- XenApp/XenDesktop 7.7 ISO comes with StoreFront 3.0.1. You can upgrade it from the 7.6 LTSR CU3 media.
- The XenApp/XenDesktop 7.6.0 ISO comes with StoreFront 2.6. If you installed StoreFront on your Delivery Controllers, then it is version 2.6, and you can upgrade it to 3.0.8000.
Server Selection – StoreFront can be installed directly on your Delivery Controllers. When installing Delivery Controller, simply leave the box checked to install StoreFront. If you let Delivery Controller install StoreFront, it will create a default store named /Citrix/Store. See below to rename this store.
Or you can install StoreFront 3.0.9000 on separate servers. You can even install StoreFront on your existing Web Interface servers (make sure Web Interface is installed first).
Citrix Blog Post StoreFront 3.0 Scalability recommends StoreFront servers to be sized with 4 vCPU and 8 GB RAM.
After installation, NT SERVICE\CitrixConfigurationReplication and NT SERVICE\CitrixClusterService must remain in the Administrators group on both StoreFront servers or propagation will fail.
Install / Upgrade StoreFront 3.0.9000
Download StoreFront 3.0.9000.
- For new installs, there’s no need to install prerequisites (e.g. IIS) since the StoreFront installer will do it for you.
- If upgrading from older StoreFront:
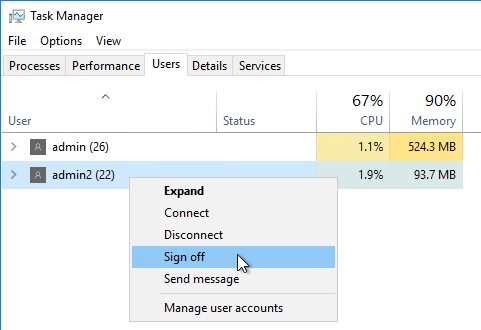
- Other Users – Use Task Manager > Users tab to logoff any other user currently logged into the machine.
- Close all MMC and PowerShell consoles.
- Stop the World Wide Web Publishing Service.
- Stop all StoreFront services.
- Other Users – Use Task Manager > Users tab to logoff any other user currently logged into the machine.
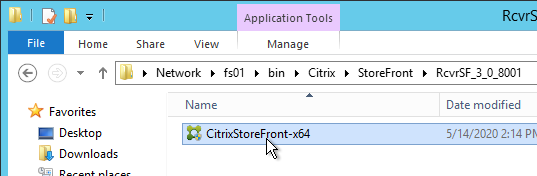
- Go to the downloaded and extracted RcvrSF_3_0_8001 folder and run CitrixStoreFront-x64.exe.
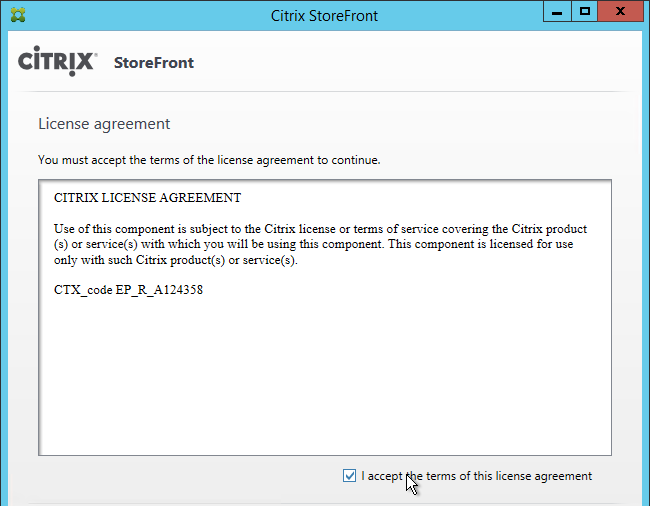
- In the License Agreement page, check the box next to I accept the terms, and click Next.
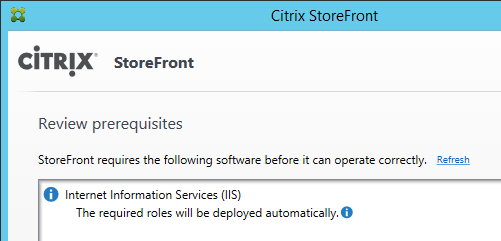
- In the Review prerequisites page, click Next.
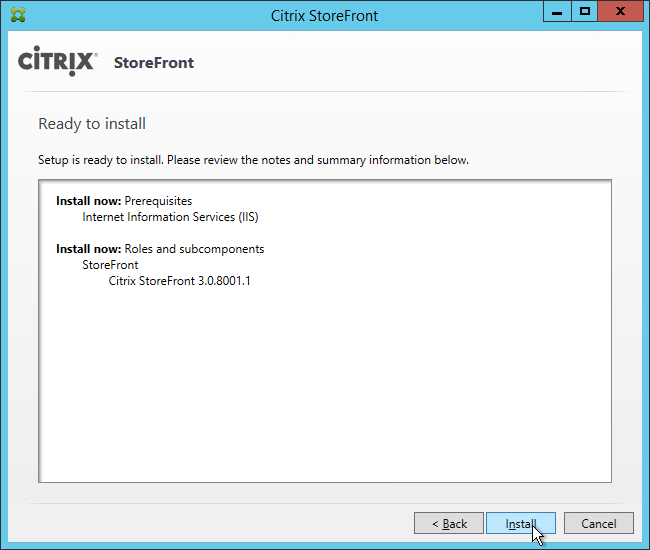
- In the Ready to install page, click Install.
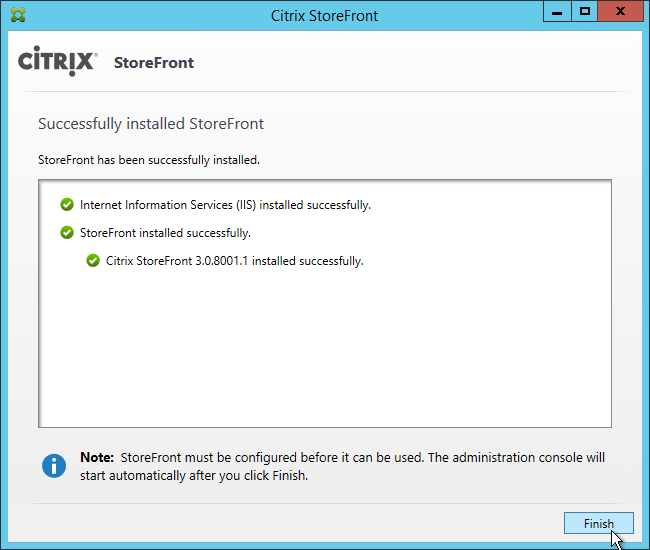
- In the Successfully installed StoreFront page, click Finish.
- If this is a new install, skip to the next section (Initial Configuration).
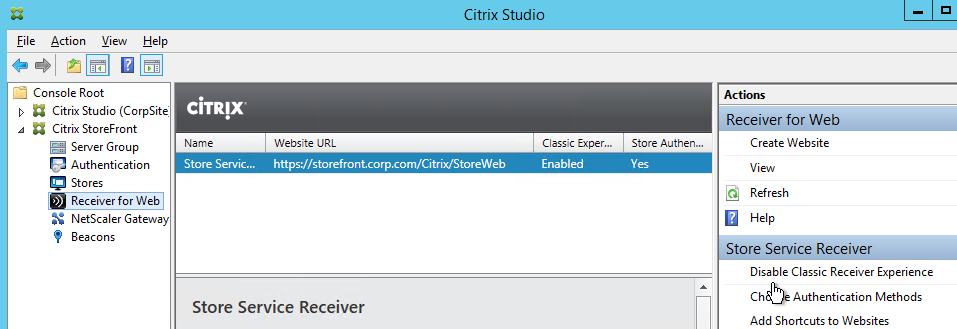
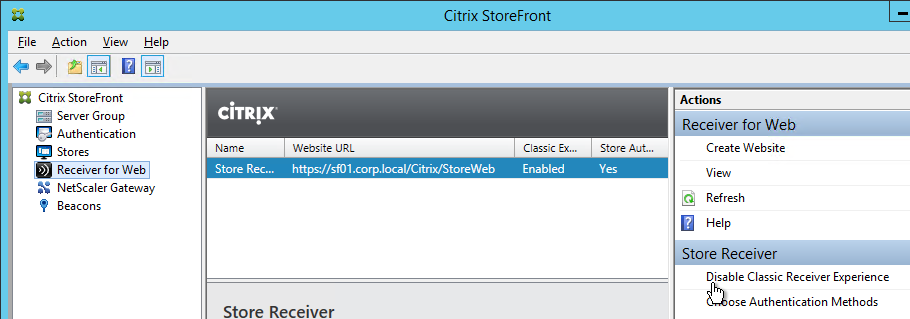
- After upgrading, in StoreFront Console, go to Receiver for Web and Disable Classic Receiver Experience.
- Click Disable.
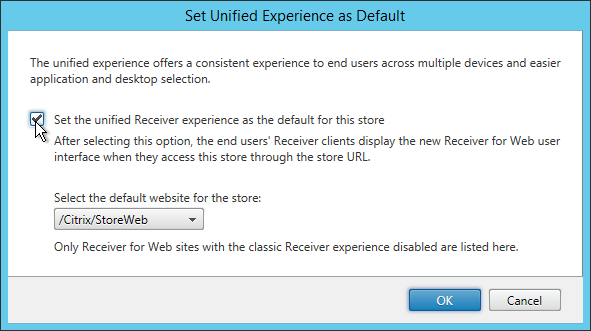
- Go to Stores and on the right, click Set Unified Experience as Default.
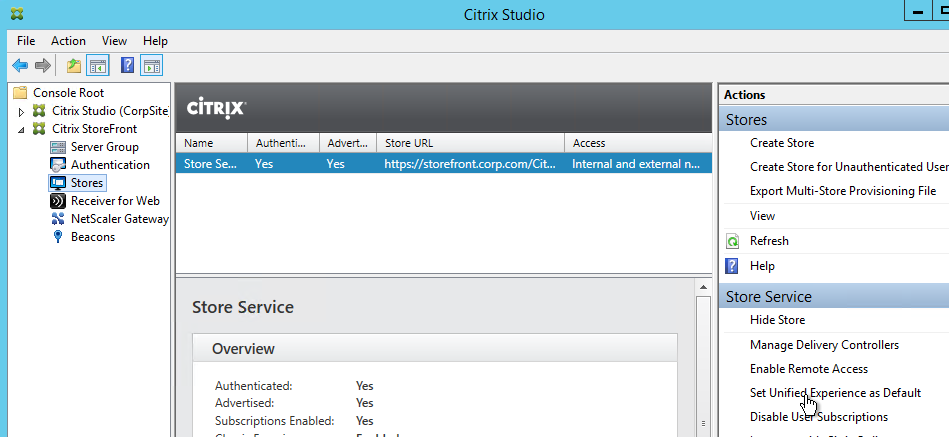
- Check the box next to Set the unified Receiver experience as the default for this store and click OK.
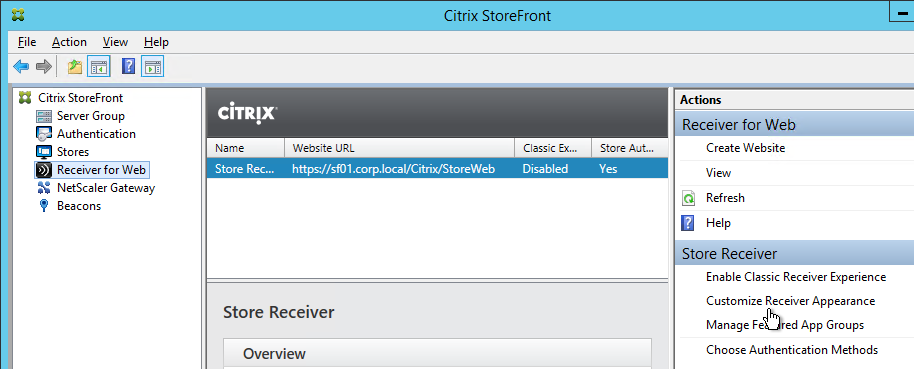
- Go back to Receiver for Web and use the Configure Receiver Appearance and Manage Featured App Groups links to customize the webpage.
Initial Configuration
If this is a new install of StoreFront, do the following:
- In PowerShell, run Set-ExecutionPolicy Unrestricted.
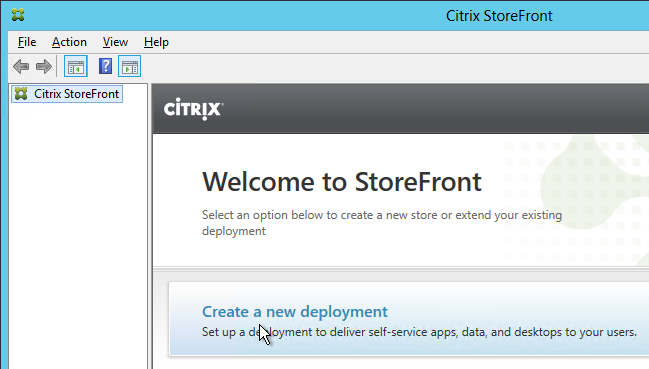
- The management console should launch automatically. If not, launch Citrix StoreFront from the Start Menu.
- In the middle, click Create a new deployment.
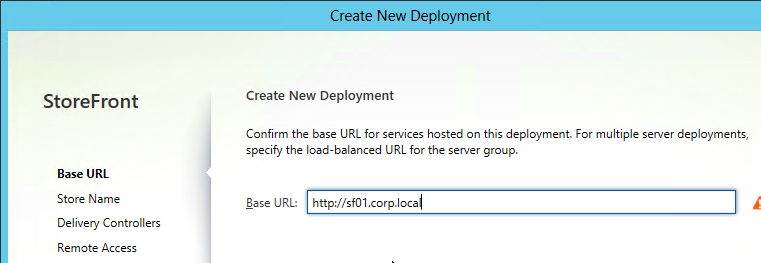
- In the Base URL page, if you installed an SSL certificate on the StoreFront server, then the Hostname should already be filled in. If SSL is not configured yet then you can leave it set to the server name and change it later once you setup SSL and load balancing. Click Next.
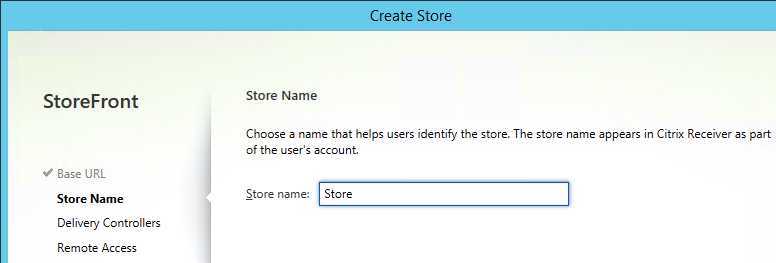
- In the Store Name page, enter a name for the store and click Next. The Store name entered here is part of the URL path. And users see this name in their local Receiver Accounts list.
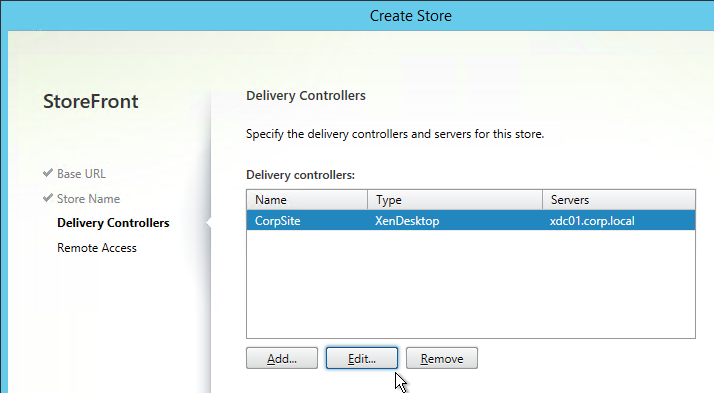
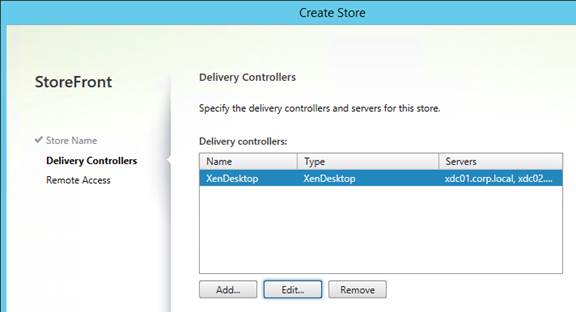
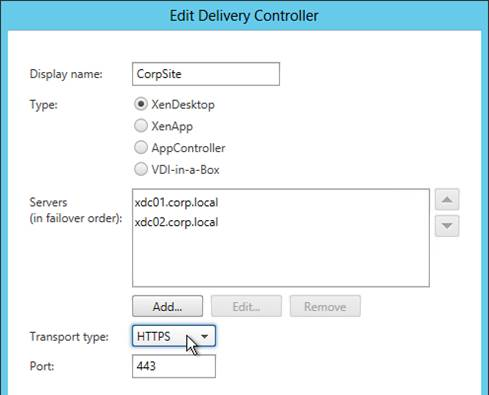
- In the Delivery Controllers page, you can one set of Delivery Controllers per XenApp farm or XenDesktop site. Click Add.
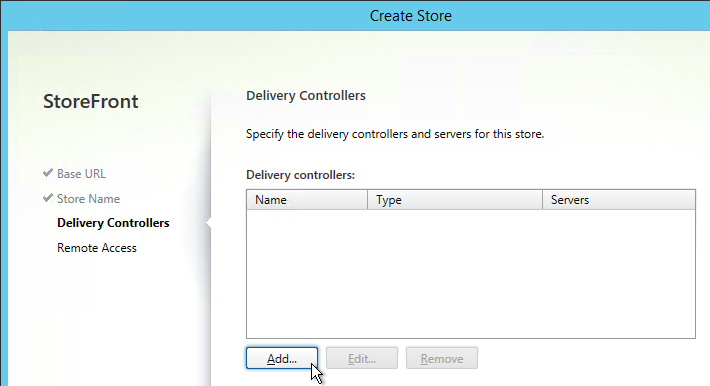
- Change the Type to XenDesktop.
- Enter a descriptive name for the XenApp/XenDesktop 7.6 or newer site/farm. This name does not need to match the actual site/farm name. And users don’t see this name.
- Add the two Controllers. Change the Transport Type to HTTP. Click OK. It’s also possible to set the Transport type to HTTPS if certificates are installed on your Delivery Controllers.

- If you have multiple XenDesktop sites/farms feel free to add them now. Or you can add older XenApp farms. Click Next when done.
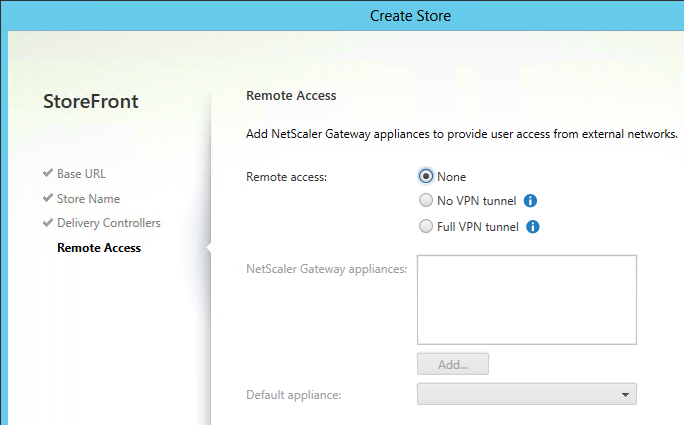
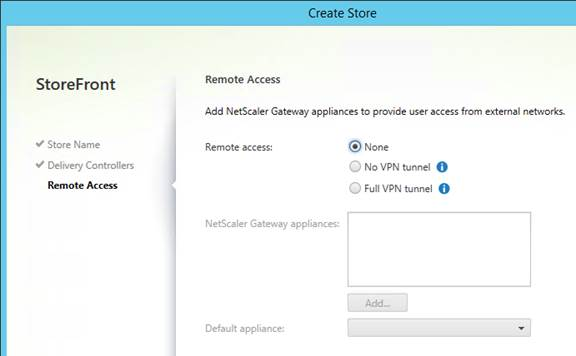
- In the Remote Access page, select None and click Create. You can configure StoreFront to use NetScaler Gateway later.
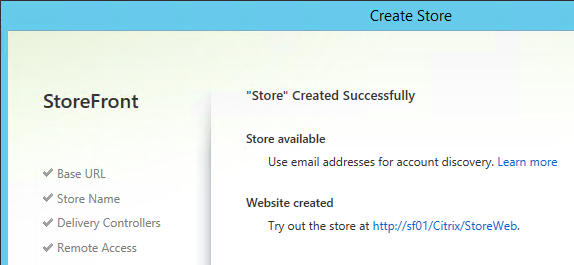
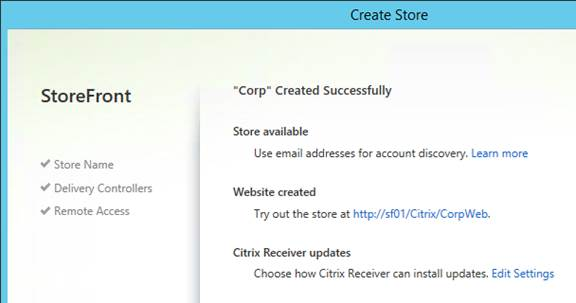
- In the Created Successfully page, click Finish.
Second StoreFront Server
After installation of the second server, NT SERVICE\CitrixConfigurationReplication and NT SERVICE\CitrixClusterService must remain in the Administrators group on both StoreFront servers or propagation will fail.
- Install StoreFront 3.0.9000 on the second server.
- On the 2nd server, create/import the SSL certificate and bind it to the Default Web Site.
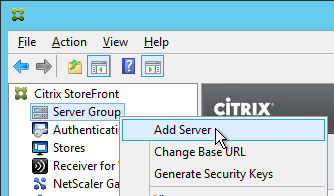
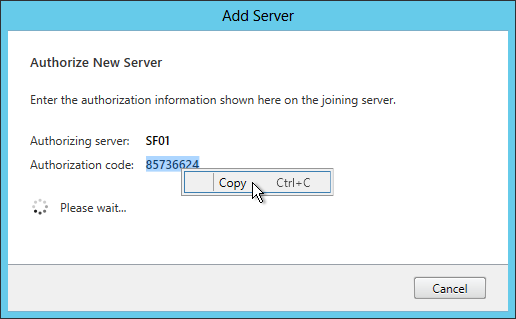
- Login to the first StoreFront server. In the StoreFront management console, right-click Server Group, and click Add Server.
- Copy the Authorization code.
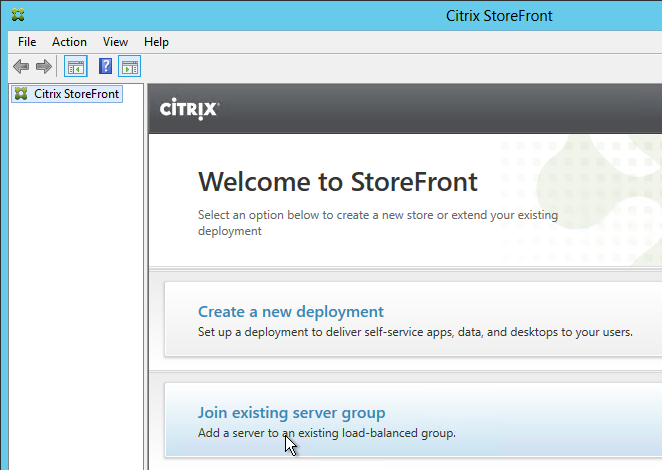
- Login to the second StoreFront server and launch the StoreFront Console. In the middle, click Join existing server group.
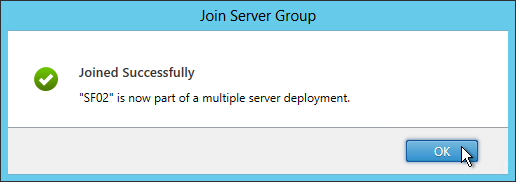
- In the Join Server Group page, enter the name of the first StoreFront server and enter the Authorization code copied earlier. Click Join.

- Then click OK.
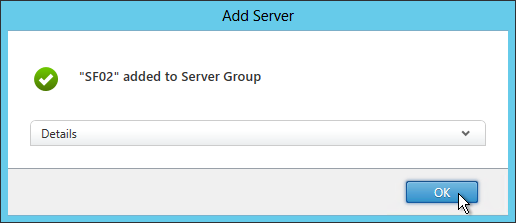
- Go back to the first server. Click OK.
- All changes made on one StoreFront server must be propagated to the other StoreFront server. When changing StoreFront web.config files, change them on one StoreFront server use the StoreFront Console to Propagate Changes to the other StoreFront servers.
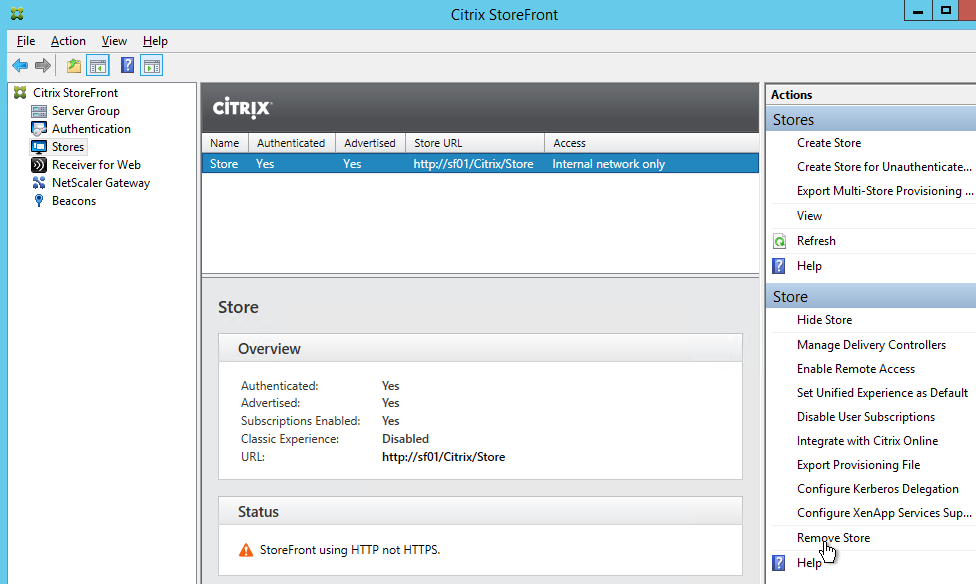
Store Name – Rename
When you install XenDesktop Delivery Controller, you are given the option of installing StoreFront on the same server. If you let the Delivery Controller installer also install StoreFront then the StoreFront on the Controller will have a default store name of /Citrix/Store. If you don’t like the default Store Name then you will need to remove the store and re-add it.
- In the StoreFront console, on the left click Stores.
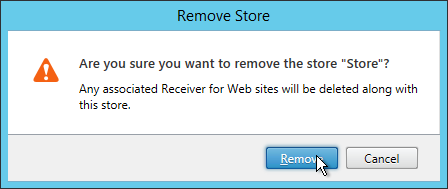
- Highlight the store and on the bottom right click Remove Store.
- Click Remove.
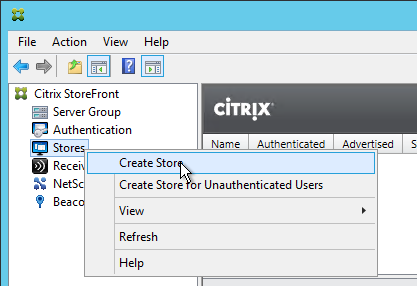
- On the left, right-click Stores and click Create Store.
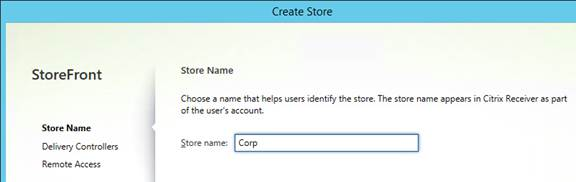
- In the Store Name page, enter a name. This name becomes part of the path (/Citrix/StoreName) and is displayed in Receiver. Click Next.
- In the Delivery Controllers page, add farms and click Next.
- In the Remote Access page, leave it set to None and click Create.
- In the Created Successfully page, click Finish.
HOSTS File
StoreFront 3.0 is smart enough to do a loopback connection to the local StoreFront server instead of sending traffic through the load balancer. For more information see No More Editing of Hosts File at Citrix Blog Post What’s New in StoreFront 3.0.
However, if you have StoreFront servers in multiple datacenters then you are probably using GSLB-enabled DNS names and StoreFront needs to resolve these names to VIPs in the local datacenter. Edit the HOSTS file (C:\Windows\System32\Drivers\Etc\HOSTS) on each StoreFront server with the following entries:
- StoreFront Load Balancing FQDN (e.g. Citrix.corp.com) = Load Balancing VIP in the local datacenter.
- NetScaler Gateway Callback FQDN (e.g. CitrixCB.corp.com) = NetScaler Gateway VIP in the local datacenter.
SSL Certificate
StoreFront requires SSL. You will save yourself much heartache if you install valid, trusted certificates. There are two options for StoreFront SSL:
- SSL Offload: Use NetScaler to do SSL Offload and load balancing. In this scenario NetScaler does SSL encryption on the client side but uses clear-text HTTP on the StoreFront side and thus there is no need for certificates on the StoreFront servers. The SSL certificate on the NetScaler must match the DNS name that resolves to the load balancing VIP for StoreFront.
- SSL End-to-end: In this scenario, NetScaler does encryption on the client-side but also re-encrypts before sending traffic to the StoreFront servers. This requires certificates on the StoreFront servers.
NetScaler usually does not verify server-side certificates so it doesn’t matter what name is in the cert that is installed on the StoreFront servers. However, some other load balancers do verify the cert and thus the cert on the StoreFront servers should match the FQDN of the StoreFront server.
If StoreFront is installed on your Delivery Controllers then both functions share the same IIS website and the same SSL certificate. If you want to enable SSL for the Delivery Controller (XML) connection, then the cert name on each server must match the FQDN of the Delivery Controller. One option is to create an SSL certificate with the following Subject Alternative Names: the StoreFront load balanced DNS name and each of the Delivery Controller FQDNs. Then import this one certificate on all StoreFront/Delivery Controllers servers and load balancers. Or a wildcard certificate could match all of these names.
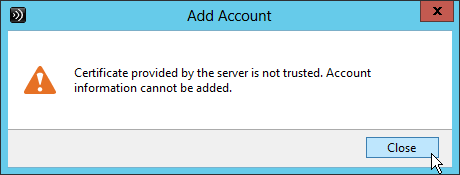
In any case, be aware of the Subject Alternative Name requirements for email-based discovery in Citrix Receiver. Email discovery in Citrix Receiver requires the certificate to not only match the StoreFront load balanced DNS name but the certificate must also match discoverReceiver.email.suffix. Usually the only option to match both names is with Subject Alternative Names. If you have multiple email suffixes then you will need multiple Subject Alternative Names, each beginning with discoverReceiver.email.suffix. If you configure Subject Alternative Names, don’t forget to add the load balanced name as one of the Subject Alternative Names.
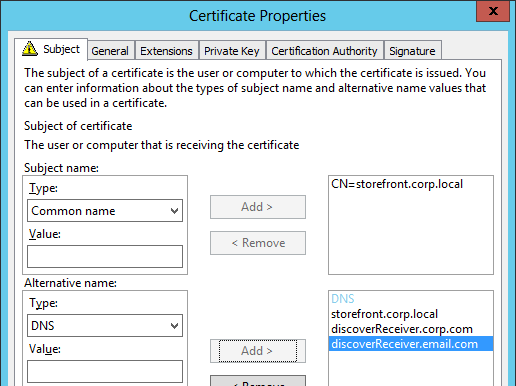
When you view a Subject Alternative Name certificate, on the Details tab, click Subject Alternative Name to verify that all names are listed, including the DNS name that resolves to the load balancing VIP.

When attempting email discovery in Receiver, if the certificate does not match discoverReceiver.email.suffix then users will see this message:
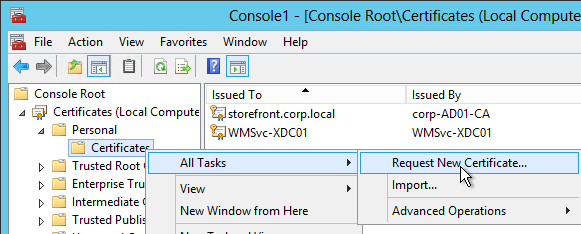
- The Certificates MMC snap-in can be used to create an internal certificate signed by a Microsoft Certificate Authority. The MMC method allows you to specify Subject Alternative Names.
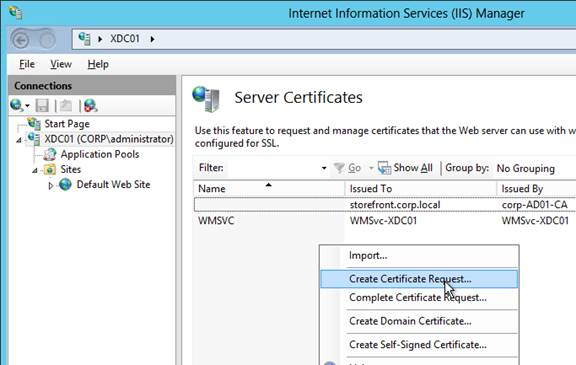
- Or use the Server Certificates feature in IIS Manager to create or import a certificate.
- After the certificate has been created/imported on the StoreFront Server, in IIS Manager, right-click the Default Web Site and click Edit Bindings.
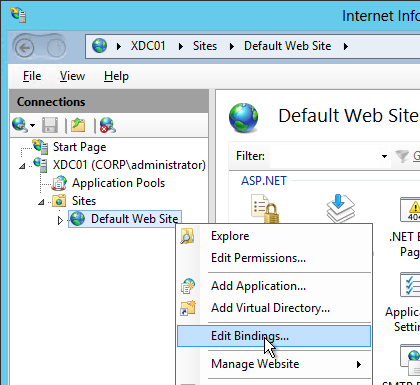
- Click Add.
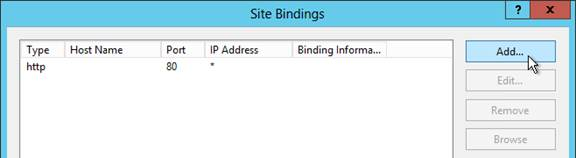
- Change the Type to https and select the SSL certificate. Click OK and then click Close.
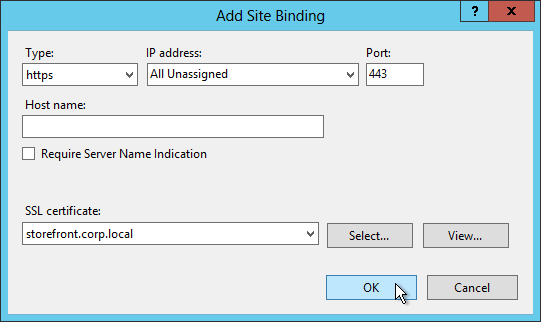
- Next step: change the Base URL inside StoreFront Console.
Delivery Controllers – SSL
Delivery Controllers can be SSL enabled by using one of two methods:
- If IIS is installed on the Delivery Controller, simply install/create a certificate, and bind it to the Default Web Site.
- If IIS is not installed on the Delivery Controller, then you need to run a command line program as described at CTX200415 Secure XML traffic between StoreFront and Delivery Controller 7.x. Or use Ray Kareer’s script at Binding your SSL Server Certificate to the Citrix Broker Service at CUGC.
Once SSL certificates are installed on the Delivery Controller servers, then you can configure the Store to use SSL when communicating with the Delivery Controllers.
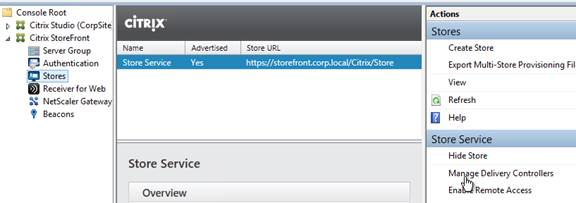
- In the StoreFront Console, on the left click Stores.
- On the bottom-right, click Manage Delivery Controllers.
- Highlight the deployment and click Edit.
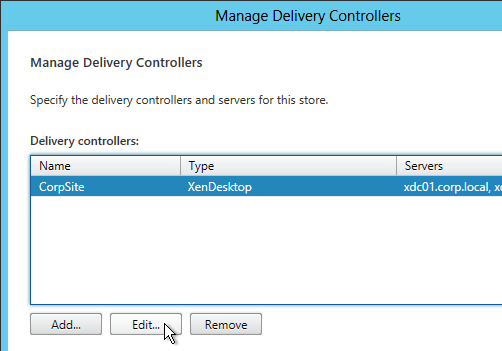
- Change the Transport type to HTTPS.
- Make sure the Delivery Controller servers are entered using their FQDNs. These FQDNs must match the certificates installed on those servers.
- Click OK twice.
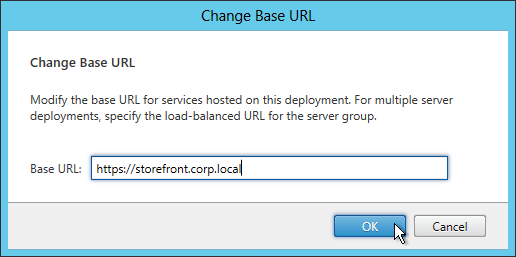
Base URL – Change
The StoreFront Base URL should point to a URL with a FQDN that resolves to a load balancing VIP that load balances the StoreFront servers. Receiver uses this Base URL to connect to StoreFront. If remote, Receiver will first connect to NetScaler Gateway and then use Gateway to proxy a connection to the Base URL.
If you are not following the Single FQDN procedure then the FQDN used for load balancing of StoreFront (Base URL) must be different than the FQDN used for NetScaler Gateway.
The StoreFront Base URL must be https. Receivers will not accept clear-text http URLs. This is true even for remote connections that are proxied through NetScaler Gateway.
- Configure load balancing of the StoreFront servers, including SSL certificate.
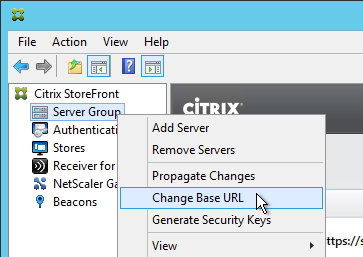
- In the Citrix StoreFront console, right-click Server Group and click Change Base URL.
- Enter the new Base URL in https://citrix.corp.com format. This must be https. Receivers will not accept http URLs.
- If the Base URL is https but you don’t have certificates installed on your StoreFront servers (aka SSL Offload) then you’ll need to run the following commands on the StoreFront servers. See No More Editing of Hosts File at Citrix Blog Post What’s New in StoreFront 3.0.
& "C:\Program Files\Citrix\Receiver StoreFront\Scripts\ImportModules.ps1"

Set-DSLoopback -SiteId 1 -VirtualPath /Citrix/StoreWeb -Loopback OnUsingHttp
Authentication Configuration
If StoreFront is not in the same domain (or trusted domain) as the users, then you can configure StoreFront 3.0 to push authentication to the Delivery Controllers. See XML service-based authentication at docs.citrix.com. Note: StoreFront must still be a member of domain but the particular domain doesn’t matter.
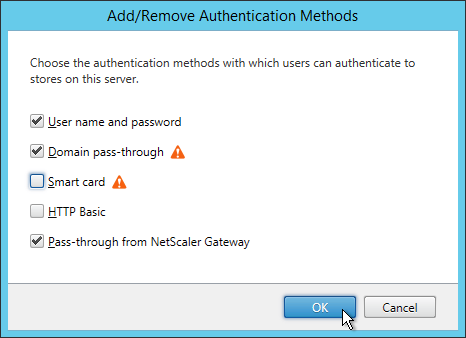
- In the Citrix StoreFront console, on the left, right-click Authentication and click Add/Remove Methods.
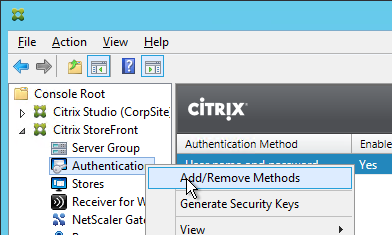
- Check the boxes next to Domain pass-through and Pass-through from NetScaler Gateway. Click OK.
- If you intend to enable pass-through authentication from Receiver Self-Service or from Receiver for Web, run the command
Set-BrokerSite -TrustRequestsSentToTheXmlServicePort $Truefrom a Windows PowerShell command prompt on a Controller. In XenApp 6.5, this is a Citrix Policy > Computer > Trust XML Requests.
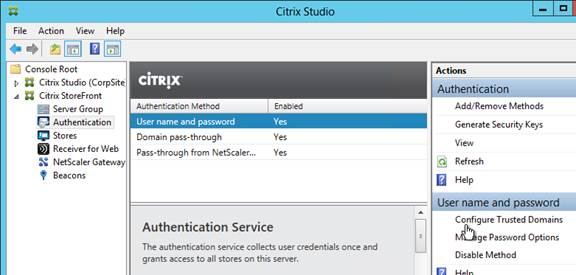
 - With User name and password highlighted in the middle, click Configure Trusted Domains on the bottom-right.
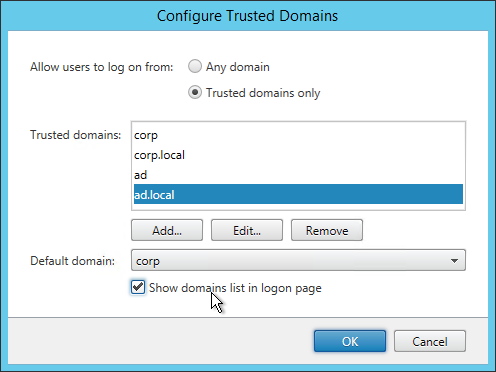
- Select Trusted domains only, click Add, and enter the domain names (NetBIOS and DNS). The DNS suffix is needed if doing userPrincipalName authentication.
- Select one of the domains as the default.
- If desired, check the box next to Show domains list in logon page. Click OK.
- With User name and password highlighted in the middle, click Manage Password Options in the bottom right.
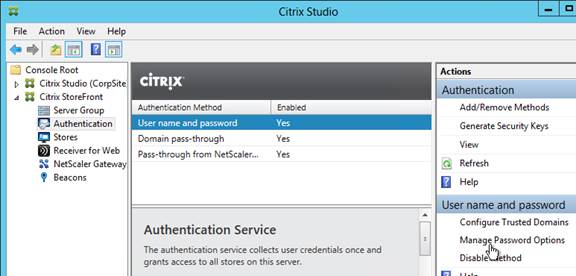
- Make your selection and click OK.
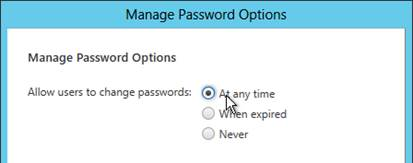
- From Feng Huang at discussions.citrix.com: you can change the password expiration warning period by editing /Citrix/Authentication/web.config. Set showPasswordExpiryWarning to Custom and set passwordExpiryWarningPeriod to your desired number of days.

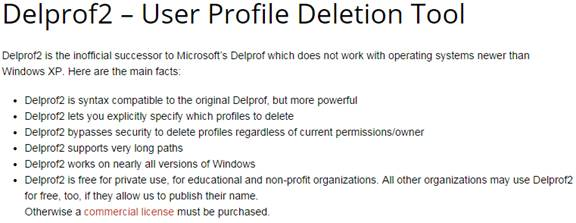
- Be careful with password changes. Any time somebody changes their password through StoreFront, a profile will be created for that user on the StoreFront server. Use a tool like delprof2.exe to periodically delete these local profiles.
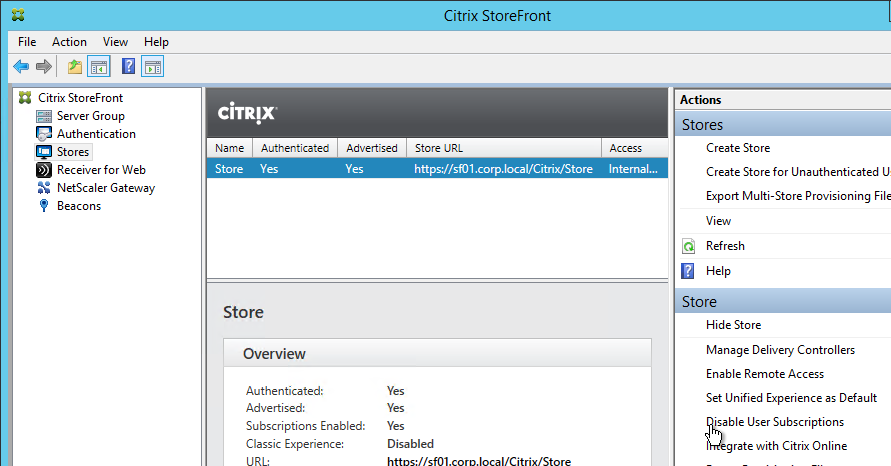
Citrix Online Integration
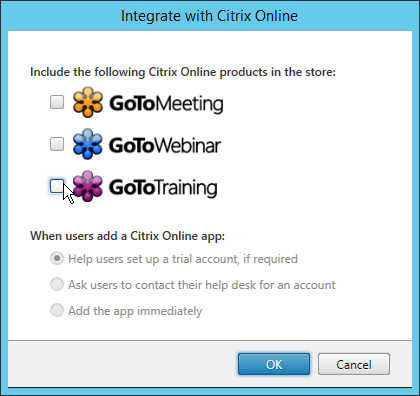
- StoreFront might be configured to add the Citrix Online icons to Receiver. To remove them, on the left click Stores and on the right click Integrate with Citrix Online.
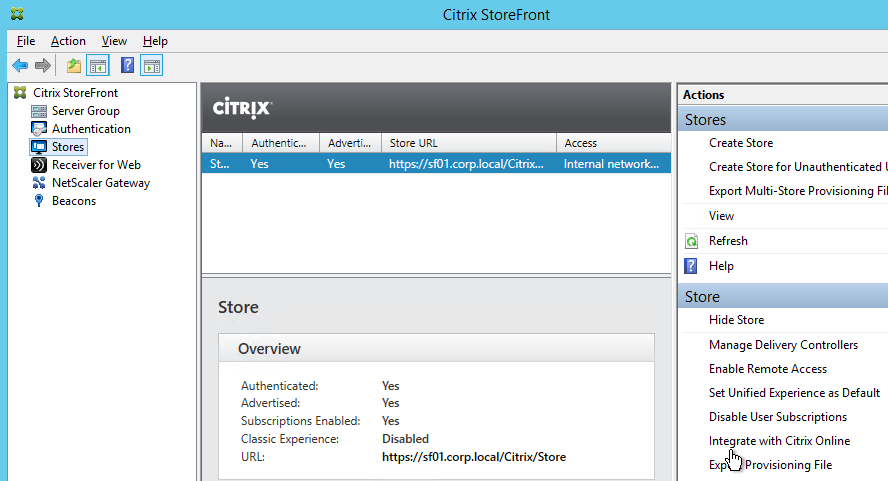
- Uncheck all three boxes and click OK.
Receiver for HTML5 – Enable and Upgrade
By default, Receiver for HTML5 is not enabled.
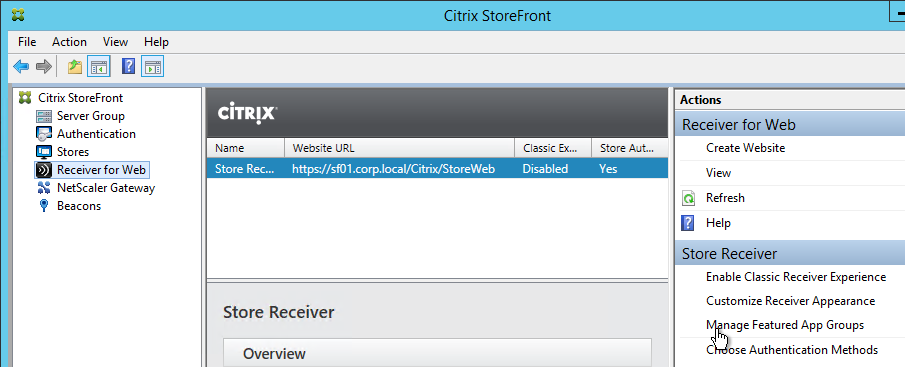
- In the StoreFront console, on the left, click Receiver for Web.
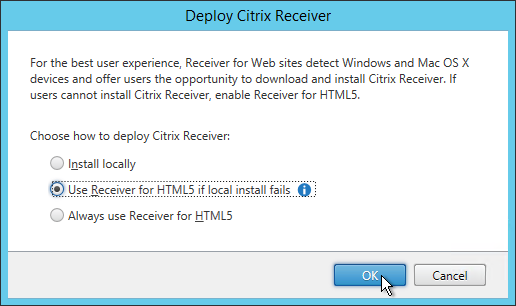
- On the bottom right, click Deploy Citrix Receiver.
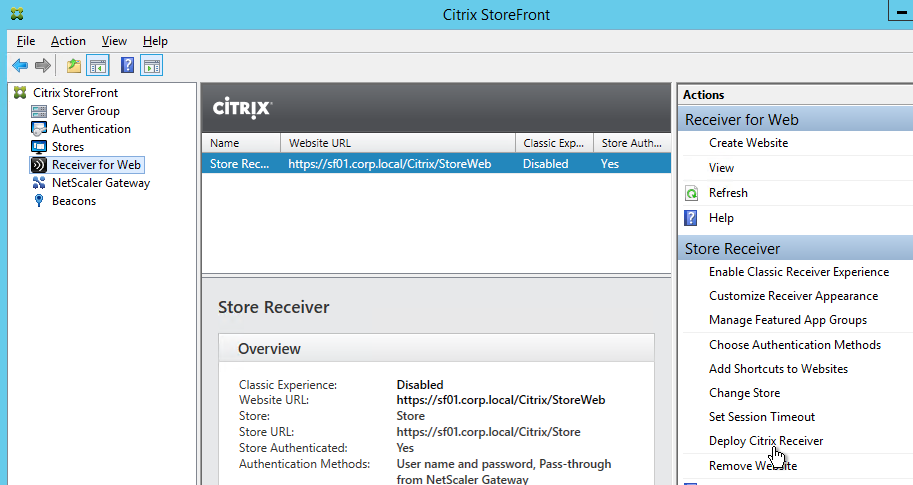
- Change the option to Use Receiver for HTML5 if local install fails, and then click OK.
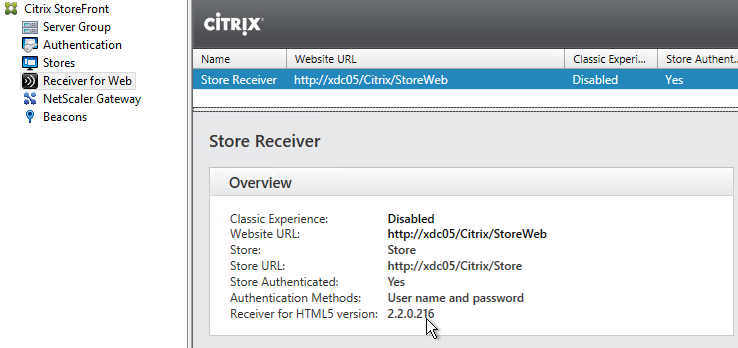
- To see the installed version of HTML5 Receiver, click the Receiver for Web node on the left. The version is displayed in the middle pane, in the bottom half.
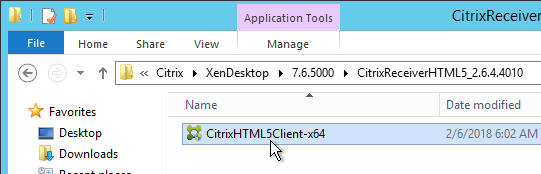
- Download the latest Receiver for HTML5 and install it on one of the StoreFront servers. It installs silently. When you propagate changes, the Receiver for HTML5 should be copied to the other server.
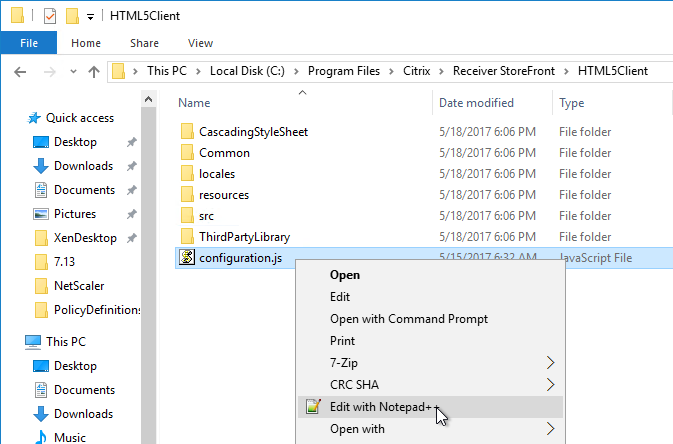
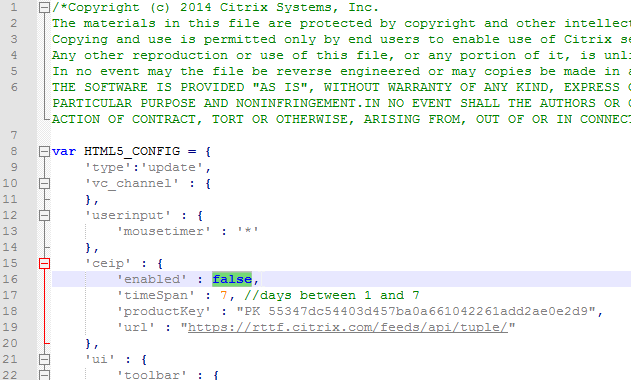
- Customer Experience Improvement Program (CEIP) is enabled by default. To disable it, edit the file “C:\Program Files\Citrix\Receiver StoreFront\HTML5Client\configuration.js”.
- Search for the ceip section and change it to false.
- HTML5 Receiver 2.6.4 adds an experimental multimonitor feature. You can enable it by setting multiMonitorto true.

- HTML5 Receiver 2.6.4 improves PDF printing in Chrome and Firefox. Enable it by setting supportedBrowsersto true.

- HTML5 Receiver 2.6.2 has an experimental printing feature where in the remote app, after printing to the Citrix PDF printer, the second print dialog opens in the current tab instead of a different tab. To enable this feature, on the StoreFront server, edit C:\Program Files\Citrix\Receiver StoreFront\HTML5Client\configuration.js and set openWithinSession to true. Note: this setting changed in 2.6.4 and newer.

- When printing from HTML5 Receiver to the Citrix PDF Printer, the user must click Continue to show the PDF. You can get rid of this prompt in 2.5.1 and newer. In the configuration.js file, scroll down to the line containing printDialog and set it to true.


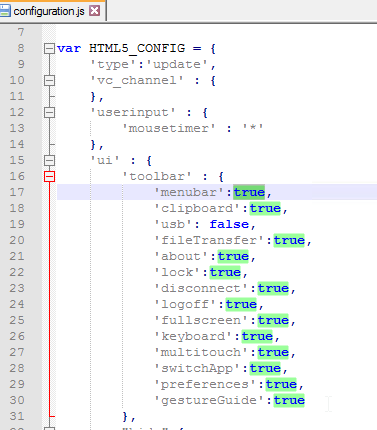
- From Configuring toolbar at Citrix Docs: The new toolbar can be disabled or customized by editing the file C:\Program Files\Citrix\Receiver StoreFront\HTML5Client\configuration.js.
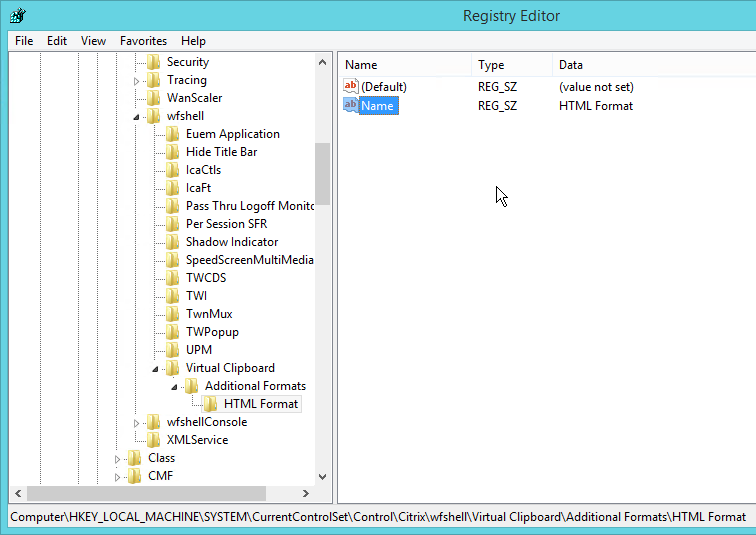
- From Enhanced clipboard support at Citrix Docs: To enable enhanced clipboard support, on every VDA set the registry value HKEY_LOCAL_MACHINE\SYSTEM\CurrentControlSet\Control\Citrix\wfshell\Virtual Clipboard\Additional Formats\HTML Format\Name=”HTML Format”. Create any missing registry keys. This applies to both virtual desktops and Remote Desktop Session Hosts.
- Citrix Blog Post Receiver for HTML5 and Chrome File Transfer Explained:
- How to use the toolbar to transfer files
- Citrix Policy settings to enable/disable file transfer
- VDA registry settings to control file transfer
- HTML5Client\Configuration.js settings for client-side configuration
- How to view HTML5Client log file
- In the StoreFront console, on the left, right-click Server Group, and click Propagate Changes.

- Optionally, install Citrix PDF Printer on the VDAs. The PDF printer is in the Additional Components section of the HTML5 Receiver download page. This PDF printer is only used with Receiver for HTML5, and not with regular Receiver.

- Note: as of Receiver for HTML 2.0, it’s no longer necessary to install App Switcher on the VDAs.
- StoreFront can be configured to launch HTML5 applications in the same Receiver for Web tab instead of creating a new tab. See Configure Citrix Receiver for HTML5 use of browser tabs at Citrix Docs for more information.
Receiver for Web Timeout
- On the left, click Receiver for Web.
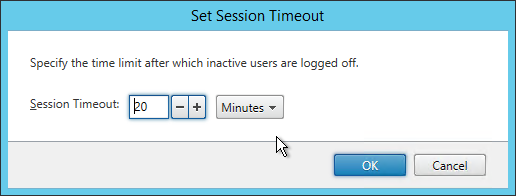
- On the right, click Set Session Timeout
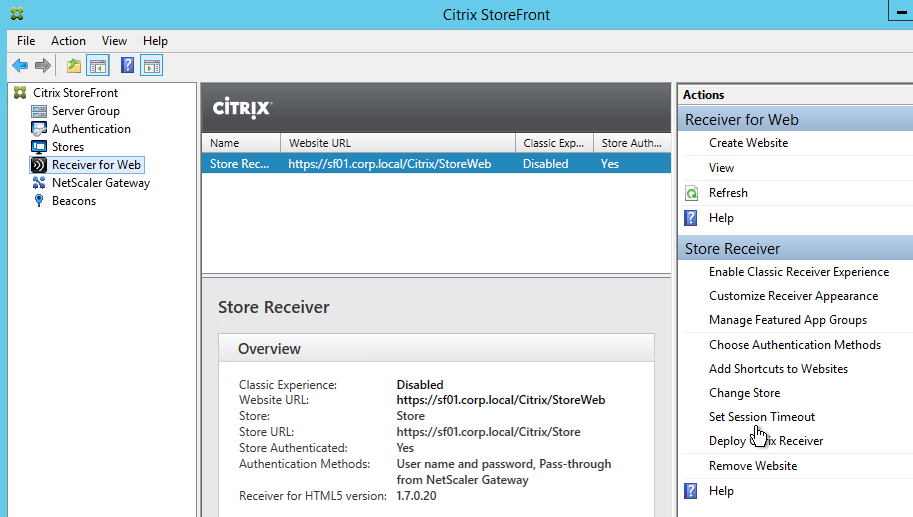
- Set the timeout as desired and click OK.
- The session timeout in StoreFront 3.0 is not being reset correctly when a user launches an application. See Michael Bednarek’s code at discussions.citrix.com that fixes the problem.
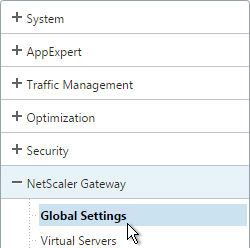
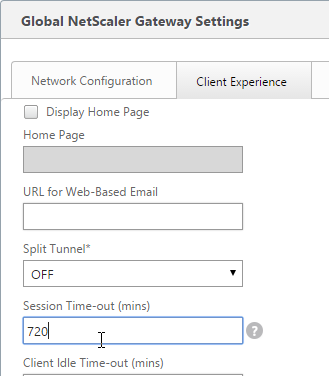
- If you are using a NetScaler, you will need to change the Global Session Timeout located at NetScaler Gateway > Global Settings > Change Global Settings > Client Experience > Session Time-out (mins).
Receiver for Web Pass-through Authentication
If you enabled Pass-through auth in the Authentication node it does not enable it from Receiver for Web. If you enable it in Receiver for Web, additional configuration is required on the Receiver side to fully enable pass-through auth.
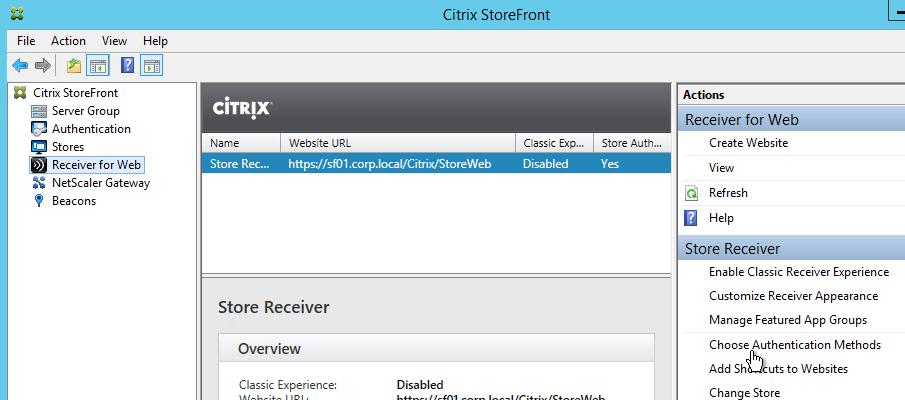
- On the left, click Receiver for Web
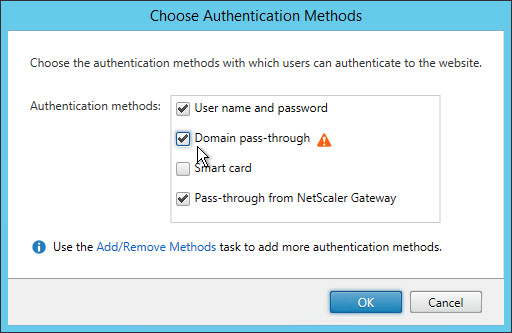
- On the right, click Choose Authentication Methods.
- If desired, check the box next to Domain pass-through. Click OK.
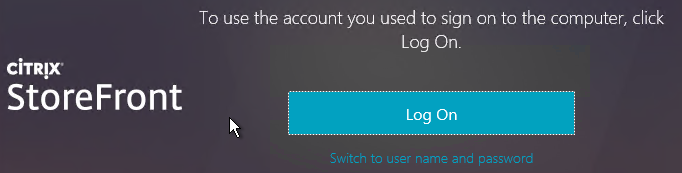
- If the StoreFront URL is in the browser’s Local Intranet zone then you’ll see a prompt to automatically Log On. This only appears once.
- If you try to launch an icon it will ask you to login to Windows. To fix this, you must also enable pass-through authentication on the client side (Receiver).
Unified Receiver Experience
If you did a clean install of StoreFront 3.0 or newer then the newer Receiver UI will already be enabled and you can skip this section.
If you upgraded from an older StoreFront then you can disable the Classic UI to enable the newer UI.
- On the left, click Receiver for Web.
- On the right, click Disable Classic Receiver Experience.
- Click Disable.

- On the left, click Stores. On the right, click Set Unified Experience as Default.
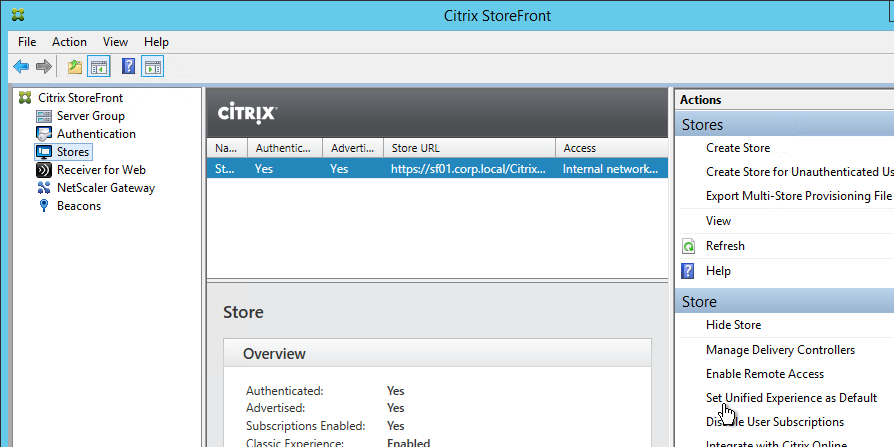
- Check the box next to Set the unified Receiver experience as the default for this store and click OK.

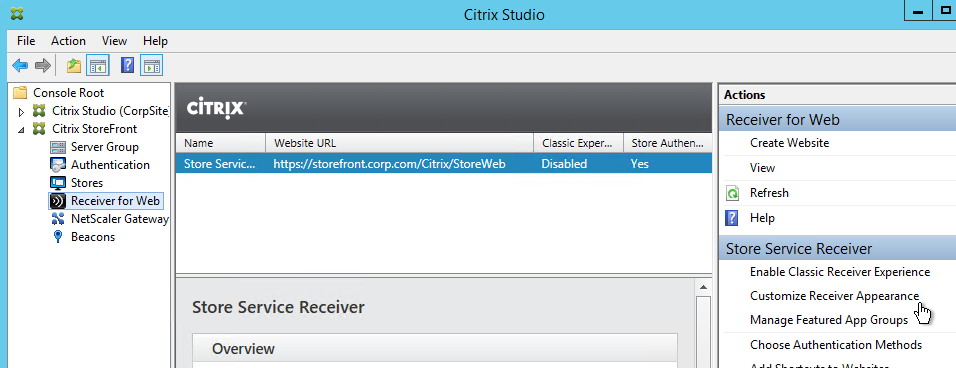
Customize Receiver Appearance
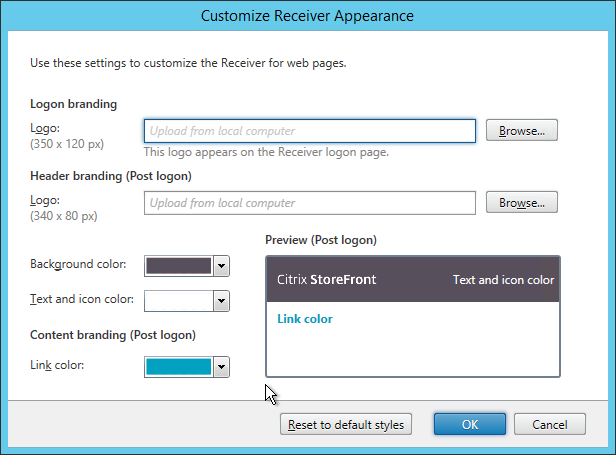
If the Unified Receiver appearance is enabled, you can go to Receiver for Web > Customize Receiver Appearance to change logos and colors. Additional customization can be performed using the SDK.
You can also Manage Featured App Groups.

These Featured App Groups are displayed at the top of the Apps > All page.
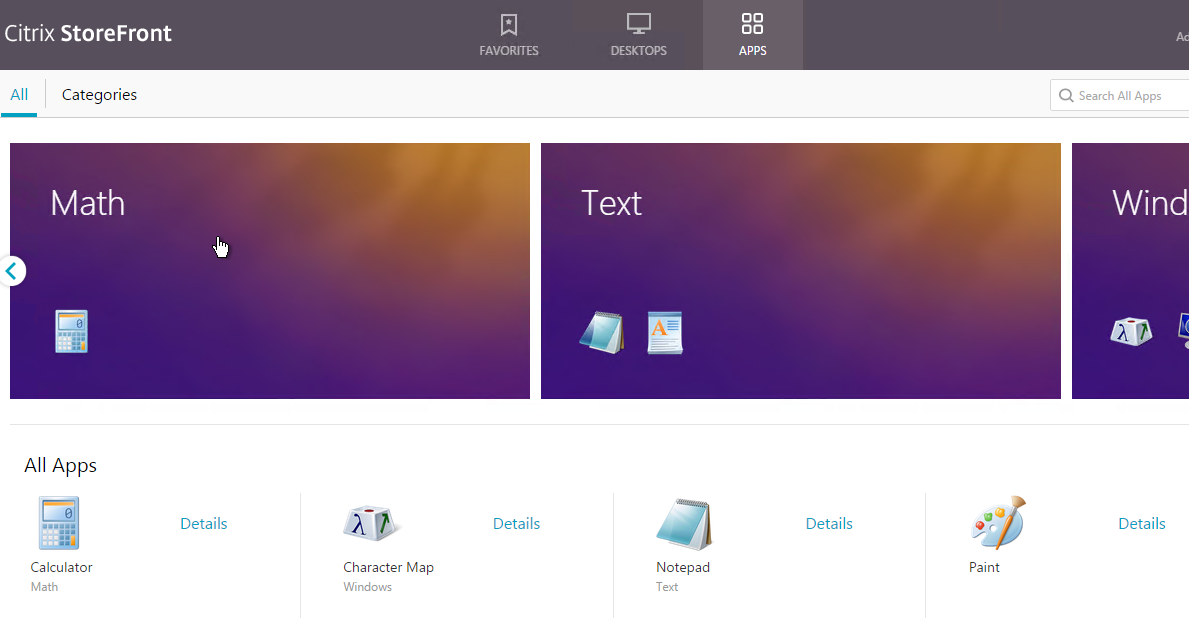
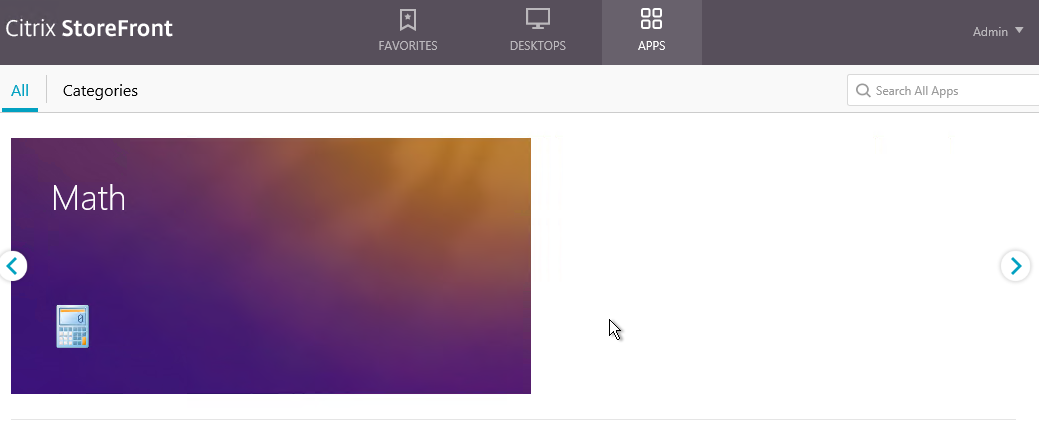
By default, Featured App Groups are displayed with continual horizontal scrolling. This is OK if you have several Featured App Groups but doesn’t look right if you only have one Featured App Group.
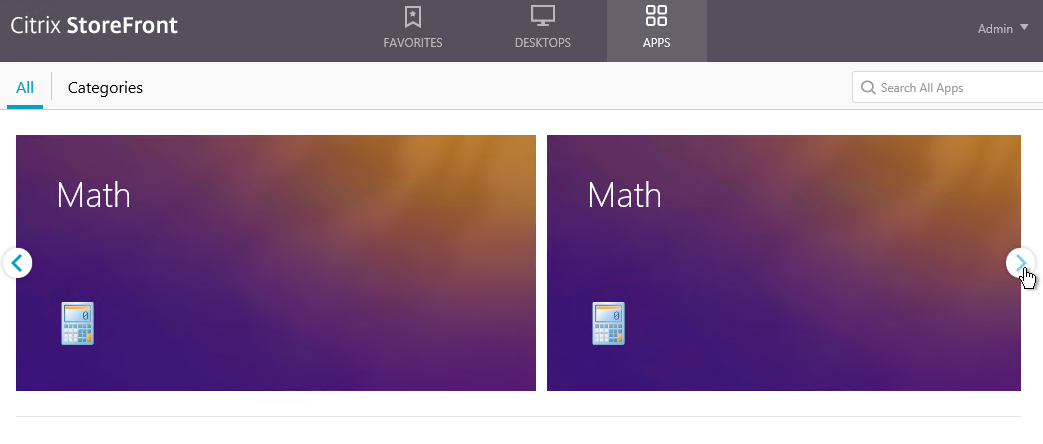
Michael Bednarek has posted some code at Citrix Discussions to disable the continuous horizontal scrolling. Also see CTX202415 StoreFront Featured Apps Group Appears More Than Once.
Additional StoreFront and Receiver customizations are available through the StoreFront APIs.
Default Tab
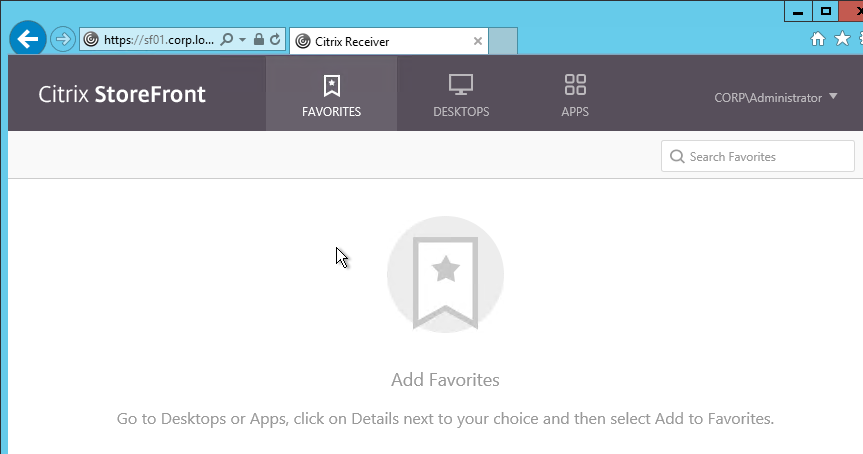
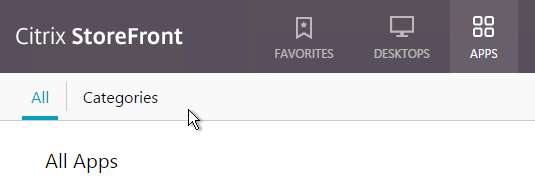
- By default, when a user logs in to StoreFront, the Favorites tab is selected. Users can go to other tabs to add icons to the list of Favorites.
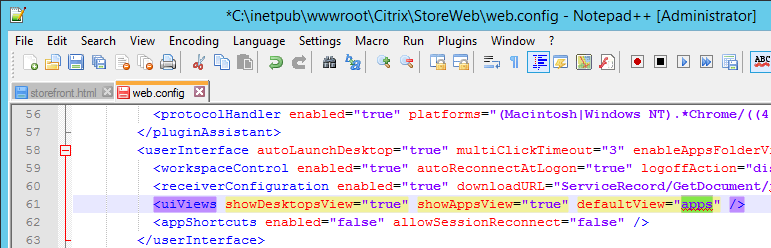
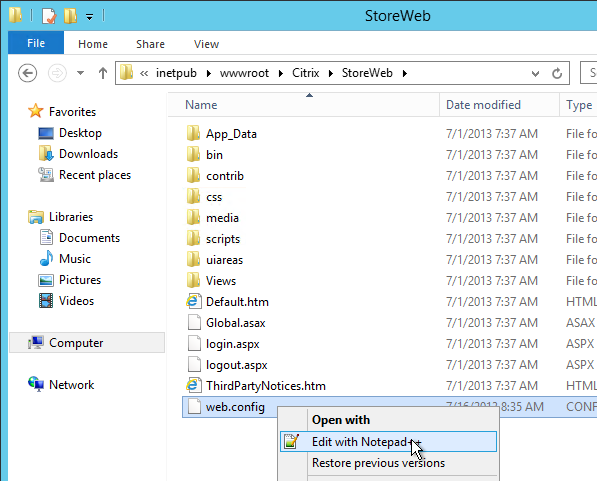
- You can change the default tab to something other than Favorites by editing C:\inetpub\wwwroot\Citrix\StoreWeb\web.config in an elevated text editor.
- Search for defaultView or scroll to line 61. Change the defaultView to apps or desktops, or leave it set to the default of auto. Auto will select a tab in the following priority order depending on which tabs (views) are enabled: Favorites > Apps > Desktops.
- If you change it to default to the Apps view, then you might also want to default to the Categories view instead of the All view.
- You can do this by adding the following code to C:\Inetpub\wwwroot\Citrix\StoreWeb\custom\script.js. More details at discussions.citrix.com.
CTXS.Extensions.afterDisplayHomeScreen = function (callback) {
     CTXS.ExtensionAPI.navigateToFolder('/');
};

CTXS.Extensions.onViewChange = function (viewName) {
  if (viewName == 'store') {
    window.setTimeout(function () {
    CTXS.ExtensionAPI.navigateToFolder('\\');
    }, 0);
  }
};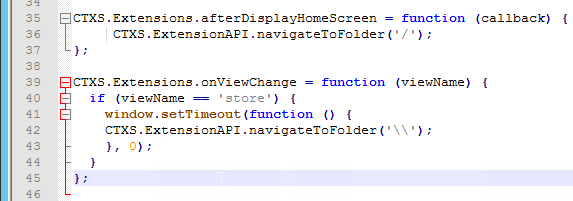
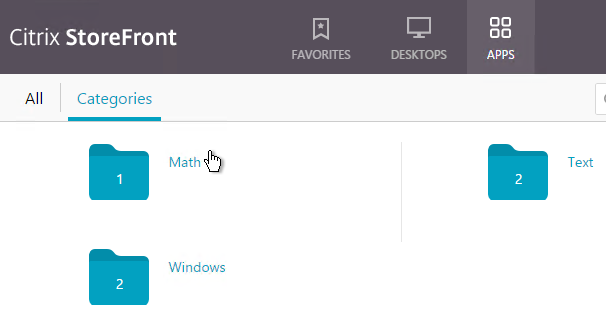
- Then when you login to StoreFront you’ll see Apps > Categories as the default view. This works in Receiver too.
- To completely remove the Favorites tab, in the StoreFront Console, go to Stores > Disable User Subscriptions.
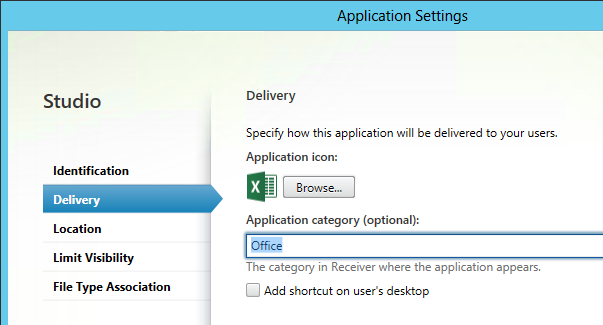
- When publishing applications in Studio, specify a Category so the applications are organized into folders.
Propagate Changes
Any time you make a change on one StoreFront server, you must propagate the changes to the other StoreFront server.
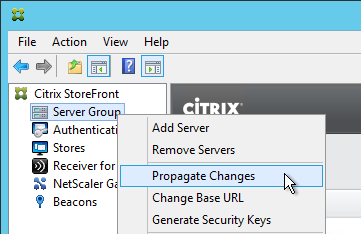
- In the StoreFront console, on the left, right-click Server Group and click Propagate Changes.
- You might see a message saying that you made changes on the wrong server.
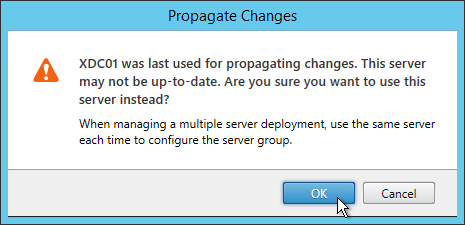
- Click OK when asked to propagate changes.
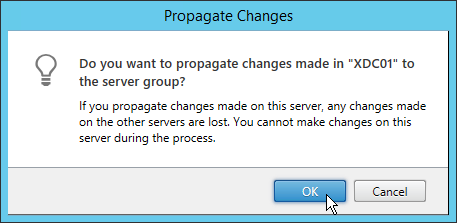
- Click OK when done.

IIS Default Web Page
Citrix CTX133903 How to Make Storefront the Default Page within the IIS Site. To make a Storefront Web site the default page within the IIS site, complete the following procedure:
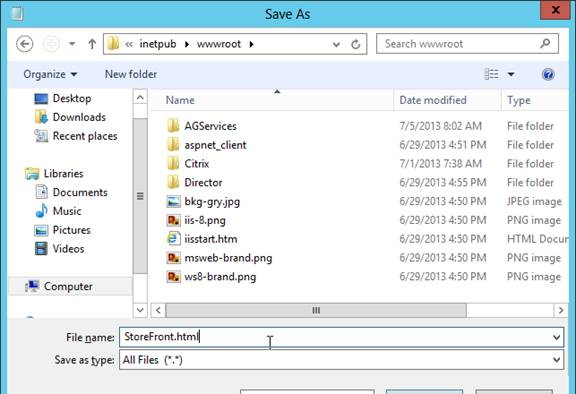
- Open Notepad and paste the following text:
<script type="text/javascript">
<!--
window.location="/Citrix/StoreWeb";
// -->
</script>
Note: Replace /Citrix/StoreWeb to the correct path to your Store’s Web site, if required. You can also put https://StoreFrontFQDN in the location field.
- Select File > Save As and browse to the IIS folder, by default the C:\inetpub\wwwroot is the IIS folder.
- Select the Save as type to All types.
- Type a file name with an html extension, and select Save.
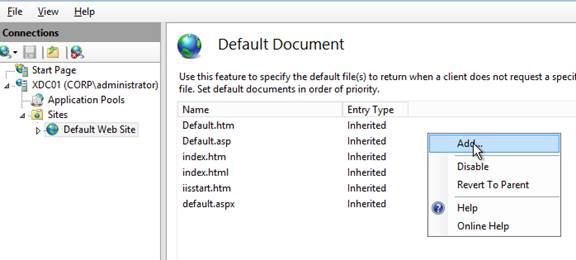
- Open IIS Manager.
- Select the SERVERNAME node (top-level) and double-click Default Document, as shown in the following screen shot:

- Select Add…,
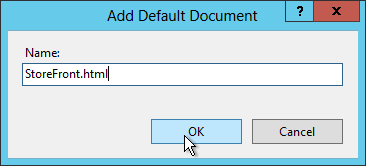
- And enter the file name of the .html file provided in Step 4.
- Ensure the .html file is located at the top of the list, as shown in the following screen shot:
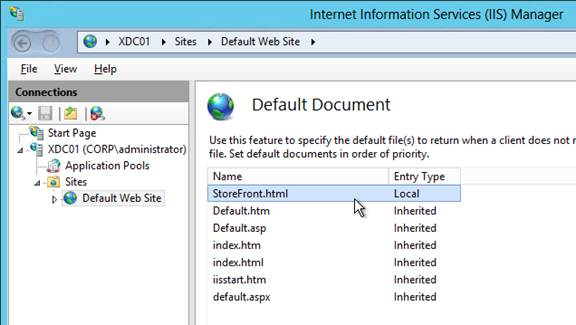
- Repeat these steps on every StoreFront server.
Deploy Citrix Receiver from StoreFront
If you performed a standalone install of StoreFront, then it is configured to tell users to pull Receivers from Citrix’s website. Follow this section to configure StoreFront to download Receivers directly from the StoreFront server.
Or if you installed StoreFront 2.6 using the XenApp/XenDesktop 7.6 autoselect.exe and later upgraded it to StoreFront 3.0.9000, then StoreFront will probably have local Receiver clients that need to be upgraded. Both procedures are covered in this section.
- Go to C:\Program Files\Citrix\Receiver StoreFront\Receiver Clients\. Create a Windows folder if it doesn’t exist.
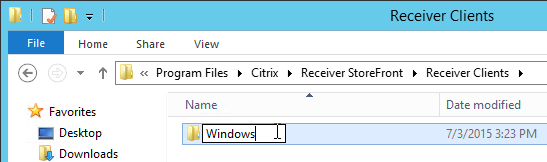
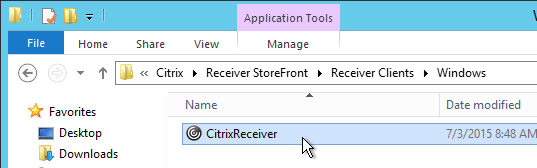
- In the Windows folder, paste the downloaded Receiver 4.9.9002 LTSR for Windows, overwriting the existing file if one exists. Rename the file the CitrixReceiver.exe if it isn’t already. Do this on both StoreFront servers.
- Go back up to the Receiver Clients folder and create a Mac folder if one doesn’t exist.
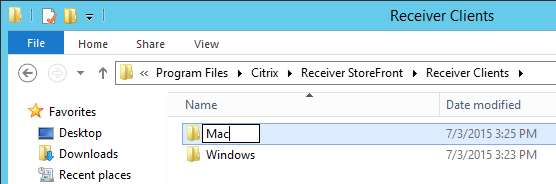
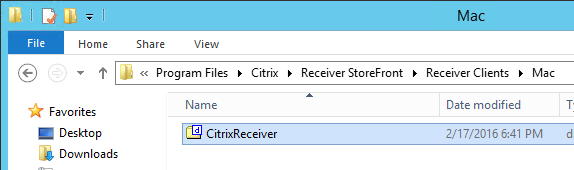
- Copy the downloaded Receiver for Mac 12.9.1 to C:\Program Files\Citrix\Receiver StoreFront\Receiver Clients\Mac. Overwrite the existing file if one exists. Rename the file to CitrixReceiver.dmg.
- Go to C:\inetpub\wwwroot\Citrix\StoreWeb and edit the file Web.config. If UAC is enabled you’ll need to run your text editor elevated.
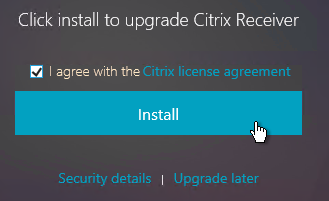
- Scroll down to the pluginAssistant section (line 52). If desired, change upgradeAtLogin to true. This will enable StoreFront to check the installed version of Receiver and offer to upgrade.

- If the win32 and macOS paths point to downloadplugins.citrix.com, you can change the paths to a local folder so that the Receiver is downloaded directly from StoreFront instead of from Citrix.com. Simply change http://downloadplugins.citrix.com to clients. Also, change the file names so they match the ones on your StoreFront servers.

- Close and save the file.
- Propagate Changes to the other StoreFront servers.
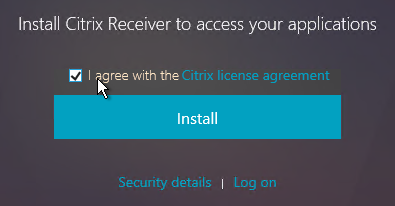
- When users connect to Receiver for Web, they will be prompted to install or upgrade. Note: this only applies to Receiver for Web. Receiver Self-Service will not receive this prompt.
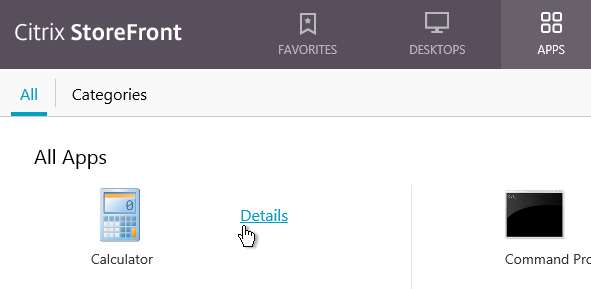
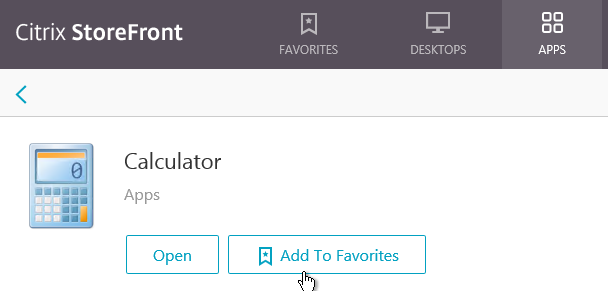
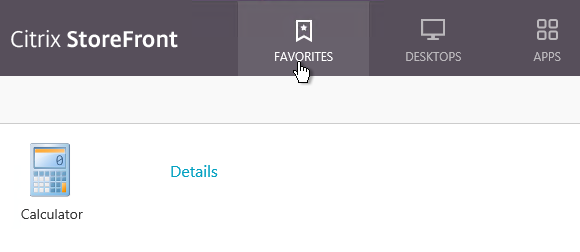
Auto-Favorite
To force a published application to be favorited (subscribed), use one of the following keywords in the published application description:
- KEYWORDS: Auto = the application is automatically subscribed. But users can remove the favorite.
- KEYWORDS: Mandatory = the application is automatically subscribed and users cannot remove the favorite.
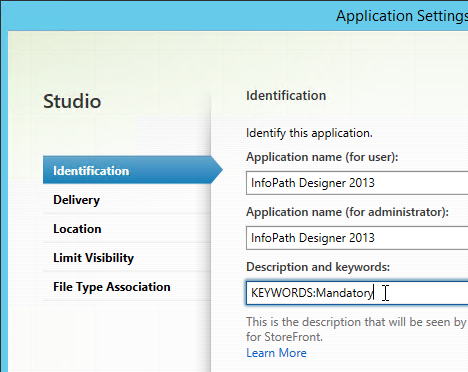
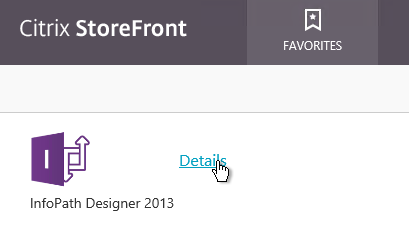
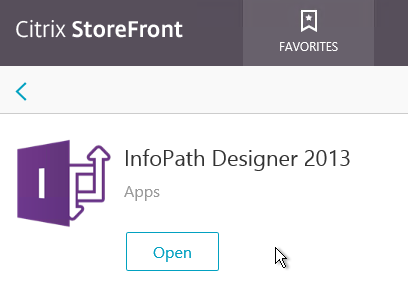
With Mandatory applications there is no option to remove the application from Favorites.
Related Topics
StoreFront Subscriptions – disable, control, replicate, etc.
StoreFront Tweaks – customize RFWeb, SSON for PNAgent, etc.
If i have different session timeouts on two Storefront servers which is part of the same server group (For example, Session timeout = 1 hr on one and 24 hrs on the other) which setting will be used ?
Is it possible that if a user has contacted Storefront Server1, the session timeout on Server 1 will be used and if the user has contacted Server 2, the session timeout of Server 2 will be used ?
Yes, I believe that’s correct. But I can’t imagine why you have different timeouts on different servers in the server group?
Hi Carl Stalhood,
We have store front servers version 2.6 load balanced in netscaler configured for XenApp 7.6 and XenApp 5.0 environment. Is we can upgrade store front version from 2.6 to 3.6 ? Is the version is compatible with both XenApp 7.6 environment as well as XenApp 5.0 environment ? Our vendor has recommended the version 3.0 but we actually want to upgrade it to 3.6 because of more features.
Yes, you can do a direct upgrade. Take a snapshot because StoreFront upgrades frequently fail with no rollback, and 2.6 doesn’t have an option to export the config.
StoreFront works with any version of XenApp from 4.5 and newer.
Thanks Carl,
Could you please share a link having steps mentioned to upgrade the store front from 2.6 to 3.6. Also please suggest how we can first test the store front 3.6.
It’s an inplace upgrade. Just run the installer.
Hi Carl
We have multiple sites configured on Storefront 2.6. Is it possible to configure the Change Password option on only one or certain sites? The configuration is normally done under Authentication, but when activating this , it will show the change password option on all the sites configured.
StoreFront 3.5 changed authentication so it is per store.
Not remove it, just disable it.
Ex: A store with 5 delivery groups in it (mix of 7.6 and 6.5 DC’s groups), I have to run a maintenance window on one group of 6.5 XenApp servers and I want to disable that group (not delete it). Is there any way to do that?
I looked for some powershell cmdlets to do so, but I couldn’t find anything useful.
If you post your question to http://discussions.citrix.com, a Citrix Product Manager might respond.
Hi Carl, is there a way to disable a specific delivery controller group in a store in Storefront?
I have a storefront that publishes icons from 7.6 and 6.5 farms, I’ve created a store with many delivery controller groups in it pointing to all our farms and sometimes and I would like to “disable” one for those groups for maintenance purposes.
Is there any way to accomplish this in XenApp 7.6?
Remove it from the config? I suspect you can use PowerShell commands to automate it.
Carl, I upgraded from 3.0.1.56 to 3.0.1000.1 and my MMC is crashing now. I ran through CTX218815 article you mentioned above to fix the root cert issue and that is when the constant MMC crash started. I’ve been on the phone with support for about 2 hours with no luck. Any thoughts? Thanks.
Log Name: Citrix Delivery Services
Source: Citrix Delivery Services Admin
Date: 11/15/2016 10:46:40 AM
Event ID: 0
Task Category: None
Level: Error
Keywords: Classic
User: N/A
Computer: XXXXXXXXXX
Description:
Error while creating the Citrix StoreFront Snap-in.
Failed to import required module C:\Program Files\Citrix\Receiver StoreFront\Management\Cmdlets\UtilsModule.psm1.
AuthorizationManager check failed.
I will note that I can still get to the storefront web page, login, and launch apps. It’s strictly something with MMC and that psm1 file.
Be sure you get the updated files. See https://discussions.citrix.com/topic/382558-the-management-console-is-unavailable-because-a-root-certificate-is-missing/ for an up-to-date full discussion of this issue. The files were updated yesterday by Citrix.
Looks like the new files fixed the issue with MMC. Thanks. GOtta love Citrix…
@John
Srid
https://www.virtualexperience.no/2015/11/04/fixing-citrix-receiver-duplicate-icons-and-stores/
Not sure if u knew or not.
Hi Carl, first off thanks for this great article. I had a question regarding migration. We are currently running an XA7.6 site and are building a XA7.11 environment. If a requirement is to keep our end-users receiver configurations where the store name appears. What considerations should we keep in mind. Specifically can we (or rather must we) use the same store name on the new site, in order to make the cutover transparent to our users? What else do we need to consider perhaps from the NetScaler side? We have two Netscalers fronting our Storefront servers for external connections.
Store name, Farm names, Base URL, and SRID must be identical for Receiver to not treat it as a new store. These are same requirements to let Receiver connect to StoreFront in multiple datacenters.
The profiles are saved to the network share on logoff. During login, they are downloaded to the local disk and cached.
Hi Carl,
Is it possible to set the Citrix Receiver as default? (couse HTML5 gives more problems)
Kind Regards,
Rick
You could disable HTML5 Receiver.
In Chrome users have to hit the button to detect Receiver. IE shouldn’t be an issue. Edge doesn’t work at all.
i have a question regarding the host file edits. If I am gslbing internally between multiple datacenters, I don’t need to add a Netscaler gateway callback FQDN, correct? that’s only for when users are authenticating through the netscaler gateway correct? All I want to is load balance my internal URL.
Callback is for NetScaler Gateway authentication and SmartAccess. If you only use Gateway for HDX Optimal Routing, then you don’t need a callback.
Hi Carl,
I just installed a StoreFront 3.6 to use with Citrix 7.11
I’m trying to add my old 6.5 farm to this new StoreFront but when I add nothing comes up.
I added using “Manage Delivery Controllers”
Type: Xenapp (6.5 or lower)
Servers: I added all of my 6.5 farm servers (using the servername.domain)
Protocol: HTTP
Port: 80
Is there any other configuration that I’m missing?
Thanks in advance!
What error are you seeing in Event Viewer > Applications and Services > Citrix Delivery Services? If you’re doing Single Sign-on, then you might need to enable Trust XML.
Carl, i found the problem: the 6.5 farm is responding using port 8080 😉
I see that you can set the categories view as default for Receiver for web, but what about Native Receiver?
If Unified Experience is enabled then it should work.
Hello Carl,
I’ve setup my Storefront web site to detect the Windows workstation for older versions of Citrix receiver and upgrade it to version 4.4.
The issue I have is when Citrix receiver try to do the upgrade, it requires admin access to the workstation.
Is there any way to do Citrix Receiver upgrade through Storefront without admin access on the machine?
The message is:
“Cannot install Citrix Receiver.
The installer detects that a client already exists and it can be modified only by an administrator.
To upgrade that client, run the package with administrator privileges.”
Please let me know if you need additional information.
Thanks,
Vu H. Le
Hi Carl,
Are there any issues adding a Win 2012 r2 server fresh install as a storefront server to an existing Win 2008 r2 storefront in a Xenapp 7.8 environment? The Storefront is ver 3.5? Can you also use the same Win 2012 r2 storefront server as a delivery controller in same environment with win 2008 r2 delivery controllers?
I’m not aware of any issues.
Hello Carl,
firstly let me thank you for such a great job. You saved me endless nights by your series related to StoreFront 3.x deployment/tweaking.
Nevertheless there is one thing I was not able to find anywhere. Is it possible to hide Favorites tab? I hid possibility to add Application/Desktop to Favorites and therefore it doesn’t really make sense to have it there as we do not enforce any application to be mandatory.
Thanks and regards,
Stanislav
In StoreFront, you can disable subscriptions.
Great documentation.. Thanks for this.
I have some doubt as I am going to renew SSL Certificate for Storefront in our environment.
1. Will there be any impact on live ICA sessions? or on Active sessions through Netscaler Gateway?
2. Do I needs to link intermediate-Root certificate with Server SSL certificatein Storefront any where?
3. Shall I need import same certificate on all Storefront server which are load balanced?
4. Shall I need to import and link whole certificate chain in Netscaler as well?
Will look forward for your response.
Thanks in advance.
1. If you are running NetScaler 11.0 build 64 or newer, then changing the Cert should not drop anybody.
2. Any certificate installed on NetScaler should be linked to Intermediate. If in IIS, simply importing the Intermediate Cert to the Intermediate Certificate store is sufficient.
3. Depends on your XML Configuration. If StoreFront is separate from Controllers then yes. If StoreFront and Controllers are the same machine and if https to the Controllers then no. In either case, it’s not required.
4. Not the whole chain. Link all certs in the chain except the root certificate.
Thanks Carl for clarifying my doubts. Can I ‘Propagate Change ‘ to other storefront servers to replicate new SSL certificate to all store front servers and will help to avoid import it manually?
Cert binding is an IIS configuration that is performed manually on each server.
Hello Carl, Is there a way to skip Receiver detection? It takes some time and can cause confusion with our less technical end users. We run Receiver 3.4 and sometimes SF/NSGW doesn’t detect it. I would like to completely disable it. Is that possible?
In /Citrix/StoreWeb/web.config, search for pluginAssistant.
Thanks Carl, I’m running SF 3.5 and have set web.config pluginAssitant as pasted below. When I connect through my NSGW I still receive the blue “Receiver” button that is SF prompting for Receiver…it allows me to say “already installed”. Am I missing something on the Netscaler? It looks to be happening at SF. Is it unavoidable?
web.config:
pluginAssistant enabled=”false” upgradeAtLogin=”false”
What browser? If Chrome or Edge, the button is required for StoreFront to detect it and use it. Without the button, you’d only get HTML5 Receiver.
IE can use plug-ins and thus doesn’t have this problem.
Do you have HTML5 enabled as fallback? You can turn that off.
Also see http://support.citrix.com/article/CTX209283
HI Carl,
Sorry, I am not sure if I am posting in the correct section, but let me try. I was following this post step-by-step and not sure where it is gone wrong, but for some reason when user is logged in to the Citrix via StoreFront it can see only 15GB out of 70GB. So just to make sure the vDisk is 70GB and the user whe is logged in to Citrix can see only 15GB as the local drive.
Kind regards
Pawel.
Are you caching on local drive? What is the size of the cache drive?
No, the back end is running on VMware and that is not physical computer. It is virtual PC. So when the user is logged in under his profile can see only 15GB, but when I check in disk management I can see whole 70GB drive…
Is your vDisk set to Cache on Hard Drive or Cache in RAM with overflow to disk? If so then you have a .vmdk file attached to your Target Device. What is the size of that .vmdk file?
I noticed that the default landing page (which I made the default by editing the script.js file on Storefront) shows up for any user logging in with the Add Favorites … superimposed on top of the Apps/Categories window. Until a user adds a favorite, this piece remains on the default landing page and prevents the user from clicking on any of the icons in the rows it sits on top of.
I noticed that too. If you read the thread others also noticed. So the solution for Categories view is not a good one.
Hi Carl. Solved it (hotkeys in StoreFront 3.0.1.57 not disabled). With Citrix Receiver 4.4 it works again that the hotkeys are disabled when configured with (None) in Default.ica.
Hi Carl. Great blog. May I ask you if you have an idea for the following issue? I’ve updated StoreFront to 3.0.1.57. Since then all hotkeys, which I’ve disabled with the Default.ica file in wwwroot\Citrix\StorenameWeb\App_Data, are active again although the Default.ica file still exists.
Did you mean “C:\inetpub\wwwroot\Citrix\Store\App_Data\default.ica”?
I used http://support.citrix.com/article/CTX140219 and with the hotkeys set to None and it worked. “C:\inetpub\wwwroot\Citrix\Store\App_Data\default.ica”. Put the hotkeys in the WFClient section.
Is it possible to force Receiver upgrade from the web?
You mean if Receiver is not on the StoreFront server? I’m not sure. You can try editing c:\inetpub\wwwroot\Citrix\StoreWeb\web.config and enable upgradeAtlogin.
When Receiver for Web detects a lower version Receiver in the client PC, for the moment, you can click “upgrade later” to carry on without upgrading. Is it possible to force the upgrade?
I don’t think it’s possible to prevent that. You can try posting at discussions.citrix.com to see if somebody has a hack. Or maybe call Citrix Support and submit an enhancement request.
Hi Carl,
In regards to the “Update later” tick box for deploying receiver, is it possible to remove this option? so then the user is only given the option to update/Upgrade to no matter what. This way it keeps all user’s at the same level as each other and no one is different from another.
hi carl
First i would like to to praise you about your very clear and detailed article of storefront tweaks
i have some question about the section of the PNAgent Authentication about the Single Sign-on part
because you write that for different logon method (such as domain passthrough & smart card passthrough) we need do create a second store but i cant find a way to create a second pnagent site and attach him to the second store so that we will get two pnagent sites and each of them pointing to different store with a different logon method.
ill be hapy to know if you have a solution for that.
best regards
When you create two stores, doesn’t each store have it’s own XenApp Services URL? Are you not able to configure different Auth for each XenApp Services URL?
Hi Carl, thanks for spending the time to compile the useful configurations changes above, it’s really appreciated! I’m having an issue making a basic change to the X1 theme on StoreFront 3.0.1. I want to add a hyperlink below the Log On button. I have completed a similar task for the NetScaler logon page without issue! Are you able to point me in the right direction to do this?
Any luck with the material at https://www.carlstalhood.com/storefront-tweaks/#customize3?
Thank you for the quick response! I have been able to configure a banner which appears post logon. For example, above published content I can ensure a hyperlink is present there. However, there is a requirement for the link to appear on the pre-login page (it’s for self service password reset).
Hi Carl, please ignore my last comment! I have been able to get there from the cookbook link you provided. The following line requires adding to the script.js file for text to appear below the logon button:
$(‘.customAuthBottom’).html(“Example three – below login box”)
Using <a href will allow for the use of hyperlinks instead of general text. The style.css file can be updated to amend the text size and colour.
Thanks for your help!
Hi Carl, I have configured Citrix receiver 4.3 using storefront 2.6 to appear published application on user’s start menu when login to Citrix desktop. When I launch the published application from start menu single sign on is working, if user try to launch the published desktop within the same session from start menu I am getting authentication prompt to enter the credential where sson is not working. Any suggestions pls
Is RDP “Prompt for Password” enabled in a GPO somewhere? Try creating a new GPO that disables “Prompt for Password”.
Ho wto increase the upload size on Storefront html5 8.1. It’s getting interrupted when i upload more than a MB size.
Storefront behind the Netscaler gateway setup.
So it seems on Storefront 3.0 and above have taken the upgraded client feature out on upgrading citrix receiver on clients. I find it hard to believe, but support just confirmed it.
If you have no client the will not work any longer. I just cant believe this. Carol what version Did you upgrade on this thread?
Citrix is stating this….
“Or if you installed StoreFront 2.6 using the XenApp/XenDesktop 7.6 autoselect.exe and later upgraded it to StoreFront 3.0.1, then StoreFront will probably have local Receiver clients that need to be upgraded.”
is not accurate?
Carol can you confirm that 3.0 and 3.0.1 offer client upgrades?
I realize you cant upgraded from 3.x to the 4.x without using ReceiverCleanupUtitly first.
I was able to get around this by building a my own package. It was a exe that ran the cleanup utilty first, then installed 4.3.100 with certain switches so the end users didn’t have to do anything. By renaming it to CitrixReceiverWeb.exe it would still operates the same. But they state they did away with Client upgrades on StoreFront 3.0
I think you’re asking multiple questions.
You can certainly install the updated Receiver clients on StoreFront so that StoreFront can offer them to clients.
You can configure StoreFront upgradeAtlogin to offer newer Receivers to older installed Receivers. I have definitely tested this on 3.0.1.
Carl,
My intent was to only ask if this is working in your environment.
pluginAssistant enabled=”true” upgradeAtLogin=”true”>
Seems like the client upgrade at logon is not working. Citrix at this point is wasting my time. I have to get through the front line guys. So Annoying. There support has really gone down hill.
Is there any other options that I am missing other than modifying the webconfig?
Offering them to clients, and offering upgrades are different pieces.
I can get it to offer a client if there is not one. But offering a upgrade, it just will not do.
Thank you for you help.
Works for me. What browser?
With receiver 3.4 up to 4.2 on the clients.
Clients run IE10, and IE11. Storefront house version 4.3.100. with upgradeAtLogin=”true”>
Does it offer you a local client if Receiver is not installed? If the client comes from CITRIX.com then something’s not right.
Yes, It will offer a local client from what I have listed in the clients directory on Storefront. But only if there is no citrix receiver client installed on the users end. But if you have a earlier version of receiver it does not prompt to upgrade. ” like in your screen shot above”
Nothing is coming from Citrix.com. The main issues is I cant get it to detect older verisons of receiver on clients.
Google is a good option to test from due to NPAPI removed from chrome.
I tried it last weekend and it definitely offered me an upgrade. I was using IE 11 and the site is in the Local Intranet zone.
Ok, fair enough. Ill kick it back on Citrix. Thanks for confirming this Carl.
Hi Carl ! As said before, keep up the good job, your site is just amazingly helpfull !!!
I’m running a XA 6.5 farm. Storefront 3.1 is freshly installed on a new server.
Locally (into the LAN) all works like a charm but when reaching the storefront page from IE or receiver from the outside (through a Netscaler 10.5) I get this message as soon as I log: “Your session is expired. Please log in”.
I guess I miss someting. Any idea, please ?
StoreFront 3.0.1? Or StoreFront 3.1, which is currently in beta?
The error usually means a persistence problem on the load balancer.
I must have read most of your posts by now – very informative again. In my setup when a user browses to the receiver for web site for the first time they get prompted to install receiver (4.3 is already installed). After clicking Install the next page with the download options is displayed only very briefly before it refreshes and logs in as expected. My question being is there a way to avoid the install button in the first place?
What browser? Modern browsers like Chrome use Protocol Handlers. Users have to click a button to enable the handler so the presence of Receiver can be detected.
Ok, no way to get around that one. Thanks for the quick response.
Sorry I should have mentioned I only get this with Chrome. IE just logs in straight away.
Hi Carl! Thank you for that post! I have recently seen an interesting issue by our customer. He has multiple site SF configuration. If he opens the first app in receiver for example IE it starts correctly. If he opens another one than IE starts once more and the second app also starts. He has then 2 IE sessions and one session from second app and so on. Maybe you know this issue? I have found thsi thread but without solution. http://discussions.citrix.com/topic/370062-multi-site-store-configuration-apps-launching-twice/
THX!
Hi Carl! Maybe you have experience with this issue?
I have not seen the issue yet. Did you also configure farm aggregation in your web.config file?
Yes I did. According to http://docs.citrix.com/en-us/storefront/3/configure-high-availability-for-stores/sf-configure-ha-example.html
Interesting is a fact you have the issue only when you use native receiver. In Browser it runs clean. If we take multiple site configuration away, then it works normally again.
Thanks so much for these pages..
Do you know if there is away to make the Header branding in Customize Receiver Appearance bigger? Default it is 340 x 80 px.. Thanks.
After the image is uploaded it is added to C:\inetpub\wwwroot\Citrix\StoreWeb\custom\style.css. You are welcome to edit this file. For example, you can add the width attribute to the .logo-container class to make it wider. Other size adjustments might require changes to other CSS classes.
Does Storefront 3.0 still have the issue where the second console cannot be opened when propagating or corruption will occur?
I’m not aware of that issue but it’s always a good idea to keep the consoles close while editing the web.config files. Propagation essentially copies the files from one server to another and I wouldn’t be surprised if there are conflicts between the files and an open console.
Carl,
Regarding Citrix Receiver deployment from StoreFront site, do you know of a way to deploy CitrixEnterpriseReceiver, or any Citrix Receiver with Single Sign-On automatically installed and enabled for that matter? So users do not have to manually select this option?
Only through a script. And admin permissions needed.
Yes, unfortunately we push the CitrixEnterpriseReceiver through SCCM with script to install and enable to existing users. Was hoping for a way during new installations, when users reach the StoreFront page that do not have Citrix Receiver installed, that they would not need to select the “Enable single sign-on”, as this includes SSO in installation. To enable, we enable through GPO. Still hoping for a way to auto install Citrix Receiver with SSO from StoreFront like old days…
SSO on non-managed machines could be a privacy risk so Citrix wants to make absolutely sure the user understands the ramifications of automatically sending credentials to an untrusted server.
We have 2 separate storefronts set up. One on 2 and one on 3. When users are connecting via the Citrix receiver app on their mobile devices they are being prompted to select an account, either the old store or the new. Is there anyway to have these 2 separate stores to be transparent to the users. We don’t want them confused. It appears that if they select either store they are presented with apps from both stores. I would just like to set it so that the “choose an account screen” doesn’t show up when first configuring from a mobile device.
Are they the same store name? Or do you have two different stores on the same StoreFront server?
When using a browser, it’s easy to connect to a particular Store. With Receiver Self-Service, it downloads a provisioning file, which contains all of the stores and prompts the user to select one. You could hide a store so that it’s no longer included in the provisioning file. Or you could put your stores on different servers.
hi Carl,
do you know if there is a way to disable the “upload/download” feature on the Citrix HTML5 receiver ? the citrix policy to restrict “client drive redirection” seems to have no effect on this part.. ?!
thanks
Under ICA\File Redirection is a setting named “Download file from desktop”. However, the release notes say: “When file upload/download is disabled using Studio policy, the toolbar continues to display the button for these features.” http://docs.citrix.com/en-us/receiver/html5/1-8/about-this-release.html
thanks for your quick return,
we’re using the receiver HTML 5 v1.7.0.20
I have no policy called “Download file from desktop” in the citrix studio console 7.6
I have only the option to restrict the “Client Drive redirection” and the button are still visible and usable !
Upgrade Group Policy Management – https://www.carlstalhood.com/controller/#gpomgmt
thanks a lot the upgrade to 7.6.300 does the trick.
So it means that by default Xenapp7.6 setup.exe doesn’t provide this policy natively to fine tune the HTML5 receiver? and the FP3 for Xenapp 7.6 was required ?!
Actually FP2 came with Group Policy Mgmt 2.4 Hotfix 2, which has the settings. But FP3 is the newest.
Thank you so much i learned good things about configuration levels.
Hi Carl
Great site! A very general query but currently we are running WI on Netscaler VPX (i.e. all on the virtual appliance). We provide access to just one published app (XenApp 6.5). Would you say it’s worth ‘upgrading’ to Storefront in this scenerio and if so what version of Netscaler VPX should we be using as the entry point?
Reasons for considering upgrading are primarilydue to Receiver compatibility issues for our dispersed client base. Thanks
If you have any desire to upgrade to 7.6 (or 7.7) then I would definitely look at StoreFront. I would upgrade to StoreFront 3.0 for no other reason than support for modern browsers. You can install StoreFront on your Windows-based XenApp Controllers. Or you can build one or more new Windows servers. For a single application, I would turn off subscriptions/favorites. StoreFront also improves multi-datacenter configurations.
Good work once again . Your contributions to the Citrix community is outstanding.
Hi Carl,
I have made the modifications to both sections to change the default from Favorites to Apps\Catagories. I have even reset IIS but it will not take affect for some reason. I have also tested with Citrix Receiver and it still defaults to Favorites. Any ideas?
Thanks
Brian
If you have multiple StoreFront servers, did you Propagate changes?
Great info. Thanks so much, Carl! Really helped me as a Citrix beginner. Also great to know about the StoreFront 3.0 upgrade and new features.
FYI the Citrix Receiver for HTML5 has some issues with SSL on Firefox and Chrome. I had to disable it to avoid some nuisance. See http://support.citrix.com/article/CTX134123
Hi Carl,
Great site, I’ve learned a lot configuration musts from your site.
I am going through the process of deploying a PoC XenApp 7.6 environment, so far I have configured the following in both of our datacenters (connected by slow link):
1 Delivery Controller (7.6 all the latest HF installed, 1 machine cat, 1 delivery group)
1 VDA – XenApps manually provisioned in this stage of the PoC, but once Storefront and HA is sorted, I will work on PVS. (7.6 with all the latest HF installed)
1 Storefront 3.0
The second datacenter deployment is for DR purposes only. The 2 storefront servers are in a Server Group and both delivery controllers are added to the store as separate sites/farms. DNS is pointing to the storefront server in primary site and is secured with wildcard cert.
I’ve modified the web.config (and propagated changes) to use the second farm as DR only. I.e. Single “farm” entry in primaryFarmRefs with the Name of the primary datacenter farm/site added to the Storefront Store and the name of the second farm/site entered into backupFarmRefs. As I understand this is what is required for the icons not to be duplicated in the Receiver.
My problem is that while the icons are not duplicated in Receiver I do have another strange issue. The first application launches perfectly but every application after that launches the original application again as well as the second application. So for example: I launch Outlook first, it opens. I then click Word, Outlook launches again and then word launches (all in the one session on the same VDA).
I restored the original web.config and removed the second site from Manage Delivery Controllers and applications are launching as expected.
I also have a Netscaler in each site, load-balancing the storefront servers (followed your article for that too) but I have removed these from the equation to simplify the troubleshooting of my issue.
Regards,
David
Do you have prelaunch configured? Is it the same in both Receiver and RfWeb?
Hey Carl, Looking to test the new SF3 and wondering if I can setup a new StoreFront 3.0 server and have it serve a few VDI’s that are brokered by the delivery controllers that our current SF2.1 servers use?
You can build as many StoreFront Server Groups as you want. Multiple StoreFront Server Groups can point to the same farms.
and just to confirm the SF Server Groups can be different versions. In our case 2.1 and 3.0 and based on the SF URL hit the same VDI can be served?
StoreFront is just a web server. XenApp/XenDesktop doesn’t care what web server you put in front of it.
Receiver definitely cares since it communicates with StoreFront. If you have the same DNS name for both then you might find functionality to change depending on which server is being accessed. If you expect to move Receivers from one SF group to the other then make sure both SF groups have the SRID, same Base URL, and same Delivery Controller Deployment names.
Thank you, thank you, thank you… for this:
& “C:\Program Files\Citrix\Receiver StoreFront\Scripts\ImportModules.ps1”
Set-DSLoopback -SiteId 1 -VirtualPath /Citrix/StoreWeb -Loopback OnUsingHttp
Hi,
When I try to upgrade 1 SF server 2.6 version to 3.0, it failed.
In the event viewer, it shows,
Category:Error, WinError Message:Installation of ‘..\CitrixStoreFront-x64.msi’ failed with error code 1603. Fatal error during installation
With the same situation, another server was successful upgraded.
Any idea for that?
There’s are similar threads at http://discussions.citrix.com.
HI Carl i have a xenapp site and a xendesktop site 7.6 each has 2 deliveries controllers, I only created one store and published that via a load balanced storefront configuration, the 4 delivery controllers are all present on the store, to xenapp i added everyone, to xendesktop i only added specific persons to the delivery group, i propagated all the changes on the storefront but i am still seeing to the users which are on both delivery groups only the xenapp desktops and not the xendesktop desktop
do i need a separate store for each site?, if so how do i add that on the netscaler gateway when there are 2 stores?
In StoreFront, go to Stores > Manage Delivery Controllers. On this first page you should have two entries – one per farm. If you edit one of the entries, you should have two controllers per farm. Make sure each farm has Transport Type set to HTTP. You can also look in Event Viewer > Applications and Service > Citrix Delivery Services.
Thanks for the contribution, Mr. Stalhood.
Hi,
Thank you for all the knowledge you share.
I have just one question. On one of my Storefront implementation, I removed the explicit authentication method as asked by the customer. Now they want to re-add it, but one of group member cannot add this method. Did you ever face this issue ?
Propagating changes doesn’t fix it?
Good Day Carl, you have an excellent website here!
I have an issue with my current env. I have two DDC’s that also server as StoreFronts. When I performed an inplace upgrade from XA7.5 to XA7.6, my second StoreFront would not ‘Propagate’, it would join the server group, but would fail to propagate. I’ve uninstalled the second SF many times and attempted to join and propagate, but no success. Both DDC’s are on the same domain/network, I also deleted the wwwroot Citrix folder by mistake on the second server. What is the first couple steps you can advise to help resolve my issue to propagate my second DDC/SFront?
This could mean that the service accounts are missing from the local administrators group on the StoreFront servers. I’ve seen group policies interfere with propagation.
Any 7.8 with appdisk sop yet?
Keep up the good work Carl. Probably the best site for IT Pros looking for info on installing Citrix in the real world. Thanks
Great documentation!! Nice stuff in deed!! This website certainly helps in collating the information which is missed in the vendor website.
Hello Carl
How can i set the Unified Experience on a DSDesktopAppliance-Site?
I have already set the unified Receiver experience as the default and recreated the site, but still get the green bubble theme…
Regards,
Dominique
See this thread – https://discussions.citrix.com/topic/366575-storefront-30-new-theme-for-desktopappliance-site/