Navigation
This article applies to StoreFront versions 2411, 2402 LTSR, 2203 LTSR, 1912 LTSR, and all other versions 3.5 and newer.
- Change Log
- StoreFront Versions
- StoreFront Installation / Upgrade
- Store Name – Rename
- SSL Certificate
- Base URL – Change
- Default Web Page
- Authentication Configuration
- Receiver for Web (browser interface)
- Favorites, Categories, and Default View – Default to Categories view instead of All
- Beacons
- Propagate Changes
- Export/Import StoreFront Configuration
- Logon Simulator
💡 = Recently Updated
Change Log
- 2025 April 9 – Deploy Workspace app – updated for Workspace app 2503 for Mac
- 2025 Mar 5 – HTML5 Workspace app – updated with Workspace app for HTML5 version 2502
- 2025 Feb 8 – Updated Versions section for StoreFront 2402 LTSR CU2
- 2025 Jan 16 – Deploy Workspace app – updated for Workspace app 2409.10 for Windows
- 2025 Jan 9 – Updated Versions section for StoreFront 2203 LTSR CU6
- 2024 Dec 4 – Updated Versions and Install sections for StoreFront 2411
- 2024 Jan 24 – Versions – StoreFront security vulnerability
- 2023 Dec 20 – Next Generation Experience in StoreFront 2311
- 2023 Dec 20 – Citrix Workspace web extensions at Citrix Docs
- 2024 April 30 – Updated Versions and Install sections for StoreFront 1912 LTSR CU9
- 2023 June 5 – added link to CTX559036 Storefront 2302 CU2 – All Apps are now showing on initial landing page instead of categories view.
StoreFront Versions
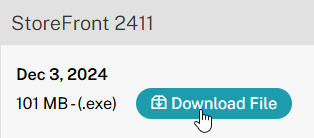
The most recent StoreFront release is version 2411.
- Starting with version 1811, the version numbering changed to a YYMM (year/month) format.
- Versions 2402, 2203, and 1912 are Long Term Service Releases (LTSR).
The default user interface in StoreFront 1811 and newer is now the “purple” interface, which is different from versions 3.16 and older. Be aware of this change before you upgrade StoreFront. Customizations might not work in the new interface. There doesn’t appear to be any way to revert to the older user interface. The Next-gen experience in 2311 and newer is not enabled by default but can be enabled manually.
Download one of the following versions of StoreFront. For LTSR versions of Citrix Virtual Apps and Desktops (CVAD), deploy the StoreFront that comes with your version of LSTR CVAD.
- For Current Release, download StoreFront 2411
- For CVAD 2402, download StoreFront 2402 LTSR CU2.

- For CVAD 2203, download StoreFront 2203 LTSR CU6. StoreFront 2203 LTSR CU4 Update 1 and later fix a security vulnerability.

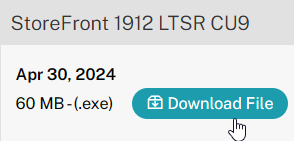
- For CVAD 1912 LTSR, download StoreFront 1912 LTSR CU9 (Cumulative Update 9).
StoreFront Installation / Upgrade
For small environments, it might be OK to install StoreFront on the Delivery Controller machines. But usually StoreFront and Delivery Controllers are separate machines.
- If StoreFront will pull icons from multiple Citrix Virtual Apps and Desktops sites/farms, then StoreFront should be installed on its own machines.
To automate the installation of StoreFront, see Dennis Span Citrix StoreFront unattended installation with PowerShell.
The default user interface in StoreFront 1811 and newer is now the “purple” interface, which is different from versions 3.16 and older. Be aware of this change before you upgrade StoreFront. There doesn’t appear to be any way to revert to the older user interface.

Citrix Blog Post StoreFront 3.0 Scalability recommends StoreFront servers to be sized with 4 vCPU and 8 GB RAM.
- If upgrading, do the following before beginning the upgrade:
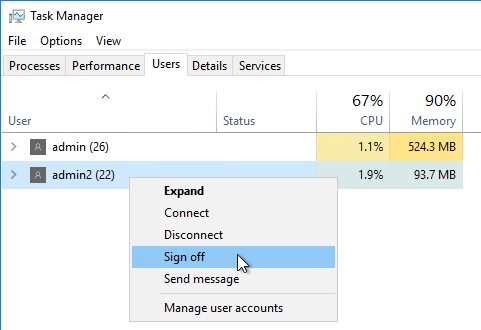
- Other Users – Use Task Manager > Users tab to logoff any other user currently logged into the machine.
- Export the StoreFront configuration so you can restore it if something goes wrong.
- Stop the World Wide Web Publishing Service.
- Stop all StoreFront services.
- Close all PowerShell and StoreFront consoles.
- Citrix CTX226419 StoreFront upgrade fails to keep the setting in default ICA file. Take a backup of default.ica and usernamepassword.tfrm from C:\inetpub\wwwroot\Citrix\StoreName\App_Data. After upgrading StoreFront, replace the new default.ica and usernamepassword.tfrm with the old default.ica and usernamepassword.tfrm files to ensure you retain the old settings.
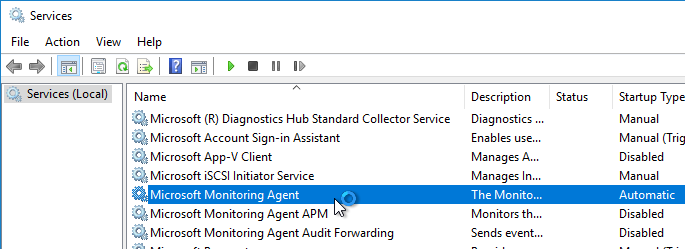
- If Microsoft SCOM Agent is installed, then stop the Microsoft Monitoring Agent service.
- See Patrick van den Born Avoid 1603 errors when upgrading Citrix StoreFront 2.x to Citrix StoreFront 3.5
- Other Users – Use Task Manager > Users tab to logoff any other user currently logged into the machine.
- Operating system support:
- StoreFront 2407 and newer are not supported on Windows Server 2016.
- StoreFront 2203 and newer are supported on Windows Server 2022.
- StoreFront 2203 is not supported on Windows Server 2012 R2.
- StoreFront 1912 and newer are supported on Windows Server 2019.
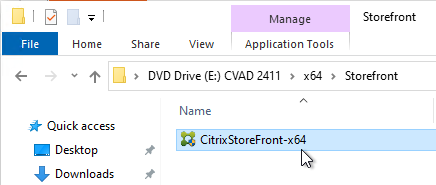
- Run CitrixStoreFront-x64.exe from the CVAD ISO at /x64/StoreFront. Or download it separately.
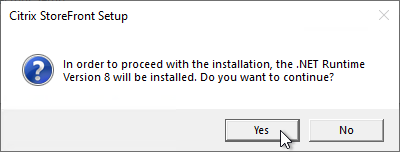
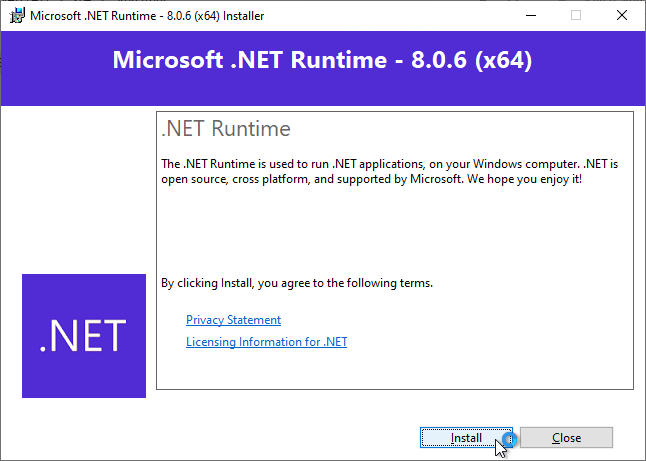
- Click Yes if asked to install .NET Runtime Version 8.
- Click Install.
- Click Close.
- Click Install.
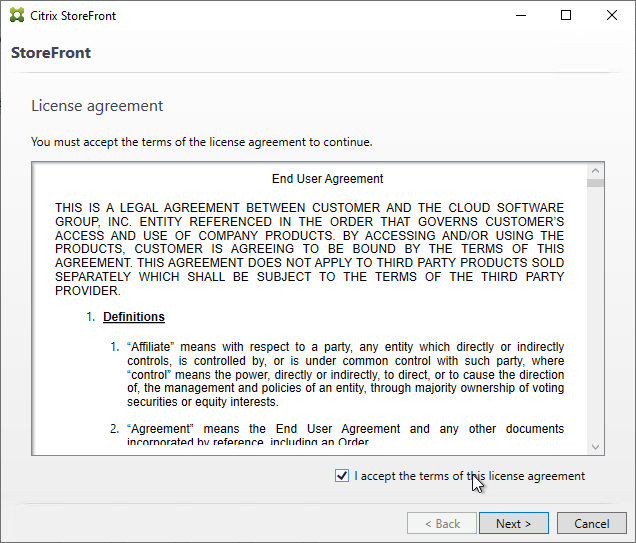
- In the License Agreement page, check the box next to I accept the terms, and click Next.
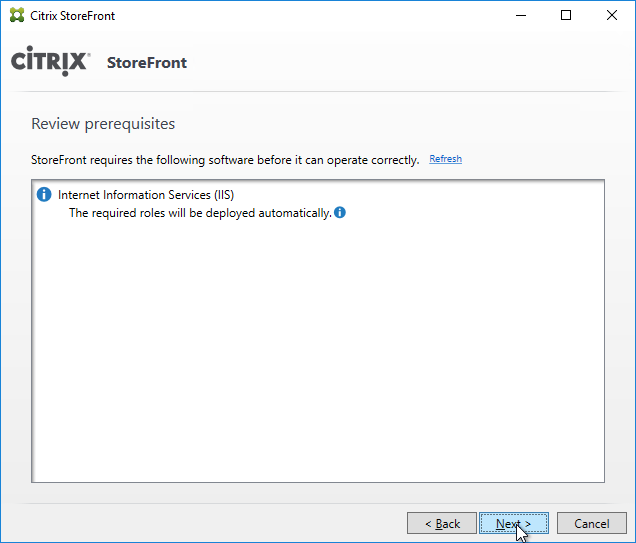
- In the Review prerequisites page, click Next.
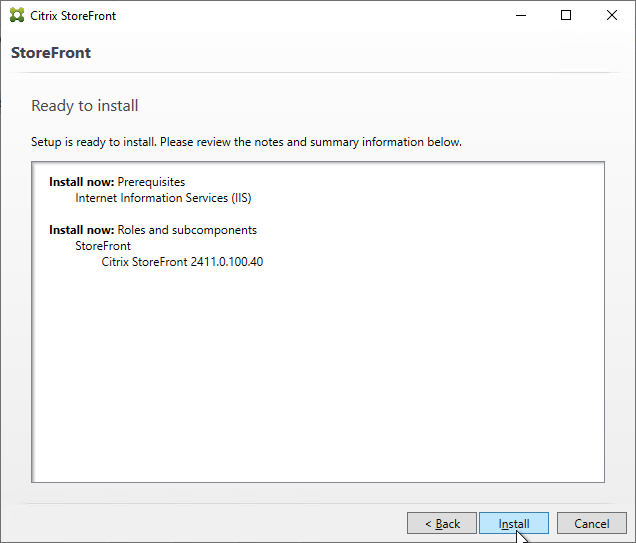
- In the Ready to install page, click Install.
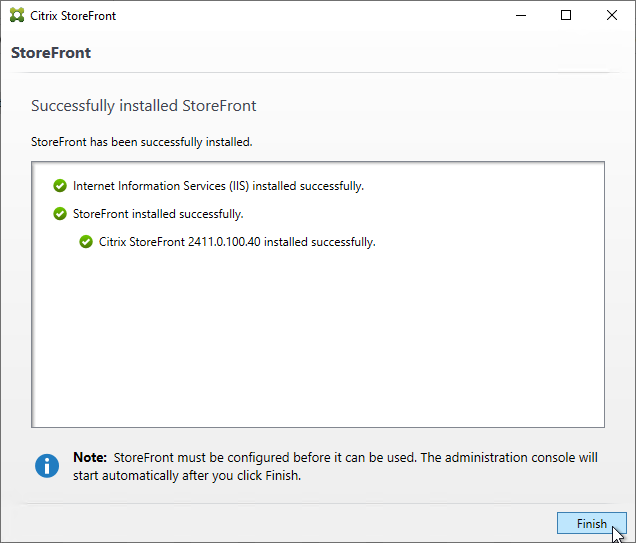
- In the Successfully installed StoreFront page, click Finish.
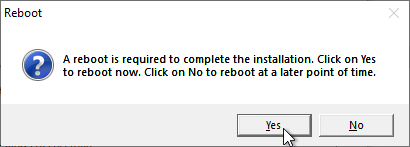
- Click Yes if prompted to reboot.
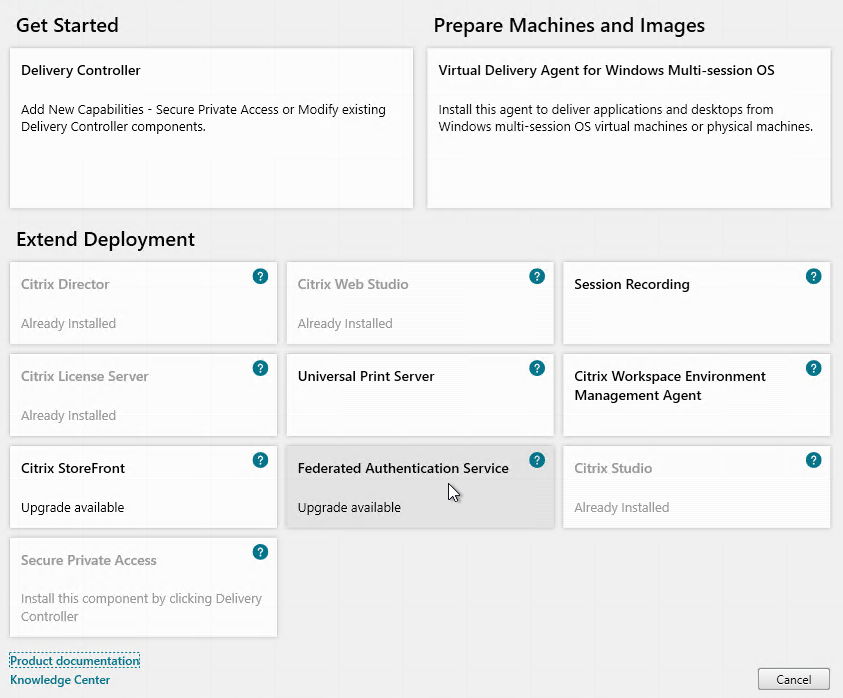
- FAS – If you upgraded a StoreFront server that was connected to Citrix Federated Authentication Service (FAS), then also upgrade Citrix Federated Authentication Service.
If this is a new install, skip to the Initial Configuration.
If you are upgrading from StoreFront 3.8 or older, then do the following to add SAML Authentication as an option. This feature lets you perform SAML against StoreFront without needing Citrix Gateway. If you did a fresh deployment of 3.9 or newer, then SAML is already added.
- Right-click your Store and click Manage Authentication Methods.

- On the bottom, click the Advanced button, and click Install or uninstall authentication methods.
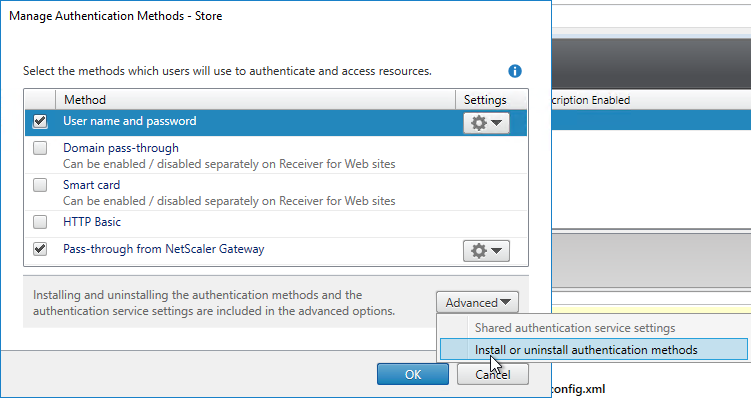
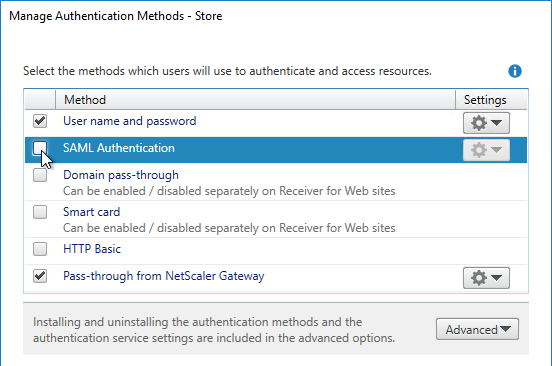
- Check the box next to SAML Authentication, and click OK.
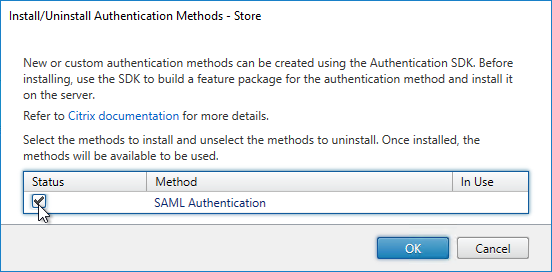
- If you don’t want to configure SAML at this time, then uncheck the authentication method. See the Federated Authentication Service article for SAML details.
Initial Configuration
In StoreFront 3.8 and newer, you can create multiple stores in different IIS websites. This functionality is not exposed in the GUI and instead the entire StoreFront configuration must be performed using PowerShell. See Citrix Blog Post StoreFront 3.8 is Available NOW! for sample PowerShell commands to create the stores.
You can also use PowerShell to create a store and configure it as detailed at CTX206009 How to configure a Store via Powershell.
If this is a new deployment of StoreFront, do the following to perform the initial configuration:
- In PowerShell, run Set-ExecutionPolicy RemoteSigned.
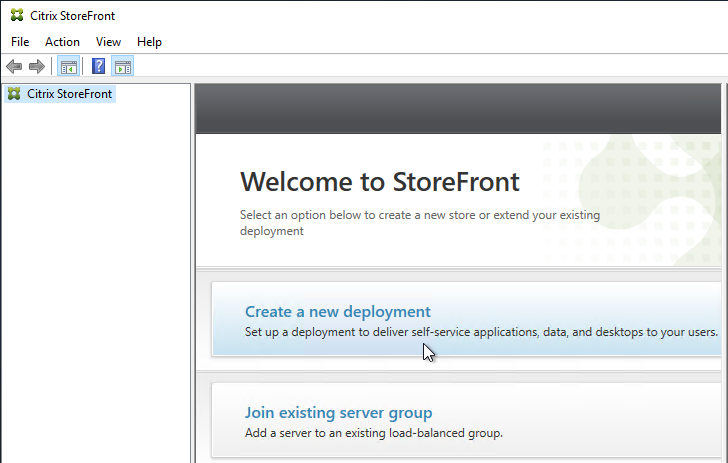
- The management console should launch automatically. If not, launch Citrix StoreFront from the Start Menu.

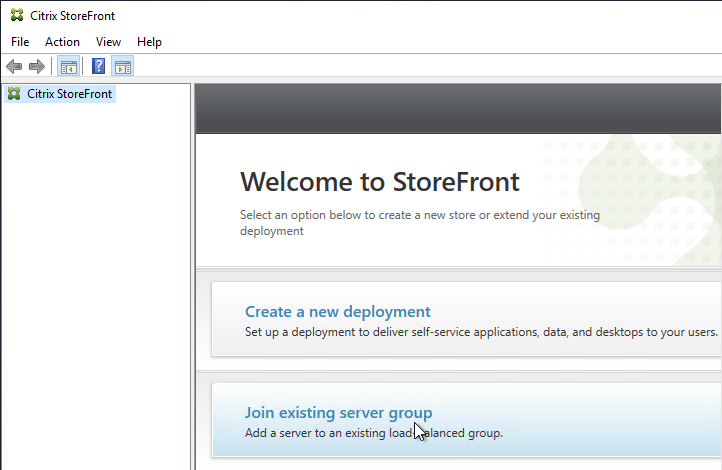
- In the middle, click Create a new deployment.
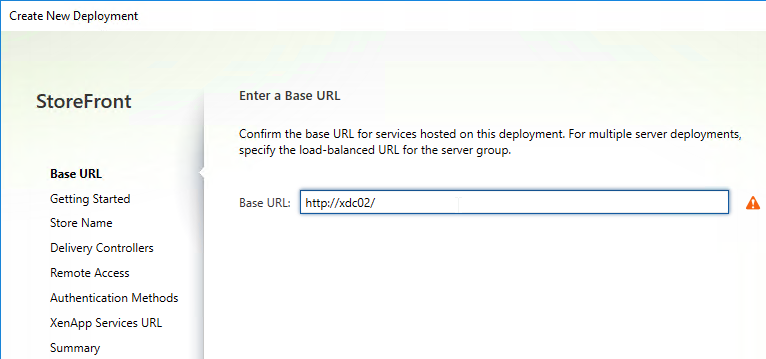
- In the Base URL page, if you installed an SSL certificate on the StoreFront server, then the Hostname should already be filled in. For now, you can leave it set to the server’s name and then change it later once you set up SSL and load balancing. Click Next.
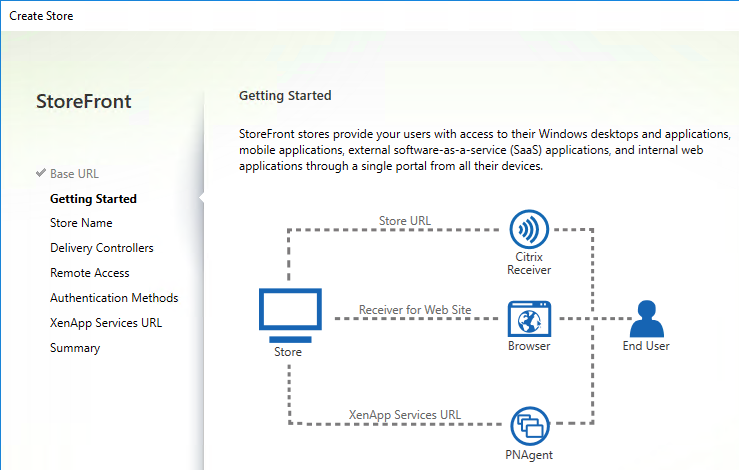
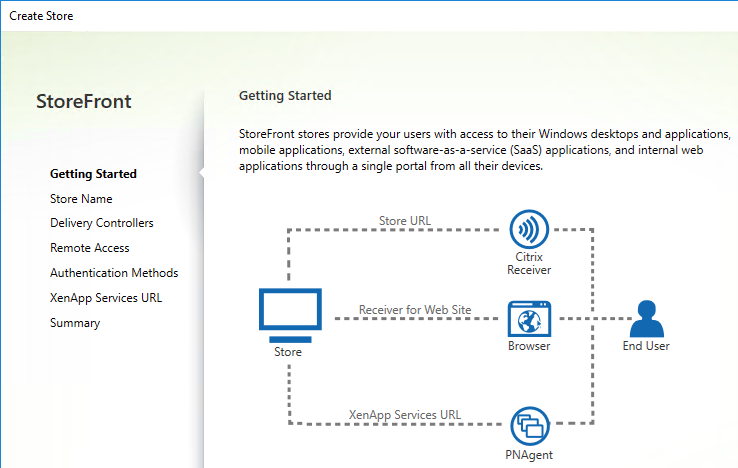
- In the Getting Started page, click Next.
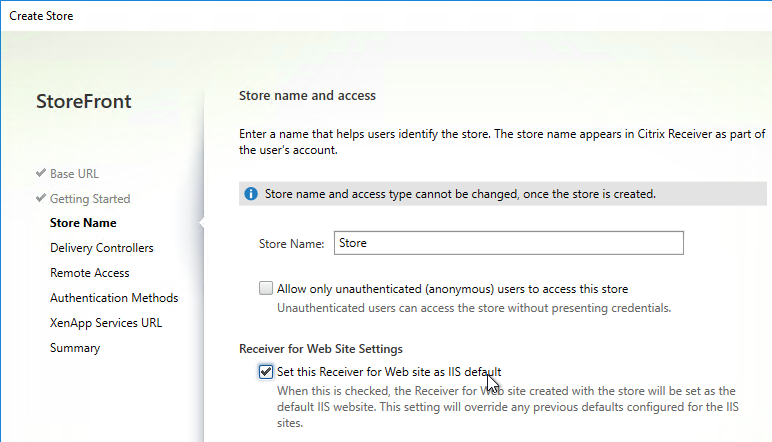
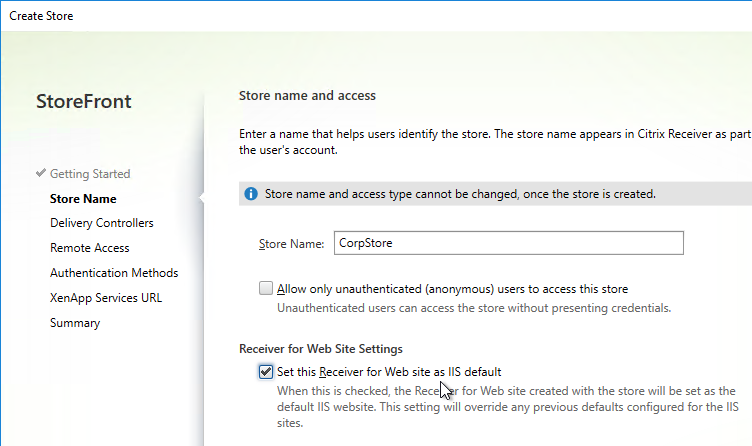
- In the Store Name page, enter a name for the store. The name entered here is part of the URL path (e.g. /Citrix/CorpStoreWeb)
- Check the box next to Set this Receiver for Web site as IIS default and click Next.
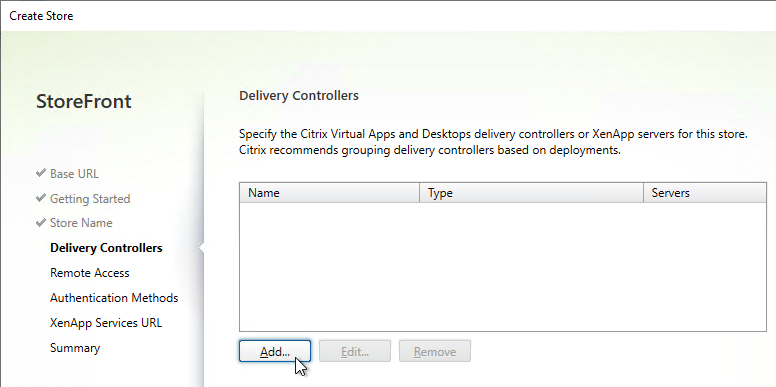
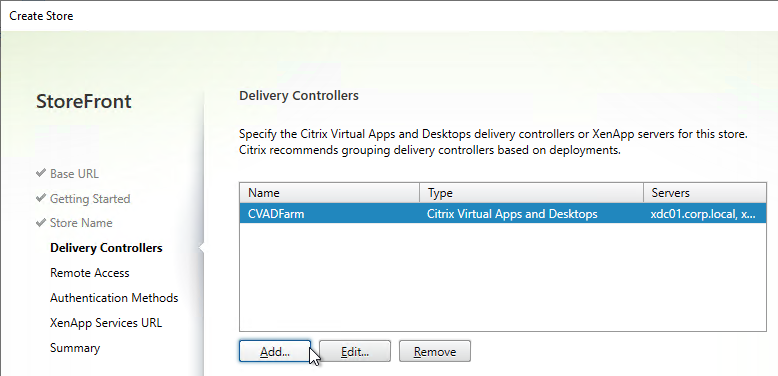
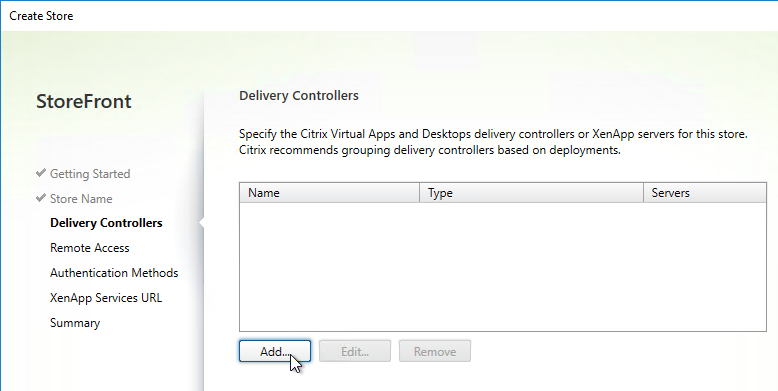
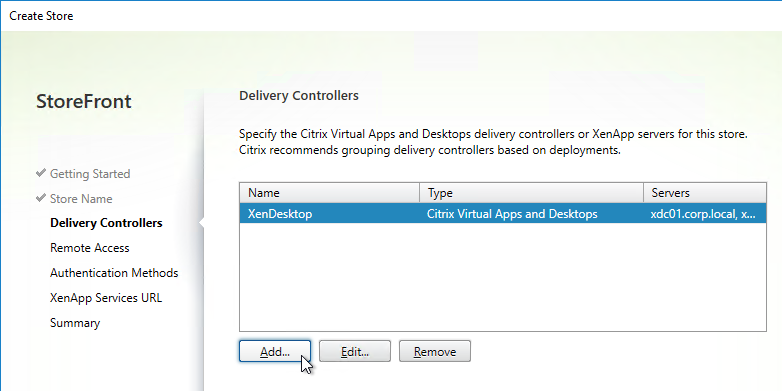
- In the Delivery Controllers page, click Add.
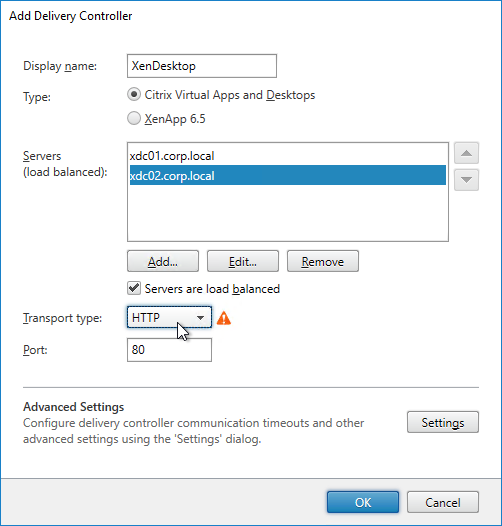
- Enter a descriptive name for the Citrix Virtual Apps and Desktops (CVAD). This name does not need to match the actual farm name.
- Add the two Delivery Controllers. Change the Transport Type to HTTP. Click OK. You can set it to HTTPS is you have valid certificates (trusted by StoreFront) installed on your Delivery Controllers.
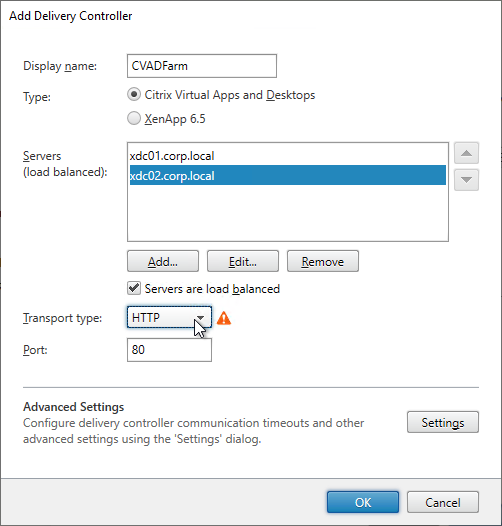
- If you have multiple Citrix Virtual Apps and Desktops sites/farms, feel free to add them now. You can also add older XenApp 6.5 farms. Click Next when done.
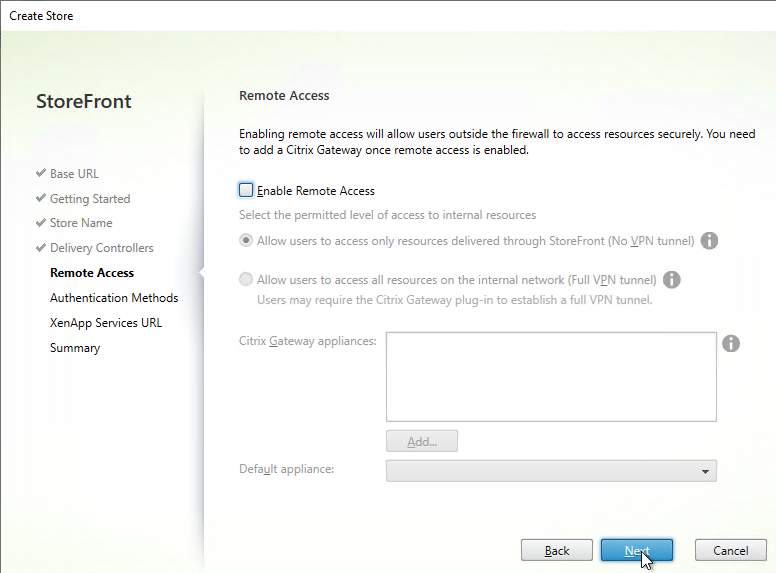
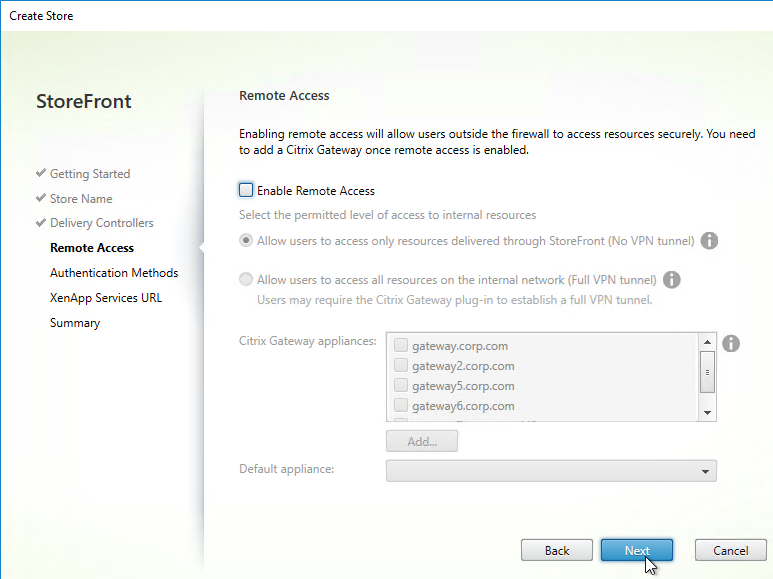
- In the Remote Access page, don’t check the box. Just click Next. You can set this up later.
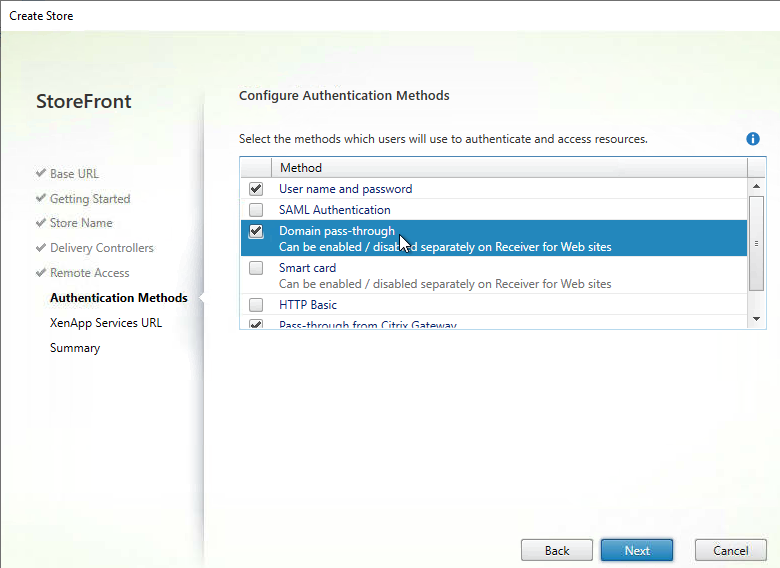
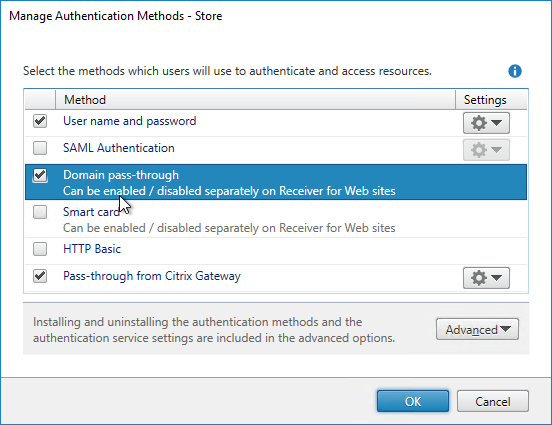
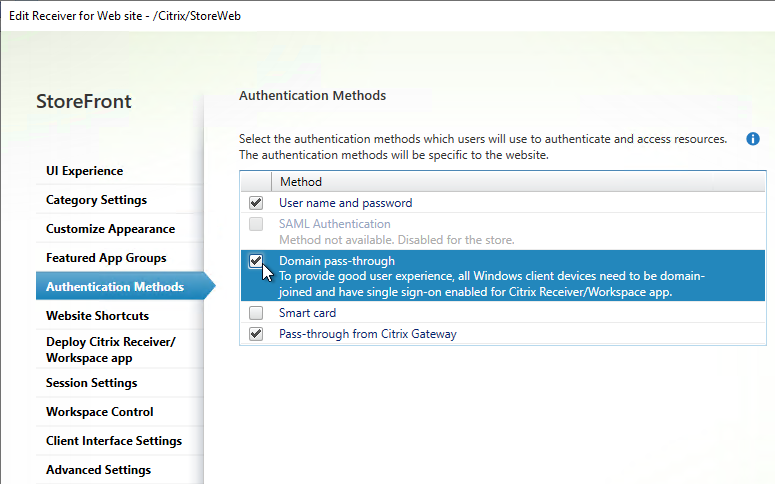
- In the Authentication Methods page, check the boxes next to Domain pass-through and Pass-through from Citrix Gateway. Click Next.
Note: if you want Domain pass-through authentication for browser users, you also need to enable it for Receiver for Web as detailed later in this article.
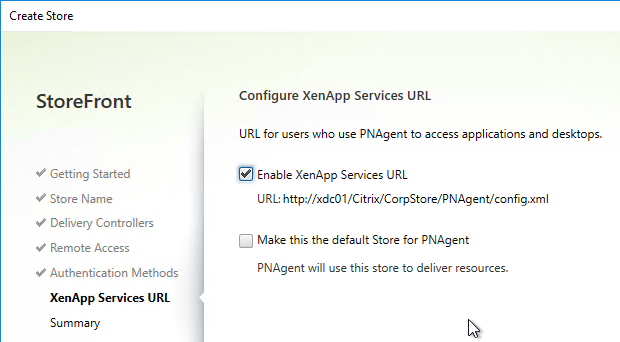
- In the XenApp Services URL page, click Create.
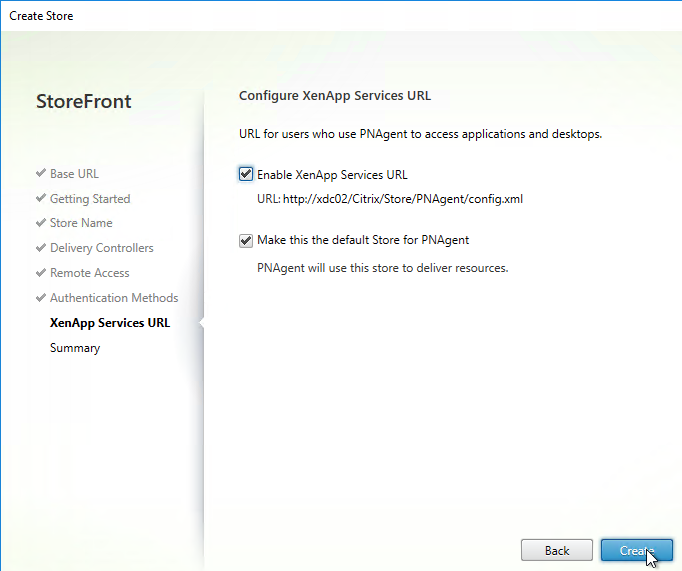
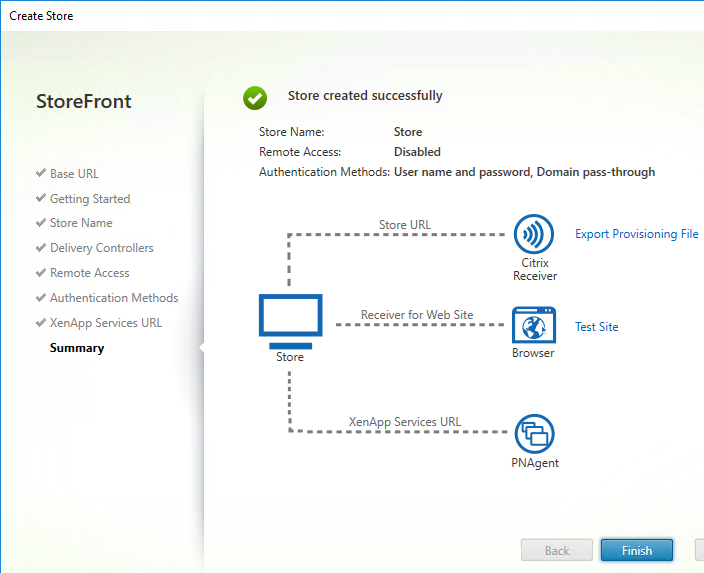
- In the Summary page, click Finish.
Second StoreFront Server
After the server group is created, NT SERVICE\CitrixConfigurationReplication and NT SERVICE\CitrixClusterService must remain in the Administrators group on both StoreFront servers or propagation will fail.
- Install StoreFront on the second server.
- Create/Import an SSL certificate and bind it to the Default Web Site.
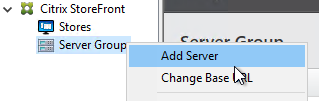
- Login to the first StoreFront server. In the StoreFront management console, right-click Server Group and click Add Server.
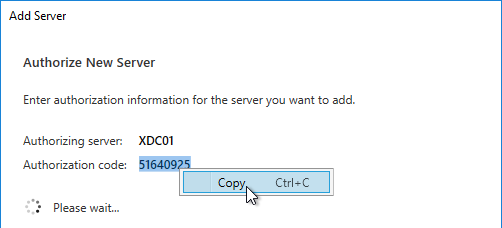
- Copy the Authorization code.
Note: the Please wait message means it is waiting on you to add the 2nd server. You don’t actually have to wait.
- Login to the second StoreFront server and launch the management console. In the middle, click Join existing server group.
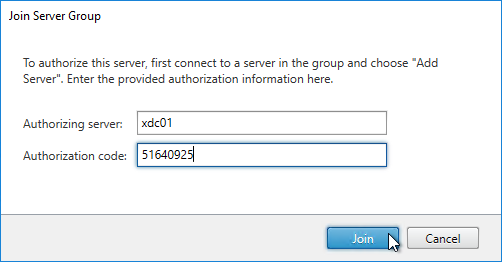
- In the Join Server Group page, enter the name of the first StoreFront server and enter the Authorization code copied earlier. Click Join.
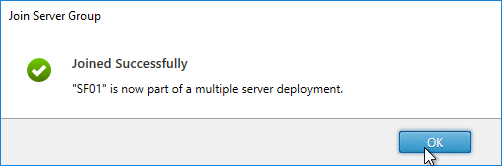
- Then click OK.
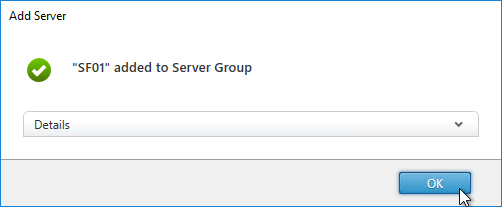
- Go back to the first server. Click OK.
- Notice this message. It is good advice.
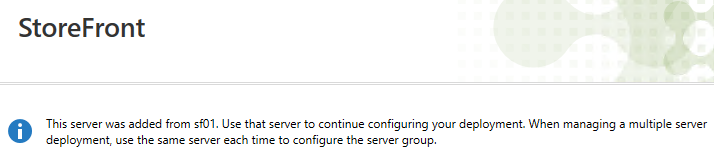
- All changes made on one StoreFront server must be manually propagated to the other StoreFront server. You do that by right-clicking Server Group, and clicking Propagate Changes.
- When you propagate changes, the default web page might not be replicated to the other nodes. Copy C:\inetpub\wwwroot\web.config manually to each node.
Customer Experience Improvement Program
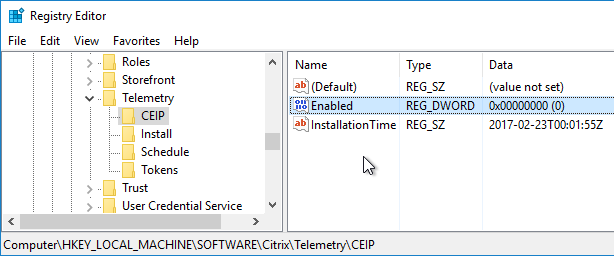
StoreFront 3.9 and newer enable Customer Experience Improvement Program (CEIP) by default. To disable it, create the registry value HKEY_LOCAL_MACHINE\SOFTWARE\Citrix\Telemetry\CEIP\Enabled (DWORD) and set it to 0 (zero). Also see CEIP at Install, set up, upgrade, and uninstall at Citrix Docs.
See https://www.carlstalhood.com/delivery-controller-2203-ltsr-and-licensing/#ceip for additional places where CEIP is enabled.
Citrix Analytics
StoreFront 1906 and newer supports uploading data to Citrix Analytics.
The client devices must be running Workspace app 1903 and newer.
See Enable Analytics on Virtual Apps and Desktops on-premises at Citrix Docs.
Store Name – Rename
If you installed StoreFront on your Delivery Controller, it will have a default store named Store. If you don’t like the default Store Name (/Citrix/Store) then you will need to remove the store and re-add it.
Note: Some at Citrix Discussions (A protocol error occurred while communicating with the Authentication Service) have reported authentication issues after following this procedure. It’s probably cleaner to uninstall StoreFront and reinstall it.
- In the StoreFront console, on the left, click Stores.
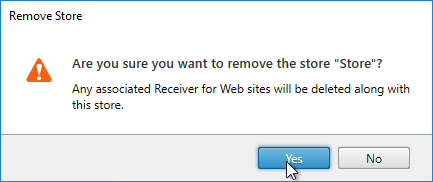
- Right-click your store, and click Remove Store.
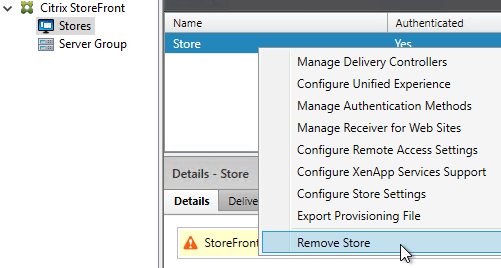
- Click Yes.
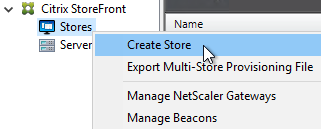
- On the left, right-click Stores, and click Create Store.
- In the Getting Started page, click Next.
- In the Store Name page, enter a name for the store. The name entered here is part of the URL path (e.g. /Citrix/CorpStoreWeb).
- Check the box next to Set this Receiver for Web site as IIS default and click Next.
- In the Delivery Controllers page, click Add.
- Enter a descriptive name for the Citrix Virtual Apps and Desktops farm. This name does not need to match the actual farm name. (If StoreFront 3.5, don’t put spaces or periods in the farm name)
- Change the Type to XenDesktop or Citrix Virtual Apps and Desktops.
- Add the two Delivery Controllers.
- Change the Transport Type to HTTP. Click OK. You can leave it set to HTTPS (recommended) if you have valid certificates (trusted by StoreFront) on your Delivery Controllers.
- If you have multiple Citrix Virtual Apps and Desktops farms, feel free to add them now. You can also add older XenApp farms. Or later, you can add farms in Store > Manage Delivery Controllers. Click Next when done.
- In the Remote Access page, don’t check the box and click Next. You can set this up later.
- In the Authentication Methods page, check the boxes next to Domain pass-through and Pass-through from Citrix Gateway. Click Next.

- In the XenApp Services URL page, click Create.
- In the Created Successfully page, click Finish.

SSL Certificate
StoreFront requires SSL. You will save yourself much heartache if you install valid, trusted certificates on the StoreFront servers or your load balancer. There are two options for StoreFront SSL.
- SSL Offload: Use Citrix ADC to do SSL Offload and load balancing. In this scenario, install the SSL certificate on the load balancer. You can leave the StoreFront servers listening on HTTP and no IIS server certificate. The SSL certificate on the Citrix ADC must match the DNS name that resolves to the load balancing VIP.
- SSL End-to-end: Install an SSL certificate on each StoreFront server and bind it to IIS. This allows you to use SSL protocol between the load balancer and the StoreFront servers.
If your load balancer cannot terminate SSL, then the StoreFront IIS certificate must match the DNS name that resolves to the load balancing VIP.
For load balancers that can terminate SSL (e.g., Citrix ADC), the StoreFront IIS server certificate should match the StoreFront server name. If StoreFront is installed on the Delivery Controllers, with server-specific certificates you can later enable HTTPS in the StoreFront Store Delivery Controller configuration.
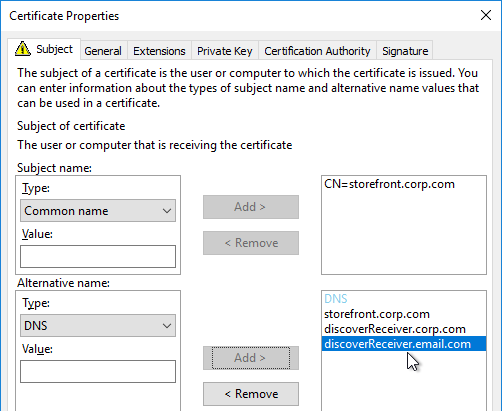
Another option is to create an SSL certificate with Subject Alternative Names for the load balanced DNS name and each of the StoreFront server FQDNs. Then import this one certificate on all StoreFront servers. Or a wildcard certificate could match all of these names.
In either case, be aware that Email-based discovery in Citrix Receiver requires the certificate to not only match the StoreFront load balanced DNS name but the certificate must also match discoverReceiver.email.suffix for every email domain. Usually, the only option to match multiple email domains is with Subject Alternative Names. If you have multiple email suffixes, then you will need multiple Subject Alternative Names, each beginning with discoverReceiver. If you don’t plan on implementing email-based discovery, then you don’t have to worry about these discoverReceiver Subject Alternative Names.
If the certificate does not match discoverReceiver.email.suffix, then users will see this message when attempting to use email discovery in Citrix Workspace app.
When adding Subject Alternative Names to a certificate, the first Subject Alternative Name should be the same as the Load Balancing FQDN. The remaining Subject Alternative Names should be discoverReceiver.email.suffix for every email domain.
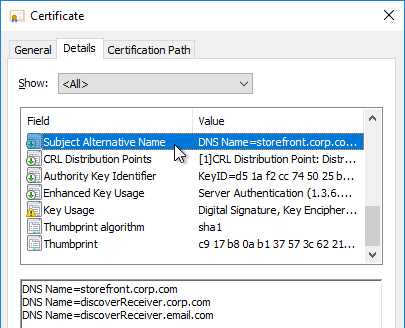
When you view a Subject Alternative Name certificate, on the Details tab, click Subject Alternative Name to verify that all names are listed including the DNS name that resolves to the load balancing VIP.
There are several methods of creating a certificate for StoreFront.
- If you are implementing Single FQDN for internal and external users, then the certificate for external Citrix Gateway can also be used for internal StoreFront.
- Single FQDN has additional Subject Alternative Name certificate requirements, including Internal Beacon FQDN and Callback FQDN.
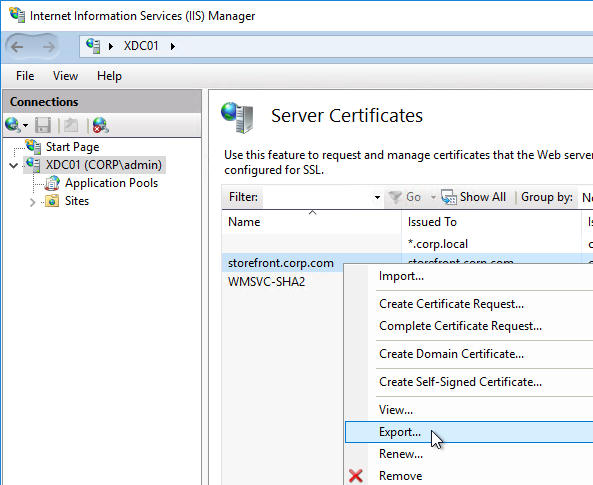
- If you will support non-domain-joined machines (e.g., iPads, thin clients) connecting to your internal StoreFront, then the StoreFront certificate should be signed by a public Certificate Authority. You can use IIS to request the certificate. You can then export the certificate from IIS and import it to Citrix ADC (for Load Balancing and Citrix Gateway). Public Certificate Authorities (e.g., GoDaddy, Digicert, etc.) let you enter additional Subject Alternative Names when you purchase the certificate.
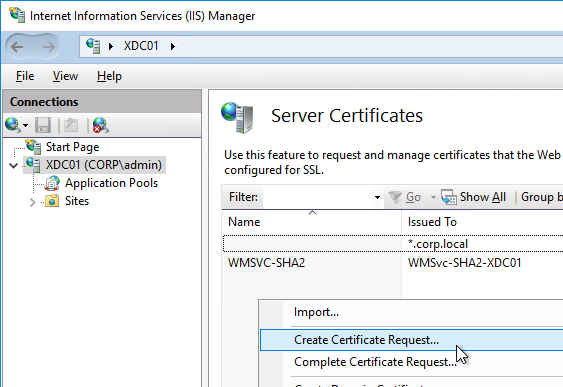
- If all internal machines are domain-joined, then you can use an internal Certificate Authority to create the StoreFront certificate. The Certificates MMC snap-in can be used to create an internal certificate signed by a Microsoft Certificate Authority. The MMC method allows you to specify Subject Alternative Names.
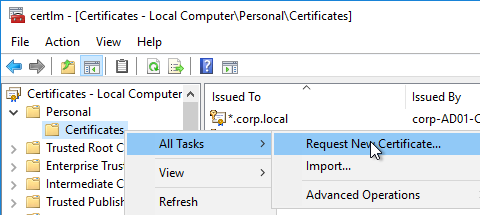
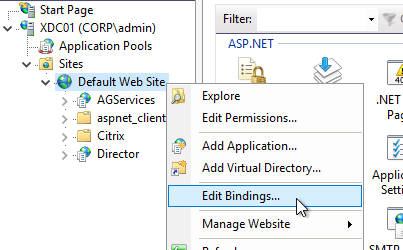
Once the certificate is created or imported, bind it to IIS:
- In IIS Manager, right-click the Default Web Site, and click Edit Bindings.
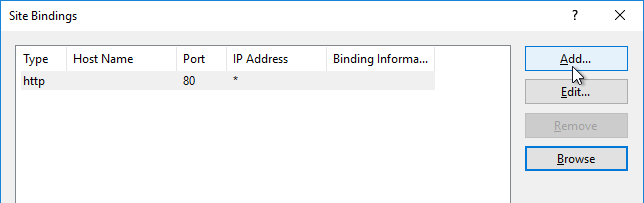
- Click Add.
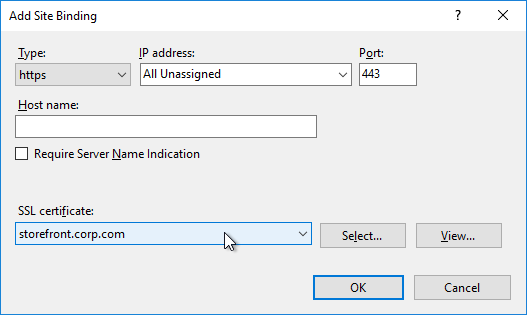
- Change the Type to https and select the SSL certificate. Do NOT put anything in the Host name field. Click OK, and then click Close.
Delivery Controllers – SSL
Delivery Controllers can be SSL enabled by using one of two methods:
- If IIS is installed on the Delivery Controller, simply install/create a certificate, and bind it to the Default Web Site.
- If IIS is not installed on the Delivery Controller, then you need to run a command line program as described at SSL for Delivery Controller.
Once SSL certificates are installed on the Delivery Controller servers, then you can configure the StoreFront Store to use SSL when communicating with the Delivery Controllers.
- In the StoreFront Console, on the left click Stores.
- In the middle, right-click your store, and click Manage Delivery Controllers.
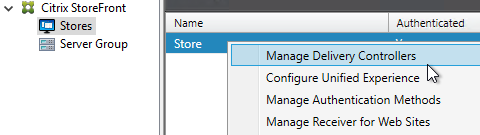
- Highlight the deployment and click Edit.
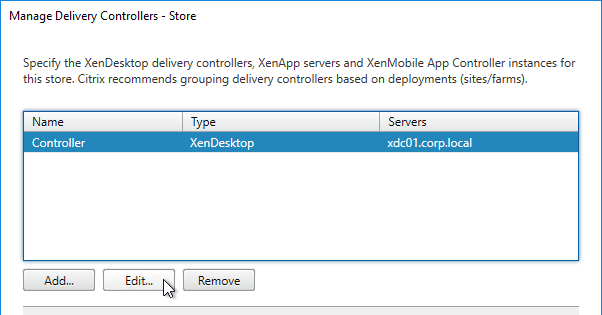
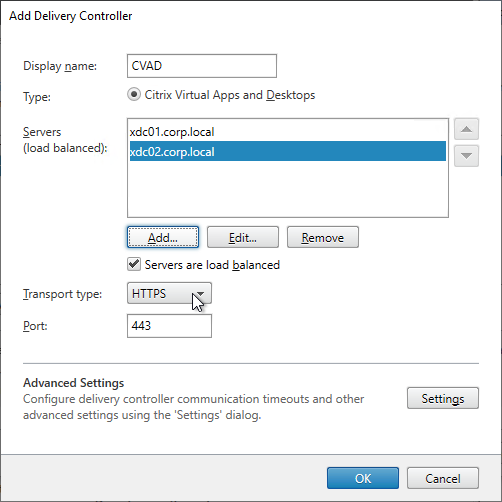
- The Servers list must contain FQDNs that match the certificates installed on those Delivery Controller servers.
- Change the Transport type to HTTPS.
- Click OK twice.
- See CTX399424 Gateway Callback and / or XML Communication fails after upgrade to Storefront 2203 for a workaround. The fix is included in StoreFront 2203.1.
Base URL – Change
- Configure load balancing of the StoreFront servers, including SSL certificate.
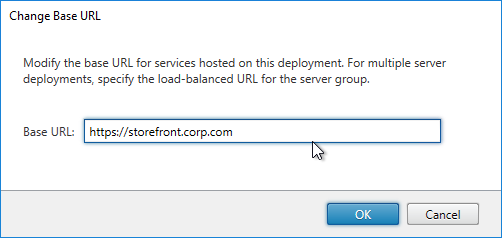
- In the Citrix StoreFront console, right-click Server Group, and click Change Base URL.
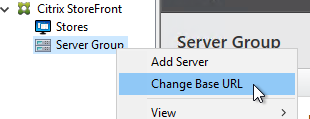
- Enter the StoreFront Load Balancing FQDN as the new Base URL in https://storefront.corp.com format.
- Receiver requires that the Base URL is https. It won’t accept http.
- If you want the StoreFront Base URL to be the same as your Gateway FQDN, then see the Single FQDN instructions.
- Click OK.
If the Base URL is https, but you don’t have certificates installed on your StoreFront servers (aka SSL Offload), then you’ll need to do the following:
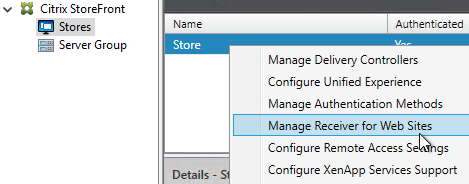
- On the left, click the Stores node.
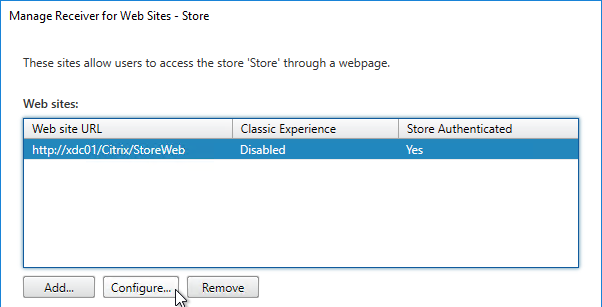
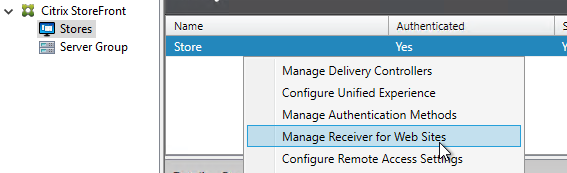
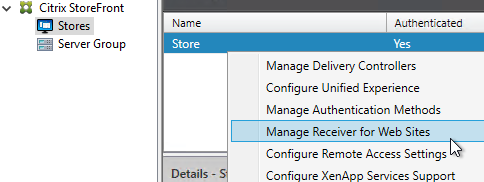
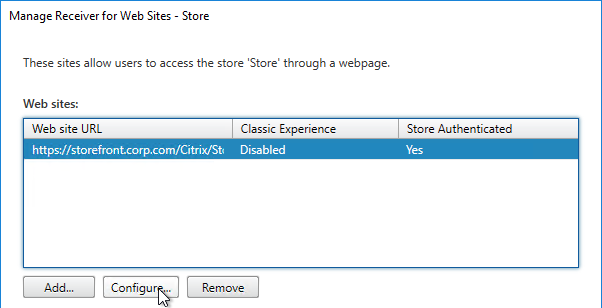
- In the middle, right-click your store, and click Manage Receiver for Web Sites.
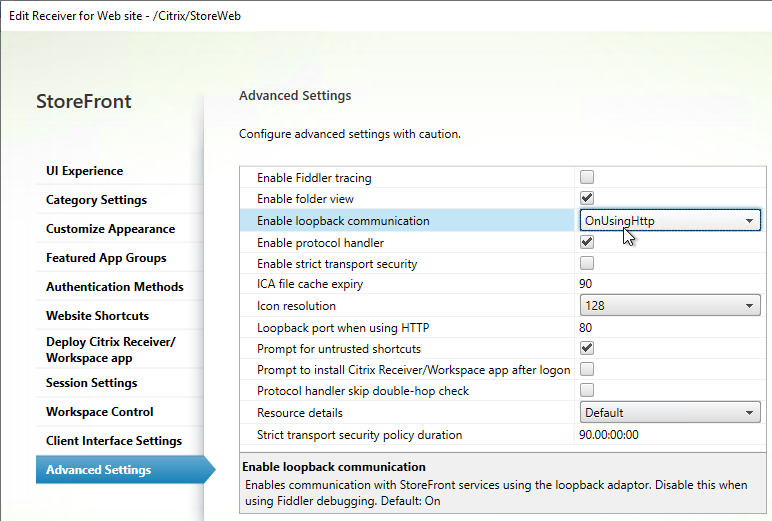
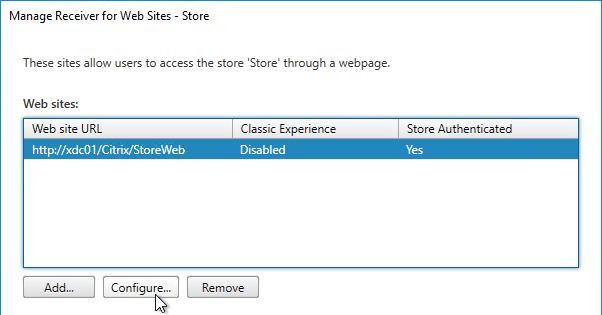
- Click Configure.
- On the Advanced Settings page, change Enable loopback communication to OnUsingHttp. Click OK, and then click Close.
Default Web Page
After changing the Base URL, you’ll need to update the IIS Default Website.
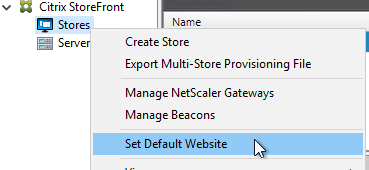
- On the left, right-click Stores, and click Set Default Website.
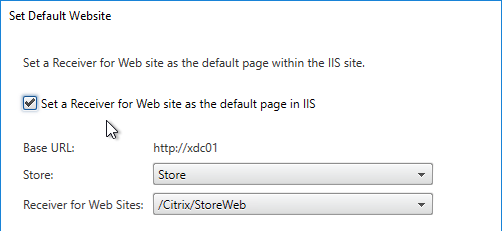
- Check the box next to Set a Receiver for Web site as the default page in IIS and click OK.
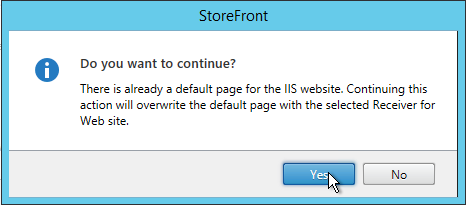
- Click Yes to overwrite.
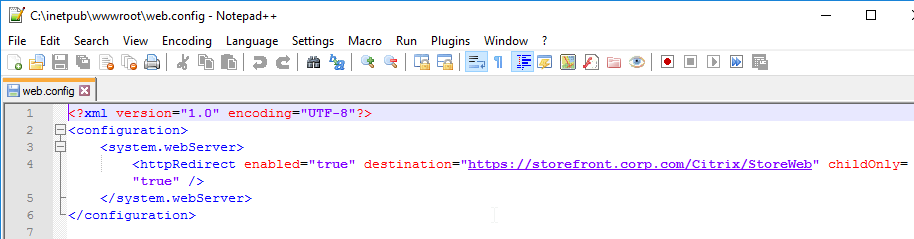
- If you go to C:\inetpub\wwwroot and edit the file web.config, you’ll see the redirect.
Authentication Configuration
- In the Citrix StoreFront console, on the left, click the Stores node.
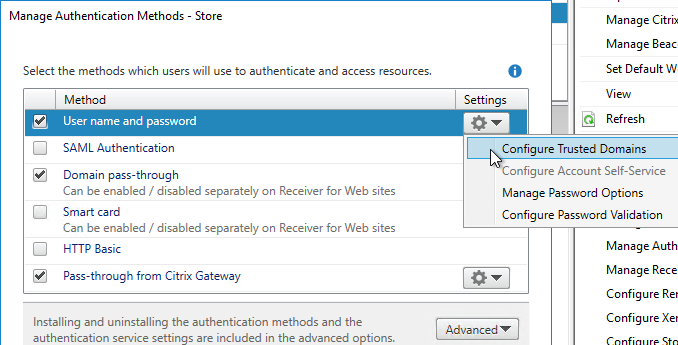
- In the middle, right-click your store, and click Manage Authentication Methods.

- Check the boxes next to Domain pass-through and Pass-through from Citrix Gateway.
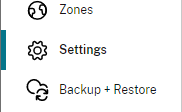
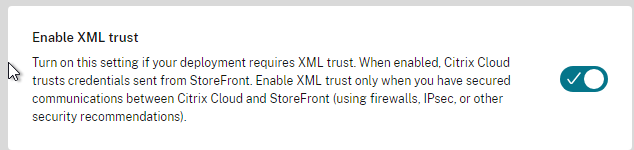
- If you intend to enable pass-through authentication from Receiver Self-Service (native Workspace app) or from Receiver for Web (web browser), then in Web Studio (CVAD 2212 and newer), go to Settings and Enable XML trust.
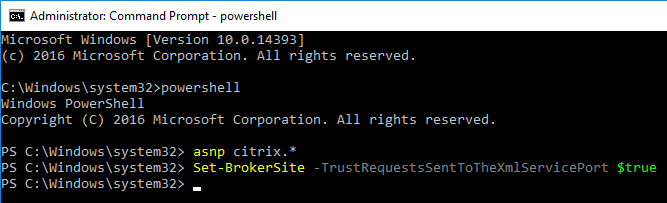
- Or go to a Delivery Controller and run the command
Set-BrokerSite -TrustRequestsSentToTheXmlServicePort $Truefrom a Windows PowerShell command prompt. You might have to runasnp citrix.*first.
- Or go to a Delivery Controller and run the command
- If StoreFront is not in the same domain (or trusted domain) as the users, then you can configure StoreFront to delegate authentication to the Delivery Controllers. See XML service-based authentication at Citrix Docs.
- StoreFront 3.6 and newer can be workgroup members without joining a domain.
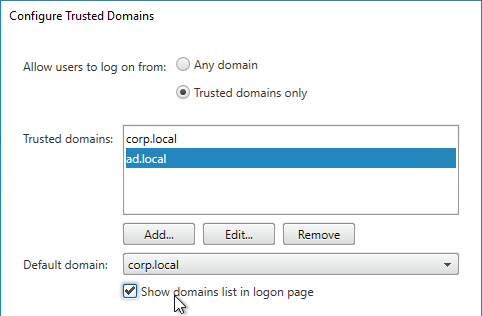
- Click the top gear icon, and then click Configure Trusted Domains.
- Select Trusted domains only, click Add, and enter the domain names in DNS format. The DNS suffix is needed if doing userPrincipalName authentication from Citrix Gateway.
- Select one of the domains as the default.
- If desired, check the box next to Show domains list in logon page. Click OK.
- Click the top gear icon, and then click Manage Password Options.
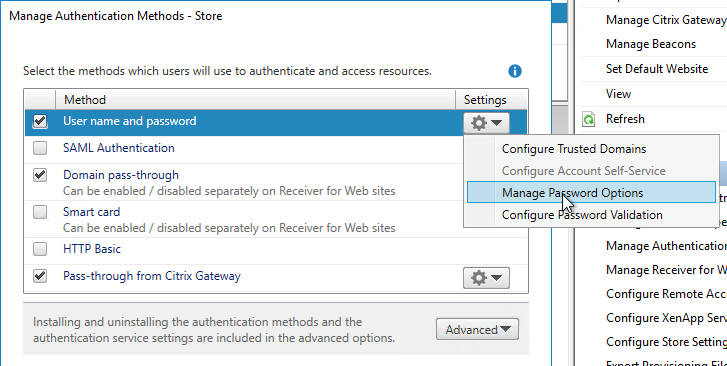
- Make your selection, and click OK.
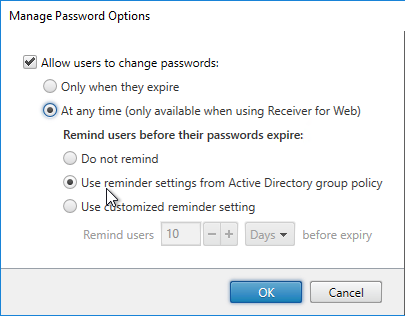
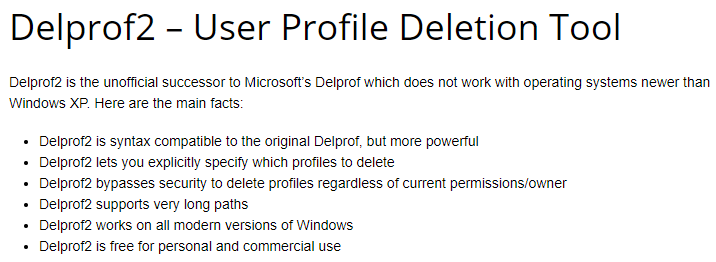
- Be careful with password changes. Any time somebody changes their password through StoreFront, a profile will be created for that user on the StoreFront server. Use a tool like delprof2.exe to periodically delete these local profiles.
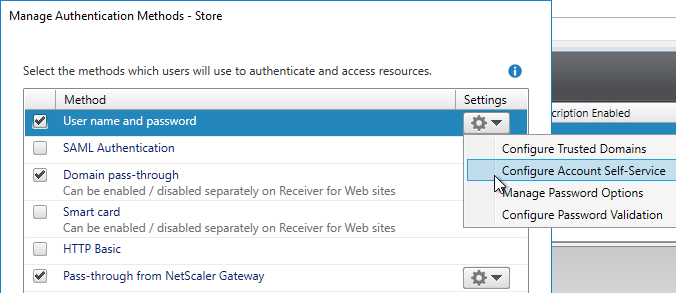
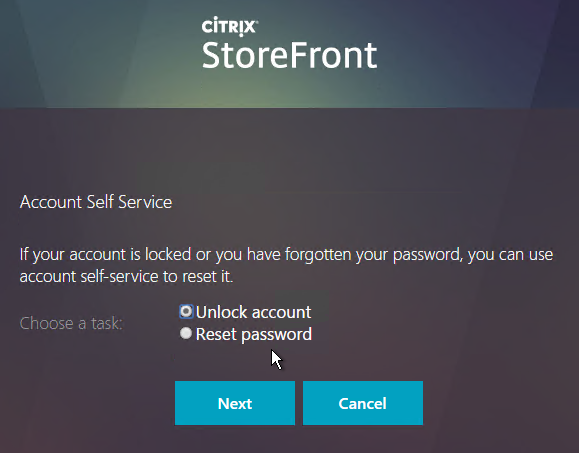
- If you have Citrix Virtual Apps and Desktops and installed Self-Service Password Reset, you can integrate SSPR with StoreFront 3.7 or newer by clicking the top gear icon and clicking Configure Account Self-Service. This option is only available if your Base URL is https (encrypted). See the following for detailed implementation guides.
- Citrix CTX217143 Self-Service Password Reset Central Store Creation Tool
- Citrix CTX224244 How Do I Deploy Self-Service Password Reset For the First Time
- George Spiers Citrix Self-Service Password Reset
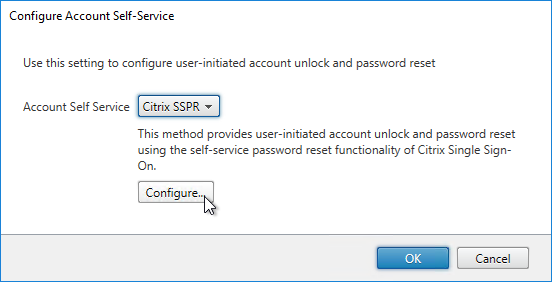
- Change the selection to Citrix SSPR, and click Configure.
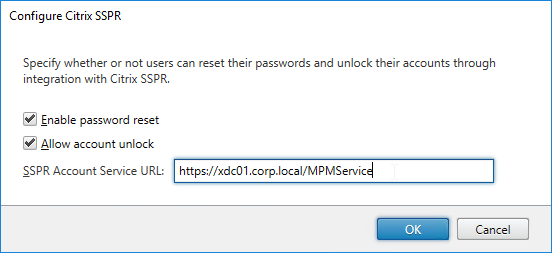
- Check both boxes and enter the URL of the SSPR server using the displayed example (with /MPMService on the end). Click OK three times.
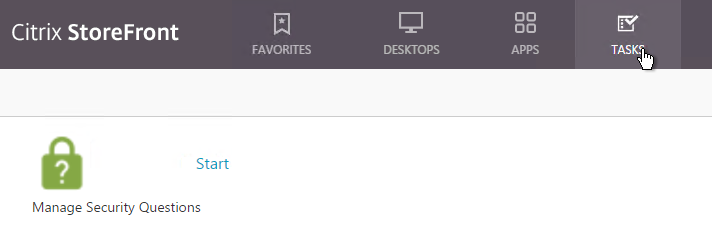
- With SSPR enabled, a new Tasks tab lets users enroll with SSPR.
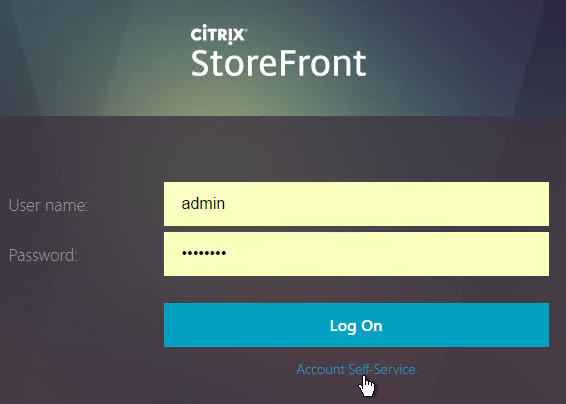
- The logon page also has an Account Self-Service link.
Next Generation Experience
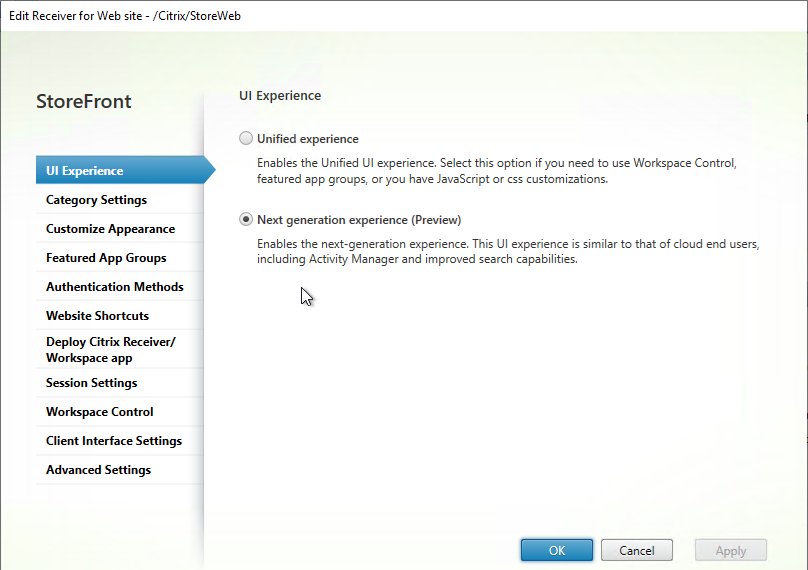
In StoreFront 2411 and newer, you can do the following to enable the Next-gen experience theme, which looks the same as Workspace in Citrix Cloud, including the Activity Manager. 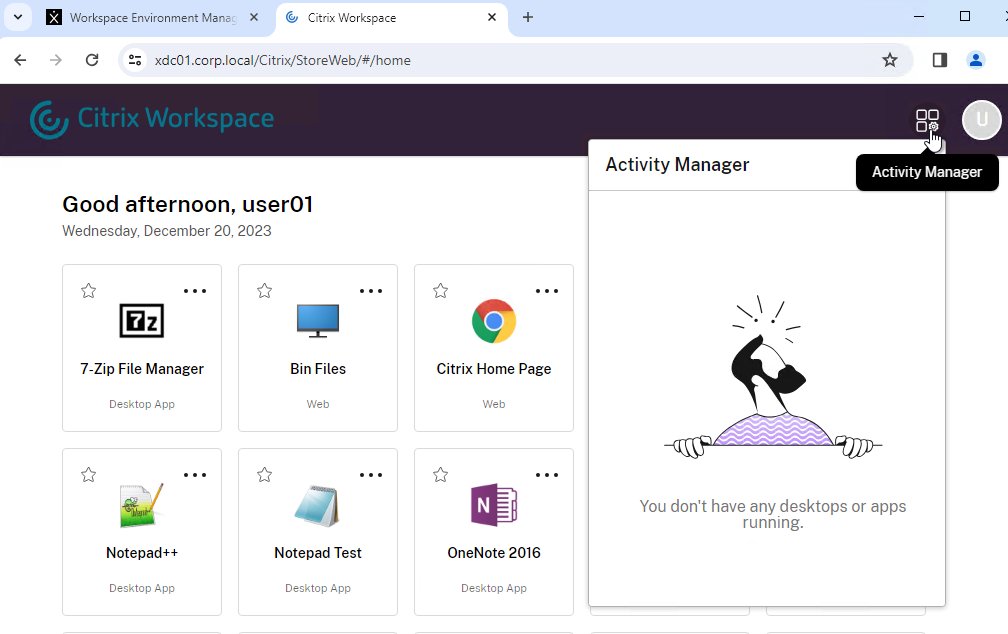
- In the StoreFront Console, on the left, click the Stores node.
- In the middle, right-click your store, and click Manage Receiver for Web Sites.
- Click Configure.
- On the UI Experience page, select Next generation experience and click OK.
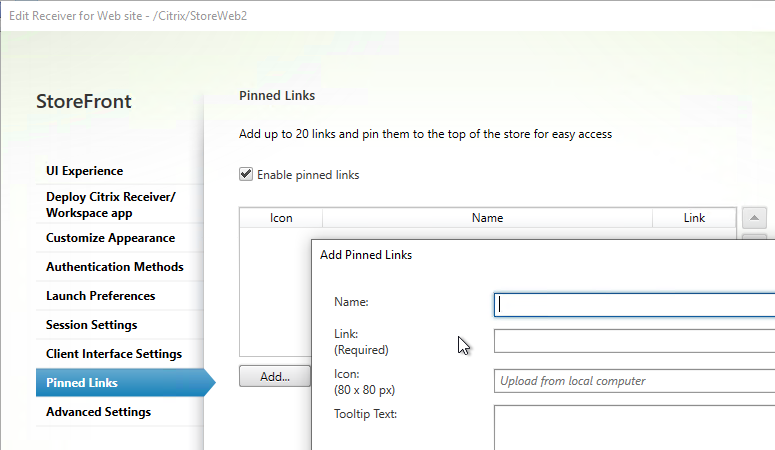
- StoreFront 2411 adds Pinned Links to the Next generation experience.
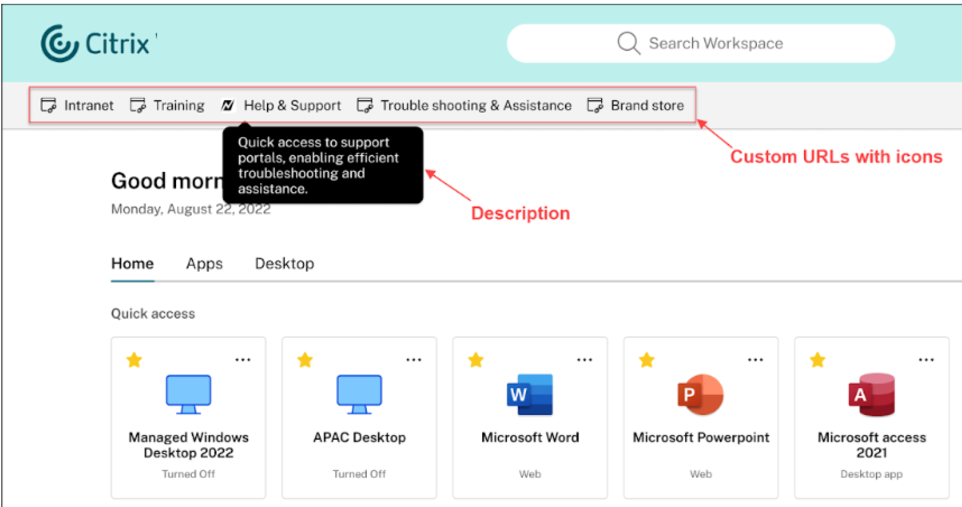
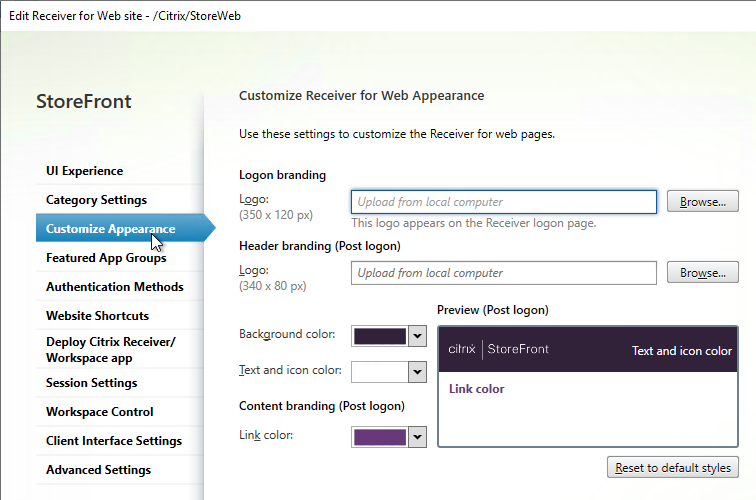
Customize Receiver Appearance
You can go to Stores > Manage Receiver for Web Sites > Configure > Customize Appearance to change logos and colors. Additional customization can be performed using the SDK.
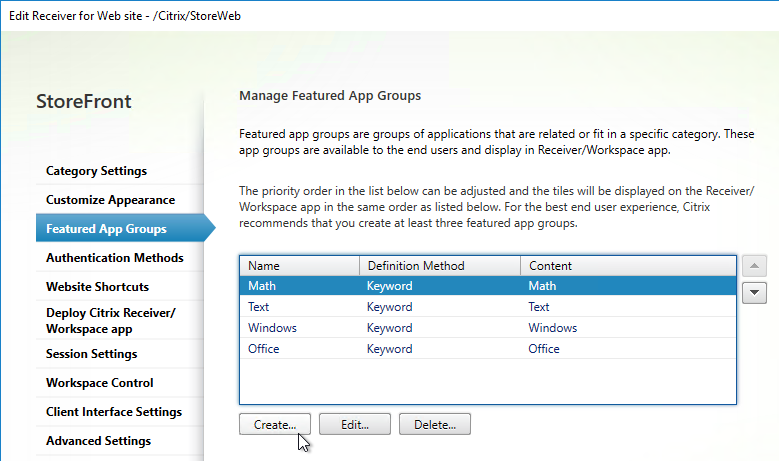
You can also Manage Featured App Groups.
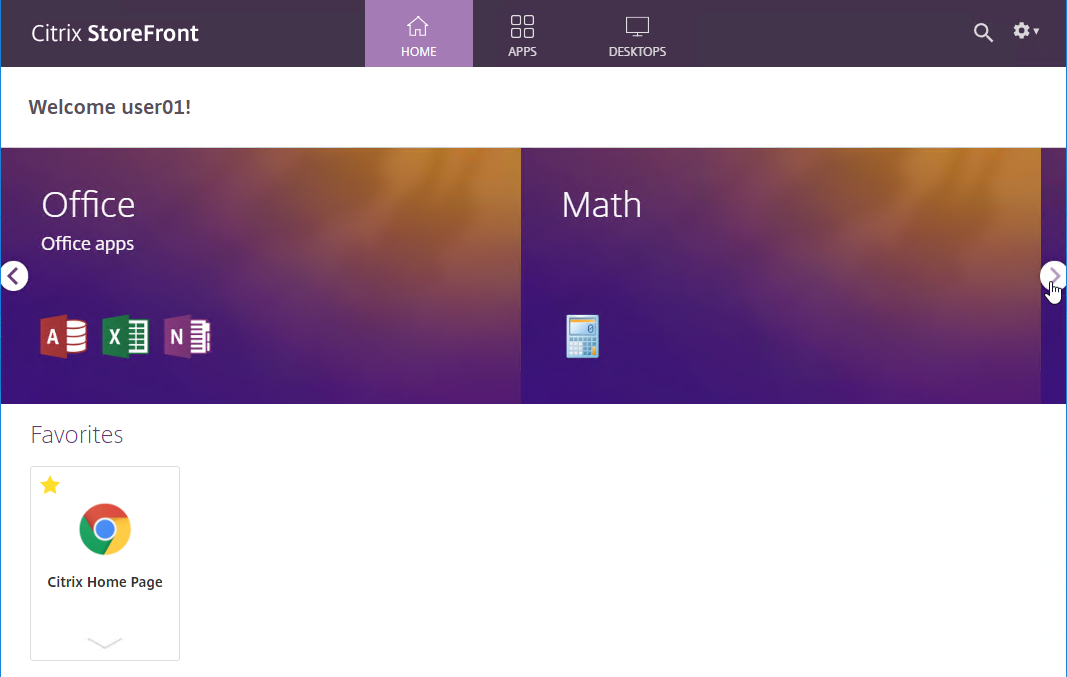
In StoreFront 1811 and newer, Featured App Groups are shown in the user interface as Collections.
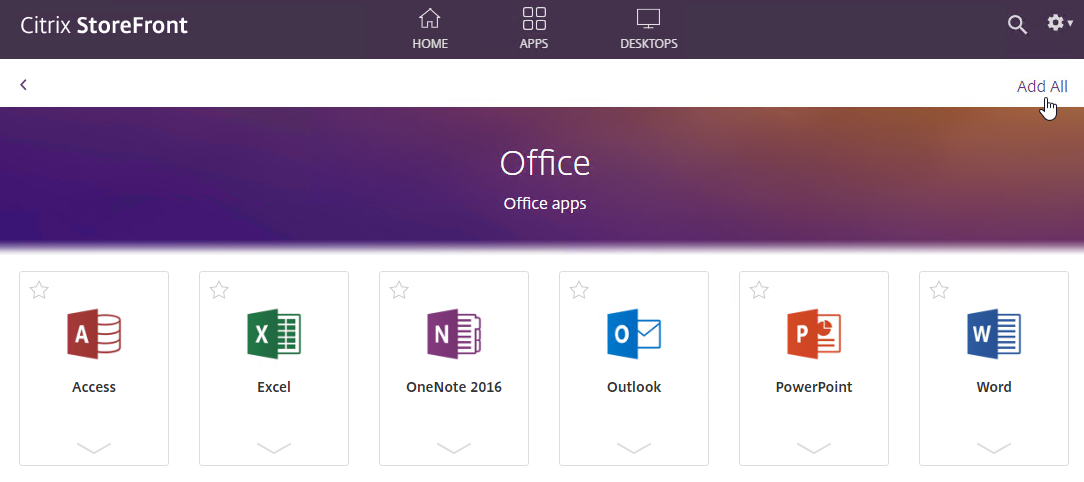
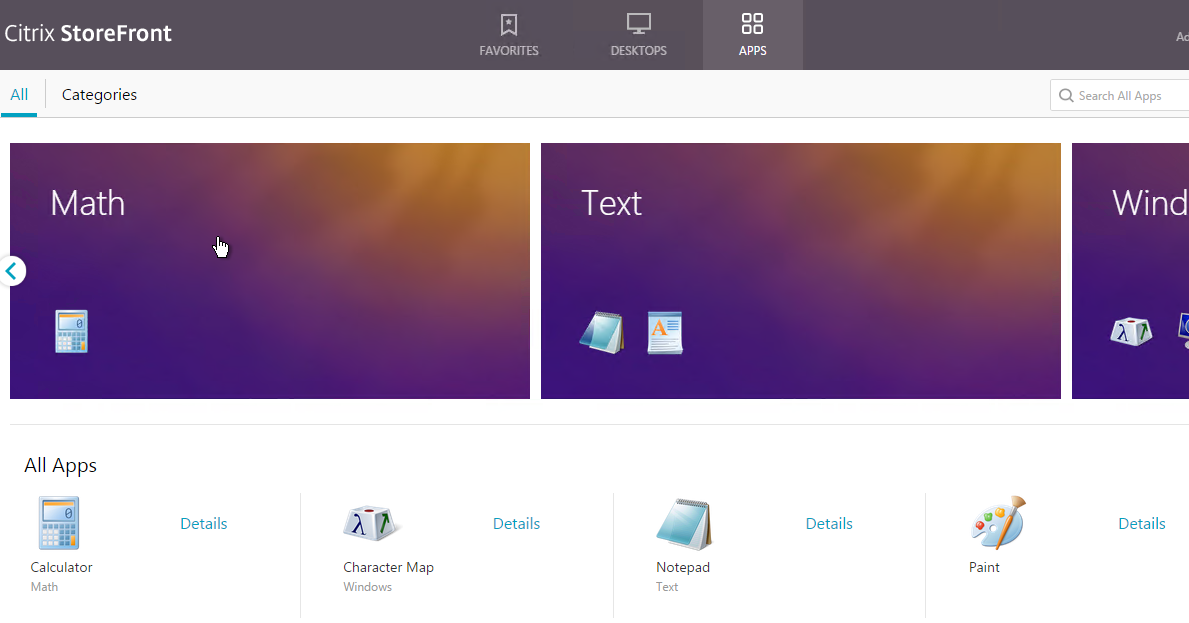
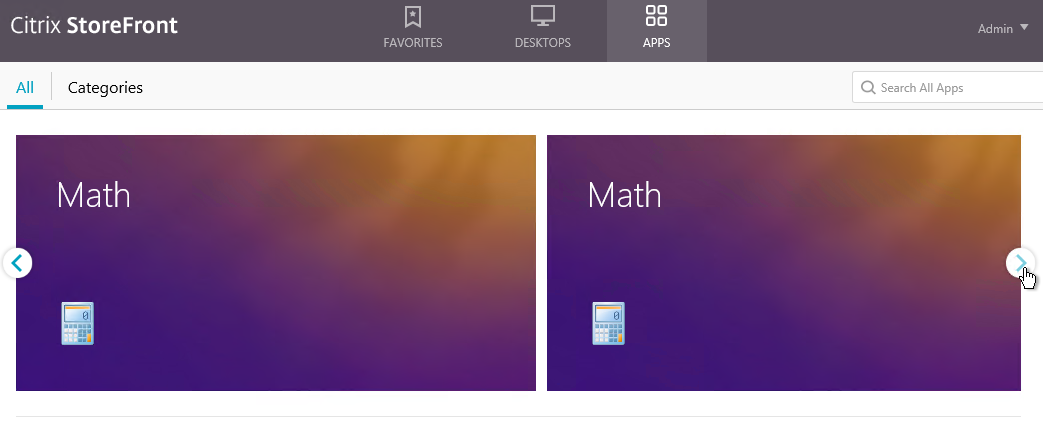
- The HOME page shows the Feature App Groups in a ribbon with arrows to let the user see more Featured App Groups. The ribbon view is limited to three icons per Featured App Group. When the user clicks a Featured App Group, every icon in the Featured App Groups is shown.
- The APPS page has a Collections tab showing all collections and the number of icons in each Collection.
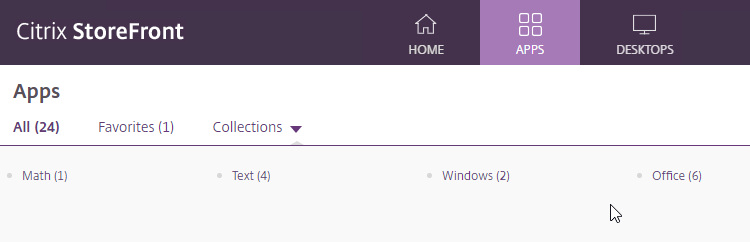
- When the user clicks a collection, all icons in the collection are shown. The user can click Add All on the top right to mark all of the icons as Favorites.
To create Featured App Groups:
- Go to Stores > myStore > Manage Receiver for Web Sites > Configure.
- In the Edit Receiver for Web site window, on the Featured App Groups page, click Create.
- Give the Collection a name and a description.
- At the bottom, there are three methods of adding icons to the Feature App Group.
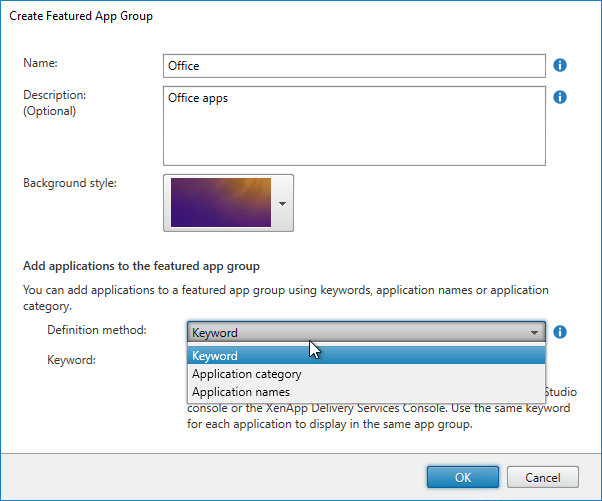
- If you select the Keyword option, then enter a keyword that will be added to the published apps that are in this collection.
- In Citrix Studio, go to the Properties of a published application. In the Description field, at the end, enter KEYWORDS:myCollectionKeyword.

In StoreFront older than version 1811:
- Featured App Groups are displayed at the top of the Apps > All page.
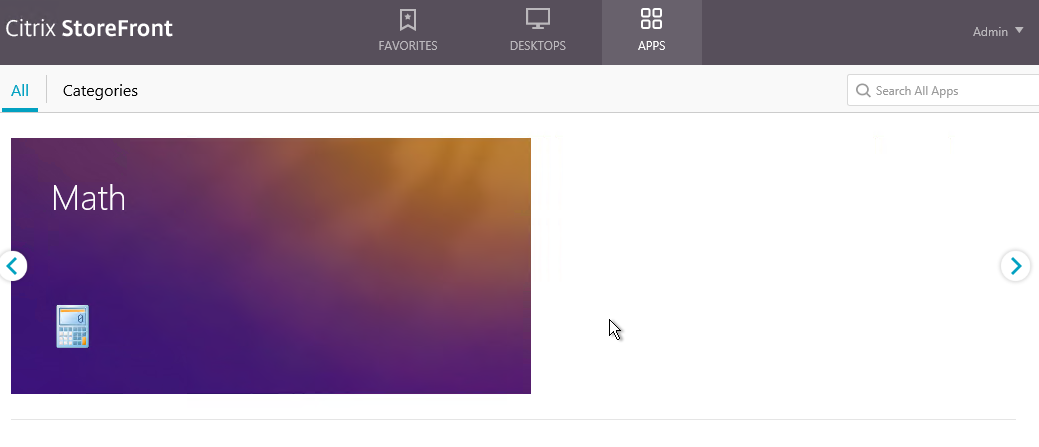
- By default, Featured App Groups are displayed with continual horizontal scrolling. This is OK if you have several Featured App Groups but doesn’t look right if you only have one Featured App Group.
- Michael Bednarek has posted some code at Citrix Discussions to disable the continuous horizontal scrolling.
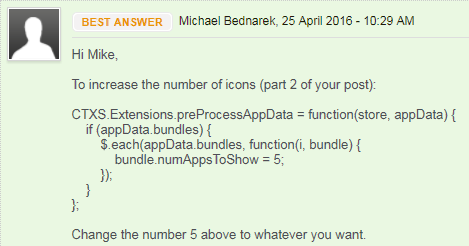
- If you want to display more than 3 apps per group, see Michael Bednarek at Modify Receiver for Web site at Citrix Discussions.
Receiver for Web (browser) Pass-through Authentication
- On the left, click the Stores node.
- In the middle, right-click your store, and click Manage Receiver for Web Sites.
- Click Configure.
- On the Authentication Methods page, if desired, check the box next to Domain pass-through. Click OK.
- If the StoreFront URL is in the browser’s Local Intranet zone, then you’ll see a prompt to automatically Log On. This only appears once.
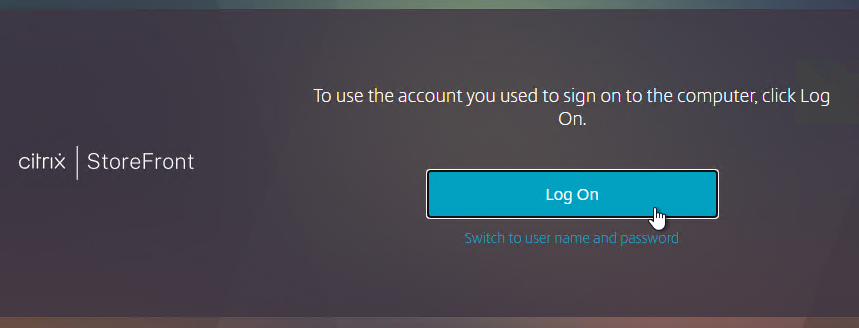
- If you want to default to Pass-through without any user prompt, then see Citrix Blog Post Configuring domain pass-through as your default authentication method.
Workspace app for HTML5 2502
- On the left, click the Stores node.
- In the middle, right-click your store, and click Manage Receiver for Web Sites.
- Click Configure.
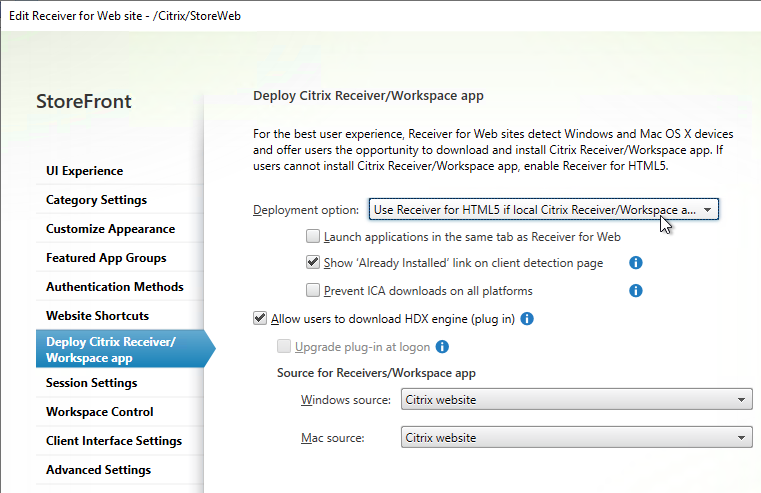
- In StoreFront 2411 and newer, on the Launch Preferences page, change the drop-down to Use Receiver for HTML5 if local Citrix Receiver/Workspace is unavailable.
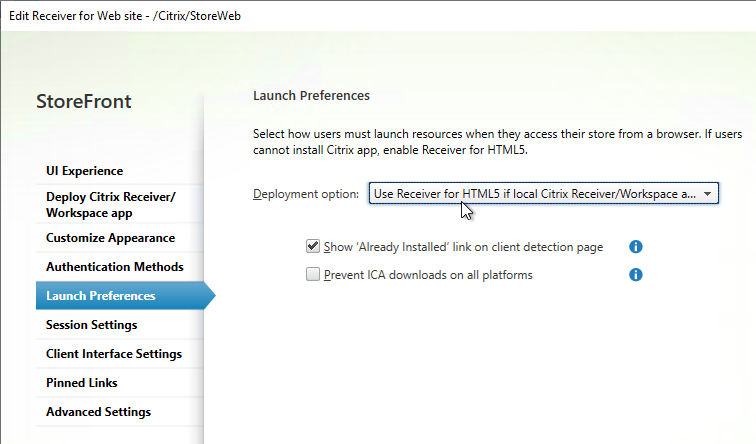
- Prior to StoreFront 2411, on the Deploy Citrix Receiver / Workspace app page, change the drop-down to Use Receiver for HTML5 if local Citrix Receiver/Workspace is unavailable.
- Prior to StoreFront 2411, on the Deploy Citrix Receiver / Workspace app page, change the drop-down to Use Receiver for HTML5 if local Citrix Receiver/Workspace is unavailable.
- By default, the HTML5 session opens in a new tab. You can optionally enable Launch applications in the same tab as Receiver for Web. See Configure Citrix Receiver for HTML5 use of browser tabs at Citrix Docs for more information.
- Click OK, and then click Close.
- Download the Workspace app 2411 for HTML5.
Note: new versions of Workspace app for HTML5 are released frequently. For example, 2306 and newer support the new launch experience.

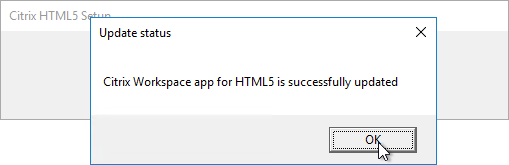
- Install the HTML5 Workspace app (CitrixHTML5Client-x64.exe) on one of the StoreFront servers. It installs without prompting. Repeat this step on all StoreFront servers in the Server Group since Propagate Changes doesn’t seem to propagate the new Workspace App.

- To see the installed version of HTML5 Workspace app, in StoreFront console, click the Stores node on the left.
- In the middle pane, in the bottom half, switch to the Receiver for Web Sites tab. You might have to click Refresh to see the new version.

HTML5 Workspace app configuration
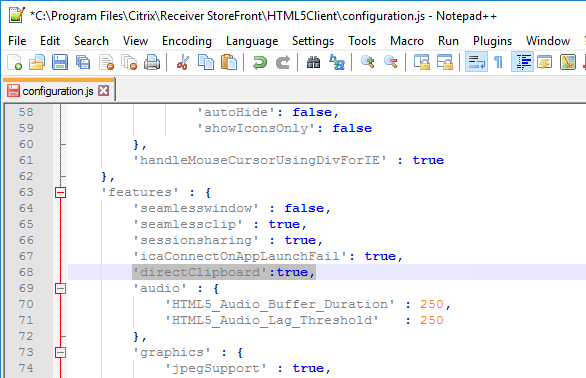
- Copy/paste of text using Ctrl+C and Ctrl+V – HTML5 Workspace app version 1907 app adds support for copy/paste of text using Ctrl+C and Ctrl+V and the feature is enabled by default. More info at Enhanced clipboard experience at Citrix Docs.
- Multi-monitor – HTML5 Workspace app has a multi-monitor feature, which is enabled by default.

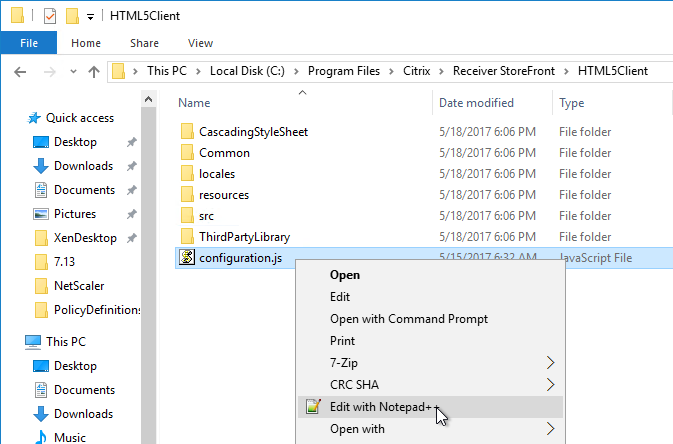
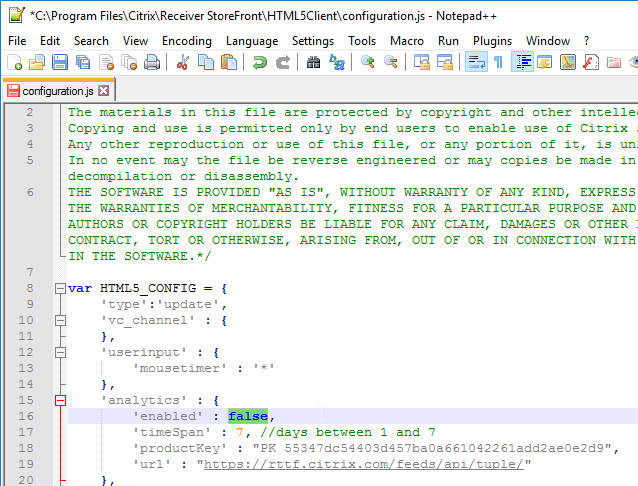
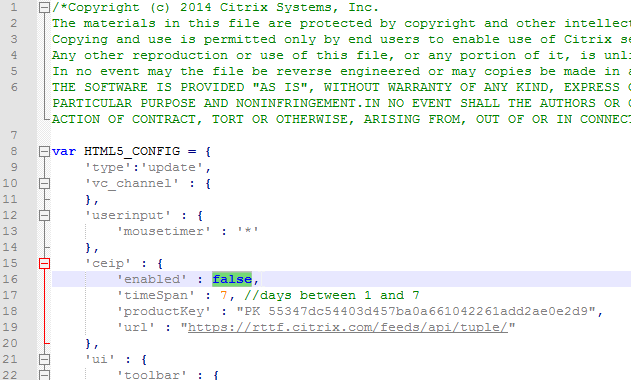
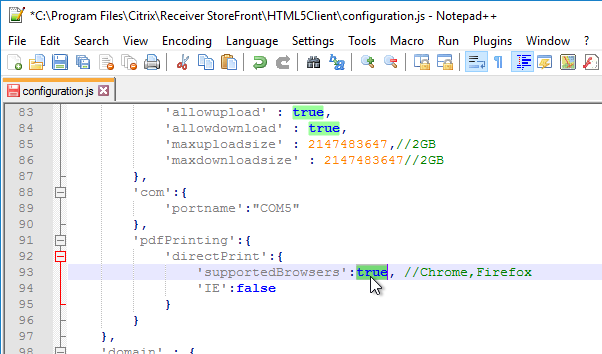
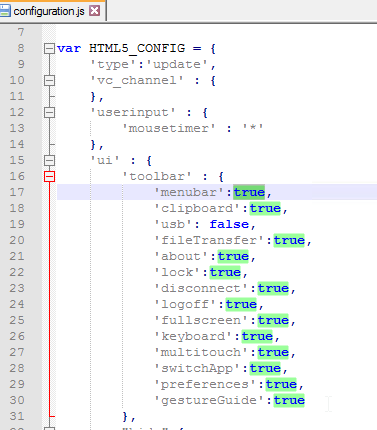
- To configure HTML5 Workspace app, edit the file “C:\Program Files\Citrix\Receiver StoreFront\HTML5Client\configuration.js”.
- Customer Experience Improvement Program (CEIP) is enabled by default. To disable CEIP in HTML5 Workspace App 1906 and newer, find the first analytics section and change enabled to false.
- To disable CEIP in HTML5 Workspace App 1905 and older, search for the ceip section, and change it to false.
- Customer Experience Improvement Program (CEIP) is enabled by default. To disable CEIP in HTML5 Workspace App 1906 and newer, find the first analytics section and change enabled to false.
- In the StoreFront console, on the left, right-click Server Group, and click Propagate Changes.
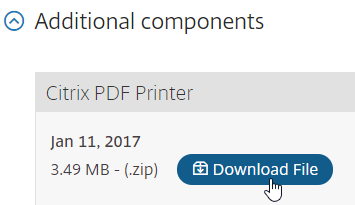
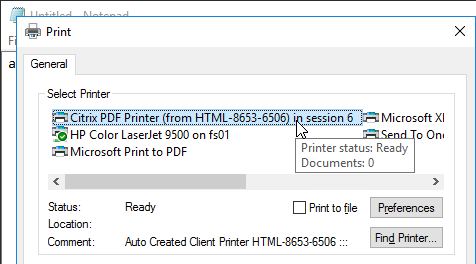
- For VDA 7.15 and older, optionally, install Citrix PDF Printer on the VDAs. The PDF printer is in the Additional Components section of the HTML5 Workspace app download page.
Note: in VDA 7.16 and newer, the PDF Printer is included with the VDA installation and no longer needs to be installed separately.
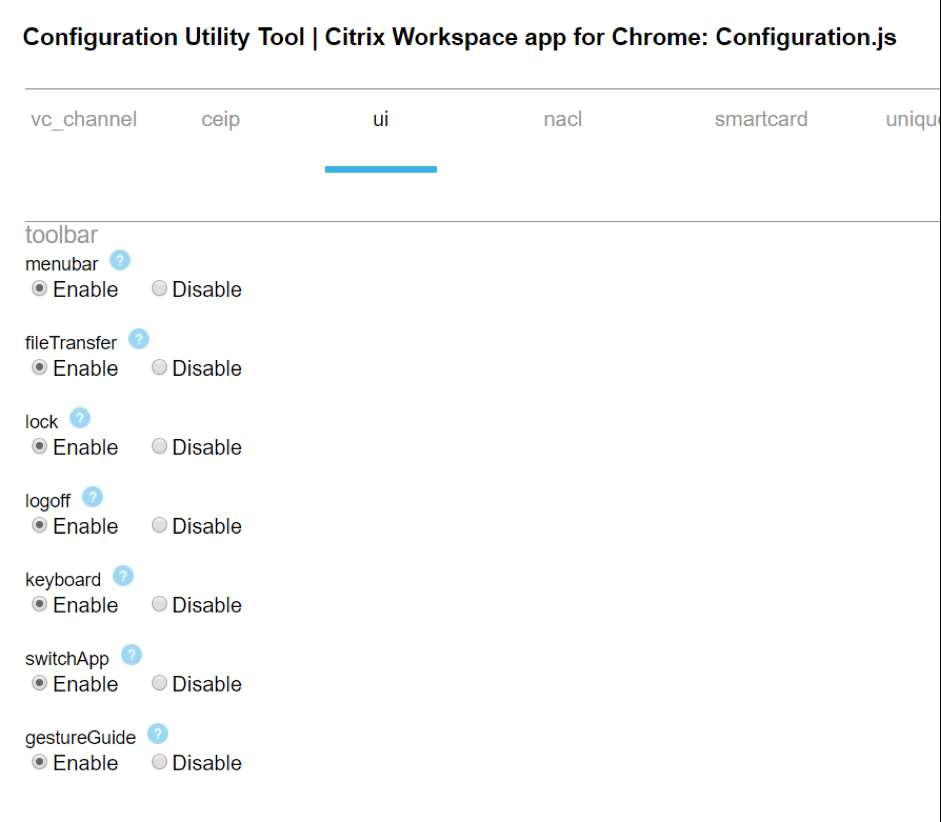
Other HTML5 Receiver configurations you can change by either editing C:\Program Files\Citrix\Receiver StoreFront\HTML5Client\configuration.js, or use the Citrix Workspace app (earlier known as Citrix Receiver) for Chrome and HTML5 – Configuration Utility downloadable from CTX229141.
- HTML5 Workspace app has improved PDF printing in Chrome and Firefox. Enable it by setting supportedBrowsers to true.
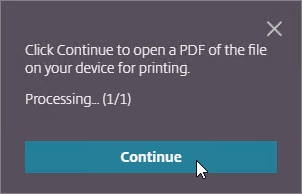
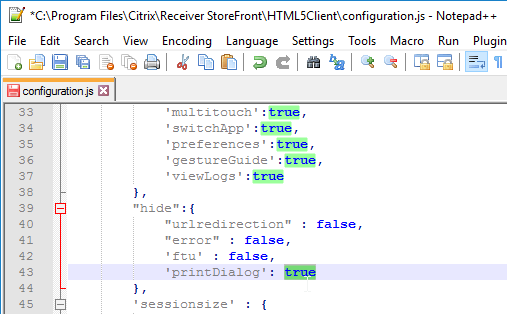
- When printing from HTML5 Workspace app to the Citrix PDF Printer, the user must click Continue to show the PDF. You can get rid of this prompt. In the configuration.js file, scroll down to the line containing printDialog and set it to true.
- The new HTML5 Workspace app toolbar can be disabled or customized by editing the file C:\Program Files\Citrix\Receiver StoreFront\HTML5Client\configuration.js.
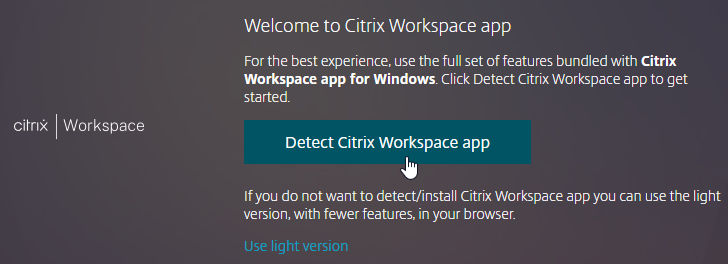
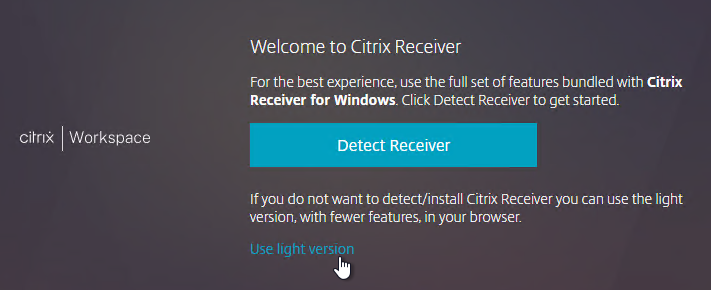
If HTML5 Workspace app is enabled, users have the option of selecting either native or HTML5 by clicking Change Citrix Receiver or Change Citrix Workspace app.
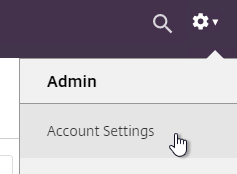
- In StoreFront 1912 and newer, click the gear icon on the top right and then click Account Settings.
- Click either Change Citrix Workspace app or Change Citrix Receiver..
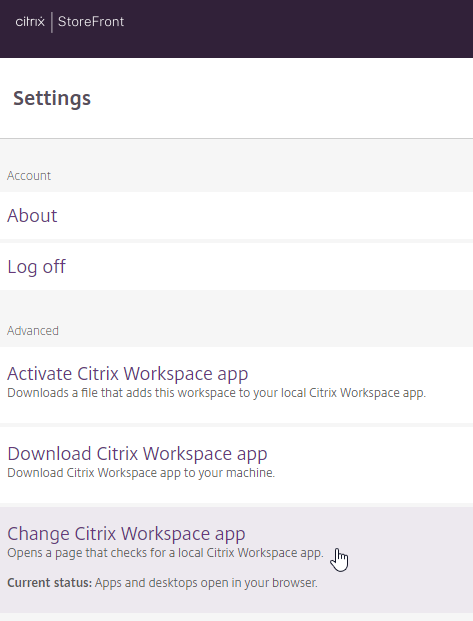
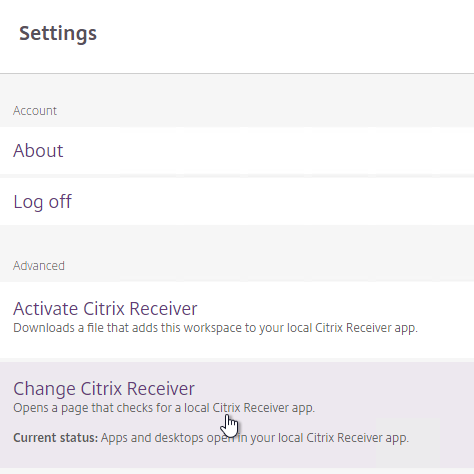
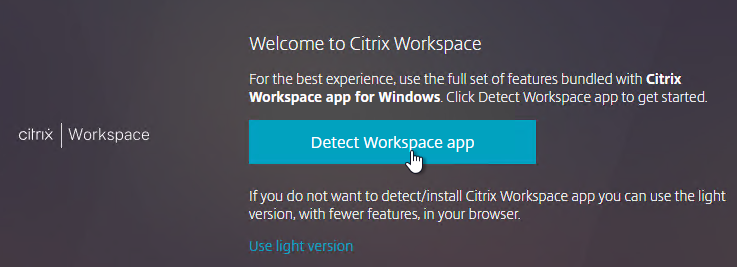
- If you want to use the locally installed Workspace app, then click the blue Detect Citrix Workspace app or blue Detect Receiver button. If you want to use the HTML5 Client, click Use light version.
Citrix Blog Post Receiver for HTML5 and Chrome File Transfer Explained:
- How to use the toolbar to transfer files
- Citrix Policy settings to enable/disable file transfer
- VDA registry settings to control file transfer
- HTML5Client\Configuration.js settings for client-side configuration
- How to view HTML5Client log file
Deploy Citrix Workspace app
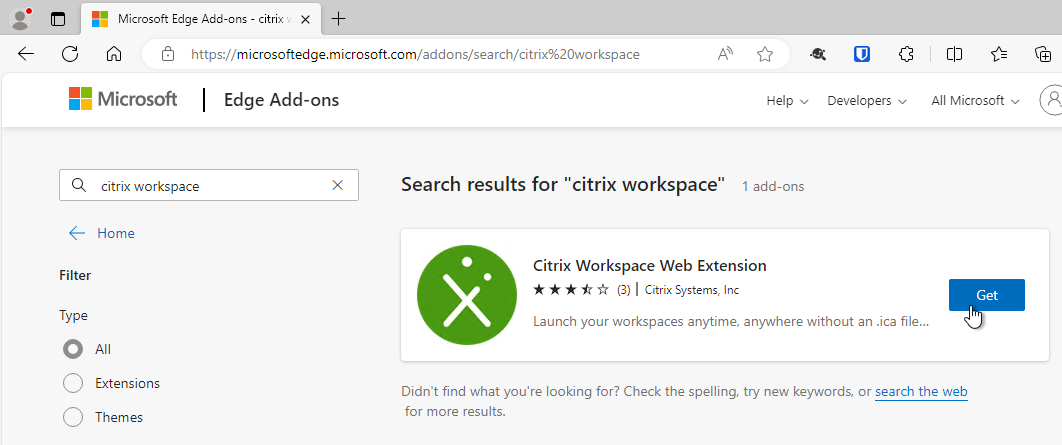
- Citrix recommends that all users install the Citrix Workspace Web Extension in their endpoint browsers. This extension eliminates the need for StoreFront to detect the locally installed Workspace app and enables .ica files to be downloaded to memory instead of to disk. StoreFront support for the extension is enabled by default in StoreFront 2311 and newer. See Citrix Workspace web extensions at Citrix Docs.
- StoreFront can deploy Workspace app to users that don’t have Workspace app installed. In StoreFront console, on the left, click the Stores node.
- In the middle, right-click your store, and click Manage Receiver for Web Sites.
- Click Configure.
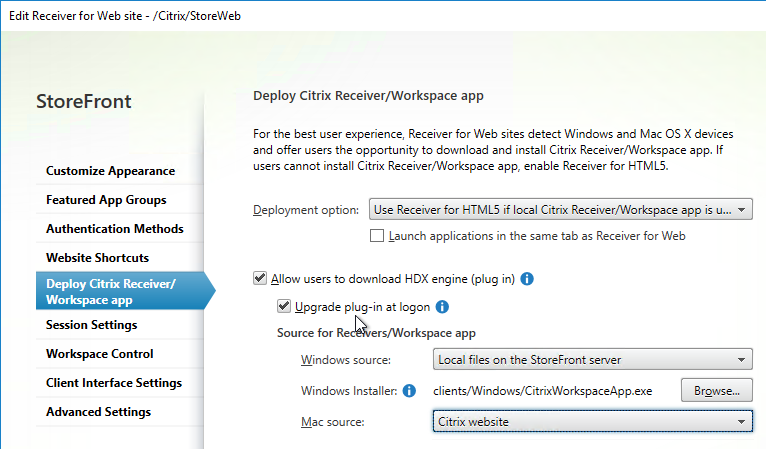
- On the Deploy Citrix Receiver/ Workspace app page, check the box next to Allow users to download HDX engine (plug in).
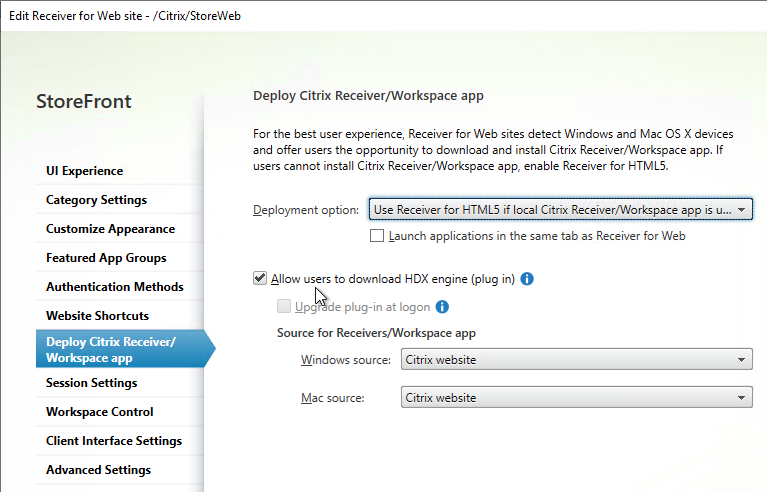
- Change both source drop-downs to Local files on the StoreFront server.
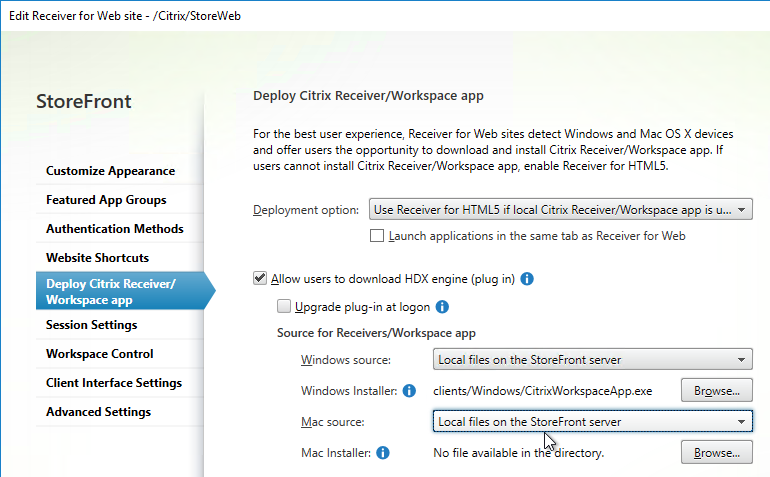
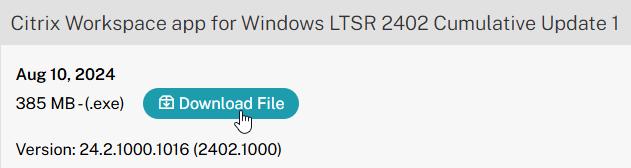
- For Windows, download one of the following:
- For Mac, download Workspace app 2503 for Mac.

- Click each of the Browse buttons and browse to the downloaded Workspace app.
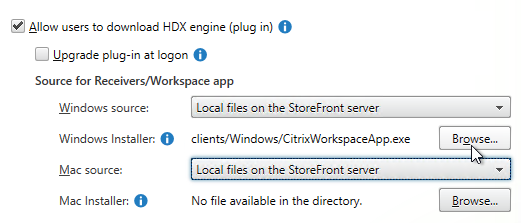
- You can optionally enable Upgrade plug-in at logon.
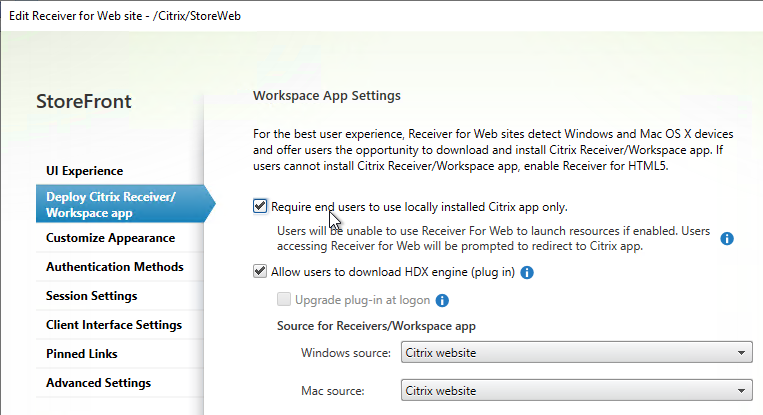
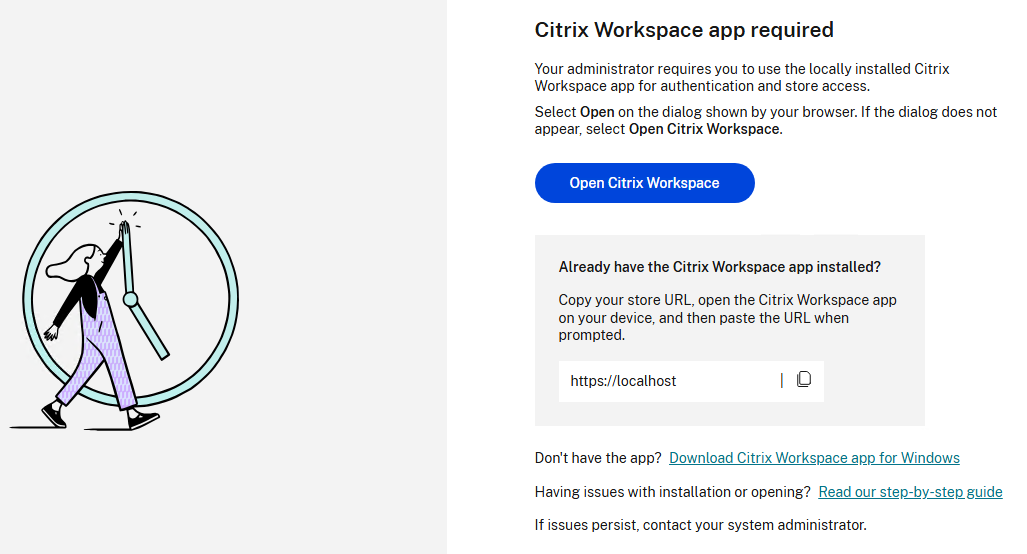
- StoreFront 2411 and newer have an option to Require end users to use locally installed Citrix app only.
- Click OK when done, and Close when done.
- If you prefer for users to download Workspace app from the Citrix website, then note that StoreFront might default to downloading Receiver instead of Workspace app. To change it to Workspace app, do the following:
- In StoreFront Console, in the Deploy Citrix Receiver/ Workspace app page, change Windows source and Mac source to Files on remote server (through URL).
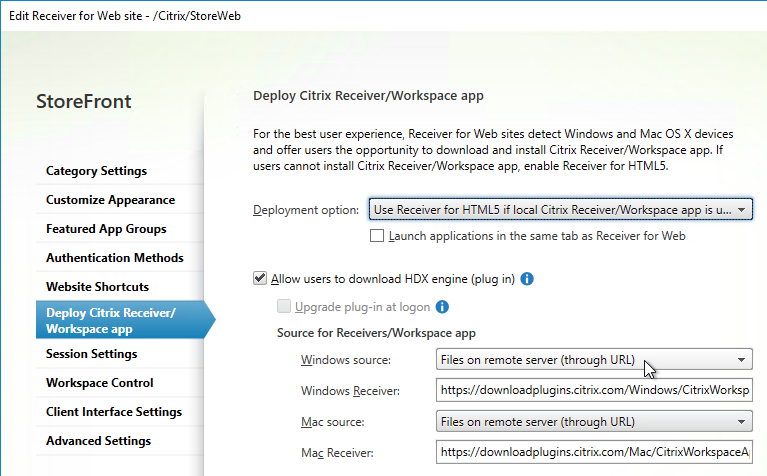
- Enter the following paths. The default paths might be http instead of https and you should change them to https.
Windows Receiver = https://downloadplugins.citrix.com/Windows/CitrixWorkspaceApp.exe
Mac Receiver = https://downloadplugins.citrix.com/Mac/CitrixWorkspaceApp.dmg
- In StoreFront Console, in the Deploy Citrix Receiver/ Workspace app page, change Windows source and Mac source to Files on remote server (through URL).
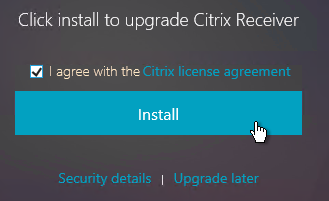
- When users connect to Receiver for Web, they will be prompted to install or upgrade. In StoreFront 2203 and newer, the screens say Workspace app.
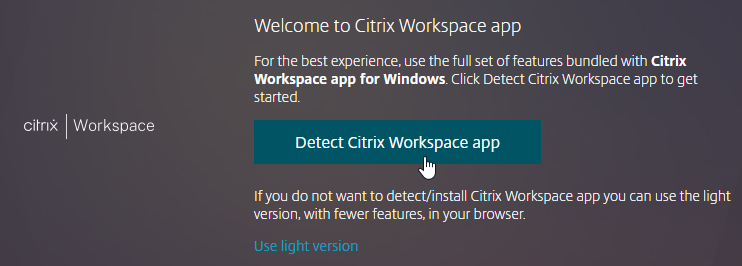
- In older versions of StoreFront, the screens might say Citrix Receiver instead of Citrix Workspace app.
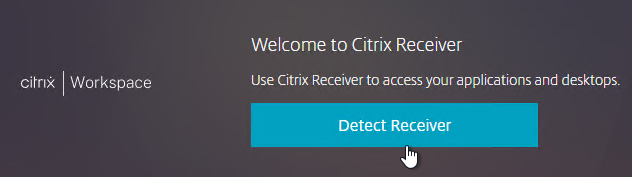

- You can change it to Citrix Workspace app by following the instructions at CTX221097 How to rename items on StoreFront?.
- Search the list of strings in the KB article for any string containing the word Receiver, copy the string to C:\inetpub\wwwroot\Citrix\StoreWeb\custom\strings.en.js, and change it to Workspace app. A few of the strings are shown below. Make sure there are commas between each item except the last item.
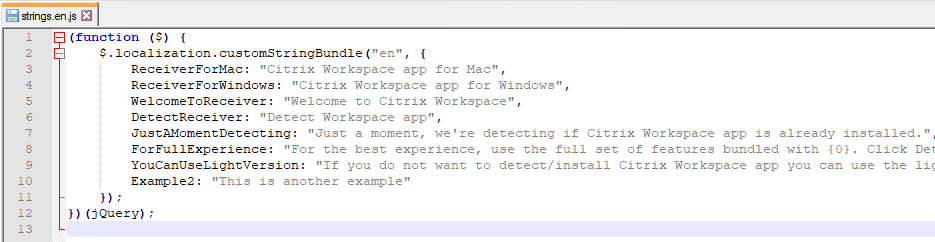
- Search the list of strings in the KB article for any string containing the word Receiver, copy the string to C:\inetpub\wwwroot\Citrix\StoreWeb\custom\strings.en.js, and change it to Workspace app. A few of the strings are shown below. Make sure there are commas between each item except the last item.
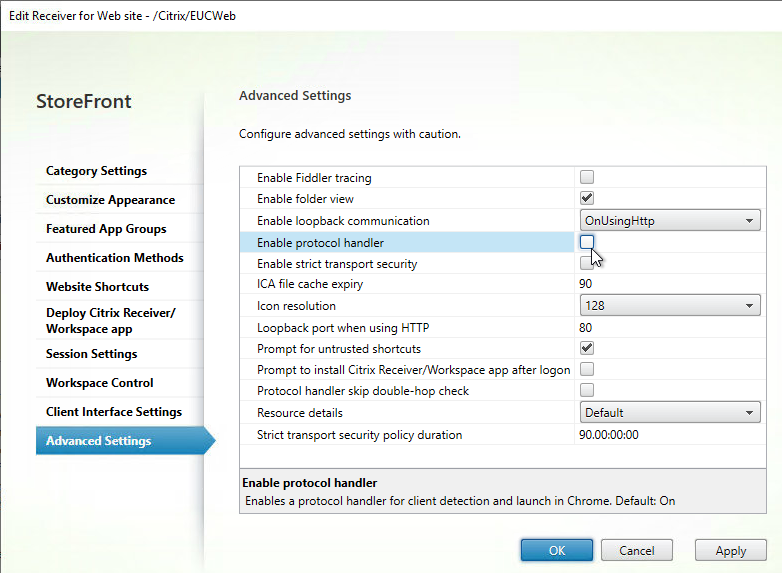
- If you don’t want StoreFront to detect the locally installed Workspace app, then edit the Receiver for Web site, switch to the Advanced Settings page and uncheck the box next to Enable protocol handler. This disables the button that asks users to Detect Workspace app.

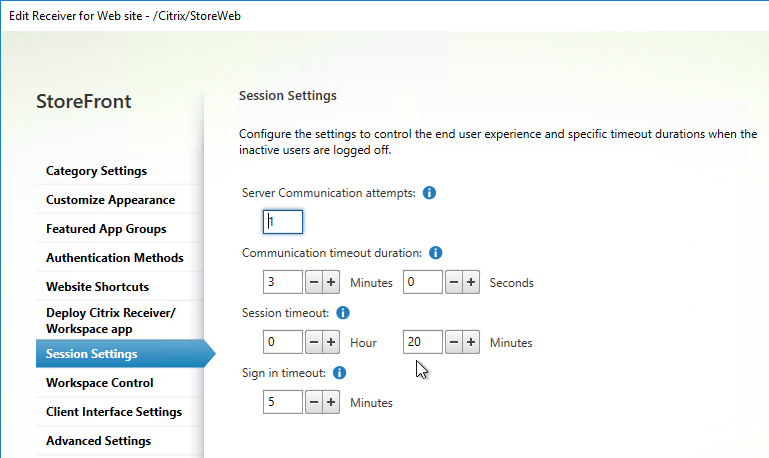
Receiver for Web Timeout
- On the left, click the Stores node.
- In the middle, right-click your store, and click Manage Receiver for Web Sites.
- Click Configure.
- On the Session Settings page, set the Session timeout as desired, and click OK.
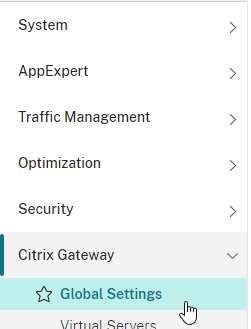
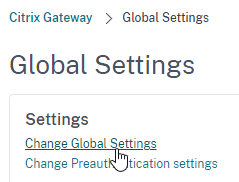
- If you are using a Citrix ADC, you will need to change the Global Session Timeout located at Citrix Gateway => Global Settings => Change Global Settings (right pane) => Client Experience (tab) => Session Time-out (mins).
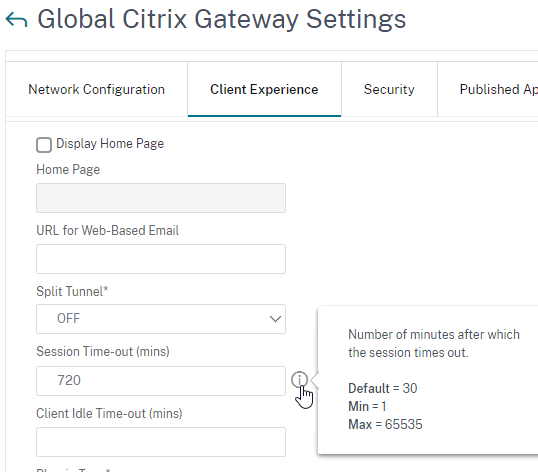
- This Citrix Gateway Session Time-out only applies to StoreFront and AAA. If you want it to also apply to ICA sessions, then on the Network Configuration tab, set ICA Session Timeout to ON. Source = CTX218008 How to configure ICA Proxy Connection Termination upon AAA Session Time Out.
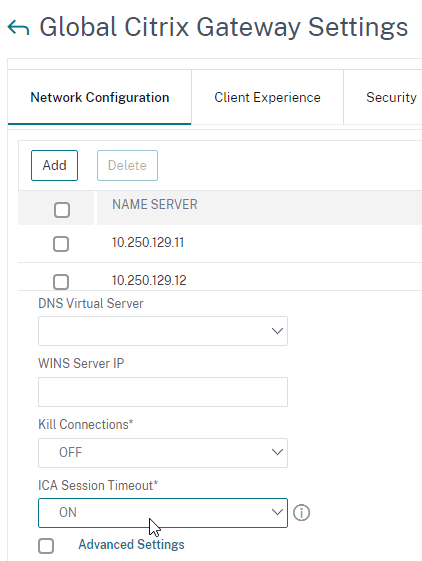
- This Citrix Gateway Session Time-out only applies to StoreFront and AAA. If you want it to also apply to ICA sessions, then on the Network Configuration tab, set ICA Session Timeout to ON. Source = CTX218008 How to configure ICA Proxy Connection Termination upon AAA Session Time Out.
- From Change the session time-out of Citrix Receiver for Web at Citrix Docs: If you increase the session timeout for RfWeb to be more than 1 hour, you must also increase the maxLifetime appropriately in c:\inetpub\wwwroot\Citrix\Authentication\Web.config.
- If your desired timeout value is greater than 8 hours, you should also edit tokenLifeTime in c:\inetpub\wwwroot\Citrix\StoreWeb\web.config.
Favorites, Categories, and Default Tab
By default, when a user logs into StoreFront, the HOME tab or Favorites tab is selected. Users can go to other tabs to add icons to the list of Favorites.
In StoreFront 1811 and newer:
- Favorites are shown on the HOME tab.
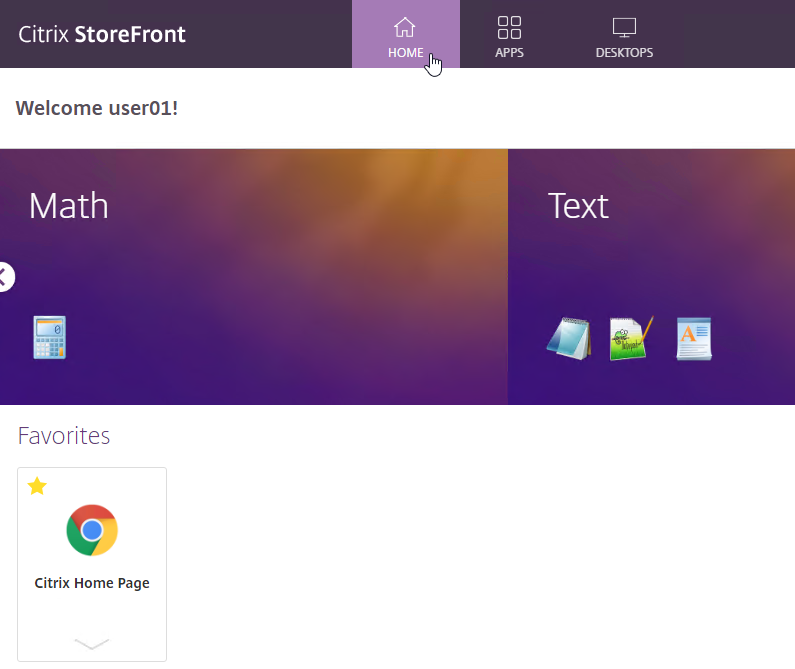
- Favorites are also shown on the APPS view on the Favorites tab.
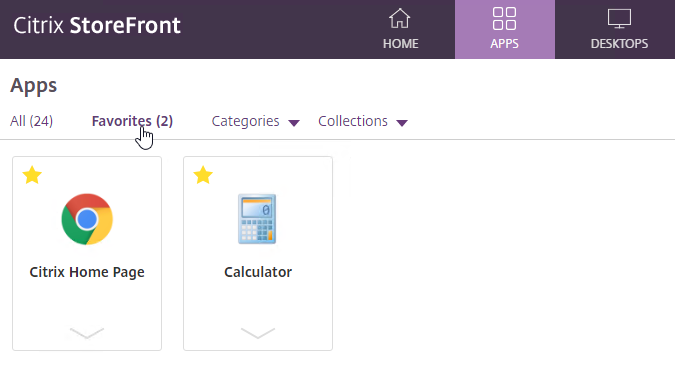
- The user can click the star icon next to a published icon to mark that published icon as a Favorite and add it to the HOME view and Favorites tab.
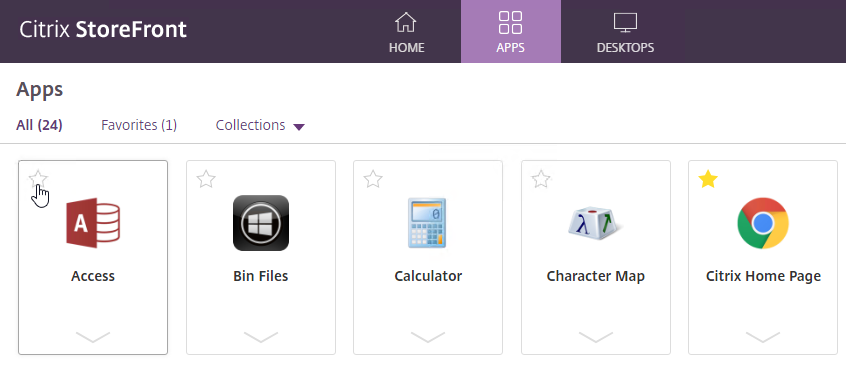
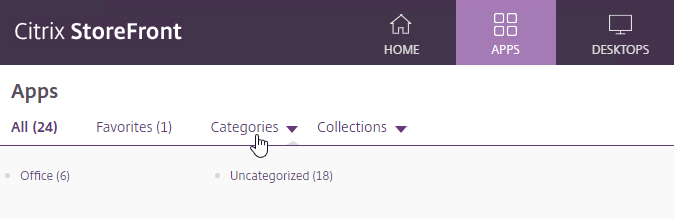
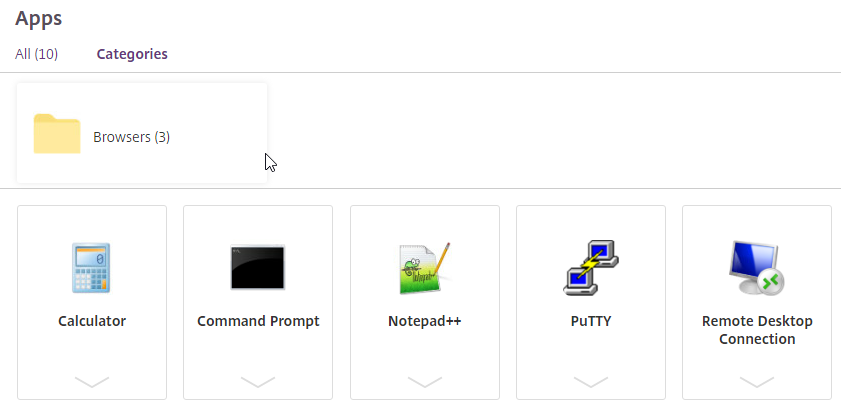
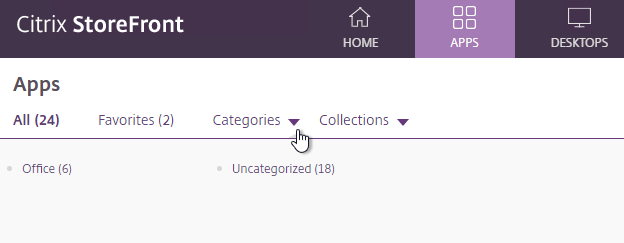
- On the APPS view, the user can expand the Categories drop-down and select a Category to view all icons in that Category.
- To default to the Categories view, see the custom code at CTX559036 Storefront 2302 CU2 – All Apps are now showing on initial landing page instead of categories view.
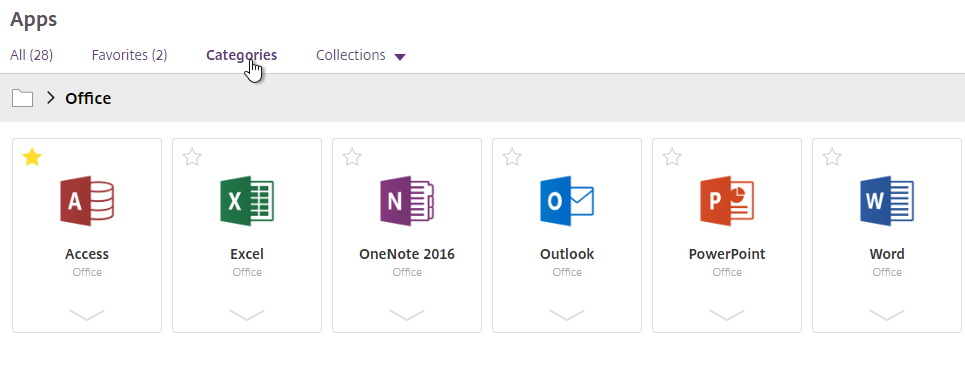
- StoreFront 1912 CU2 and newer has an option to collapse the categories after one is selected. Notice the Uncategorized folder.
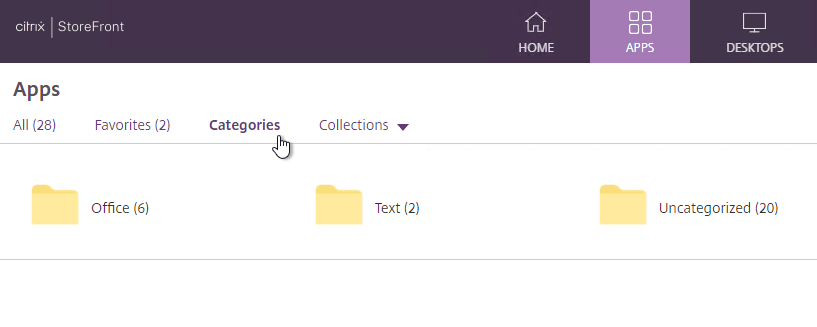
- After clicking a category, the user must click Categories again to switch to a different category.
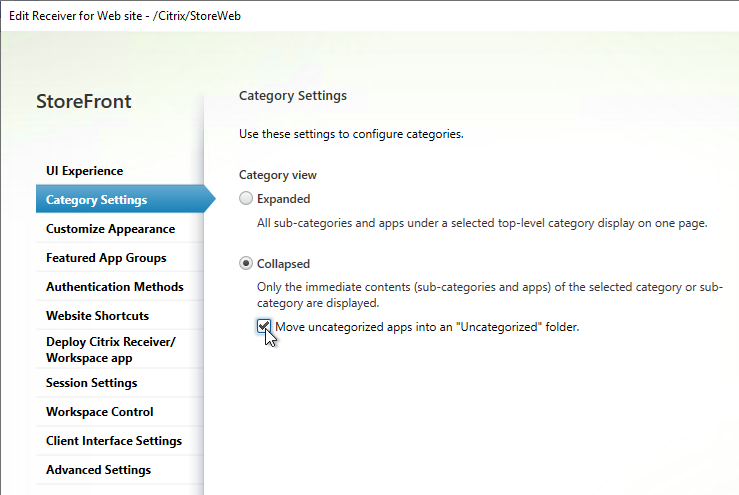
- StoreFront 1912 CU5 and StoreFront 2203 have an option to show Uncategorized icons directly below the Categories list if no Category is selected by the user.
- This feature is configured in StoreFront console > click your store > Manage Receiver for Web sites > Configure > Category Settings. 1912 CU5 and 2203 adds the checkbox option to Move uncategorized apps into an Uncategorized folder. It’s checked by default, but you can uncheck it.
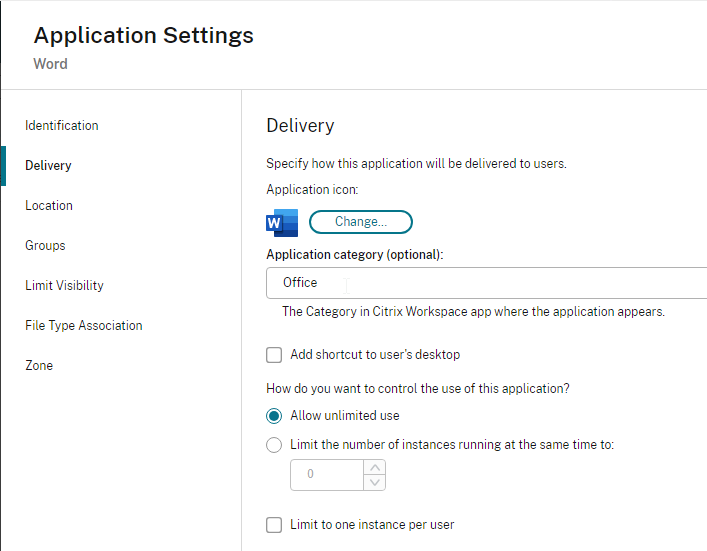
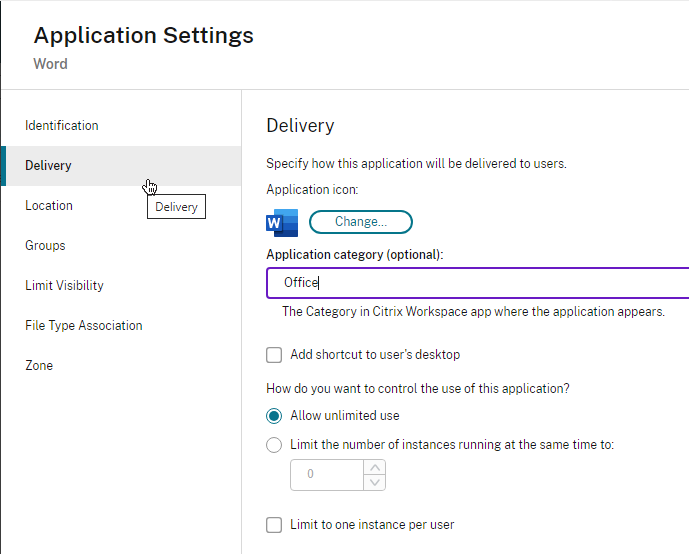
- Categories are configured in the Properties of the published application on the Delivery page.
- Collections are configured as Featured App Groups.
In StoreFront older than 1811:
- There’s a FAVORITES view.
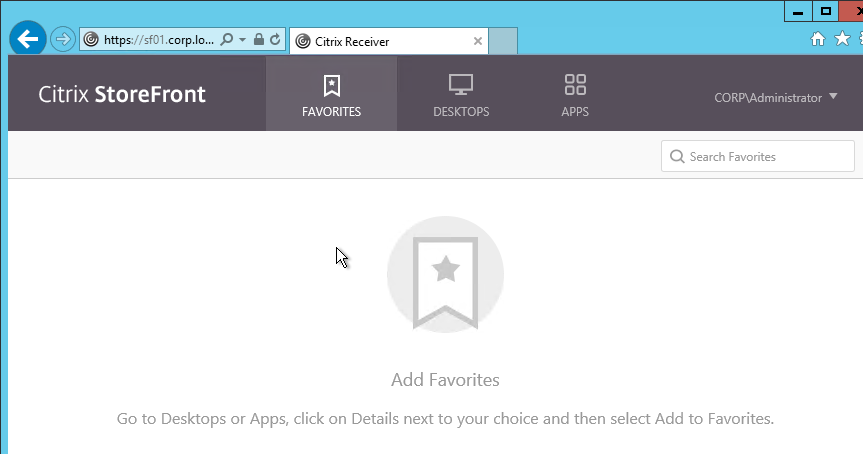
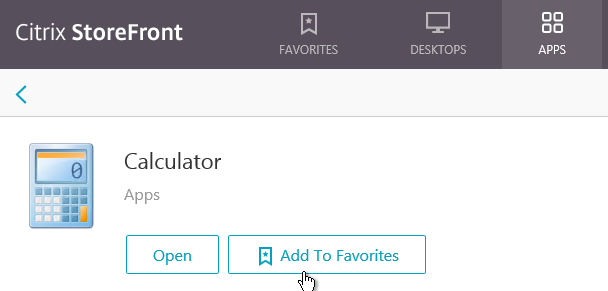
- On the APPS or DESKTOPS views, the user can click the Details link next to a published icon.
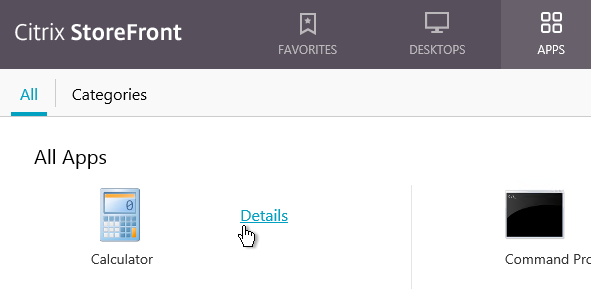
- Then the user can click Add to Favorites to add the icon to the FAVORITES view.
Favorites can be controlled by the administrator:
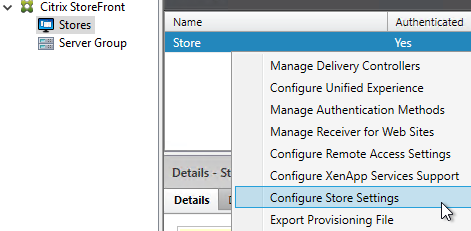
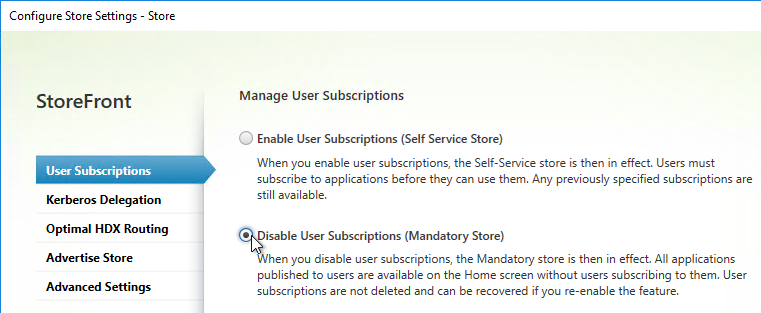
- You can completely remove the FAVORITES or HOME views by going to Stores > myStore > Configure Store Settings > User Subscriptions, and choose Disable User Subscriptions (Mandatory Store).
- To force a published application to be favorited (subscribed), use one of the following keywords in the published application description:
- KEYWORDS: Auto = the application is automatically subscribed. But users can remove the favorite.
- KEYWORDS: Mandatory = the application is automatically subscribed, and users cannot remove the favorite.
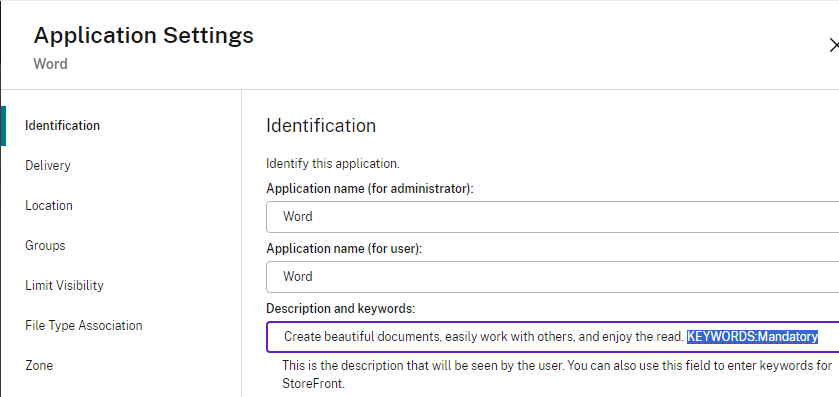
- With Mandatory applications there is no option to remove the application from Favorites.
- Citrix Blog Post How to implement dynamic landing pages in StoreFront has code for the following: If favorites exist, go to favorites tab. If favorites do not exist, go to the store tab. 💡
//If favorites exist, go to favorites tab. If favorites do not exist, go to the store tab. var favoritesExist = false; CTXS.Extensions.sortMyAppList = function (app_array,defaultSortFn) { //This version checks if the amount of user favorites are greater than or equal //to "favoriteThreshold". var favoriteThreshold = 1; var favoriteCount = 0; for (var i = 0; i < app_array.length; i++){ if (app_array[i].canBeRemoved()){ favoriteCount++; } } if (favoriteCount >= favoriteThreshold){ favoritesExist = true; } //This should always be called at the end defaultSortFn(); }; CTXS.Extensions.afterDisplayHomeScreen = function (callback) { if (favoritesExist == false){ CTXS.ExtensionAPI.changeView("store"); } }; - Trentent Tye has a simple customization for C:\inetpub\wwwroot\Citrix\StoreWeb\custom\script.js to default to the APPS view if the user doesn’t have any favorites. See Citrix Storefront – Adventures in customization – Default to “Store” view if you have no favourited app’s.
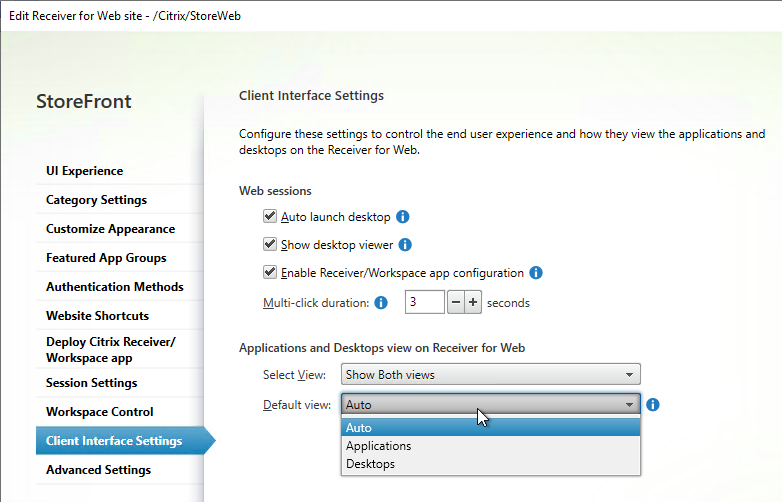
CTXS.Extensions.afterDisplayHomeScreen = function (callback) { /* If the user has no favorited apps, set the view to the apps view */ if (CTXS.Store.getMyApps().length == 0) { CTXS.ExtensionAPI.changeView("store") } }; - You can change the default view and view visibility by going to the Stores > myStore > Manage Receiver for Web Sites > Configure > Client Interface Settings page.
- In StoreFront 1811 and newer, if you want to default to the APPS tab with Categories view expanded, then see CTP Sam Jacobs at Storefront 1811 – Default to Categories view at Citrix Discussions. Or see Citrix Blog Post How to land on the categories view in StoreFront 1811+.
- Add the following to C:\Inetpub\wwwroot\Citrix\StoreWeb\custom\script.js.
Note: if you already have afterDisplayHomeScreen in your script.js file, then you’ll need to merge them.
function categoriesDelay() {
$('#categoriesTabBtn').click();
}

CTXS.Extensions.afterDisplayHomeScreen = function (callback) {
CTXS.ExtensionAPI.changeView('store');
window.setTimeout(categoriesDelay,250);
callback();
};
- Add the following to C:\Inetpub\wwwroot\Citrix\StoreWeb\custom\script.js.
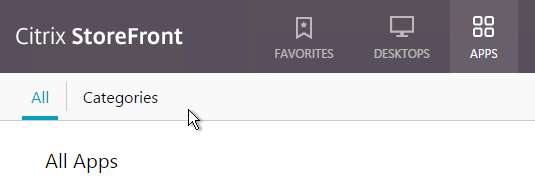
- In StoreFront older than version 1811, if you change the default view to APPS, then you might also want to default to the Categories view instead of the All view.
- When publishing applications in Citrix Studio, on the Delivery page, specify an Application category so that the applications are organized into folders.
- To default the Apps view to the Categories view instead of the All view, add the following code to the end of the file C:\Inetpub\wwwroot\Citrix\StoreWeb\custom\script.js. More details at Storefront 3.0 – change default view at Citrix Discussions.
CTXS.Extensions.afterDisplayHomeScreen = function (callback) {
     CTXS.ExtensionAPI.navigateToFolder('/');
};

CTXS.Extensions.onViewChange = function (viewName) {
  if (viewName == 'store') {
    window.setTimeout(function () {
    CTXS.ExtensionAPI.navigateToFolder('\\');
    }, 0);
  }
};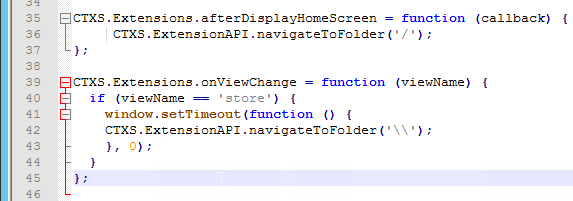
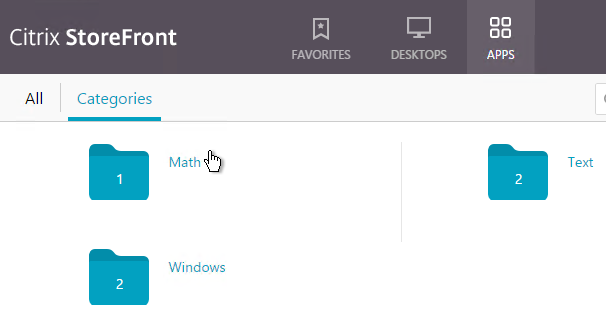
- Then when you login to StoreFront, you’ll see Apps > Categories as the default view. This works in Workspace app too.
- When publishing applications in Citrix Studio, on the Delivery page, specify an Application category so that the applications are organized into folders.
Beacons
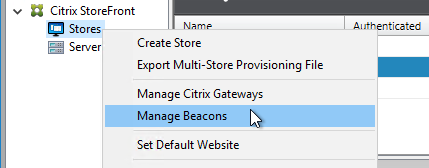
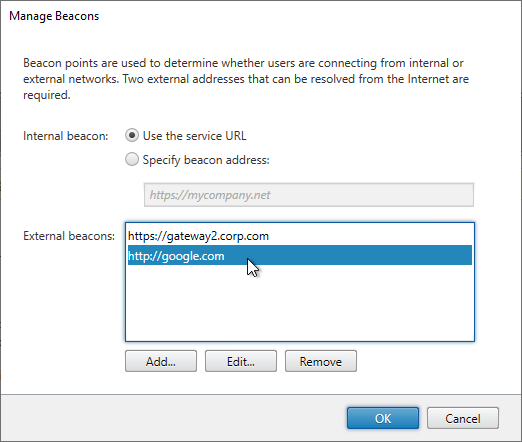
- On the left, right-click Stores, and click Manage Beacons.
- Configure an Internal Beacon. Receiver Self-Service (Workspace app native interface) tries to connect to the Internal Beacon to determine if Workspace app is currently internal or not. If the Internal Beacon is reachable then Receiver Self-Service assumes it is internal, and thus connects to the StoreFront Base URL. If the Internal Beacon is not reachable, then Receiver Self-Service assumes it is external and thus connects to Citrix Gateway. For this to work properly, the Internal Beacon must not be resolvable externally.
If you are not doing Single FQDN, then the Internal Beacon can be the StoreFront FQDN since the StoreFront FQDN is usually only available internally.If you are doing Single FQDN, then you can’t use the StoreFront FQDN. Instead, you must use a different internal website for the beacon. If you need to support internal iPads, due to differences in how iPads determine location, the Internal Beacon should be a new FQDN that resolves to the StoreFront Load Balancing VIP, thus requiring the StoreFront certificate to match both the Internal Beacon and the Base URL. If internal iPads are not needed, then the Internal Beacon can be any internal website.If you want to force internal Receiver Self-Service users to connect through Citrix Gateway (for AppFlow reporting), you can set the Internal Beacon to a fake URL. Since the Internal Beacon is never resolvable, Receiver Self-Service always uses Citrix Gateway. Or you can use Optimal Gateway to achieve the same goal.
- The External beacons are used by Workspace app to determine if Workspace app has Internet access or not. You can use any reliable Internet DNS name. http://ping.citrix.com is no longer valid and should be changed to some other address. Click OK when done.
Propagate Changes
Any time you make a change on one StoreFront server, you must propagate the changes to the other StoreFront server.
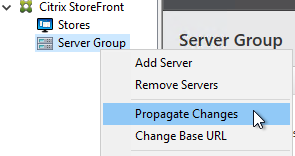
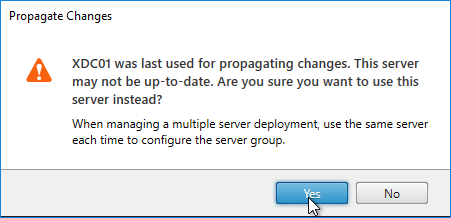
- In the StoreFront console, on the left, right-click Server Group, and click Propagate Changes.
- You might see a message saying that you made changes on the wrong server.
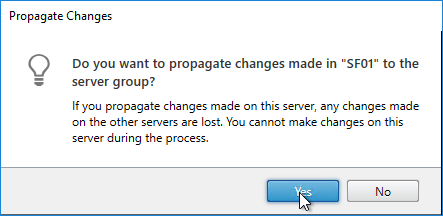
- Click Yes when asked to propagate changes.
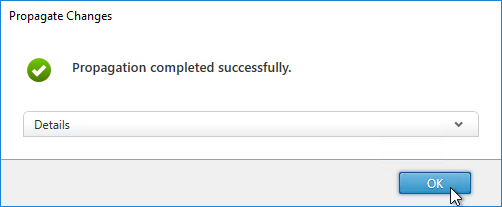
- Click OK when done.
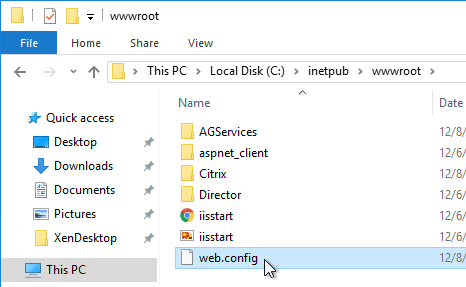
- When you propagate changes, the default web page is not replicated to the other nodes. Copy C:\inetpub\wwwroot\web.config manually to each node.
Export/Import StoreFront Configuration
Use the following PowerShell cmdlets to export StoreFront Configuration into a .zip file (encryption optional) and import to a different StoreFront server group:
- Export-STFConfiguration
- Import-STFConfiguration
See Export and import the StoreFront configuration at Citrix Docs for details.
Logon Simulator
ControlUp has ScoutBees logon simulator for StoreFront and Citrix Gateway.
eG Innovations has a free Logon Simulator for Citrix XenApp and XenDesktop.
Do you have any pull with citrix to get their download for workspace app fixed? Chrome did a security update and now the citrix download link doesn’t load on mac’s and throws a security warning on windows (this link downloadplugins.citrix.com/MAC/CitrixWorkspaceApp.dmg). I’ve set it up as a local download for now from storefront but ideally they would fix this… more info here https://www.chromestatus.com/feature/5691978677223424
I notice there is no way to install citrix Storefront with XenDesktopServerSetup since LTSR 1912 CU1
https://docs.citrix.com/en-us/citrix-virtual-apps-desktops/install-configure/install-command.html#command-line-options-for-installing-core-components
Do I have miss something ?
Thanks
Correct. But in the Metainstaller there’s still the StoreFront button on the bottom. Or you can manually run it from \x64\StoreFront folder.
Dear Carl,
Today for one client, I install a new 7.15 cu6 from scratch and I think there is a problem with new Storefront when adding a second Storefront.
When start join, the communicate initialize, the server 1 and 2 communicate and fail with error during process. (see at the end of this post for error detail)
I discover with a new Storefront installation, when choose your store name, you cannot set “Store” for name, you receiver an error “this store exist”. You set an another name and after configuration, you seen your Custom Store name and another with name “Store Service”.
At this time (on test environnement), I removed Storefront 3.12.6, I install Storefront 3.12.5, I perform clean install and configuration of Storefront, I can join a second server and I make an update to Storefront 3.12.6.
And now the Storefront deployment works normaly.
For the moment I no open a case, may be you can see this directly ?
I reproduced the error encountered today on a test environment of which here are the logs
Sorry for the french language for log.
Event log 1 :
Nom du journal :Citrix Delivery Services
Source : Citrix Configuration Replication Service
Date : 07/07/2020 20:40:13
ID de l’événement :1
Catégorie de la tâche :(2850)
Niveau : Erreur
Mots clés : Classique
Utilisateur : N/A
Ordinateur : ctxcrlsf2-715.endor.lan
Description :
Une erreur s’est produite lors de l’exécution de la commande : ‘Remove-DSServersFromCluster’
L’accès est refusé.
Au caractère C:\Program Files\Citrix\Receiver StoreFront\Management\Cmdlets\ConfigurationReplicationModule.psm1:146 : 5
+ Clear-DSConfigurationReplicationClusterMemberCache
+ ~~~~~~~~~~~~~~~~~~~~~~~~~~~~~~~~~~~~~~~~~~~~~~~~~~
L’accès est refusé.
Citrix.DeliveryServices.PowerShell.Command.RunnerInterfaces.Exceptions.PowerShellExecutionException, Citrix.DeliveryServices.PowerShell.Command.RunnerInterfaces, Version=3.12.0.0, Culture=neutral, PublicKeyToken=e8b77d454fa2a856
Une erreur s’est produite lors de l’exécution de la commande : ‘Remove-DSServersFromCluster’
L’accès est refusé.
Au caractère C:\Program Files\Citrix\Receiver StoreFront\Management\Cmdlets\ConfigurationReplicationModule.psm1:146 : 5
+ Clear-DSConfigurationReplicationClusterMemberCache
+ ~~~~~~~~~~~~~~~~~~~~~~~~~~~~~~~~~~~~~~~~~~~~~~~~~~
System.Management.Automation.ActionPreferenceStopException, System.Management.Automation, Version=3.0.0.0, Culture=neutral, PublicKeyToken=31bf3856ad364e35
L’exécution de la commande s’est arrêtée, car la variable de préférence « ErrorActionPreference » ou le paramètre courant a la valeur Stop : L’accès est refusé.
System.Management.Automation.Interpreter.InterpretedFrameInfo: System.Management.Automation.Interpreter.InterpretedFrameInfo[]
à System.Management.Automation.Runspaces.PipelineBase.Invoke(IEnumerable input)
à Citrix.DeliveryServices.PowerShell.Command.Runner.PowerShellCommandRunner.InvokeCommand(IPowerShellCommand command, Command powerShellCommand)
à Citrix.DeliveryServices.PowerShell.Command.Runner.PowerShellCommandRunner.RunCommand(IPowerShellCommand command)
XML de l’événement :
1
2
2850
0x80000000000000
36
Citrix Delivery Services
ctxcrlsf2-715.endor.lan
Une erreur s’est produite lors de l’exécution de la commande : ‘Remove-DSServersFromCluster’
L’accès est refusé.
Au caractère C:\Program Files\Citrix\Receiver StoreFront\Management\Cmdlets\ConfigurationReplicationModule.psm1:146 : 5
+ Clear-DSConfigurationReplicationClusterMemberCache
+ ~~~~~~~~~~~~~~~~~~~~~~~~~~~~~~~~~~~~~~~~~~~~~~~~~~
L’accès est refusé.
Citrix.DeliveryServices.PowerShell.Command.RunnerInterfaces.Exceptions.PowerShellExecutionException, Citrix.DeliveryServices.PowerShell.Command.RunnerInterfaces, Version=3.12.0.0, Culture=neutral, PublicKeyToken=e8b77d454fa2a856
Une erreur s’est produite lors de l’exécution de la commande : ‘Remove-DSServersFromCluster’
L’accès est refusé.
Au caractère C:\Program Files\Citrix\Receiver StoreFront\Management\Cmdlets\ConfigurationReplicationModule.psm1:146 : 5
+ Clear-DSConfigurationReplicationClusterMemberCache
+ ~~~~~~~~~~~~~~~~~~~~~~~~~~~~~~~~~~~~~~~~~~~~~~~~~~
System.Management.Automation.ActionPreferenceStopException, System.Management.Automation, Version=3.0.0.0, Culture=neutral, PublicKeyToken=31bf3856ad364e35
L’exécution de la commande s’est arrêtée, car la variable de préférence « ErrorActionPreference » ou le paramètre courant a la valeur Stop : L’accès est refusé.
System.Management.Automation.Interpreter.InterpretedFrameInfo: System.Management.Automation.Interpreter.InterpretedFrameInfo[]
à System.Management.Automation.Runspaces.PipelineBase.Invoke(IEnumerable input)
à Citrix.DeliveryServices.PowerShell.Command.Runner.PowerShellCommandRunner.InvokeCommand(IPowerShellCommand command, Command powerShellCommand)
à Citrix.DeliveryServices.PowerShell.Command.Runner.PowerShellCommandRunner.RunCommand(IPowerShellCommand command)
Event log 2 :
Nom du journal :Citrix Delivery Services
Source : Citrix Cluster Join Service
Date : 07/07/2020 20:40:28
ID de l’événement :1
Catégorie de la tâche :(2850)
Niveau : Erreur
Mots clés : Classique
Utilisateur : N/A
Ordinateur : ctxcrlsf2-715.endor.lan
Description :
Une erreur s’est produite lors de l’exécution de la commande : ‘Remove-DSClusterEnvironment’
Le terme « Set-DSAdminConsoleOperationMode » n’est pas reconnu comme nom d’applet de commande, fonction, fichier de script ou programme exécutable. Vérifiez l’orthographe du nom, ou si un chemin d’accès existe, vérifiez que le chemin d’accès est correct et réessayez.
Au caractère C:\Program Files\Citrix\Receiver StoreFront\Management\Cmdlets\ClusterConfigurationModule.psm1:1357 : 5
+ Set-DSAdminConsoleOperationMode -Mode “FirstUse”
+ ~~~~~~~~~~~~~~~~~~~~~~~~~~~~~~~
Le terme « Set-DSAdminConsoleOperationMode » n’est pas reconnu comme nom d’applet de commande, fonction, fichier de script ou programme exécutable. Vérifiez l’orthographe du nom, ou si un chemin d’accès existe, vérifiez que le chemin d’accès est correct et réessayez.
Citrix.DeliveryServices.PowerShell.Command.RunnerInterfaces.Exceptions.PowerShellExecutionException, Citrix.DeliveryServices.PowerShell.Command.RunnerInterfaces, Version=3.12.0.0, Culture=neutral, PublicKeyToken=e8b77d454fa2a856
Une erreur s’est produite lors de l’exécution de la commande : ‘Remove-DSClusterEnvironment’
Le terme « Set-DSAdminConsoleOperationMode » n’est pas reconnu comme nom d’applet de commande, fonction, fichier de script ou programme exécutable. Vérifiez l’orthographe du nom, ou si un chemin d’accès existe, vérifiez que le chemin d’accès est correct et réessayez.
Au caractère C:\Program Files\Citrix\Receiver StoreFront\Management\Cmdlets\ClusterConfigurationModule.psm1:1357 : 5
+ Set-DSAdminConsoleOperationMode -Mode “FirstUse”
+ ~~~~~~~~~~~~~~~~~~~~~~~~~~~~~~~
System.Management.Automation.CommandNotFoundException, System.Management.Automation, Version=3.0.0.0, Culture=neutral, PublicKeyToken=31bf3856ad364e35
Le terme « Set-DSAdminConsoleOperationMode » n’est pas reconnu comme nom d’applet de commande, fonction, fichier de script ou programme exécutable. Vérifiez l’orthographe du nom, ou si un chemin d’accès existe, vérifiez que le chemin d’accès est correct et réessayez.
System.Management.Automation.Interpreter.InterpretedFrameInfo: System.Management.Automation.Interpreter.InterpretedFrameInfo[]
à System.Management.Automation.Runspaces.PipelineBase.Invoke(IEnumerable input)
à Citrix.DeliveryServices.PowerShell.Command.Runner.PowerShellCommandRunner.InvokeCommand(IPowerShellCommand command, Command powerShellCommand)
à Citrix.DeliveryServices.PowerShell.Command.Runner.PowerShellCommandRunner.RunCommand(IPowerShellCommand command)
XML de l’événement :
1
2
2850
0x80000000000000
48
Citrix Delivery Services
ctxcrlsf2-715.endor.lan
Une erreur s’est produite lors de l’exécution de la commande : ‘Remove-DSClusterEnvironment’
Le terme « Set-DSAdminConsoleOperationMode » n’est pas reconnu comme nom d’applet de commande, fonction, fichier de script ou programme exécutable. Vérifiez l’orthographe du nom, ou si un chemin d’accès existe, vérifiez que le chemin d’accès est correct et réessayez.
Au caractère C:\Program Files\Citrix\Receiver StoreFront\Management\Cmdlets\ClusterConfigurationModule.psm1:1357 : 5
+ Set-DSAdminConsoleOperationMode -Mode “FirstUse”
+ ~~~~~~~~~~~~~~~~~~~~~~~~~~~~~~~
Le terme « Set-DSAdminConsoleOperationMode » n’est pas reconnu comme nom d’applet de commande, fonction, fichier de script ou programme exécutable. Vérifiez l’orthographe du nom, ou si un chemin d’accès existe, vérifiez que le chemin d’accès est correct et réessayez.
Citrix.DeliveryServices.PowerShell.Command.RunnerInterfaces.Exceptions.PowerShellExecutionException, Citrix.DeliveryServices.PowerShell.Command.RunnerInterfaces, Version=3.12.0.0, Culture=neutral, PublicKeyToken=e8b77d454fa2a856
Une erreur s’est produite lors de l’exécution de la commande : ‘Remove-DSClusterEnvironment’
Le terme « Set-DSAdminConsoleOperationMode » n’est pas reconnu comme nom d’applet de commande, fonction, fichier de script ou programme exécutable. Vérifiez l’orthographe du nom, ou si un chemin d’accès existe, vérifiez que le chemin d’accès est correct et réessayez.
Au caractère C:\Program Files\Citrix\Receiver StoreFront\Management\Cmdlets\ClusterConfigurationModule.psm1:1357 : 5
+ Set-DSAdminConsoleOperationMode -Mode “FirstUse”
+ ~~~~~~~~~~~~~~~~~~~~~~~~~~~~~~~
System.Management.Automation.CommandNotFoundException, System.Management.Automation, Version=3.0.0.0, Culture=neutral, PublicKeyToken=31bf3856ad364e35
Le terme « Set-DSAdminConsoleOperationMode » n’est pas reconnu comme nom d’applet de commande, fonction, fichier de script ou programme exécutable. Vérifiez l’orthographe du nom, ou si un chemin d’accès existe, vérifiez que le chemin d’accès est correct et réessayez.
System.Management.Automation.Interpreter.InterpretedFrameInfo: System.Management.Automation.Interpreter.InterpretedFrameInfo[]
à System.Management.Automation.Runspaces.PipelineBase.Invoke(IEnumerable input)
à Citrix.DeliveryServices.PowerShell.Command.Runner.PowerShellCommandRunner.InvokeCommand(IPowerShellCommand command, Command powerShellCommand)
à Citrix.DeliveryServices.PowerShell.Command.Runner.PowerShellCommandRunner.RunCommand(IPowerShellCommand command)
Event log 3 :
Nom du journal :Citrix Delivery Services
Source : Citrix Cluster Join Service
Date : 07/07/2020 20:40:28
ID de l’événement :1
Catégorie de la tâche :(2203)
Niveau : Erreur
Mots clés : Classique
Utilisateur : N/A
Ordinateur : ctxcrlsf2-715.endor.lan
Description :
Exception lors du déploiement du groupe de serveurs.
Citrix.DeliveryServices.PowerShell.Command.RunnerInterfaces.Exceptions.PowerShellExecutionException, Citrix.DeliveryServices.PowerShell.Command.RunnerInterfaces, Version=3.12.0.0, Culture=neutral, PublicKeyToken=e8b77d454fa2a856
Une erreur s’est produite lors de l’exécution de la commande : ‘Remove-DSClusterEnvironment’
Le terme « Set-DSAdminConsoleOperationMode » n’est pas reconnu comme nom d’applet de commande, fonction, fichier de script ou programme exécutable. Vérifiez l’orthographe du nom, ou si un chemin d’accès existe, vérifiez que le chemin d’accès est correct et réessayez.
Au caractère C:\Program Files\Citrix\Receiver StoreFront\Management\Cmdlets\ClusterConfigurationModule.psm1:1357 : 5
+ Set-DSAdminConsoleOperationMode -Mode “FirstUse”
+ ~~~~~~~~~~~~~~~~~~~~~~~~~~~~~~~
à Citrix.DeliveryServices.PowerShell.Command.Runner.PowerShellCommandRunner.RunCommand(IPowerShellCommand command)
à Citrix.DeliveryServices.ClusterService.PowerShell.DeploymentSteps.DeploymentBase.Deploy()
System.Management.Automation.CommandNotFoundException, System.Management.Automation, Version=3.0.0.0, Culture=neutral, PublicKeyToken=31bf3856ad364e35
Le terme « Set-DSAdminConsoleOperationMode » n’est pas reconnu comme nom d’applet de commande, fonction, fichier de script ou programme exécutable. Vérifiez l’orthographe du nom, ou si un chemin d’accès existe, vérifiez que le chemin d’accès est correct et réessayez.
System.Management.Automation.Interpreter.InterpretedFrameInfo: System.Management.Automation.Interpreter.InterpretedFrameInfo[]
à System.Management.Automation.Runspaces.PipelineBase.Invoke(IEnumerable input)
à Citrix.DeliveryServices.PowerShell.Command.Runner.PowerShellCommandRunner.InvokeCommand(IPowerShellCommand command, Command powerShellCommand)
à Citrix.DeliveryServices.PowerShell.Command.Runner.PowerShellCommandRunner.RunCommand(IPowerShellCommand command)
XML de l’événement :
1
2
2203
0x80000000000000
49
Citrix Delivery Services
ctxcrlsf2-715.endor.lan
Exception lors du déploiement du groupe de serveurs.
Citrix.DeliveryServices.PowerShell.Command.RunnerInterfaces.Exceptions.PowerShellExecutionException, Citrix.DeliveryServices.PowerShell.Command.RunnerInterfaces, Version=3.12.0.0, Culture=neutral, PublicKeyToken=e8b77d454fa2a856
Une erreur s’est produite lors de l’exécution de la commande : ‘Remove-DSClusterEnvironment’
Le terme « Set-DSAdminConsoleOperationMode » n’est pas reconnu comme nom d’applet de commande, fonction, fichier de script ou programme exécutable. Vérifiez l’orthographe du nom, ou si un chemin d’accès existe, vérifiez que le chemin d’accès est correct et réessayez.
Au caractère C:\Program Files\Citrix\Receiver StoreFront\Management\Cmdlets\ClusterConfigurationModule.psm1:1357 : 5
+ Set-DSAdminConsoleOperationMode -Mode “FirstUse”
+ ~~~~~~~~~~~~~~~~~~~~~~~~~~~~~~~
à Citrix.DeliveryServices.PowerShell.Command.Runner.PowerShellCommandRunner.RunCommand(IPowerShellCommand command)
à Citrix.DeliveryServices.ClusterService.PowerShell.DeploymentSteps.DeploymentBase.Deploy()
System.Management.Automation.CommandNotFoundException, System.Management.Automation, Version=3.0.0.0, Culture=neutral, PublicKeyToken=31bf3856ad364e35
Le terme « Set-DSAdminConsoleOperationMode » n’est pas reconnu comme nom d’applet de commande, fonction, fichier de script ou programme exécutable. Vérifiez l’orthographe du nom, ou si un chemin d’accès existe, vérifiez que le chemin d’accès est correct et réessayez.
System.Management.Automation.Interpreter.InterpretedFrameInfo: System.Management.Automation.Interpreter.InterpretedFrameInfo[]
à System.Management.Automation.Runspaces.PipelineBase.Invoke(IEnumerable input)
à Citrix.DeliveryServices.PowerShell.Command.Runner.PowerShellCommandRunner.InvokeCommand(IPowerShellCommand command, Command powerShellCommand)
à Citrix.DeliveryServices.PowerShell.Command.Runner.PowerShellCommandRunner.RunCommand(IPowerShellCommand command)
Event log 4 :
Nom du journal :Citrix Delivery Services
Source : Citrix Cluster Join Service
Date : 07/07/2020 20:40:28
ID de l’événement :8
Catégorie de la tâche :(2201)
Niveau : Erreur
Mots clés : Classique
Utilisateur : N/A
Ordinateur : ctxcrlsf2-715.endor.lan
Description :
Une exception s’est produite lors de la tentative de suppression de l’échec de configuration de la machine que vous associez.
Citrix.DeliveryServices.PowerShell.Command.RunnerInterfaces.Exceptions.PowerShellExecutionException, Citrix.DeliveryServices.PowerShell.Command.RunnerInterfaces, Version=3.12.0.0, Culture=neutral, PublicKeyToken=e8b77d454fa2a856
Une erreur s’est produite lors de l’exécution de la commande : ‘Remove-DSClusterEnvironment’
Le terme « Set-DSAdminConsoleOperationMode » n’est pas reconnu comme nom d’applet de commande, fonction, fichier de script ou programme exécutable. Vérifiez l’orthographe du nom, ou si un chemin d’accès existe, vérifiez que le chemin d’accès est correct et réessayez.
Au caractère C:\Program Files\Citrix\Receiver StoreFront\Management\Cmdlets\ClusterConfigurationModule.psm1:1357 : 5
+ Set-DSAdminConsoleOperationMode -Mode “FirstUse”
+ ~~~~~~~~~~~~~~~~~~~~~~~~~~~~~~~
à Citrix.DeliveryServices.PowerShell.Command.Runner.PowerShellCommandRunner.RunCommand(IPowerShellCommand command)
à Citrix.DeliveryServices.ClusterService.PowerShell.DeploymentSteps.DeploymentBase.Deploy()
à Citrix.DeliveryServices.ClusterService.Service.ServiceController.RemoveJoinerSetup()
System.Management.Automation.CommandNotFoundException, System.Management.Automation, Version=3.0.0.0, Culture=neutral, PublicKeyToken=31bf3856ad364e35
Le terme « Set-DSAdminConsoleOperationMode » n’est pas reconnu comme nom d’applet de commande, fonction, fichier de script ou programme exécutable. Vérifiez l’orthographe du nom, ou si un chemin d’accès existe, vérifiez que le chemin d’accès est correct et réessayez.
System.Management.Automation.Interpreter.InterpretedFrameInfo: System.Management.Automation.Interpreter.InterpretedFrameInfo[]
à System.Management.Automation.Runspaces.PipelineBase.Invoke(IEnumerable input)
à Citrix.DeliveryServices.PowerShell.Command.Runner.PowerShellCommandRunner.InvokeCommand(IPowerShellCommand command, Command powerShellCommand)
à Citrix.DeliveryServices.PowerShell.Command.Runner.PowerShellCommandRunner.RunCommand(IPowerShellCommand command)
XML de l’événement :
8
2
2201
0x80000000000000
50
Citrix Delivery Services
ctxcrlsf2-715.endor.lan
Une exception s’est produite lors de la tentative de suppression de l’échec de configuration de la machine que vous associez.
Citrix.DeliveryServices.PowerShell.Command.RunnerInterfaces.Exceptions.PowerShellExecutionException, Citrix.DeliveryServices.PowerShell.Command.RunnerInterfaces, Version=3.12.0.0, Culture=neutral, PublicKeyToken=e8b77d454fa2a856
Une erreur s’est produite lors de l’exécution de la commande : ‘Remove-DSClusterEnvironment’
Le terme « Set-DSAdminConsoleOperationMode » n’est pas reconnu comme nom d’applet de commande, fonction, fichier de script ou programme exécutable. Vérifiez l’orthographe du nom, ou si un chemin d’accès existe, vérifiez que le chemin d’accès est correct et réessayez.
Au caractère C:\Program Files\Citrix\Receiver StoreFront\Management\Cmdlets\ClusterConfigurationModule.psm1:1357 : 5
+ Set-DSAdminConsoleOperationMode -Mode “FirstUse”
+ ~~~~~~~~~~~~~~~~~~~~~~~~~~~~~~~
à Citrix.DeliveryServices.PowerShell.Command.Runner.PowerShellCommandRunner.RunCommand(IPowerShellCommand command)
à Citrix.DeliveryServices.ClusterService.PowerShell.DeploymentSteps.DeploymentBase.Deploy()
à Citrix.DeliveryServices.ClusterService.Service.ServiceController.RemoveJoinerSetup()
System.Management.Automation.CommandNotFoundException, System.Management.Automation, Version=3.0.0.0, Culture=neutral, PublicKeyToken=31bf3856ad364e35
Le terme « Set-DSAdminConsoleOperationMode » n’est pas reconnu comme nom d’applet de commande, fonction, fichier de script ou programme exécutable. Vérifiez l’orthographe du nom, ou si un chemin d’accès existe, vérifiez que le chemin d’accès est correct et réessayez.
System.Management.Automation.Interpreter.InterpretedFrameInfo: System.Management.Automation.Interpreter.InterpretedFrameInfo[]
à System.Management.Automation.Runspaces.PipelineBase.Invoke(IEnumerable input)
à Citrix.DeliveryServices.PowerShell.Command.Runner.PowerShellCommandRunner.InvokeCommand(IPowerShellCommand command, Command powerShellCommand)
à Citrix.DeliveryServices.PowerShell.Command.Runner.PowerShellCommandRunner.RunCommand(IPowerShellCommand command)
Hi,
I test some process and I think this problem find origin with exclude storefront install with delivery controller component.
When you restart between component installation (Controller and Storefront), it seem work.
During creation site (empty) process, I see task “Storefront creation node” and one site name “Store Service” is present.
Hello Carl, I recently upgraded SF 3.15 CU5 to LTSR 1912 CU1 and worked fine. Users are able to launch apps and desktops normally. But it has broken an automation (script based) which connects to the Store and ‘auto launches’ the app. It’s something similar to what Logon simulators do. When I point it to use SF 3.15 CU5, it works but not on 1912 CU1. Any help would be appreciated please. Thanks.
Hi Carl, After upgrading the storefront to 1912 , F13 (shift+F1) is not working for user , even though we enable hotkeys. please help
Check your default.ica settings under your iis storefront, something like C:\inetpub\wwwroot\Citrix\Portal\App_Data\default.ica. When you update I believe it wipes out any changes you had in there before.
Then just add in the keys you want under the WFClient section.I typically disable them all but one. Just set as needed.
IE. [WFClient]
[WFClient]
Hotkey1Char=(none)
Hotkey1Shift=(none)
Hotkey2Char=(none)
Hotkey2Shift=(none)
Hotkey3Char=(none)
Hotkey3Shift=(none)
Hotkey4Char=(none)
Hotkey4Shift=(none)
Hotkey5Char=(none)
Hotkey5Shift=(none)
Hotkey6Char=(none)
Hotkey6Shift=(none)
Hotkey7Char=F6
Hotkey7Shift=Alt
Hotkey8Char=(none)
Hotkey8Shift=(none)
Hotkey9Char=(none)
HotKey9Shift=(none)
Hotkey10Char=(none)
Hotkey10Shift=(none)
Hotkey11Char=(none)
HotKey11Shift=(none)
Hotkey12Char=(none)
HotKey12Shift=(none)
Hotkey13Char=(none)
HotKey13Shift=(none)
HI, yes True but i added below HotKey but it’s still not working , when users try Shift+F1 , it’s opening client start menu
Hotkey1Char=F1
Hotkey1Shift=Shift
What short cut are you trying to do? As well is this for desktops or seamless app?
I believe for desktop you may need to disable the “show desktop viewer” in order for the shortcuts to work. They work for me on seamless.
storefront, right click on store, manage receiver for website, configure, client interface settings, uncheck show desktop viewer.
How can I disable classic experience after SF1903? I have a store that had classic experience enabled. I configured the unified experience and it works for receiver for web since migrating to 1903 but in receiver it is still the classic view. I see the “unified experience” is disabled in the details view but find no way to enable this via GUI.
Hello Carl,
Apologies ahead of time if I’m not posting this in the right place. I’ve got an odd problem that I’m having a heck of a time pinning down. We are using Storefront 3.12 we are aggregating a number of sites into this Storefront server group. We have 2 Xenapp 7 Sites, one is ours and one is a vendor’s. These both work fine, the problem comes when we try to integrate our legacy Xenapp 6.5 farm. Sporadically we have users that login and will see the apps from the XA7 sites no problem, but they will get none of the 6.5 resources to show. Another user will log into the same site and will be able to see the icons. I’m seeing the following errors but I’m not sure if they are related.
I see these every so often:
Log Name: Citrix Delivery Services
Source: Citrix Store Service
Date: 3/31/2020 11:09:13 AM
Event ID: 4013
Task Category: (12346)
Level: Warning
Keywords: Classic
User: N/A
Computer:
Description:
Citrix XML Service ‘XA65’ was unable to return icon data for one or more of the following apps: [i_Word Online,Soarian Financials – CERT,Soarian Financials – TEST,Soarian Financials – TST2,i_SecurityManagement TEST2,i_SoftAR TEST2,i_SoftDMI TEST2,i_SoftIDADM TEST2,i_SoftIDPC TEST2,i_SoftLabMic TEST2]. See http://support.citrix.com/article/CTX114769 for more details.
The article link is a dead url.
and
I see these pretty regularly:
Log Name: Citrix Delivery Services
Source: Citrix Store Service
Date: 5/12/2020 3:27:46 PM
Event ID: 0
Task Category: (12346)
Level: Error
Keywords: Classic
User: N/A
Computer:
Description:
The Citrix servers do not trust the server. This message was reported from the XML Service at address http://xxx/scripts/wpnbr.dll [NFuseProtocol.TRequestReconnectSessionData].
Any help would be much appreciated as its hard to find good info on Xenapp65 anymore, Citrix and other support vendors pretty much wont help at this point. So here I am.
Thanks
In XenApp 6.5, in Citrix Policy, there’s a setting to Trust XML. That will need to be enabled.
I’ve seen problems with icons. Sometimes I reduce my assigned apps to figure out which one is giving me an icon problem. Then I change the icon on that app to fix it.
Ok thanks Carl.
XML trust is set to True for those I checked that early on. And yes I have been able to narrow it down to what looks like a small group of apps but then I see behavior that suggests the issue is a moving target. We have 4 storefront servers in the server group and we get different results depending on which server I hit, Is there any reason different DDCs would have issues with different apps or different storefront servers would get different results from the same DDCs? I wouldnt think LHC would come into play here because the SQL DB is online.
Does storefront create an icon cache or have some other mechanism involved in resource enumeration that can get corrupted or out of sync? If so is there a way to reset it and let it recreate?
Could delegated Kerberos config be an issue? I’m not familiar with it, just read about it in the storefront doc. We havent configured any of that because we have never needed anything like this in our environment that I’m aware of. The XA65 are 2k8r2 and the storefront servers w2k12r2. Would these configurations definitely be required or is this something that only may be need if your environment dictates it?
Thanks again for your help
Hello Carl,
Is it still needed to break the storefront group as Citrix suggested if we are updating the storefront from 7.15.300 to 7.15.500
Thanks in advance.
I think the official instructions say to do that. I never do.
Hi Carl, I have a question about workspace app working with saml without adc. I have everything set up and working with adfs as my idp provider and storefront configured with Fas. The web part works fine when connecting to the vda, but workspace app does not work, workspace app pops up a browser with an error navigation to the web page was canceled.
Maybe ADFS doesn’t like Workspace app’s User-agent string since Workspace app is using Chromium? https://hi.service-now.com/kb_view.do?sysparm_article=KB0759249
Otherwise, there are many limitations of Workspace app authentication, and this might be one of those limitations.
Thanks for the quick reply. One last question? Can I install the newest version of FAS or do I have to install FAS with the current version of CVAD im on?
FAS should be the same version that came with your version of CVAD.
Hi Carl,
we tried updating from StoreFront 3.12.5000 to 1912.0.0.40.
But after that, some of our Clients won’t start Desktops anymore.
1) We have customized Clients installed in a safety mode (no Domain, Google Chrome as Desktop, only some URLs allowed via whitelisting). They are installed in user’s home office, so they are out of reach. When using SF 1912 they receive an error message saying URL “receiver:…” is not allowed. With StoreFront 3.12 it’s working fine.
2) We are using ECOS sticks for home office users as well. Booting these sticks on a private client starts a linux desktop with Firefox browser and Linux receiver installed. This one gets also an error with SF 1912.
– Did you know why we receive this error about “receiver:…” URL?
– Is it possible to always have a page where the user can select between “Light-Receiver” aka HTML5-Receiver and “Already installed” aka local installed Receiver?
Regards
– Manfred –
Do you know a way to customize storefront fo that an identifier (servername) is displayed on the login page? We can get it to process and show once logged in. Thanks in advance!
I think what you are looking for Jerry is here:
https://www.citrix.com/blogs/2018/01/03/how-to-add-a-server-identifier-to-the-storefront-page-footer/
Hello again Carl. We are running XA 7.18, but I want upgrade the SF to 1912 (SF 3.15) for some SAML bugfixes. I’ve upgraded SF, but left FAS and XA at 7.18. Now I can’t launch apps from SF Web, getting error “Cannot start app”, and the SF logs show error 28: “It was not possible to select a FAS”. The FAS registry entry is there, but the FAS console will no longer launch. (FAS installed on SF server)
So I think I need to upgrade FAS to 1912, but I’d really like to leave XA at 7.18. Do you think mixing versions like this will work? Or am I asking for trouble?
Thanks again for all your great work.
Citrix recently told me that FAS doesn’t have to be upgraded at same time as StoreFront but I’ve had similar problems that were fixed by upgrading FAS.
FAS is usually on a different server. Only StoreFront and VDAs talk to FAS. Controllers don’t.
Hi Carl
Updated a SF 1909 to SF 1912 LTSR and now Desktop Autolaunch fails to start for IE11. I’ve tested with FF, Chrome and Edge and autolaunch just works – thin client, fat clients Reciver 4.6 and Workspace App 1911. The storefront servers are added to the local intranet zone and the ICA add-on is enabled but atm I can;t get it work with
IE. Any ideas what could be stopping IE?
The previous storefront 3.5 receiver for web works aok with IE.
Kind Regards
H
When you launch using IE, does it launch automatically? In other words, it doesn’t download the .ica file and require you to launch it manually? Any other IE add-ins that might be interfering?
Hi
I’m trying to upgrade 2 StoreFront Servers from SF 7.15 to 1912 with the Citrix instructions here
https://docs.citrix.com/en-us/storefront/current-release/install-standard.html#upgrade-storefront
Does it hurt if you direct upgrade each server without having to break one away from the server group?
I usually just do an in-place upgrade after snapshoting the servers. I’m guessing Citrix’s method is more reliable.
I upgraded my 3 node SF servers from 7.15CU5 to 1912 following their no downtime instructions and it fails. I rolled back and performed the standard CU in-place update/upgrade and had zero issues. I was told yesterday by a rep that internally it’s a known issue that those steps fail.
Hi Carl!
Sorry for the late reply. Regarding your question: “I believe all of that is correct. Is something not working correctly?”
I am just trying to understand what are all the different settings I should change regarding the Receiver Self-Service and Receiver for Web time-outs.
What I’d like to do is set time-out for users using web-browser (accessing Netscaler built-in portal) to 4 hours, and users accessing with Receiver Self-Service (which goes always through Netscaler) to 8 hours. So I believe I should set the session time-out from Global NetScaler Gateway Settings to 480 mins (8 hours) and same to the Persistence time-out on StoreFront LB vServer, and then set the session timeout to 240 mins (4 hours) in StoreFront’s Receiver For Web settings.
That seems accurate. Does it work?
Sorry again for the late reply, but yes it seems to work. Thanks again for your help!
Hi Carl and thanks for another great tutorial!
I am trying to figure out how I could configure SSL on our StoreFront-servers so that our end users would be able to start using the Receiver Self-Service.
We’re now using ADC VPX 12.1 54.16 in Clientless Access Mode providing users Apps, Desktops and Bookmarks via the ADC built-in portal. Users access the portal URL with web-browser. The Gateway vServer has a valid SSL certificate but the StoreFront load balancing vServer is using HTTP as a protocol. Because of this the protocol on Monitor and Service Group is also HTTP, and the service group members are added via port 80.
What is the easiest way to implement SSL on our setup? If I use the “SSL Offload” option, do I only need one certificate – for the load balanced StoreFront URL? And could I create the certificate request using ADC as you instruct here? https://www.carlstalhood.com/netscaler-12-certificates/ And the StoreFront servers in this setup (SSL offload) wouldn’t require certificates at all?
If the above is true, how about the certificate itself; Do our end users need to trust the certificate? I am planning to force the end users to connect through NetScaler Gateway by setting the beacons as you instruct here: https://www.carlstalhood.com/storefront-cr-basic-configuration/#beacons So can I use a certificate created by our internal CA which is not trusted by our end users computers? The certificate would be signed by intermediate certificate authority, but I have already installed that CA’s certificate on ADC.
How about switching the load balancing vServer’s protocol from HTTP to SSL? If I try to edit the settings it won’t let me change the protocol. Do I need to re-create the vServer?
I prefer SSL everywhere possible.
You can’t change an existing vServer so you’ll have to create new ones, which won’t be a problem since SSL 443 is a different port number than HTTP 80.
If users don’t connect directly to the StoreFront VIP then the StoreFront VIP certificate can be anything. Gateway doesn’t validate certificates when communicating to StoreFront. My preference for internal certificates is to build a Windows Enterprise Certificate Authority.
Gateway VIP certificate needs to be valid, of course.
Thanks for the reply! By anything, do you mean I can put whatever certificate I have, or that it still needs to match the StoreFront load balanced VIP DNS name? What if I want to use the email based discovery?
The problem with implementing Windows Enterprise CA is that our end users come from different domain which is in a different forest, and there’s only one-way trust in place. So the end users computers don’t have the certificate by default.
Hi Carl,
I was able to get this done. Never would have been able to do this without the instructions on this site though, so thanks once again. Couple of stupid questions:
1. You can only provide Apps and VDI Desktops via Receiver Self-Service? We have the Gateway built-in portal with bookmarks and RDP Proxy. We cannot access or use these via Receiver Self-Service?
2. All of our connections go through NetScaler (internal beacon set to fake address). Is there some way we could set different session time-out for users accessing via Receiver Self-Service and Receiver for Web? I know the time-out settings are managed in “Global Citrix Gateway Settings -> Client Experience -> Session Time-out” and at “StoreFront -> Store -> Manage Receiver for Websites -> Configure -> Session Settings”.
1. I think the Gateway clientless portal is only accessible through a browser.
2. If you’re referring to HTTP to StoreFront, then they already have different timeouts. Browser usually times out much quicker than Receiver. ICA timeouts are separate.
Sorry about the spam Carl, but I forgot to ask what is the relation of the StoreFront LB vServer persistence time-out setting with the other time-out settings I mentioned?
If persistence isn’t working correctly, then it will seem like the timeout happened sooner than expected since lack of persistence might put you on a StoreFront server that hasn’t authenticated you.
Hi Carl,
so in summary:
ICA-timeouts are managed via Citrix Policies and Group Policies?
For VDI’s I’ve configured e.g. the “session idle timer” and “disconnect session timer” policy settings in Studio. For XenApp VDI’s I’ve configured “Server idle timer interval” in Studio, and from GPO “end session when time limits are reached” and “set time limit for disconnected sessions” settings in GPMC.
What I’d like to change is how often the Receiver Self-Service asks for credentials when a user tries to launch an app or VDI. So is this set from “Global Citrix Gateway Settings -> Client Experience -> Session Time-out”? And the browser timeout – when a user is logged out from the built-in portal – is managed from “StoreFront -> Store -> Manage Receiver for Websites -> Configure -> Session Settings”?
I believe all of that is correct. Is something not working correctly?
Hello Carl,
Thanks you for your article, very nice ! 😉
You know, how to configure Citrix HTML5 for Pass-Through Authentication (via web browser)?
After the configuration in the StoreFront Website, the published desktop required a separate login instead of using the local username / password ?? For information, I create machine catalog via MCS with the master image (Windows 10) + settings.
Any ideas ?
Many thanks.
Best Regards.
Did StoreFront ask you to login using Explicit credentials? If not, then I don’t think it’s possible for ssonsvr.exe to pass credentials to the ICA session. ssonsvr.exe is included with Workspace app so if you already have Workspace app installed then you shouldn’t need HTML5 connection.
Same problem with the Workspace, after login, the published desktop require a separate login instead of using the local username / password, I don’t understand what happen…
In StoreFront Authentication, is Username and Password enabled? If so, when you connect to StoreFront, did it prompt you to enter credentials? If so, then StoreFront should forward those credentials to the VDA sessions.
If StoreFront does not prompt you for authentication because you enable Pass-through authentication, then I would expect the HTML5 ICA session to prompt you for credentials. Full ICA sessions can utilize ssonsvr.exe on the client device to forward credentials.
Are you using Win 2019 or 2016? If yes then you need to setup an AD policy to disable password prompt.
Dear All,
Good Idea, Piyush ! 😉
I found the GPO at the customer to force password prompt !
Now, all is OK 🙂
Cheers,
CEM
7.1906 I noticed that after upgrading the ReceiverHTML5 client on my primary SF server and propagating the changes, that that it didn’t copy across (for eg. the configuration.js was pre-1906). Only noticed it as I was manually disabling CEIP (now called “Analytics”)
Thanks Carl for this blog
Instead of setting the Receiver for Web timeout value as a Global value on the Netscaler:
“If you are using a NetScaler, you will need to change the Global Session Timeout located at NetScaler Gateway => Global Settings => Change Global Settings (right pane) => Client Experience (tab) => Session Time-out (mins).”
could we not change the session profile bound to the NSGW VIP instead (override global) ? We use our Netscaler for more than just Storefront so not sure of the other impacts of setting a global value.
I’m guessing Session Profile would also work.
Afternoon Carl,
Just a quick question as im strugglign to find a valid answer anywhere else,
Is the export/import process supported from 3.13 to 1906?
as when I try to import the config from our existing 3.13 environment onto a blank 1906 install its failing with ‘the version of the chosen storefront configuration – 3.13.0.16017 – does not match the installed version’
this leads me to believe its unsupported? which would be a shame
Docs says this: “You can only import StoreFront configurations which are the same StoreFront version as the target StoreFront installation.”. That’s unfortunate. https://docs.citrix.com/en-us/storefront/current-release/export-import-storefront-config.html
Hi Carl ,
An insights on the below issue , one of my customers i getting the same error while updating the SF from v1903 to 1906 on Server 2019
https://discussions.citrix.com/topic/403611-1906-upgrade-error/?page=2
Version 1811 across the board. I modified the html5 configuration.js to enable/disable various settings. All seem to work as intended except for “urlredirection” : true,
If I leave it as false, then click on a published url, it pops up an option to open on my client or server. both work fine. however i dont want them to have the option to open on the server.
If i set “urlredirection” : true, in the configuration.js, when I try it it opens in the tab to load but I do not get a prompt or error and it eventually closes the tab with nothing happening.
Any suggestions to try/check?
Hi Carl,
With Socket Pooling enabled there is a risk for TCP Ports to get exhausted on the StoreFront server.
https://support.citrix.com/article/CTX227903
May cause more harm than performance gain.
Thanks for the link. I just updated that section with the list of fixed versions as listed in that article.
Hi Carl, got an odd question that i hope you might be able to help on 🙂 Currently running SF 3.13 and have seen a difference in behavior between viewing icons via Receiver and via the URL in IE11.
We have delivery groups for the desktops set up in XD 7.15 LTSR and the Win10 machines are static assigned via a delivery group. within Receiver, if a user does not have a static assigned desktop, they do not see the icon, but from the web page in IE11 they do see the icon? this leads to confusion as users assume they have an assigned desktop and try clicking it – to which they just get the helpful message “failed to launch desktop” 🙁
do you know of a way to prevent the icon showing via the web page? short of locking down the delivery group and having to manage the access all the time to only allow access to the DG if the user has an assigned machine?
Are both methods logging in as the same account? Are both methods connecting to the same store?
yup, all the same…. just seems to process things slightly differently
I’ve seen pass-through authentication cause different accounts to be logged in both methods.
You have a Delivery Group with static machines? Does that Delivery Group have a Desktop Assignment Rule? Who is assigned to the rule? You could always remove the rule.
you got it 🙂 yes an assignment rule had been created accidentally despite being static assigned only. disabled the rule and the issue has gone away 🙂 Weird that we got the different experience in the 2 access methods but at least we are sorted now 🙂 Thanks again!
Looking for advice.
I have two StoreFront servers running 3.12.1000 (LTSR 7.15 CU1) load balanced behind a NetScaler. These are on Server 2012 R2. I’m planning to migrate to Server 2016 this year and replace the existing systems.
I plan to keep my existing configurations, all of which I have documented. I do plan to look into the export/import options as well.
I’m thinking I have a couple options, but not sure which is best.
1. Add new servers to existing Server Group, add to the LB after some testing and eventually change over. Then remove and decommission other servers. My concerns here are adding to the Server Group and if that will have any impact on production.
2. Create a completely new store and configure exactly as existing.
3. Create new store by exporting/importing the configurations and web files.
I like option 1 but am wary about how that will work out. Any input is appreciate.
Citrix does not support mixing OS versions in a StoreFront Server Group. It probably works, but they won’t support it.
Makes sense. Brand new is probably safer anyway, considering I documented ever change I made I might as well.
I should have stated, I plan to upgrade to 3.12.3000 (LTSR 7.15 CU3) with this migration as well.
Does anyone know how to set the “Home” tab by default in RfW, SF 1811? I thought it would be obvious…
Did you ever solve this issue? i have the same issue today, missing alot of serviecs on storefront nr2 and not able to join the server group.
We have a Citrix Gateway, that routes to a particular storefront pair with autodiscover. For some reason our external receiver clients never timeout. By timeout I mean I never have to re-auth to them. The ICA sessions seem to timeout fine, its the actual auth into receiver that doesn’t expire. Thoughts?
https://support.citrix.com/article/CTX211564 has some info on the timeouts.
Anyone have any issues with the Storefront servers not showing up in the Citrix Library in SCOM after upgrading to 1811. I am not able to install the Storefront SCOM agent after the upgrade.
Hi Carl, can we add 7.15 LTSR XenApp/XenDesktop site to existing StoreFront 3.6?
Yes, should work fine. However, 3.6 is not LTSR so you’ll want to upgrade it to be LTSR compliant.
hi carl,
Current setup that we have is in cloud citrix. But thin client is not compatible with it so we are going to use a thin client web browser and a dedicated storefront. but when we are using http application is published but if https it is not working but we have provided certificates is there any ports that we need to add? 80 and 443 are already open
443 is all you need. Can other devices connect to the website on https? Maybe your thin client is missing ciphers. A network trace can show you the SSL handshake.
HI Carl
We are in the process of building Citrix 7.15 LTSR and I have build one ddc, one storefront for this initial setup. and it is working fine and can successfully launch the store URL. However, I am struggling to add the new storefront 3.12 server to the existing server group as it is throwing Event ID 2 with following message. (Event From the primary storefront server)
Join failed. Exception attempting to obtain Server Group details from the Authorizer.
System.Security.Cryptography.CryptographicException, mscorlib, Version=4.0.0.0, Culture=neutral, PublicKeyToken=b77a5c561934e089
Keyset does not exist
at System.Security.Cryptography.CryptographicException.ThrowCryptographicException(Int32 hr)
at System.Security.Cryptography.X509Certificates.X509Utils._ExportCertificatesToBlob(SafeCertStoreHandle safeCertStoreHandle, X509ContentType contentType, IntPtr password)
at System.Security.Cryptography.X509Certificates.X509Certificate.ExportHelper(X509ContentType contentType, Object password)
at Citrix.DeliveryServices.Admin.Utils.Certificates.Certificate.get_RawData()
at Citrix.DeliveryServices.ClusterService.Service.ServiceController.GetClusterDetails(ClusterDetailsRequest clusterRequest)
When I looked into the secondary storefront server, Citrix configuration replication service doesn’t exist and NT service/Citrix configuration replication service not available in the administrators group. Our environment is with server 2016 vanilla build with no hardened/lockdown policies. Any suggestions on this would be highly appreciated.
Have you seen https://support.citrix.com/article/CTX207518 ?
Yes. I have tried all these options, however as mentioned in my original comments, I can’t see the NT Service\citrixconfiguration replication service in secondary server.. I tried to install and configure a new store with new set of 2016 servers , but getting the same error.
Yes I did. and however, NT service\citrixconfiguration replication service not found in the secondary server.
Any help on this please?
Hello Carl,
What is the process for upgrade a server group of 4 sotrefronts
See https://www.carlstalhood.com/xenappxendesktop-upgrades/#storefront
Did modifying that regular expression on the StoreFront web.config file seem to break the Receiver detection for anyone else? After changing that expression if I uninstall my Mac Receiver and try to log back into StoreFront it enumerates and skips the detection and prompt to install the 12.8.1 Receiver we are pushing out.
I am trying to create a duplicate published and only have it viable in the zone the machine opening receiver is located in so as to have the application run from a local host in the zone the receiver is located. Could you point me to the documents defining this sort of configuration?
Thanks
Peter
I think you need to configure your load balancer to add the header X-Citrix-ZonePreference with zone name to your StoreFront HTTP traffic from these clients. Or, if the users are always in the same location, then you can configure zone preference based on user group.
Hi Carl,
i have a strange issue
when internal users (my domain users) trying to access my XenApp farm through Citrix receiver either on Netscaler either Storefront directly, receives Socket error 10038 unable to contact server, in the same time external access through Netscaler works fine.
Have you something in mind?
Thanks in advance
Are you saying that it works through a browser but not through Receiver?
When going internal direct, I think Citrix defaults to returning the FQDN of the VDA instead of the VDA’s IP address, which means the client machine must be able to DNS resolve the VDA’s FQDN. When going through Gateway, Receiver only connects to Gateway, and doesn’t need to connect directly to VDAs.
Not working either through browser nor through Receiver and the DNS is able to resolve successfully VDA’s FQDN.
Citrix farm is deployed on Azure
when i try through Azure VM with receiver internally the connection worked without socket error
but my local users establish connection through VPN tunnel with Azure VDA ‘s
Regarding above information , can you think something else? maybe beacons?
Thanks in advance
Hello Carl, do you have a configuration guide to use DFA with StoreFront and Netscaler Gateway?
Hello Carl,
Thanks for all that information! I have a doubt about which kind of receiver I’ll use in my Xenapp 7.x enviroment, I have the lastest version of SF but I cannot find any discuss about HTML5 vs Windows Receiver, Pros vs Cons, something like that, did you wrote some article about that or do you know any one?
Thanks !
Windows Receiver is fully functional. HTML5 Receiver has fewer features, but does not need to be installed. HTML5 Receiver also has a requirement for SSL WebSockets, or internal NetScaler Gateway, whereas Windows Receiver works fine without ICA certificates.
Receiver for web – session settings timeout.
looks like it might be beneficial to add this link to the article : https://support.citrix.com/article/CTX211564
Thanks. I updated the link for http://support.citrix.com/article/CTX215701, which was redirecting to CTX211564.
Hello, looking for some info on whether there is a limit on how many sites/farms can be managed through a single store in Storefront 3.0.1? Any help is appreciated
Hi Carl. I just recently did an in-place upgrade from Storefront 3.7/Director 7.11 to 7.15LTSR CU (SF 3.12.2000.8)
When I completed the upgrade and rebooted my Storefront server, it lists 7.15LTSRCU for Director and Storefront in the Programs and Features, but still has Citrix XenDesktop 7.11. There are still folders for XenDesktop, but when I launch Storefront it opens the new version. I’m afraid if I uninstall it, it might remove files from the upgrade. Any ideas?
Just a question on Storefront Upgrade. I am upgrading to 3.12 and you mentioned that we need to export configuration. In a normal upgrade, does it actually wipe the configuration or you export just because of a “just in case” situation – to be on the safe side..
Just in case. If upgrade fails, and it you fix the problem, the config is probably gone.
Doesn’t snapshot work for SF upgrades?
Yes it does.
Thanks
Hi Carls,
I have two storefront servers having version 3.6 running on WS 2008 R2. I want to add two new storefront servers having version 3.12 and want to propagate the changes from existing servers to New servers. Just want to confirm if propagation possible with different Storefronts versions servers running on different windows servers.
Not supported. You’ll need to upgrade the existing ones first. Or export the config from old and import to new.
Hello Carl,
How can I set up two stores one expecting http and the other expecting https on the same server.
Essentially I currently have users using the http site, but I am deploying new machines with the receiver on them. I want to deploy a SSL store since I am pushing out receiver withouth affecting my existing users’s experience. As such I need a store with an https base URL ( I think) can I host multiple BaseURLs on the same SF server to accomodate the secure and insecure stores?
Thanks for the wealth of information you provide.
I don’t think browsers care how you connect. Receivers insist on https.
In the RfWeb > Configure > Advanced Settings, make sure Loopback Processing (the third line) is set to OnUsingHttp.
http vs https is an IIS and Base URL setting. It has nothing to do with the store.
Are you overcomplicating the problem? why not just use a single https URL and redirect http connections to the https site in IIS?
Hosts file:
If the Load Balancing FQDN (e.g. storefront.corp.com) and NetScaler Gateway Callback FQDN (e.g. callback.corp.com) are listed in DNS why would we need the Hosts File edited?
We have 2 x HA pair of NetScalers, DMZ Pair are the NetScaler GW and Internal HA Pair are the NLB pointing at our 2 x StoreFront Servers. Everything is 7.15 are NetScaler 12
We use a signal FDQN for access both internally and externally.
It used to be more important when StoreFront did not support loopback and you had to add the Base URL FQDN with 127.0.0.1 address.
Different environments resolve DNS names in different ways. I usually ping the name to make sure it resolves to the Gateway that I need it to go to. If not, then I modify the hosts file.
Hi, I am having problems to open apps from remote access, I have the Storefront natted and this was access by the client, however after login-in in the web interface, and clicking the application users receive this error “unable to launch you application, ……. cannot connect to the citrix xen app server. there is no citrix xenapp server configured on the specified address.”
Hi Charl, I was wondering if you know of a way to suppress the ‘Open Link’ window that popups when passing a file to the local browser. The popup window only remembers the ‘Yes, Open in device’ for the current session, next time round it shows it again. Our users don’t like it popping up all the time
Hi Carl,
I have an issue regarding to SSL certificate.
We use XenApp&XenDesktop 7.15.1000. StoreFront server is XDSF01(primary) and XDSF02. Base Url: https://citrix.companyname.corp/. We use InfoBlox as DNS solution. I add “citrix” as alias to XDSF01 and XDSF02 servers.
The issue is when connecting to https://citrix.companyname.corp/, users will see a certificate error webpage. “There is a problem with this website’s security certificate.” Users have to click continue to get to the StoreFront website. However, if connecting to https://xdsf01.companyname.corp/, then there is no error. Users can get to the StoreFront website directly.
I use this way to create certificate: MMC – Certificate(Local Computer) – Request New Certificate – Properties – Add Common name “CN=citrix.companyname.corp” and Add DNS “citrix.companyname.corp”.
However, after certificate created, in Certificate Details tab, I see the value of Subject Alternative Name is automatically changed to “DNS Name=XDSF01.companyname.corp”. I tried several times but still the same.
Do you think it is the cause of my issue? If so, can you please kindly advise how to fix it? Thanks a lot.
Are you using Microsoft CA? Is the CA not configured to accept SAN Names?
Yes, we are using Microsoft CA. Can you please advise me where I can check the setting for “accept SAN”? Thanks.
What CA template are you using?
https://social.technet.microsoft.com/Forums/security/en-US/36f77417-1163-47ed-9a8e-f5d426680f37/how-to-include-the-subject-alternative-name-san-parameter-through-the-mmc-certificate-enrollment?forum=configmgrgeneral
Hi Carl,
I ran the command on our CA server (Win2008r2 OS) and restarted the certificate service, but I still cannot add SAN in the certificate.
The certificate template I am using is Computer. Here is how I requested a certificate. On one of StoreFront server, MMC -> Certificate(Local Computer) -> Request New Certificate -> Configured by your administrator -> Under “Active Directory Enrollment Policy”, check “Computer” template -> click Properties to add Common name “CN=citrix.companyname.corp” and add DNS “citrix.companyname.corp”. -> Enroll.
Btw, we use F5 to load balance two StoreFront servers. It works well. We don’t have NetScaler. The only issue for us is this certificate error when accessing storefront through https.
I wonder if the Computer certificate template won’t accept subject names in the request. Can you try the Web Server certificate template?
Carl,
I am having a issue with the timeout for storefront. If I set my session time out to 15minutes and I have an app that I am actively working in it still time out so if I need to login to another app I am prompted to login again. Is there a workaround to this?
StoreFront and sessions are separate timeouts. There’s no link between them. There’s no way for StoreFront to know that you are actively working in a published app.
ok, how about the gateway. I am using netscaler, can I have the gateway time out instead or will it not know that I have an active app running?
Gateway has a timeout for StoreFront (AAA) but I don’t think it applies to sessions (ICA). Otherwise, same story – AAA / StoreFront doesn’t know what you’re doing in ICA.
ok. here is what I am trying to accomplish, maybe you can let me know if it is possible and how to go about getting it done.
user connects to NS GW after they authenticate it passes them to SF. They open a published app and they are working, I want to be sure that if they walk away and the session is inactive for let’s say 15 minutes that the app closes and the session terminates so they are forced to login again. (the app close part I am using GP for remote desktop which works). The other part is that I need that session to close so they are forced to login and if they are still active in a specific app for more than 15 minutes and they then decide to open another app it should open without prompting to login.
Please let me know how to go about getting this done.
thanks.
RDS Timeouts (GPO) control session idle timeouts.
Receiver for Web timeout is usually much lower (e.g. 15 minutes) and usually times out much quicker than the session. It’s the Receiver for Web timeout that dictates if a login is needed again.
If users launch multiple apps, it might be easier for the user if you publish a desktop. Once on the desktop, the user can launch anything. And only the session (RDS) timeout applies.
Hello Carl,
I’ve tested to create a new account without password, but when I logon to SF without inputing the password, it prevents me from logon and message shows “Please input your password”.
Is this by design? Or any configurations we can change to logon without password.
Are you trying to do Anonymous apps? If so, you can create a Store that’s specifically for Anonymous.
Or are you trying to do Citrix FAS?