Navigation
- NetScaler Gateway Universal Licenses
- Create NetScaler Gateway Virtual Server
- Verify SSL Settings
- Gateway Portal Theme
- SSL Redirect
- DNS SRV Records for Email-based discovery
- Block Citrix VPN for iOS
- View ICA sessions
- Customize Logon Page
- UDP Audio Through Gateway
- Unified Gateway
- StoreFront – Rewrite X-Citrix-Via
💡 = Recently Updated
NetScaler Gateway Universal Licenses
For basic ICA Proxy connectivity to XenApp/XenDesktop, you don’t need to install any NetScaler Gateway licenses on the NetScaler appliance. However, if you need SmartAccess features (e.g. EPA scans) or VPN then you must install NetScaler Gateway Universal licenses. These licenses are included with the Platinum editions of XenApp/XenDesktop, Advanced or Enterprise Edition of XenMobile, and the Platinum version of NetScaler.
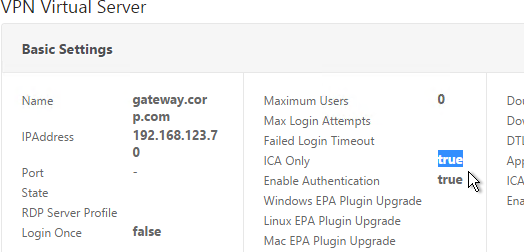
When you create a NetScaler Gateway Virtual Server, the ICA Only setting determines if you need NetScaler Gateway Universal licenses or not. If the Virtual Server is set to ICA Only then you don’t need licenses. But if ICA Only is set to false then you need a NetScaler Gateway Universal license for every user that connects to this NetScaler Gateway Virtual Server. Enabling ICA Only disables all SmartAccess, SmartControl, and VPN features.
If you don’t need any non-ICA Proxy features, then you don’t need any Gateway Universal licenses, and you can skip to the next section.
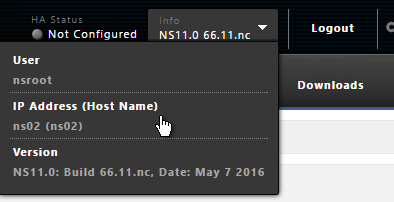
The Gateway Universal licenses are allocated to the case sensitive hostname of each appliance. If you have an HA pair, and if each node has a different hostname, allocate the Gateway Universal licenses to the first hostname, and then reallocate the same licenses to the other hostname.
To see the hostname, click the version info on the top right.
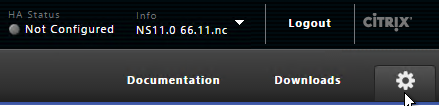
To change the hostname, click the gear icon on the top right.
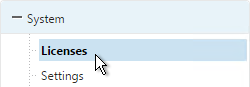
To upload the allocated Gateway Universal licenses to the appliance, go to System > Licenses. A reboot is required.
After NetScaler Gateway Universal licenses are installed on the appliance, they won’t necessarily be available for usage until you make a configuration change as detailed below:
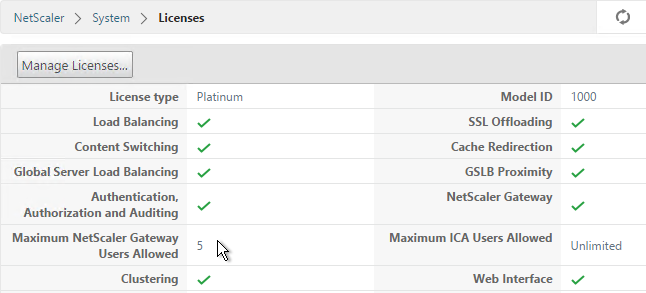
- On the left, expand System, and click Licenses.
- On the right, in the Maximum NetScaler Gateway Users Allowed field is the number of licensed users for NetScaler Gateway Virtual Servers that are not set to ICA Only.
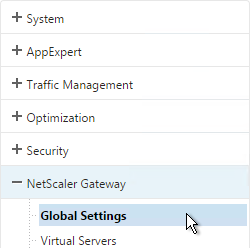
- On the left, under NetScaler Gateway, click Global Settings.
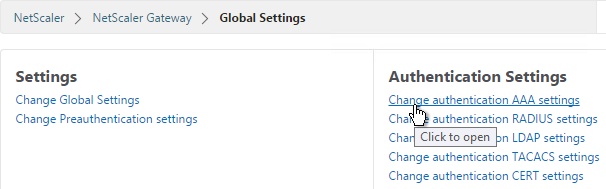
- In the right column of the right pane, click Change authentication AAA settings.
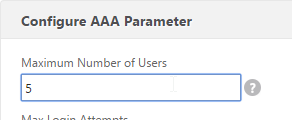
- Change the Maximum Number of Users to your licensed limit. This field has a default value of 5, and administrators frequently forget to change it thus only allowing 5 users to connect.
- If desired, check the box for Enable Enhanced Authentication Feedback. Click OK.
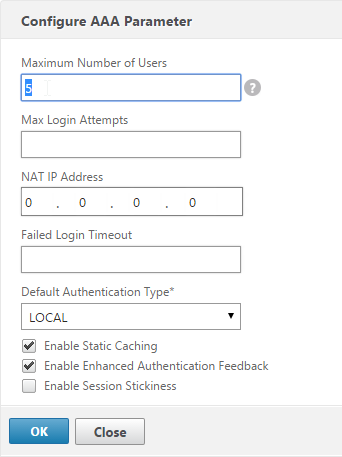
set aaa parameter -enableEnhancedAuthFeedback YES -maxAAAUsers 200
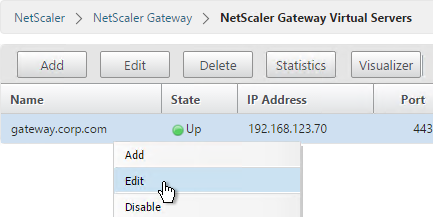
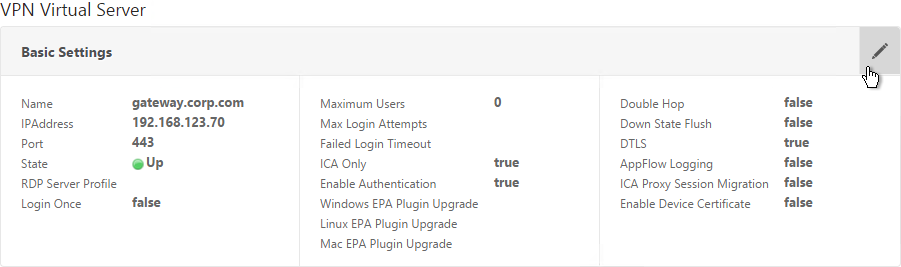
- Then edit the NetScaler Gateway Virtual Server.
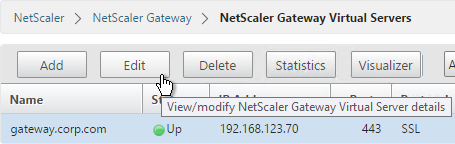
- In the Basic Settings section, click the pencil icon near the top right.
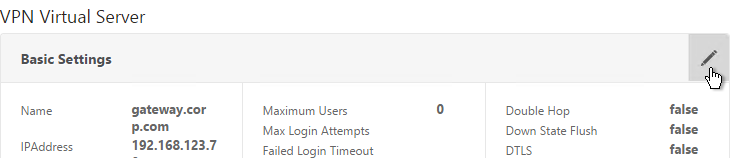
- Click More.
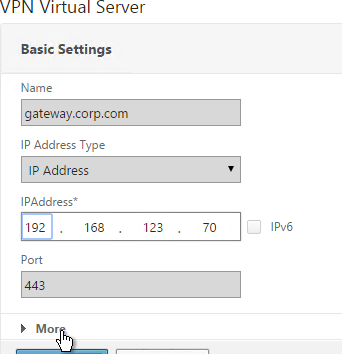
- In the Max Users field, either enter 0 (for unlimited/maximum) or enter a number that is equal to or less than the number of licensed users. Click OK.
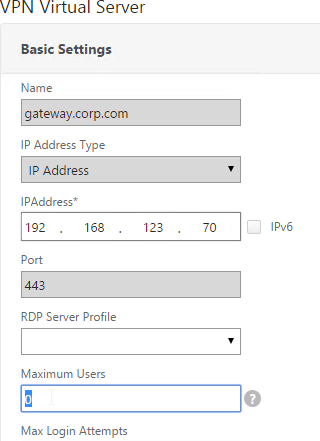
set vpn vserver gateway.corp.com -maxAAAUsers 0
Create Gateway Virtual Server
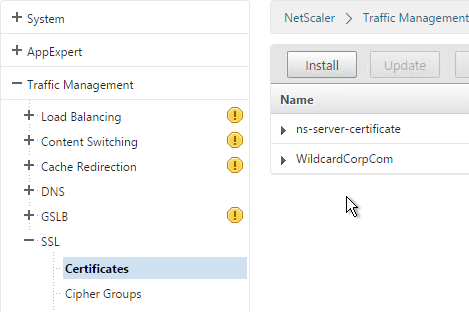
- Create a certificate for the NetScaler Gateway Virtual Server. The certificate must match the name users will use to access the Gateway. For email discovery in Citrix Receiver, the certificate must have subject alternative names (SAN) for discoverReceiver.email.suffix (use your email suffix domain name). If you have multiple email domains then you’ll need a SAN for each one.

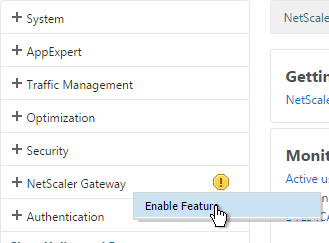
- On the left, right-click NetScaler Gateway and click Enable Feature.
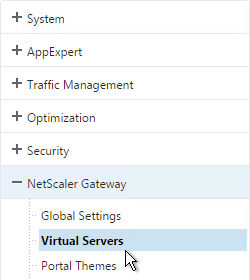
- On the left, expand NetScaler Gateway and click Virtual Servers.
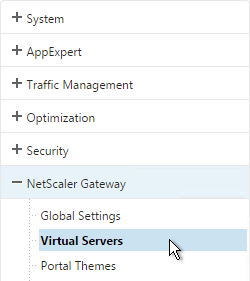
- On the right, click Add.
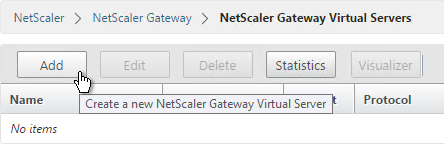
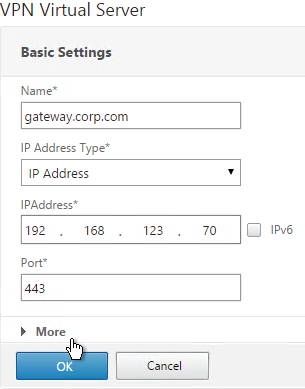
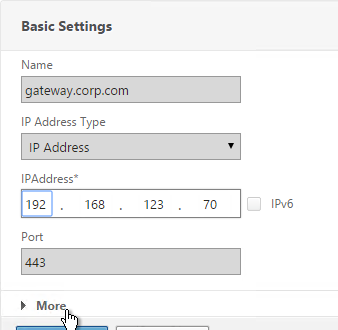
- Name it gateway.corp.com or similar.
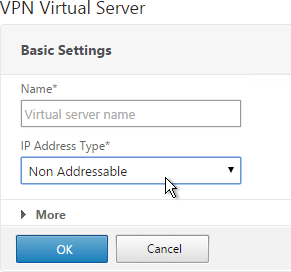
- Enter a new VIP that will be exposed to the Internet. Note: new to NetScaler 11.0 is the ability to set it to Non Addressable, which means you can place it behind a Content Switching Virtual Server.
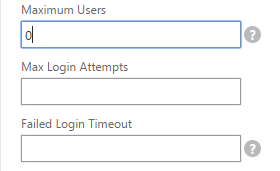
- Click More.
- In the Max Users field enter 0.
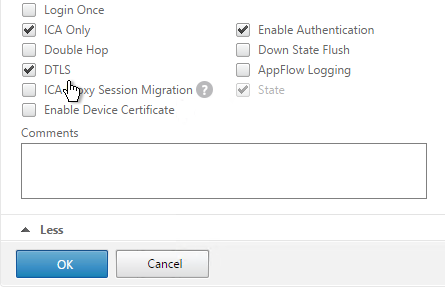
- In the Max Login Attempts field, enter your desired number. Then enter a timeout in the Failed Login Timeout field.
- Check the box next to ICA Only. This option disables SmartAccess and VPN features but does not require any additional licenses.
- Check the box next to DTLS and click OK. DTLS enables UDP Audio and Framehawk. Note: DTLS is not yet supported for double-hop ICA.

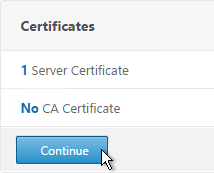
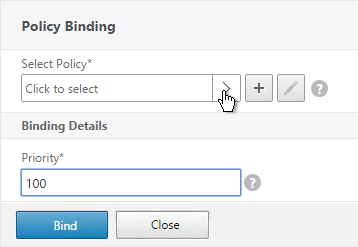
- In the Certificates section, click where it says No Server Certificate.
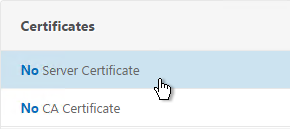
- Click the arrow next to Click to select.
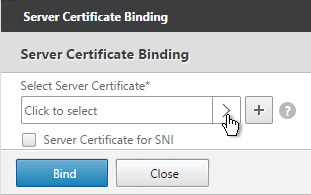
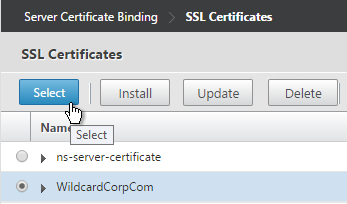
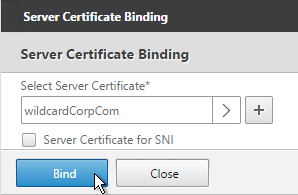
- Select a previously created certificate that matches the NetScaler Gateway DNS name, and click Select.
- Click Bind.
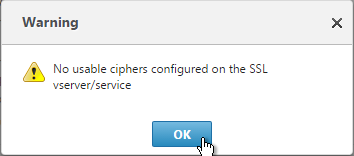
- If you see a warning about No usable ciphers, click OK.
- Click Continue.
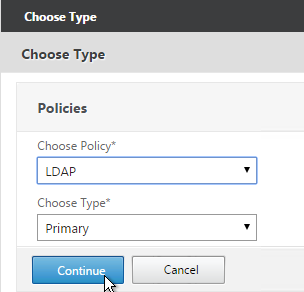
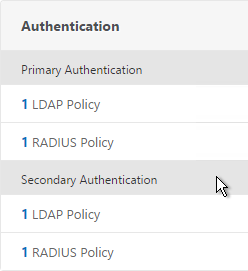
- In the Authentication section, click the plus icon in the top right.
- Note: it’s also possible to disable authentication on Gateway and make StoreFront do it instead as described in Citrix CTX200066 How to Log On to StoreFront When Authentication is Disabled on NetScaler Gateway VIP. However, it’s more secure to require Gateway to authenticate the users before the user can communicate with StoreFront.

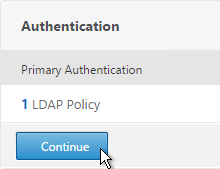
- Select LDAP, select Primary and click Continue.
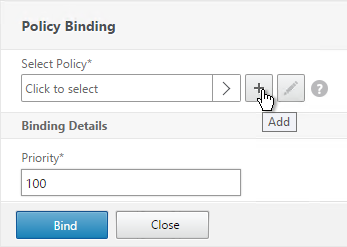
- If you used the authentication dashboard to create the LDAP server then you probably haven’t create the corresponding policy yet. Click the plus icon to create a new policy.
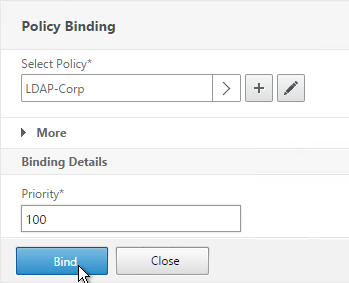
- Use the Server drop-down to select the previously created LDAP server.
- Give the policy a name. It can match the LDAP Server name.
- In the Expression box, enter ns_true or select it from the Saved Policy Expressions drop-down. Click Create.

- Click Bind.
- Or for two-factor authentication, you will need to bind two policies to Primary and two polices to Secondary:
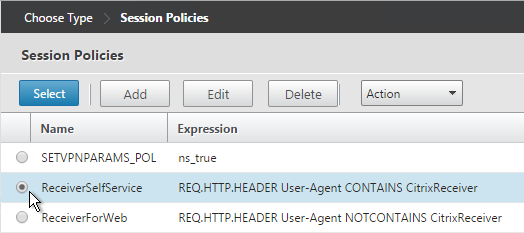
- Primary = LDAP for Browsers (User-Agent does not contain CitrixReceiver)
- Primary = RADIUS for Receiver Self-Service (User-Agent contains CitrixReceiver)
- Secondary = RADIUS for Browsers (User-Agent does not contain CitrixReceiver)
- Secondary = LDAP for Receiver Self-Service (User-Agent contains CitrixReceiver)
- Click Continue.
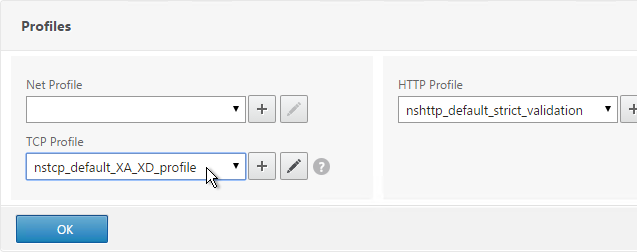
- Scroll down to the Profiles section and click the pencil icon.

- In the TCP Profile drop-down select nstcp_default_XA_XD_profile and click OK.
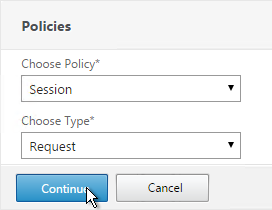
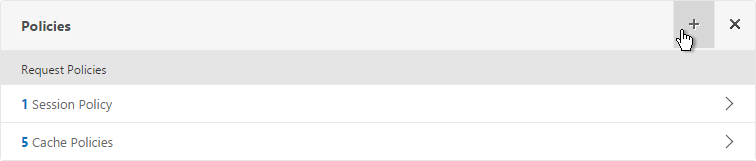
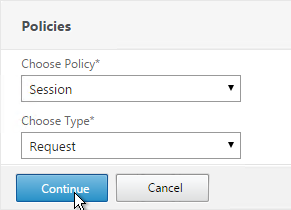
- In the Policies section, click the plus icon near the top right.

- Select Session, select Request and click Continue.
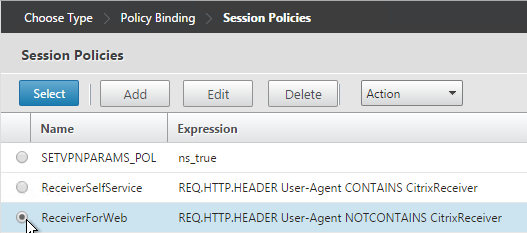
- Click the arrow next to Click to select.
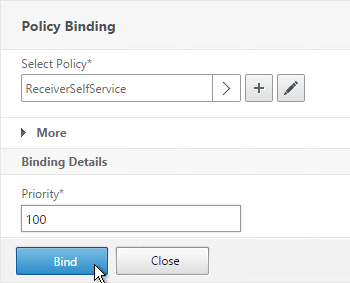
- Select one of the Receiver session policies and click Select. It doesn’t matter which order you bind them.
- There’s no need to change the priority number. Click Bind.
- Repeat these steps to bind the second policy. In the Policies section, click the plus icon near the top right.
- Select Session, select Request and click Continue.
- Click Add Binding.

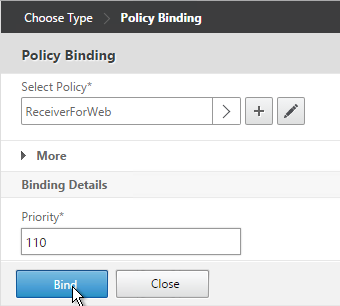
- Click the arrow next to Click to select.

- Select the other Receiver session policy and click Select.
- There’s no need to change the priority number. Click Bind.
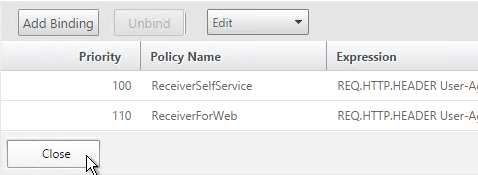
- The two policies are mutually exclusive so there’s no need to adjust priority. Click Close.
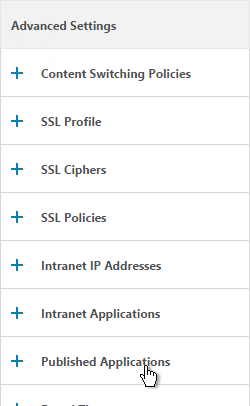
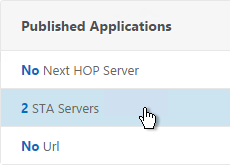
- On the right, in the Advanced Settings section, click Published Applications.
- Click where it says No STA Server.

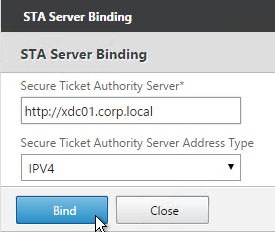
- Add a Controller in the https://<Controller_FQDN> or http://<Controller_FQDN> format, depending on if SSL is enabled on the XenApp Controller or not. This must be a FQDN or IP address. Short names don’t work.
- For the Address Type, select IPV4. Click Bind.
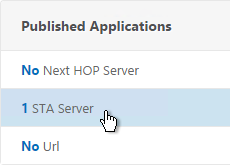
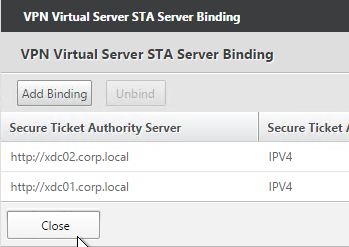
- To bind another Secure Ticket Authority server, on the left, in the Published Applications section, click where it says 1 STA Server.
- Click Add Binding. Enter the URL for the second controller.
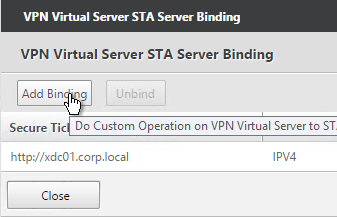
- The State is probably down. Click Close.
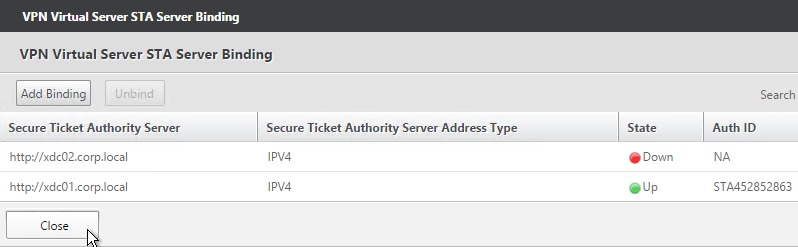
- In the Published Applications section, click STA Server.
- Now they should be up and there should be a unique Auth ID for each server. Click OK.
add vpn vserver gateway.corp.com SSL 10.2.2.200 443 -icaOnly ON -dtls ON -tcpProfileName nstcp_default_XA_XD_profile

bind vpn vserver gateway.corp.com -policy "Receiver Self-Service" -priority 100

bind vpn vserver gateway.corp.com -policy "Receiver for Web" -priority 110

bind vpn vserver gateway.corp.com -policy Corp-Gateway -priority 100

bind vpn vserver gateway.corp.com -staServer "http://xdc01.corp.local"
bind vpn vserver gateway.corp.com -staServer "http://xdc02.corp.local"

bind vpn vserver gateway.corp.com -portaltheme X1
- If you haven’t enabled the Default SSL Profile, then perform other normal SSL configuration including: disable SSLv3, bind a Modern Cipher Group, and enable Strict Transport Security.
bind ssl vserver MyvServer -certkeyName MyCert

set ssl vserver MyvServer -ssl3 DISABLED -tls11 ENABLED -tls12 ENABLED

unbind ssl vserver MyvServer -cipherName ALL

bind ssl vserver MyvServer -cipherName Modern

bind ssl vserver MyvServer -eccCurveName ALL

bind vpn vserver MyvServer -policy insert_STS_header -priority 100 -gotoPriorityExpression END -type RESPONSE
Verify SSL Settings
After you’ve created the Gateway Virtual Server, run the following tests:
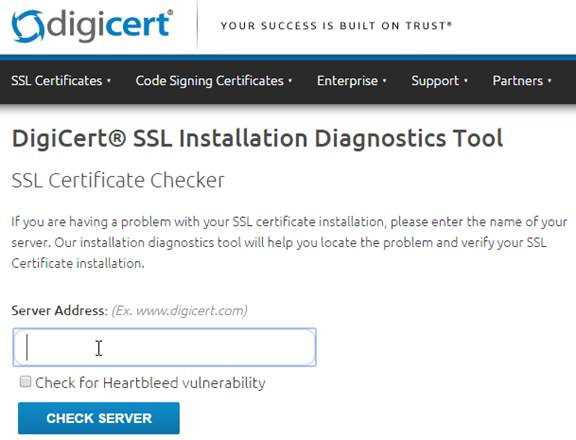
- Citrix CTX200890 – Error: “1110” When Launching Desktop and “SSL Error” While Launching an Application Through NetScaler Gateway: You can use OpenSSL to verify the certificate. Run the command:
openssl s_client -connect gateway.corp.com:443.Replace the FQDN with your FQDN. OpenSSL is installed on the NetScaler or you can download and install it on any machine. - Go to https://www.digicert.com/help/ to verify the certificate chain.
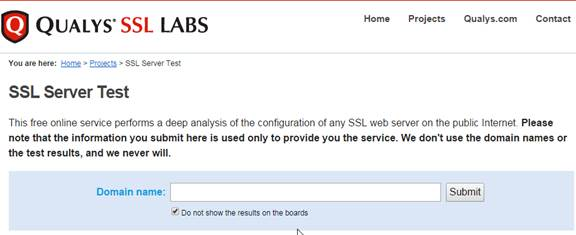
- Go to https://www.ssllabs.com/ssltest/ and check the security settings of the website. Citrix Blogs – Scoring an A+ at SSLlabs.com with Citrix NetScaler – 2016 update
Gateway Portal Theme
Citrix Blog Post Branding your Deployment Part 2: Matching NetScaler to StoreFront explains NetScaler Gateway Portal Themes, how to edit the Portal Theme CSS, and warns about GUI changes overwriting CSS file changes.
If you want the logon page for NetScaler Gateway to look more like StoreFront 3.0, NetScaler 11.0 build 62 and newer have a built-in X1 theme:
- Go to NetScaler Gateway > Virtual Servers and edit an existing Virtual Server.
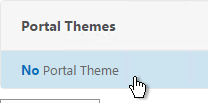
- On the right, in the Advanced Settings section, click Portal Themes.

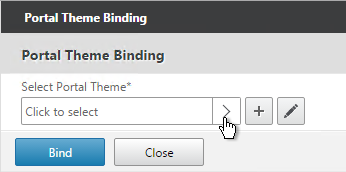
- On the left, click where it says No Portal Theme.
- Click to select.
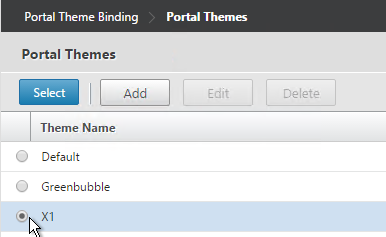
- Select the built-in X1 theme and click Select.
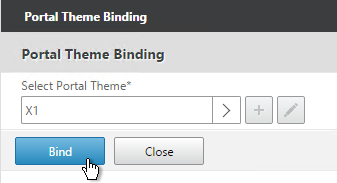
- Click Bind.
- Click Done.
bind vpn vserver gateway.corp.com -portaltheme X1
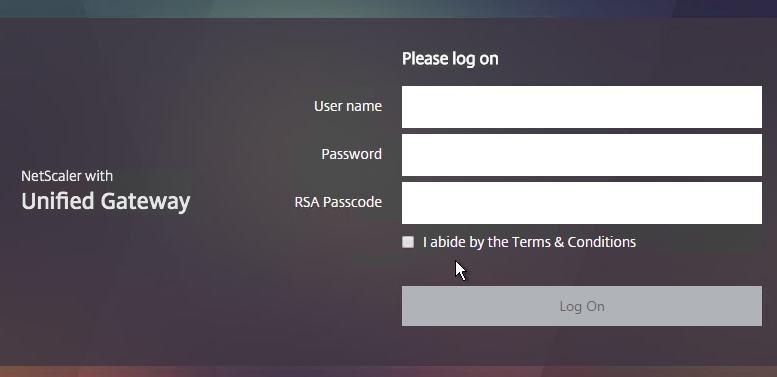
- When you access the NetScaler Gateway login page you’ll see the theme.
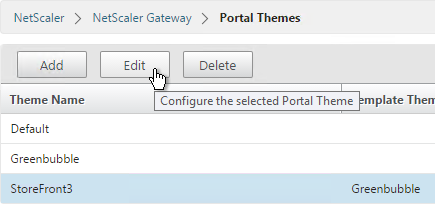
You can also create your own theme by starting from one of the built-in themes:
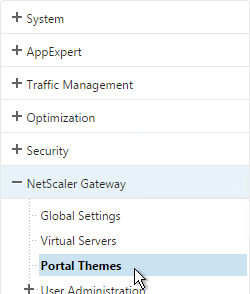
- Go to NetScaler Gateway > Portal Themes.
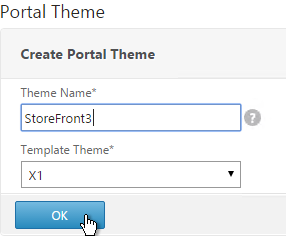
- On the right, click Add.

- Give it a name and select X1 as the Template Theme.
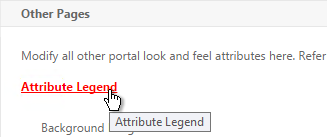
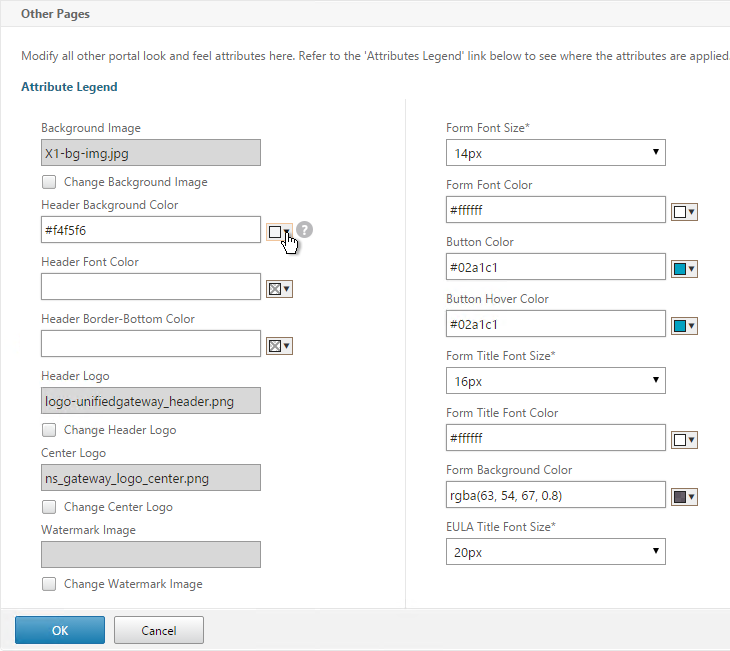
- In the Look and Feel section there are two sub-sections: one for Home Page and one for Other Pages. In each of these sections is an Attribute Legend link that shows you what you can edit.
- The Home Page is for Unified Gateway (aka VPN Clientless Access).
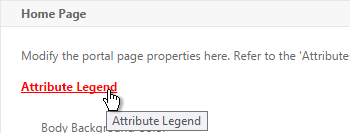
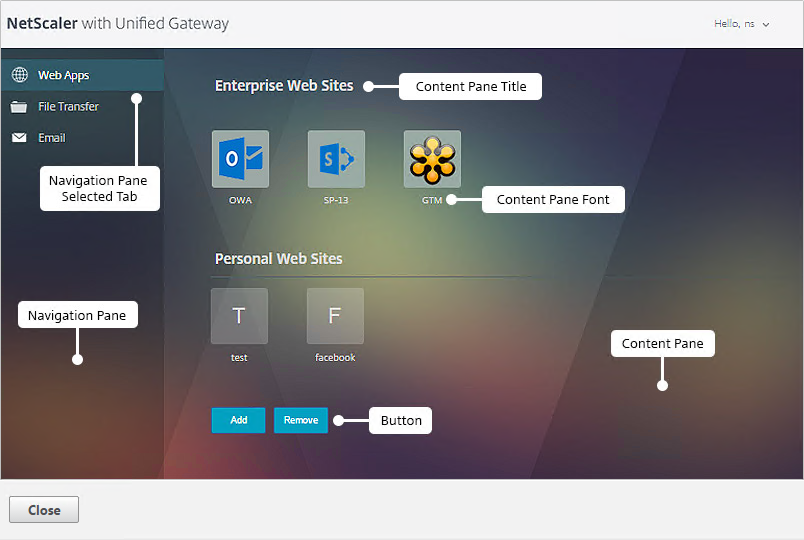
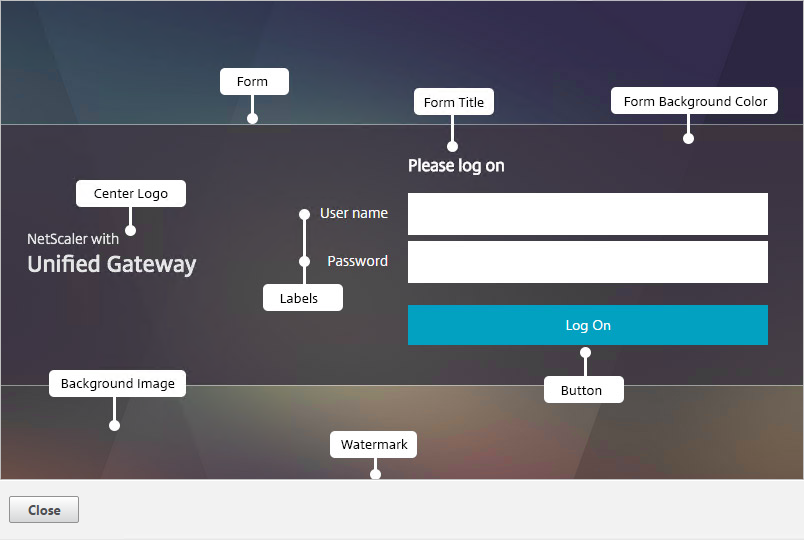
- If you want to modify the logon page, use the Other Pages sub-section.
- Make changes as desired and click OK.
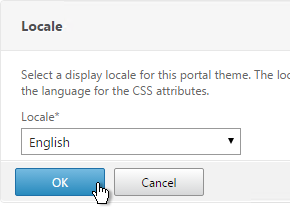
- In the Locale section, select a language and click OK.
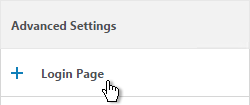
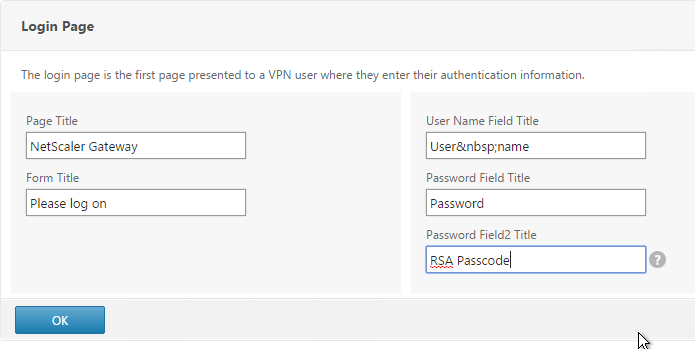
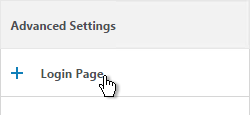
- On the right, in the Advanced Settings section, click Login Page.
- Make changes as desired (e.g. Password Field Titles) and click OK.
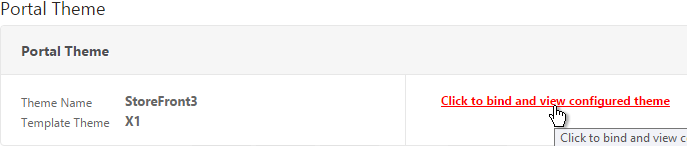
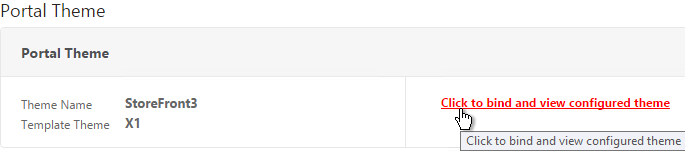
- At the top of the screen, click the link to Click to bind and view configured theme.
- Select a Gateway Virtual Server and click Preview.
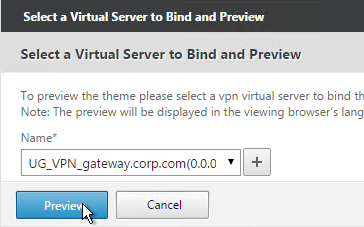
- The logon page is displayed.
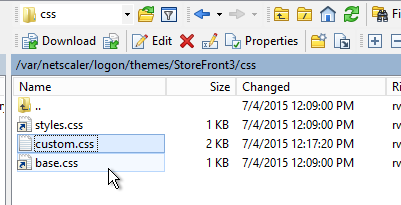
- You could go to /var/netscaler/logon/themes/StoreFront3/css and make more changes to custom.css but this file gets overwritten any time you make a change in the Portal Themes section of the NetScaler GUI.
- Citrix CTX209526 NetScaler; How to Copy a Portal Theme from the Device running version 11.0 to another Device running 11.0. 💡
Jason Samuel – How to fix Green Bubble theme after upgrading to NetScaler 11 Unified Gateway details the following:
- Change the NetScaler Unified Gateway logo to match the older Citrix Receiver logo.
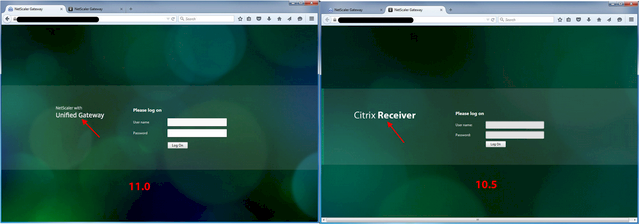
- Restore the older favicon.
- And other observations regarding the Green Bubbles theme in NetScaler 11.0
SSL Redirect – Down vServer Method
This procedure details the Down vServer method of performing an SSL redirect. An alternative is to use the Responder method.
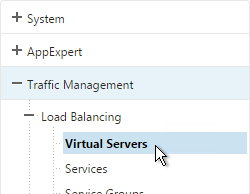
- On the left, expand Traffic Management, expand Load Balancing, and click Virtual Servers.
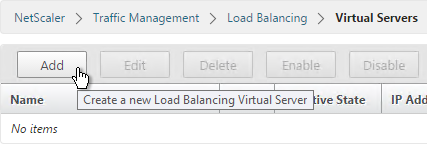
- On the right, click Add.
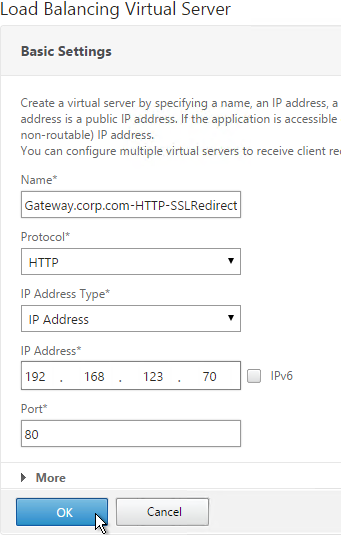
- Give it a name of Gateway-HTTP-SSLRedirect or similar.
- Set the IP Address so it matches the VIP of the NetScaler Gateway vServer. Click OK.
- Do not select any services. This redirect only works if the vServer is Down. Click Continue.
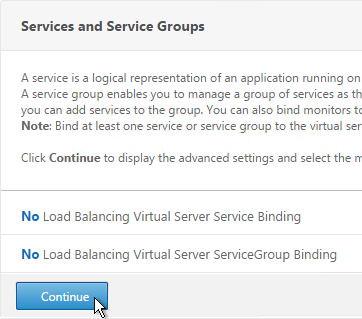
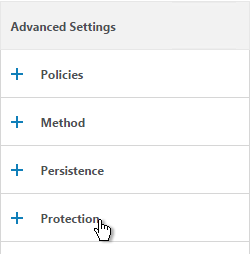
- On the right, in the Advanced Settings column, click Protection.
- Enter https://gateway.corp.com or similar into the Redirect URL Click Save.
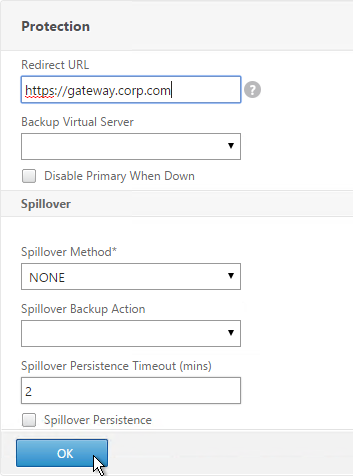
- Then click Done.
add lb vserver gateway.corp.com-HTTP-SSLRedirect HTTP 10.2.2.200 80 -redirectURL "https://gateway.corp.com"
- All SSL Redirect Virtual Servers are supposed to be Down. They don’t work if they are not down. By contrast, the Responder method uses redirect Virtual Servers that are Up.

Public DNS SRV Records
For email-based discovery, add a SRV record to each public email suffix DNS zone. Here are sample instructions for a Windows DNS server:
- In Server Manager, click Tools > DNS Manager
- In the left pane of DNS Manager, select your DNS domain in the forward or reverse lookup zones. Right-click the domain and select Other New Records.
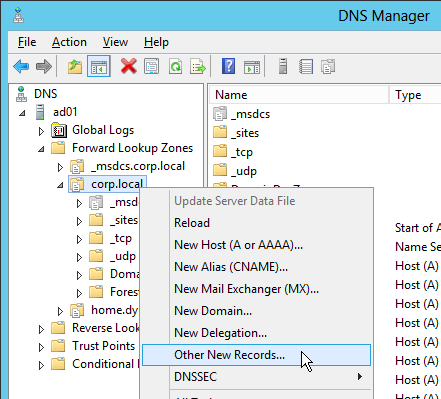
- In the Resource Record Type dialog box, select Service Location (SRV) and then click Create Record.
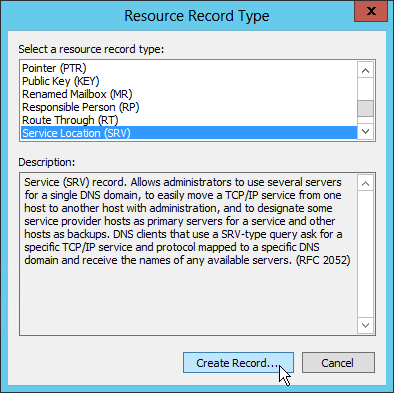
- In the New Resource Record dialog box, click in the Service box and enter the host value _citrixreceiver.
- Click in the Protocol box and enter the value _tcp.
- In the Port number box, enter 443.
- In the Host offering this service box, specify the fully qualified domain name (FQDN) for your NetScaler Gateway Virtual Server in the form servername.domain (e.g. gateway.company.com)

Block Citrix VPN for iOS
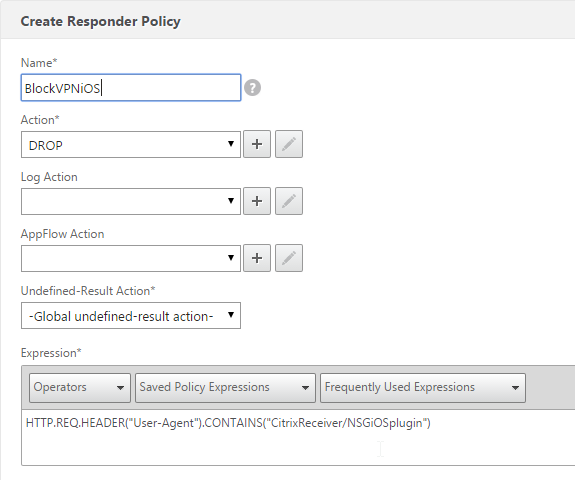
Citrix CTX201129 Configuration for Controlled Access to Different VPN Plugin Through NetScaler Gateway for XenMobile Deployments: do one or both of the following:
- Create an AppExpert > Responder > Policy with Action = DROP and Expression =
HTTP.REQ.HEADER("User-Agent").CONTAINS("CitrixReceiver/NSGiOSplugin"). Either bind the Responder Policy Globally or bind it to the Gateway vServers.
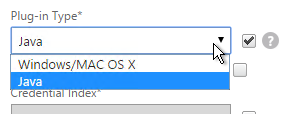
- In your Gateway Session Policies, do not set the Plugin type to Windows/Mac OS X.
View ICA Sessions
To view active ICA sessions, click the NetScaler Gateway node on the left and then click ICA Connections on the right.
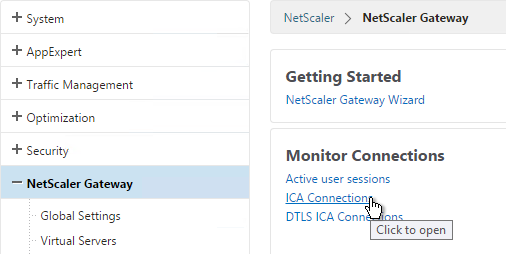
show vpn icaconnection
Customize Logon Page
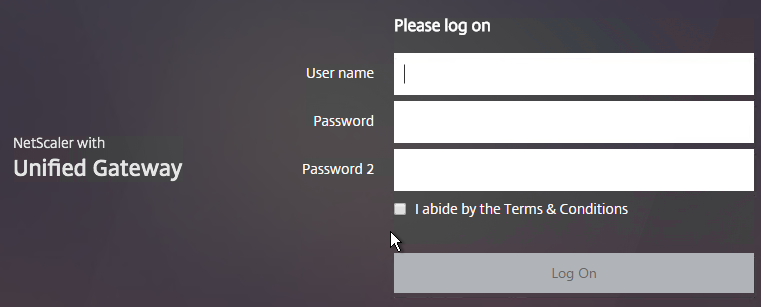
Logon Page Labels
When two factor authentication is configured on NetScaler Gateway, the user is prompted for User name, Password, and Password 2.
The Password field labels can be changed to something more descriptive, such as Active Directory or RSA:
To change the labels, edit a Portal Theme:
- Go to NetScaler Gateway > Portal Themes and edit an existing theme. You can’t edit the built-in themes so you’ll have to create one if you haven’t already.
- On the right, in the Advanced Settings column, click Login Page.
- In the Login Page section, change the two Password fields to your desired text.
- Click OK.
- In the Portal Theme section you can Click to bind and view configured theme to Preview your changes.
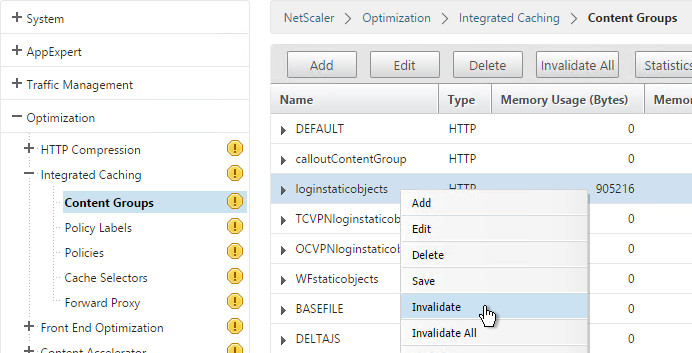
- On Platinum Edition appliances, you might have to invalidate the loginstaticobjects Content Group (Optimization > Integrated Caching > Content Groups) before the changes appear. This seems to be true even if Integrated Caching is disabled.
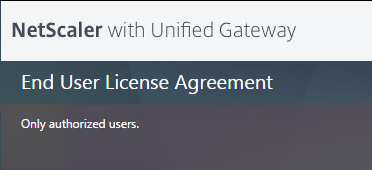
Logon Security Message (Disclaimer, EULA)
You can force users to agree to a EULA before they are allowed to login.
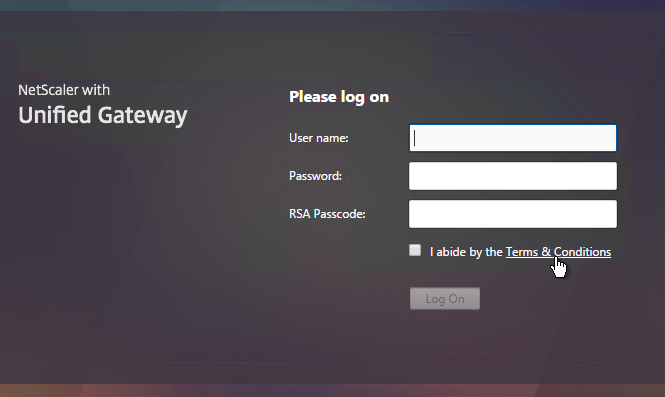
Clicking the Terms & Conditions link allows the user to view the EULA text that you have entered.
Do the following to configure the EULA:
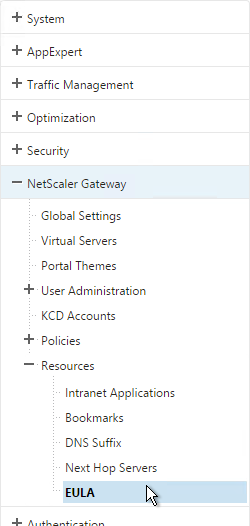
- Go to NetScaler Gateway > Resources > EULA.
- On the right, click Add.

- Give the EULA a name and enter some text. You can even enter HTML code. See the example posted by Chris Doran at Citrix Discussions.
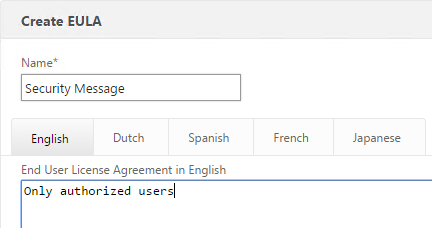
- Click Create.
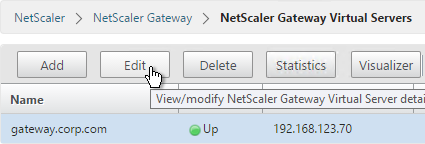
- Edit a Gateway Virtual Server.
- On the right, in the Advanced Settings column click EULA.
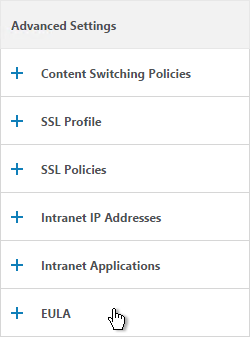
- Click where it says No EULA.
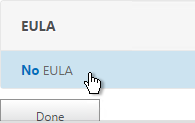
- Click the arrow next to Click to select.
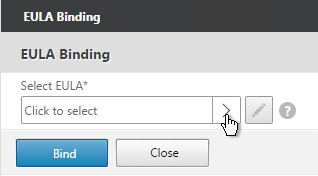
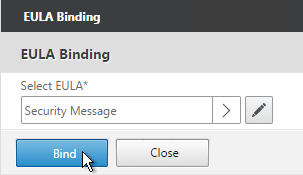
- Select the EULA and click Select.
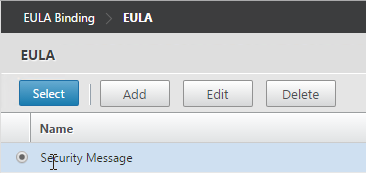
- Click Bind.
- Mike Roselli at Automatic EULA Acceptance by Cookie Rewrite Guide at Citrix Discussions details Rewrite policies that change the behavior so that users only have to accept the EULA once. It records acceptance in a cookie. 💡
Logon Page Links
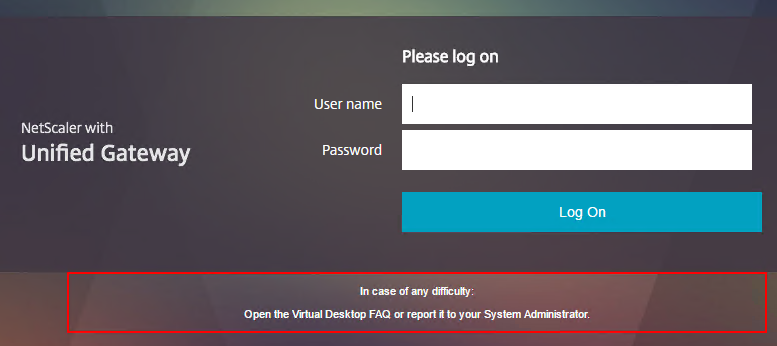
Citrix CTX202444 How to Customize NetScaler Gateway 11 logon Page with Links shows how to add links to the NetScaler Gateway 11 logon page.
- In WinSCP, go to /netscaler/ns_gui/vpn/js and edit the file gateway_login_form_view.js.
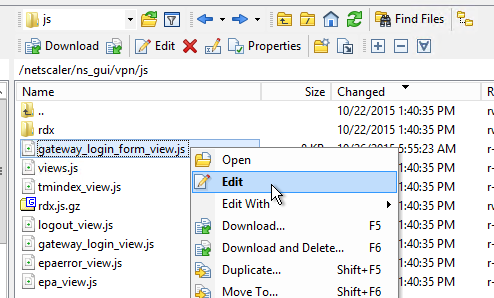
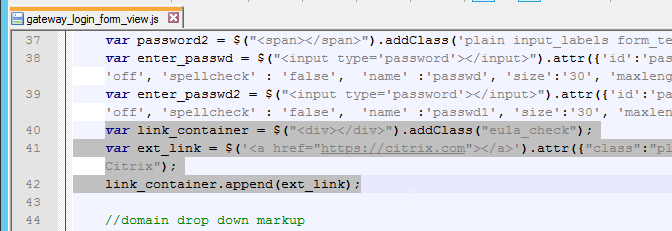
- Scroll down to line 40 and insert the code copied from the article. Feel free to change the link.
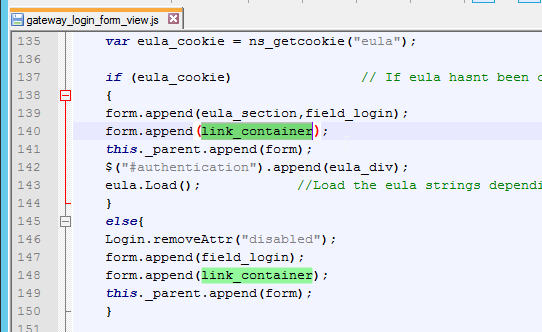
- Scroll down to line 140 and insert the line form.append(link_container);
- Since this is an if block, insert the line in both the if section and the else section (line 148). Both should be after the append field_login line and before the append(form) line.
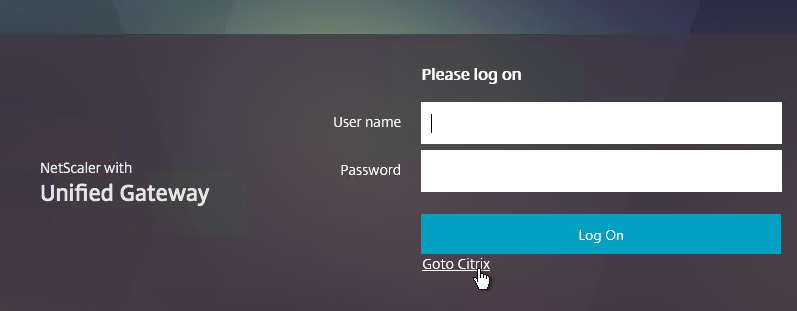
- Save the file and verify your results.
- If you reboot your appliance then your changes will be lost. To preserve your changes after a reboot, copy the modified file to /var.
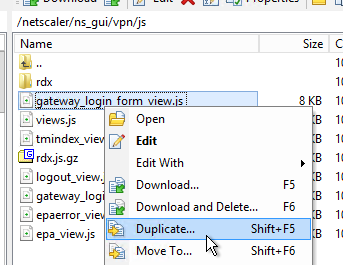
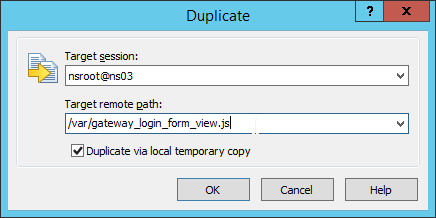
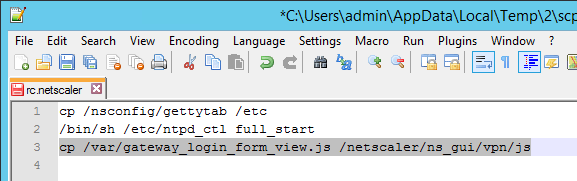
- Then edit /nsconfig/rc.netscaler and add a cp line to copy the modified file from /var to /netscaler/ns_gui/vpn/js. This is the same procedure as older NetScaler firmware. Feel free to reboot your appliance to confirm that the changes are still applied.

Other Customizations
Citrix CTX215817 NetScaler : How to Customize Footer of NetScaler Gateway Login Page. 💡
Mike Roselli at Netscaler 11 Theme Customization – How to Add Links and Verbiage at discussions.citrix.com has sample rewrite policies to customize the NetScaler Gateway logon page with additional HTML.
Craig Tolley Customising the NetScaler 11 User Interface – Adding Extra Content: add new sections to login page. These sections pull content from local HTML files.
Daniel Ruiz Set up a maintenance page on Netscaler Gateway: configure a Responder policy (see the blog post for sample HTML code). During maintenance, manually bind the Responder policy to the Gateway. Manually remove the policy after maintenance is complete. 💡
UDP Audio Through Gateway
From John Crawford at Citrix Discussions and Marius Sandbu Enabling Citrix Receiver audio over Netscaler Gateway with DTLS
Note: If you have NetScaler 11 build 62 or newer then enabling DTLS on the Gateway also enables Framehawk. See VDA > Framehawk for Framehawk configuration.
Requirements for UDP Audio:
- Citrix Receiver 4.2 or newer
- NetScaler Gateway 10.5.e (enhancement build) or NetScaler 11
- UDP 443 allowed to NetScaler Gateway Virtual Server
- UDP 16500-16509 allowed from NetScaler SNIP to VDAs
To enable UDP Audio through Gateway, make changes on both the NetScaler Gateway Virtual Server and in Receiver:
- Edit the NetScaler Gateway Virtual Server. In the Basic Settings section click the edit (pencil) icon.
- Click More.
- Enable the DTLS option and click OK.
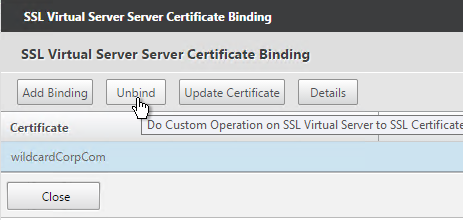
- After enabling DTLS, it probably won’t work until you unbind the Gateway certificate and rebind it.
Client-side configuration
There are two methods of enabling RTP on the client side:
- Edit default.ica on the StoreFront server
- Use GPO to modify the client-side config
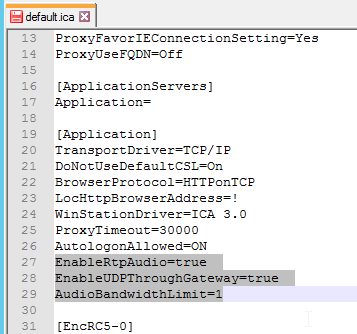
To edit the default.ica file on the StoreFront server (h/t Vipin Borkar): Edit the file C:\inetpub\wwwroot\Citrix\Store\App_Data\default.ica and add the following lines to the Application section:
EnableRtpAudio=true
EnableUDPThroughGateway=true
AudioBandwidthLimit=1
To use GPO to modify the client-side config:
- Copy the receiver.admx (and .adml) policy template into PolicyDefinitions if you haven’t already.
- Edit a GPO that applies to Receiver machines. You can also edit the local GPO on a Receiver machine.
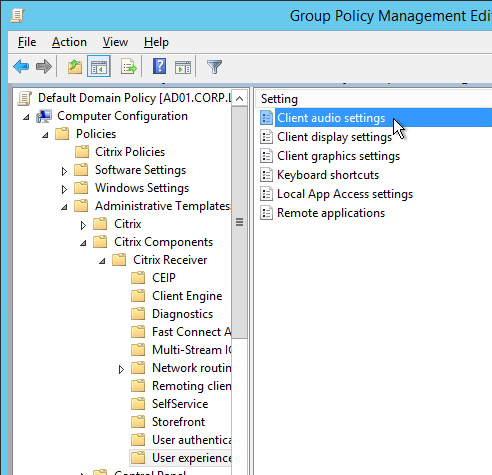
- Go to Computer Configuration > Policies > Administrative Templates > Citrix Components > Citrix Receiver.
- Edit the setting Client audio settings.
- Enable the setting.
- Set audio quality as desired. Higher quality = higher bandwidth.
- Check to Enable Real-Time Transport.
- Check to Allow Real-Time Transport through Gateway. Click OK.

Next step
Configure StoreFront to use NetScaler Gateway
Unified Gateway
Unified Gateway FAQ at docs.citrix.com
The Unified Gateway wizard in NetScaler 11 relies on Clientless Access and the built-in portal. See Jens Trendelkamp NetScaler Gateway Single Sign-On to Storefront in Clientless Access Mode and Citrix CTX202890 How to Integrate StoreFront into Clientless Access Page from NetScaler When Using CVPN to learn how to enable iFrame in StoreFront so it can be embedded in the Clientless Access portal.
Unified Gateway means Content Switching for NetScaler Gateway. There are two methods of Content Switching:
- Create a Content Switching Virtual Server that has a Content Switching policy that directs requests to a NetScaler Gateway
- Create a NetScaler Gateway Virtual Server that has Content Switching policies that direct requests to Load Balancing Virtual Servers.
In either case you can only have one Gateway Virtual Server in the Content Switching configuration.
Content Switching vServer with Gateway as Target
- When creating a Gateway Virtual Server, you can change the IP Address Type to Non Addressable. This means you can only access the Gateway through a Content Switching Virtual Server.
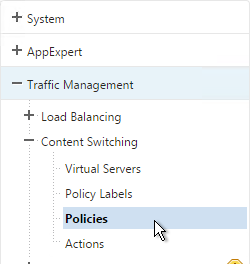
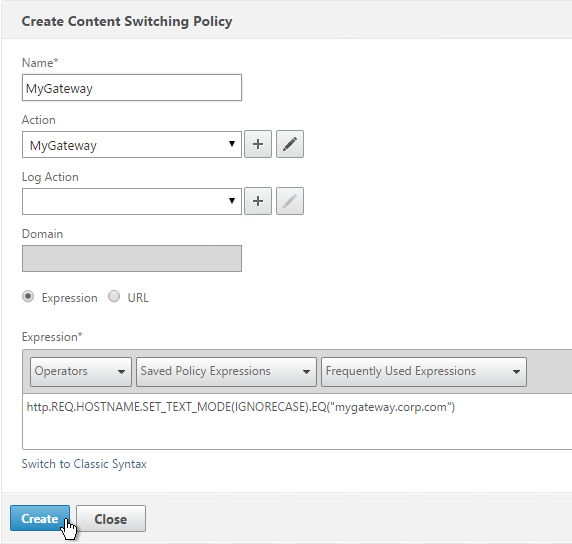
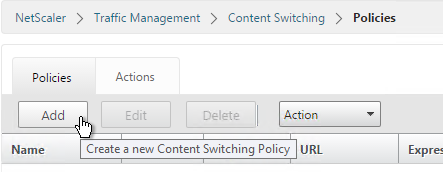
- On the left, go to Traffic management > Content Switching > Policies.
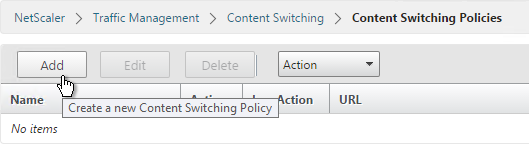
- On the right click Add.
- Give the policy a name.
- Click the plus icon next to the Action field.
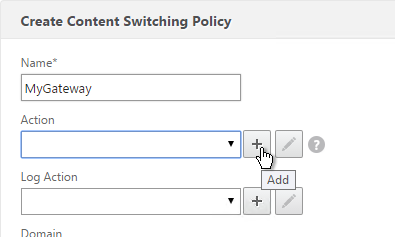
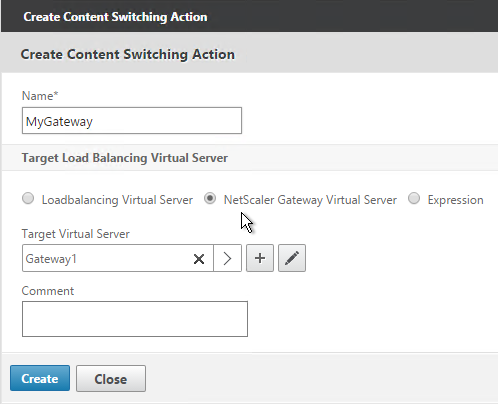
- Give the Action a name.
- Change the selection to NetScaler Gateway Virtual Server.
- Click the arrow to select a Gateway Virtual Server and click Create.
- Back in the policy screen, enter an expression. There are several options for selecting traffic that should be directed to the Gateway:
- Hostname
- The built-in is_vpn_url expression
- Any path that starts with /Citrix/.
http.REQ.HOSTNAME.SET_TEXT_MODE(IGNORECASE).EQ("mygateway.corp.com") && (is_vpn_url || http.REQ.URL.PATH.SET_TEXT_MODE(IGNORECASE).STARTSWITH("/Citrix/")) - Click Create when done.
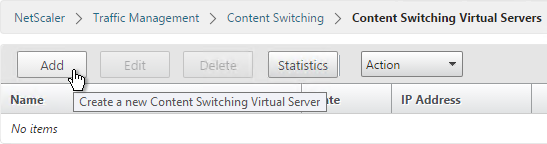
- Add or Edit a Content Switching Virtual Server.
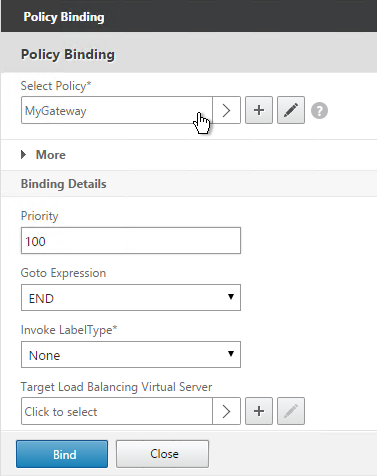
- Click where it says No Content Switching Policy Bound.
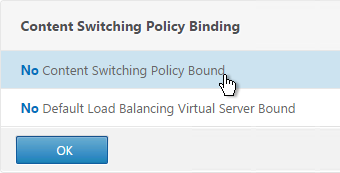
- Click the arrow to select a Content Switching policy and click Bind.
Gateway vServer with Load Balancing vServer as Target
Another option is to bind Content Switching policies to a Gateway Virtual Server:
- On the left, go to Traffic Management > NetScaler Gateway > Policies > Content Switching.
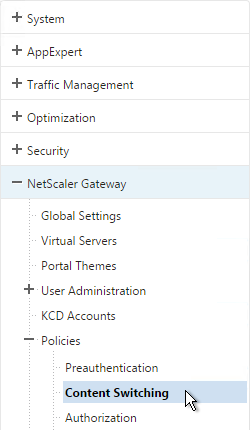
- On the right, click Add to create a Content Switching Policy with an Action that points to a Load Balancing Virtual Server.
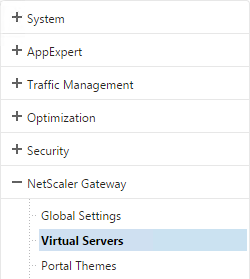
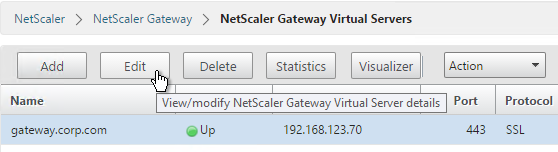
- On the left, go to NetScaler Gateway > Virtual Servers.
- On the right, edit an existing NetScaler Gateway Virtual Server.
- On the right in the Advanced Settings section, click Content Switching Policies.
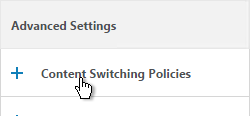
- Click where it says No Content Switching Policies.
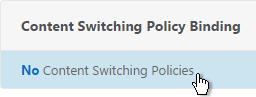
- Select a Content Switching policy that sends traffic to a Load Balancing Virtual Server and click Bind.
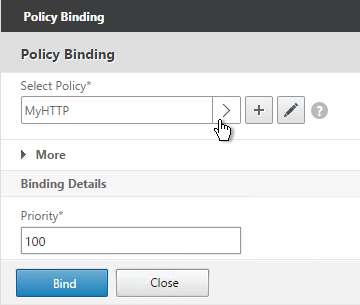
- Repeat for additional Content Switching policies that redirect to Load Balancing Virtual Servers. You cannot bind Content Switching policies that redirect to NetScaler Gateway Virtual Servers.
StoreFront – Rewrite X-Citrix-Via
When NetScaler Gateway communicates with StoreFront, it adds a header called X-Citrix-Via that contains the FQDN entered in the user’s address bar. StoreFront uses this header to find a matching Gateway object so StoreFront knows how to handle the authentication. In NetScaler 11.0 and newer, you can create a rewrite policy to change this header. This is useful when changing URLs or using DNS aliases for Gateways. See CTX202442 FAQ: Modify HTTP Header X-Citrix-Via on NetScaler for more details.
Here’s a sample rewrite policy for this header:
enable ns feature REWRITE

add rewrite action rwact_storefront replace "HTTP.REQ.HEADER(\"X-Citrix-Via\")" "\"mystorefront.mydomain.com\""

add rewrite policy rwpol_storefront "HTTP.REQ.HEADER(\"X-Citrix-Via\").NE(\"mystorefront.mydomain.com\")" rwact_storefront

bind vpn vserver mygateway-vs -policy rwpol_storefront -priority 100 -type REQUEST
Thanks for the helpful article and link. I was able to customize netscaler/gateway by modifying gateway_login_form_view.js and using cp command to make it also works (which I tested on lab with single NS VM). However, on production the changes I made on primary appliance does not show up on secondary appliance. I verify the .js file entry between primary and secondary appliance (verified by accessing secondary appliance with winscp) and it is not showing the changes. Other changes seems to be reflecting across appliance
Are you saying that you failed over the pair but your customizations are not applied? You might have to make the same changes to both appliances in the pair.
Thanks for quick response. I made the change on both appliance and ran sync from active NS and it worked. Now both appliance has code. I will have to try fail over on non production hour and seen how it behaves. Other than that your article and references were really helpful. I saw other people articles but your looks like you have taken time and effort to organize it which makes it simple for anyone to follow the step correctly without messing up. Thanks for sharing it to the community.
Sometime even call to Citrix recommends using your article and to be honest your references are more organized and comprehensible than citrix docs.
Hi Carl,
I am planning to configure reverse proxy for the an application in Netscaler.
The communication is detailed below.
Client sends a request to the Content Server
Whenever we call Content server, it communicates to directory services server for authentication.
The directory services server sends a request to the Client for authentication
Client response back to the directory service server with credentials
The directory services server checks the Active directory for the user existence and roles.
After the successful authentication the user will be redirected to the contents in website which is available for them.
http://domain.com/lastpage —then redirect to server- A
http://domain.com/frontpage–then redirect to server-B
I hope the traffic flow will be like this as exhibited below.Request you to please share me your valuable comment.
Internet users–>CS Vserver–>AAA login–>LB Vserver–Internal services
Do you have a specific question? This is certainly doable on NetScaler.
By “redirect”, do you actually mean “content switch”?
Yes, I actually meant content switching
Hi Carl,
I have deployed a content switching vServer which takes the user to Oracle WebLogic page. The traffic flow is as follows:
User on the internet –> CS vServer –> LB vServer –> Service on Internal Network (Oracle WebLogic)
This works fine except that when user lands on Weblogic page, they need to click a link to get to logon page.
I need to get the user landing on logon page directly (without having to click the link).
I have tried using URL rewrite policies and actions but when the page loads with the rewrite policy / action (attached to an LB vServer), it does not display properly. Its missing the background colors, images and user logon does not work.
Your help is appreciated.
Thanks!
Hi Carl,
is it possible to apply WAF to NetScaler Gateway?
It doesn’t appear to be possible to apply it directly to the Gateway. If you are accessing HTTP servers across the tunnel, then proxy that HTTP traffic through NetScaler Load Balancing VIPs and bind the AppFW policy there.
You can bind it via global policy, but it is suggested in such instances to use an expression that will target the Gateway only in some manner and not be left “true”. Note that Citrix hardens Gateway and StoreFront quite a bit and they’re allegedly routinely pentested I am told. Generally it’s not recommended to front with WAF unless there is a corporate mandate of some type. if you do, be prepared to do a LOT of testing and tuning, in my experience.
Hi Carl,
I am Unable to create Content Switch policy getting the error ” Expression syntax error [CLIENT.^OS(win7) E, Offset 7]”
Please assist on the same.
I suspect that Client Secure Expressions are not supported in Content Switching. What are you trying to do?
Hello Mr Carl, i have a problem with this:
add cs policy Pol_CS_externo_app -rule “HTTP.REQ.URL.PATH.REGEX_MATCH(re?/AdministradorSuraLinea/[A-Za-z0-9:,;\\(\\)!\\-_#\\.|\\/%]*$?) || HTTP.REQ.URL.PATH.REGEX_MATCH(re?/admoncart/[A-Za-z0-9:,;\\(\\)!\\-_#\\.|\\/%]*$?) || HTTP.REQ.URL.PATH.REGEX_MATCH(re?/ADR/[A-Za-z0-9:,;\\(\\)!\\-_#\\.|\\/%]*$?) || HTTP.REQ.URL.PATH.REGEX_MATCH(re?/banw/services/WSPuntosExito[A-Za-z0-9:,;\\(\\)!\\-_#\\.|\\/%]*$?) || HTTP.REQ.URL.PATH.REGEX_MATCH(re?/bea/[A-Za-z0-9:,;\\(\\)!\\-_#\\.|\\/%]*$?) || HTTP.REQ.URL.PATH.REGEX_MATCH(re?/bitacora/[A-Za-z0-9:,;\\(\\)!\\-_#\\.|\\/%]*$?) || HTTP.REQ.URL.PATH.REGEX_MATCH(re?/cexp/[A-Za-z0-9:,;\\(\\)!\\-_#\\.|\\/%]*$?) || HTTP.REQ.URL.PATH.REGEX_MATCH(re?/consatrack/[A-Za-z0-9:,;\\(\\)!\\-_#\\.|\\/%|\\s|\\/=]*$?) || HTTP.REQ.URL.PATH.REGEX_MATCH(re?/contragarantiascumplimiento[A-Za-z0-9:,;\\(\\)!\\-_#\\.|\\/%]*$?) || HTTP.REQ.URL.PATH.REGEX_MATCH(re?/cuentasSuracliente/[A-Za-z0-9:,;\\(\\)!\\-_#\\.|\\/%]*$?) || HTTP.REQ.URL.PATH.REGEX_MATCH(re?/cumplimientowls/[A-Za-z0-9:,;\\(\\)!\\-_#\\.|\\/%]*$?) || HTTP.REQ.URL.PATH.REGEX_MATCH(re?/empresariales/[A-Za-z0-9:,;\\(\\)!\\-_#\\.|\\/%]*$?) || HTTP.REQ.URL.PATH.REGEX_MATCH(re?/FacturacionAsesores/[A-Za-z0-9:,;\\(\\)!\\-_#\\.|\\/%]*$?) || HTTP.REQ.URL.PATH.REGEX_MATCH(re?/Financiaciones/[A-Za-z0-9:,;\\(\\)!\\-_#\\.|\\/%]*$?) || HTTP.REQ.URL.PATH.REGEX_MATCH(re?/formasElectronicas/services/detalleRealesWebService[A-Za-z0-9:,;\\(\\)!\\-_#\\.|\\/%]*$?)”
ERROR: Expression syntax error [uraLinea/[^A-Za-z0-9:, Offset 57
Hi Carl
Just want to say thanks for all of the information. I am troubleshooting an issue in our environment where internal citrix sessions are not being pulled externally when a user logs in from home. It seems to be intermittent and doesnt work more than it works.
I have tested this myself and i can see my apps disappear from my internal pc. Reciever on the external machine then starts to load the apps but disconnects almost immediatey. Looking at logs i can see the session is active on the same server and recognised as external. Clicking to launch an app opens a new session on a new server.
Have you ever encountered this before? Citrix have recommended we enable ica proxy migration on the gw vserver but this hasn’t resloved the issue. Tested in both basic and smart access mode.
Carl, Appreciate the post it is very helpful! We are seeing a strange action once our 2 factor authentication is completed. Issue: On first page we enter UserName, Password, 2 Factor Pin. Then instead of completing and logging us in we get another page “Additional Information Required , Please type your response below. Please enter password”.
Hi carl
First of all thank you for this blog and I ask for your assistance: I installed a Netscaler 11.0 for external connections to applications but sometimes when I connect from outside the VIP server does not respond only after the restart of Netscaler .
Are you saying that it stops responding until you reboot?
Do you have an HA pair of NetScaler? I’ve seen ARP issues on firewalls.
What build of 11.0? Maybe a bug.
Have you run network traces on your firewall to see if ARP is working correctly?
Hi Carl,
do you know in the UG portal page for CVPN if there is a way to set the categories view as default?
Im using NS 11.1 (last build) with many bookmarks for CVPN and are mixed with ICA apps…
I know that we can do this in storefront playing with some js, but what about UG.
Thank you
Thanks Carl for your responses. They’ve been very helpful and yes makes sense that Receiver would prompt a user to select a store if the NS GW contains multiple session policies to a SF with multiple stores. With regards to StoreFront 3.8 and it’s multiple sites capability via powershell – I have no issues with that, but do have issue with losing the administration piece with the StoreFront console. I guess it a matter of time that this gets included in the GUI. Thanks again.
Actually, store prompting has nothing to do with session policies. Receiver has to perform “discovery”. When you point it to Gateway, Gateway then connects to StoreFront. StoreFront now needs to download a provisioning .xml file for one store. If there’s more than one store, StoreFront will prompt you for a store.
For multi-Base URL, Citrix thinks it’s more desirable in large enterprises that typically automate StoreFront deployment/configs, so I don’t think they’re in any hurry to put it in the console.
Thanks for the explanation. That helps visualize the communication flow better. I also see your point for multi-Base URL.
Hi Carl is it possible to setup 2 separate xendesktop sites each with their own set of storefront servers (different baseurl) in the same location to a unified gateway? That way I have one single URL for inside and outside.
I’m not sure what you’re asking. But you can do almost anything with Content Switching, except content switch to more than one Gateway.
Gateway can have multiple Session Policies pointing to different StoreFront addresses.
Thanks for your reply Carl. What I was trying to ask is if I could show more than one StoreFront implementation each with their own base URL to Unified Gateway, but I believe Unified Gateway can only enumerate resources from one StoreFront. But since you mentioned Gateway being able to have multiple session policies pointing to different SF addresses – I am curious to how this is done and would look? I am guessing it would enumerate all resources from the different SF URL addresses onto the user NS GW display page after login? Do you have any instructions or know of pointing material to support that?
All Session Policies that apply to a user are combined. For conflicting settings, lowest priority number wins. So, only one StoreFront per user. But you could have different session policies (StoreFront) for different users.
Say I get rid of one StoreFront implementation and move it to the one I’ll keep so instead of having 2 SF implementations I’ll have 1 instead. I’ll just create a new Store for the one I am moving. That way I can keep it simple and have 1 base URL with 2 SF Stores in order to keep the branding separate.Then I can create the Session Policies for the different Stores and bind it to the NS GW vServer. The user logging in would never have access to both Store resources just one. So if Session Policies are combined I should be ok? No need to add AD groups in AAA groups or anything like such?
This works for web browsers, but unfortunately does not work for Receiver. Receiver will prompt the user to select a store.
StoreFront 3.8 supports multiple Base URLs on the same server. But you have to deploy it using PowerShell.
Hi Carl. When I will use AAA Groups for having different session policies to Storefront (ICA only) based on Active Directory groups, do I Need universal licenses for that?n
Best regards Gabi
Nope. It works with ICA Proxy. But of course the non-ICA-proxy features don’t work without it.
Dear Mr. Carl,
Would you please me help me on this.
Can i create multiple netscaler VIPs thats pointing to the same Citrix Farm ?
Best Regrads,
Basem
Of course. Simply create multiple Gateway objects on your StoreFront server and bind all of them to the same store. Each Gateway object has a different DNS name. If you have one DNS name for multiple Gateways, and if you need Callback URL, then see https://www.carlstalhood.com/storefront-3-5-configuration-for-netscaler-gateway/#gslb
Thank you Carl… I really appreciate you kindly help .
Carl, do you know if it is possible to default to the Applications tab after logging into Unified gateway? Currently I have Web Apps, Applications, and Email Tab. I would like it to default to the applications tab (Storefront). Thanks
I know RfWebUI theme in 11.1 can definitely default to Apps tab by configuring StoreFront to default to the Apps tab.
Carl,
I used to modify the logon page to add multiple domain drop down menu options for choices in 10.x version that has been changed in 11.x. The labeling modification was also much simpler and I had changed it from “Domain” to Connection Type since the choices were VPN or Apps and such.
I have now used CTX203873 to add multiple Domain drop down menu successfully. The Themes give you the options of changing the Second Password in case of 2 Factor. Where do I change the label for Domain? so the three fields could look like User name, Password, Connection Type?
Please advise
Regards
Hello Carl,
is it possible to bind multiple Netscaler Gateway vServer behind one Unified Gateway vServer or Content Switching vServer? We are a CSP with a Multi-Tenant Environment and I need that to migrate from CSG to Netscaler.
There currently is no way to bind multiple Gateways to a single Content Switching vServer.
Carl:
Your articles, and documentations are so helpful, and very detail oriented, you are indeed a citrix Guru.
You should be working for citrix, heading the documentation and training citrix group.
There are many citrix Admins out there that are being benefit and becoming better because of you Carl.
Once again very thankful!!!!!
Carl,
Is there a way for me to determine if there were any connections to the Netscaler Gateway over the last few days? I’m trying to decommission one of the netscalers but I’m unsure if there were any connections to the gateway recently.
I’m able to check connections at the present moment but not over the pass day or two. I just want to be able to determine when the last connection happened.
Check your Syslog or /var/log/ns.log.
Hi Carl,
I want configure the logon page based by language. If the browser is set to german the logon labels are in german as well. If the browser is in something else the labels are in english.
Is that possible?
Hi Carl,
we are looking for a logon page by language, you know if the browser has language settings english prompting username and password. If the browser has another language netscaler presents the logon page based on the language. Nice would be if we can set a default language and if the browser doesn´t match present the logon page in english.
Is this possible with 11 65.72?
Carl, we’re running UG on 11.0 64.34 but want to remove the File Transfer tab. In previous versions this was possible by editing either the styles.css or homepage2.html (http://support.citrix.com/article/CTX120643).
By chance would you know where the current location that changes would have to be made?
I think you can edit /var/netscaler/logon/themes/X1/css/base.css, find files-icon, and add display:none;. I used Chrome to Inspect Element, which tells me the style classes and the files they come from.
Oops… I guess I’m so conditioned to having to customize AG/NG the old way, that I did not look through the GUI. It’s right there under Portal Theme > Custom Theme Name > Look and Feel.
Carl,
It’s hard to find docs that clearly explain when the NS Gateway is required or not. Some references say when external access is required, but some not quite so clear. I want to provide secure access to internal users across multiple sites based on smart access or EPA scans and there is no external access requirement. Can you help me to understand when NS vs NSG deployment is needed or recommend a reference? Thank you for this site!!!
StoreFront can’t do EPA scans on its own so you’ll need NetScaler Gateway for that. Then configure StoreFront to only accept Gateway authentication (no Explicit Auth).
If there is any NAT between the client device and the VDA then you need NetScaler Gateway.
Carl,
Do you know the current stable version? Is it still 10.5 or is there a 11 build that is considered the stable build for a XenApp implementation?
I’m waiting on 11.0 build 65. Hopefully it fixes some things.
I am hoping that this is not a stupid question and would appreciate some tips. I am looking to deploy two virtual servers. One for ICA only, and one for Smart Mode, i.e. with the universal licenses. The reason is we have a lot more ICA connections that Universal.
All of our users come in through a single domain name (IP address), which is then NATed to the VIP.
How can we configure NetScaler to see if the connection is from a different domian name, or direct it to a particular VS.
You can do it based on source IP. GSLB Static Proximity. Or NetScaler Gateway listener policies.
However, it won’t know who the user is until the user logs in. By then it’s too late.
Hi Carl. Wonder if you can help me with something. I have created a Unified Gateway vserver and added some internal web applications as bookmarks. The apps are working ok, you reach the application login prompt and can login by typing your credentials. I have then created single sign on traffic policies and bound them to the Unified Gateway vserver. SSO is not working however and I will not automatically login. Am I taking the wrong approach here? Do I need to configure something completely different?
Carl,
Thank you for the information and site. I am trying to front-end a small XenApp 7.x site with a Netscaler 11 VPX, using an Express license. When I attempt to use the “Configure XenApp/XenDesktop” link, I am confronted with the following message:
“The following licenses are not available: SSL VPN Install the licenses and restart the appliance”
I’m not looking to create an SSL_VPN, so I’m confused. Reading your notes above, it seems that I should be able to set an “ICA_ONLY” somewhere, but I’ve not yet found that.
I am running 11.0 64.34
The only feature that seems to be licensed with the Express license is “SSL Offloading”
Is this not possible on version 11, or have I downloaded the incorrect OVA for ESX?
I never use the wizards. Instead, I always create my Gateway vServer and policies manually.
Did you verify it is licensed? In the top left of the webpage, it should say (5) instead of (1).
Thank you for the reply. As I’m really green to the Netscaler (always used CSG + WI), I am going to let the wizard help me out this time around so I can learn.
A problem with the wizards is lack of flexibility. And they hide the implementation details. They’re good for quick PoC but not for production.
UPDATE – Kindly disregard this question. I had bungled up the host MAC. Relicensed Express and all is well now.
The best NetScaler article. 2 tons of the great tips. Congratulations!
Carl,
Great article as always. This helped a ton customizing NetScaler Gateway 11. I have a customer requesting the ability to remove some of the choices all together or based on group. For example, access to storefront is available in either VPN or Client less access. There is no need to have a Citrix XenApp selection there…
Or the client only allows VPN access to members of a particular group so does not want that choice available to all….
Is this possible?
Thanks!
You can certainly create different session policies for different groups. Configure your LDAP policy to extract groups. Add the group names to NetScaler Gateway > User Auth > AAA Groups. Bind the session policies to those groups. Keep in mind that session policies merge and conflicts are handled by the lowest priority number across all bind points. If the user gets two session policies where one enables client choices but you don’t want client choices then you’ll need to disable client choices in a lower priority number policy.
Carl,
Thanks for the quick reply, I was able to make this work for the client and it turned out better than they expected. Looks like they will be moving forward with a full implementation as a replacement to their current configuration.
One more question, I am struggling getting the “Apps” tab to populate in the Clientless or VPN screen. I was able to get it to work at one point but cannot figure out what I am missing.
I have tried creating a StoreFront app in Unified Gateway and adding the storefront information to the UG profile but its just gives me the option and does not add the tab. Any suggestions??
Thanks again
The apps tab should work with Web Interface but I don’t recall it being supported with StoreFront. There are some instructions to configure StoreFront to run in a frame and maybe that’s what’s needed. Also, there are differences between http and https. Here’s a thread- http://discussions.citrix.com/topic/367138-show-storefront-in-netscaler-gateway-11/
Carl,
Thanks for your suggestion, this worked and I was able to populate StoreFront 3.0 and launch apps/desktop .
Carl. I love your site, thank you for filling the gaps. I have a weird issue. I know it’s with NS11, and I’m sure it’s with 10.5 too but haven’t tested it.
We cannot customize the LOGOUT page on the NetScaler for a Gateway Virtual Server. No matter what theme you apply, the logout page is always the X1 theme. I’ve looked in the entire NetScaler, and there are only two references to the X1-bg-img.jpg file. One in the /var/netscaler/vpn/media, and one in /netscaler/ns_gui/vpn/media. Changing both of those do not update the image. I even wrote an nsbefore.sh script to copy the modified image to the /netscaler directory upon reboot, and it didn’t update it.
I tried updating the logout page on the StoreFront, and it works, but the logout page when you integrate StoreFront with NS goes back to the NetScaler.
Can you help? Thanks.
What is the URL? It might be one of the dynamically generated pages that uses the CSS and nothing else.
When I logoff of NetScaler Gateway 11 using the StoreFront portal, it pulls the logoff page from the StoreFront server, not the NetScaler. The text for the logoff screen is contained in /Citrix/StoreWeb/receiver/js/ctxs.core.min_12F0270C2FDA3CCD.js
That’s what I thought as well. I found the background image on the StoreFront and changed it to gray. When I hit the Default storefront Store directly and login, then logout, it customized the page to gray. However, when I hit the NetScaler Gateway that accesses the same default Store, upon logging out it gives you the X1 default login page. That made me think that logging out from a NetScaler connection sends you to a page on the NetScaler. Which I cannot find.
Hi Glenn we have the same issue have you even find a solution
Same thing here…when I change the background image in “inetpub\wwwroot\Citrix\StoreWeb\receiver\images\common\ReceiverFullScreenBackground_blablabla.jpg” I get the updated image when accessing StoreFront directly and logging out…if I use the NetScaler to login, and then logout…I get the default of whatever theme I used when creating the new theme. The call back of the log off button in StoreFront states that it references the NSGW URL /StoreWeb/#.
Anyone got an update on this? Just seems out of place after deploying an image theme all over a rollout and then the default images popup here and there.
Hi Carl,
We have a scenario in which the client would like to leverage Unified Gateway with a single FQDN to access the XenDesktop environment for all production users, however would only like to provide access to SSL VPN or clientless access for the admin group. They also want to ONLY allocate a certain amount of universal licenses for the admin group, and have the regular production users not leverage that licensing. Is this possible?
Is there a way for at login to determine which user type can have access to FULL VPN/Unified Gateway, and which can only redirect directly into Storefront under a single FQDN?
Thanks in advance!
Separate licensing requires separate Gateway vServers. One has ICA Only checked and the other one does not.
As for group-based access, create separate session policies for each use case. Go to Gateway > User Admin > AAA Groups and add a group that matches the AD group name (case sensitive). Bind the VPN session policy to the AAA group. Make sure the AAA Group bind point has a lower priority number than the Gateway vServer bind point.
Thanks for the quick response Carl!
Another excellent article Carl and made quick sense to me of how to use Content Switching with NetScaler Gateways !
Hi Carl,
We have setup NC11.0 63.16.nc with XD 7.6 and SF 3.0.1, there is no problem when use HTML5. However the full Receiver keeps on Connecting and never connects. If login to SF directly, the Receiver works without any problem. Do you have any hints on this? Thanks a lot.
What type of client? I’ve seen several NetScaler 11 issues reported at Citrix Discussions, especially from iOS devices.
What step of the process is failing? Are you clicking an icon in Receiver for Web? Then Receiver launches and tries to connect and then it fails? If so, that could be several issues (STA, ciphers, firewall, etc.).
Hi Carl,
We have a NS11.0 63.16.nc VPX setup with XD7.6 and SF3.0, there is no problem whrn connect with HTML5. But if choose full Receiver, the receiver just keeps on Connecting and never connected. Tested with SF directly, Receiver works without problem. Do you have any hints on that? Thanks a lot.
Carl, on our Netscaler (version NS11.0: Build 63.16.nc) I have tried adding our 2 Delivery Controllers as STA Servers under Published Applications within our NetScaler Gateway Virtual Server using the following format https://FQDNofDDC. However the state of both is listed as Down and the Auth ID is listed as NA. If I unbind them both and add them back without using SSL (e.g. http://FQDNofDDC) their state is listed as Up and the Auth ID appears for both. The issue is that our environment requires us to use https instead of http wherever possible. I know this isn’t a firewall issue as I have successfully tested https (443) from the Netscaler to both Delivery Controllers by creating a test Load Balancing Service for both on the Netscaler And I know the SSL cert is correctly bound on the DDCs because our StoreFront servers have both the DDCs added in with https (443) and that works like a charm. There are SSL certificates installed and bound to 443 on both of our Delivery Controllers (Broker Service version 7.6.2.5024).
Is your NetScaler a physical appliance? I wonder if it’s trying to use TLS 1.2 to connect the STAs. Try doing a network trace on the NetScaler and see if the SSL negotiation is failing.
Correct, physical appliance (Netscaler MPX 5500). It appears to be using TLS 1.2 to connect to the STAs because I’m getting the following on both DDCs (Server 2012 R2) in the System Event Log:
“An TLS 1.2 connection request was received from a remote client application, but none of the cipher suites supported by the client application are supported by the server. The SSL connection request has failed.”
And a sample stream from the network trace shows multiple:
1) TCP SYN from SNIP to DDC
2) SSL Client Hello Handshake using TLS 1.2 from SNIP to DDC
3) TCP SYN_ACK from DDC to SNIP
4) TCP RST_ACK from DDC to SNIP
Incorrect stream above, actually:
1) TCP SYN from SNIP to DDC
2) TCP SYN_ACK from DDC to SNIP
3) SSL Client Hello Handshake using TLS 1.2 from SNIP to DDC
4) TCP RST_ACK from DDC to SNIP
Jason Samuel has a post today where he recommends disabling TLS 1.2 on the Windows server. Try this tool – https://www.nartac.com/Products/IISCrypto
Hi Carl, do you know a way to force Password 2 to come as a new page after you successfully login with username password. In example for Radius SMS messages this is very useful. For Netscaler 10.x this was accomplished by editing login.js.
Great blog, and great post 🙂
In other words you want to hide the 2nd password field and instead rely on RADIUS challenge. I have not seen any instructions for NetScaler 11 yet.
In the file
/netscaler/ns_gui/vpn/js/gateway_login_form_view.js, you can comment out the lineform.append(field_pass2);. Not sure if this works with your 2FA solution. Not sure if this sticks after a reboot.Hi Carl,
thanks for your quick replies. Unfortunately when i do this, it does not move to a new page where it asks for:
Additional Information Required
Please type your response below.
Please respond to the challenge: SMS challenge sent to mobile device.
Think i will go for a support ticket on this 🙂
Hi Carl,
thank you for amazing blog! It helps me every day in the IT life 🙂 My question is how can i in this NS 11.0 62.10 Build exchange two password fields Passw1 and Passw2? Earlier I could do this with login.js file and now? It seems no more working with this build. Thanks!
I think the new Portal Theme method restricts the edits you can make in the actual theme files. I’m hoping somebody figures out the secret or this gets addressed in a newer build. I saw on the forums that it’s possible to revert to the older Custom Theme method with the customtheme.tar.gz file.
Hi Carl, thank you for the answer. I have tried to change the /netscaler/ns_gui/vpn/js/gateway_login_form_view.js File but with no success. Also tried to change /var/netscaler/logon/themes/custom_cw_csc_X1/custom_theme.json file also with no success
What exactly is not working? It hides the 2nd password field for me.
no, no, i want to exchange the order of the fields, not to hide the second one
/netscaler/ns_gui/vpn/js/gateway_login_form_view.js contains the login form so if you want to swap the fields I assume you’d do it there.
Correct. Here is my change in the /netscaler/ns_gui/vpn/js/gateway_login_form_view.js file:
field_pass2.append(left_pass2,right_pass2);
password2.appendTo(left_pass2);
enter_passwd2.appendTo(right_pass2);
field_pass.append(left_pass,right_pass);
password1.appendTo(left_pass);
enter_passwd.appendTo(right_pass);
But it doesn not make an effect
I’m guessing you want to adjust the form.apped function calls.
Or try changing:
password2.appendTo(left_pass);
password1.appendTo(left_pass2);
it works so. 🙂 but it isnt reboot persistent 🙁
You’ll probably need to do the rc.netscaler trick to overwrite the file at boot.
Carl, please provide me a link how to do it. Thanks!
https://www.carlstalhood.com/netscaler-gateway-virtual-server/#savecustomizations
Perfect! Thank you very much Carl! It seems to be a solution to swap the fields in the x1 Theme)
So, this code is functional and works:
/netscaler/ns_gui/vpn/js/gateway_login_form_view.js:
field_pass.append(left_pass2,right_pass2);
password2.appendTo(left_pass);
enter_passwd2.appendTo(right_pass2);
field_pass2.append(left_pass,right_pass);
password1.appendTo(left_pass2);
enter_passwd.appendTo(right_pass);
Then copy /netscaler/ns_gui/vpn/js/gateway_login_form_view.js to /var and modify /nsconfig/rc.netscaler Just add a line:
cp /var/gateway_login_form_view.js /netscaler/ns_gui/vpn/js/gateway_login_form_view.js
Now it is reboot persistent.
Seems the new release has a bug in the EULA. Such that even if you don’t enable it it comes back.
I have the login page set without an EULA. Login, go to the storefront, logout and poof EULA is there on next login.
Its cool, but the problem is you can check the box and login with out reading the text.
Called Citrix about the bug, but in the meantime, I would like to add some legal text to the login page, but using index.html does not work as in the past. Any ideas?
Is the new EULA feature sufficient? https://www.carlstalhood.com/netscaler-gateway-11-virtual-server/#disclaimer
Carl, I have entered logon changes as described, but they do not show up, and I don’t have integrated caching. Thanks.
Similar thread at http://discussions.citrix.com/topic/366783-netscaler-11-portal-theme-login-page-customizations/. Maybe a bug?