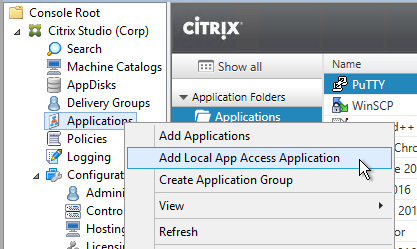
Navigation
- Change Log
- Create Group Policy Objects (GPOs)
- Windows Group Policy ADMX Templates
- Microsoft Edge (Chromium)
- Microsoft Teams
- Microsoft FSLogix
- OneDrive ADMX Template
- Group Policy Computer Settings for VDAs
- VDA Receiver Configuration
- Group Policy User Settings for VDAs (separate article)
💡 = Recently Updated
Change Log
- 2023 July 22 – Windows GPO ADMX Templates – added Administrative Templates (.admx) for Windows 11 2023 Update (23H2)
- 2023 Aug 23 – FSLogix– updated group policy screenshots for FSLogix 2210 Hotfix 2
- 2021 Mar 15 – Edge – updated link for Kasper Johansen Microsoft Edge in Citrix – Revamped
- 2021 Feb 25 – OneDrive – added link to CTP James Rankin Managing OneDrive on Citrix Virtual Apps and Desktops
- 2020 Oct 15 – Teams – Citrix script to disable GPU for each user
- 2020 Sep 18 – OneDrive .admx – updated for machine-wide installation
- 2020 July 9 – Computer Settings – Use WDDM graphics display driver for Remote Desktop Connections = Disabled for Windows 10 version 2004 with VDA earlier than VDA 2006. Source = Windows 10 v2004 – Citrix Known Issues
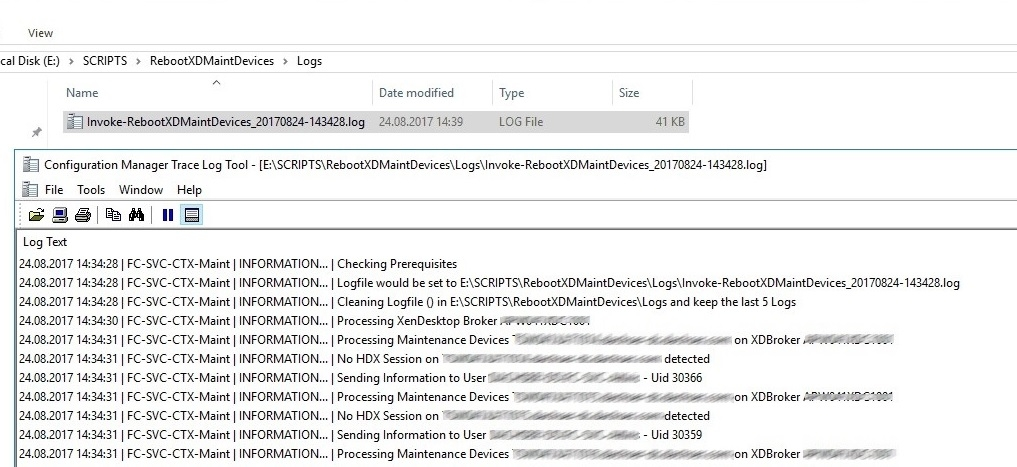
- 2020 Jun 23 – Group Policy Computer Settings for VDAs – added Audit process tracking for Director.
- 2020 May 28 – FSLogix – added link to CTP James Kindon Navigating Azure Storage options for FSLogix Containers
- 2020 May 7 – Teams – Microsoft recommends excluding the Media-Stack folder from profile roaming.
- 2020 Apr 23 – Teams – added Don’t install Microsoft Teams with new installations or updates of Office to prevent the per-user install.
- 2020 Apr 23 – Teams – added Prevent Microsoft Teams from starting automatically after installation
- 2020 Apr 22 – GPO Computer Settings – added Show clear logon background setting – source = Citrix Discussions
- 2020 Apr 10 – FSLogix – added link to CTP James Rankin and CTP Ryan Revord Spreading users over multiple file shares with FSLogix Profile Containers.
- 2020 Apr 7 – FSLogix – added link to FSLogix in a Citrix Provisioning environment
- 2020 Mar 29 – FSLogix and Citrix – multi-session write-back for FSLogix Profile Container
- 2020 Mar 16 – FSLogix – added links to CTX270433 Outlook Search Indexing Fails on Windows Server 2019 VDA and CTP James Kindon Windows Search in Server 2019 and Multi-Session Windows 10.
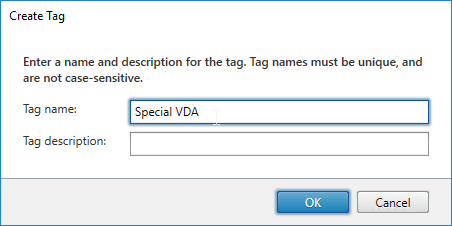
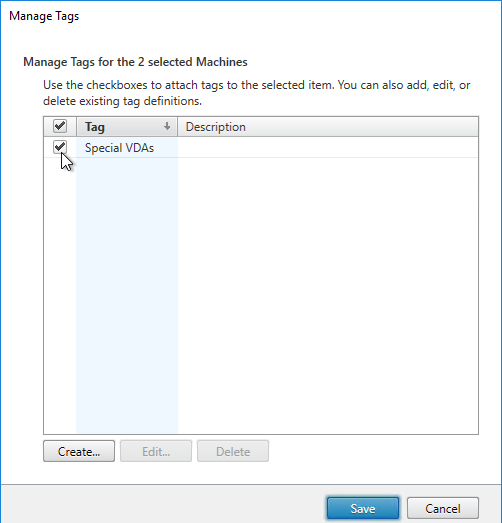
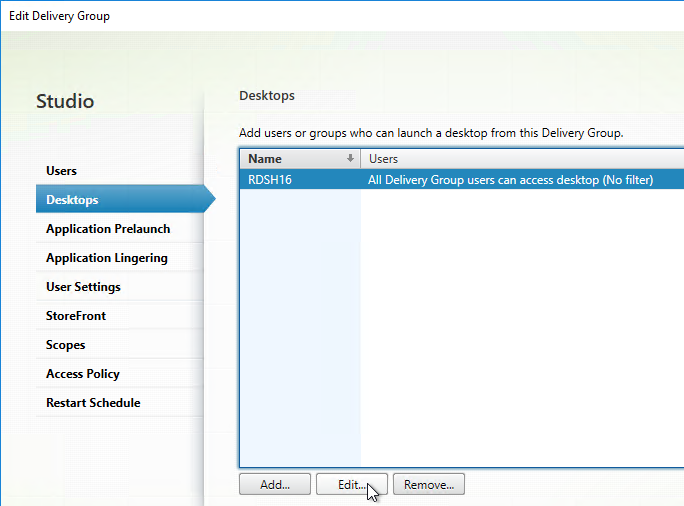
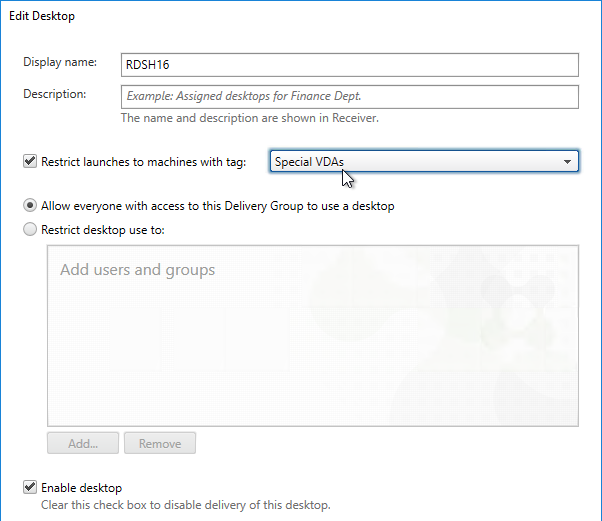
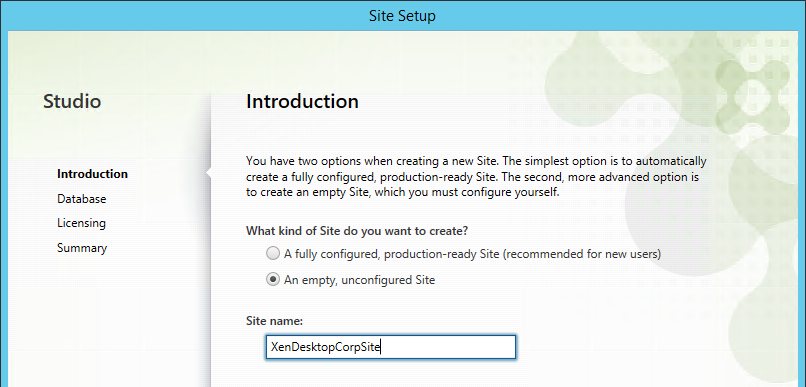
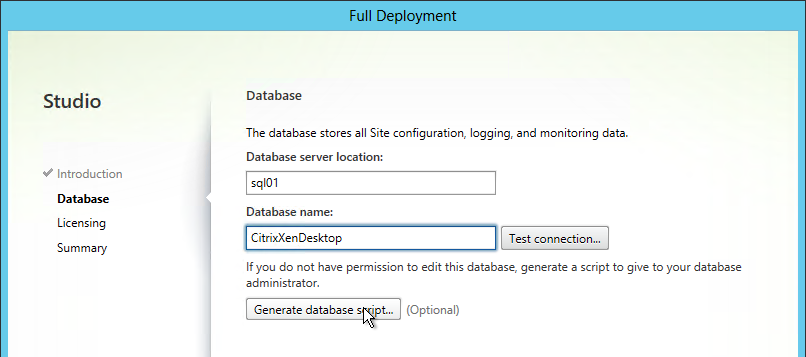
Create Group Policy Objects
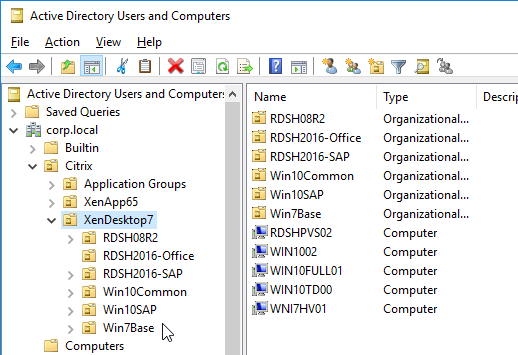
- Within Active Directory Users and Computers (dsa.msc), create a parent Organizational Unit (OU) to hold all VDA computer objects.
- Then create sub-OUs, one for each Delivery Group. The VDA computer objects for each Delivery Group should be placed in these sub-OUs. Notes:
- The only objects that belong in these VDA OUs are the VDA computer accounts.
- There’s no need to put any user accounts in these VDA OUs since Group Policy Loopback Processing mode will handle user settings.
- The computer objects for the Citrix brokering infrastructure machines (Controllers, StoreFront, Director, etc.) should go in normal server OUs, and not in the VDA OUs.
- Separate VDA sub-OUs for each Delivery Group lets you apply different GPO settings to each Delivery Group.
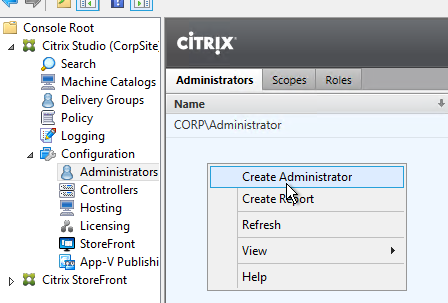
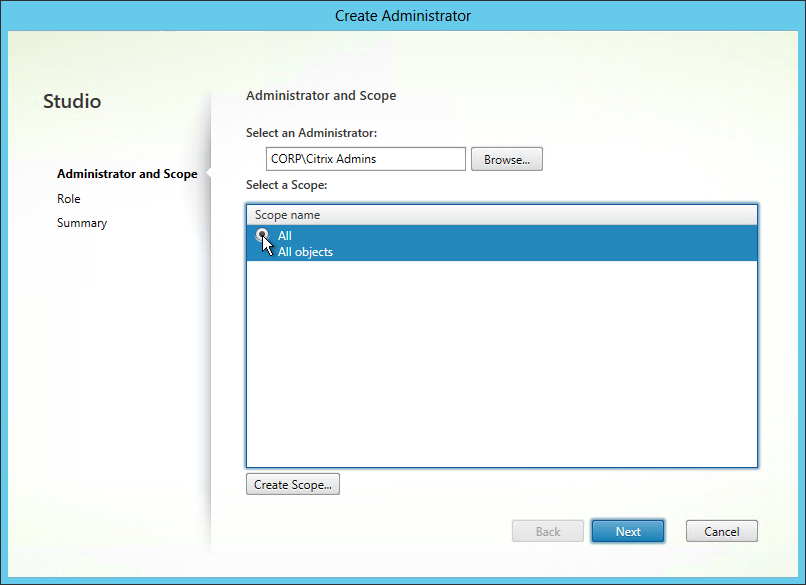
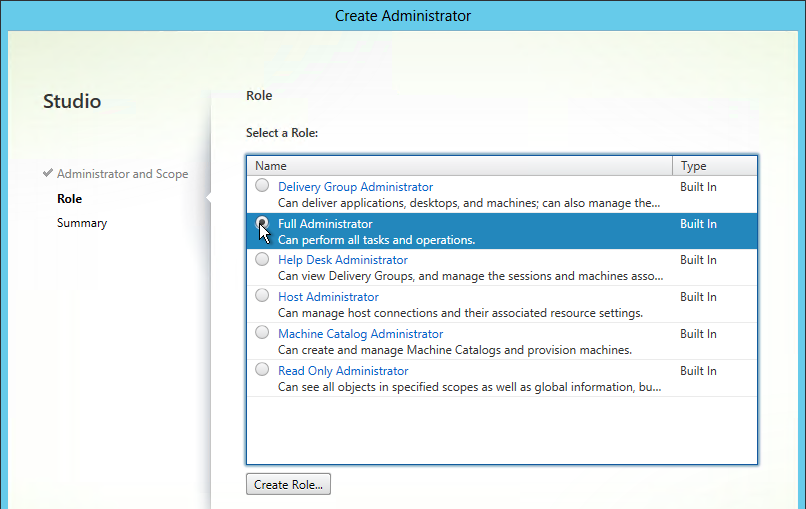
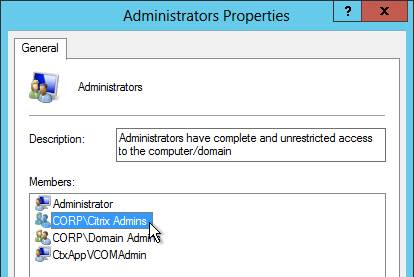
- Grant Citrix Admins the permission to add computer objects to the VDA OUs.
- Grant Citrix Admins the permission to link GPOs to the VDA OUs.
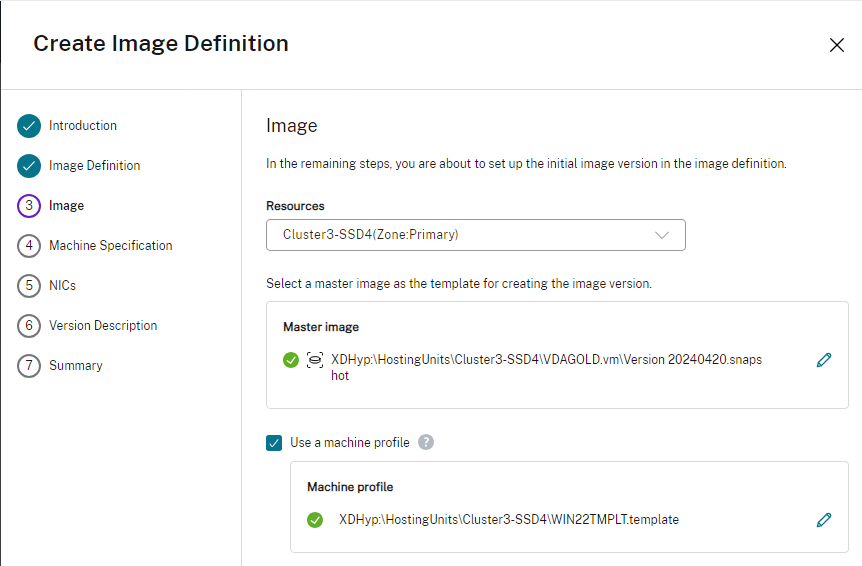
- Master images should be placed in the VDA OUs so the VDA GPO Computer Settings can be burned into the master image. This avoids timing issues when non-persistent machines reboot and GPO settings haven’t applied yet.
- The only objects that belong in these VDA OUs are the VDA computer accounts.
- Move the VDAs from the Computers container to one of the Delivery Group OUs.
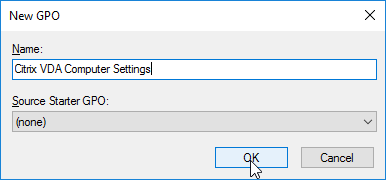
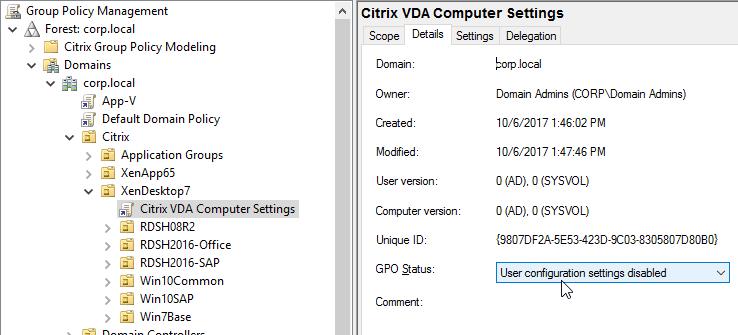
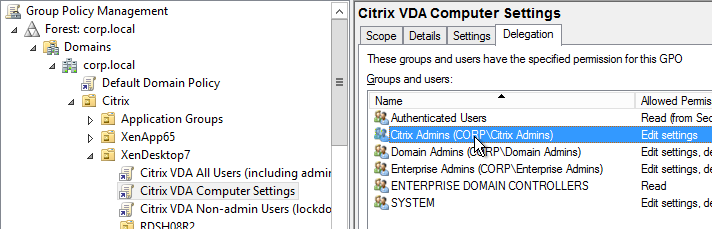
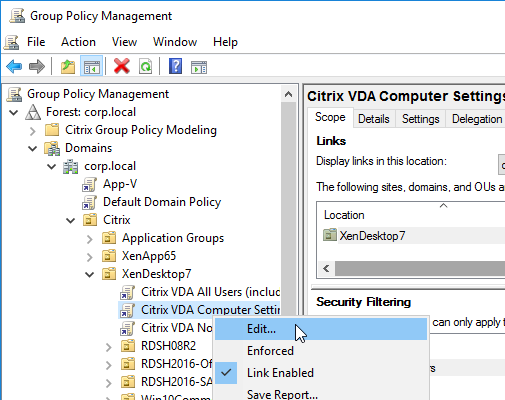
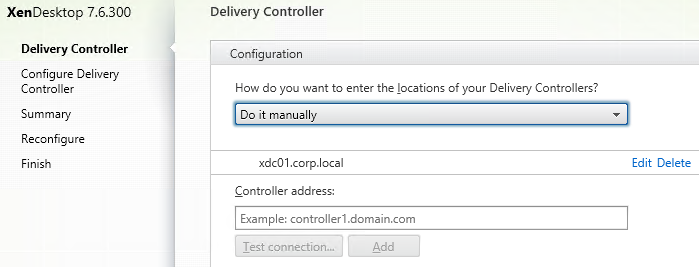
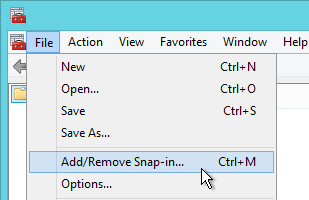
- Within Group Policy Management Console (gpmc.msc), create a Group Policy Object (GPO) called Citrix VDA Computer Settings, and link it to one of the Citrix OUs. This particular GPO usually applies to all Delivery Groups, and thus should be linked to the parent OU. Or you can link it to Delivery Group-specific sub-OUs.
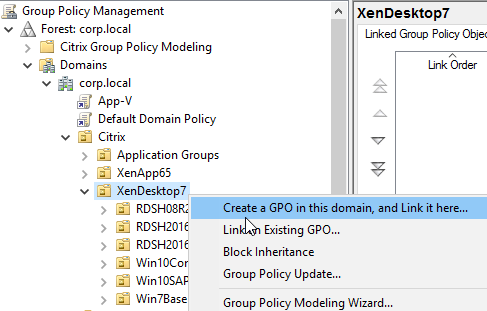
- On the left, click the new VDA Computer Settings GPO to highlight it.
- On the right, switch to the Details tab.
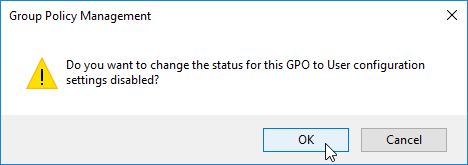
- Change the GPO Status drop-down to User configuration settings disabled. This GPO will only contain computer settings.
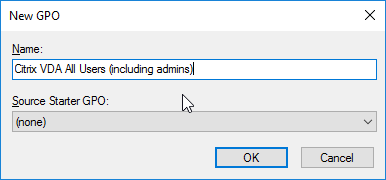
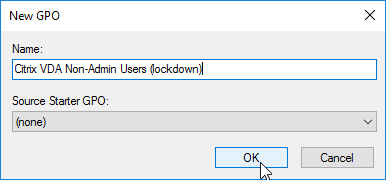
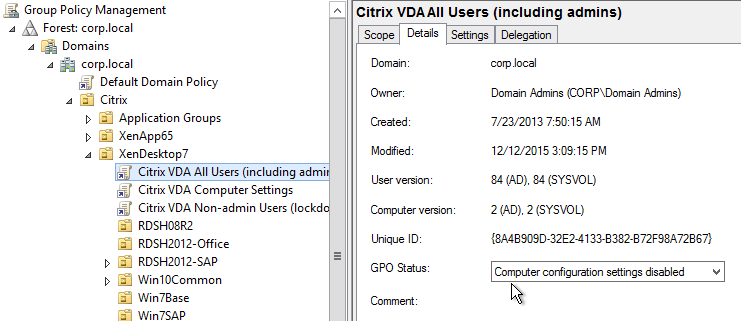
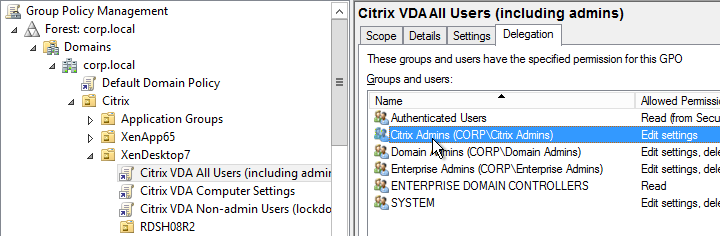
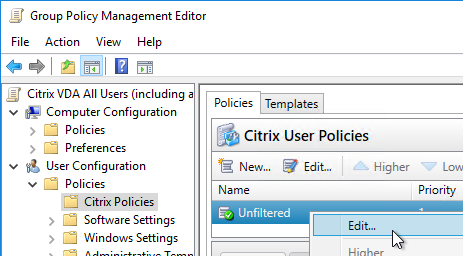
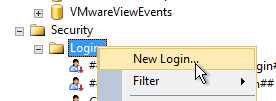
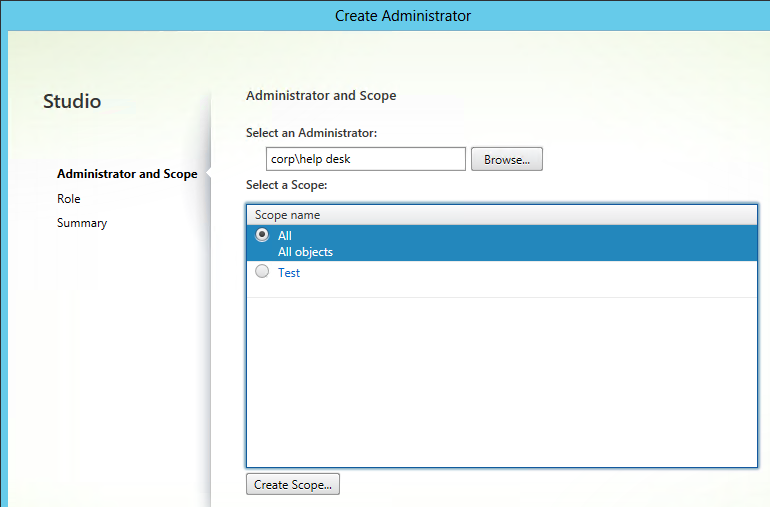
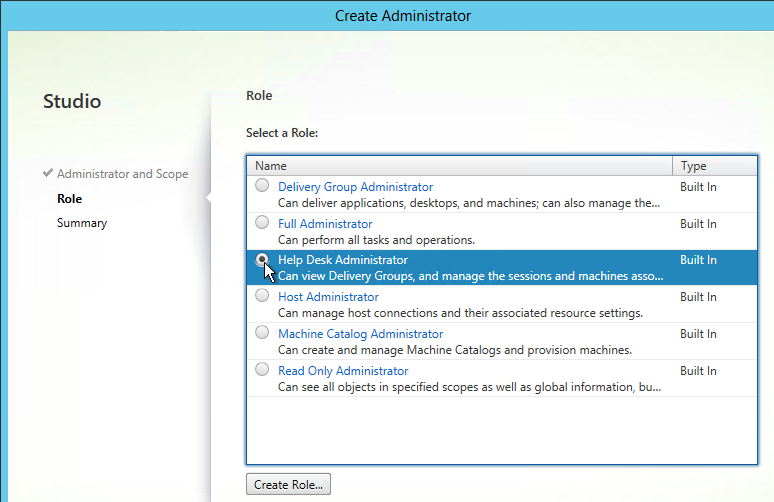
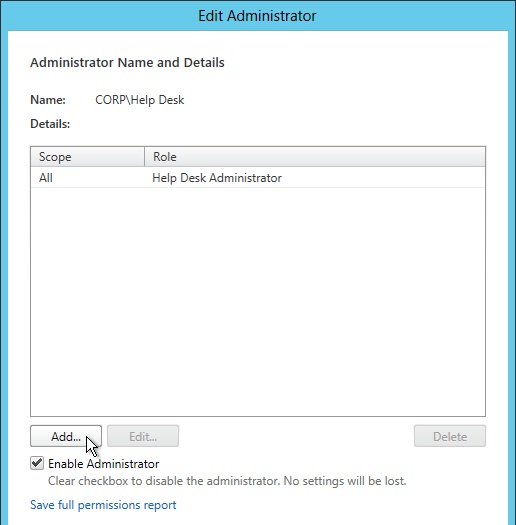
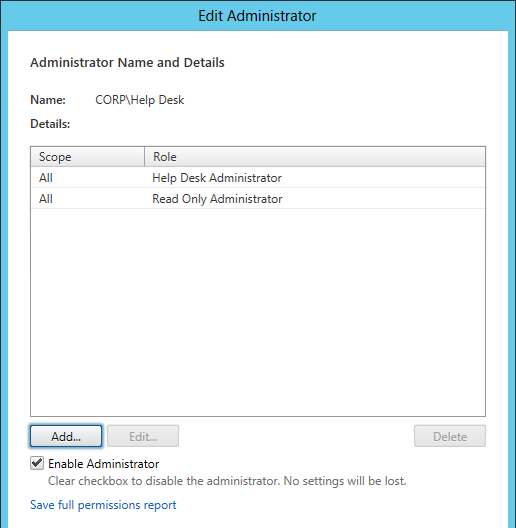
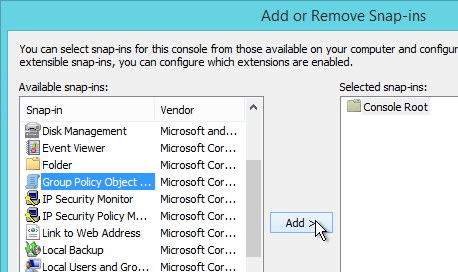
- Create and link two new Citrix-specific GPOs (in addition to the Citrix VDA Computer Settings GPO).
- One of the GPOs is called Citrix VDA All Users (including admins), and the other is called Citrix VDA Non-Admin Users (lockdown).
- Modify the Details page of both of these GPOs, and set GPO Status to Computer configuration settings disabled. These GPOs will only contain user settings.
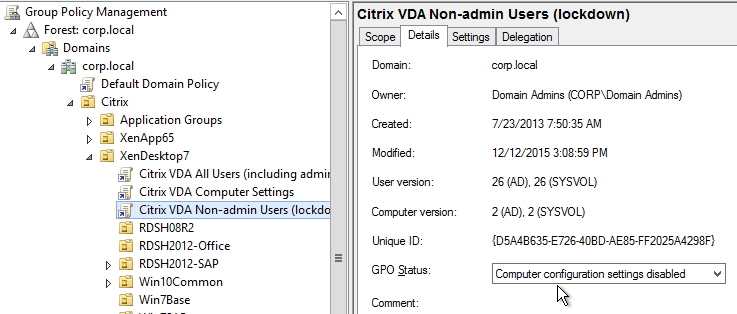
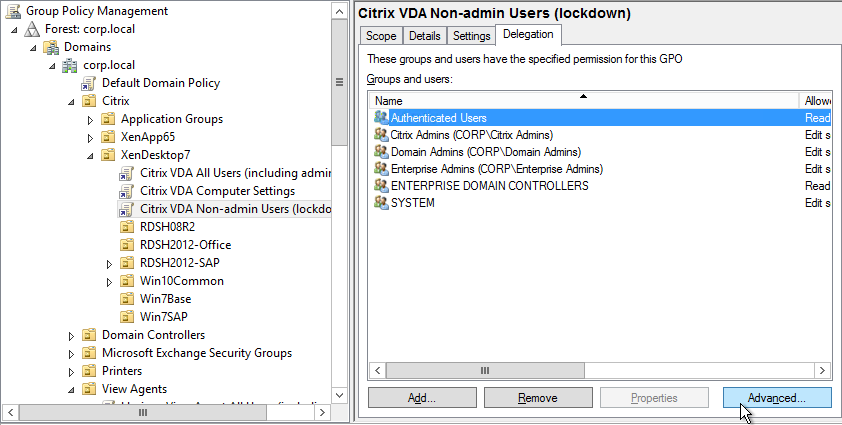
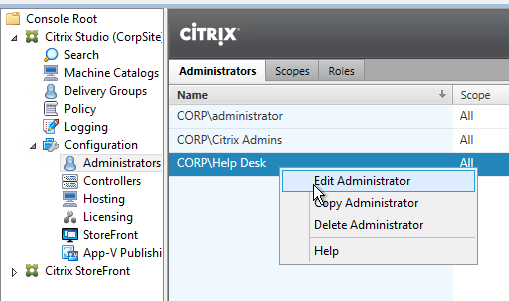
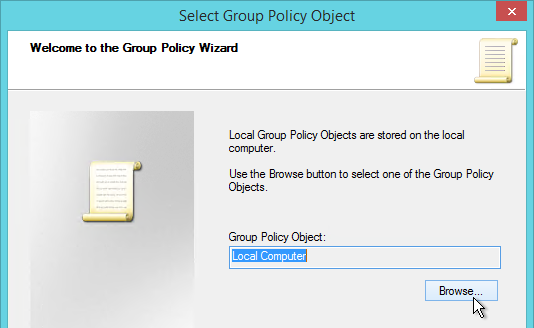
- On the left, click the Citrix VDA Non-Admin Users GPO to highlight it.
- To delegate administration of this GPO to Citrix Admins:
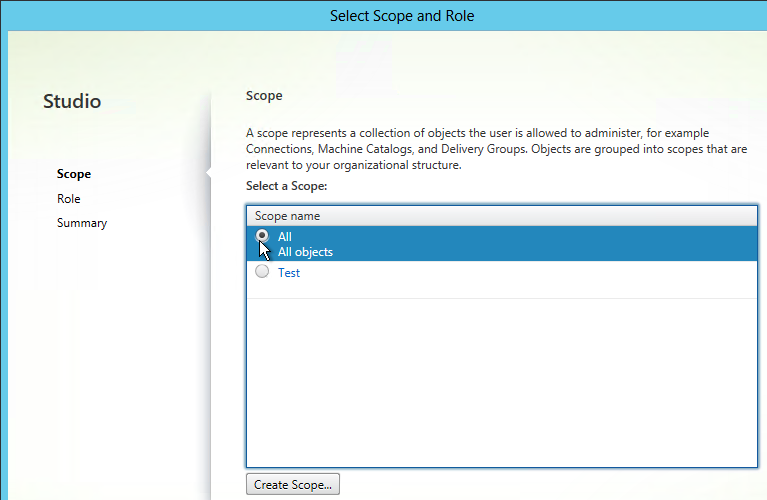
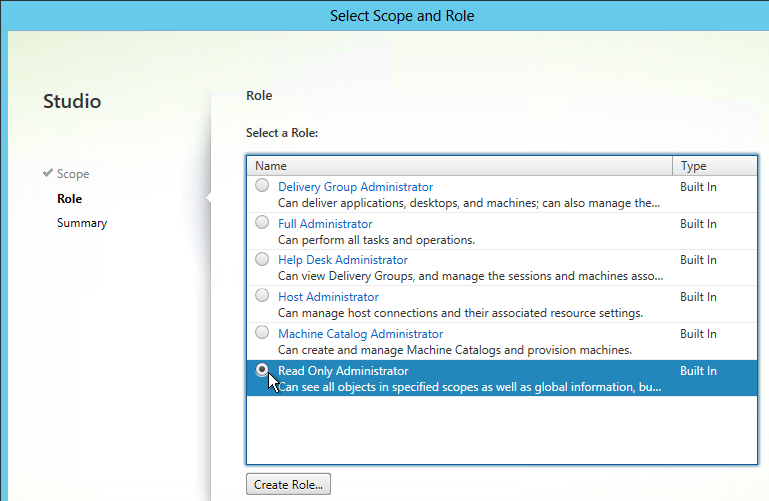
- On the right, switch to the Delegation tab, and click Add.
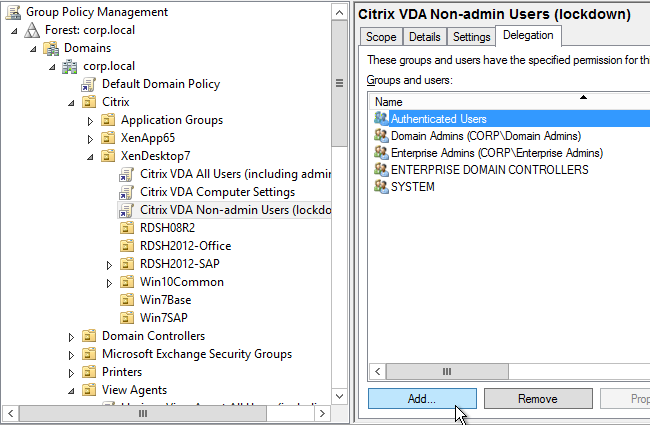
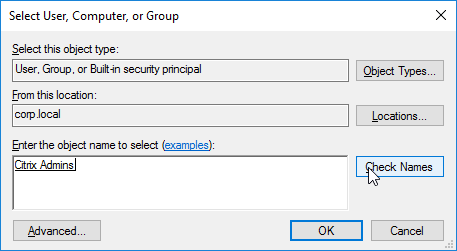
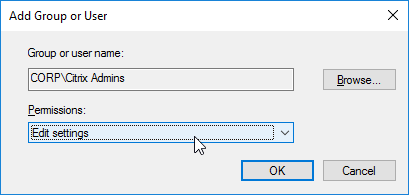
- Find your Citrix Admins group, and click OK.
- In the Add Group or User window, change the Permissions to Edit settings, and click OK.
- On the right, switch to the Delegation tab, and click Add.
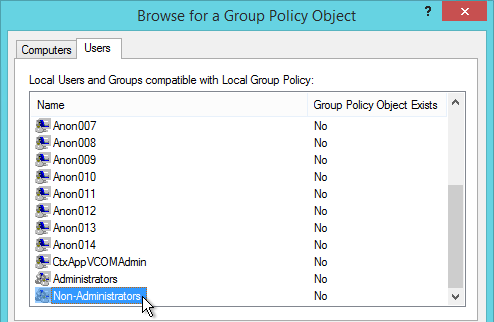
- To prevent the user lockdown GPO from applying to administrators:
- On the Delegation tab, click Advanced.
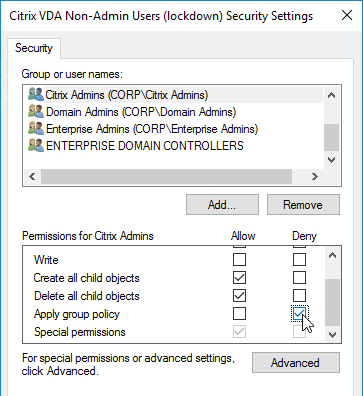
- On the top half, click the Citrix Admins group to highlight it.
- Scroll down to reveal the Apply Group Policy row, and then place a check mark in the Deny column.
- If desired, you can also deny the GPO to Domain Admins and Enterprise Admins.
- Click OK to close the Security Settings window.
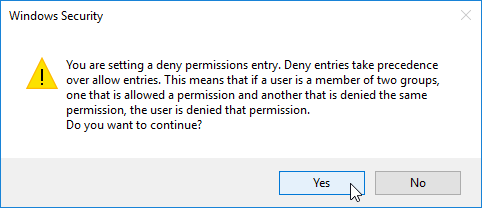
- Click Yes when asked to continue.
- On the Delegation tab, click Advanced.
- To delegate the other two GPOs, add the Citrix Admins group with Edit Settings permission. But don’t deny Apply Group Policy. The deny entry is only needed on the Lockdown GPO.
Windows Group Policy Templates
The latest Windows 10 or Windows 11 GPO templates includes the GPO settings for Windows Server.
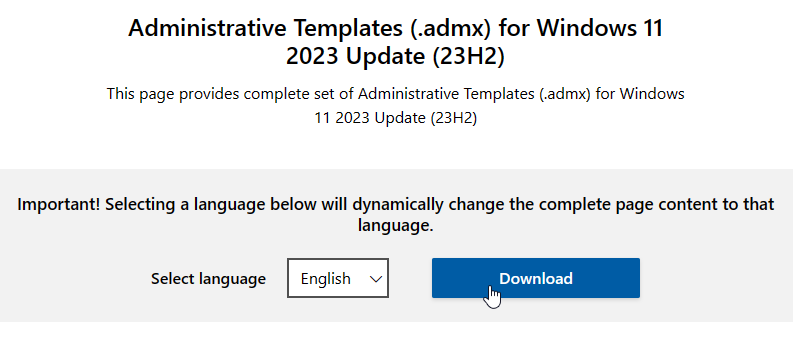
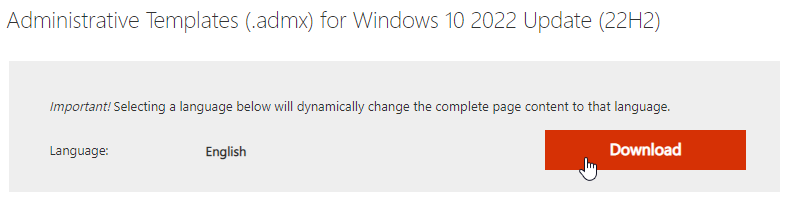
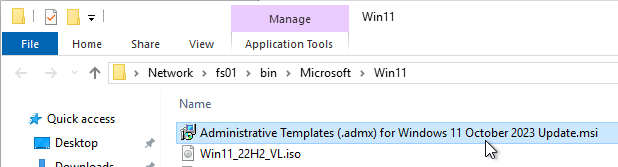
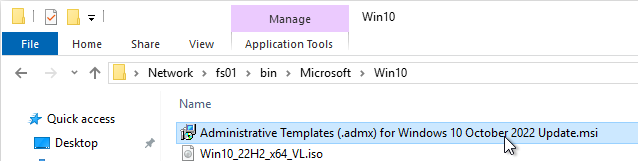
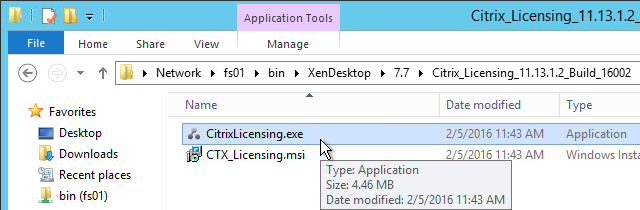
- Download the Administrative Templates (.admx) for Windows 10 2022 Update (22H2) or Administrative Templates (.admx) for Windows 11 2023 Update (23H2).
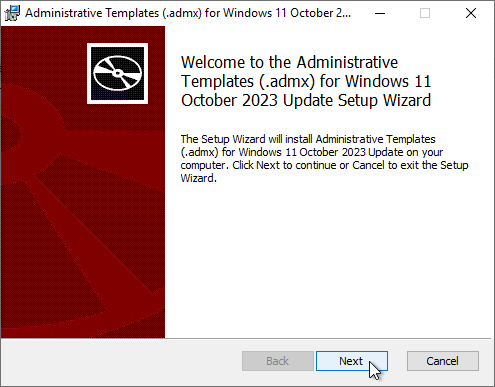
- Run the downloaded Administrative Templates (.admx) for Windows.msi file.
- In the Welcome to the Administrative Templates (.admx) for Windows Setup Wizard page, click Next.

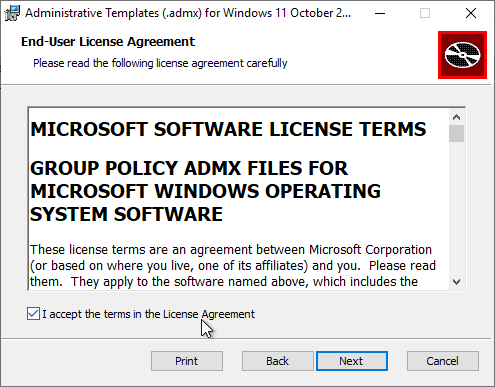
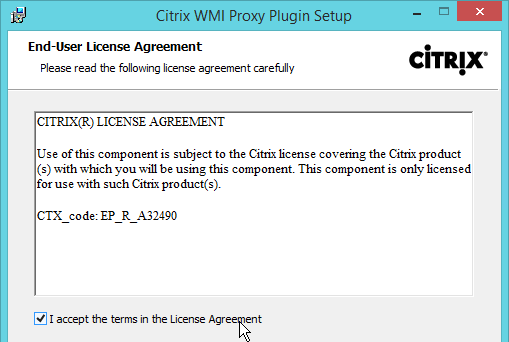
- In the End-User License Agreement page, check the box next to I accept the terms and click Next.
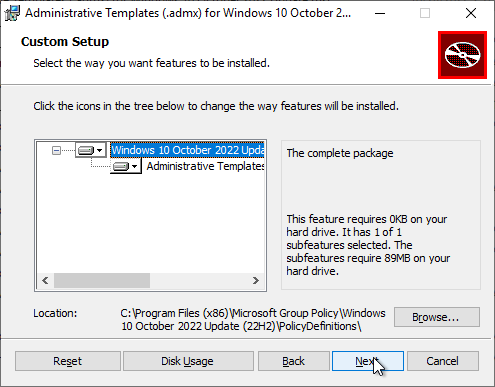
- In the Custom Setup page, record the Location field since you’ll need to go there later. Click Next.

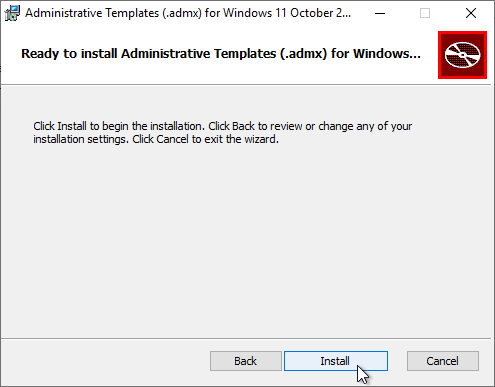
- In the Ready to install Administrative Templates (.admx) for Windows page, click Next.
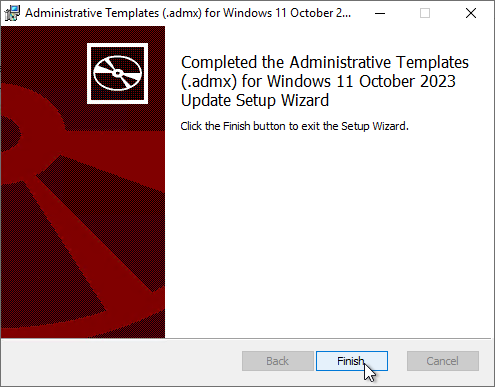
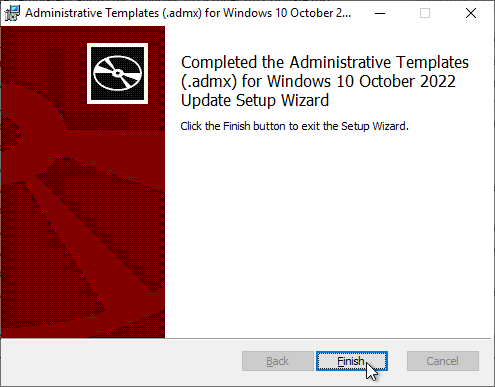
- In the Completed the Administrative Templates (.admx) for Windows Setup Wizard page, click Close.
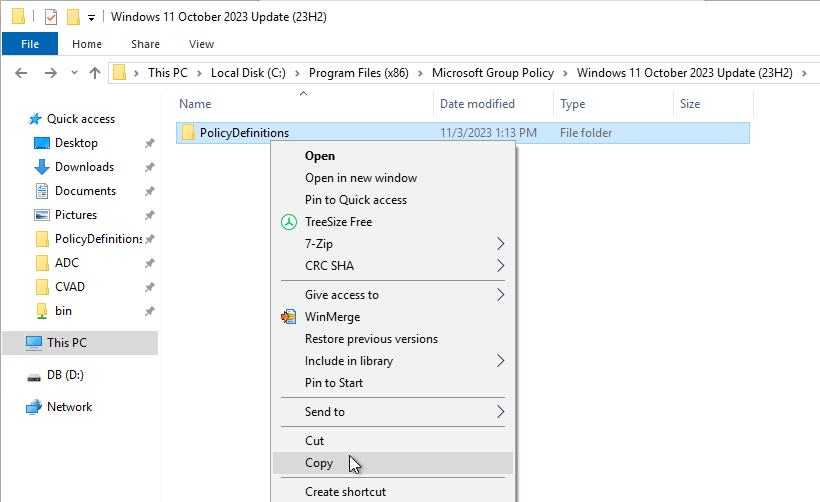
- In File Explorer, go to C:\Program Files (x86)\Microsoft Group Policy\Windows 11 October 2023 Update (23H2) or C:\Program Files (x86)\Microsoft Group Policy\Windows 10 October 2022 Update (22H2).
- Copy the PolicyDefinitions folder.
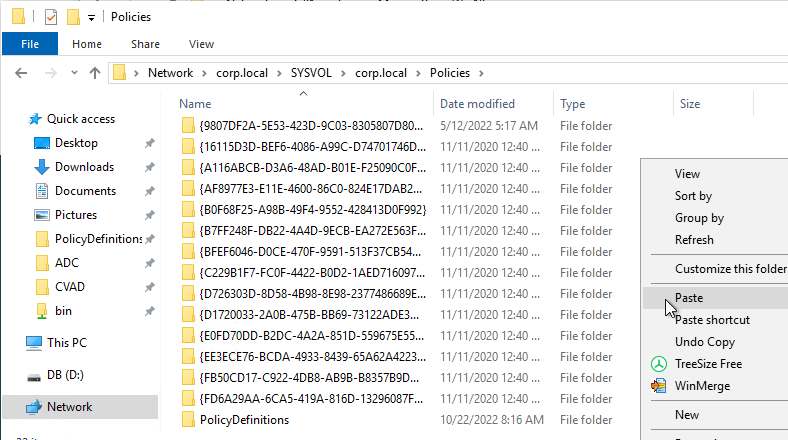
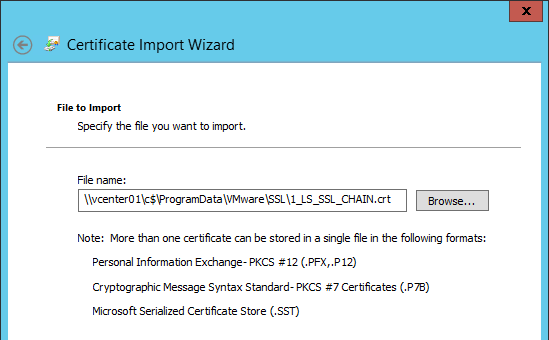
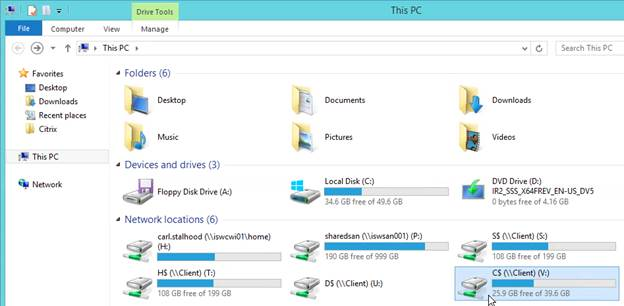
- Go to your domain’s sysvol (e.g., \\corp.local\sysvol) and in the corp.local\Policies folder, paste the PolicyDefinitions folder. If you don’t have this folder, then you can create it. Or copy the files to C:\Windows\PolicyDefinitions as detailed next.
- If prompted, replace the existing files.
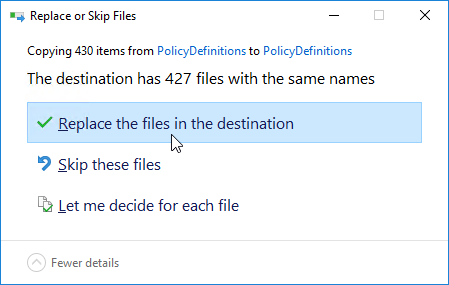
- If prompted, replace the existing files.
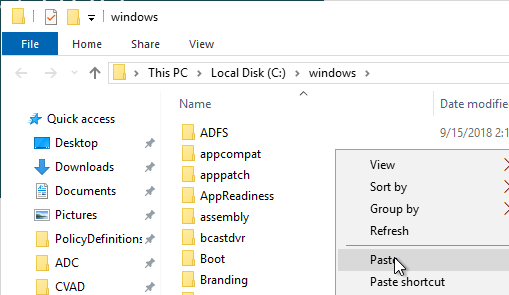
- If your Sysvol does not have a PolicyDefinitions folder, then instead go to C:\Windows\ and paste the folder. Overwrite the existing files.
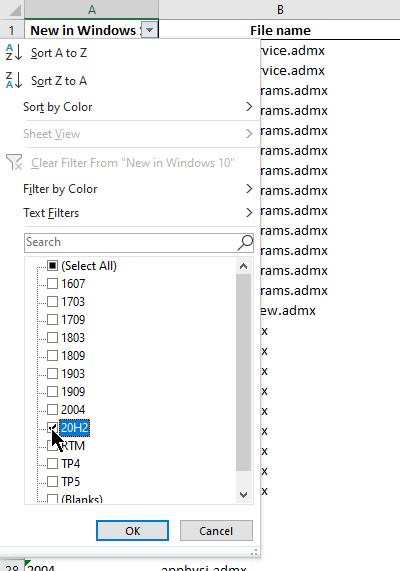
See Group Policy Settings Reference Spreadsheet for Windows 11 2023 Update (23H2) for a spreadsheet containing all GPO settings in Windows.
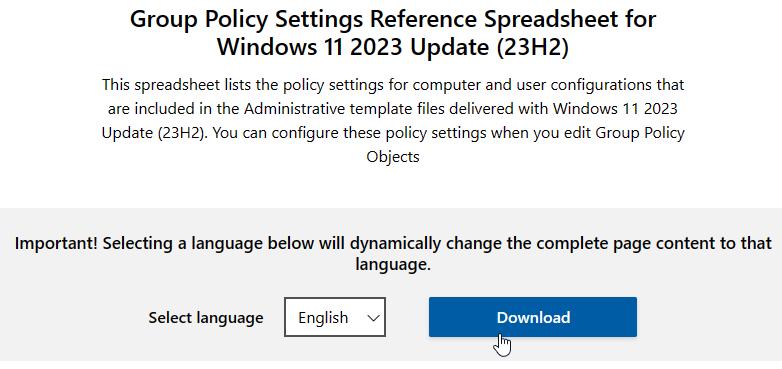
The spreadsheet can be filtered to only show the newest settings.
Microsoft Edge (Chromium)
Download and install Microsoft Edge for Business on your VDA machines or Horizon Agent machines.
Installation and Configuration instructions can be found at Kasper Johansen Microsoft Edge in Citrix – Revamped. The article details group policies for Edge.
Avanite Roaming Edge Chromium details the folders that should be roamed by Citrix Profile Management (UPM) or VMware Dynamic Environment Manager (DEM).
Microsoft Teams
Prevent the per-user version of Teams from installing with Office 365 (aka Microsoft 365 apps). Configure this GPO setting before installing Office. Then you can later install the machine-wide version of Teams. More details at Microsoft Docs.
This setting requires the latest Office GPO templates to be installed.
- Edit a GPO that contains Computer Settings.
- Updates – Computer Configuration | Policies | Administrative Templates | Microsoft Office 2016 (Machine) | Updates
- Don’t install Microsoft Teams with new installations or updates of Office = enabled
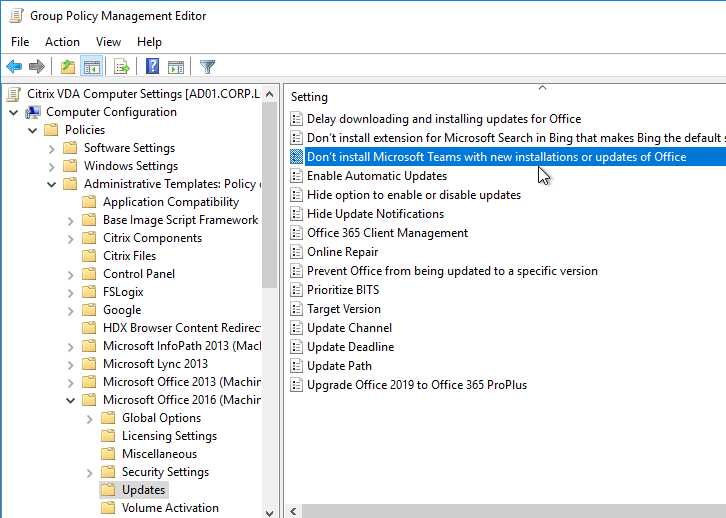
- Don’t install Microsoft Teams with new installations or updates of Office = enabled
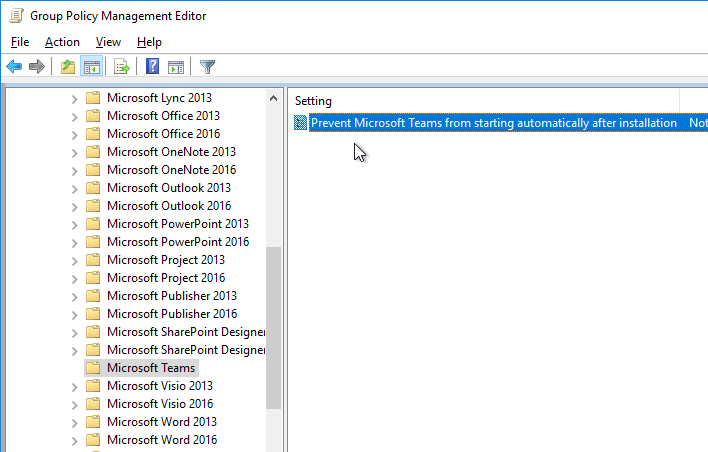
Prevent Microsoft Teams from starting automatically after installation. Set this GPO setting before you install Teams. This setting requires the latest Office GPO templates to be installed.
- Edit a GPO that contains User Settings. These User Settings probably won’t apply unless you enable Group Policy Loopback Processing in a computer settings GPO.
- Teams – User Configuration | Policies | Administrative Templates | Microsoft Teams
- Prevent Microsoft Teams from starting automatically after installation = enabled
- Prevent Microsoft Teams from starting automatically after installation = enabled
Install Teams using the machine-based installer. See Manuel Winkel Install Teams & OneDrive in Citrix (Machine-Based) and CTP James Rankin Microsoft Teams on Citrix Virtual Apps and Desktops, part #1 – installing the damned thing.

- The Machine-wide installer does not update itself. You must periodically download the latest version, uninstall the Machine-wide installer, and install the latest version.
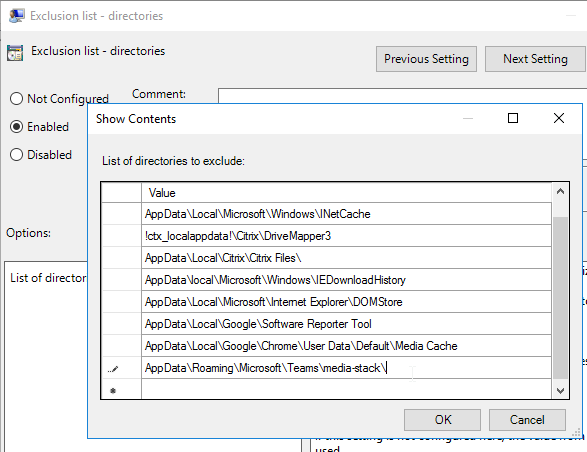
Microsoft recommends excluding the Media-Stack folder from roaming. Add the exclusion for AppData\Roaming\Microsoft\Teams\media-stack\ to Citrix Profile Management’s Exclusion List – Directories setting.
If your VDAs don’t have GPUs, then disable GPU in Teams to reduce CPU. Citrix has a PowerShell script that can disable this setting for each user. Also see:
- CTP James Rankin Microsoft Teams on Citrix Virtual Apps and Desktops, part #2 – default settings and JSON wrangling
- CTP James Rankin Microsoft Teams on Citrix Virtual Apps and Desktops, part #3 – 18 tips for optimizing performance
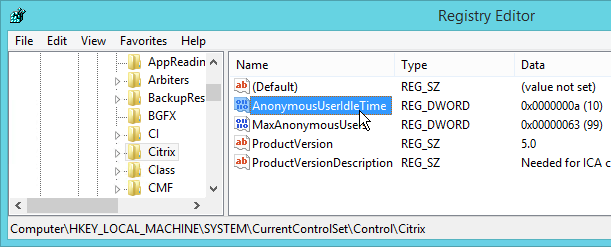
Microsoft FSLogix
If you need to roam the user’s Outlook .OST file (Outlook Cached Mode), Outlook Search Index, OneDrive cache, OneNote data, SharePoint data, Skype data, and/or Teams data, then download, install, and configure Microsoft FSLogix. FSLogix has more Office roaming features than Citrix Profile Management. A common architecture is to enable FSLogix Office Container for the Office cache files and use Citrix Profile Management for all other roaming profile files and registry keys.
Microsoft FSLogix is free for all Microsoft RDS CALs, Microsoft Virtual Desktop Access per-user CALs, and all Microsoft Enterprise E3/E5 per-user licenses. Notice that per-device licenses are excluded. See Licensing Requirements at Microsoft Docs.
G0-EUC tested FSLogix Profile Container (not Office Container) and found that it reduces capacity by 27%. (source = The impact of managing user profiles with FSLogix)
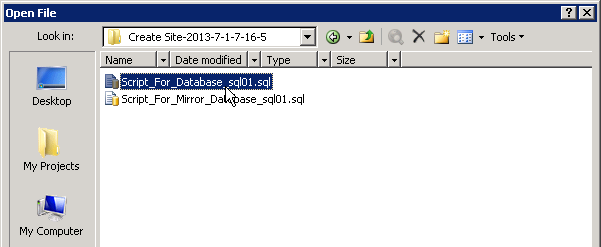
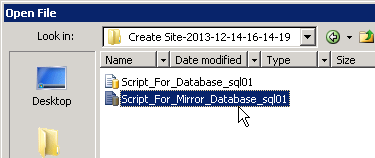
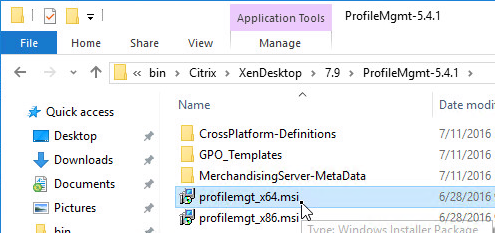
Do the following to install Microsoft FSLogix on the VDA machine:
- Go to https://aka.ms/fslogix_download.
- Extract the downloaded .zip file.
- In the FSLogix \x64\Release folder, run FSLogixAppsSetup.exe.

- Check the box next to I agree to the license terms and conditions and click Install.

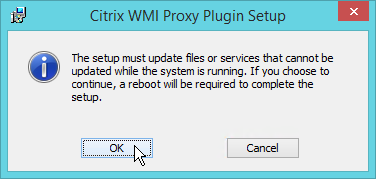
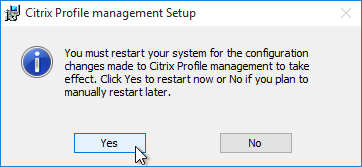
- In the Setup Successful page, click Restart.

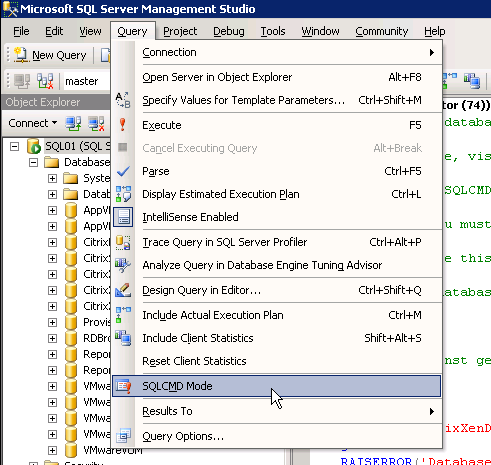
FSLogix is configured through Group Policy or by editing registry values on each FSLogix Agent machine. Here is some info on group policy configuration:
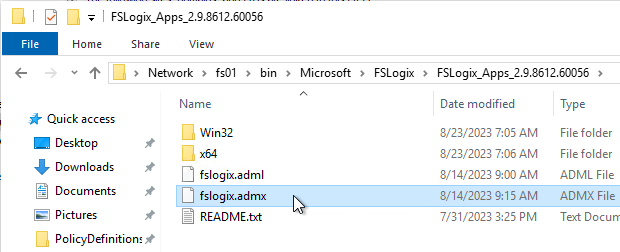
- The FSLogix .zip file contains fslogix.admx and fslogix.adml files for configuration of FSLogix through Group Policy. Copy these files to your PolicyDefinitions folder. The .adml file goes in the en-US folder.

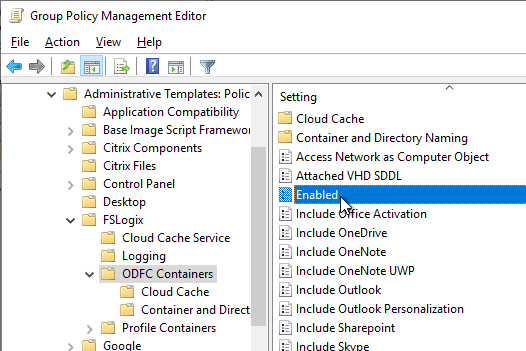
- Find the settings in Group Policy Editor at Computer Configuration | Policies | Administrative Templates | FSLogix
- Note that FSLogix 2210 Hotfix 2 (2.9.8612.60056) and newer have a different group policy structure than older versions.
- The ODFC Containers node controls Office Containers only. The Profile Containers node lets you capture the entire profile and not just Office. You can also configure both as detailed at FAQ: How to use Office 365 Containers and Profile Containers together. Citrix environments typically combine FSLogix Office Containers with Citrix Profile Management. VMware Horizon environments typically use FSLogix Profile Container to replace DEM Personalization.
- You’ll need a file share with appropriate permissions to store the Office containers or Profile Containers.
- See CTP Aaron Parker A Practical Guide to FSLogix Containers Capacity Planning and Maintenance.
- See CTP James Kindon Architecting for FSLogix Containers High Availability: VHD Location vs Cloud Cache
- See CTP James Kindon Navigating Azure Storage options for FSLogix Containers – Azure Files, Azure NetApp, file servers
- See FSLogix in a Citrix Provisioning environment for Cloud Cache with Citrix PVS.
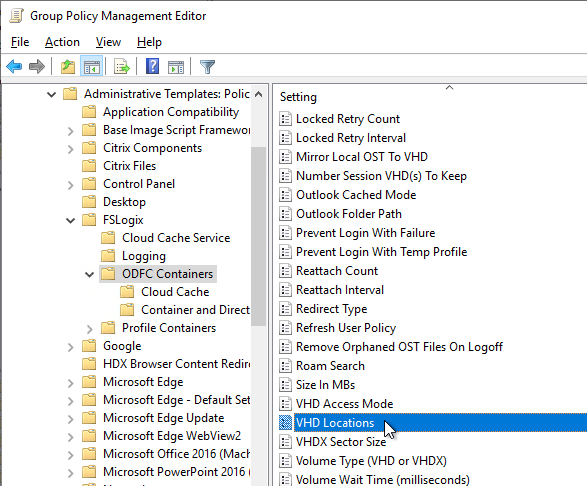
- Then configure either the VHD location setting, or the Cloud Cache Locations setting, but not both. See Configure Cloud Cache at Microsoft Docs.
- VHD Location is a machine setting that applies to all users that log into the machine. If you want different paths for different users, then configure the ObjectSpecific registry key as detailed at Microsoft Docs. CTP James Kindon uses this configuration at Designing Profile Management with Active-Active Resource Locations.
- VHDLocations can have multiple values. See CTP James Rankin and CTP Ryan Revord Spreading users over multiple file shares with FSLogix Profile Containers.
- VHDX Profile Cleanup – Aaron Parker’s Github
- VHDX Compaction – See Invoke-FslShrinkDisk.ps1 at Github
- Set Volume Type to VHDX.

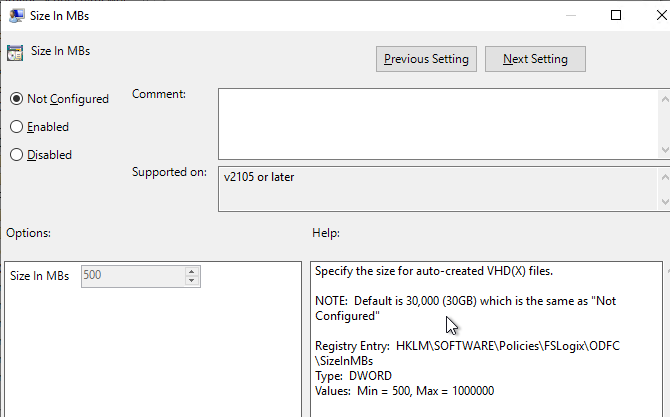
- The .vhdx files are thin provisioned and can grow up to the maximum Size in MBs, which defaults to 30 GB. Newer versions of FSLogix let you increase this size later.
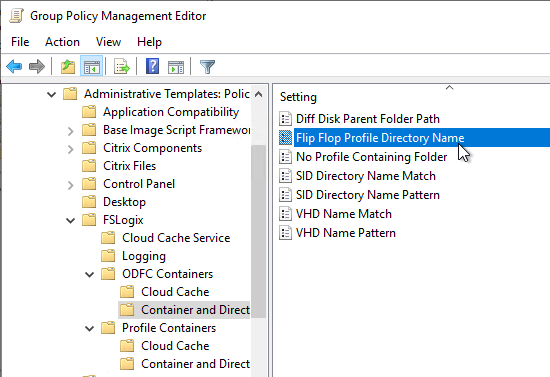
- Under Container and Directory Naming enable the setting Flip Flop Profile Directory Name.
- For Office Containers, back in the ODFC Containers node, review each of the Include settings and enable whichever data you want to include in the Office Container. More details at Configure ODFC Container at Microsoft Docs.
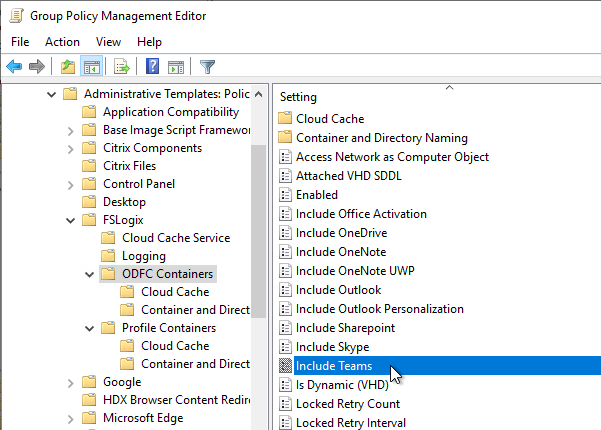
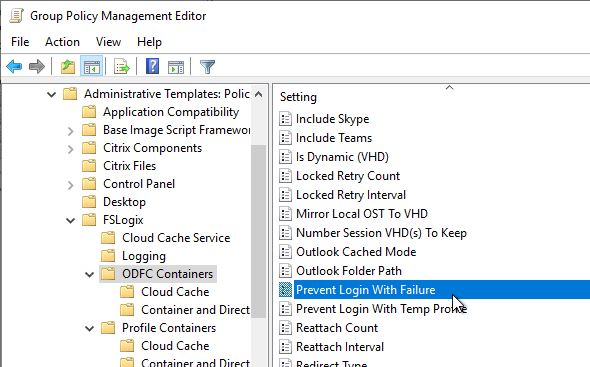
- Since an FSLogix Container can only be mounted on one machine, consider setting Prevent login with failure. This causes the user to see a window if the container is already mounted and the user will have to call the help desk to clear the other session.
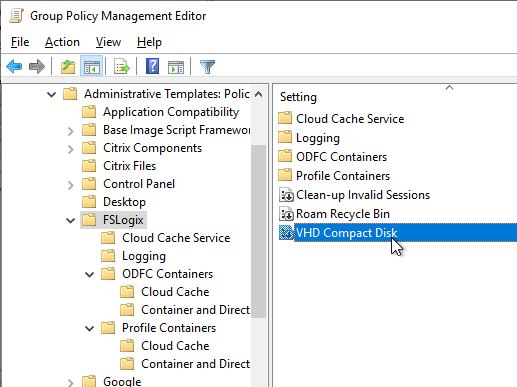
- FSLogix 2210 and newer automatically compact .vhdx files when they have free space. It’s enabled by default and is configurable on the left, directly under the FSLogix node. On the right, configure the VHD Compact Disk setting.
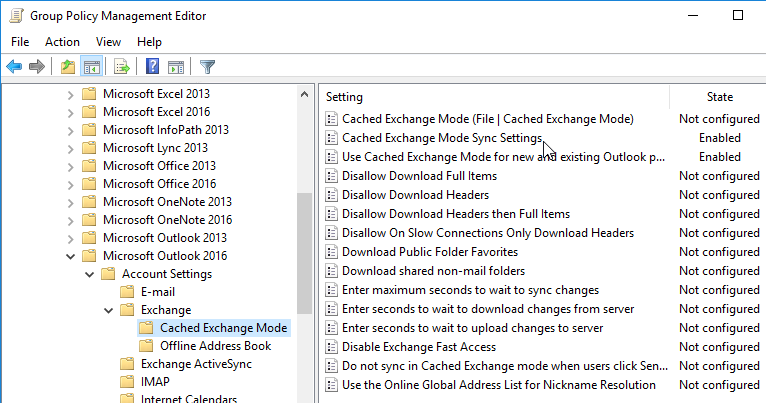
- In a Group Policy that applies to Citrix users, you might want to configure Cached Exchange Mode Sync Settings to reduce the size of the .ost files. You’ll need to install the Office GPO templates if you haven’t already. Then find the setting at User Configuration | Policies | Administrative Templates | Microsoft Outlook 2016 (also applies to 365 and 2019) | Account Settings | Exchange | Cached Exchange Mode.
Other FSLogix Configurations and Links
- Citrix Profile Management – To avoid conflicts with Citrix Profile Management, configure Citrix Profile Management to exclude the Office cache folders. See Office Container Exclusions for details.
- Citrix App Layering – The FSLogix driver might conflict with Citrix’s App Layering drivers. See Adjust driver (frxdrvvt) altitude with UniDesk.
- Citrix Blog Post Citrix App Layering and FSLogix profile containers
- See FSLogix Forum FAQs
- Microsoft Teams – When installing Microsoft Teams, use the per-machine Teams installer instead of the normal per-user Teams installer. Dale Scriven explains the per-machine Teams installer in more detail. Note that the per-machine Teams installer does not auto-update so administrators must manually install updates.
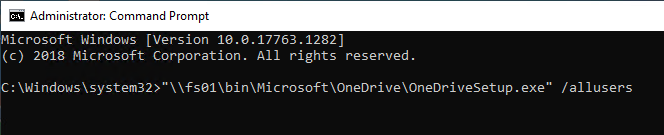
- Microsoft OneDrive – Install the sync client per machine instead of the normal per-user installer.
- Migrate existing OST/PST files – Aaron Parker’s Github
- How to open an FSLogix Support Request
Full Profile Container (not just Office):
- CTP Aaron Parker Crowd Sourced Redirections.xml for FSLogix Profile Containers.
- FSLogix in a Citrix Provisioning environment for more Redirections.
- Copy an existing user profile into an FSLogix full profile container – FSLogix Docs
- VHDX Profile Cleanup – Aaron Parker’s Github
- VHDX Compaction – FSLogix 2210 Hotfix 1 and newer have compaction built in. Or see Invoke-FslShrinkDisk.ps1 at Github
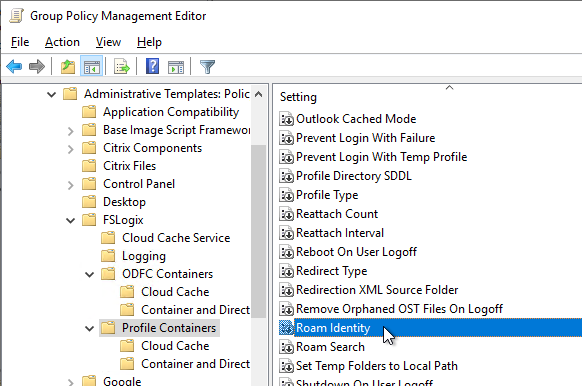
- In FSLogix 2210 Hotfix 1 and newer, enable Roam Identity.
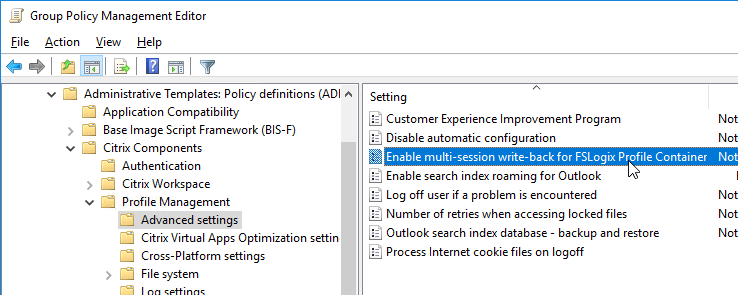
- Citrix Profile Management 2003 has a feature to perform multi-session write-back for FSLogix Profile Container.
OneDrive ADMX Template
See CTP James Rankin Managing OneDrive on Citrix Virtual Apps and Desktops 💡
Microsoft has a per-machine installation of the OneDrive sync client. To reduce the size of your roaming profiles, the per-machine install is strongly recommended over the normal per-user install of OneDrive.
To enable Files-on-demand, you’ll need the OneDrive ADMX Template.
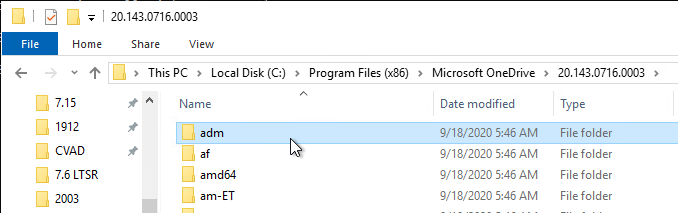
- Go to a Windows 10 1709 or Windows Server 2019 or newer machine that has OneDrive installed.
- If machine-wide installation, go to C:\Program Files (x86)\Microsoft OneDrive.
- If per-user installation, go to %localappdata%\Microsoft\OneDrive.
- Double-click the latest version.
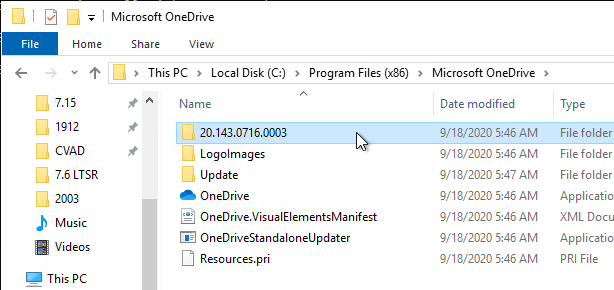
- Then open the adm folder.
- Right-click the OneDrive.admx file and copy it.
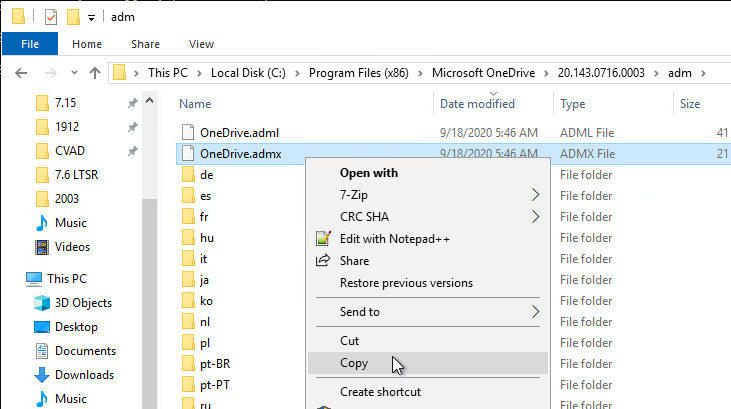
- If your domain has PolicyDefinitions in SYSVOL (\\corp.local\sysvol\corp.local\Policies\PolicyDefinitions), paste the .admx file there.

- If you don’t have SysVol PolicyDefinitions, then go to C:\Windows\PolicyDefinitions and paste the .admx file.

- If you don’t have SysVol PolicyDefinitions, then go to C:\Windows\PolicyDefinitions and paste the .admx file.
- Go back to the OneDrive files and copy OneDrive.adml.
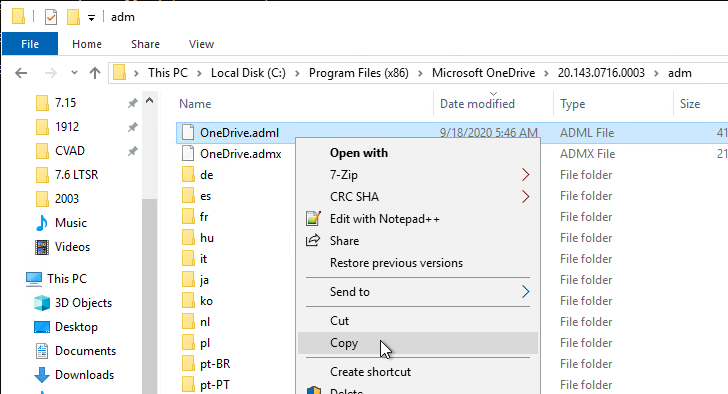
- If your domain has a PolicyDefinitions central store in SYSVOL, paste the .adml file to the en-us folder in PolicyDefinitions in SYSVOL. en-US is a subfolder of the PolicyDefinitions folder.

- If you don’t have SysVol PolicyDefinitions,, then go to C:\Windows\PolicyDefinitions\en-US and paste the .adml file. en-US is a subfolder of the PolicyDefinitions folder.

- If you don’t have SysVol PolicyDefinitions,, then go to C:\Windows\PolicyDefinitions\en-US and paste the .adml file. en-US is a subfolder of the PolicyDefinitions folder.
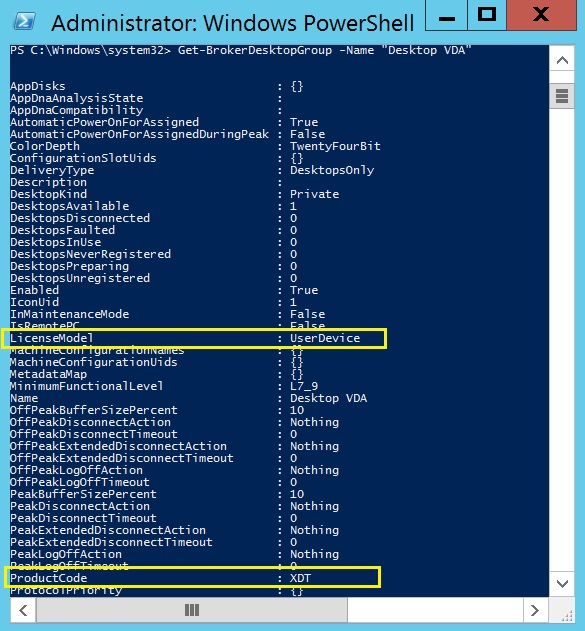
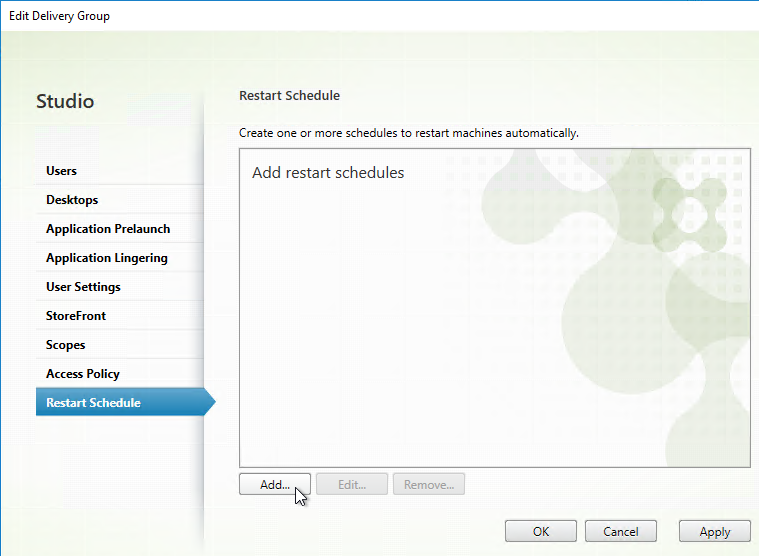
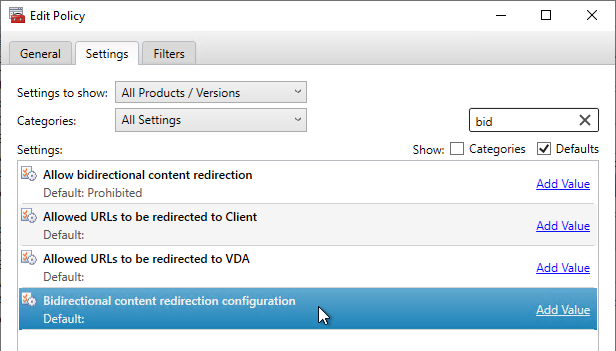
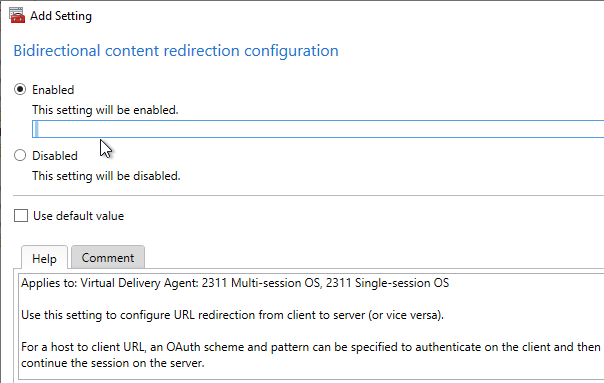
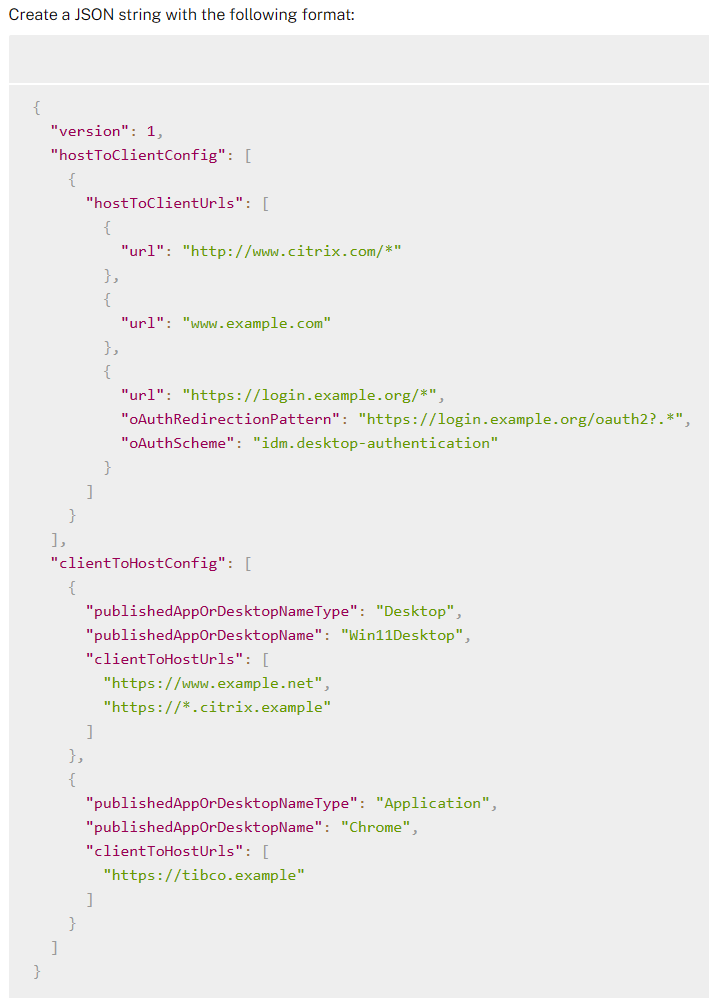
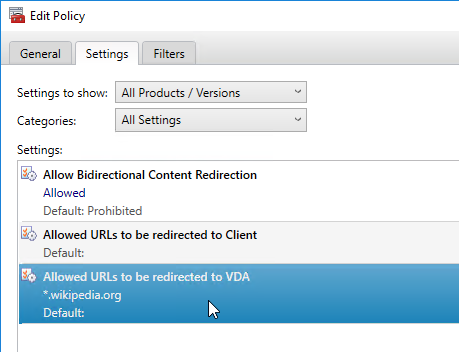
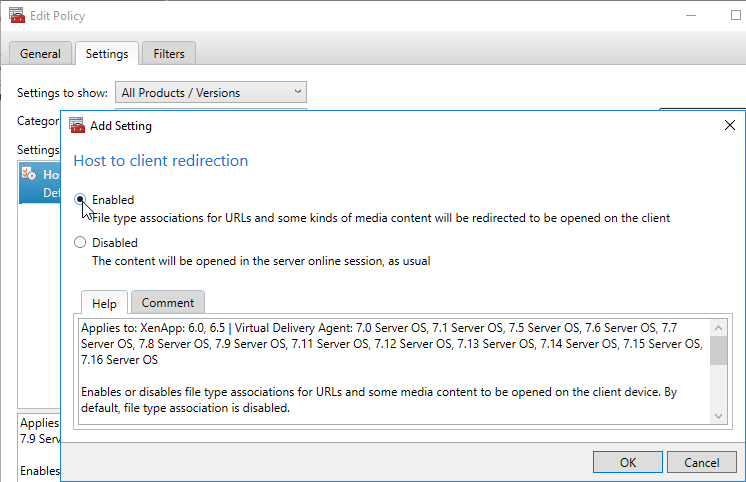
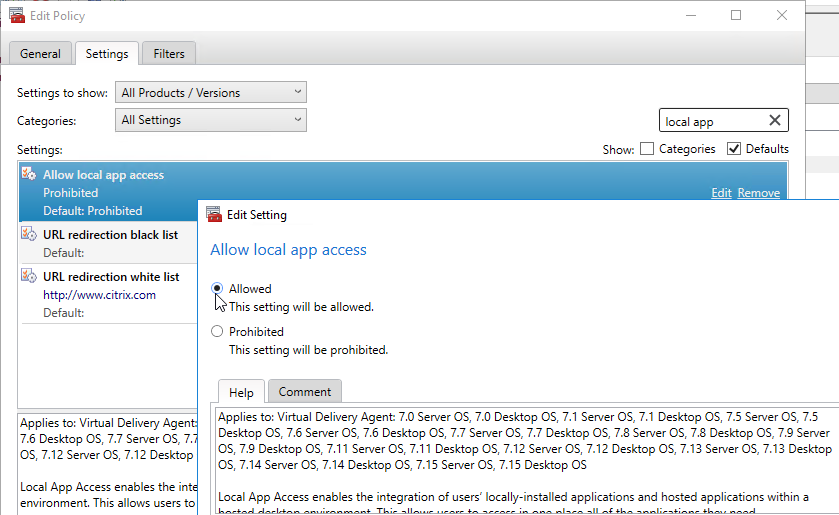
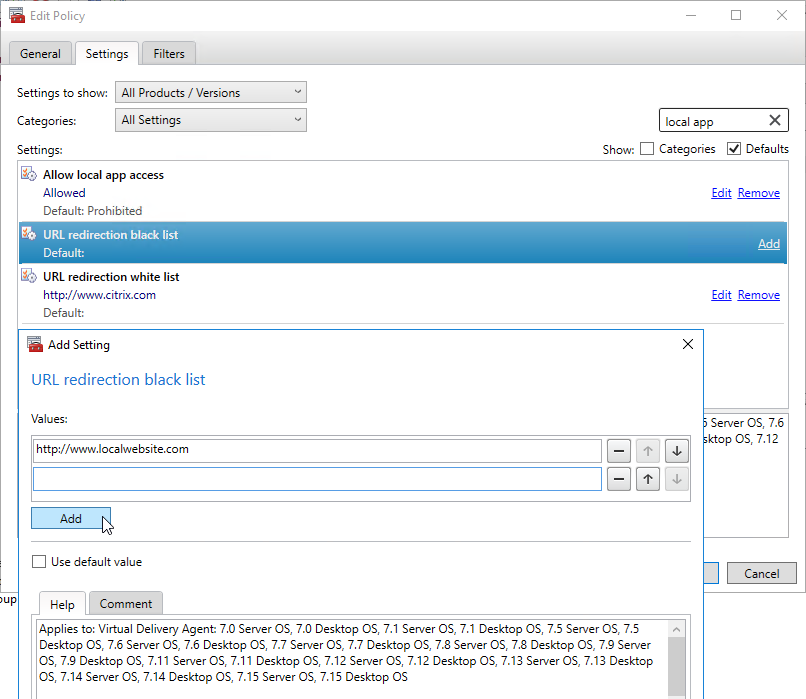
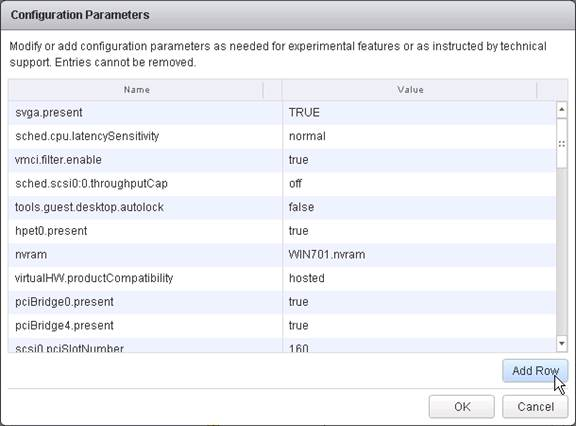
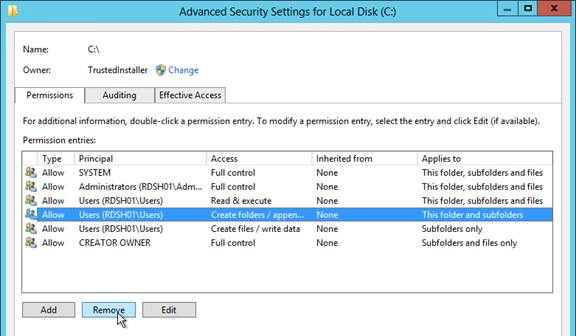
Group Policy Computer Settings
Edit the Citrix VDA Computer Settings GPO and enable the settings shown below. All settings are located under Computer Configuration > Policies.
Some of the settings in this section might require the newer Windows Group Policy Templates.
Process tracking for Director
- Audit Policy – Computer Configuration | Policies | Windows Settings | Security Settings | Local Policies | Audit Policy
- Audit process tracking = success – Source = Diagnose user logon issues at Citrix Docs.
Idle Time to Lock Session
- Security Options – Computer Configuration | Policies | Windows Settings | Security Settings | Local Policies | Security Options
- Interactive logon: Machine inactivity limit – Windows 8/2012 and newer – published desktops only – seconds of idle time before session locks
Control Panel
- Settings Page Visibility – Computer Configuration | Policies | Administrative Templates | Control Panel
- Settings Page Visibility
- Windows Server 2016 and Windows 10 1607 support was added with the September 2018 Windows patches. Otherwise, it’s only available in Windows 10 1703 and newer.
- Also with the September 2018 patches, the Settings Page Visibility setting is added to the User half of the GPO. See https://www.carlstalhood.com/group-policy-objects-vda-user-settings/#settingspage for details. Before September 2018, this setting is Computer half only, which means it applies to all users, including administrators.
- Winaero How To Hide Settings Pages in Windows 10 describes this new setting. Also see TechNet Hiding pages in Settings with Windows 10 1703.
- Settings Page Visibility
Teams
Prevent the per-user version of Teams from installing with Office 365 (aka Microsoft 365 apps). Configure this GPO setting before installing Office. Then you can later install the machine-wide version of Teams. More details at Microsoft Docs.
This setting requires the Office GPO templates to be installed.
- Updates – Computer Configuration | Policies | Administrative Templates | Microsoft Office 2016 (Machine) | Updates
- Don’t install Microsoft Teams with new installations or updates of Office = enabled
- Don’t install Microsoft Teams with new installations or updates of Office = enabled
Network
- Network – Computer Configuration | Policies | Administrative Templates | Network | Network Isolation
- Subnet definitions are authoritative = enabled – Windows 10 setting – Source = CTX232340 Windows 10 PVS target devices experience poor performance
OneDrive Files-on-demand
For Windows 10 1709 and newer or Windows Server 2019 and newer. Make sure the OneDrive .admx file is installed first.
- OneDrive – Computer Configuration | Policies | Administrative Templates | OneDrive
- Use OneDrive Files On-Demand = enabled
Verbose Messages
- System – Computer Configuration | Policies | Administrative Templates | System
- Display highly detailed status messages = enabled. Windows 10. Shows what’s happening during logon.
Group Policy Settings
- Group Policy – Computer Configuration | Policies | Administrative Templates | System | Group Policy
- Configure Group Policy Caching = disabled. Windows 8.1/2012 R2 and newer setting
- Configure Logon Script Delay = enabled, 0 minutes. Windows 8.1/2012 R2 and newer setting.
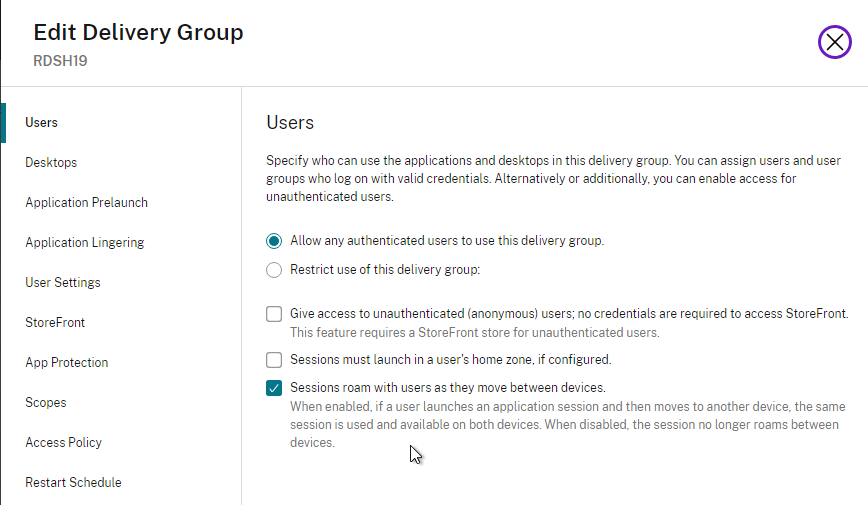
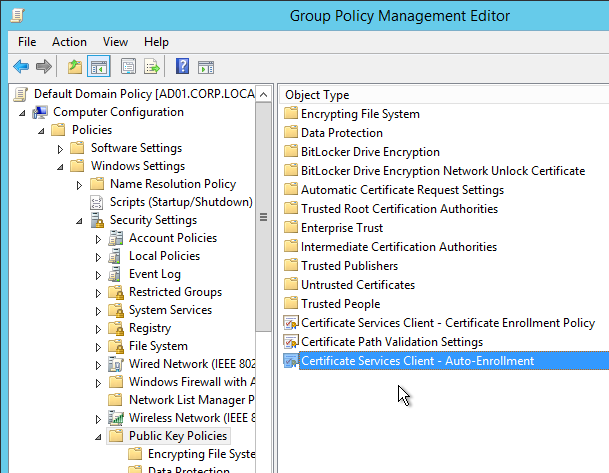
- Configure User Group Policy loopback processing mode = Enabled, either Merge or Replace depending on the desired result
User Group Policy loopback processing mode changes in Windows Server 2008 R2. Make sure the VDA computer accounts have Read access to the loopback user GPOs, even if those GPOs only contain user settings.
Logon Settings
To get rid of the Windows 10 “we’re happy you’re here” message:
- Logon – Computer Configuration | Policies | Administrative Templates | System | Logon
- Show first sign-in animation = disabled
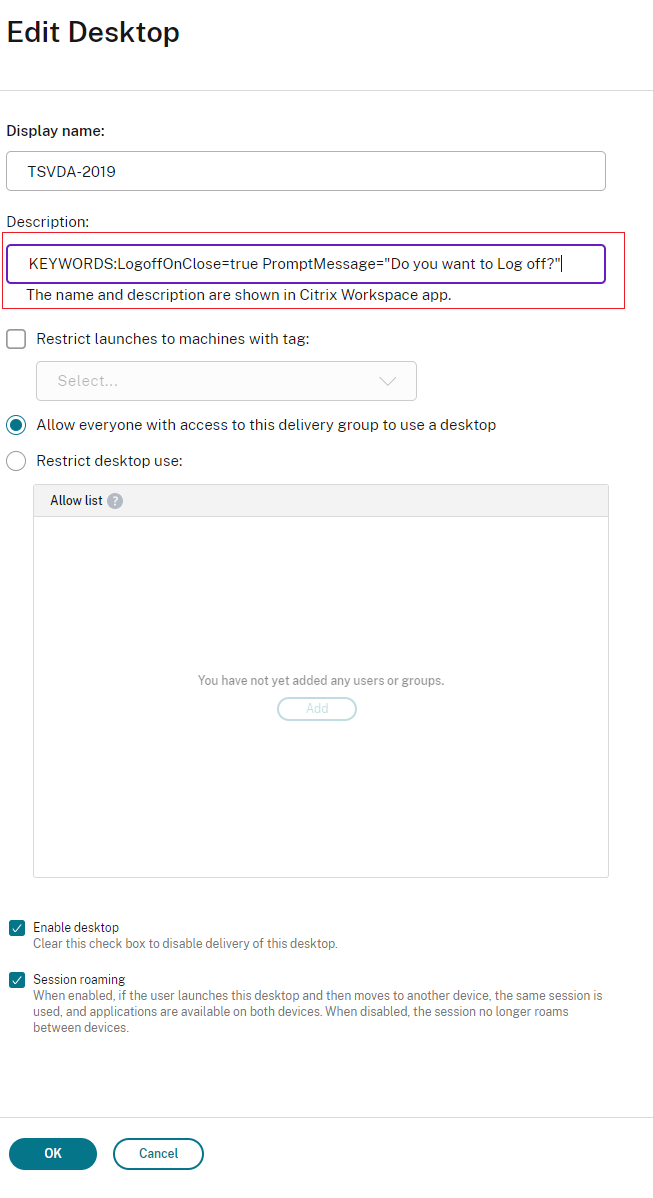
- Show clear logon background = enabled – for Win10 1903 and newer – source = Citrix Discussions
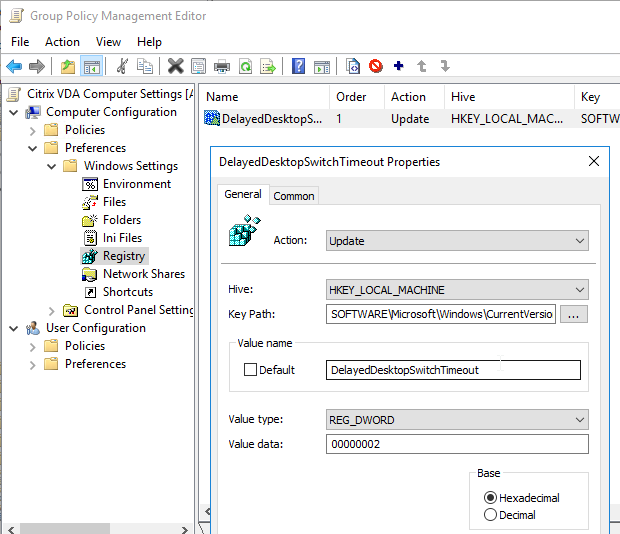
DelayedDesktopSwitchTimeout. Create a Group Policy Preferences Registry Item (Computer Configuration | Preferences | Windows Settings | Registry) to set HKEY_LOCAL_MACHINE\SOFTWARE\Microsoft\Windows\CurrentVersion\Policies\System\DelayedDesktopSwitchTimeout (REG_DWORD) = 2. On Windows 10, this might cause the desktop to appear sooner. (Source = VMware Communities)
Power Settings
The following are more applicable to virtual desktops than session hosts:
- Hard Disk Settings – Computer Configuration | Policies | Administrative Templates | System | Power Management | Hard Disk Settings
- Turn Off the hard disk (plugged in) = enabled, 0 seconds
- Sleep Settings – Computer Configuration | Policies | Administrative Templates | System | Power Management | Sleep Settings
- Specify the system hibernate timeout (plugged in) = enabled, 0 seconds
- Specify the system sleep timeout (plugged in) = enabled, 0 seconds
- Turn off hybrid sleep (plugged in) = enabled, 0 seconds
- Video and Display Settings – Computer Configuration | Policies | Administrative Templates | System | Power Management | Video and Display Settings
- Turn off the display (plugged in) = enabled, 0 seconds
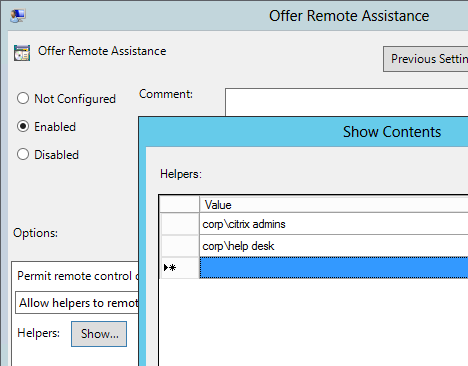
Remote Assistance Settings
Configure the following so you can shadow users using Director:
- Remote Assistance – Computer Configuration | Policies | Administrative Templates | System | Remote Assistance
- Configure Solicited Remote Assistance = disabled
- Configure Offer Remote Assistance = enabled, specify the Help Desk and Administrator groups that can offer remote assistance
User Profiles Settings
- User Profiles – Computer Configuration | Policies | Administrative Templates | System | User Profiles
- Add the Administrators security group to roaming user profiles = enabled
- Delete cached copies of roaming profiles = enabled (only enable on persistent session hosts)
- Do not check for user ownership of Roaming Profile Folders = enabled
- Set maximum wait time for the network if a user has a roaming user profile or remote home directory = enabled, 0 seconds
- Source = MasterXen at “Please wait for User Profile Services” – Logon delay
Cloud Content
- Cloud Content – Computer Configuration | Policies | Administrative Templates | Windows Components | Cloud Content (Windows 10 1511 and newer)
- Turn off Microsoft consumer experiences = enabled
File Explorer Settings
Citrix CTX203658 Start Menu Icons Set to Default (Blank Document) After Update to Receiver 4.3.100 – Windows 8 and newer
- File Explorer – Computer Configuration | Policies | Administrative Templates | Windows Components | File Explorer
- Allow the use of remote paths in file shortcut icons = enabled
Event Viewer Settings
If you are using Provisioning Services, it might be desirable to move the event logs to a persistent cache disk. This allows you to review the event logs even after the Target Device reboots. Use Group Policy Preferences to create the folder on the cache disk.
- Application – Computer Configuration | Policies | Administrative Templates | Windows Components | Event Log Service | Application
- Control the location of the log file = enabled, D:\EventLogs\Application.evtx
- Security – Computer Configuration | Policies | Administrative Templates | Windows Components | Event Log Service | Security
- Control the location of the log file = enabled, D:\EventLogs\Security.evtx
- System – Computer Configuration | Policies | Administrative Templates | Windows Components | Event Log Service | System
- Control the location of the log file = enabled, D:\EventLogs\System.evtx
- Folder – Computer Configuration | Preferences | Folder
- Action = update
- Path = D:\EventLogs
Microsoft Account – Windows 10 (1703 and newer)
- Microsoft account – Computer Configuration | Policies | Administrative Templates | Windows Components | Microsoft account
- Block all consumer Microsoft account user authentication = Enabled
OneDrive Settings – Windows 10
- OneDrive – Computer Configuration | Policies | Administrative Templates | Windows Components | OneDrive
- Prevent the usage of OneDrive for file storage = enabled
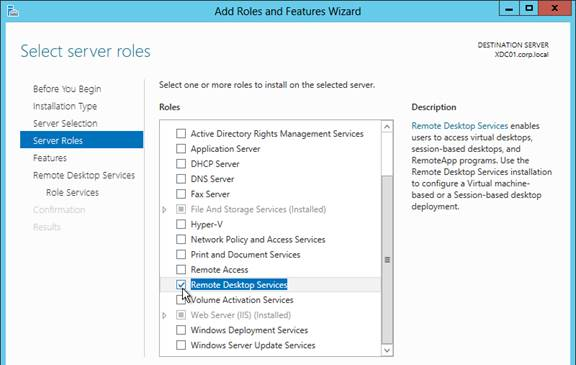
Remote Desktop Services Settings
- Connections – Computer Configuration | Policies | Administrative Templates | Windows Components | Remote Desktop Services | Remote Desktop Session Host | Connections
- Restrict Remote Desktop Services users to a single Remote Desktop Services session = disabled
- More details at http://support.citrix.com/article/CTX131245
- Restrict Remote Desktop Services users to a single Remote Desktop Services session = disabled
- Device and Resource Redirection – Computer Configuration | Policies | Administrative Templates | Windows Components | Remote Desktop Services | Remote Desktop Session Host | Device and Resource Redirection
- Allow time zone redirection = enabled
- Do not allow smart card device redirection = enabled
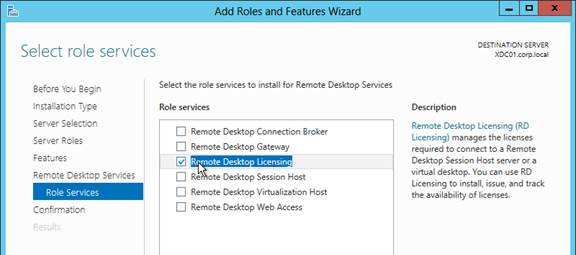
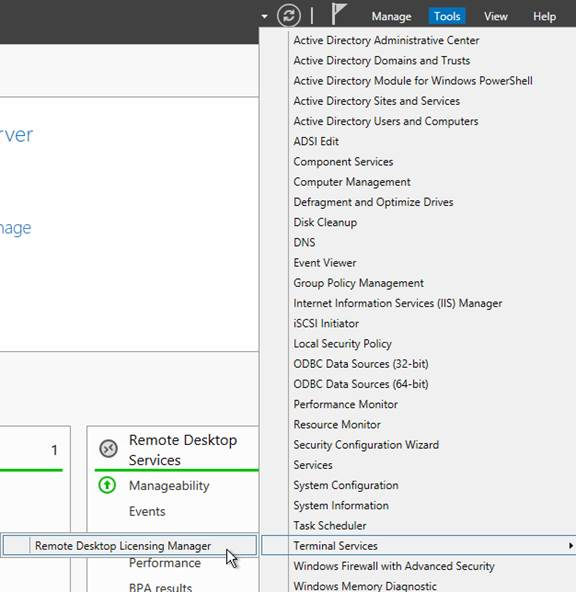
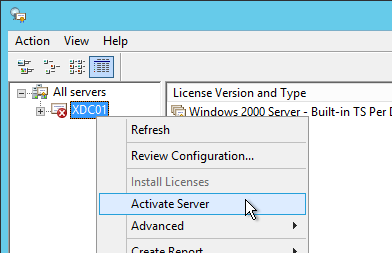
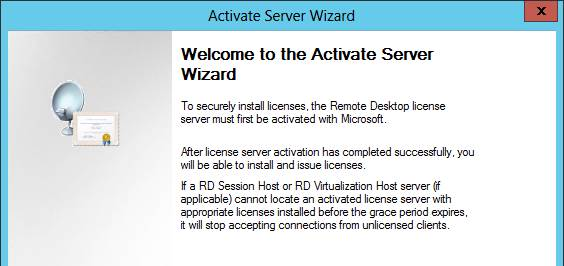
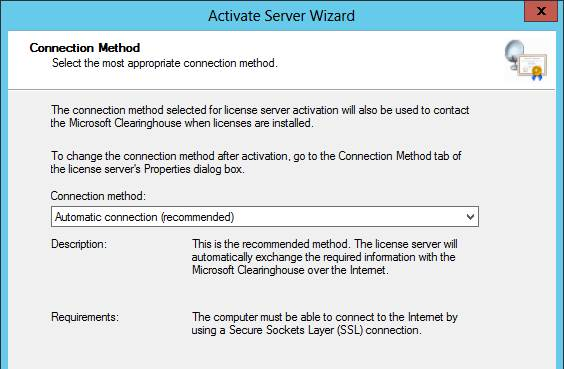
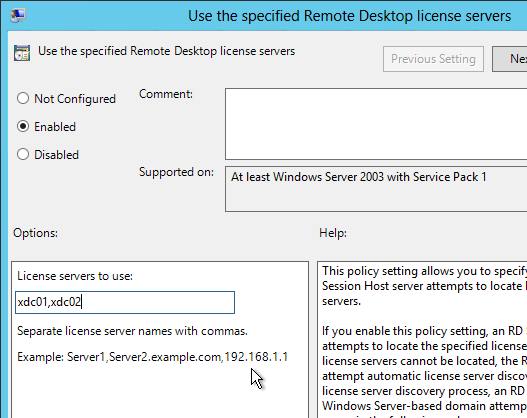
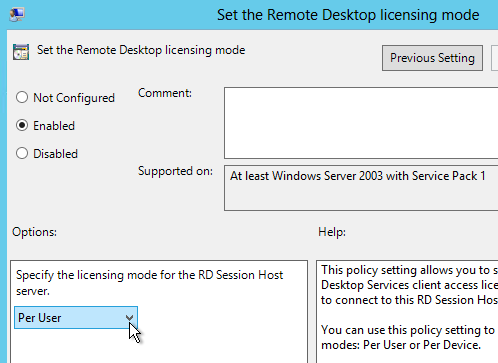
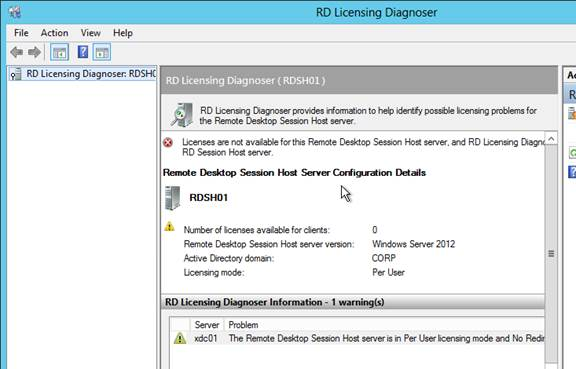
- Licensing – Computer Configuration | Policies | Administrative Templates | Windows Components | Remote Desktop Services | Remote Desktop Session Host | Licensing
- Set the Remote Desktop license mode = enabled, Per User
- Use the specified Remote Desktop license servers = enabled, your RDS Licensing Servers (e.g. the XenDesktop Controllers)
- Remote Session Environment – Computer Configuration | Policies | Administrative Templates | Windows Components | Remote Desktop Services | Remote Desktop Session Host | Remote Session Environment
- Use the hardware default graphics adapter for all Remote Desktop Services sessions = Enabled
- Source = Marco Hofmann Basic XenApp HDX 3D Pro Proof of Concept – What I missed
- Use WDDM graphics display driver for Remote Desktop Connections = Disabled
- For Windows 10 version 2004 with VDA earlier than VDA 2006. Source = Windows 10 v2004 – Citrix Known Issues
- Use the hardware default graphics adapter for all Remote Desktop Services sessions = Enabled
- Security – Computer Configuration | Policies | Administrative Templates | Windows Components | Remote Desktop Services | Remote Desktop Session Host | Security
- Always prompt for password upon connection = disabled (to override other GPOs where it might be enabled)
- Session Time Limits – Computer Configuration | Policies | Administrative Templates | Windows Components | Remote Desktop Services | Remote Desktop Session Host | Session Time Limits
- Set a time limit for active but idle Terminal Services sessions = enabled, 3 hours or similar
- Set time limit for disconnected sessions = enabled, 3 hours or similar
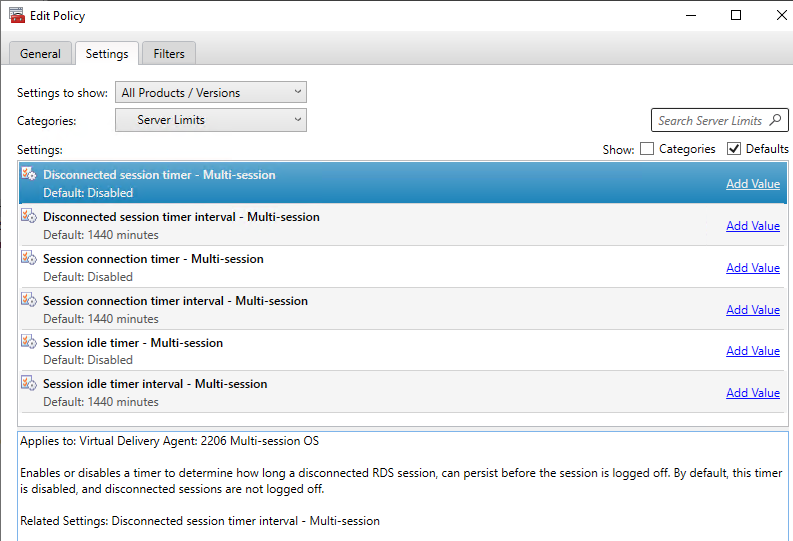
- CVAD 2206 and newer also let you set RDSH timers in the user half of a Citrix Policy under the Server Limits category. Citrix Docs says: Timer settings for multi-session machines configured using Citrix policies are expected to override timer settings configured through Microsoft Group Policies. To avoid unexpected behavior, we recommend you configure timer settings using one of the two methods.
Search Settings – Windows 8.1 / 2012 R2, Windows 10
- Search – Computer Configuration | Policies | Administrative Templates | Windows Components | Search
- Allow Cortana = disabled (Windows 10)
- Don’t search the web or display web results in search = enabled
- Additional search settings can be found here
Store Settings – Windows 8.1 / 2012 R2, Windows 10
- Store – Computer Configuration | Policies | Administrative Templates | Windows Components | Store
- Turn off the Store application = enabled
Windows Update Settings
- Windows Update – Computer Configuration | Policies | Administrative Templates | Windows Components | Windows Update
- Allow non-administrators to receive update notifications = disabled
- Windows Update for Business – Computer Configuration | Policies | Administrative Templates | Windows Components | Windows Update | Windows Update for Business
- Select when Preview Builds and Feature Updates are received = Enabled, Semi-Annual Channel, 365 day deferral
Additional Settings
Windows 10 group policy settings for controlling Internet connectivity and Privacy Settings can be found at Microsoft Technet Manage connections from Windows operating system components to Microsoft services.
James Rankin Five tips for dealing with Windows 10 telemetry: disable Modern apps, disable Cortana, disable services, block DNS domains.
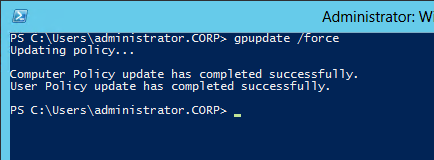
After modifying the GPO, use Group Policy Management Console to update the VDA machines.
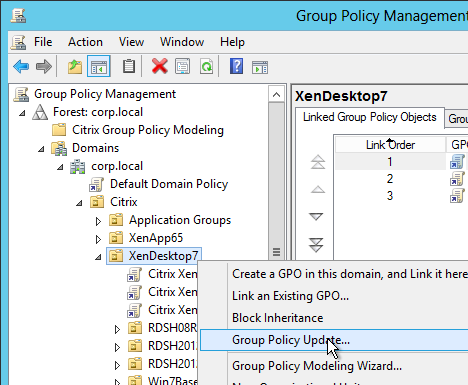
Or run the command gpupdate /force. Or wait 90 minutes.
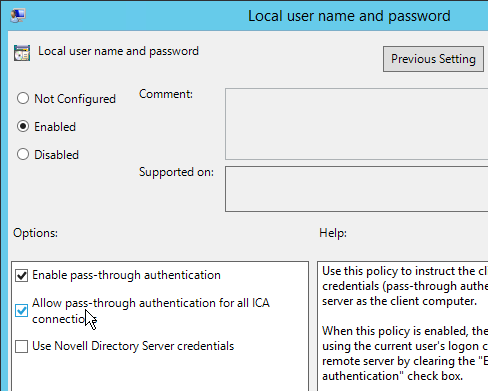
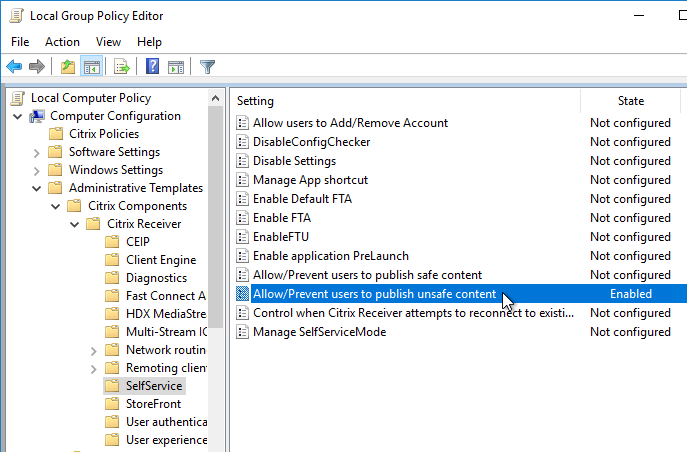
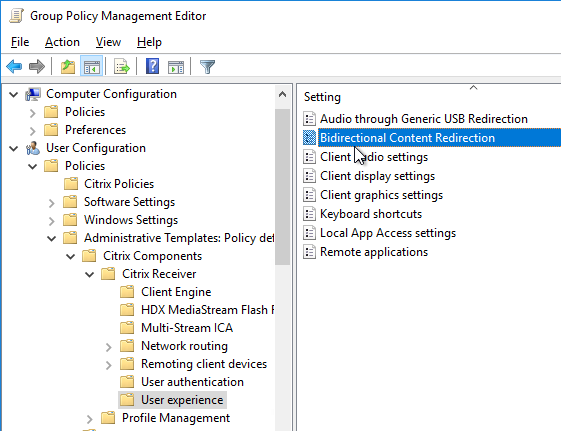
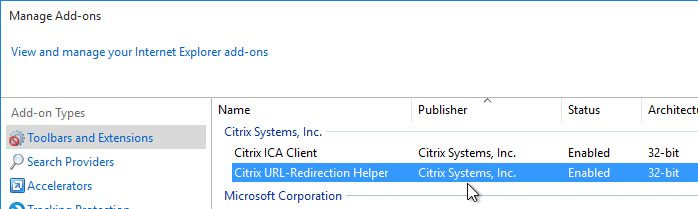
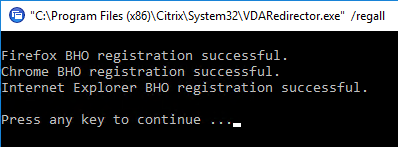
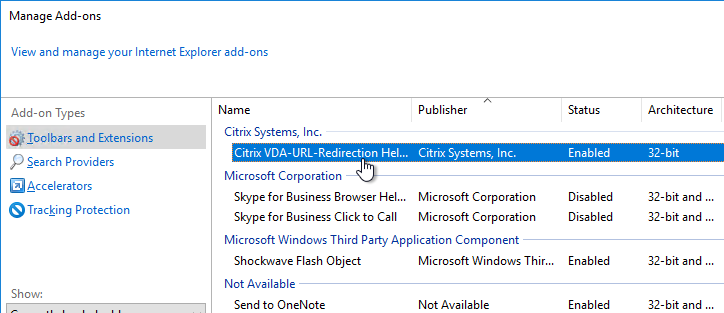
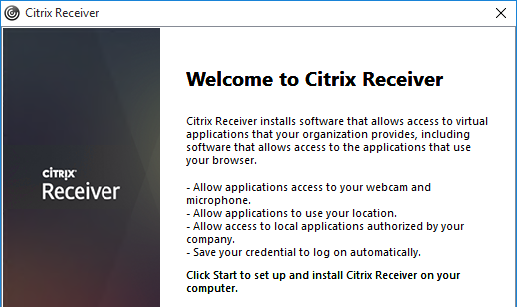
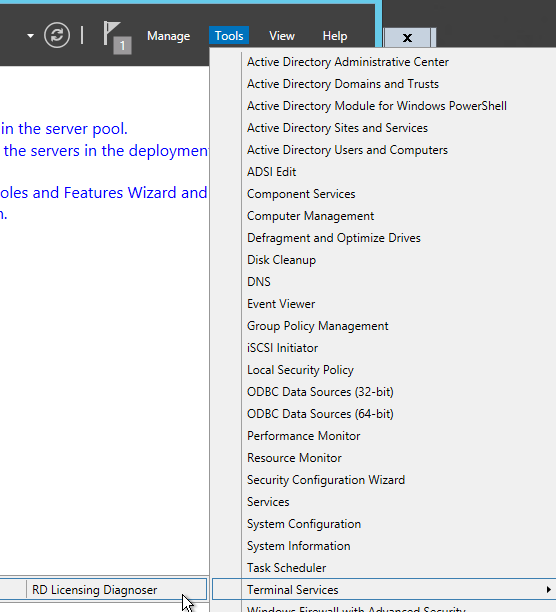
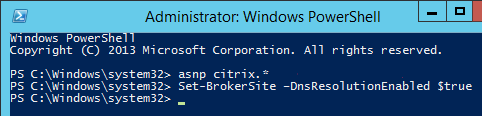
Citrix Receiver
If you want pass-through authentication for the Citrix Receiver that is installed on your VDAs, use receiver.admx to enable pass-through authentication.
- See the instructions at https://www.carlstalhood.com/receiver-for-windows/#admx to copy the receiver.admx file to PolicyDefinitions.
- Edit the Citrix Computer Settings GPO.
- Go to Computer Configuration > Policies > Administrative Templates > Citrix Components > Citrix Receiver > User Authentication. On the right, open Local user name and password.
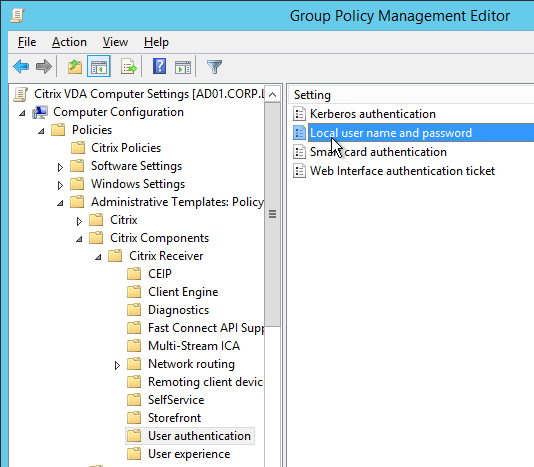
- Enable the setting.
- Check the top two boxes and click OK.


 `
`