Navigation
💡 = Recently Updated
Change Log
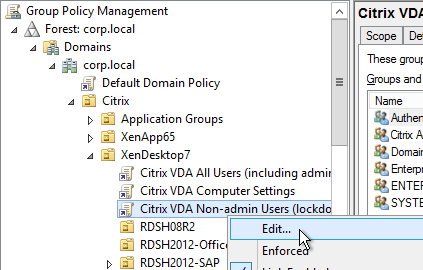
User Lockdown
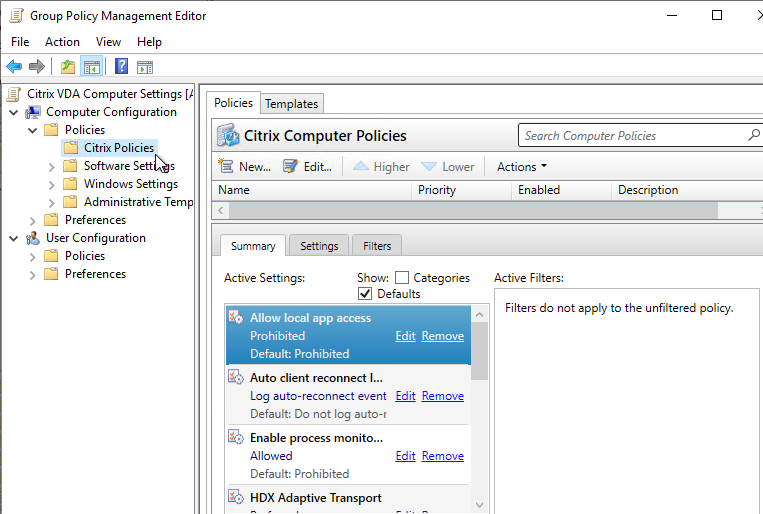
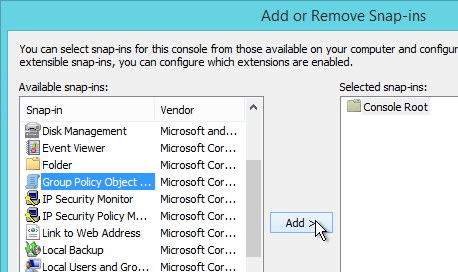
The following is a list of Group Policy Settings recommended by Microsoft to lockdown a Remote Desktop Session Host / Citrix Session. These settings should go in the Citrix VDA Non-Admin Users GPO. All settings are located at User Configuration > Policies.
This page assumes the GPOs have already been created and Loopback Processing has already been enabled.
Some of the settings in this section might require the newer Windows Group Policy Templates.
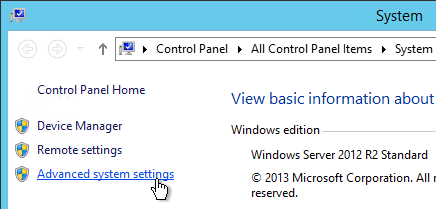
Control Panel GPO Settings
- User Configuration | Policies | Administrative Templates | Control Panel
- Always open All Control Panel Items when opening Control Panel = enabled
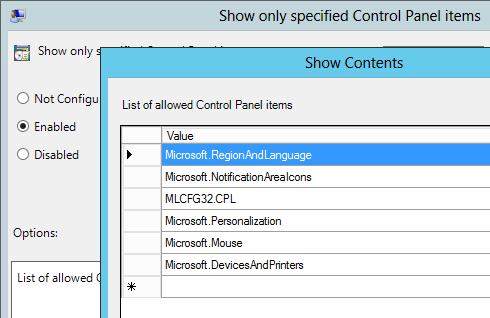
- Show only specified Control Panel items = enabled, canonical names =
- Microsoft.RegionAndLanguage
- Microsoft.NotificationAreaIcons
- MLCFG32.CPL
- Microsoft.Personalization
- Microsoft.Mouse
- Microsoft.DevicesAndPrinters
- Microsoft.System (lets users see the computer name)
- User Configuration | Policies | Administrative Templates | Control Panel | Programs
- Hide the Programs Control Panel = enabled
Settings Page Visibility
The September 2018 patches for Windows 2016 and Windows 10 add control of Settings Page Visibility in both the Computer half of the GPO (applies to all users), and now in the User half of the GPO (can apply to non-admin users).
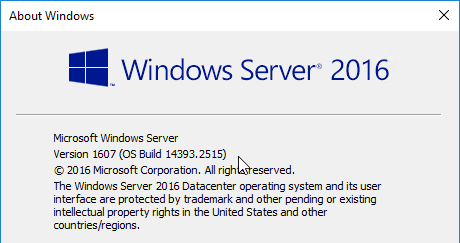
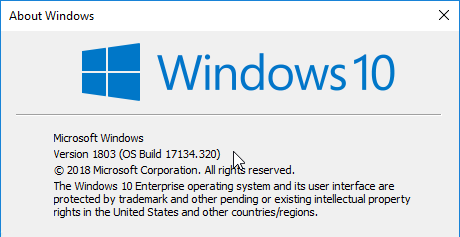
- Make sure the Windows 10 and Windows 2016 VDAs are patched to at least the September 2018 Cumulative Update.
- For Windows 2016, winver should show OS Build 14393.2515 or higher.
- For Windows 10 1803, winver should show OS Build 17134.320 or higher.
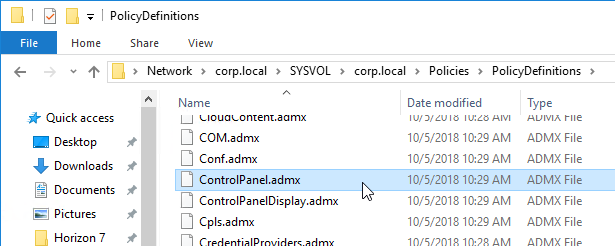
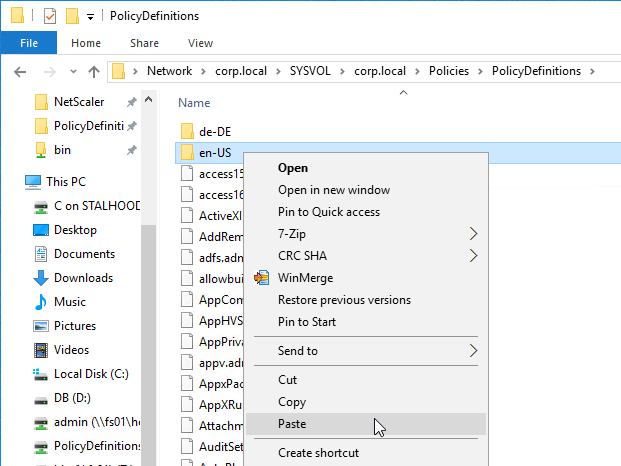
- Go to your \\domain.com\sysvol\domain.com\Policies\PolicyDefinitions and find the file ControlPanel.admx. If it is not dated August 30 or later, then you’ll need to copy the updated version.
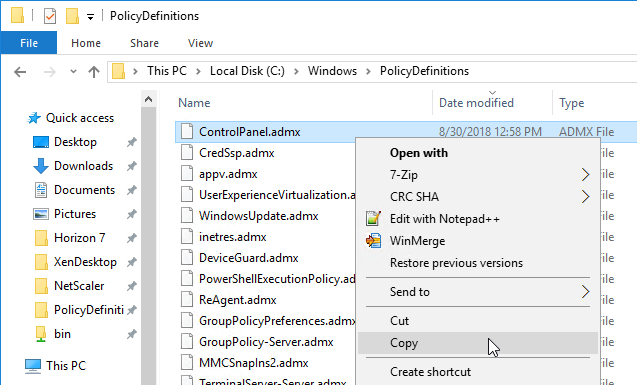
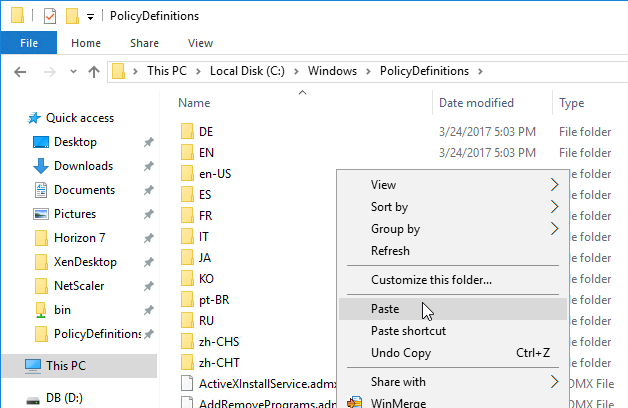
- On one of these newer VDAs, go to C:\Windows\PolicyDefinitions and copy the file ControlPanel.admx. The September 2018 patch updated this file.
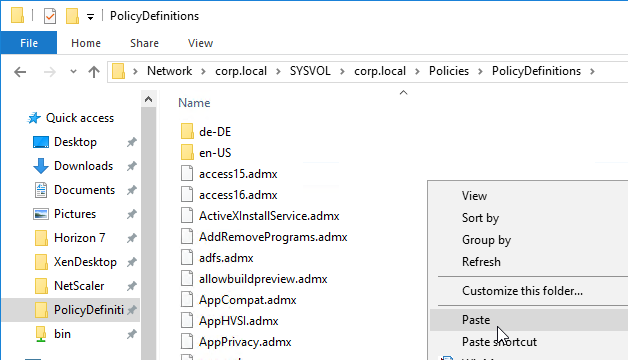
- Go to your \\domain.com\sysvol\domain.com\Policies\PolicyDefinitions and paste the .admx file. Overwrite the existing file.
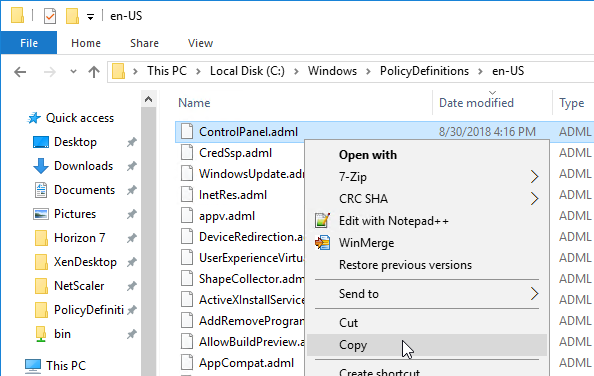
- On one of these newer VDAs, go to C:\Windows\PolicyDefinitions\en-US and copy the file ControlPanel.adml.
- Go to your \\domain.com\sysvol\domain.com\Policies\PolicyDefinitions\en-US and paste the .adml file. Overwrite the existing file.
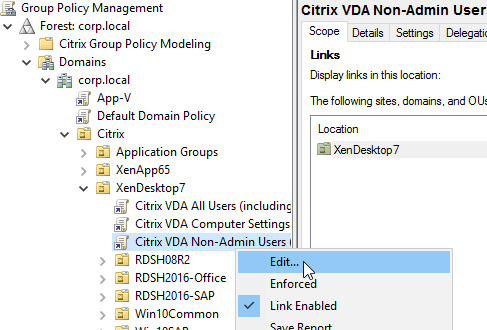
- Edit the Non-Admin Users GPO.
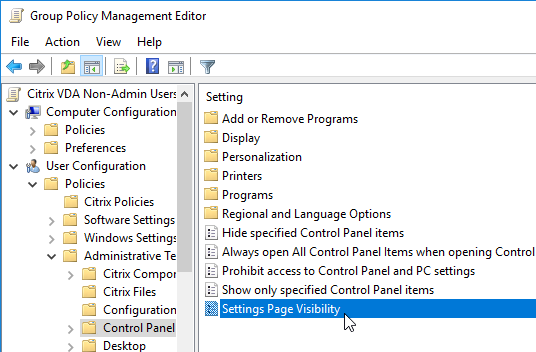
- Go to User Configuration | Policies | Administrative Templates | Control Panel.
- On the right is Settings Page Visibility.
- Winaero How To Hide Settings Pages in Windows 10 describes this new setting. Also see TechNet Hiding pages in Settings with Windows 10 1703. A sample configuration is: showonly:printers;colors. According to Server 2016 & PC Settings/Immersive Control Panel at Citrix Discussions, the maximum length for this field is 255 characters.
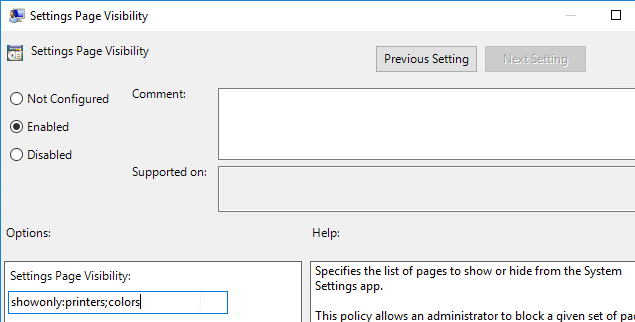
- When the non-admin user logs into a Windows 10 or Windows Server 2016 VDA that has the September update installed, the Settings pages are restricted based on the GPO configuration. Since this GPO setting is in the user half of the Non-admin users GPO, admins can still see all Settings pages.
Desktop GPO Settings
- User Configuration | Policies | Administrative Templates | Desktop
- Hide Network Locations icon on desktop = enabled
- Remove Properties from the Computer icon context menu = enabled
- Remove Properties from the Recycle Bin icon context menu = enabled
If you prevent access to the Properties of the Computer icon then users might not be able to determine the name of the machine they are connected to.
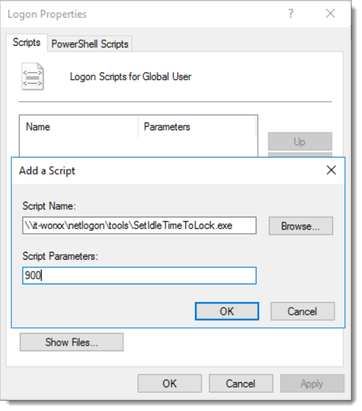
On Windows Server 2016, screen saver idle time does not work. Arjan Mensch developed a tool to lock the screen after a period of idle time. Launch the tool from a Group Policy login script. Download the tool from Enforcing lock screen after idle time Windows Server 2016 RDS Session Host.
- User Configuration | Policies | Administrative Templates | Start Menu and Taskbar
- Clear the recent programs list for new users = enabled
- Do not allow pinning Store app to the taskbar = enabled
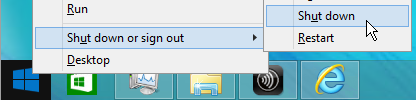
- Remove and prevent access to Shut Down, Restart, Sleep, and Hibernate commands = enabled
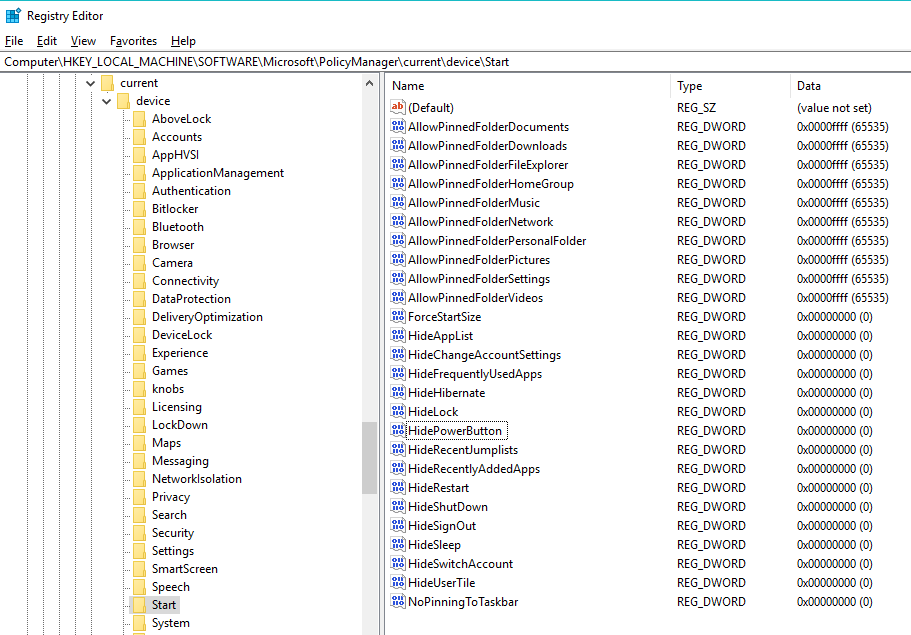
- In Windows 10 1709, if you want to remove the Power Button, in the VDA, set HKLM\Software\Microsoft\PolicyManager\current\device\Start\HidePowerButton (DWORD) = 1. Source = Power Button Windows 10 VDI at Citrix Discussions.
- Remove common program groups from Start Menu = enabled (only if you have some other means for putting shortcuts back on the user’s Start Menu/Desktop. Also, enabling this setting might prevent Outlook desktop alerts. Microsoft 3014833)
- Remove Help menu from Start Menu = enabled (Windows 7 / 2008 R2 only)
- Remove links and access to Windows Update = enabled
- Remove Network icon from Start Menu = enabled (Windows 7 / 2008 R2 only)
- Remove Run menu from Start Menu = enabled (not recommended)
- Remove the Action Center icon = enabled (not in Windows 10)
- Remove the networking icon = enabled
- Remove the People Bar from the taskbar = enabled (Windows 10 1703 and later)
- Remove the Security and Maintenance icon = enabled (Windows 10)
- Remove user folder link from Start Menu = enabled (Windows 7 / 2008 R2 only)
If you hide common program groups, then you will need some other method of creating application shortcuts for each user. Group Policy Preferences Shortcuts is the typical method.
Removing the Run menu prevents users from entering UNC paths or drive letters in Internet Explorer.
Start Menu pinned tiles
- Configure Start Menu pinned tiles as desired
- Remove Server Manager
- Remove PowerShell
- Etc.
- Use Export-StartLayout to save to an .xml file.
- Use Import-StartLayout to import to the Default User profile. All new users (new profiles) will get the customized Start Menu layout.
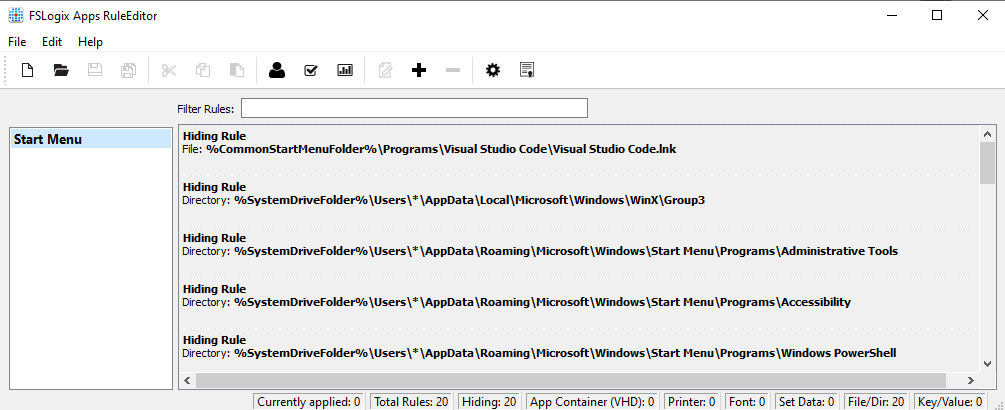
CTP James Rankin Dynamic Start Menu on Server 2016/2019 and Windows 10 using FSLogix App Masking
CTP James Kindon AppMasking The Windows Start Menu using FSLogix
Kasper Johansen The Windows Server 2019 Start Menu Is Playing Nice:
- Clean up the default Start Menu
- Use AppLocker to prevent access to Windows Security
CTP James Kindon Windows 10 Start Menu: declutter the default:
- To eliminate the Start Menu tiles, remove Store apps, and Edge.
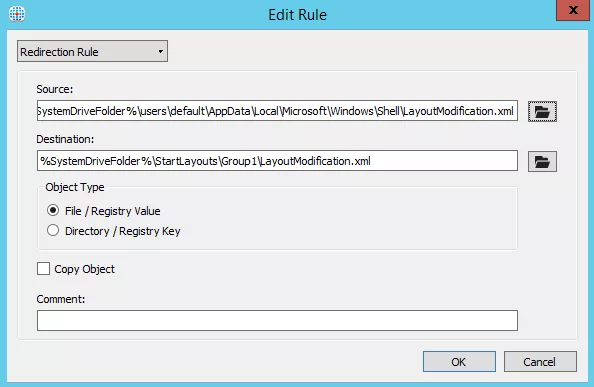
CTP James Rankin Management of Start Menu and Tiles on Windows 10 and Server 2016, part #1 contains the following:
- LayoutModification.xml in Default User Profile
- Start Screen Layout Group Policy setting
- Partially-locked layout
- FSLogix to apply a custom default layout for different user groups on the same device, and allowing users to customize all of it
CTP Eric Haavarstein Customize Windows 10 Start Screen and Optimize for Higher User Density contains the following:
- Lock down a section of the Start Menu
- Configure Citrix Profile Management to roam the Start Menu
- Remove Provisioned Apps
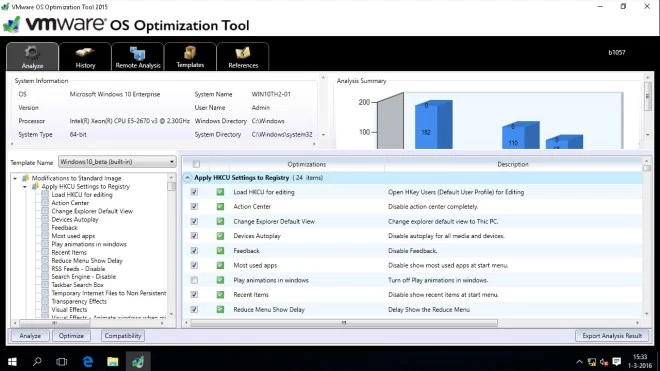
- Tune Windows using OS Optimization Tool
- Disable Telemetry services
Microsoft Technet Customize Windows 10 Start with Group Policy.
System GPO Settings
- User Configuration | Policies | Administrative Templates | System
- Prevent access to registry editing tools = enabled, Disable regedit from running silently = No
- Prevent access to the command prompt = enabled, Disable command prompt script processing = No
Disabling registry editing tools also disables reg.exe. This is true even if silently is set to No.
Explorer GPO Settings
- User Configuration | Policies | Administrative Templates | Windows Components | File Explorer (Windows 8+) or Windows Explorer (Windows 7)
- Hide these specified drives in My Computer = enabled, Restrict A, B, C, and D drives only
- Hides the Manage item on the File Explorer context menu = enabled
- Prevent access to drives from My Computer = enabled, Restrict A, B, C, and D drives only. If this setting is enabled, you can’t use Start Menu’s search to find programs.
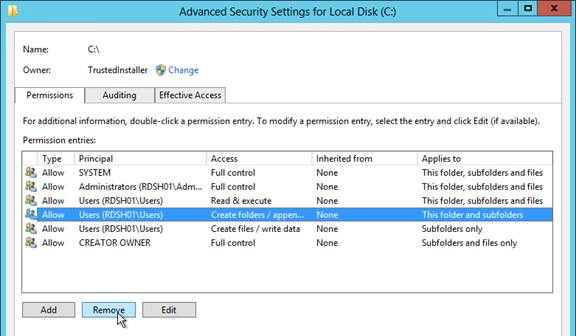
- Prevent users from adding files to the root of their Users Files folder = enabled
- Remove “Map Network Drive” and “Disconnect Network Drive” = enabled
- Remove Hardware tab = enabled
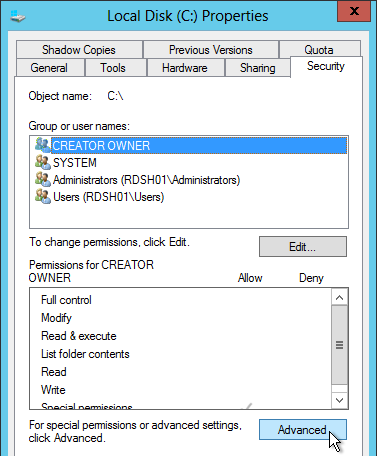
- Remove Security Tab = enabled
- Turn off caching of thumbnail pictures = enabled
Borders – Windows Server 2019 File Explorer does not show borders around File Explorer. To add borders, see Geir Dybbugt Microsoft Server 2019: No window border/allwhite issue
To hide specific drive letters:
- User Configuration => Preferences => Windows Settings => Drive Maps => New Mapped Drive
- Choose Action Update => Drive Letter Existing C => Hide this drive
- Common Tab: Run in logged-on users’ Security
Windows Update GPO Settings
- User Configuration | Policies | Administrative Templates | Windows Components | Windows Update
- Remove access to use all Windows Update features = enabled, 0 – Do not show any notifications
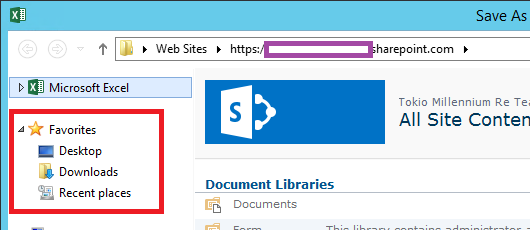
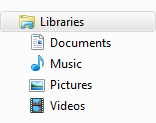
File Explorer
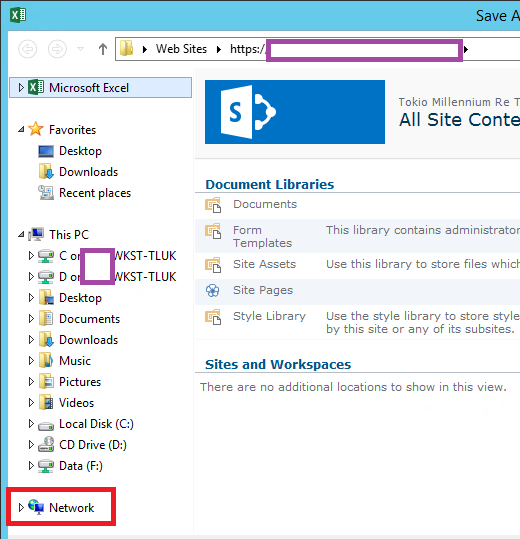
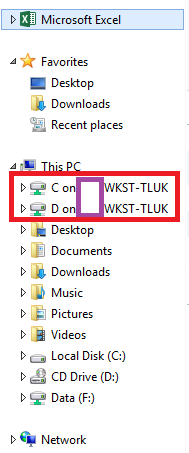
Hide Favorites, Libraries, Network and redirected local drives
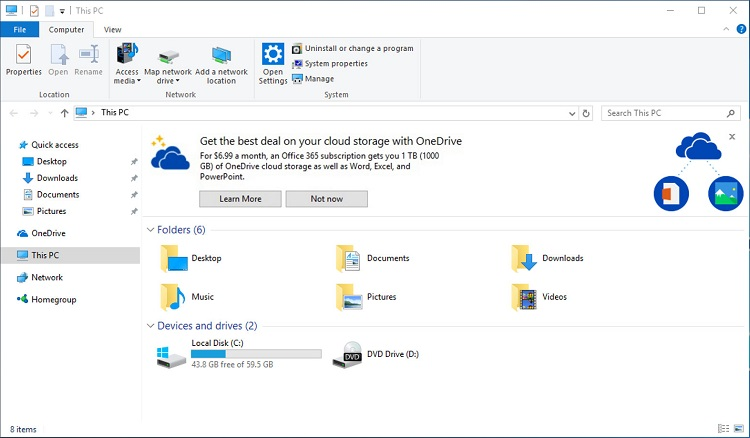
Winhelponline Removing “Quick access” from Windows 10 File Explorer details the following registry value to remove Quick Access from File Explorer in Windows 10, or Windows Server 2016 and newer. (h/t Sean Bolding)
- HKEY_LOCAL_MACHINE\SOFTWARE\Microsoft\Windows\CurrentVersion\Explorer
Terence Luk Hide Favorites, Libraries, Network and redirected local drives for Citrix and RDS published RemoteApp applications: See the Blog Post for instructions to edit the registry on the VDA to hide these items. Similar instructions are provided by David Wilkinson at Remove Quick Access from File Explorer in Windows Server 2016.
Explorer Notifications
From TenForums How to Hide or Show Sync Provider Notifications within File Explorer in Windows 10: Windows 10 1607 adds notifications inside File Explorer.
To stop these, use Group Policy Preferences to set the following registry value:
- Key = HKEY_CURRENT_USER\SOFTWARE\Microsoft\Windows\CurrentVersion\Explorer\Advanced
- Value = ShowSyncProviderNotifications (DWORD) = 0
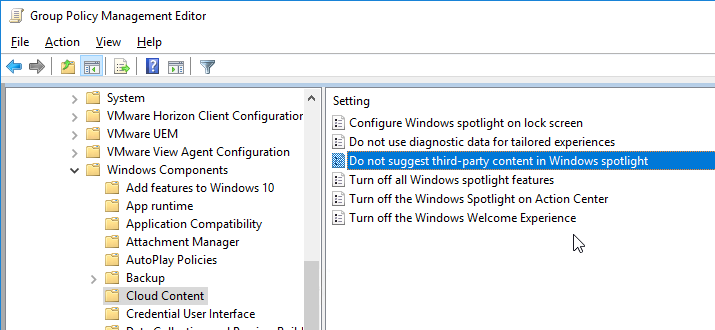
Windows Spotlight
Windows 10 1703 and newer shows suggestions, tips and ads on various parts of Windows (Start Menu, lock screen, Action Center, Explorer, etc.). These notifications are configurable at User Configuration | Policies | Administrative Templates | Windows Components | Cloud Content. Also see Richard Hay Windows 10 Creators Update: Turn Off Suggestions, Tips, and Ads Throughout the Operating System and Chris Hoffman How to Disable All of Windows 10’s Built-in Advertising.
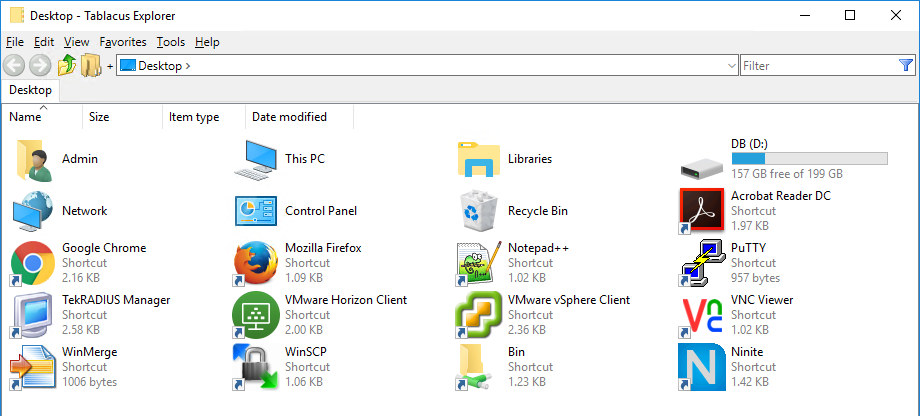
Explorer Replacement
Instead of locking down Windows File Explorer, you can run a 3rd party Explorer like Tablacus Explorer. The tool is detailed by Marco Hofmann at Tablacus Explorer is an awesome replacement for explorer.exe as a #XenApp published Application!.
Flickering Icons
If you published a desktop on Windows Server 2016, and if you redirected the Desktop folder to a network share, then desktop icons might flicker. Helge Turk at XenApp 7.12/13, Server 2016 desktop icons flickering at Citrix Discussions resolved it be creating the following Registry Key using Group Policy Preferences:
- HKEY_CURRENT_USER\SOFTWARE\Classes\CLSID\{031E4825-7B94-4dc3-B131-E946B44C8DD5}
Chrome
Use Chrome Group Policy to push the Chrome plug-in for Citrix’s Browser Content Redirection feature in Citrix Virtual Apps and Desktops (CVAD) 1808 and newer.
Chrome 77+ Audio Issue
No Audio on Google Chrome version 77.x and newer inside ICA session.
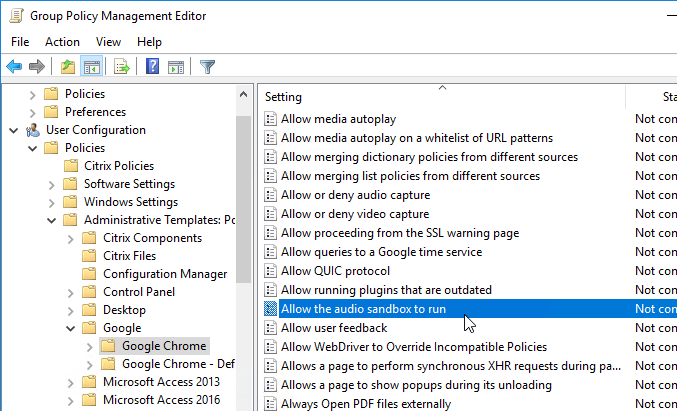
Newer Google Chrome ADMX templates let you disable the audio sandbox. User Configuration | Policies | Administrative Templates | Google | Google Chrome | Allow the audio sandbox to run = Disabled.
Another workaround is to use Group Policy Preferences to deploy the following registry value: (source = CTX261992 Citrix Virtual Apps and Desktops: No Audio on Google Chrome version 77.x inside ICA session)
If the new Chrome-based Microsoft Edge consumes 100% CPU, then CTP James Kindon Deploying Brave and Microsoft Edge Dev Browsers in Citrix CVAD environments says a similar registry value is needed for the new Edge.
- Key =
HKLM\SYSTEM\CurrentControlSet\services\CtxUvi
- Value (String) =
UviProcessExcludes = chrome.exe;msedge.exe;
GPO ADMX Templates
- Download the Google Chrome ADMX templates from Set Chrome Browser policies on managed PCs.

- Extract the .zip file.
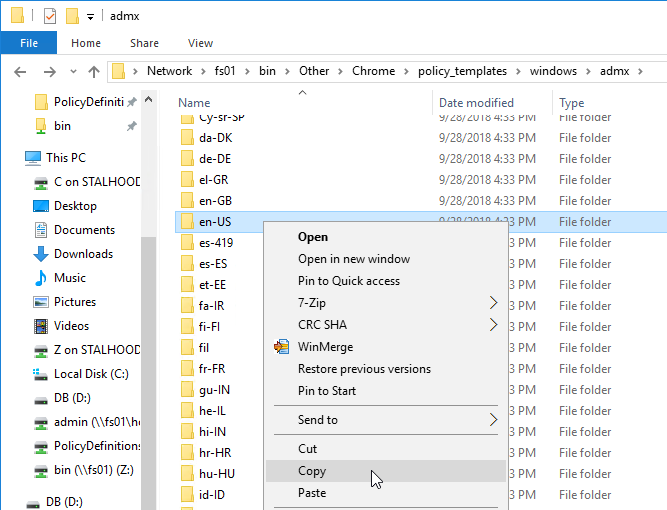
- Go to the extracted files. In the \policy_templates\windows\admx folder, copy the chrome.admx and google.admx files.
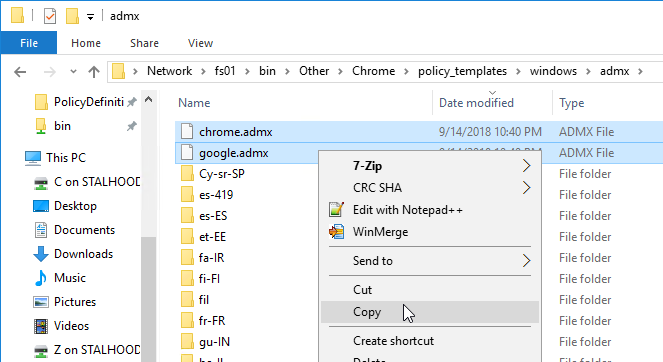
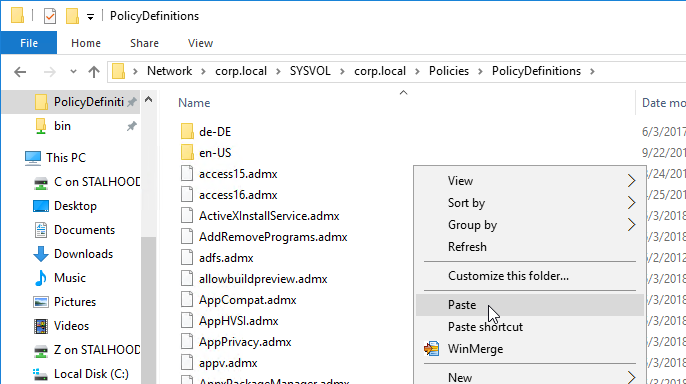
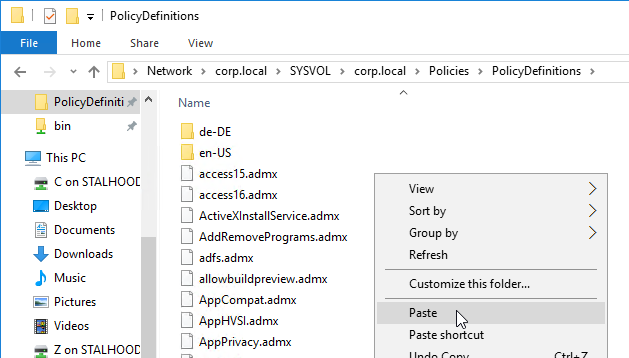
- Go to PolicyDefinitions in your SYSVOL (e.g. \\domain.com\sysvol\domain.com\Policies\PolicyDefinitions) and paste the .admx files.
- Go back to the extracted Google Chrome templates in the \policy_templates\windows\admx folder and copy the en-US folder.
- Go to back to PolicyDefinitions in your SYSVOL and paste the en-US folder. It will add .adml files to the existing en-US folder.
Roam Chrome Settings
You can optionally enable Chrome’s roaming profile support. For details, see Use Chrome Browser with Roaming User Profiles at Google Help.
- Edit the Citrix All Users GPO.
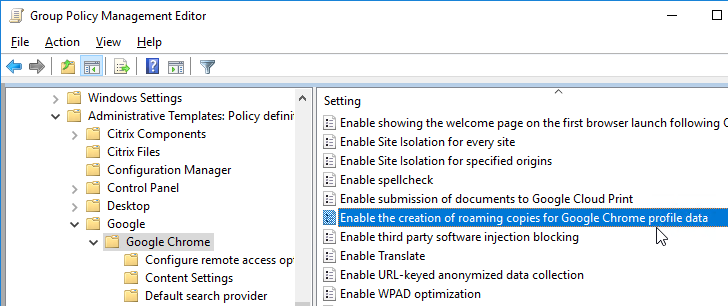
- Go to User Configuration | Policies | Administrative Templates | Google | Google Chrome.
- On the right, double-click Enable the creation of roaming copies for Google Chrome profile data and Enable it.
Browser Content Redirection Extension
To force install the Chrome Extension needed for Browser Content Redirection in Citrix Virtual Apps and Desktops (CVAD) 1808 and newer:
- Edit the Citrix All Users GPO.
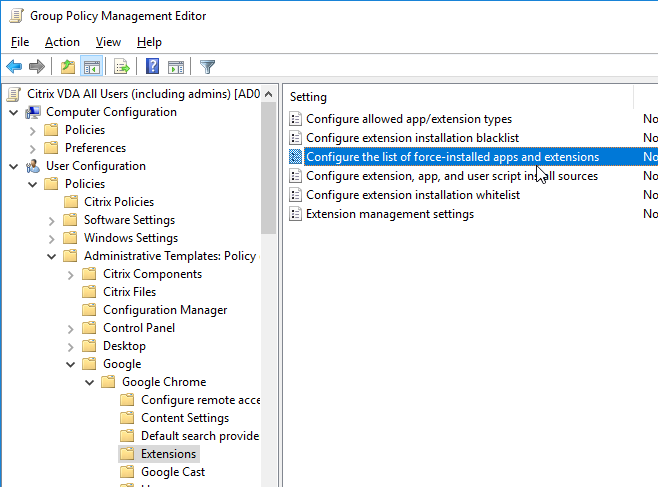
- Go to User Configuration | Policies | Administrative Templates | Google | Google Chrome | Extensions.
- On the right, double-click Configure the list of force-installed apps and extensions.
- Enable the setting and click Show.
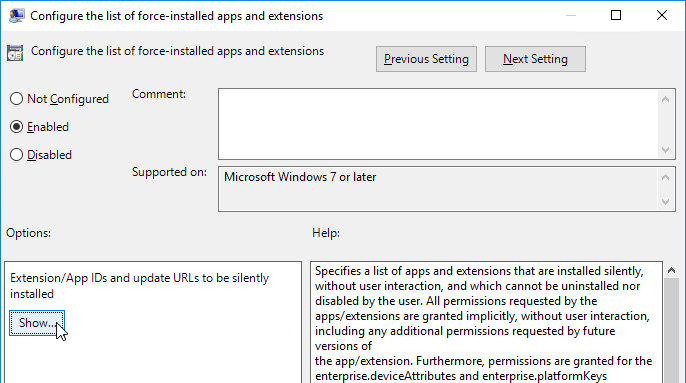
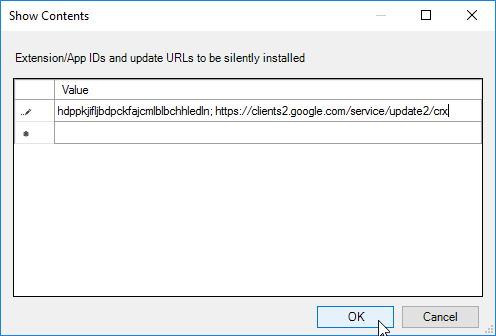
- In the box, enter the following text and click OK.
hdppkjifljbdpckfajcmlblbchhledln; https://clients2.google.com/service/update2/crx
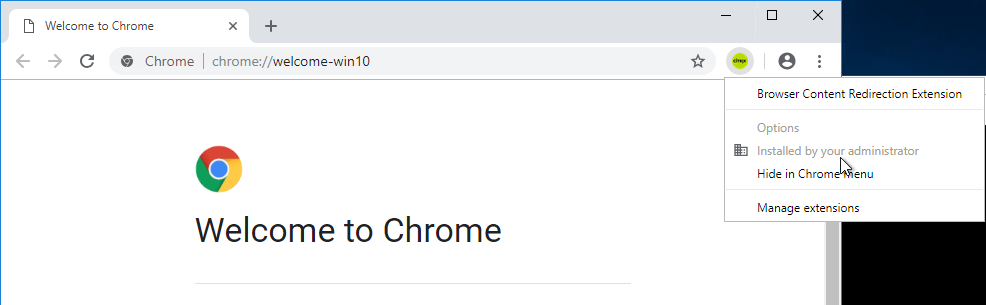
- When a user opens Chrome from inside a VDA, the Citrix Browser Content Redirection Extension is automatically installed.
- Configure the Citrix Policy settings detailed at Browser Content Redirection.
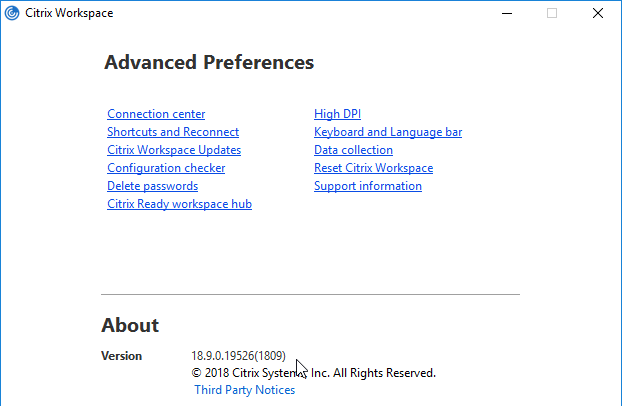
- Redirection of websites from Chrome requires Workspace app 1809 or newer on the client device.
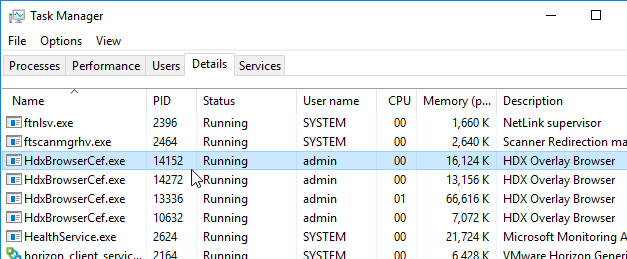
- When you visit a whitelisted (ACL) website, on the client side, you should see HdxBrowserCef.exe processes. These processes come from Workspace app, and does not use Chrome on the client side.
Edge / Internet Explorer Settings
This section assumes the GPOs have already been created.
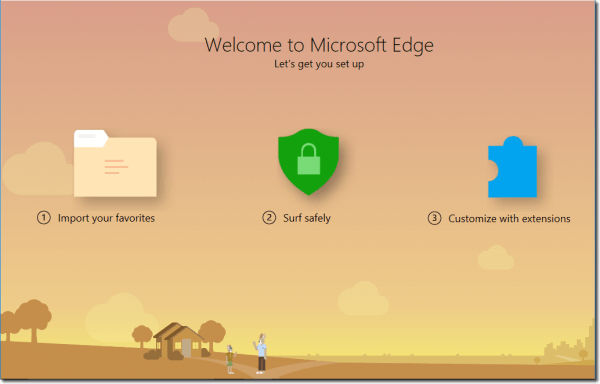
Edge
When a new user launches Edge, the first run wizard appears.
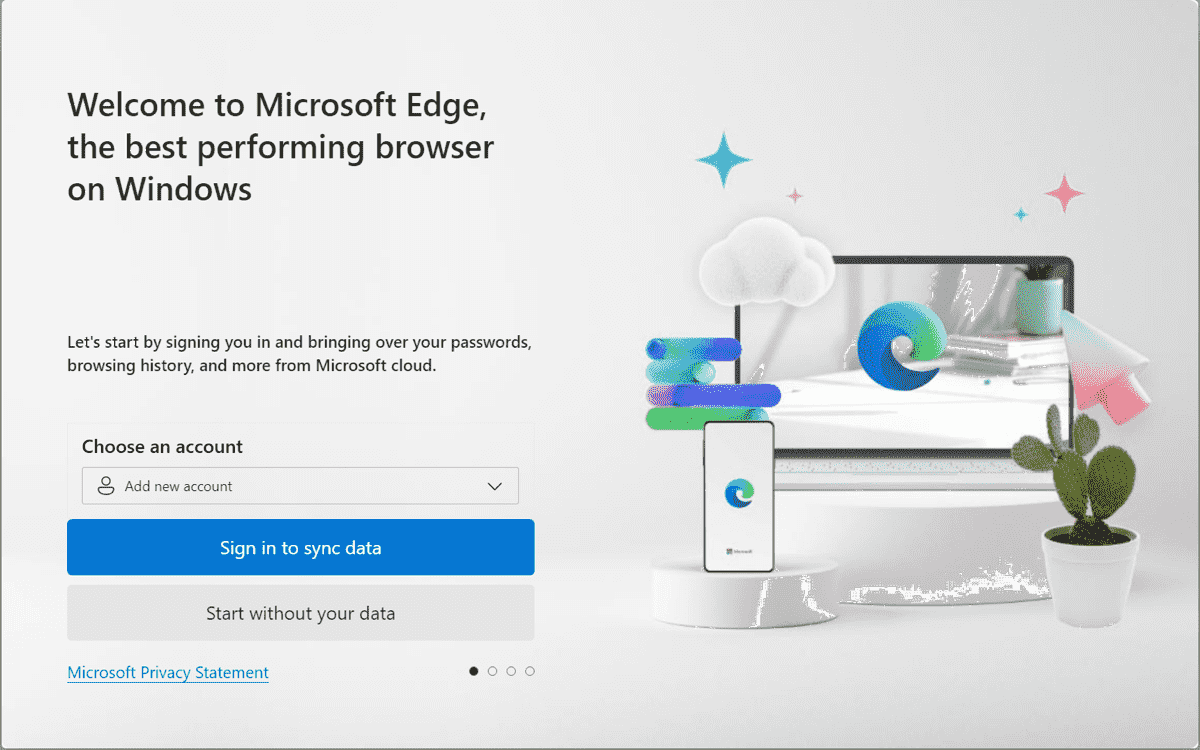
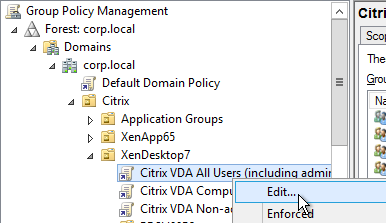
To prevent this from occurring, edit the Citrix VDA All Users GPO.
Edge First Run GPO Settings
- User Config | Policies | Administrative Templates | Microsoft Edge
- Hide the First-run experience and splash screen = enabled
Internet Explorer First Run Wizard
When a new user launches Internet Explorer, the first run wizard appears.
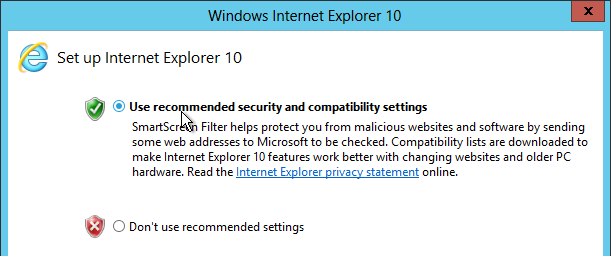
To prevent this from occurring, edit the Citrix VDA All Users GPO.
Internet Explorer First Run GPO Settings
- User Config | Policies | Administrative Templates | Windows Components | Internet Explorer
- Prevent managing SmartScreen Filter = enabled, on
- Prevent running First Run Wizard = enabled, Go directly to home page
- Specify default behavior for a new tab page = enabled, Home page
- Turn on Suggested Sites = disabled
- User Config | Policies | Administrative Templates | Windows Components | Internet Explorer | Compatibility View
- Include updated Web site lists from Microsoft = enabled
- User Config | Policies | Administrative Templates | Windows Components | Internet Explorer | Internet Control Panel | Advanced Page
- Turn on Enhanced Protected Mode = disabled
Enhanced Protected Mode might disable Internet Explorer add-ons. Read the text to determine if it should be disabled.
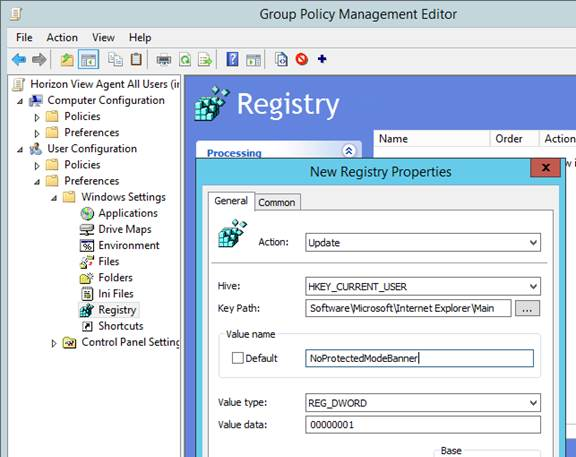
Users might see a message that Protected mode is turned off for the Local intranet zone.

To prevent this message, do the following:
- Edit the Citrix VDA All Users GPO.
- Go to User Configuration > Preferences > Windows Settings > Registry.
- Create a new Registry Item.
- Set the Hive to: HKEY_CURRENT_USER
- Set the Key Path to: Software\Microsoft\Internet Explorer\Main
- Set the Value name to: NoProtectedModeBanner
- Set the Value type to: REG_DWORD
- Set the Value data to: 1
- Click OK.
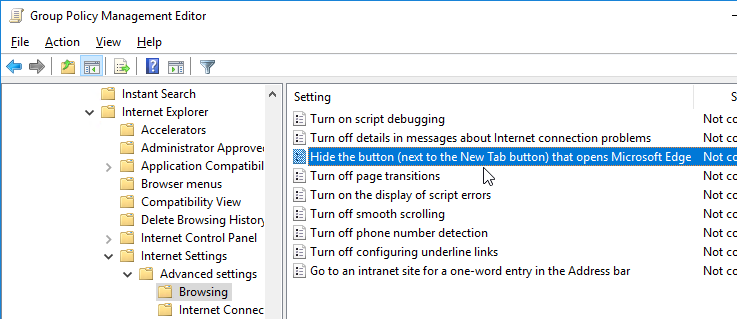
IE 11 in Windows 10 1703 and newer has a new button to open Edge.

- To hide this button, edit a Group Policy that applies to users, go to User Configuration | Policies | Administrative Templates | Windows Components | Internet Explorer | Internet Settings | Advanced Settings | Browsing, and enable the setting Hide the button (next to the New Tab button) that opens Microsoft Edge. Source = René Bigler on Twitter.
4SysOps Disable Welcome to Microsoft Edge page and default browser prompt in Windows 10 1607: registry keys and PowerShell script to disable it.
Published Internet Explorer Settings – Runonce
If a user launches Internet Explorer as a published application, then Internet Explorer might not be fully configured and thus some websites won’t work. By default, Windows runs per-user configuration (ActiveSetup) of Internet Explorer only when the user connects to a full desktop, which doesn’t happen when only launching published apps. To override this behavior so it works with published IE even if the user never connects to a full desktop, do the following:
- Edit the Citrix VDA All Users GPO.
- Go to User Configuration > Policies > Windows Settings > Scripts (Logon/Logoff).
- Double-click Logon.
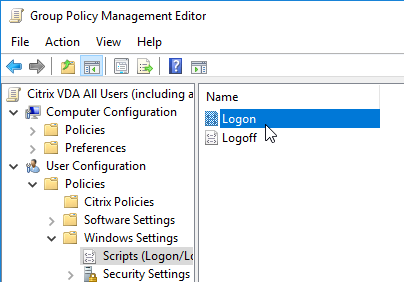
- Click Add.
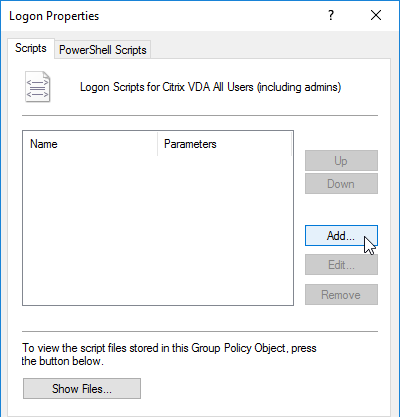
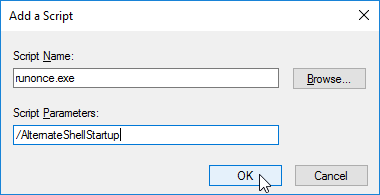
- In the Script Name field, enter runonce.exe.
- In the Script Parameters field, enter /AlternateShellStartup. Click OK.
- Note: running runonce.exe /AlternateShellStartup might cause black borders around windows in published applications.
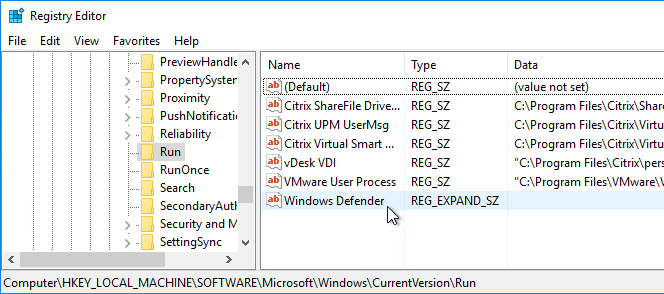
- Runonce.exe /AlternateShellStartup also causes the items in the HKEY_LOCAL_MACHINE\SOFTWARE\Microsoft\Windows\CurrentVersion\Run registry key to be executed when a published app is launched. Consider deleting the items (e.g. VMware Tools icon), or they might keep sessions open after users close their apps. Also see CTX891671 Graceful Logoff from a Published Application Renders the Session in Active State.
- An alternative to runonce.exe /AlternateShellStartup is to run the following commands provided by Steve Washburn at Active Receiver connection after app is closed at Citrix Discussions.
@echo off
"C:\Windows\System32\rundll32.exe" "C:\Windows\System32\iesetup.dll",IEHardenUser
"C:\Windows\SysWOW64\rundll32.exe" "C:\Windows\SysWOW64\iesetup.dll",IEHardenUser
start "" "C:\Program Files (x86)\Internet Explorer\iexplore.exe"
exit
Windows 8.1/2012 R2 might not run the script at logon. Configure the following GPO computer settings to enable the script (configure these in the Citrix VDA Computer Settings GPO):
Logon Script GPO Settings
- Computer Configuration | Policies | Administrative Templates | System | Group Policy
- Configure Group Policy Caching = disabled. Windows 8.1/2012 R2 setting
- Configure Logon Script Delay = enabled, 0 minutes. Windows 8.1/2012 R2 setting.
- Configure User Group Policy loopback processing mode = Enabled, either Merge or Replace depending on the desired result
Internet Explorer Group Policy Preferences
The Internet Explorer Maintenance settings in group policy (User Configuration > Windows Settings > Internet Explorer Maintenance) have been removed in Internet Explorer 10 and Windows Server 2012.
If you run group policy editor on Windows Server 2008 R2 and try to add an Internet Settings object using Group Policy Preferences, notice there is no option to configure Internet Settings for Internet Explorer 9 or Internet Explorer 10.
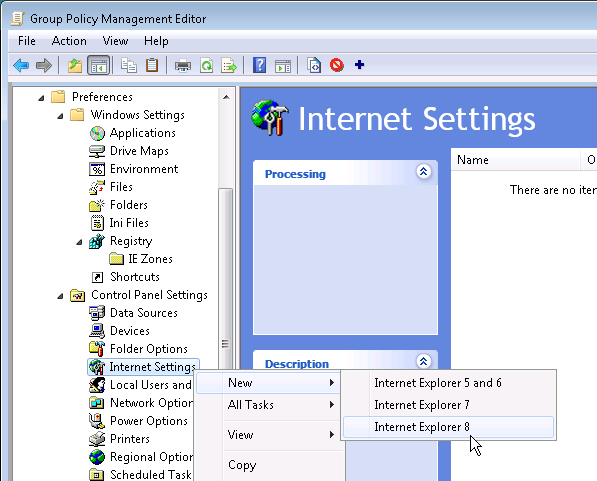
If you use group policy editor in Windows 8 or Windows 2012, then Internet Explorer 10 is an option.

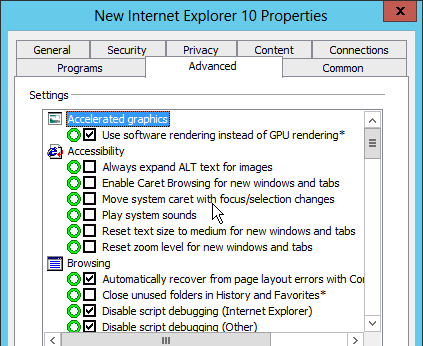
If you have access to Windows 8/2012, you can add an Internet Settings object for Internet Explorer 10. When configuring a setting, notice the red or green lines (and red or green circles). Only green settings are applied. To change a setting to green, press F6 on your keyboard. To disable a setting, press F7 on your keyboard.
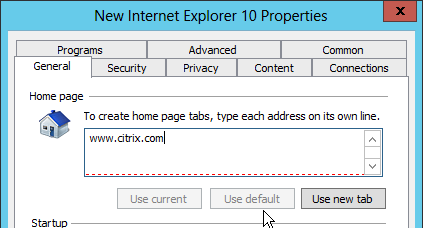
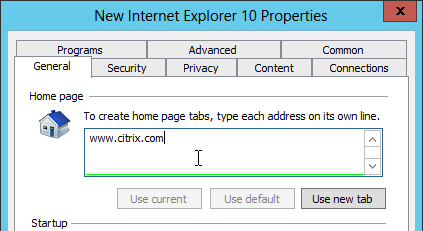
As you look through the tabs, you’ll see a bunch of green items. These green items will be applied and might not be the behavior you expect. To disable all settings on a particular tab, press F8. To turn them back on, press F5.
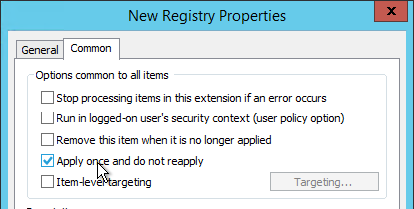
On the Common tab you can check the box to Apply once and do not reapply.

Internet Explorer Security Zone Configuration
There is a group policy setting at User Config | Policies | Administrative Templates | Windows Components | Internet Explorer | Internet Control Panel | Security Page | Site to Zone Assignment List that can be used to put Internet sites in Internet Explorer security zones. However, users cannot add their own sites (the user interface in Internet Explorer is grayed out).
This section details an alternative procedure for administrator-configured zones while allowing users to add their own Trusted Sites.
Note: Zones can’t be configured using a Group Policy Preferences Internet Settings object so instead you’ll need to configure registry keys as detailed below.
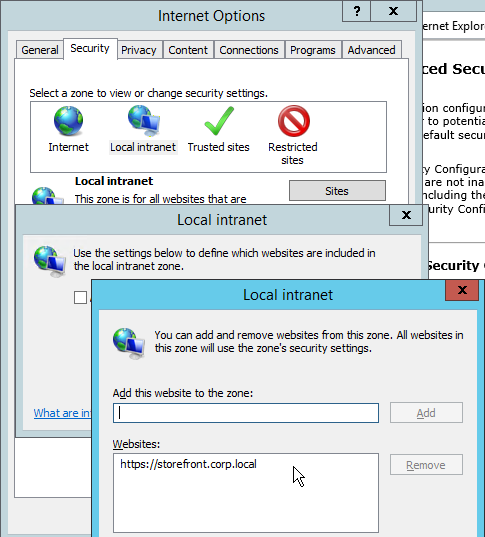
- Run Internet Explorer and configure security zones as desired.
- If you are using Workspace Control in Receiver for Web or need pass-through authentication, make sure you add StoreFront as a Local Intranet Site.
- Run Group Policy Management Console on the same machine where you have security zones configured.
- Edit the Citrix VDA All Users GPO.
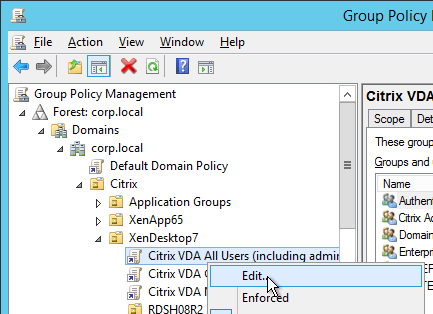
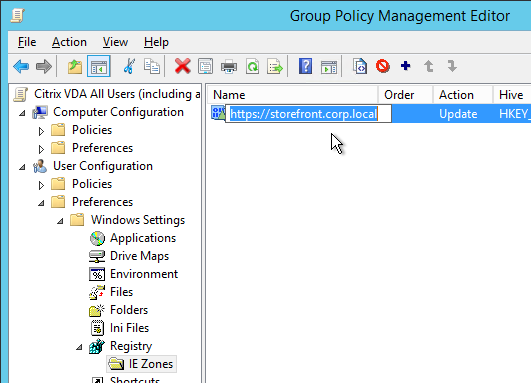
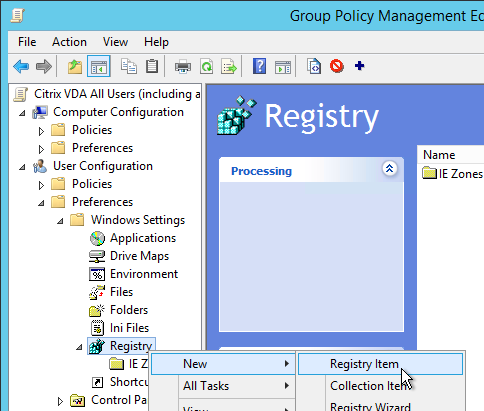
- Go to User Configuration > Preferences > Windows Settings > Registry and create a new Collection Item. Name it IE Zones or similar.
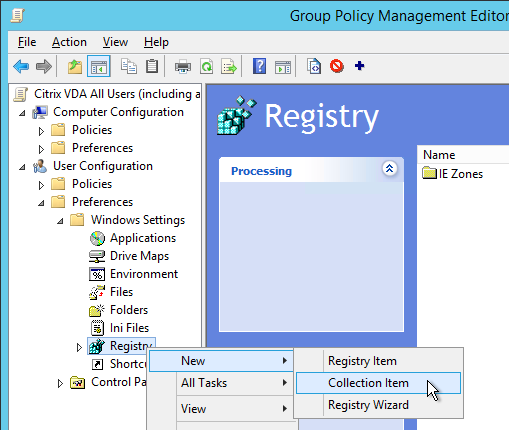
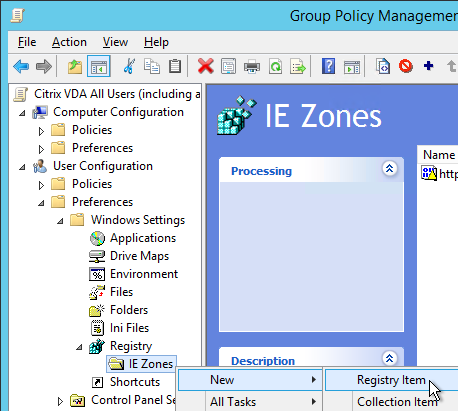
- Right-click the collection and click New > Registry Item.
- Click the … button next to Key Path.
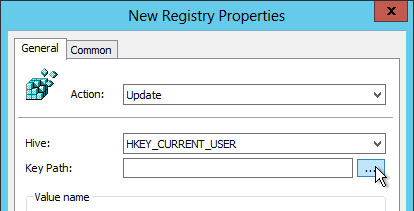
- Navigate to HKEY_CURRENT_USER\Software\Microsoft\Windows\CurrentVersion\Internet Settings\ZoneMap\Domains. Click the key corresponding to the FQDN you’re adding. Then select the registry value on the bottom that corresponds to the protocol (e.g. * or https). Click Select. Note: 1 indicates Local Intranet zone.
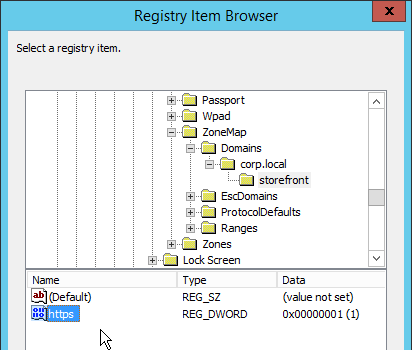
- Then click OK. Note: 1 indicates Local Intranet zone.
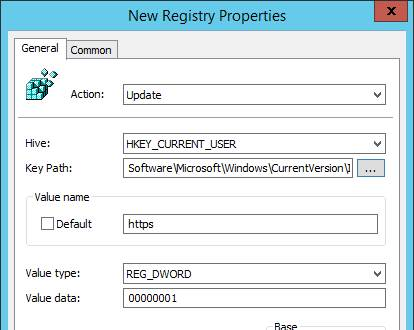
- Feel free to rename the Registry Item to reflect the actual zone.
- Repeat these steps for additional zones.
Internet Explorer Home Page
If you don’t have access to Windows 8/2012 group policy editor, configure the default home page using a registry key.
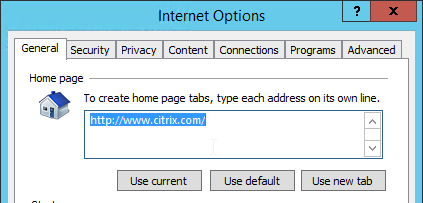
- Run Internet Explorer and configure home page as desired.
- Run Group Policy Management Console on the same machine where you have the home page configured.
- Edit the Citrix VDA All Users GPO.

- Go to User Configuration > Preferences > Windows Settings > Registry and create a new Registry Item.
- Click the … button next to Key Path.
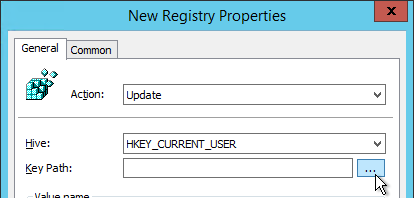
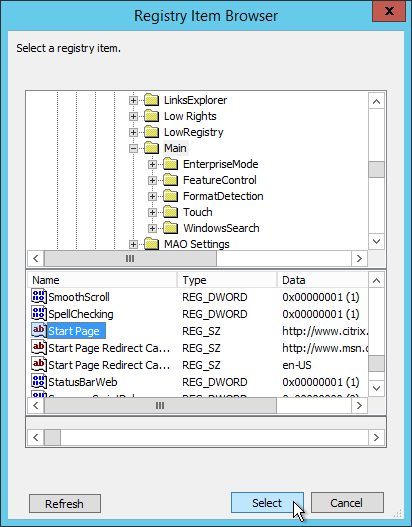
- Navigate to HKEY_CURRENT_USER\Software\Microsoft\Internet Explorer\Main. On the bottom, select Start Page. Then click Select.
- On the Common tab, you can select Apply once and do not reapply. Then click OK.
Proxy Settings
If you don’t have access to Windows 8/2012 group policy editor, configure Proxy Settings using registry keys. Proxy Settings are stored under HKCU\Software\Microsoft\Windows\CurrentVersion\Internet Settings. Use Group Policy Preferences or similar to distribute the registry keys.

To prevent users from changing proxy settings, also configure the following group policy setting.
- User Configuration | Policies | Administrative Templates | Windows Components | Internet Explorer | Internet Control Panel
- Disable the Connections page = enabled
Julian Mooren at XenApp & Internet Explorer – Improving User Experience details how to enable Tracking Protection in Internet Explorer to reduce XenApp CPU. The procedure uses Group Policy Preferences to set registry keys, and adds a folder to Citrix Profile Management synchronization.
Microsoft 365 Apps / Office 365 / Office 2021 / Office 2019 / Office 2016
Microsoft 365 Apps (aka Office 365) Planning
Microsoft 365 Apps ProPlus is supported on Windows Server 2019.
Microsoft FSLogix can roam Office cache files (e.g. Outlook .ost file) and Search Index. FSLogix is free for most customers.
CTP Marius Sandbu Guide to Deploying Office 365 in RDSH and VDI Enviroment contains:
- Common best-practices and guidelines
- Identity Federation and sync
- Licensing and Roaming
- Deployment and managing updates
- Vendors and Office 365 Optimization
- Skype for Business
- Teams
- Outlook
- OneDrive
- Group Policy
- Troubleshooting and general tips for tuning
- Remote display protocols and when to use when.
- Server 2019 and Office 365
- Office 2019 / Office 365 ProPlus
Citrix Implementation Guide Microsoft Office 365 for Citrix XenApp and XenDesktop 7.x contains:
- Considerations for Outlook Cached Mode
- Group Policy settings for Outlook Cached Mode
- For Lync Audio/Video – various options for delivering the Lync client
- Caveats for OneDrive for Business
- Licensing – shared computer activation
VMware Best Practices for Delivering Microsoft Office 365 in VMware Horizon 7 contains:
- Requirements for Using Nonpersistent VDI and RDS with Office 365 ProPlus
- Using the Office 2016 Deployment Tool to download and install Office
- Enabling Shared Computer Activation on Nonpersistent VDI and RDS
- Considerations for Deploying Office 365 ProPlus to a Horizon Environment – OneDrive, Outlook
- Office Group Policy Settings
Office 2021 / 2019
Office 2021 and Office 2019 are Perpetual version of Office, which means no new features until the next Office LTSC is released.
- By contrast, Microsoft 365 Apps ProPlus receives new features periodically (every few weeks).
Office 2021 and Office 2019 require volume licenses. See Microsoft Office 2019 Volume License Pack for KMS server or Active Directory activation.
There is no MSI installer for Office 2021 or Office 2019. Instead, you use Office Deployment Tool to download and install the Click-to-run version of Office 2021/2019 Volume License. See Deploy Office LTSC 2021 or Deploy Office 2019 (for IT Pros).
The Office 2021/2019 icons/shortcuts do not say 2021 or 2019 on the end. There’s no year designation.
File > Account shows the version info. As does Apps and Features.
Office Group Policy Templates
Download the Microsoft 365 Apps / Office LTSC 2021 / Office 2019 / Office 2016 group policy templates. The same templates are used for all Office versions 2016 and newer.
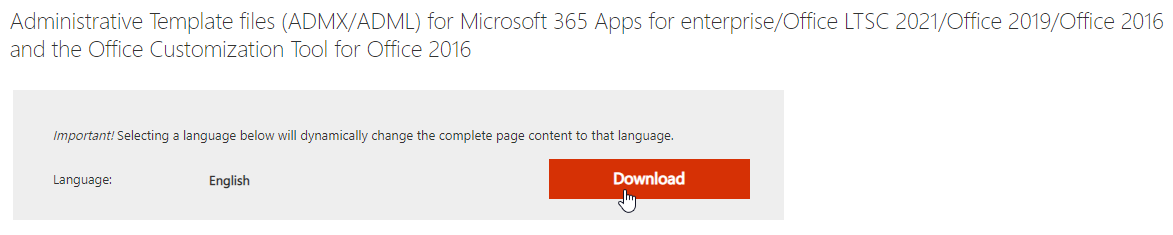
Microsoft renamed Office 365 to Microsoft 365 Apps.
Choose the bitness that you installed. The default for Microsoft 365 Apps is x64.
Microsoft 365 Apps, Office 365, Office 2021, Office 2019, Office 2016
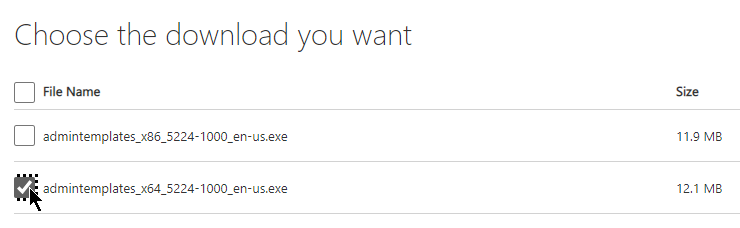
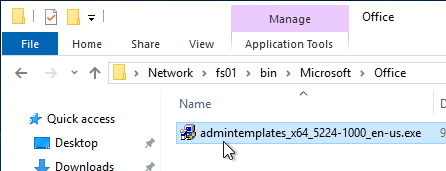
- Go to the downloaded Microsoft 365 Apps / Office 365 / Office 2021 / Office 2019 / Office 2016 group policy templates and run admintemplates_x64_5077-1000_en-us.exe.
Note: Office 2016, Office 2019, Office 2021, and Office 365 use the same group policy templates.
- Check the box next to Click here to accept and click Continue.

- Specify a folder to place the extracted templates in.
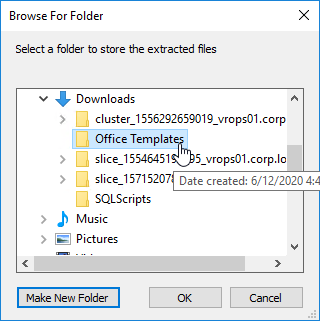
- Click OK to acknowledge that files extracted successfully.
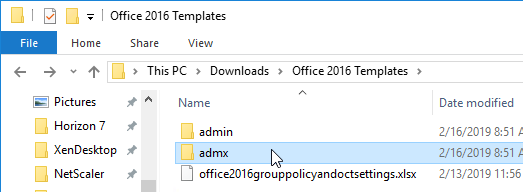
- Go to the folder where you extracted the files, and open the ADMX folder.
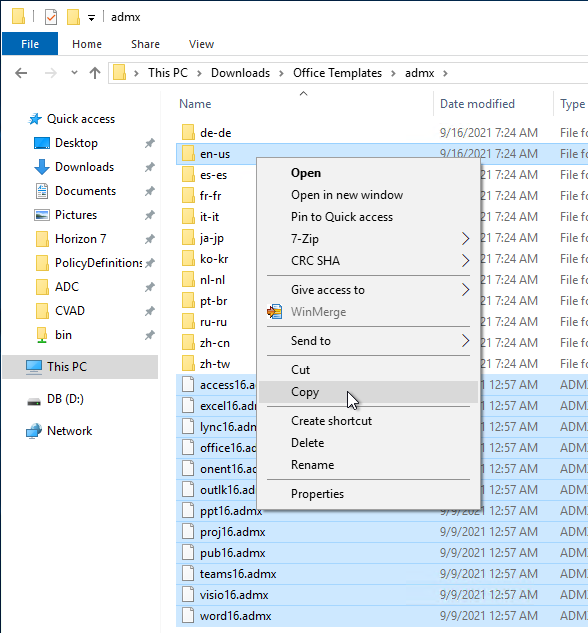
- Copy all .admx files, and the en-us folder, to the clipboard.
- Go to \\domain.com\sysvol\domain.com\Policies\PolicyDefinitions and paste the files.
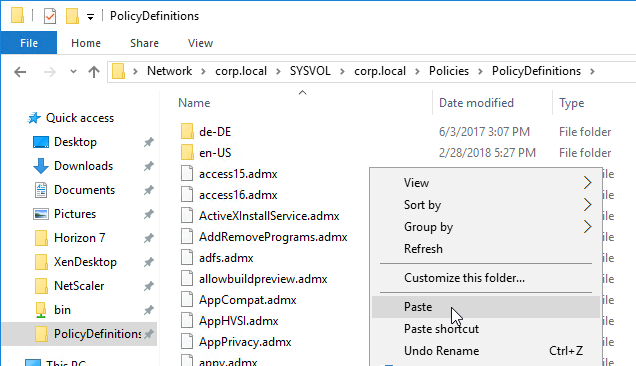
- If you do not have PolicyDefinitions in your Sysvol, then instead go to C:\Windows\PolicyDefinitions and paste the files.
Group Policy and Tweaks
This section assumes the Group Policy Objects have already been created.
For Teams, edit the Citrix VDA Computer Settings GPO and enable the Group Policy settings shown below.
Prevent the per-user version of Teams from installing with Office 365 (aka Microsoft 365 apps). Configure this GPO setting before installing Office. Then you can later install the machine-wide version of Teams. More details at Microsoft Docs.
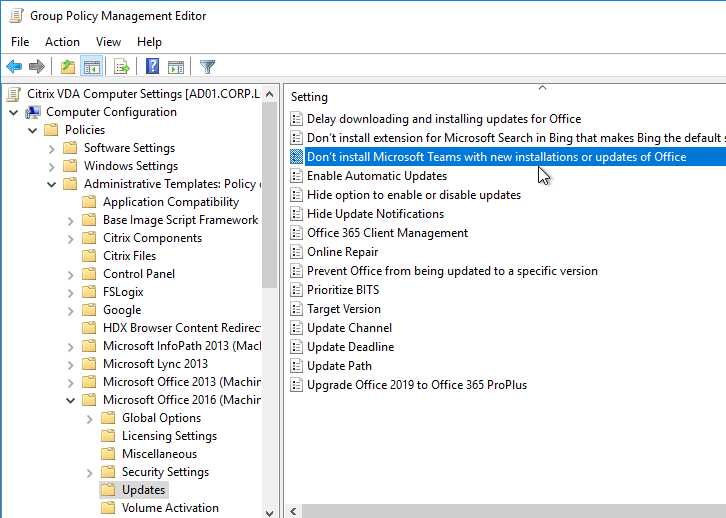
- Updates – Computer Configuration | Policies | Administrative Templates | Microsoft Office 2016 (Machine) | Updates
- Don’t install Microsoft Teams with new installations or updates of Office = enabled
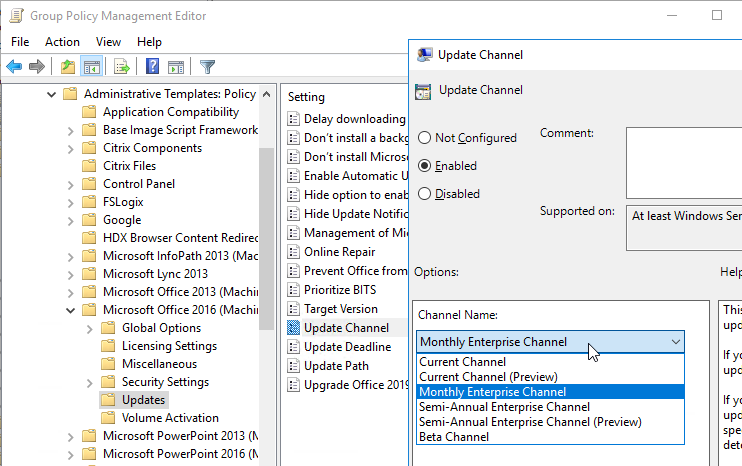
- Update Channel – for Microsoft 365 Apps (aka Office 365) only
Edit the Citrix VDA All Users GPO and enable the Group Policy settings shown below. All are located under User Configuration > Policies.
Office 2013 group policy settings are different than the group policy settings for Office 2016, Office 2019, Office 365, and Microsoft 365 Apps. If you want to copy Office 2013 settings to Office 365 / 2019 / 2016 settings, see Microsoft’s Copy-OfficeGPOSettings PowerShell script.
Microsoft 365 Apps, Office 365, Office 2019, and Office 2016 are all version 16.0, thus the same GPO settings work for all of these versions. In Group Policy Editor, the GPO settings are under the Office 2016 folders.
- Disable Office Telemetry
- Key =
HKCU\Software\Microsoft\Office\Common\ClientTelemetry
- Value (DWORD)
DisableTelemetry = 0xffffffff
- User Configuration | Policies | Administrative Templates | Microsoft Office 2016 | First Run
- Disable First Run Movie = enabled
- Disable Office First Run on application boot = enabled
- User Configuration | Policies | Administrative Templates | Microsoft Office 2016 | Global Options |Customize
- Allow roaming of all user customizations = enabled
- User Configuration | Policies | Administrative Templates | Microsoft Office 2016 | Miscellaneous
- Block signing into office = enabled, Org ID only Source = Microsoft Answers
- Disable Office Animations = enabled
- Do not use hardware graphics acceleration = enabled (if no GPU)
- Hide file locations when opening or saving files = enabled, Hide OneDrive Personal
- Suppress recommended settings dialog = enabled
- User Configuration | Policies | Administrative Templates | Microsoft Office 2016 | Privacy | Trust Center
- Automatically receive small updates to improve reliability = disabled
- Disable Opt-in Wizard on first run = enabled
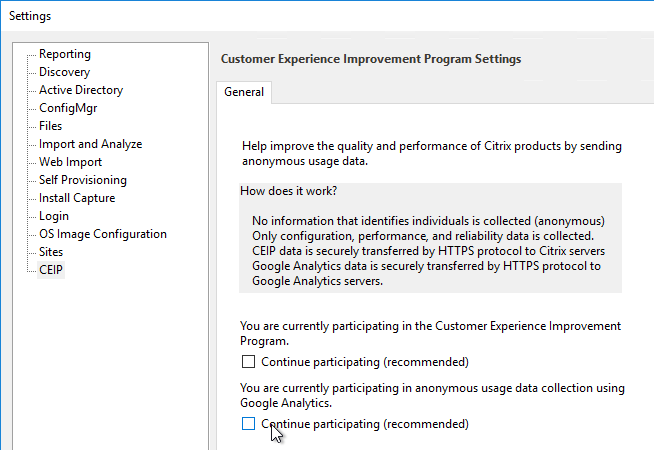
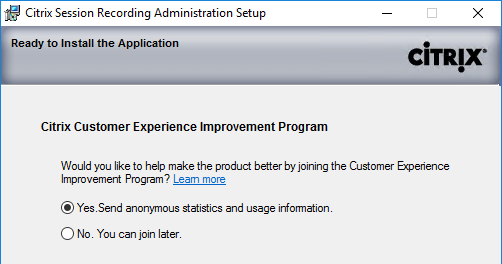
- Enable Customer Experience Improvement Program = disabled
- User Configuration | Policies | Administrative Templates | Microsoft Office 2016 | Tools | Options | General | Service Options… | Online Content
- Online Content Options = enabled, Allow Office to connect to the Internet
- User Configuration | Policies | Administrative Templates | Microsoft Outlook 2016 | Account Settings | Exchange
- Automatically configure profile based on Active Directory Primary SMTP address = enabled
- User Configuration | Policies | Administrative Templates | Microsoft Outlook 2016 | Account Settings | Exchange | Cached Exchange Mode
- Use Cached Exchange Mode for new and existing Outlook profiles = disabled
- If you prefer to use Cached Exchange Mode, set the above setting to enabled, and add below: Source = Citrix’s Office 365 Implementation Guide
- Cached Exchange Mode Sync Settings = enabled, time-window of downloaded content
- Install FSLogix to assist with roaming of the OST file.
- User Configuration | Policies | Administrative Templates | Microsoft Outlook 2016 | Miscellaneous | PST Settings
- Default location for PST files = enabled, user’s home directory
- User Configuration | Policies | Administrative Templates | Microsoft Outlook 2016 | Outlook Options | Other | AutoArchive
- AutoArchive Settings = enabled, uncheck box next to Turn on AutoArchive
- User Configuration | Policies | Administrative Templates | Microsoft Outlook 2016 | Outlook Options | Preferences | Search Options
- Prevent installation prompts when Windows Desktop Search component is not present = enabled
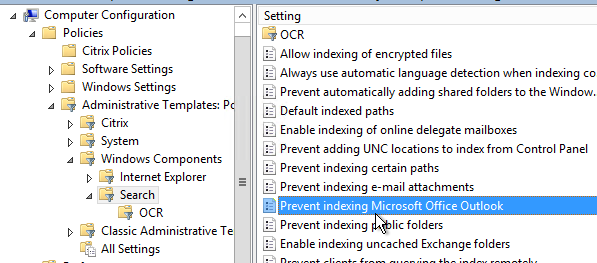
- Computer Config | Policies | Administrative Templates | Windows Components | Search |
- Prevent indexing Microsoft Office Outlook = enabled (see below)
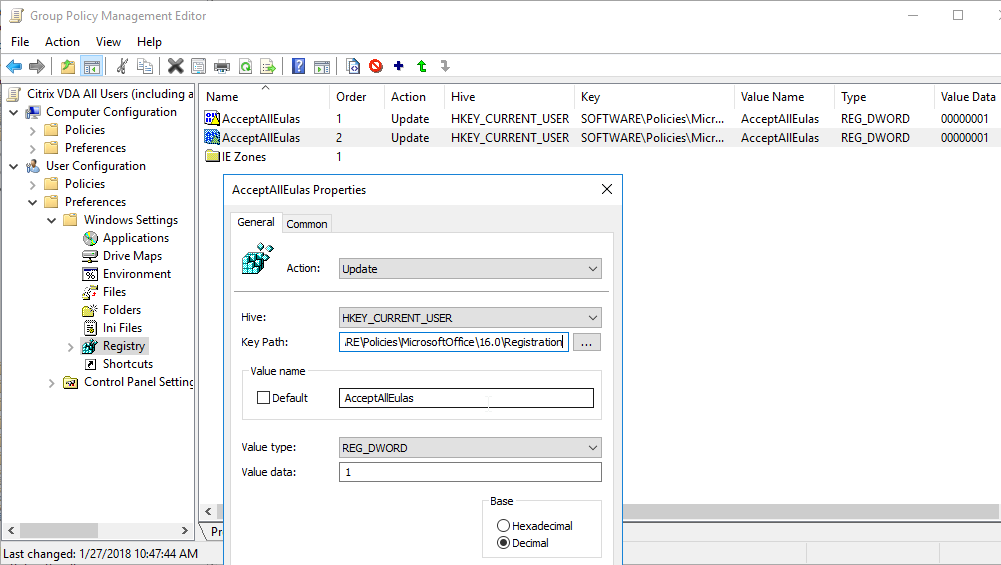
Office Click-to-Run Accept EULA Window
To get rid of the Accept Office License Agreement button/window…
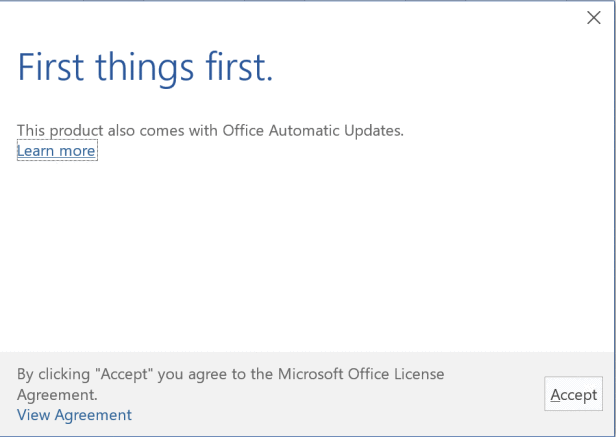
Use Group Policy Preferences to set the following registry values:
- HKEY_CURRENT_USER\Software\Policies\Microsoft\Office\15.0\Registration
- AcceptAllEulas (DWORD) = 1
- HKEY_CURRENT_USER\Software\Policies\Microsoft\Office\16.0\Registration
- AcceptAllEulas (DWORD) = 1
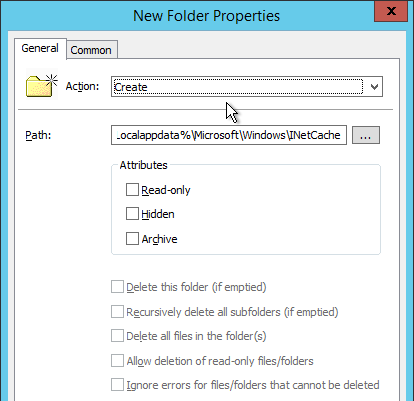
Office temp file errors
To prevent Office temp file errors:
- User Configuration | Preferences | Window Settings | Folders | New Folder
- Action = Create
- Path = %Localappdata%\Microsoft\Windows\INetCache
Outlook and Windows Search
When launching Outlook, you might see the message “Please wait while Windows configures Microsoft Office 64-bit Components”.
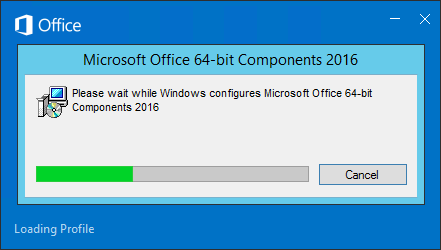
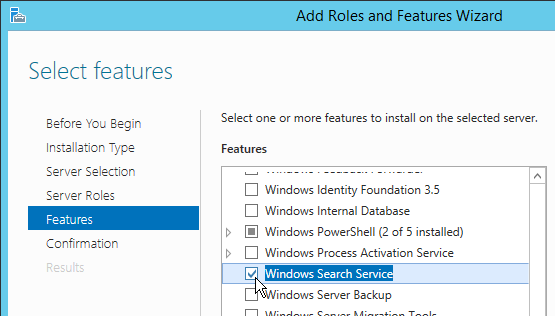
To fix the Outlook search problem, you can either install Windows Search Service (Windows Feature).
Or enable the GPO setting: Computer Config | Policies | Administrative Templates | Windows Components | Search | Prevent indexing Microsoft Office Outlook.
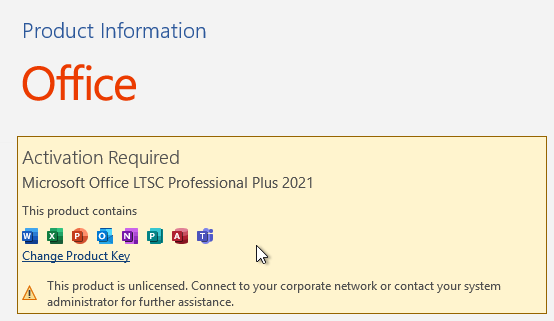
Office VL Activation not working
If Office 2016+ Volume License is not activating correctly, set the following registry value as detailed at Microsoft Office can’t find your license for this application at Citrix Discussions:
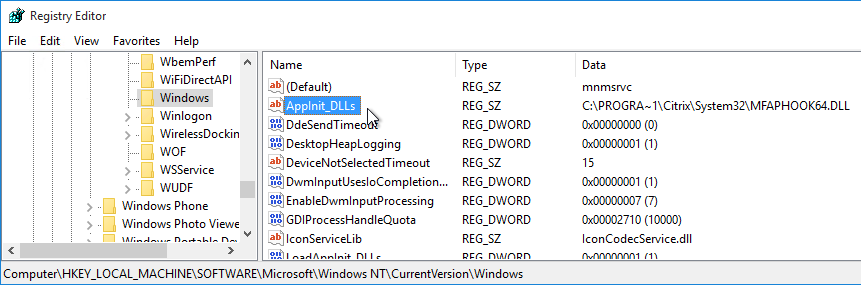
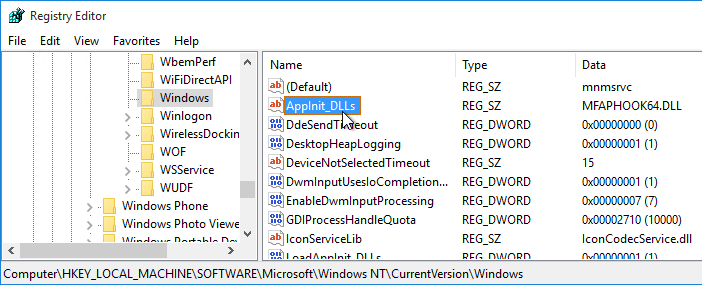
- Key =
HKEY_LOCAL_MACHINE\SYSTEM\CurrentControlSet\services\CtxUvi
- Value =
UviProcessExcludes (REG_SZ) = sppsvc.exe
Adobe Reader
Adobe Reader Group Policy
- Download the Adobe Reader XI Policy Templates from Reader XI Administrative Template
- Copy the .admx file and the en-us folder.
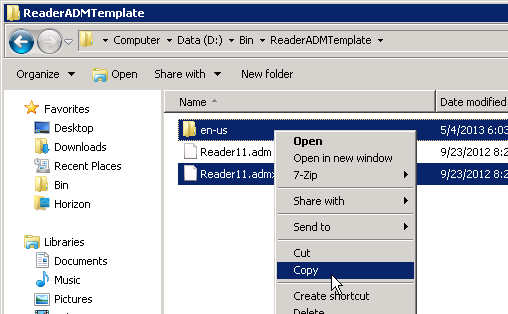
- Go to \\domain.com\SYSVOL\domain.com\Policies\PolicyDefinitions and paste the files. If this folder doesn’t exist, go to C:\Windows\PolicyDefinitions instead.
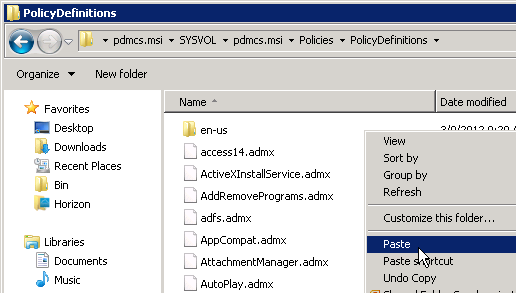
- Click Yes when asked to replace files.
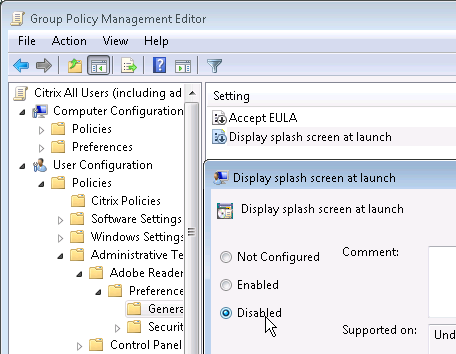
- Now open a group policy that applies to all Citrix users.
- Go to User Configuration > Administrative Templates > Adobe Reader > Preferences > General.
- Open the setting Accept EULA and Enable it.
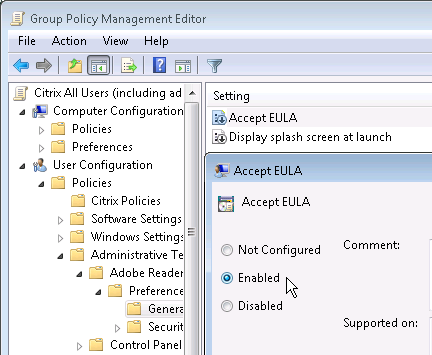
- Then open the Display splash screen at launch setting and Disable it.
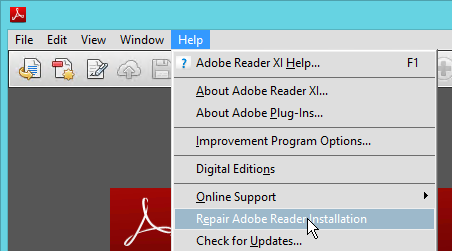
Disable Repair
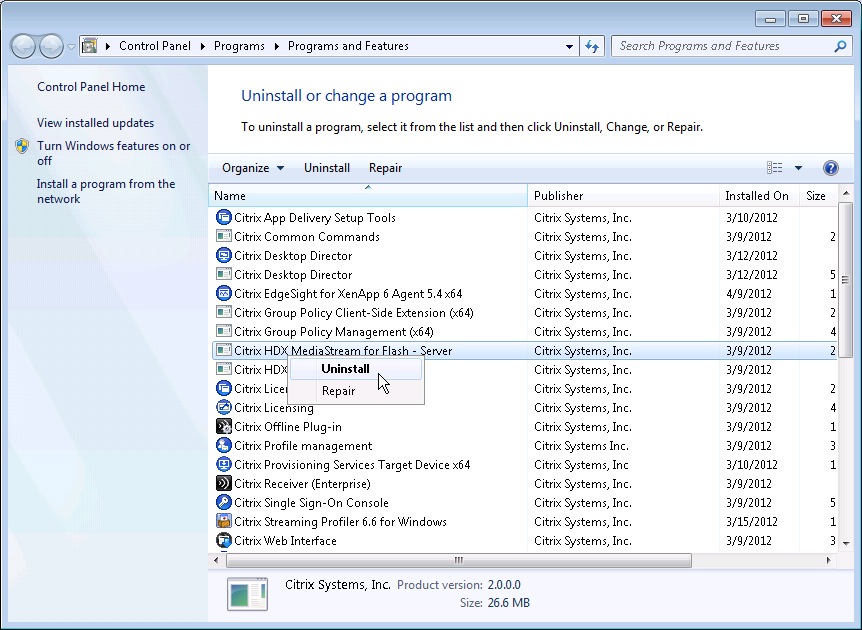
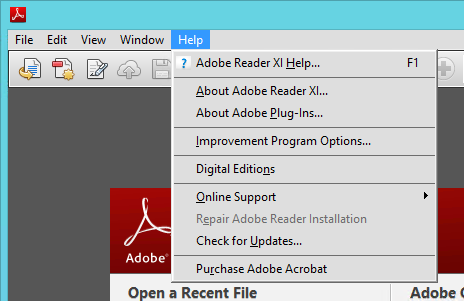
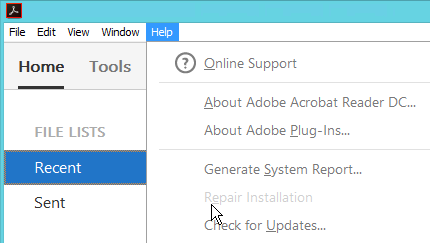
In Adobe Reader, users can open the Help menu and click Repair Adobe Reader Installation.

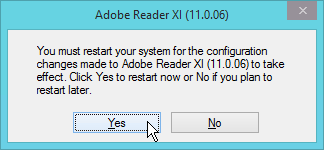
Then users are prompted to reboot. Obviously this is not good. Even non-admins can reboot.
- In regedit, navigate to HKEY_LOCAL_MACHINE\SOFTWARE\Wow6432Node\Adobe\Acrobat Reader\11.0\Installer.
- Add the DWORD DisableMaintenance and set it to 1.
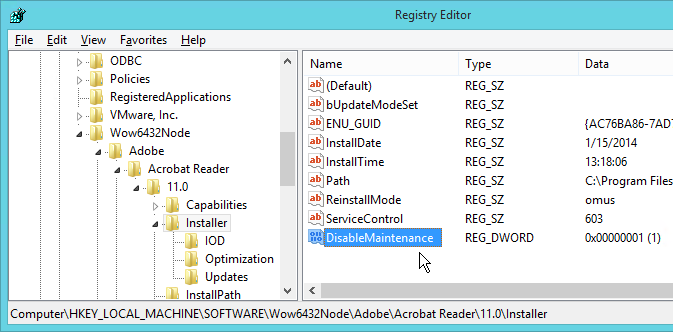
- Now the Repair option is grayed out on the Help menu.
Disable Updates
For Acrobat Reader DC, you must edit the registry to disable Updates. This also works for Adobe Reader XI.
- HKEY_LOCAL_MACHINE\SOFTWARE\Wow6432Node\Adobe\Adobe ARM\Legacy\Reader\{AC76BA86-7AD7-1033-7B44-AC0F074E4100}
- Mode = 0 (disables updates)
In Adobe Reader XI, there is a GUI method of disabling updates:
- Run Adobe Reader from the Start Menu.
- Open the Edit menu and click Preferences.
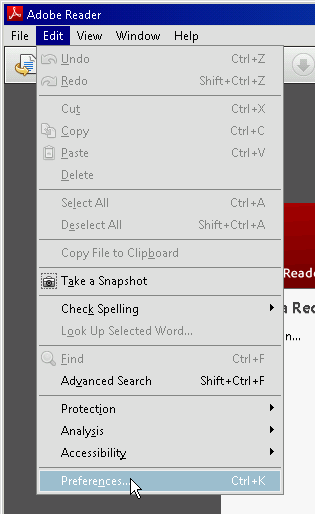
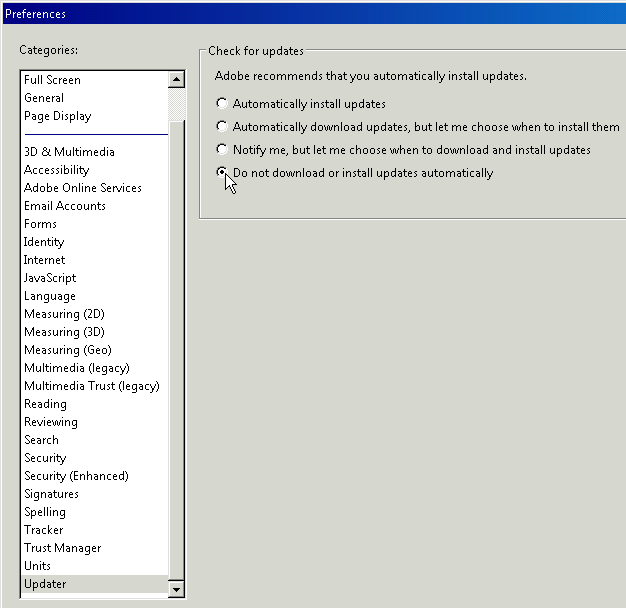
- On the Updater page, change the selection to Do not download or install updates automatically and click OK.
Other Optimizations
Rick van Soest Removing “The Cloud” from Adobe Acrobat Reader DC:
- To remove tools, delete them from C:\Program Files (x86)\Adobe\Acrobat Reader DC\Reader\AcroApp\ENU
- To remove the welcome screen, add the following registry dword value: HKLM\Software\Policies\Adobe\Acrobat Reader\DC\FeatureLockDown
- bUsageMeasurement (REG_DWORD) = 0
- To remove the “add account” button, HKLM\Software\Policies\Adobe\Acrobat Reader\DC\FeatureLockDown\cSharePoint
- BDisableSharePointFeatures (REG_WORD) = 1
- To remove the “Check for update” button, HKLM\Software\Adobe\Acrobat Reader\DC\Installer
- DisableMaintenance (REG_DWORD) = 1
Adobe.com – Citrix Deployments: Before deployment, the product should be configured as needed. In particular, you will want to disable features and behaviors that should not be accessible to end users in an IT-managed environment. For example:
- The Updater should be disabled as described in this guide and the Preference Reference.
- Accept the EULA on behalf of all users by setting the appropriate registry key.
- For multilanguage installations (MUI), set the preferred language for all users via the SUPPRESSLANGSELECTION property or registry settings described in the Preference Reference.
- Deploy enterprise files to the product’s directories (rather than per-user directories) so they are available to all users.
- There are over 500 documented settings. Refer to the Preference Reference for complete registry and plist details.
Scrolling performance
If scrolling performance is poor in graphic intensive documents, try the following:
- Go toEdit > Preferences > Rendering.
- UncheckSmooth line art and Smooth images. Alternatively, you can set these preferences during pre-deployment configuration:
- HKCU\Software\Adobe\Adobe Acrobat\10.0\Originals\bAntialiasGraphics: 0x00000000
- HKCU\Software\Adobe\Adobe Acrobat\10.0\Originals\bAntialiasImages: 0x00000000
Distiller performance
- In some environments, Distiller performance may suffer if the messages.log file becomes too large after a number of Distiller operations. Delete this file periodically. It is located at \Application Data\Adobe\Acrobat\Distiller<version>\messages.log.
- Remove unused fonts from the Windows installation.
Citrix Files
Citrix Files allows you to access your files in ShareFile directly through a mapped drive providing a native Windows Explorer experience. Citrix FIles replaces ShareFile Drive Mapper.
Citrix Files instructions:
To install Citrix Files:
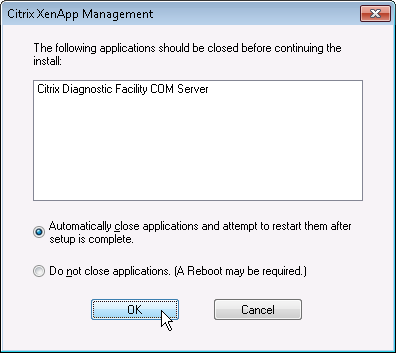
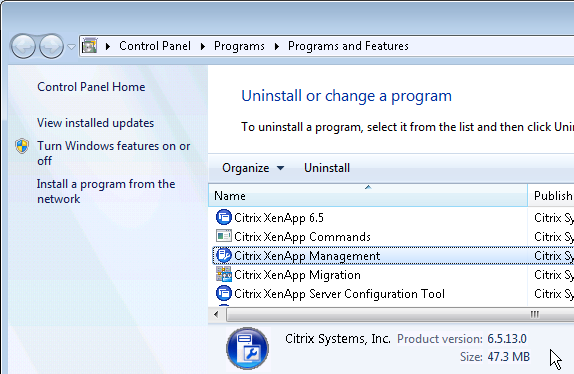
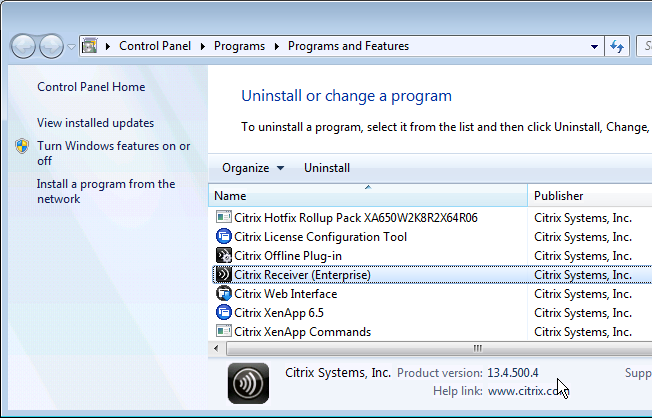
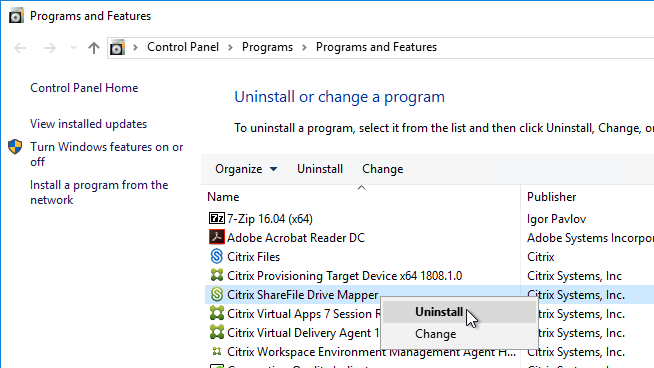
- If Citrix ShareFile Drive Mapper is installed, uninstall it. Also see CTX238202 Upgrading from ShareFile Drive Mapper to Citrix Files for Windows.
- In VDA 1808 and newer, Citrix Files is bundled with the VDA installer.
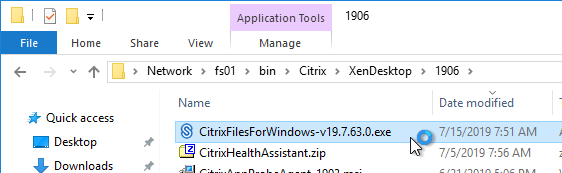
- Or, download Citrix Files. The downloaded version might be newer than the version included with the VDA installer.

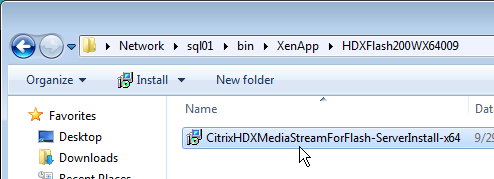
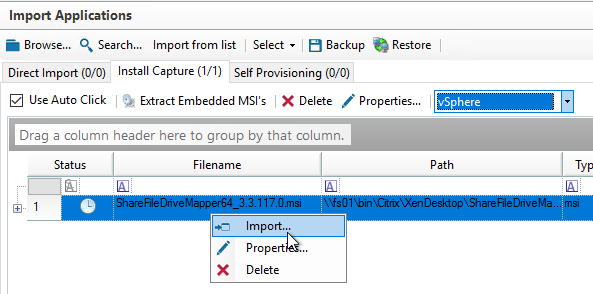
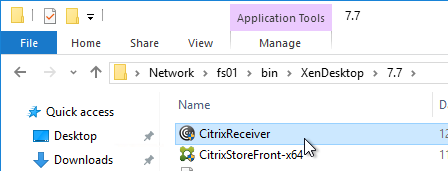
- On a VDA, run CitrixFilesForWindows-v.exe.
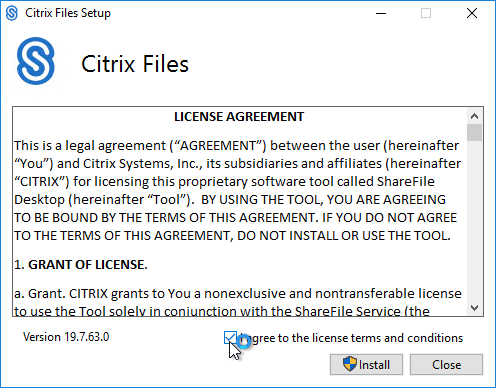
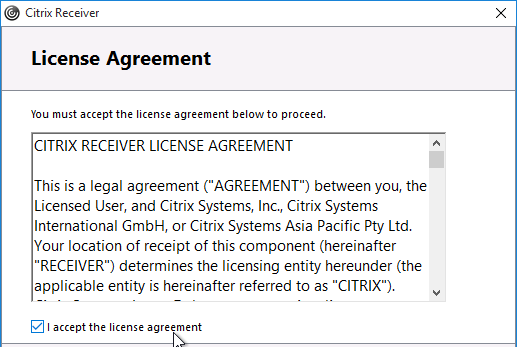
- Check the box next to I agree to the license terms, and click Install.
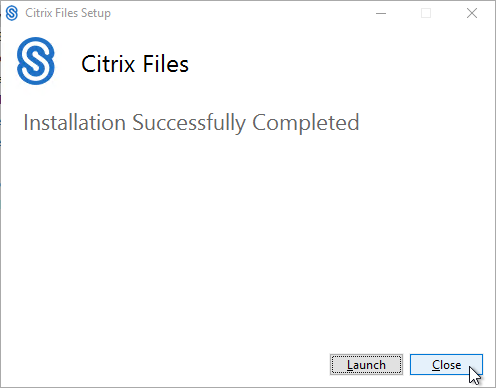
- In the Setup Successful page, click Close.
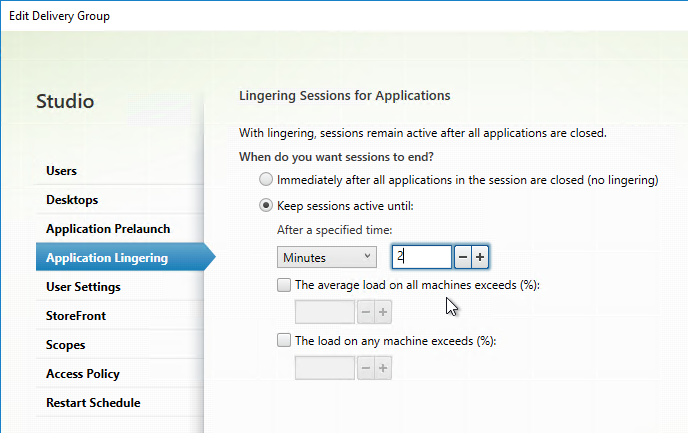
Session Lingering:
- Citrix recommends editing your Delivery Group and enabling Application Lingering for a couple minutes so Citrix Files has time to upload files.
To configure Citrix Files:
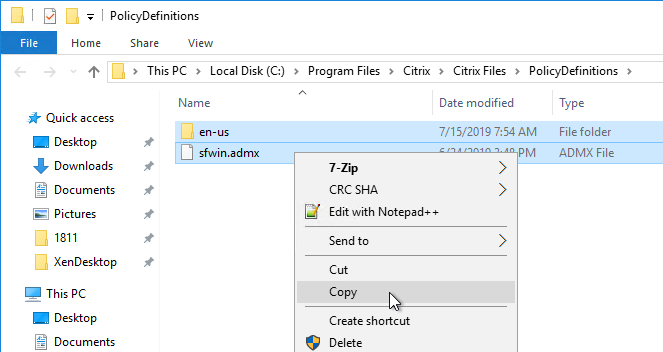
- Go to C:\Program Files\Citrix\Citrix Files\PolicyDefinitions, and copy the file and folder.
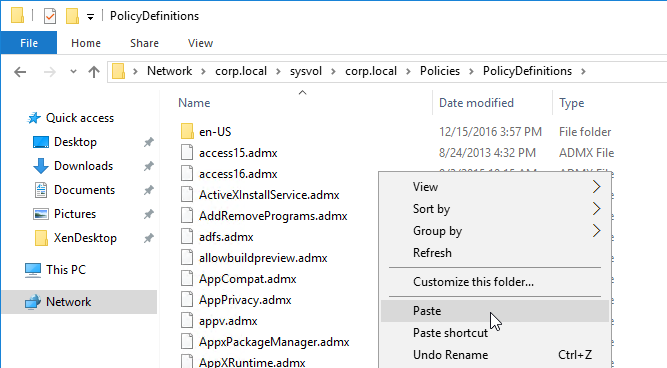
- Go to \\domain.com\SYSVOL\domain.com\Policies\PolicyDefinitions and paste the files and folder. If this path doesn’t exist, then paste the files in C:\Windows\PolicyDefinitions on your Group Policy editing machines instead.
- Edit a GPO that applies to all users.

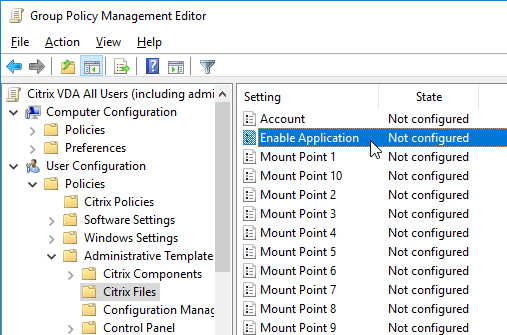
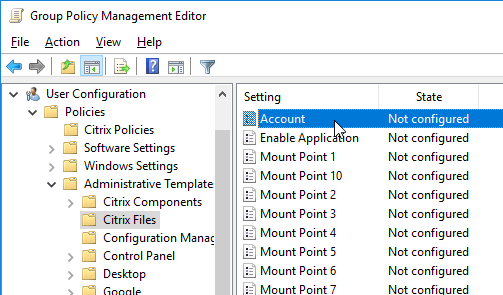
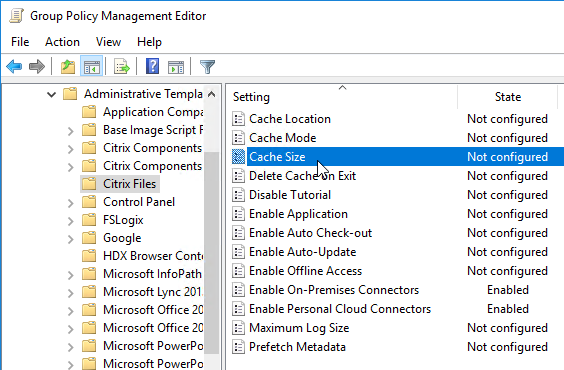
- Go to User Configuration > Policies > Administrative Templates > Citrix Files.
- Citrix Files is enabled by default. If you only want some users to use Citrix Files, then you can configure a GPO to disable Citrix Files, and then configure a different GPO that re-enables it. The GPO that enables Citrix Files would be targeted to an AD group, and the GPO would be higher priority than the GPO that disables it. The setting to disable and enable Citrix Files is called Enable Application.
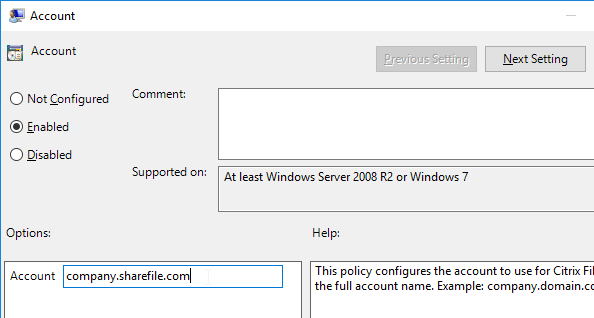
- Edit the Account setting.
- Enable the setting, and enter your ShareFile URL. Click OK.
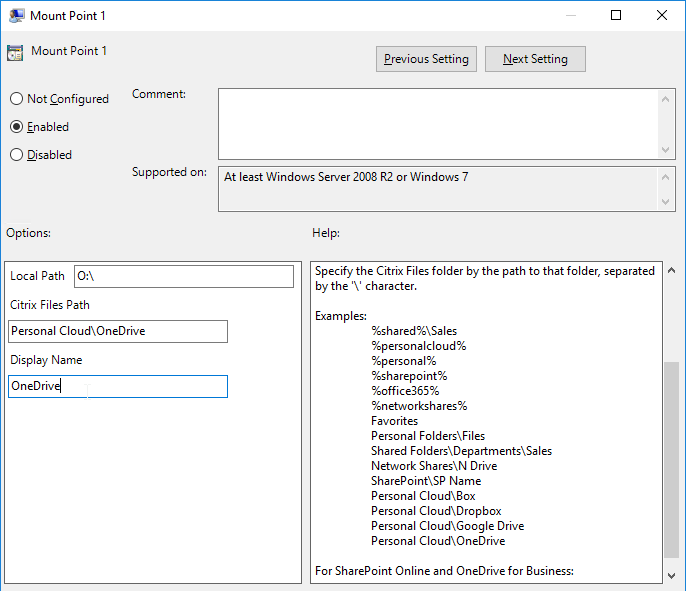
- The Mount Point settings let you map different parts of Citrix Files to different drive letters.
- Edit a GPO that applies to the computers that have Citrix Files installed.

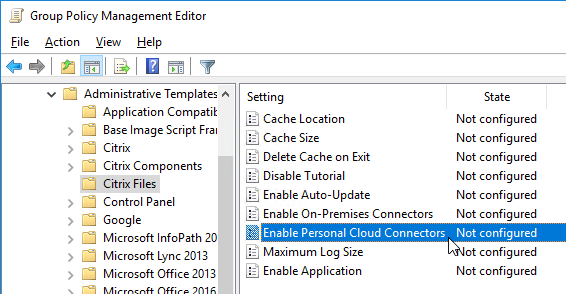
- Go to Computer Configuration > Policies > Administrative Templates > Citrix Files.
- The default Cache Location is AppData\Local\Citrix\Citrix Files\PartCache.
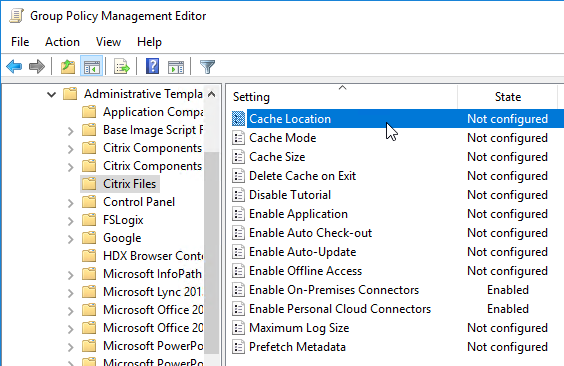
- Default Cache Size is 256 MB.
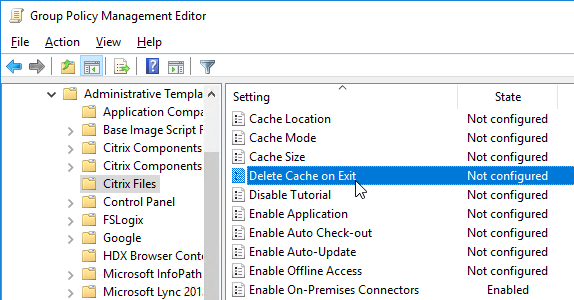
- Delete Cache on Exit is not needed on non-persistent machines, and not needed if the roaming profile cache is deleted on logoff. Make sure the Citrix Files cache is excluded from roaming profiles as detailed later.
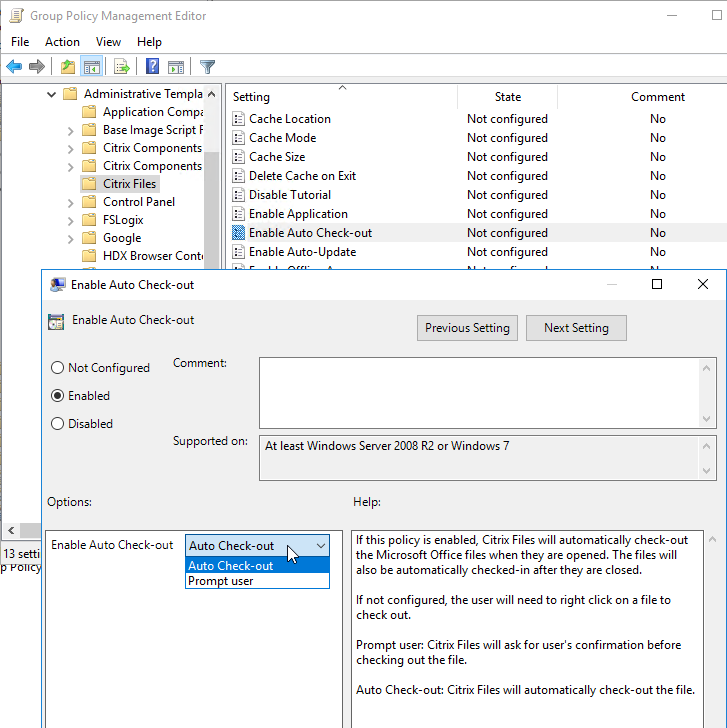
- Auto Check-out of Office files can be enabled here.
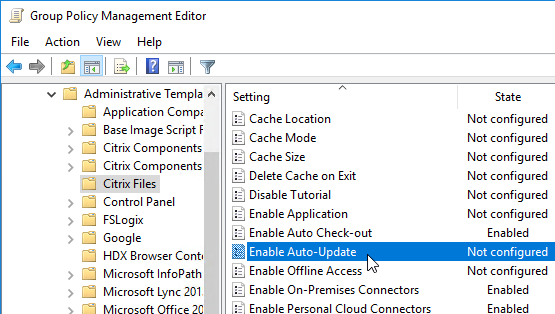
- Auto-Update does not apply to Remote Desktop Session Host, so you’ll have to update those machines manually.
- Offline Access is enabled (allowed) by default.
- Personal Cloud Connectors (e.g. OneDrive) and On-Premises Connectors can be enabled from here.
- Edit your Citrix Profile Management GPO.
- Go to Computer Configuration > Policies > Administrative Templates > Citrix > Profile Management > File system.
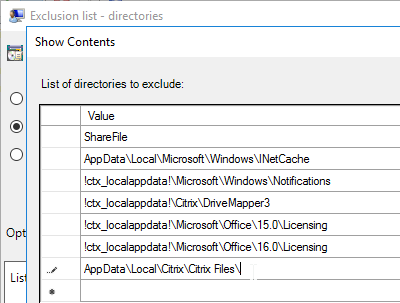
- Edit the setting Exclusion list – directories.
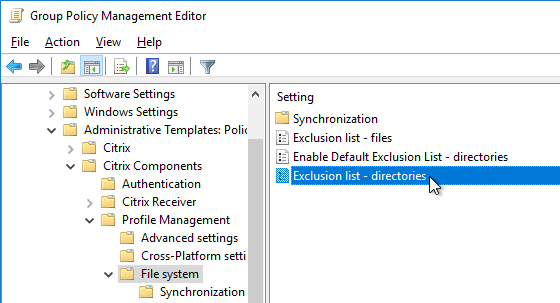
- Add AppData\Local\Citrix\Citrix Files\ to the list.
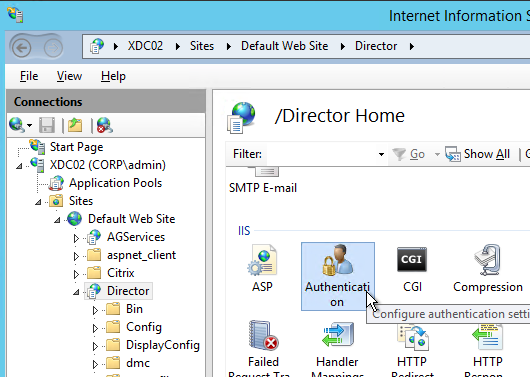
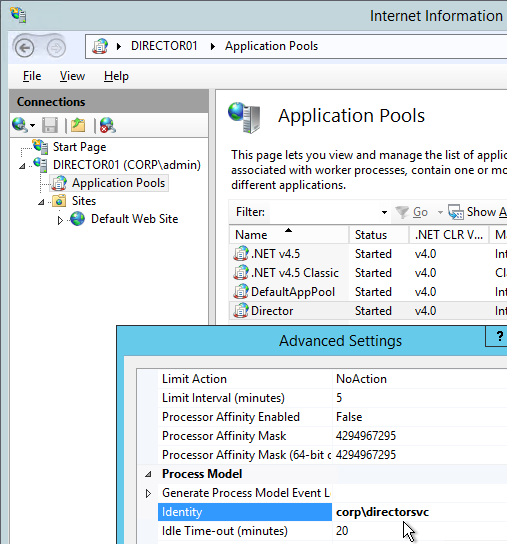
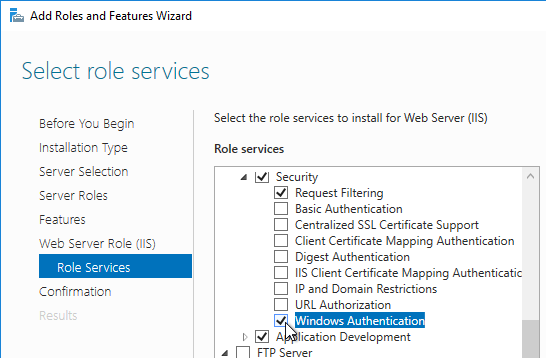
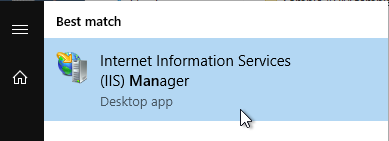
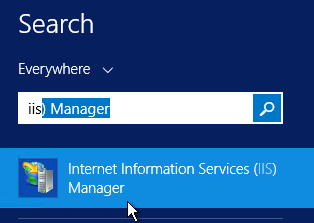
- If you have on-premises StorageZones Controllers, you can enable Single Sign-on by enabling Windows Authentication. On the StorageZones Controllers, run IIS Manager.
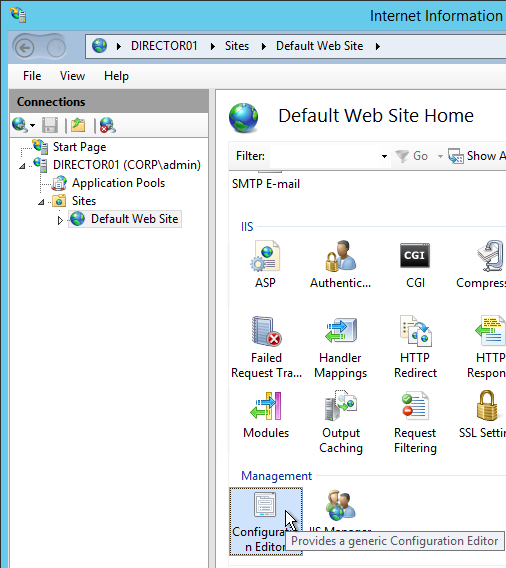
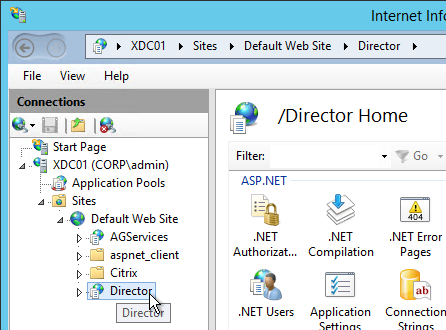
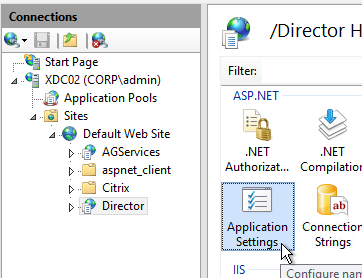
- Navigate to Default Web Site > cifs.
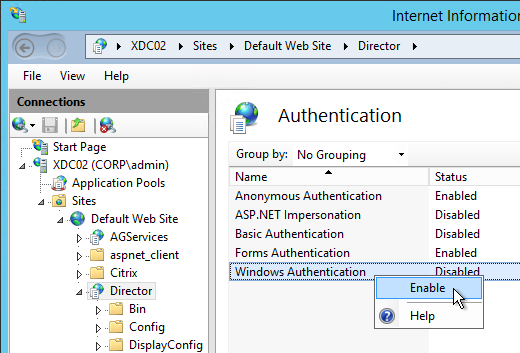
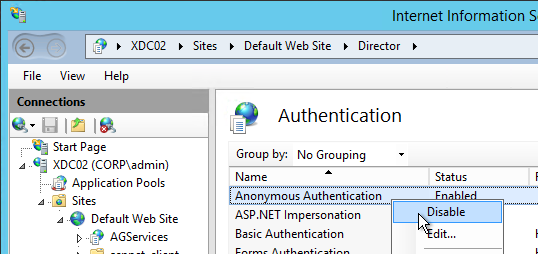
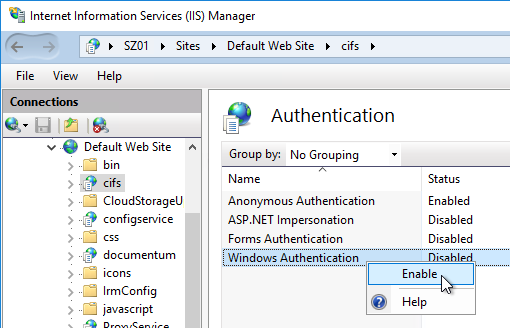
- In the middle, double-click Authentication.
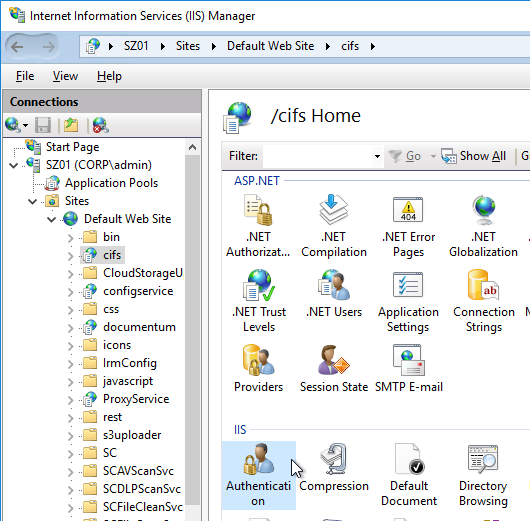
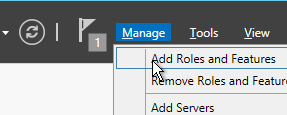
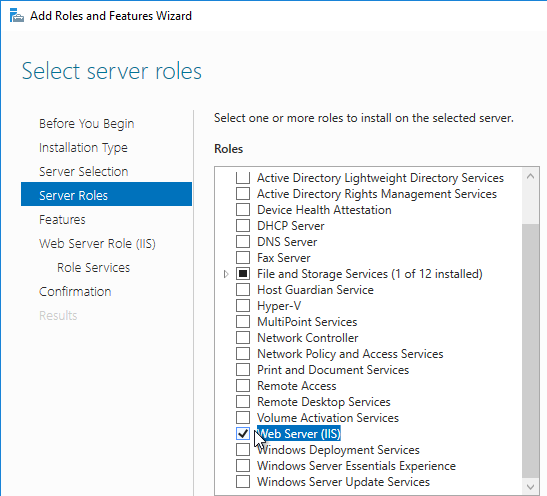
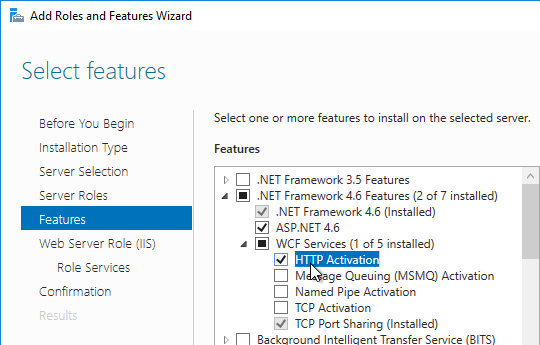
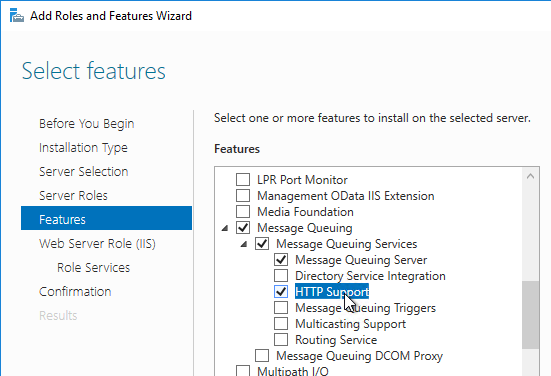
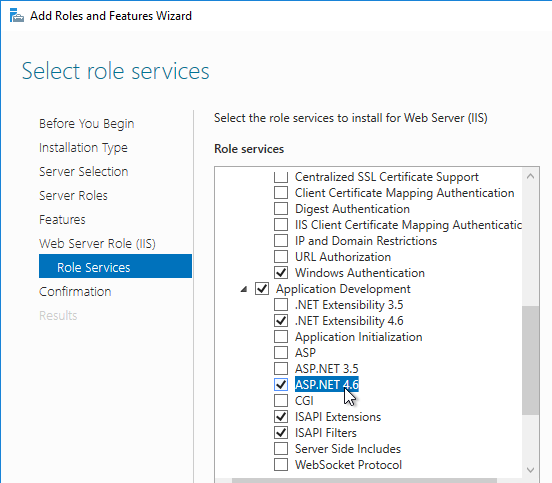
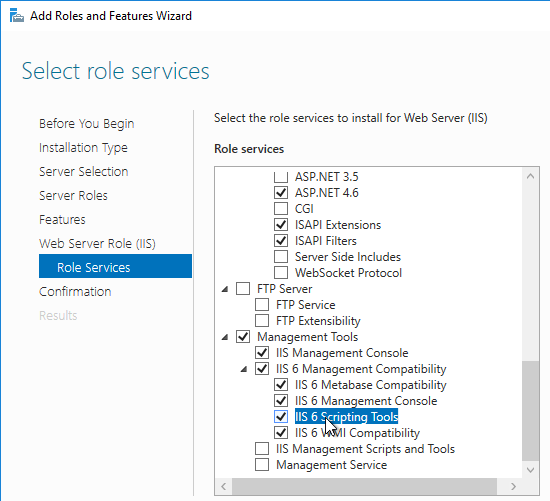
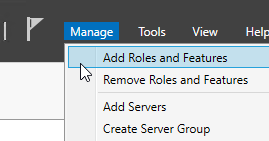
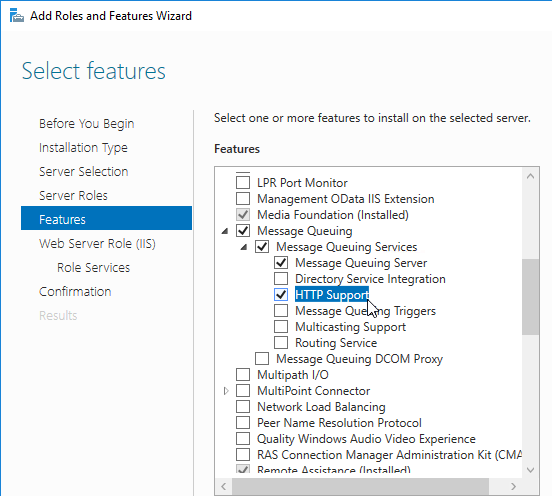
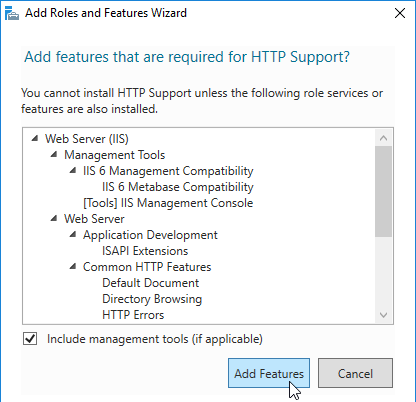
- Right-click Windows Authentication and Enable it. If you don’t see Windows Authentication in your list, you might have to install it using the Roles and Features wizard.
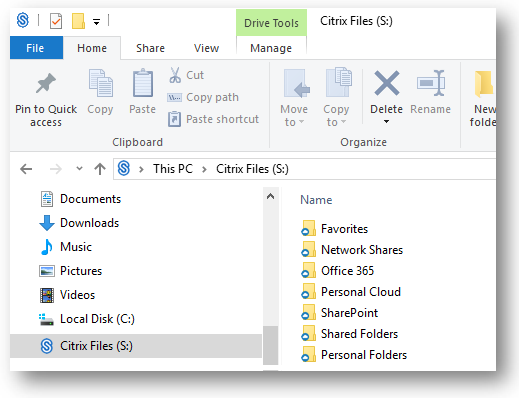
- After logging into Citrix and logging into Citrix Files, when you launch File Explorer, you’ll see Citrix Files on the left.
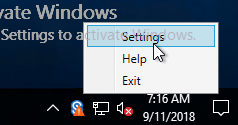
- If the Login Window doesn’t appear, the look for the icon in the system tray.
File Type Association
For the official Microsoft method of handling file type associations in Windows 10 and Windows Server 2016, see Windows 10 – How to configure file associations for IT Pros? at TechNet Blogs. This article details DISM, XML, and Group Policy.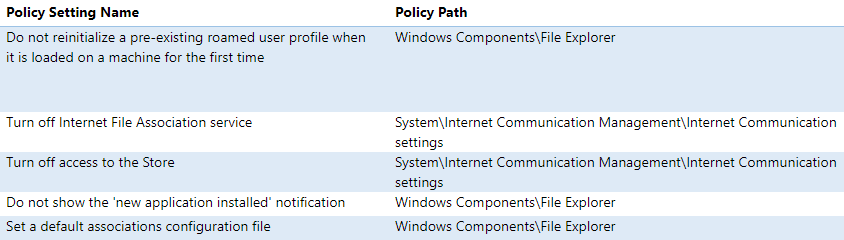
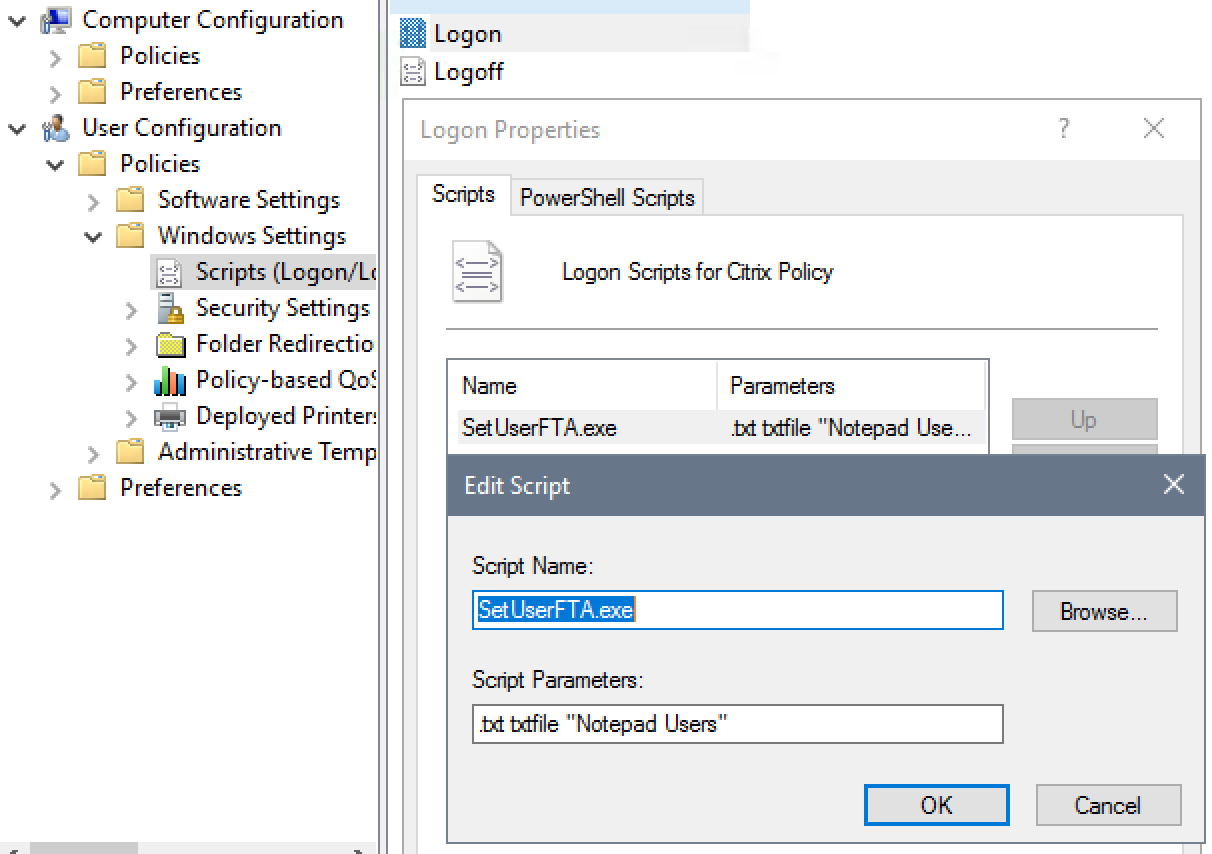
Christoph Kolbicz at SetUserFTA: UserChoice Hash defeated – Set File Type Associations per User or Group on Windows 10 and 2016 developed a tool to set specific File Type Associations. No DISM or XML needed.
Also see the following:
Next Steps


 `
`